Hi there! Have you gotten any early start on holiday crafting this year? I feel like it really became a thing with companies doing Christmas in July releases which helped my motivation. I also noticed that Christmas crafting now compared to later on, my color choices are brighter and different which is sort of cool and fun!
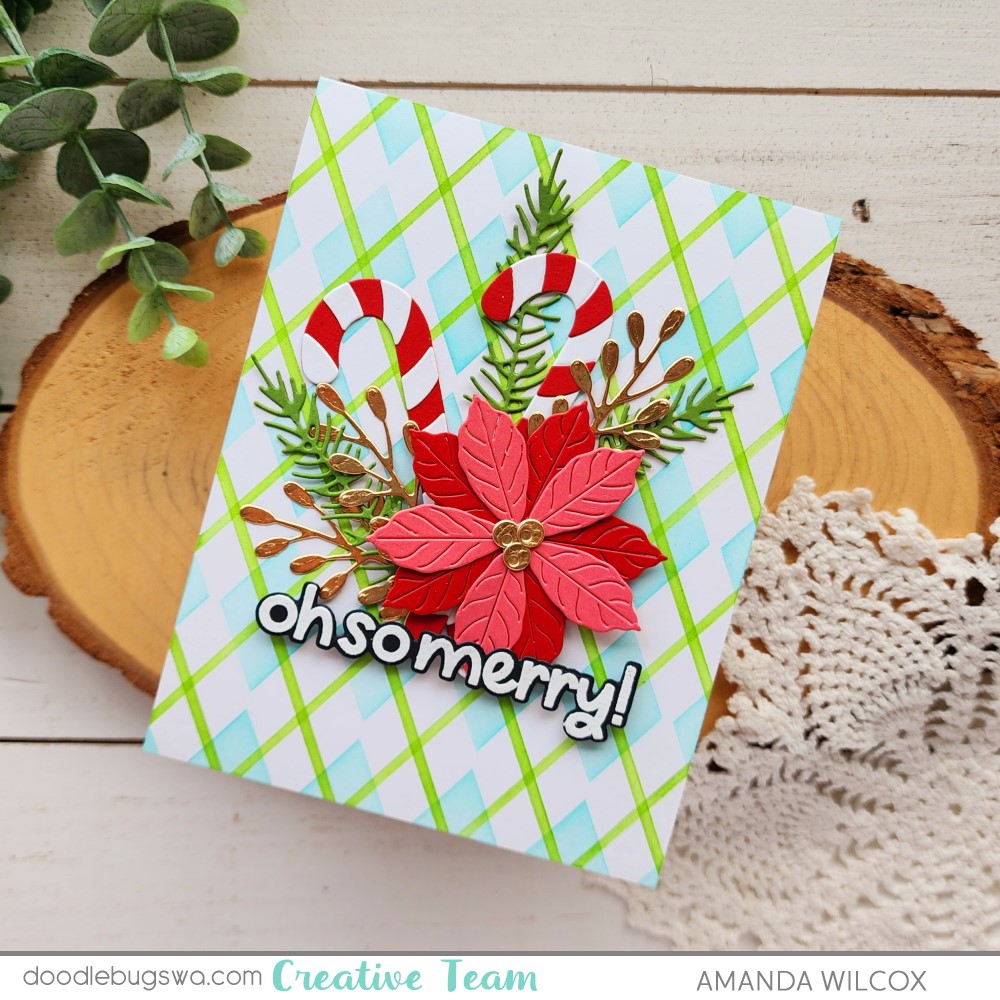
I recently picked up some new goodies from Doodlebugs with the intent of mixing them together for some holiday cards. This was the first result from that. I started by playing with the Spellbinders Christmas Bird Poinsettia die cutting pieces and arranging them different ways. I used liquid glue to adhere everything except I added the poinsettia with foam squares for some dimension.

Then I inked up a panel with the Pretty Pink Posh Argyle stencil set using mermaid and jalapeno Lawn Fawn inks. After stenciling, I glued the panel to a top folding card base and then glued my foliage down on that.

Next, I heat embossed and die cut a sentiment from Mama Elephant’s Everything Nice sentiment set. I love these bold sentiments and have all of the collections. They come in handy and are a fabulous font! I added the sentiment with foam squares and liquid glue.
Since my foliage has some pretty gold shiny pieces, I didn’t add any finishing touches. They were kind of built in when I added that shiny-ness everywhere as I went along.
I appreciate you sharing your time with me. Have a fabulous day!