Miss Ink Stamps – How’s It Goating?

Happy Thursday friends!!! I’m so happy you’re here today. I have a very punny and adorable Miss Ink Stamps card to share with you today. I hope you like it!

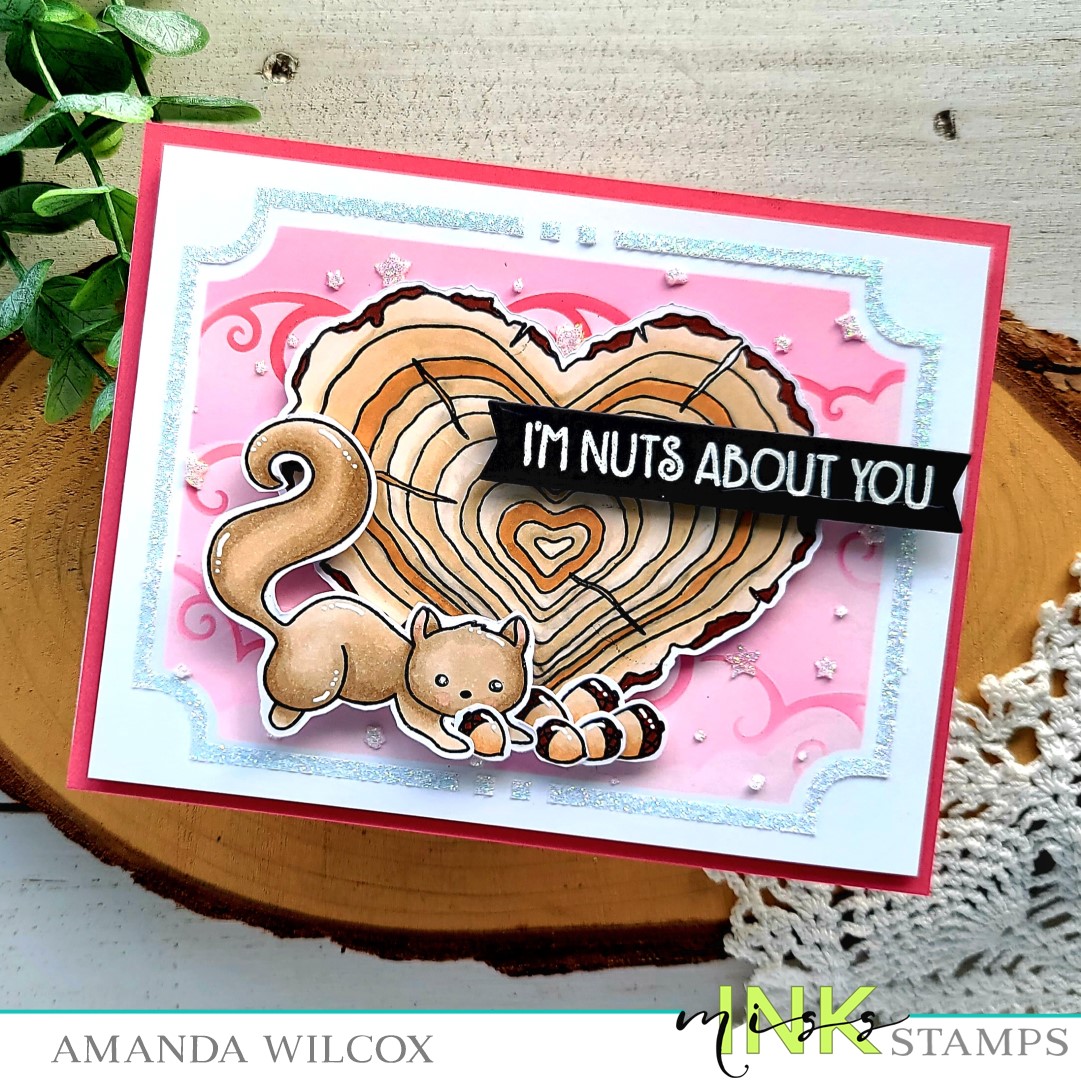
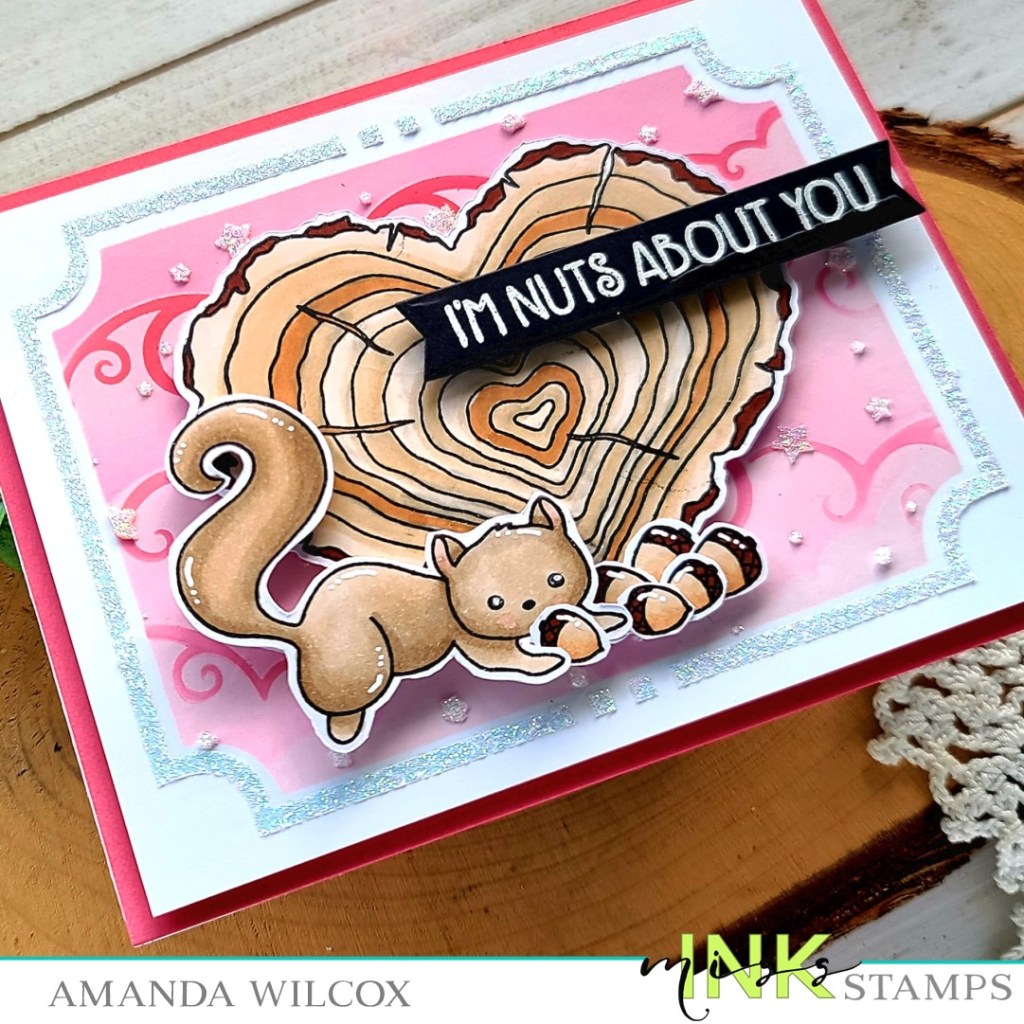
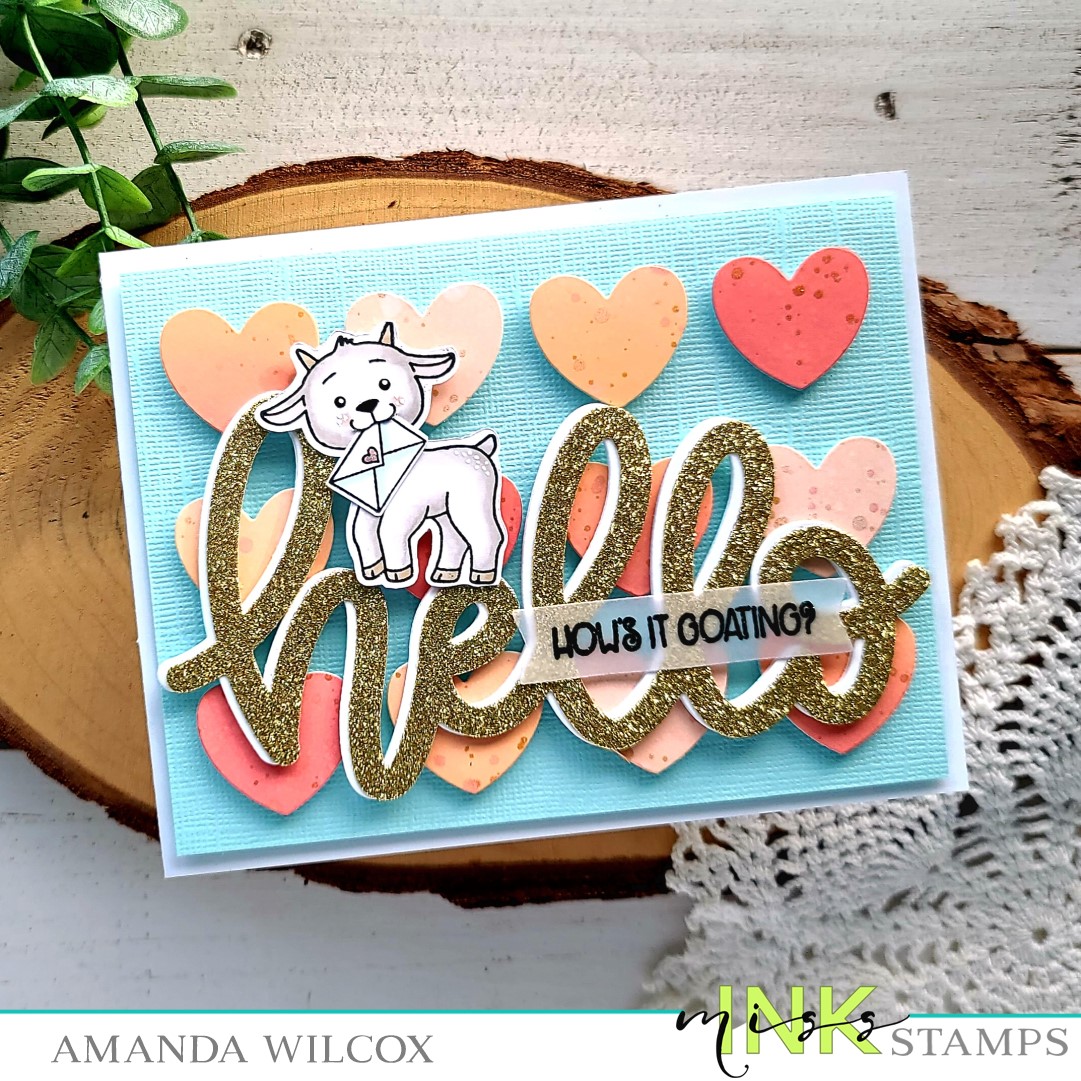
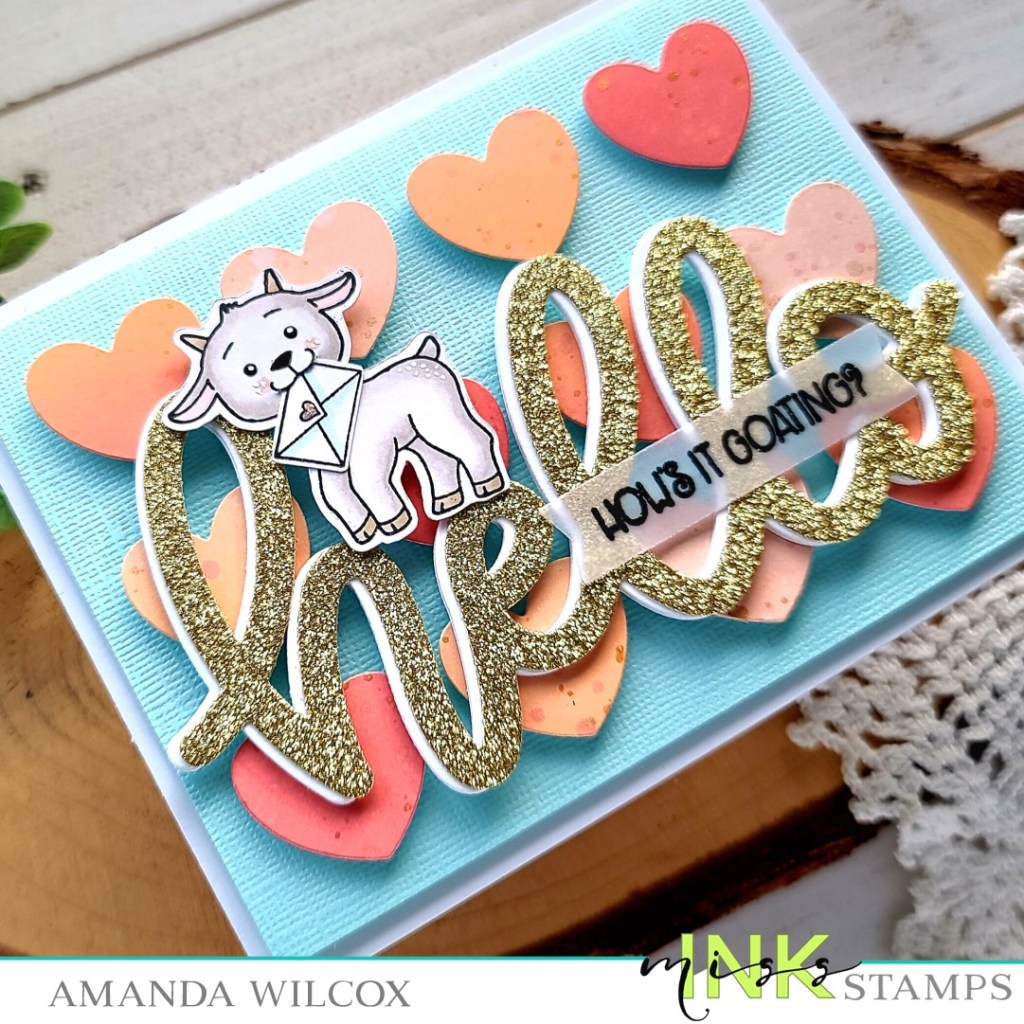
For today’s card, I am using one of the Punny Farm Goats from Miss Ink Stamps. I started by stamping and coloring him and his envelope with my copic markers. I used the scan-n-cut to cut the images out today. Then I used my craft knife to cut his mouth open so I could slide the envelope inside. I used a little liquid glue and washi tape on the back side to hold it in place.

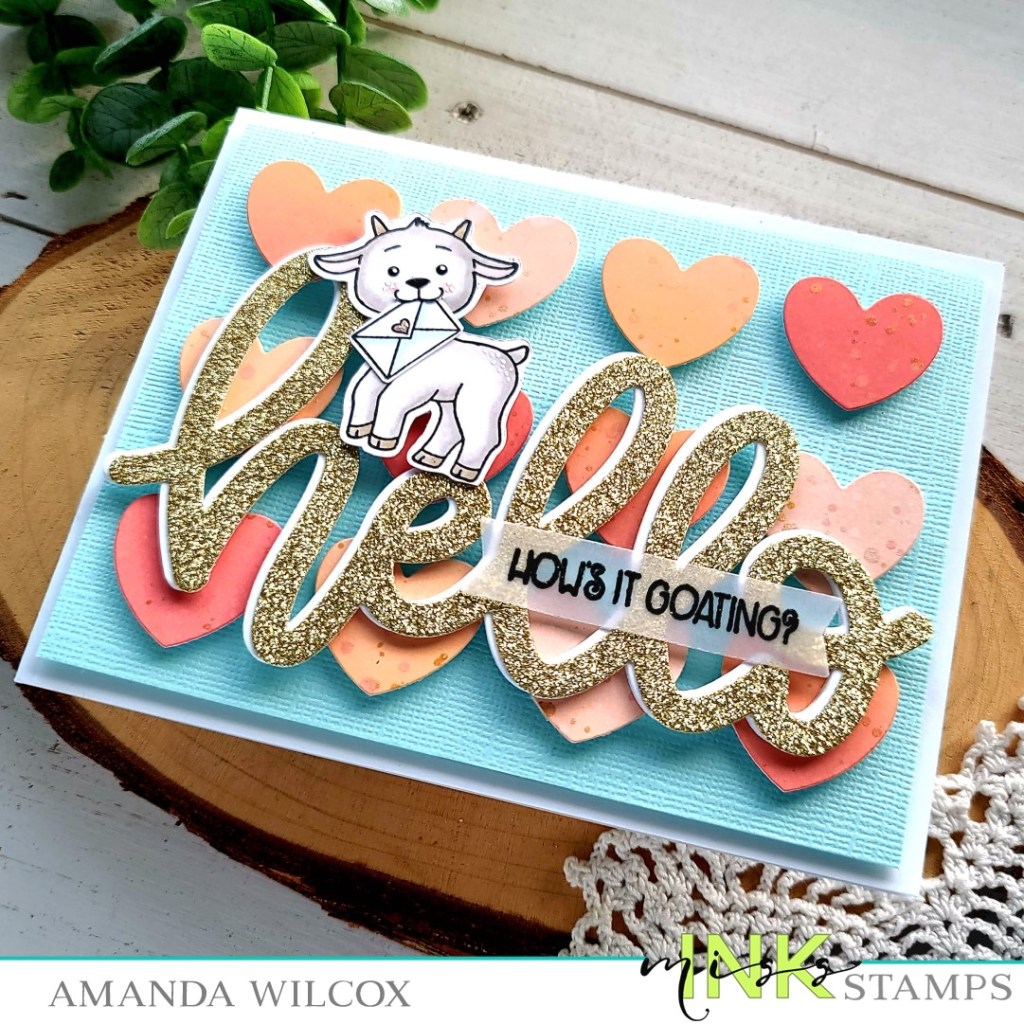
My background hearts are distress oxide ink blended on an A2 panel with abandoned coral, tattered rose and dried apricot. They are spritzed with water and flicked with gold watercolor. Then I actually die cut the A2 panel with the Mama Elephant Heart Grid Cover die. I used the frame on a card I’ll share very soon but I couldn’t just toss the leftover hearts. They were too pretty! I also die cut the Mama Elephant Big Scripty Hello from white cardstock 3 times and gold glitter once. I adhered the white ones with liquid glue and then added the gold the same way but offset a little to the right.

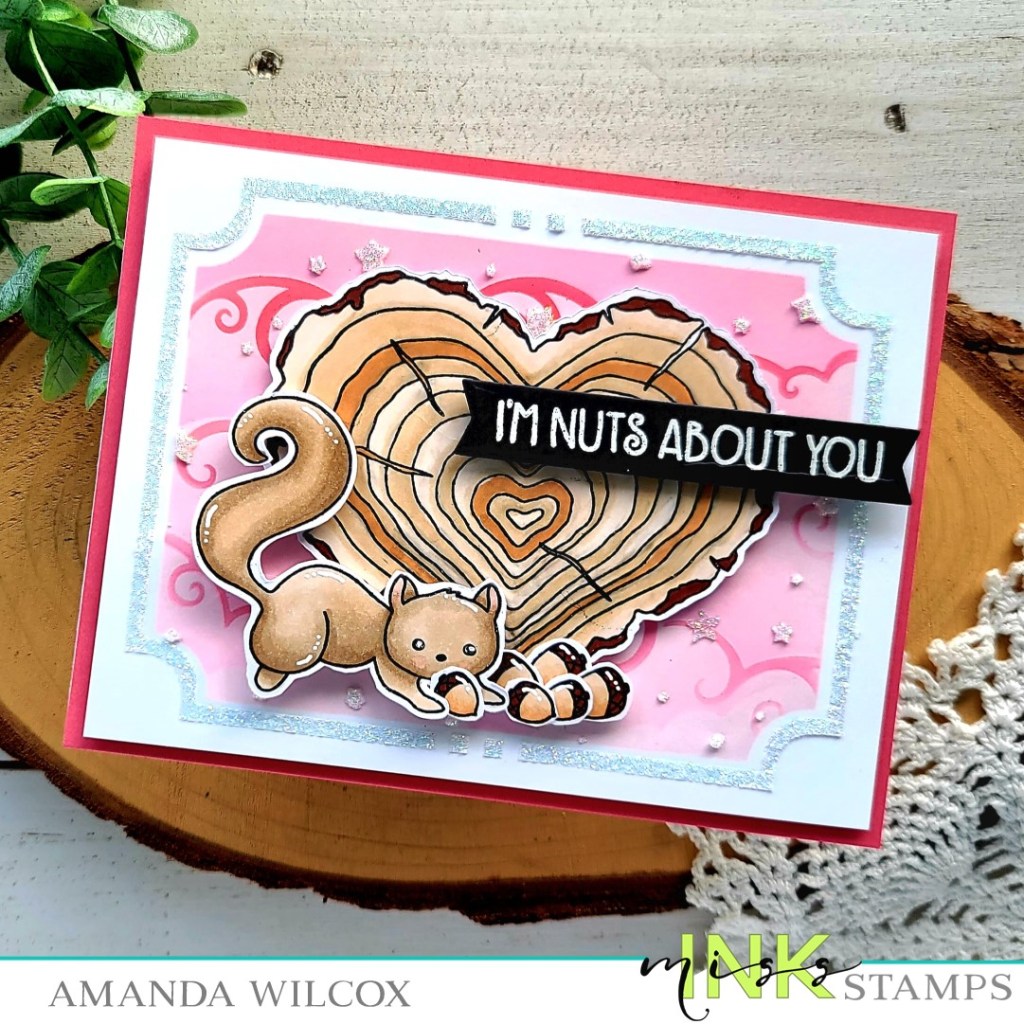
To assemble my card, I cut a light teal piece of textured cardstock to 4×5.25 inches and popped it up on a white card base. Then I popped the hearts up with foam squares and glued the hello directly to those with liquid glue. I added the goat with foam squares so he layed nice against the layered die cut sentiment. Last, I stamped and heat embossed a sentiment on vellum and cut it out with a Pink & Main Large Sentiment Strip before carefully hiding adhesive behind the letters to adhere it down.

For finishing touches, I added black glaze pen to the goat’s eyes and white gel pen highlights to him too. Then I finished things off with a little dab of unicorn Stickles to the heart on the envelope.

Voila! This adorable card is complete and ready to make someone smile!

Products used today:
Punny Farm Goats stamps
Heart Grid die
Big Scripty Hello die
Large Sentiment Strip dies
Gold glitter cardstock
Distress Oxide Inks – abandoned coral, tattered rose, dried apricot
Foam tape and squares
Stickles – unicorn

I appreciate you sharing your time with me. Have a fabulous day!

Miss Ink Stamps – Nuts About You

Thanks for stopping by today. I’m over on the Miss Ink Stamps blog with this adorable squirrel professing his nutty love just in time for Valentine’s Day. I layered a bundle of stencils to create the awesome background and couldn’t resist inking up my favorite squirrel and his heart shaped wood slice too!

I started by stamping images from Oh, Nuts! and Have Heart and colored them with my copic markers. Then I cut them out with my scissors and used a combination of liquid glue and foam squares to arrange my little scene. I set that all aside and switch gears to get messy for my background.

First I taped an A2 size piece of white cardstock to the back of the Ins & Outs Marquis layer with the window opening. I inked it up with kitsch flamingo distress oxide and then added the Scene Builder Clouds stencil and went over it with picked raspberry distress oxide lightly for some clouds. Then I slid the clouds stencil to match the swirls up with my cloud edges and added that detail with a heavier hand.

Now, to get messy I wiped off the edge of the marquis window stencil and layered the Starry Night stencil over the top and spread iridescent glitz glitter gel through that. I removed all of the stencils and let the glitz gel dry for a bit before adding the marquis frame layer and spreading the same glitz gel through that.

Once everything was completely dry I assembled my card. I decided to have a melon colored base layer that goes with the dark details in the clouds. I trimmed the stenciled panel down to 4×5.25 inches and popped it up with foam tape. Then I added my images with foam tape as well. Last, I stamped and heat embossed a sentiment on black cardstock, cut it out with a banner die and popped it up too.

For finishing touches I added white gel pen highlights to the images, black glaze pen to the squirrel’s eyes and once it was dry came back in with a white gel pen highlight there too.

Products used today:
Oh, Nuts! stamps
Have Heart stamps
Ins & Outs Marquis stencils
Starry Night stencil
Scene Builder Clouds stencil
Thermoweb Glitz Glitter Gel – iridescent
Thermoweb Stencil Pal
Pink & Main Large Sentiment Banner dies
Distress Oxide Ink – kitsch flamingo, picked raspberry
Foam tape and squares

I appreciate you sharing your time with me. Have a fabulous day!

Miss Ink Stamps – Hip Hippo Hooray

Happy Thursday everyone! Thank you for stopping by. Today I have an adorable hippo card using stamps and a bunch of stencils layered for a cool background from Miss Ink Stamps.

I knew the general design I wanted to create so today I jumped straight in with my background panel. I chose a fun purple cardstock from my stash and sprayed the Fine Lines stencil with pixie spray. With delicate stencils like this pixie spray is your best friend, I promise! After letting it sit for a few minutes I pressed the stencil to my panel and inked up with a purple ink for that great tone-on-tone stripe! I love it! Next I used the Hand Drawn Hearts stencil with white pigment ink over the stripes. Then, last but not least, I used the Tiny Snowfall stencil and spread lovely lavender glitz glitter gel from Thermoweb through it.

I set that panel aside to dry and cleaned up my mess. Then I chose images from Hippo Hooray, stamped and colored them with my copics. I used the scan-n-cut to cut them out. For my scene, I die cut a circle with the Trinity Stamps embossed edge circle stack from teal cardstock. I inked up the bottom portion with a blending brush and brown dye ink, then I went around the rest of the edge with teal ink for a little depth.

I adhered the seaweed and rocks with liquid glue and popped all the critters up with foam squares. Then I popped the circle up on the stenciled panel with foam tape and adhered the whole thing to a white card base. Last, I stamped and heat embossed a sentiment on black cardstock and die cut it with a Pink & Main large sentiment strip die. I popped the sentiment up with foam squares and trimmed off the edge.

For finishing touches today I just added loads of fun white gel pen highlights to all the images. Then I added black glaze pen to the critter eyes and after it dried put a tiny white highlight back in. This really makes the eyes come to life. I love it!

Do you layer your stencils over top of each other? It’s a newer technique for me but I just love it every time I play with a new combo!

Products used today:
Miss Ink Stamps Hippo Hooray stamps
Miss Ink Stamps Fine Lines stencil
Miss Ink Stamps Tiny Snowfall stencil
Miss Ink Stamps Hand Drawn Hearts stencil
Trinity Stamps Blending brushes
Trinity Stamps Embossed Edge Circle dies
Pink & Main Large Sentiment Strips dies
Thermoweb Pixie Spray
Thermoweb Glitz Glitter Gel – fresh lavender
Thermoweb Stencil Pal
Thermoweb foam tape and squares

I appreciate you sharing your time with me. Have a fabulous day!

Miss Ink Stamps – Sending Big Bear Hugs

Happy Thursday everyone! It’s time for some more inspiration from the Miss Ink Stamps area of my craft room. Today I’m sharing a scene card featuring the Bear Hugs stamp set. I hadn’t played with this one yet because I wasn’t sure what I wanted to create. So instead of having a plan, I stamped all the images from the set and just sat down for a while and colored. It was fantastic!

I used the scan-n-cut to cut everything out and just started playing with the images like little paper dolls. Moving them here and there, arranging them in different mini scenes until I finally landed on this super sweet, very full night time scene.

I inked up an A2 size panel with tea dye, gathered twigs and chipped sapphire distress oxide inks. I spritzed the panel and flicked gold watercolor on the sky portion. While that was drying I decided which images were layering together and used liquid glue to adhere them. Then I added foam tape to the back of everything, doubling up in some areas.

I adhered the inked panel to a white card base and added my images starting with the cave and first baby bear. I worked my way out from there. Last, I added the small tree in the distance, the moon and sentiment directly to the card front with liquid glue.

For finishing touches I just added glossy accents to the bear’s noses and the moon. Then I added unicorn Stickles to the yellow part of the campfire flames.

I absolutely adore this scene and how it all came together. These images are so sweet and fun to color!

Products used today:
Bear Hugs stamps
Foam tape and squares
Glossy accents
Stickles – unicorn
Distress Oxide Ink – chipped sapphire, tea dye, gathered twigs
Tombow Multi Mono liquid adhesive

I appreciate you sharing your time with me. Have a fabulous day!

Miss Ink Stamps – I Drink Coffee So I Don’t…

Welcome again everyone! I have a fun mini slimline card to share with you featuring stamps and stencils from Miss Ink Stamps. Today I pulled out the super fun Slim’s Whims stamp set and paired it with a new fabulous stencil called Sweater Weather. I love the texture of this stencil! I can’t wait to get really messy with it! It’s going to be great!

I started today by stamping images from Slim’s Whims and colored them with my copic markers. Then I used the scan-n-cut to cut them all out. I used a tape runner to adhere the bow tie and cup to slim and then thought it was too perfect not to decorate his mug with that sentiment. So I popped it in my MISTI and stamped it right away.

For my background, I die cut the largest mini slimline stitched panel from Trinity Stamps from kraft cardstock. Then I cut the next size down from dark blue. I blended white pigment ink through the Sweater Weather stencil over the blue panel and popped it up on the kraft with foam tape. Then, using Slim as a guide, I stamped and heat embossed another sentiment at the top of the panel. Once that cooled I added it to a white mini slimline card base.

Before I popped Slim in place I decided to give the background just a little texture and shimmer by splattering gold watercolor all over it. It’s not big but in person it gives just a little something that I love!

Then I popped Slim up with foam tape and came in with a white gel pen to give highlights all over the images. Last, I used the coordinating Trinity Stamps die set to create an envelope and stamped the glasses image on the outside of it in brown ink.

This set always makes me smile and this time was no different. It’s super fun to dress Slim up and color him in different color ways too. I actually don’t think I’ve colored him the same way twice yet. It’s great!

Products used today:
Slim’s Whims stamps
Sweater Weather stencil
Trinity Stamps Mini Slimline Card and Envelope dies
Trinity Stamps Mini Slimline Stitched Layers dies
Foam tape
Copic markers

I appreciate you sharing your time with me. Have a fabulous day!

Miss Ink Stamps – Pamper Yourself

Hello everyone! I’m popping in this afternoon with a fun “it’ll be okay” type card featuring stamps and stencils from Miss Ink Stamps.

You know I love my critters and these Rub-a-dub Doggies are pretty high on that list! I love that they are distinctly different breeds of dogs sudsing up and shaking off! They are super cute!

To create my card, I stamped a few of the pups and some accessories and colored them with my copic markers. I used the scan-n-cut to cut them out and set them aside. Then I took a blue panel and the Between the Lines stencil and inked it up with a green dye ink and a blending brush. Next, I pulled out my set of circle dies, chose 3 sizes that fit the dogs and cut holes in my panel. I thought the panel was a little stark so, without adding more ink to my brush, I inked up the edges of the cardstock. Then I flicked watered down ink all over the panel for extra texture.

Then I cut a very light blue piece of cardstock to go behind the window panel. I used the pups as a guide to ink up a little blue shadow behind each one for some added interest. Then I put foam tape on the stenciled panel and popped it up on the blue panel.

I added foam squares to the back of all the images and filled in each window with its coordinating dog and accessories.

I chose 3 sentiments from the set, stamped and heat embossed them and die cut them with banner dies before popping them up with foam squares too.

For finishing touches I added glossy accents to pup noses, black glaze pen to their eyes and unicorn Stickles to random bubbles.

Isn’t this a fun card to share with someone needing a pick-me-up?!? I think it will be perfect for it!

Products used today:
Rub-a-dub Doggies stamps
Between the Lines stencil
Pink & Main Layered Circle dies
Pink & Main Large Sentiment Strip dies
Blending Buddy brush
Lawn Fawn Cilantro ink
Foam tape and squares
Glossy accents
Stickles – unicorn

I appreciate you sharing your time with me. Have a fabulous day!

Miss Ink Stamps – You Are My Rainbow

Hello again! I’m over on the Miss Ink Stamps blog today with another way to use the rainbow builder stencil set. It was an idea that came to me and I’m so happy it turned out!

I started with my rainbow today by cutting a piece of vellum to 4×5.25 inches. Then I chose one of the 4 rainbows you can build with the stencil set and inked up the first layer which just has the middle color of the rainbow. I used distress oxide inks today which I had hoped would work but I wasn’t sure. I used wild honey, picked raspberry and twisted citron. I carefully dried each layer with my heat gun for just a minute before adding silver glitz glitter gel to the last layer and then set the whole panel aside to dry.

Next, I die cut a cloudy background panel from white and light teal cardstocks. I added foam tape to the back of the teal panel replacing the teal clouds with white ones but keeping some aside to put on top of the vellum. I added the vellum panel and then the white frame to the top.

I stamped a sentiment on one of the larger clouds and added the remaining ones with foam squares for added dimension and interest.

I finished the design off with a scattering of sweethearts sequins all over the sky. There are a couple of sizes and lots of colors in this mix which makes it that much more fun with the rainbow theme.

Isn’t this so cool! It gives me a whole new round of ideas to try with other stencils on vellum now too!

Products used today:
Rainbow Builder stencils
Sunshine and Rainbows stamps
Sweethearts sequins
Avery Elle Cloud Mat die
Distress Oxide Ink – wild honey, picked raspberry, twisted citron
Glitz Glitter Gel – silver
Stencil Pal
Foam tape
Liquid glue

I appreciate you sharing your time with me. Have a fabulous day!

Miss Ink Stamps – The Hurrier I Go…

Happy Thursday everyone! Thanks for stopping in today. I pulled out the Miss Ink Stamps Alice collection again and created a card fitting for myself these days…

I stamped images from Alice and colored them with my copic markers. I used the scan-n-cut to cut them both out and set them aside.

Next, I inked up a white panel with distress oxide inks – gathered twigs, rustic wilderness and salty ocean – and spritzed it with water, blotting it dry with a dry cloth. Then I stamped the large image from Forest Path with VersaFine ink. I find that this ink sits nicely on top of the oxide, although it takes a bit for it to dry completely so be careful.

I sat my images in place to decide on sentiment placement and thought it looked a little lacking. So I pulled out the Trinity Stamps embossed edge rectangle stack and created a gray frame for the scene. I used liquid glue to adhere it and then stamped my sentiment in the sky area on the upper right.

Finally, I added my two images with foam squares. Alas, still no glossy accents to adorn my projects these days so I opted for Wink of Stella glitter brush pen. I added this to the leaves in the tree on the left, the rabbit’s coat buttons and watch, and Alice’s headband, bow and shoes.

I tried to capture the glitter in the light but the camera was not cooperating with me. It really is quite awesome in person. If you haven’t used one of the glitter pens, I encourage you to. They aren’t too expensive and add a ton of glimmer to your projects.

Products used today:
Alice stamps
Forest Path stamps
Wonderland Wisdom stamps
Trinity Stamps Embossed Edge Rectangle dies
Distress Oxide Ink – rustic wilderness, gathered twigs, salty ocean
Distress Sprayer
Wink of Stella glitter brush pen
Liquid glue
Foam squares

I appreciate you sharing your time with me. Have a fabulous day!

Miss Ink Stamps – Happy New Year Bottle Tag

Hello everyone! I’m back with a quick New Year project featuring Miss Ink Stamps Punny Farm Pigs and Happy New Year sets and a couple of dies from Trinity Stamps.

My daughter loves having sparkling cider at the holidays so I thought it would be fun to make a bottle tag to decorate it while it sits on the counter tomorrow.

I stamped images from Punny Farm Pigs and colored them with my copic markers before using the coordinating dies to cut them all out. I used liquid glue to adhere all of the accessories on and set them aside to dry.

Next, I die cut a bottle tag from Trinity Stamps and stamped images from Happy New Year all over it in VersaMark ink. I heat embossed them in gold for that classic New Year decor vibe. Next, I die cut cheers from the bottle tag die set from white cardstock 4 times and black once. Then I cut the shadow from gold glitter cardstock and used liquid glue to adhere all the layers together. Last, I stamped and heat embossed Happy New Year in gold and trimmed it into as trip. For a little dimension and to help it stand out I inked the edges with white pigment ink. Then I added foam squares to my images and sentiment strip.

I adhered the cheers die with liquid glue, removed the release paper from the foam squares and popped everything in place.

For finishing touches I added black glaze pen to the pig’s eyes and white gel pen highlights to all the images. Once the eyes were dry, I came back in with a little white gel pen highlight on those too.

Here’s a look at the tag hanging on the sparkling cider bottle. Isn’t it just the cutest!?! I think so and I’m excited to surprise my daughter with it tomorrow. She’ll love it too!

Products used today:
Miss Ink Stamps Punny Farm Pigs stamps and dies
Miss Ink Stamps Happy New Year stamps
Trinity Stamps Bottle Tag die set
Foam squares

I appreciate you sharing your time with me. Have a fabulous day!

Miss Ink Stamps – Winter Thank You

Hello fabulous friends! Thanks for stopping by today. I’ve pretty much made myself stop making Christmas cards at this point but I’m not letting go of all the cute winter and holiday images yet! So I switched gears to creating some thank you cards to use through the winter months instead. Today I’m sharing this sweet mini scene featuring stamps and stencils from Miss Ink Stamps.

To create my card, I chose a circle die that would fit the image from Warm Winter Wishes and cut it out. Then I stamped the image and colored it with my copic markers. To set the scene, I used BG000 for some snow shading but dark blue ink and a blending brush to shade in the sky. Then I came in with white gel pen accents for falling snow and extra snow drifts on the ground.

Next I took a white panel and cut it down to 4×5.25 inches and adhered it to the Feed the Birds stencil. I spread gold glitter glitz gel through it and set the panel aside to dry. Once it was dry and I started layering things together, I didn’t like all the white so I inked it up with light brown ink and a blending brush for some contrast.

Next, I cut a banner from white cardstock and stamped a sentiment from the Fall Bouquet stamp set. I added foam tape to the back of everything, layering on my scene and sentiment first so I could trim off anything hanging over the edge. Then I added the whole panel to a white card base.

For finishing touches I added glossy accents to parts like the berries, ornaments and snowman eyes.

Isn’t this just a sweet little scene and so fun with the glittery background!?! I think it will be a perfect thank you card to send someone after Christmas!

Products used:
Warm Winter Wishes stamps
Fall Bouquet stamps
Feed the Birds stencil
Trinity Stamps Embossed Edge Circle dies
Newton’s Nook Frames & Flags dies
Thermoweb Glitz Glitter Gel – gold
Stencil pal
3D Foam tape

I appreciate you sharing your time with me. Have a fabulous day!