Miss Ink Stamps – Holly Jolly Christmas Tag

Happy Thursday everyone! I hope your week is going nicely. Are you all ready for Christmas? I usually am but I still have packages arriving through the weekend so I’ll be wrapping right up until the moment this year it seems. Oy!

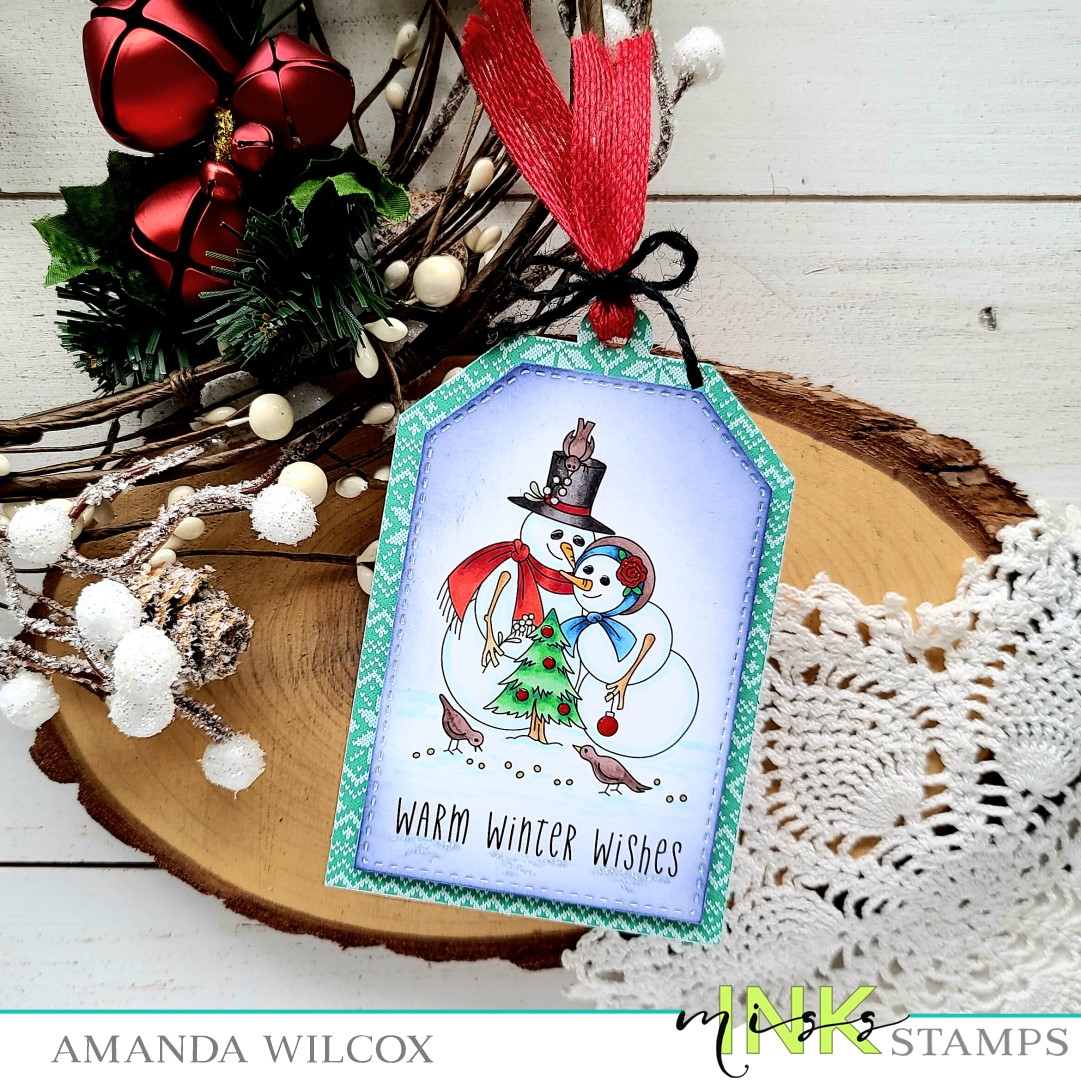
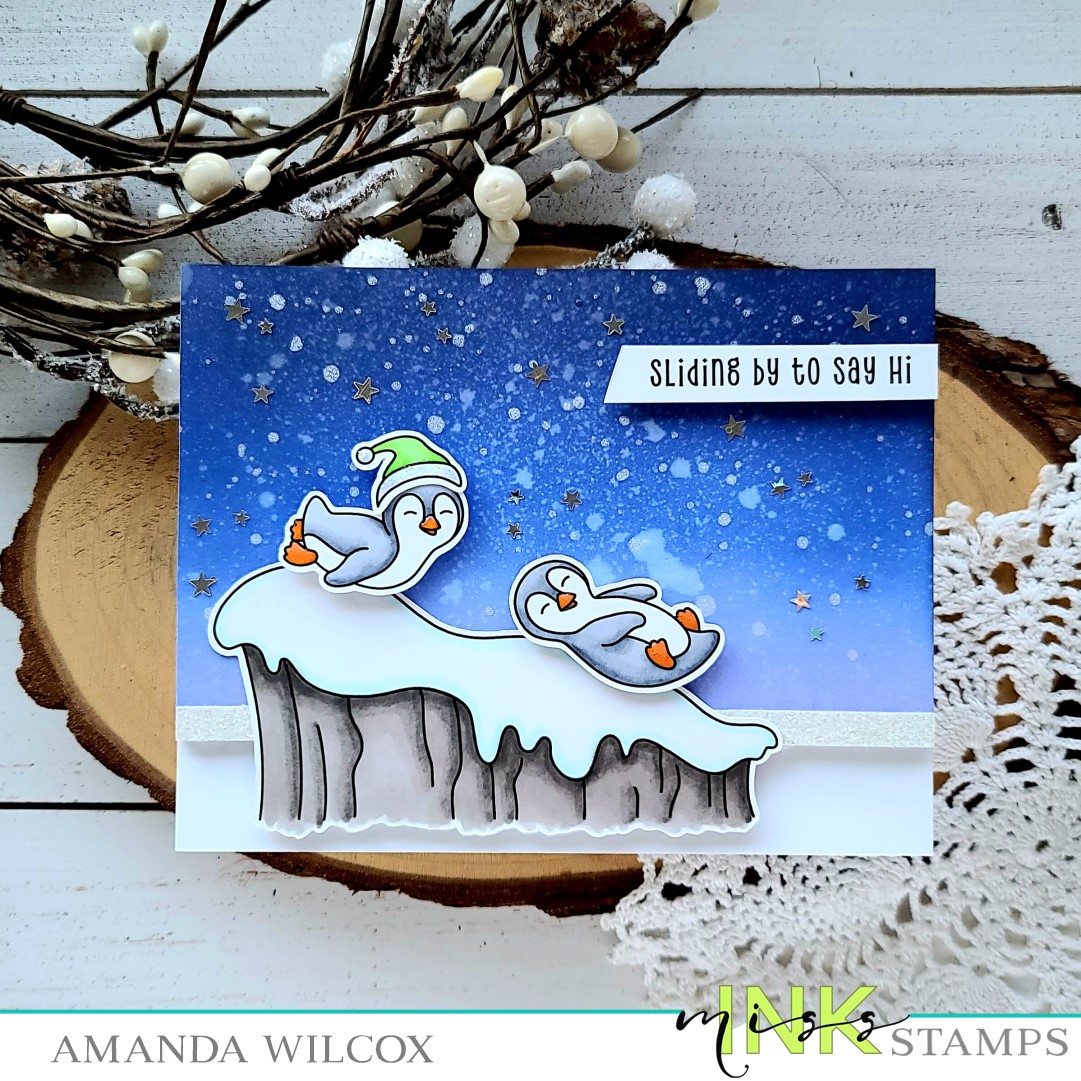
Back to the reason I’m popping in today…crafting!!! I have a SUPER fun Christmas tag featuring stamps from Miss Ink Stamps and a tag die from Trinity Stamps. I wanted to make a coffee themed tag to play along with the Ellen Hutson 12 days of Christmas tags so I pulled out Java Joe’s…but how to turn it Christmassy?!? I started digging and wouldn’t you know that the accessories in the Ice Day stamp set fit perfectly!

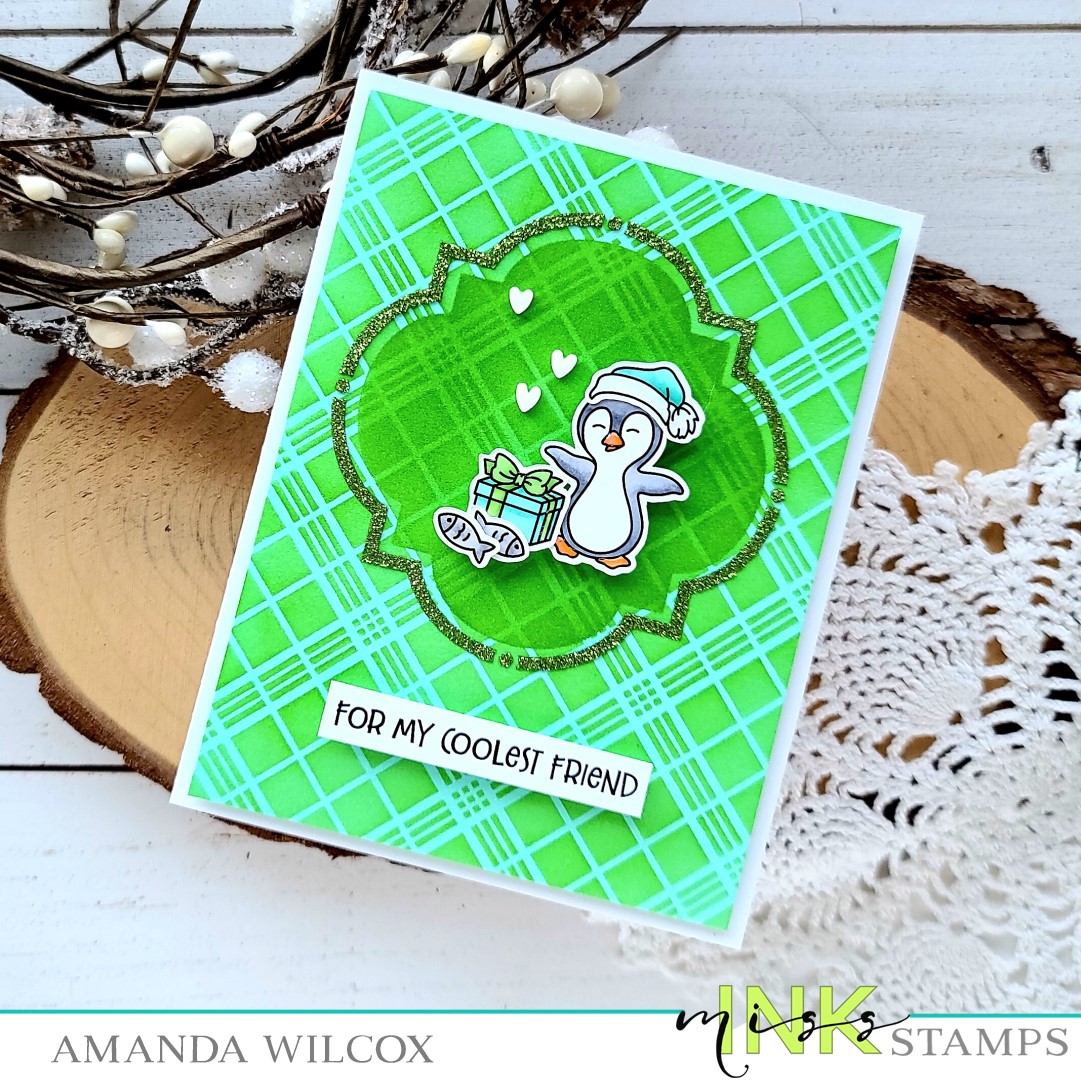
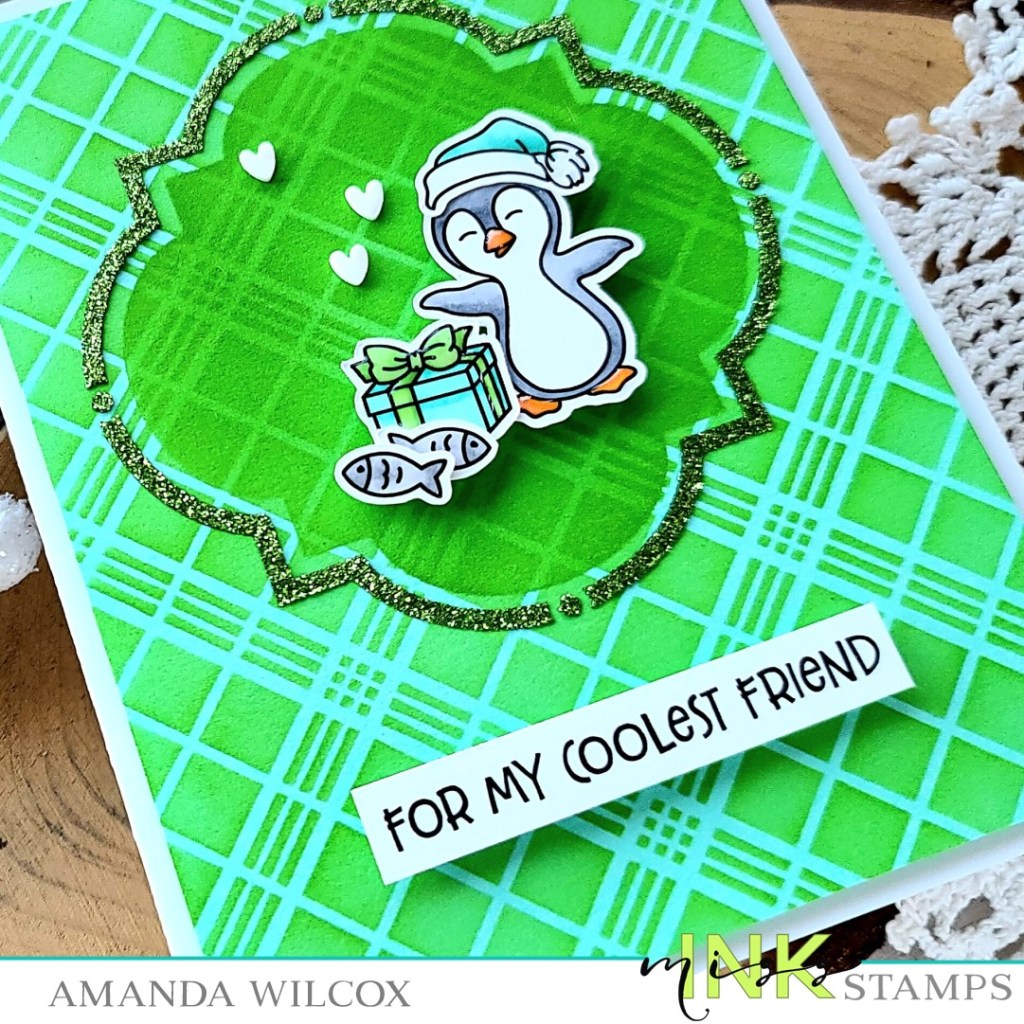
This was just too fun to create! I stamped images from Ice Day and Java Joe’s and colored them with my copics. I used the scan-n-cut to cut them out and liquid glue to adhere everything together. I added foam squares to the back and moved on to my tag base.

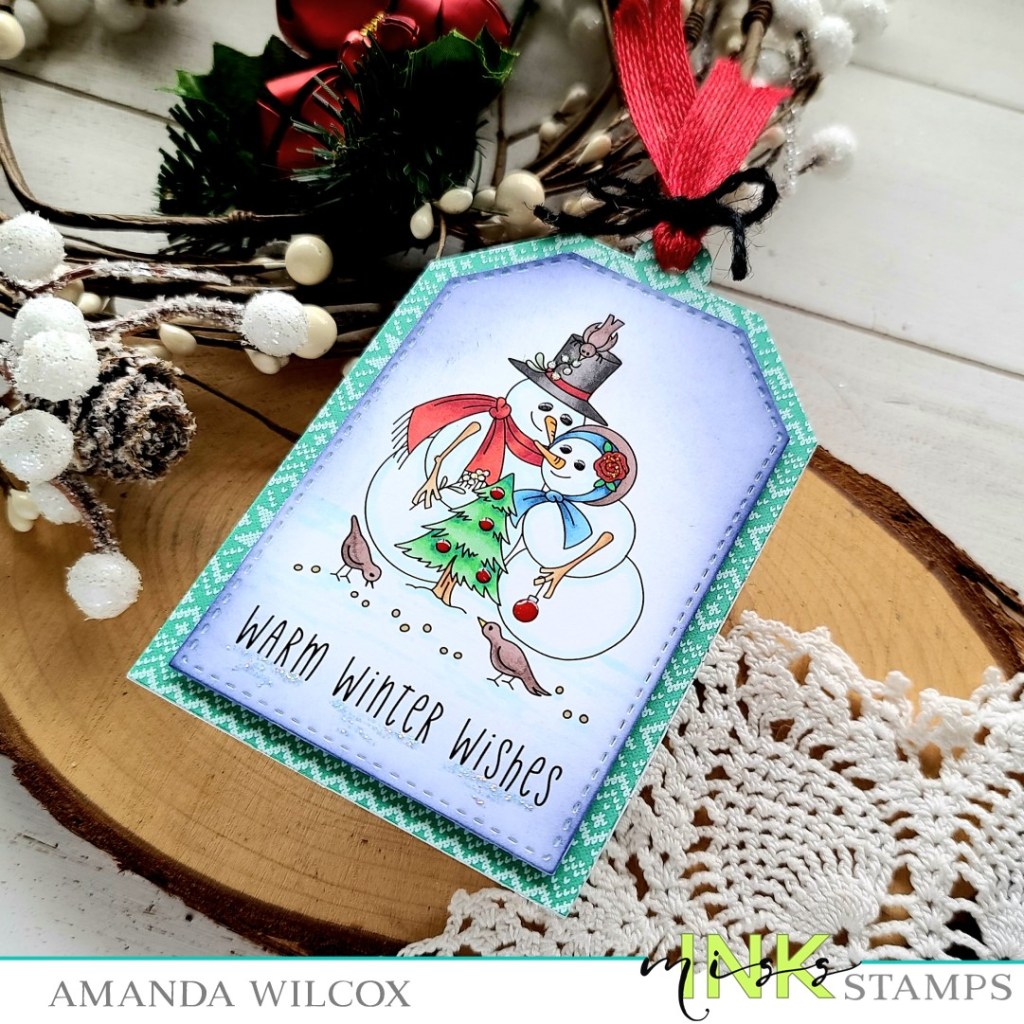
I stamped the coffee shop, brick detail and a topiary on a kraft slimline tag with sepia VersaFine ink. Then I blended distress oxide ink on the tag – brown edges, red on the building and a little touch of green on the plant. I spritzed it with water and flicked watered down brown and red ink on the tag. Next I snagged some snowflakes from Snow One Like You and stamped them in the background with white pigment ink.

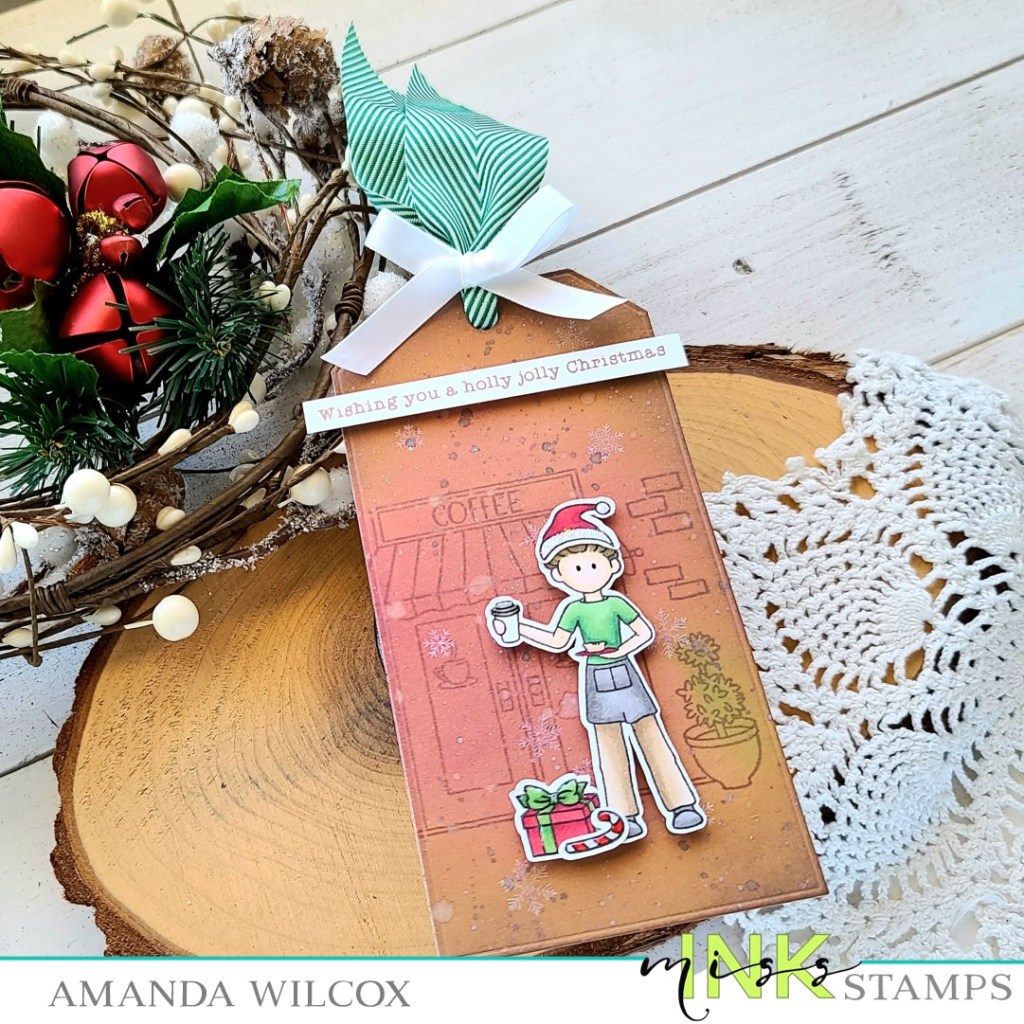
Next, I removed the release paper from the foam squares and popped my images in place. I stamped a sentiment from Holly Jolly in the same brown ink and trimmed it into a strip before popping it up with a foam strip.

For finishing touches I added glossy accents to the package bow, candy cane and coffee cup lid. Then I added unicorn Stickles to Joe’s Santa hat and black glaze pen to his eyes.

For stability and a clean surface to write on, I die cut another tag from white cardstock and adhered them together before threading my ribbon through the hole and tying it up.

I am SO EXCITED about how this fun tag turned out! I hope you liked it too!

Products used today:
Miss Ink Stamps Holly Jolly
Miss Ink Stamps Snow One Like You
Miss Ink Stamps Java Joe’s
Miss Ink Stamps Ice Day
Trinity Stamps Slimline Tag dies
foam squares
glossy accents
stickles – unicorn

I appreciate you sharing your time with me. Have a fabulous day!

Miss Ink Stamps – Coolest Friend

Happy Tuesday friends! I’m over on the Miss Ink Stamps blog today with a fun stencil layered card featuring those new adorable penguins in the Ice Day stamp set.

To create my card, I started with the images. I chose a penguin and some accessories from Ice Day, stamped them and colored them all with copic markers. I used my scan-n-cut to cut them out and set them aside.

Moving on to the background, I chose a light blue piece of cardstock and prepared my Perfectly Plaid stencil with pixie spray. I inked it up with a blending brush and green dye ink. I removed the plaid stencil and centered the Ins & Outs Quatrefoil stencil over the top. I inked up another layer of the same green ink creating a focal point for my images. I switched from the window to the frame layer of the stencil and spread grass green glitz glitter gel through that.

Once the panel was dry, I trimmed it down to 4×5.25 inches and popped it up on a white card base with foam tape. Then I added foam squares to my images and arranged them in the window area. I chose a sentiment from the Ice Day set, stamped it and trimmed it into a strip before popping it up with a foam strip too.

For finishing touches I added some white clay hearts with liquid glue and glossy accents to parts of the images like the penguin beak and feet and the bow on the present.

Wouldn’t this card make the cutest birthday card for a winter baby?!? I think so! It’s so fun and also great for guys or girls!

Products used today:
Ice Day stamps
Perfectly Plaid stencil
Ins & Outs Stencil – Quatrefoil
Pixie spray
Glitz glitter gel – grass green
Blending Brush
Lawn Fawn ink – jalapeno
Foam tape
Foam squares
Glossy accents
Twiddler’s Nook Sweethearts embellishment mix

I appreciate you sharing your time with me. Have a fabulous day!

Miss Ink Stamps | InkOn3 Collab – Wanna Build a Snowman?

Happy Friday everyone! I’m popping in with a quick peek at the card I made for the Miss Ink Stamps | InkOn3 collaboration hop that’s happening on Instagram right now. Both companies have prizes up for grabs so be sure to hop and comment along on Instagram.

For my card, I used stamps and stencils from Miss Ink Stamps and ink and liquid pixie dust from InkOn3.

I inked up the Frosty Flakes stencil with Atelier Marilyn Red ink. I smooshed the ink pad on my glass mat and sprayed it with water, then splattered it on the stenciled panel. Next, I added a drop of liquid pixie dust to the watered down ink and flicked that all over for some shimmer. Isn’t it such a fun background?!?

Then I stamped the pine forest over the top and added a sentiment at the bottom using blackout detail ink. I stamped images from Snow Buddies with the blackout detail ink and colored them with my copic markers. I used the scan-n-cut to cut them out and popped them up with foam squares.

For finishing touches I added some glossy accents to bunny noses, the carrot stem and berries. Then I painted liquid pixie dust on the bunny’s scarves and my card is finished!

Products used today:
Frosty Flakes stencil
Snow Buddies stamps
Pine Forest stamp
Marilyn Red Atelier ink
Blackout Detail ink
Liquid Pixie Dust

Remember there is a hop happening on Instagram. Click HERE and head over for some fun and inspiration!

I appreciate you sharing your time with me. Have a fabulous day!

Miss Ink Stamps – One-Layer Slimline Christmas Forest

Hey friends! Today I have a really fun Miss Ink Stamps card to share with you that is literally one layer! I actually don’t think I’ve ever successfully accomplished this before and I couldn’t be more happy with the result!

To create my card, I took a white panel and secured it to my glass mat. Then I taped down the new Treeline stencil toward the bottom. I used Lawn Fawn dye inks and just inked the edge around the trees one layer at a time, shifting the stencil up 1/4 inch each color.

The rainbow I chose for today was, from top to bottom, fresh lavender, mermaid, celery stick, sunflower, peachy keen and guava.

Once I got to the top, I shifted the stencil to use the negative on the bottom half to protect my inking and smeared Thermoweb iridescent glitz glitter gel on the white space. I left it to dry and then trimmed my panel down to 8.5×3.5 inches and adhered it to a slimline card base.

Last, but not least, I popped the whole thing in my MISTI and stamped a sentiment from Deck the Halls in the upper right and this card is finished!

I have been very into rainbow Christmas cards this year for some reason. They are just happy and make me smile! I hope you are enjoying them too!

Products used today:
Miss Ink Stamps Treeline stencil
Miss Ink Stamps Deck the Halls stamps
Thermoweb glitz glitter gel – iridescent
Thermoweb stencil pal
Thermoweb Ultra Bond liquid glue pen
Blending brushes
Lawn Fawn dye inks

I appreciate you sharing your time with me. Have a fabulous day!

*This blog uses affiliate links, at no additional cost to you, whenever possible.*

Miss Ink Stamps – Wishing You a Cool Yule

Hello again! I hope your week is going fantastic! I’m having a blast doing all things Christmas – decorating, crafting, baking – all of it! And today I have an adorable Miss Ink Stamps Christmas card featuring the newly release Have an Ice Day penguins! They are too cute and I just love coloring them!

I started by stamping images from Have an Ice Day and colored them all with my copic markers. Then I used the scan-n-cut to cut them out and used liquid glue to adhere all the bits and pieces to my sweet penguins.

Next, I blended distress oxide ink in rustic wilderness and mowed lawn on an A2 panel and spritzed it with water. I blotted it dry and ran it through my die cutter with the Pretty Pink Posh Storybook 2 die. I love these dies and how they give you something to ground your images. They also make fun shaker cards if you feel like doing that.

I adhered the main part of the inked panel to my white card base with liquid glue and then popped the windows back in place with foam squares for a little dimension and interest.

Then I added all of my images and sentiment strip with foam squares as well. For finishing touches I added a scattering of PPP Shamrock pearls across the design. Last I couldn’t resist a little unicorn Stickles and glossy accents on the penguins and their accessories.

Isn’t this little penguin family just the sweetest!?! I can’t get over how cute the hat is with the reindeer antlers coming out of it. It makes me giggle every time.

Products used:
Miss Ink Stamps Have an Ice Day
PPP Storybook 2 die
PPP Shamrock pearls
Distress Oxide Ink – rustic wilderness and mowed lawn
Foam squares
Liquid adhesive
Glossy accents
Stickles – unicorn

I appreciate you sharing your time with me. Have a fabulous day!

*This blog uses affiliate links whenever possible, at no additional cost to you.*

Miss Ink Stamps – Release Day | Warm Wishes Tag

Welcome everyone!!! Miss Ink Stamps is having an adorable winter release today and I’m sharing a fun tag featuring one of the new stamp sets.

When I saw this image I thought it would fit perfect on a tag so I checked and, sure enough, it’s perfect! I cut the inside panel of the Avery Elle Easy Layer Tag dies and stamped my image and sentiment on it. Then I used copic markers to color the scene.

I inked up the edges of the panel with chipped sapphire distress oxide ink and lined the back with foam tape. I cut the main part of the tag from white cardstock and patterned paper. Then I adhered everything and threaded ribbon through the hole, tying it with some twine.

For finishing touches, I added glossy accents to things like ornaments and snowman eyes. Then I added unicorn Stickles to the mistletoe berries, flower and a little shadow beneath the sentiment.

Such a sweet winter image! This new release is so much fun and not just for Christmas so be sure to check it out HERE.

Products used today:
Miss Ink Stamps Snow Couple stamps
Avery Elle Easy Layers Tag dies
Glossy accents
Stickles – unicorn
3D foam tape

I appreciate you sharing your time with me. Have a fabulous day!

Miss Ink Stamps – Sneak Peek | Sliding By…

Happy Friday friends! I hope your Thanksgiving was wonderful. We had a house full and it was such a great day!

Tomorrow is a new release for Miss Ink Stamps and today I have a sneak of the set – Have an Ice Day. It’s SO CUTE and super versatile for winter, holiday and all occasion cards.

I started my card by stamping and coloring the images from Have an Ice Day with my copic markers. Then I used the scan-n-cut to cut them out. Next, I ink blended an A2 size panel with distress oxide inks in chipped sapphire, blueprint sketch and shaded lilac. I spritzed the panel with water and blotted it dry. Then I put it in my splatter box and flicked pearl watercolor all over it. After it was dry, I cut an inch off the bottom and adhered a strip of white glitter cardstock to it.

I added foam tape to the back of the panel and adhered it to a white card base. Then I used a combination of liquid glue and foam tape to add my snowy hill to the bottom left of my card front. Next, I adhered the penguins with foam squares, decided on a sentiment and popped that strip up with foam strips too.

For finishing touches, I added glossy accents to the penguin’s beaks and feet and a little unicorn Stickles to the hat on the top penguin. Then I glued a scattering of stars from the Champagne Stardust sequin mix.

Be sure to check back tomorrow for another project from the release and then head to the Miss Ink shop to see everything and pick up some winter crafting goodies!

Products used today:
Have an Ice Day stamps
Champagne Stardust sequin mix

I appreciate you sharing your time with me. Have a fabulous day!

Miss Ink Stamps – I Like Big Mugs…

Happy Thursday everyone! I’m back with a little caffeinated inspiration from Miss Ink Stamps today! I had a little fun with one of my favorite gnome sets – Big Mugs and a new stencil – Lava Lamp. I also wanted to change things up a bit so I decided on a circular card today too!

I stamped my gnome out and colored him with copic markers before cutting him out with my scan-n-cut. Then I inked up a brown panel with the lava lamp stencil and white pigment ink using my blending buddy brush. I die cut the panel with an embossed edge circle from Trinity Stamps. Then I cut the next size up circle from kraft cardstock.

I created a white card base with the same circular die and adhered the kraft circle with liquid glue, then popped the stenciled circle up with foam tape. I felt like the gnome needed something behind him so I cut a smaller circle from vellum.

To hide my adhesive, I attached the gnome to the vellum with foam squares and hid tape runner on the back of the vellum behind the gnome only.

Last, I stamped a sentiment on a banner from Newton’s Nook Banner Trio set and popped it up with foam squares under the gnome’s feet.

For finishing touches I added some brown clay hearts from the Twiddler’s Nook Caffeinated Crafting embellishment mix and gave the image some white gel pen highlights.

Tomorrow is the last day to play along with the Coffee Lovers Fall | Winter Hop. Have you played along yet? I’m entering this cutie for sure!

Products used:
Miss Ink Stamps Big Mugs stamps
Miss Ink Stamps Lava Lamp stencil
Trinity Stamps Embossed Edge Circle Stack dies
Newton’s Nook Banner Trio dies
Twiddler’s Nook Caffeinated Crafting embellishment mix
Foam tape and squares

I appreciate you sharing your time with me. Have a fabulous day!

Miss Ink Stamps – Frosty Hellos

Hello again! This wee sure is chugging along quickly! I have another fun Miss Ink Stamps card to share with you but today I’m going for more of a winter feel with one of my favorite sets – Say Cheese! These mice and their sidekicks are too cute for words and so fun to create with!

Today I inked up the penguin and the mouse with the coordinating penguin hat and colored them with copic markers. I used the scan-n-cut to cut them out and adhered them together. Then I took a dark blue cardstock panel and spread Thermoweb iridescent glitz glitter gel through the frosty flakes stencil.

While that was drying, I went digging for a different sentiment and found just the perfect one in the snow buddies set. I stamped it in dark blue and cut it out with a Pink & Main large sentiment strip die. Next, I decided it would be fun to put a snowflake behind my images instead of a simple circle or something. I cut the Trinity Stamps big snowflake cut and foil dies from light blue cardstock and iridescent vellum and adhered the layers together with liquid glue. Next, I popped the mouse and penguin up with foam squares and also added some to the back of the sentiment strip too.

Once the stenciled panel was dry, I popped it up on a white card base with foam tape. Next, I added the snowflake with liquid glue and added the sentiment strip below that.

For finishing touches I went over all the eyes with black glaze pen, let it dry and added white gel pen highlights back in. Then I finished things off with glossy accents on the hat pompoms, mouse nose and penguin beak.

Products used today:
Say Cheese! stamps
Snow Buddies stamps
Frosty Flakes stencil
Thermoweb Glitz Glitter Gel – iridescent
Stencil pal
3D foam tape
foam squares
glossy accents

I appreciate you sharing your time with me. Have a fabulous day!

Miss Ink Stamps – It’s Always Tea Time

Hey friends! I’m over on the Miss Ink Stamps blog today sharing a Mad Hatter tea card. I just love the Alice series of stamps and it had been a while since I pulled them out so obviously it was past time to do so!

To create my card, I started with stamping images from Tea Party and colored them with my copic markers. I used the scan-n-cut to cut them all out and adhered the pieces to the table that I wanted sitting on top. Next, I inked up a kraft cardstock panel with the lava lam stencil and some brown dye ink. Then I layered the Ins & Outs Marquis window stencil and inked it up first with green and then dark gray. I like layering colors of ink blending for subtle shadows and hints of color.

Next I layered the Marquid frame over the panel and spread Thermoweb transfer gel blanco through it. I set it aside to dry for a bit and then heated up my laminator. Once it was ready, I ran it through with emerald watercolor deco foil. I removed it and began placing my images.

After much deliberation I sliced the table in half and adhered it to the card front with liquid glue. Then I popped the Hatter up with foam squares and placed the panel in my MISTI. I chose a sentiment from Tea Party and stamped it with brown ink.

I absolutely couldn’t waste the other half of the table or the March Hare that I had originally colored either…so let’s take a peek inside my card!

Sometimes it’s fun to bring the scene into your card too! I decided I wanted another sentiment inside this time so I chose one from wonderland wisdom and stamped it in the same brown ink.

After that I moved back to the front of the card for some simple glossy accents in various places for finishing touches.

Products used on today’s card:
Tea Party
Wonderland Wisdom
Ins & Outs Marquis stencil
Lava Lamp stencil
Thermoweb transfer gel blanco
Deco Foil – emerald watercolor
Stencil pal
Blending buddy brushes

I appreciate you sharing your time with me. Have a fabulous day!