Miss Ink Stamps – Punny Farm Pigs with Texture Paste Background

Happy Thursday again! I’m really excited to share my Miss Ink Stamps inspiration with you today. You know I love getting messy in the craft room and today is a big testimony to that. I used to love creating with Ranger texture paste but for some reason I ran out and hadn’t bought a new tub. Don’t worry, I fixed that now. And immediately dove into it when it arrived.

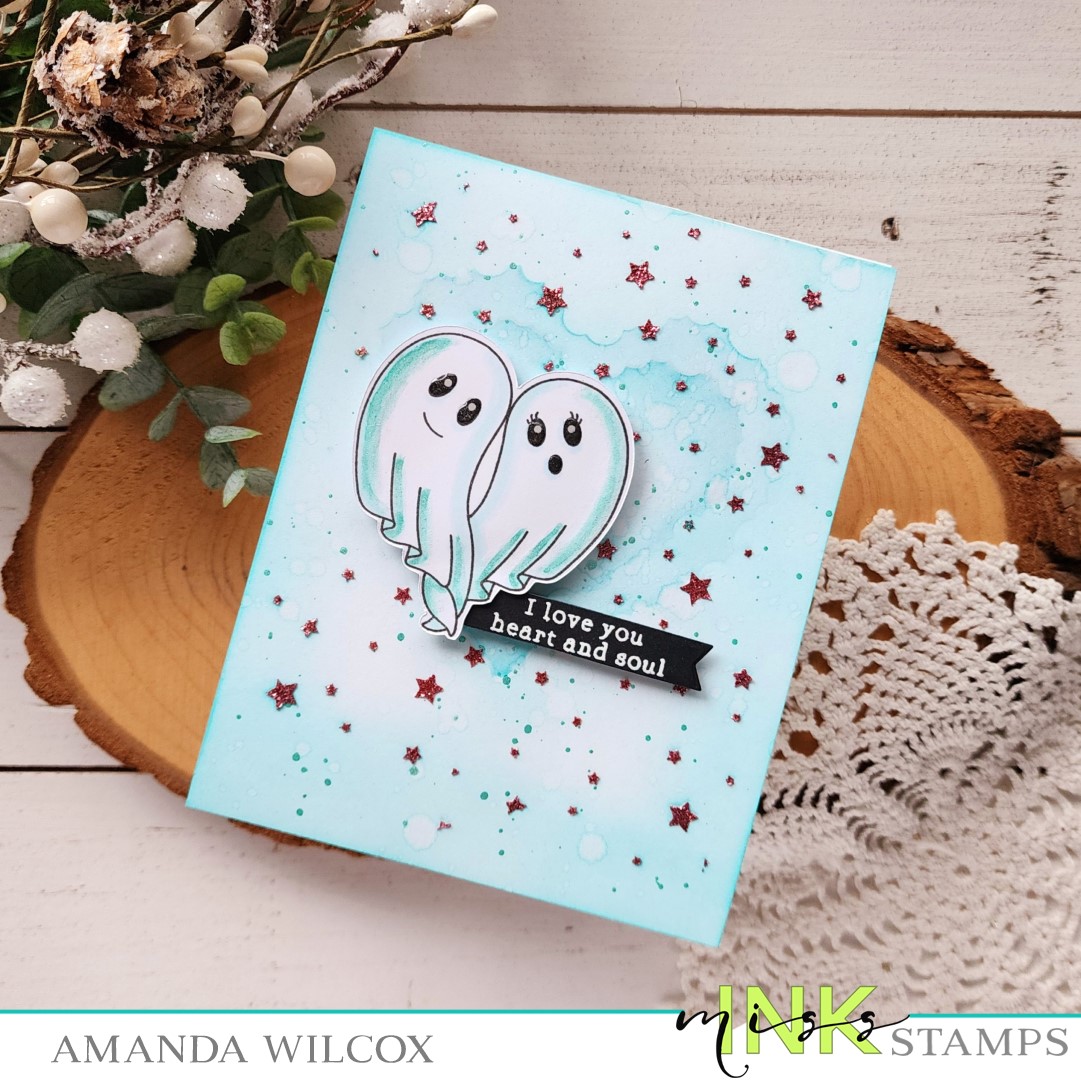
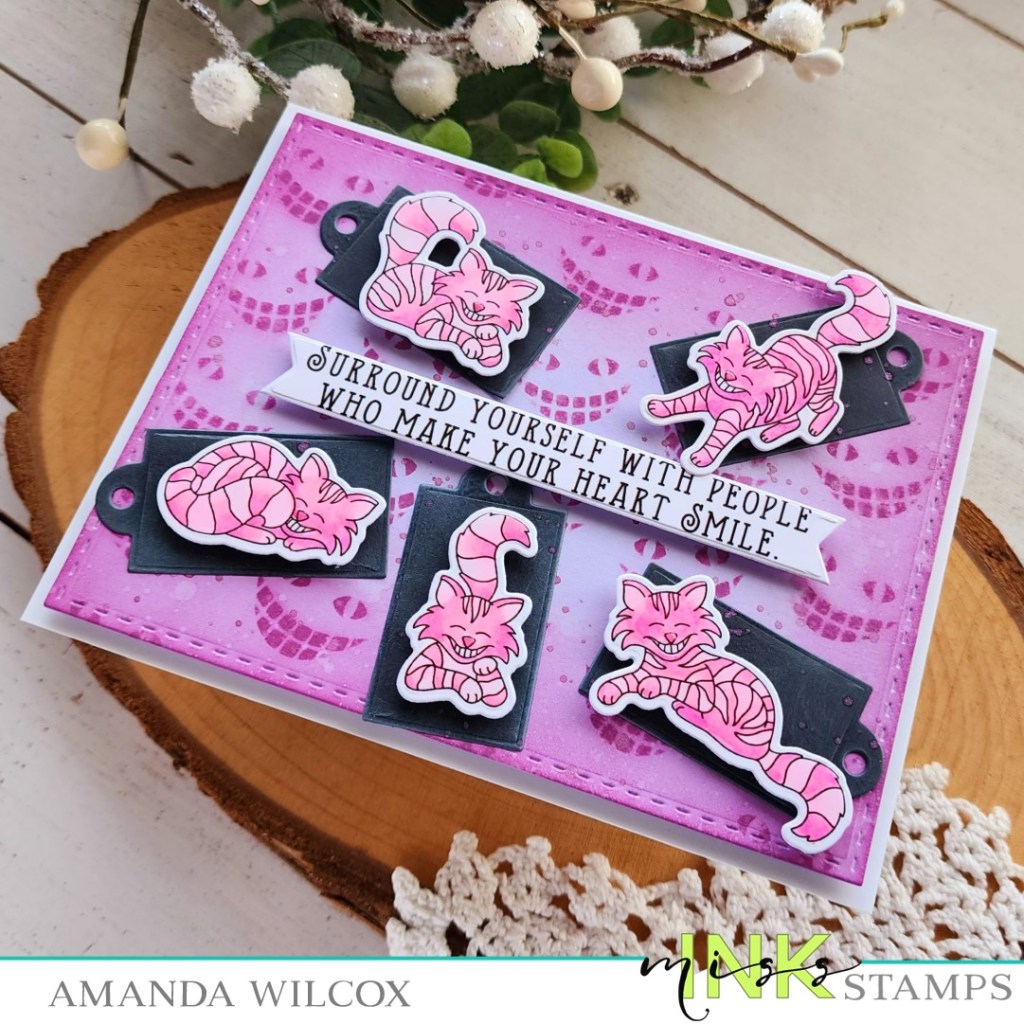
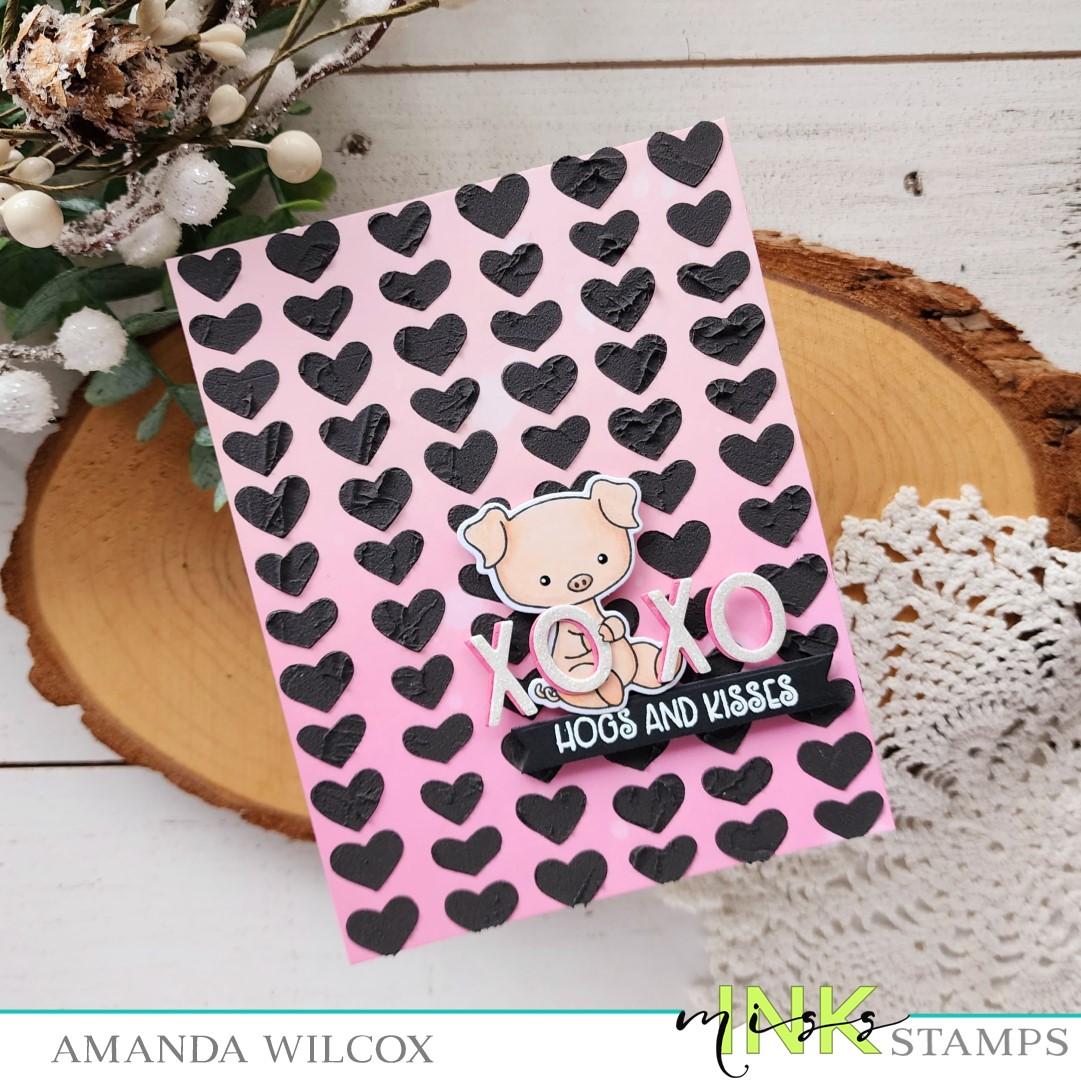
I inked up a white cardstock panel with distress oxide ink fading from picked raspberry to spun sugar. I spritzed it with water and let it dry while I mixed some paint in my texture paste. I knew I wanted to go super bold and wild for my card today. When the paste was mixed and the panel was dry, I taped the Hand Drawn Hearts stencil over the top and spread the black texture paste through it. Before removing the stencil though, I took my palette knife and created texture on the hearts so it wasn’t smooth. This kept the heart shape and gave awesome ripples in the hearts.

I stamped and colored one of the sweet piggies in Punny Farm Pigs and cut it out. Then I used a craft knife and cut one of his hands free to hold the O. The XOXO come from the EIEIO Frame die set. Last, I stamped and heat embossed my sentiment from Punny Farm Pigs and cut it out with a banner die.

I adhered the stenciled panel to a card base with liquid glue and then added my sentiment and piggy to that with a combination of liquid glue and foam squares.

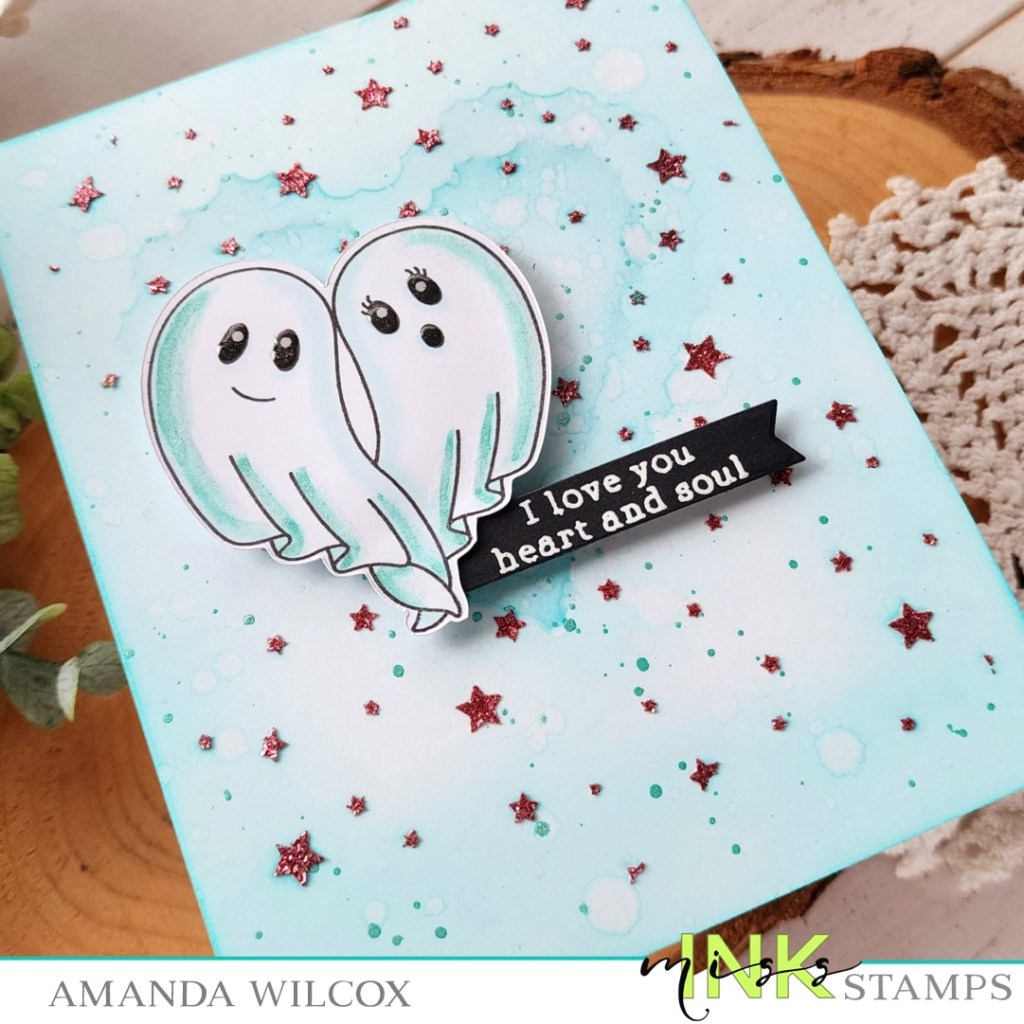
For finishing touches I used a black glaze pen on the pig’s eyes, let it dry and came back in with whit gel pen for the highlight. This makes it stand out so much more than the stamping. I also added some glossy accents to his nose.

Products used:
Punny Farm Pigs stamps and dies
EIEIO Frame dies
Hand Drawn Hearts stencil

Distress Oxide Ink – spun sugar, kitsch flamingo, picked raspberry
Texture paste

Touch of gloss
Palette knife

Foam squares
Liquid glue

Sentiment Banner die
Magic Anti-static brush
Embossing and watermark ink
Embossing powder – frosting

I appreciate you sharing your time with me. Have a fabulous day!

Miss Ink Stamps – Punny Farm Goats

Happy Thursday everyone! I’m here today with some sweet Miss Ink Stamps inspiration featuring the cutest goats ever – Punny Farm Goats! The sentiments in the set are as cute as the goats and make it a blast to create lots of different cards with this set. Today I’m still making valentines to share so that’s the route we went.

I stamped my goat and a few hearts from the set and cut them out with the scan-n-cut. Then I stamped my sentiment and heat embossed it before cutting it out with a banner die.

I inked up my background panel with the Flower Shower stencil set and glued it to a card base. Tying in the green leaves, I cut a scalloped frame from the Punny Farm Frame dies and popped it up with foam strips on the card front.

Finally, I popped up my sentiment banner and images with foam squares in the center. I finished the card off with stardust Stickles on the hearts in the air and on the sentiment strip. Then took black glaze pen and went over the goat’s eyes, letting that dry before adding the white highlight back in the center. Last, but not least, I added glossy accents to the goat’s horns, hooves and nose.

Isn’t this so stinking cute?!? I love how it turned out!

Products used:
Punny Farm Goats stamps
Punny Farm Frame dies
Flower Shower stencils

Lawn Fawn Extra Sentiment Banners dies
Foam strips and squares
Blending brushes
Lawn Fawn juice box and jalapeno inks
Glossy accents
Magic Anti-static brush
Embossing & Watermark ink
Embossing powder – frosting

Stickles – star dust

I appreciate you sharing your time with me. Have a fabulous day!

Miss Ink Stamps – Kindred Spirits

Happy Friday Eve everyone! I’m looking forward to the weekend but I’m also excited that it’s Thursday and my time to share my inspiration from Miss Ink Stamps. I had a blast pulling my Halloween stamps out and using them for a super cute valentine card!

I stamped the ghosties from Kindred Spirits and colored them with copic markers. Then I cut the image out and set it aside so I could play with background ideas.

I took a white piece of cardstock and the Heart Clouds stencils and inked them up with teal ink. Then I splattered the panel with water and flicked teal watercolor on it too. While I had the watercolor out I decided to add metallic shading on my ghosts instead of just the copic coloring. This was SO FUN! Once the watercolor was dry on the background panel I spread pink glitz gel from Thermoweb through the Starry Night stencil.

While waiting for messy things to dry, I stamped and heat embossed a sentiment on black cardstock and die cut it with a banner. I glued that to the bottom of the ghosts and popped everything up on the background panel with foam squares. Then I glued that to a card base with liquid glue.

For finishing touches I added glossy accents to the ghosts eyes and the girl’s mouth too. I love the mix of shiny and glittery all over this card. It’s so fun!

Products used:
Kindred Spirits stamps
Starry Night stencil
Heart Clouds stencils

Foam squares
Blending brushes
Lawn Fawn mermaid ink
LH Colors watercolor
Embossing & Watermark ink
Magic Anti-static brush
Embossing powder – frosting

Thermoweb Glitz Gel – pink
Banner die

I appreciate you sharing your time with me. Have a fabulous day!

Miss Ink Stamps – All Smiles

Happy Thursday friends! I’m sharing so many smiles with you today featuring fun from the Miss Ink Stamps Alice Collection. This stamp and die set and stencil are part of the new add on release. I was over the moon to see more Cheshire Cats to play with this time around. I love him in the movies and stories!

I started by stamping and coloring all of the kitties in the All Smiles stamp set. Then I used the coordinating dies to cut them all out. I decided that I wanted something for them to be on so I die cut the smallest tag from the Tags die set in black cardstock for each one. I also stamped and die cut my sentiment with a banner.

Next, I took a piece of purple cardstock and die cut it with the largest frame in the Oh Happy Day die set. I pounced seedless preserves distress oxide ink of the Cheshire Smiles stencil. Oxide ink is thick and if I try to blend through stencils I always end up with mucky blotches so pouncing is the way to go for me.

After removing the stencil, I lightly blended the same ink around the edges of the panel. I splattered it with water and flicked purple watercolor on the panel and mini tags too.

I added the cats to the tags with foam squares. Then I added the sentiment to the center of the panel with foam strips and arranged my cat tags around that with liquid glue. Finally, I popped the panel up on a white card base with foam tape.

For finishing touches I just added glossy accents to the kitty noses for a little shine on each one.

Products used:
All Smiles stamps and dies
Cheshire Smiles stencil
Oh Happy Day dies
Tags dies

Foam tape, strips and squares
LH Colors watercolor – purple
Touch of Gloss
Liquid glue
Lawn Fawn Extra Sentiment Banners dies

I appreciate you sharing your time with me. Have a fabulous day!

Miss Ink Stamps – Deck the Halls

Welcome back everyone. Today I have inspiration for quick scene “coloring” using Miss Ink Stamps stencils, dies and stamps. As things get closer to Christmas, we have less and less time to sit and color detailed scenes, but maybe you still really want to create with those gorgeous images. Here’s one solution for you.

To start my card, I stamped the bunny images I wanted cut out and colored them with copic markers. Then I used my scan-n-cut to cut them all out and set them aside.

Next I cut the stitched rectangle from EIEIO Frames die set and stamped the large background image in brown ink on it. Then, without adding ink to my blending brushes, I went around the edge with my teal brush, then over the tree trunks with brown and last the trees themselves with green. It just gives the background a glow of color so it’s not stark white but really took no time at all.

Next, I took an A2 white panel and inked up the Candy Stripes stencil with red ink. After removing the stencil I went around the border with the same color so there wasn’t any white but you could still differentiate the stripes.

I used liquid glue to adhere my layers together and to a card base, then I popped up my images and sentiment banner.

Products:
Woodland Hearth stamps
EIEIO Frames dies
Candy Stripes stencil

Blending brushes
Liquid glue
Foam squares

Embossing & Watermark Ink
Embossing powder – frosting
Magic Anti-static brush

I appreciate you sharing your time with me. Have a fabulous day!

Miss Ink Stamps – Wildflowers

Happy Thursday friends! The week is chugging along and I’m so happy about it. We have fun plans Friday night, a relaxing Saturday and more fun on Sunday this weekend. Yay!

Today I’m sharing some inspiration from the most recent addition to the Miss Ink Stamps Alice Collection. This set is called Wildflowers and it’s amazing! The florals would be perfect on their own or with any of the fun characters from Alice.

Today I chose a few images from the set to stamp and color with copic markers. Then I used the coordinating dies to cut everything out. I also stamped and cut out a sentiment with a banner die.

For my background, I inked up the Heirloom Blooms stencil with yellow ink. I faded it from the top left corner to nothing diagonally. Then I splattered the panel with gold watercolor.

I trimmed 1/4″ off the right edge of the panel and added foam tape to the back. Then I tore some gold striped washi tape and placed it on the right edge of my card base before adding the background panel to it. Then I added my images and sentiment banner with foam squares.

The only finished touches I did were glossy accents. I added them to bands on Alice’s dress, flower centers and all of the “butter” on my butterflies. This little bit of shine goes a long way in person.

Products used:
Wildflowers stamps and dies
Heirloom Blooms stencil

Blending brush
Lawn Fawn No. 2 Pencil ink
Foam squares and tape
LH Colors gold watercolor
Touch of gloss

I appreciate you sharing your time with me. Have a fabulous day!

Miss Ink Stamps – Drink Happy Thoughts

Hey friends! I’m stopping by today with an extra Miss Ink Stamps card to celebrate the Coffee Loving Cardmakers Fall | Winter Hop! Miss Ink is a super sponsor and has a super fun array of caffeinated products to create with!

I started by stamping and coloring the gorgeous image in Coffee with copic markers. Then I fussy cut it out. Yes, you read that right. I actually fussy cut something. Then I die cut a circle and heat embossed a sentiment from the same stamp set on it.

Last week I created a rainbow card when I used the outside frame from the EIEIO Frame dies. Well, of course I kept the inner scalloped rectangle and today I’m using it on this card. I went ahead and cut a vellum stitched rectangle from the same die set.

To put everything together, I started with the coffee cup and sentiment, gluing them together with liquid glue. Then I added foam tape to the back and adhered them to the vellum. I hid adhesive behind those two things to attach the vellum to the scalloped panel. Then I tied my twine around the top before adding foam tape to the back so I could avoid that area. I attached the main panel to the card front and added some glossy accents to the flower.

Are you playing along with the Coffee Lovers Hop? There are so many sales and prizes and tons of fun! I hope you are!

Products used:
Coffee stamps
EIEIO Frames dies

Foam tape
Glossy accents

I appreciate you sharing your time with me. Have a fabulous day!

Miss Ink Stamps – Stenciling and Die Cutting Fun

Hello everyone. I’m sharing a bit of Miss Ink Stamps inspiration today for those days when you want to create but maybe don’t feel like, or have time for, coloring. I seem to go through those every now and then.

Today I inked up the Rainbow Builder set with one focal rainbow. I used dye inks and blending brushes for the first two layers. I also used post-it notes to mask the stencils. Nothing fancy needed for this set but it helps keep things clean.

For the final, detail layer of the rainbow, I spread Thermoweb Glitz Gel through the stencil for a little sparkle. I chose lavender to play off the colors I used in the rainbow, but not duplicate any. While that was drying I used the EIEIO Frame dies to create my outer frame and the flowers in Hi Swirl Frame to create my flower clusters.

When the glitz was dry, I stamped my sentiment and glued my die cuts in place. I adhered the panel to a card base with liquid glue. Then, I decided to use Nuvo Crystal Drops instead of the dies for the flower centers. This just adds more interest and a little dimension to this very flat card.

Products used:
Rainbow Builder stencils
Hi Swirl Frame dies
EIEIO Frame dies

Thermoweb Glitz Gel – lavender
Nuvo Crystal Drops – bright gold
Liquid glue

I appreciate you sharing your time with me. Have a fabulous day!

Miss Ink Stamps – Death Before Decaf

Happy Thursday everyone! I’m popping in with a couple cards featuring a new set from Miss Ink Stamps called Death Before Decaf. It’s absolutely fantastic and so much fun to create with! The images are amazing and the sentiments will have you laughing so hard. I had a really hard time choosing for my first cards because they’re all so good.

I started by coloring both images in the set and used my scan-n-cut to cut them both out. Then I switched gears to figuring out backgrounds. Thumbing through my stencils, I remembered the Cuppa Joe To Go layering stencil set and just had to use it with that matching image.

I started with the stencil layer that has the actual “cup” portion and spread Thermoweb Transfer Gel Blanco through it. Once it was dry I ran it through my mini Minc with Thermoweb Snow Day transfer foil. It gives an awesome slick white shine. Then I went with the second layer and small blending brushes to add the cup sleeves and lids on.

I glued the panel to a card base and popped the frame up with foam tape from the Modern Typeset dies. Then I added my image with foam squares, sliding the edge of the arm under the frame. I cut my sentiment out with smallest die in the Tags die set and popped it up with foam squares after threading some jute twine through the hole.

I continued my messy crafting for the second background by inking a white panel with distress oxide ink in black soot and pumice stone. I spritzed it with water and blotted it dry. Then I flicked black paint and pearl watercolor all over it too.

I pulled the green from the coffee mug and inked the edge of my card base before popping the other panel up with foam tape. I believe that was rustic wilderness distress oxide ink. (I forgot to write it down.)

I cut a black frame from the Oh Happy Day die set and popped it up with foam strips and then added my image and sentiment banner the same way. It’s like the skeleton is leaning on the coffee counter window chatting with his buds and it totally cracks me up!

Products used today:
Death Before Decaf stamps
Oh Happy Day dies
Modern Typeset dies
Tags dies

Distress Oxide Ink – black soot, pumice stone, rustic wilderness
Mini Minc Machine
Thermoweb transfer gel blanco
Thermoweb Deco Foil transfer sheets – snow day
Stencil pal
Foam tape, strips and squares
LH Colors watercolor – pearl
Blending brushes
Lawn Fawn Extra Sentiment Banner dies

I appreciate you sharing your time with me. Have a fabulous day!

Miss Ink Stamps – Scared Sheetless

Welcome friends. I hope your weekend is going wonderfully. I’m back with the second Miss Ink Stamps card I mentioned on Friday. I’m a little extra excited about this one and VERY happy with how it turned out. I hope you love it too!

These ghosts are more from the original batch that I stamped and colored for Friday’s card. For my background though, that was an unexpected process. I inked a white panel with distress oxide ink in twisted citron, mowed lawn and black soot. I splattered it and blotted it dry.

Then I sprayed my Rabbit Hole stencil with Pixie Spray and adhered it to the inked panel. I placed it in my splatter box and sprayed it with Thermoweb Glitter Dust spray. I’ve used this one plain paper and felt before but not with a stencil. I was very happy with the outcome. Crisp lines and no bleeding.

***However, it’s been a (@#&*$)#* to clean my stencil since then. Just being transparent. The spray dries very quickly so even with immediate washing I’m having to scrub the entire thing mostly with my fingernail to get it off. It is coming off and I’m fairly stubborn and determined but I want you to know what you’re getting into if you try this. Also, I would do it again in a second because this looks SO COOL!

Next faux pas that happened…I went to tie my ribbon around the panel and pulled too tight so it ripped the edge. No way was I wasting this background. So I embraced the distress and went around all the edges with my razor blade for a cool look that I haven’t used in ages.

Finally, I stamped my sentiment on the smallest tag in the Tags die set and threaded it through my ribbon before I tied the knot. I used liquid glue to adhere the background panel to a card base and used foam squares to adhere everything, including the tag to keep it in place.

For finishing touches I just added Touch of Gloss to the accents on each ghost and let that sparkly background do the rest.

Products used:
Boo Sheet stamps
Rabbit Hole stencil
Tags die set

Distress Oxide Ink – twisted citron, mowed lawn, black soot
Thermoweb Glitter Dust Spray – gold
Thermoweb Pixie Spray
Liquid glue
Foam squares

I appreciate you sharing your time with me. Have a fabulous day!