Miss Ink Stamps – Spooky

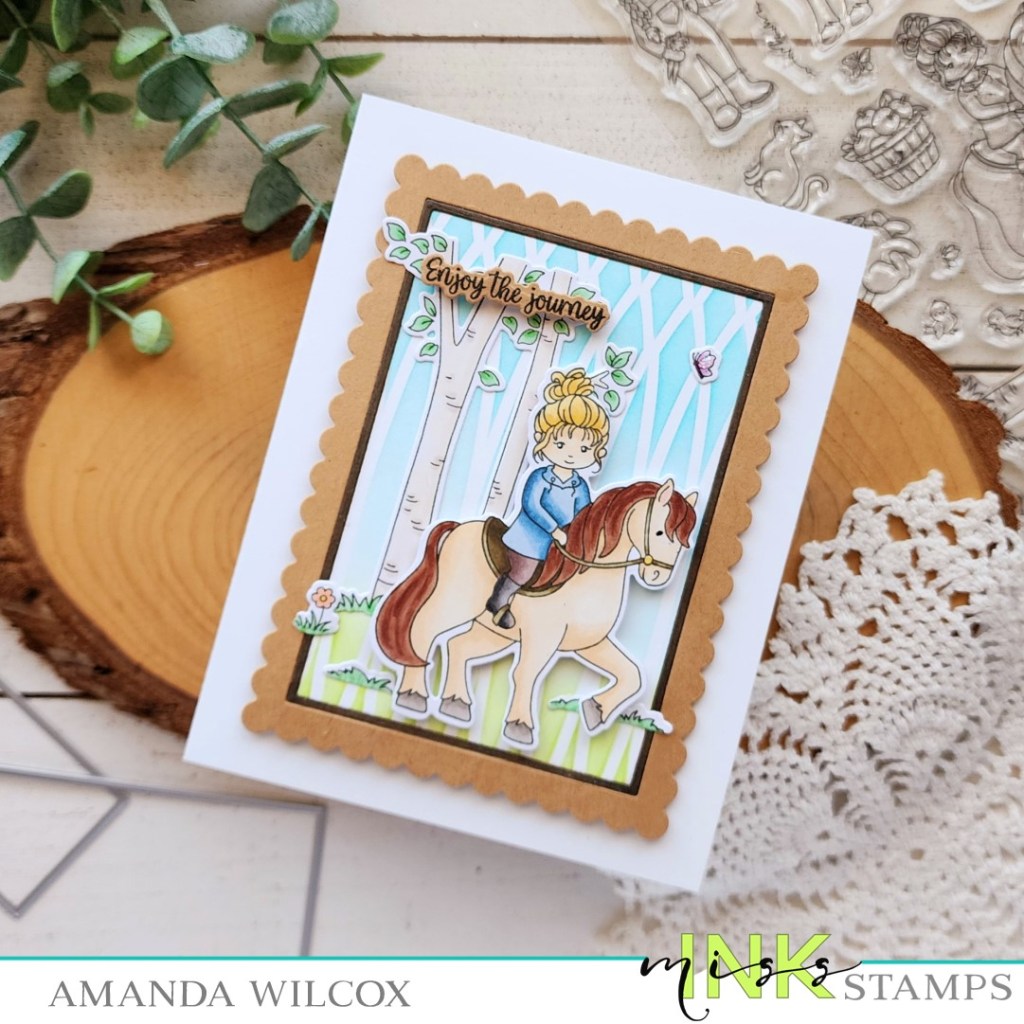
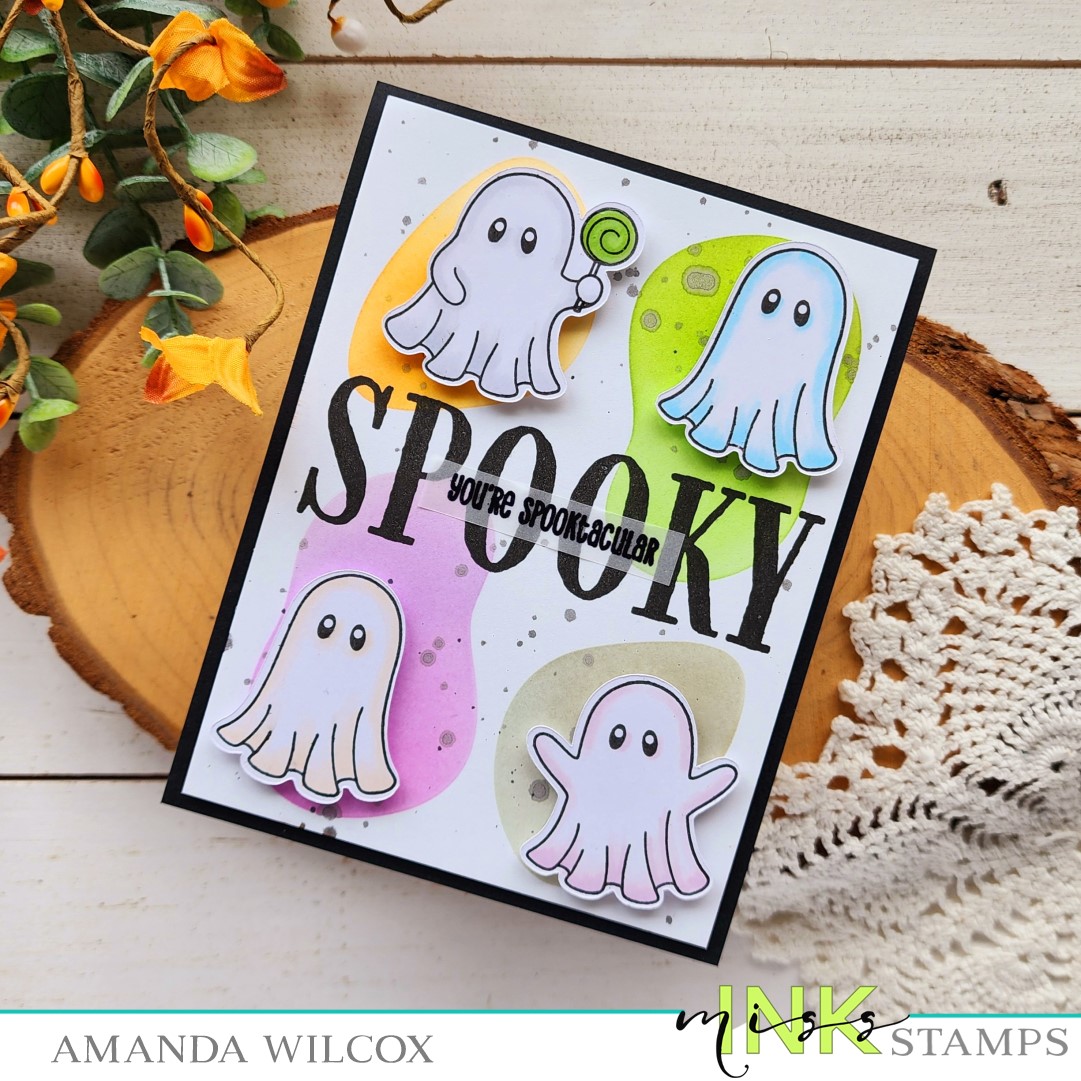
Happy Friday everyone! Miss Ink Stamps is doing a little re-release of their amazing Halloween sets and I’ve been playing with my favorite Boo Sheet set. I have a simple card to share with you today and I’ll be back again on Sunday with another one. Be sure to check out the whole team the next few days to see what kind of awesome inspiration they’re sharing as well!

I started by stamping out all of the ghosts, plus duplicates of some, along with accessories to go with the ones with open hands. I colored them all in an array of light tones for some shading. I always use the same super light BG copics and today I just had fun with all the colors.

I used my scan-n-cut to cut them out and set them aside while I worked on a background. I had a vision in my head of color blocks behind the ghosts and using five of them like the dots on a die. Ultimately you see that didn’t work out and I swapped the center ghost for my sentiment. But first I used the large blob stencil in the Artsy Abstracts stencil set to add my color blocks.

I splattered the panel with watered down black metallic watercolor and popped my ghosts up with foam squares. Then I decided to add a second sentiment over the top. That is heat embossed on vellum and carefully adhered with little dabs of liquid glue.

For finishing touches I just added Touch of Gloss to the lollipop. I glued a black panel to my card front and popped the inked panel up with foam tape and my card is all finished.

Products used:
Boo Sheet
Halloween Sentiments
Artsy Abstracts stencils

Blending Brushes
Lawn Fawn dye inks
LH Colors watercolor
Foam tape
Touch of gloss

I appreciate you sharing your time with me. Have a fabulous day!

Miss Ink Stamps – Tea Cups Sneak Peek Part 2

Hello everyone! I’m back with another sneak peek of the upcoming Miss Ink Stamps September Release! It’s a fantastic addition to the Alice collection that already exists. Today I have a card featuring the other images in the Tea Cups set that I just adore!

I had some fun stamping and coloring the images and then used a craft knife to cut a slit in the tea cup so I could slide Alice and the Hatter inside it. I secured them with washi tape and switched gears to get messy!

I took a piece of white cardstock and a few distress oxide sprays and started spritzing. I let them dry and totally hated it. The cool thing about these sprays is that you’re never done until you’re done. So I pulled out different colors and spritzed and sprayed more. Then I sprayed water and dabbed here and there. It was literally a mess and I loved every step of it! Once the panel was dry I taped the Leafy Swirls stencil over top and spread glitz glitter gel through it, also intentionally being messy and not complete.

Next, I trimmed the stenciled panel down to 4×5.25 inches and glued it to a white card base. Then I added my banners, lanterns and lights to the top with a combination of foam squares and liquid glue. Then I added my tea cup and sentiment with foam squares below that.

Typically I would go mad with gloss and glitter but there is a lot going on here so I kept it simple and let the images stand on their own this time. That except for a little over spray on my teacup from the distress oxide spraying event. Oops and definitely ties things together with the mixed media vibe.

Be sure to head to Miss Ink Stamps to check out the whole release tomorrow when it’s available for purchase! You’re going to love it all!!!

Products used today:
Tea Cups stamps
Leafy Swirl stencil

Thermoweb glitz glitter gel
Stencil pal
Foam tape
Liquid glue
Distress oxide sprays

I appreciate you sharing your time with me. Have a fabulous day!

Miss Ink Stamps – Alice Revisited Sneak Peek of Upcoming Release

We’ve got a new release coming from Miss Ink Stamps and I’m super excited about it! It’s an add on to the original Alice collection and it’s amazing!!! Today I’m sneaking a peek at an upcoming Tea Cups stamp set and a new die set that’s coming soon too.

This card actually makes me giggle because I can’t image under any circumstances the White Rabbit giving the Red Queen a heart or saying anything encouraging to her. But all the same, I am having so much fun coloring and creating with these new stamps. If you’re an Alice fan in the least, you’re going to love it all!

For my background on this card, I stamped the Queen’s Castle image on white cardstock and did ink smooshing with Tombow Brush Markers and a spray bottle. I chose a couple of reds and then threw in a brown at the end to tame it all down. Do you spy that new cool woodgrain frame too? That’s coming soon to the Miss Ink Stamps shop as well with more goodies to go with it.

The sentiment I chose was from Wonderland Wisdom which is a fun sentiment set full of quotes and sentiments in the Alice theme with a few small sub-images you can use in different ways too. This is definitely a must in the Alice Collection.

Stay tuned for more sneak peeks from the design team, especially the end of next week when everyone is flooding your feed with all this goodness!

I appreciate you sharing your time with me. Have a fabulous day!

Miss Ink Stamps – Boo Cats

Happy Thursday everyone! I was so happy to pull out some of my favorite Halloween goodies from Miss Ink Stamps this week and play a little. I hope you like it too!

First thing I did was pull out a piece of cardstock and my Halloween Mandala stencil. I love this one so much and couldn’t wait to ink it up. I added light orange ink all over the panel leaving it unblended and variegated. Then I put the stencil over top and inked it up with dark gray ink, not black. I liked the softer, less bold background. Then I splattered the panel with orange watercolor and let it dry.

Next, I stamped Boo Cats and colored them with my copic markers. Y’all know I do not fussy cut, so out the scan-n-cut came to the rescue! After that I die cut a black frame from the Modern Typeset die set. I mocked up placement of everything and added foam strips to the frame and squares to the kitties.

After adhering the frame and images I placed my panel in my MISTI and stamped my sentiment in the upper left corner. If you want variety for spooky sentiments check out the Halloween Sentiments set but I do love this punny one that’s part of Boo Cats so I used it.

For finishing touches I pulled out the same watercolor set and painted the hats of all three cats with coordinating metallic watercolors. It adds shimmer to the kitties and in the background.

Products used today:
Boo Cats stamps
Halloween Mandala stencil
Modern Typeset dies

Foam strips and squares
LH Colors watercolor
Blending brushes
Lawn Fawn dye inks

I appreciate you sharing your time with me. Have a fabulous day!

Miss Ink Stamps – Sanity is Overrated

Happy Thursday everyone! I’m happy to pop in a second time today with some inspiration featuring magical things from Miss Ink Stamps. I’m so happy with this line and how inclusive it is. Today I pulled out Stay Weird and went a little lighter with my colors for a change.

I stamped and colored a few images from Stay Weird and then used the coordinating dies to cut them out. I used liquid glue to adhere the glasses to Luna’s face and set everything aside to work on my background panel.

I took a piece of white cardstock and inked it up with light pink and blue dye inks using a blending brush, randomly. Then I used Pixie Spray on my Wonky Scallops stencil and stuck it to the panel. I went back over with the same colors in about the same places just darkening the pattern. After removing the stencil I taped the letters from the EIEIO dies spelling “sanity” and cut it from the stenciled panel.

Next, I inked the edge of a white card base with the same pink and glued white glitter paper where the die cut letters would show through. Then I popped the stenciled panel up with foam tape. I glued the shoes to hang from the letters and popped Luna up with foam squares. Then I placed the whole thing in my MISTI and stamped my sentiment on the bottom right.

I really had fun creating this card, using colors outside my typical realm and finding fun ways to enhance my sentiment.

Products used:
Stay Weird stamps and dies
EIEIO dies
Wonky Scallops stencil
Blending Brushes
Lawn Fawn Ink – ballet slippers and forget me not
Foam tape
Liquid glue

I appreciate you sharing your time with me. Have a fabulous day!

Miss Ink Stamps – Up to No Good

Happy Thursday friends! We’re one day closer to the weekend and I’m really looking forward to it! Today I have a fun magical card to share featuring a couple of stamp and die sets from Miss Ink Stamps. I’ve been itching to use these products and finally made it a priority to get them inked up!

I started by stamping some different images from Mischief Makers, plus the banner from Up to No good, and colored them with copic markers. After coloring the banner I went back and stamped the sentiment. Then, I used the coordinating dies to cut everything out.

To create my background I inked up a white piece of cardstock with distress oxide ink in tea dye and gathered twigs. I flicked water on the panel and blotted it dry. Then I splattered ground espresso distress oxide ink on it for darker contrast. Then I stamped images from Up to No Good on various parts of the panel, trying my hardest to be “random.” Then I die cut the panel for the fun jagged map look.

I inked the edge of my card base with aged mahogany distress oxide ink and popped the background panel up with foam tape. Then I added the images and sentiment banner with foam squares.

I really liked the muted look of this card so I only went over the eyes with black glaze pen for a finishing touch. No sparkly or shiny today.

Products used:
Mischief Makers stamps and dies
Up to No Good stamps and dies
Foam tape
Distress Oxide Ink – aged mahogany, tea dye, gathered twigs, ground espresso
Mama Elephant Mod Heart dies

I appreciate you sharing your time with me. Have a fabulous day!

Miss Ink Stamps – You Are My Rainbow

Happy Thursday friends! I’m back today with another card featuring the new Miss Ink Stamps July release. I love this bear and bunny series. They are so cute! I had fun creating a scene with these since they are all separate stamps.

I started by stamping the rainbow on my panel, then positioned the critters and finally added the sunshine butted right up against the edge of the rainbow. I colored everything with copic markers and then added my sentiment in the top right corner.

Pulling from colors in my coloring, I decided to ink my background panel with seedless preserves distress oxide ink. I usually spray my panel with a distress sprayer but it’s been a little too misty for my liking lately so I just used water on my fingers to flick it on the panel. It took a bit more work but I really like how it turned out. Then I used a paintbrush and watered down ink to add another layer of texture over that. Last I splattered unicorn watercolor on the panel and set it aside to dry completely.

While it was drying I added foam tape to the back of the scene panel and painted the same watercolor lightly on my rainbow so it was shimmery too. I also added black glaze pen to critter eyes and noses.

With everything dry, I glued the inked panel to a card base and popped the scene panel up on that.

Not a lot of parts today, mostly waiting for things to dry. But it’s so striking and pretty. I’m really happy with how it turned out. I think this set is going to make a gorgeous box card next though.

Products used:
Rainbow Bear and Bunny stamps
Distress Oxide Ink – seedless preserves
Foam tape
Black glaze pen
LH Colors watercolor – unicorn

I appreciate you sharing your time with me. Have a fabulous day!

Miss Ink Stamps – Hi Swirl Frame Card

Hello again! Today I’m popping in with a fun card featuring Miss Ink Stamps Hi Swirl Frame dies. This die set is so packed and it’s the only thing I needed to create this card. How often can we say that anymore? It seems that something is in one set and other piece that you just have to have is in another. I’m always feeling that way.

For this card, I cut a rainbow of 1/4″ strips and glued them to a 4×5.25 inch panel of white cardstock. I trimmed off the excess with my paper trimmer. Then I cut the frame from black cardstock and glued it down on top.

I cut the shadow for “hi” from black cardstock and the letters with Spellbinders Die Cutting sparkle foam. This stuff really is magical. It pops right back up when it comes out of the die cutter. I love it! I used liquid glue to adhere everything again.

I popped my panel up with foam tape on a white card base but something was missing. It felt boring and uninteresting. So I went back to that same die set and cut some florals using the same cardstock that’s in my rainbow stripes. I used liquid glue to adhere all of those parts and my card is finished.

Products used:
Miss Ink Stamps Hi Swirl Frame dies
Spellbinders Die Cutting Foam
Foam tape
Bearly Art liquid glue

I appreciate you sharing your time with me. Have a fabulous day!

Miss Ink Stamps – Patriotic Bear and Bunny Card

Welcome everyone. Today I have a little patriotic inspiration to share with you as Independence Day approaches in the USA. I love all things Americana and couldn’t wait to color this sweet duo up!

I used the largest die in the Oh Happy Day set to cut a piece of white copic paper. I stamped my images and colored them with copic markers. Then I cut the frame from dark blue cardstock and the inner border from gold foil cardstock for some shine.

Next, I cut an A2 piece of red cardstock and glued it to a white card base. Then I popped up the colored panel with foam tape and did the same with the frames using foam strips. To add the skinny inner frame, I carefully added the foam strips hanging over the edge just a bit so it would stick to them on the same level.

For finishing touches I added black glaze pen to the critter eyes and Touch of Gloss to their noses and the stars.

Do you create patriotic cards? I know it’s not an overly popular theme to create with but I always have fun making home decor and cards with it.

Products used:
Patriotic Bear and Bunny stamps
Oh Happy Day dies
Foam tape and strips
Touch of Gloss

I appreciate you sharing your time with me. Have a fabulous day!

Miss Ink Stamps – Release Day Enjoy the Ride Card and Tags

Hello everyone! I’m really excited to share a new card and coordinating tags featuring some of the new products being release by Miss Ink Stamps today! I’m using new stamps, dies and stencil from the release!

I started by just stamping and coloring a bunch of sweet images from Enjoy the Ride. It’s a packed full stamp set that has coordinating dies available. After everything was colored, I cut it all out and started arranging it. My card was over full so I switched gears and created some fun coordinating tags.

I used a new stencil for texture on my ink blended background and the Oh Happy Day frame dies to ground my scene. I cut the frame from kraft cardstock and used a W7 copic marker to color the inner frame so it stood out a little. I glued it to the stenciled panel and popped it all up on a white card base. Then I added my images and sentiment with a combination of liquid glue and foam squares.

Next, I started filling my tags with the leftover images. Once the tags were die cut I thought it would be nice to coordinate them with the same background so I inked them up using the same stencil. I added all the images and sentiments with liquid glue and foam squares here as well.

I threaded ribbon from my stash through the holes and tied them with twine for the rustic vibe. For finishing touches on everything I added black glaze pen to eyes with white gel pen highlights after the black was dry. Then I added glossy accents to noses, beaks and flower centers, with stardust Stickles to the butterfly wings.

Be sure to head over to Miss Ink Stamps and check out the whole release. It’s huge and so amazing!!!

Products used:
Enjoy the Ride stamps and dies
Oh Happy Day dies
Stencil

Foam tape and squares
Blending brushes
Lawn Fawn Inks – mermaid and jalapeno
Touch of Gloss
Stickles – stardust

I appreciate you sharing your time with me. Have a fabulous day!