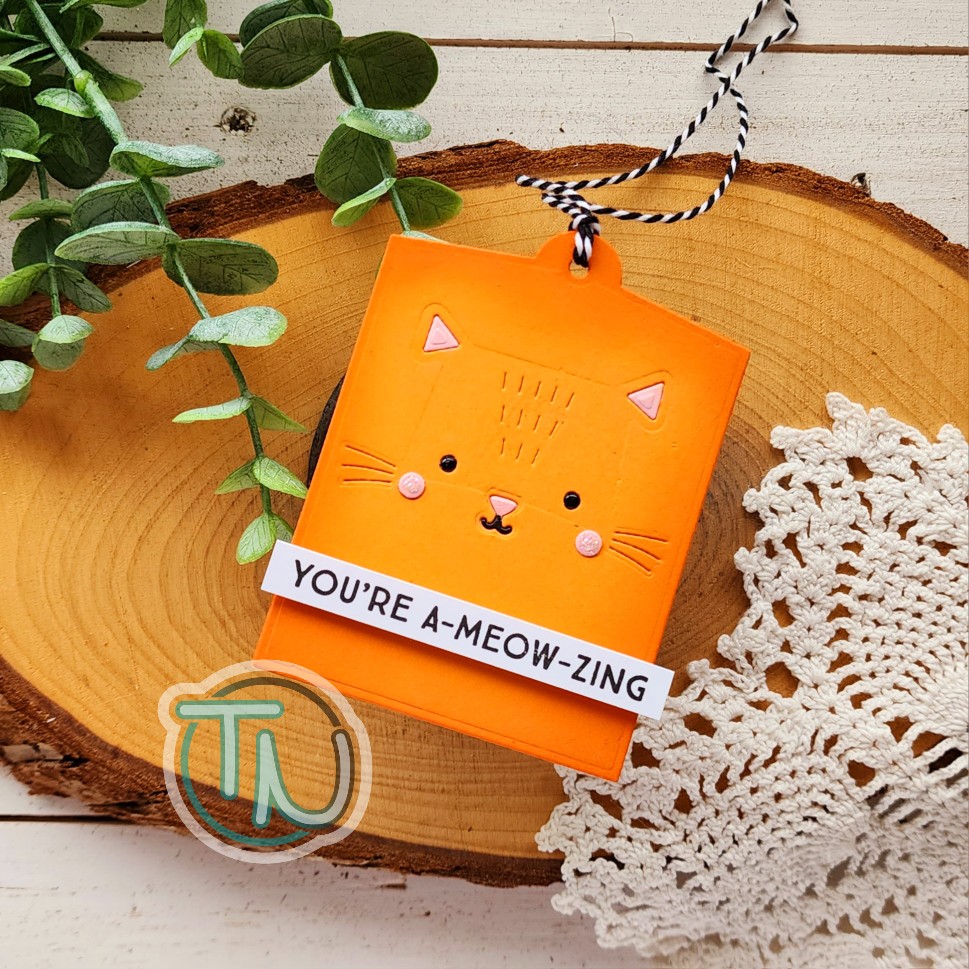
Hello there! It’s time for #tagtimesaturday and today we’re keeping it super simple and adorably punny! You know I love critters and puns; my daughter is no different. So today I’m using the fun MFT Stamps Best Friend Faces dies with their Trendy Tag and Best Friends Furever sentiment stamps.
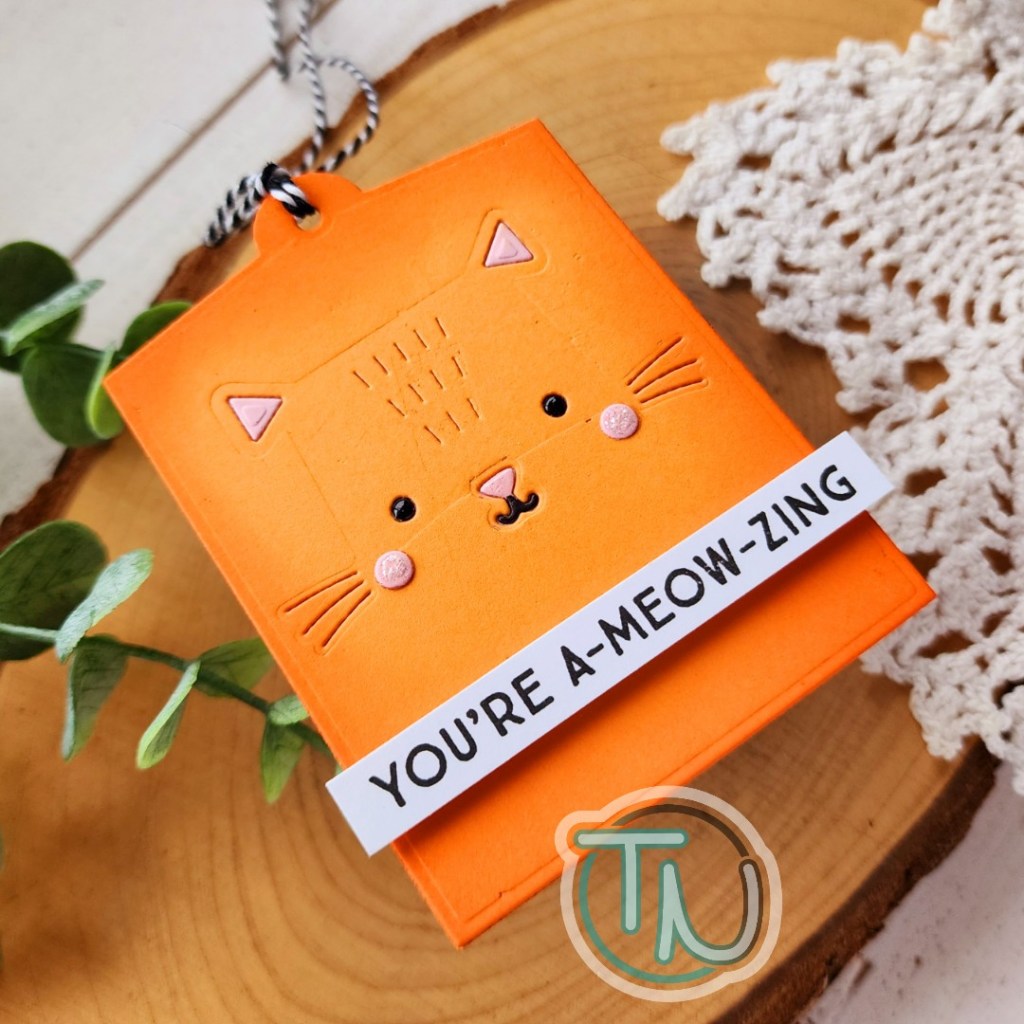
Our cats are far from this color but I just had to make a fun orange kitty tag today, partially because my daughter’s school colors are orange and black. I cut two tags – orange and white. On the orange one, I die cut the kitty face and then glued the tags together. This made it simple to inlay the little face details after cutting them from black and pink cardstock. There is a die in the Best Friend Faces set for cheeks and I made sure to add those too.
Once the face was all put together and had an afterthought to ink blend a little depth on the edges. So I carefully added darker orange blending around the sides before popping my sentiment up with foam strips. Then I cut some twine and threaded it through the loop.
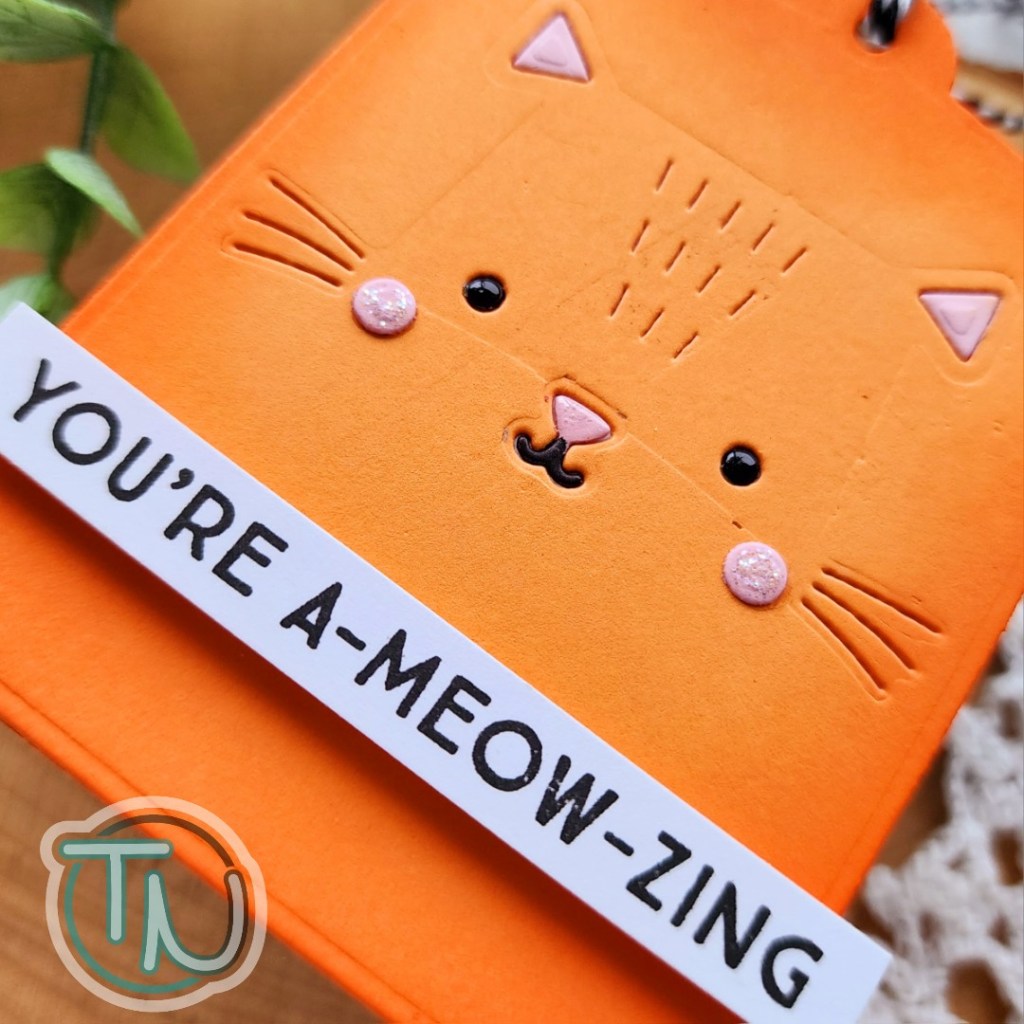
For finishing touches I added glossy accents to the eyes and nose, and stardust Stickles to the cheeks for some sparkle. It’s very simple but so cute and sure to make her smile!
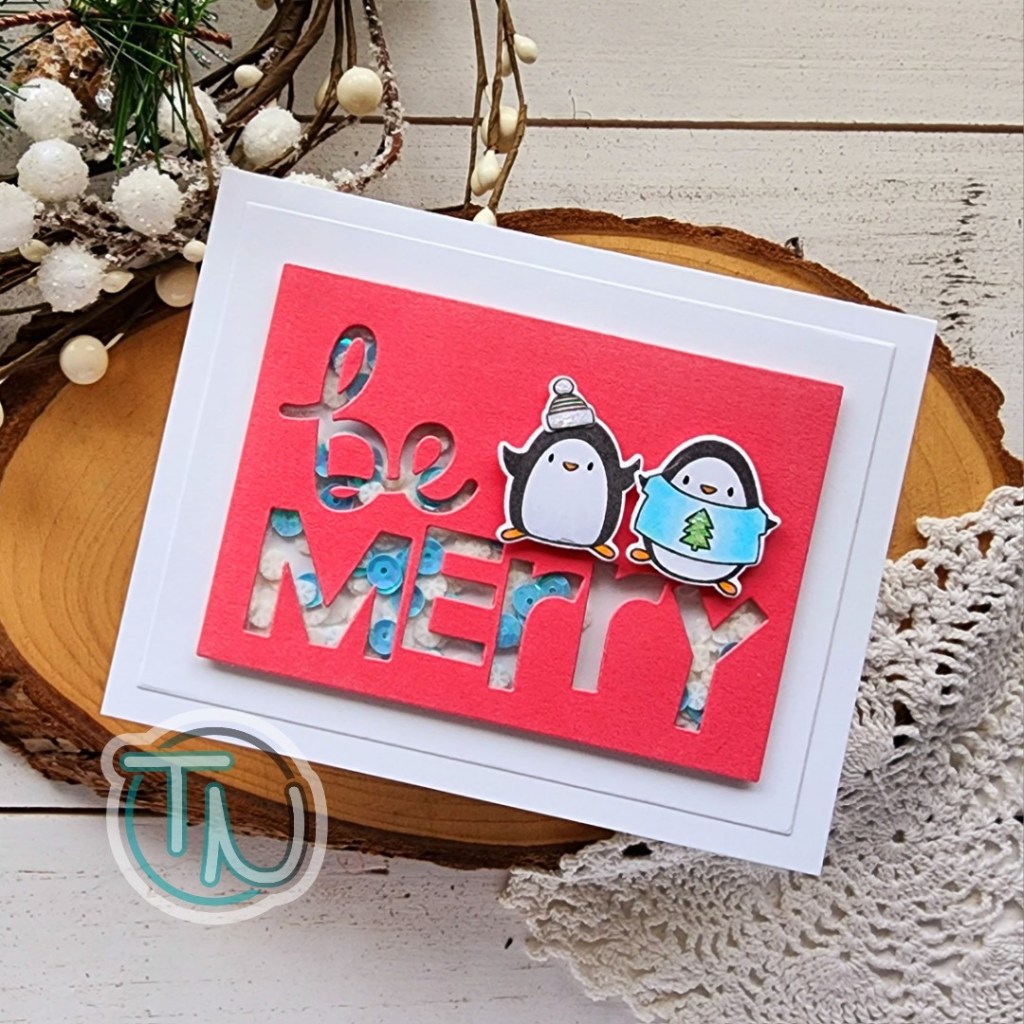
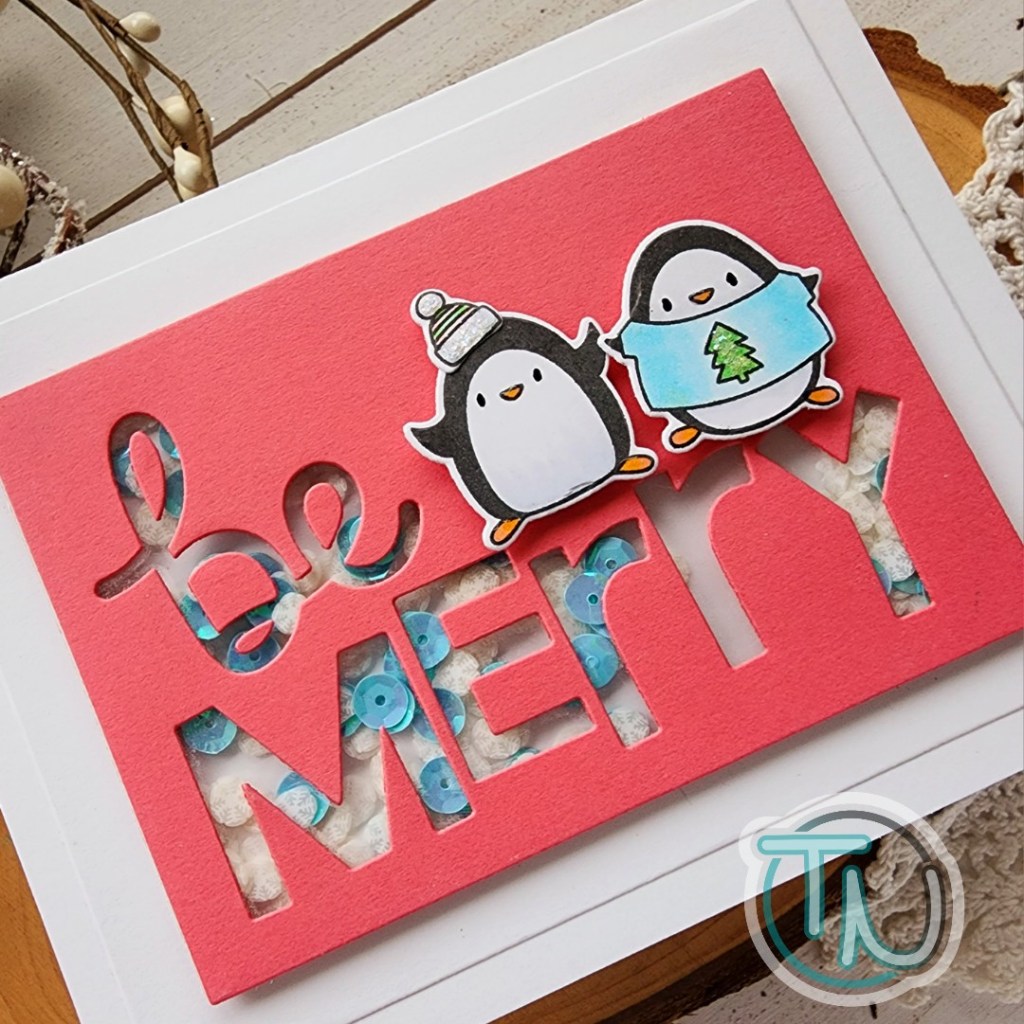
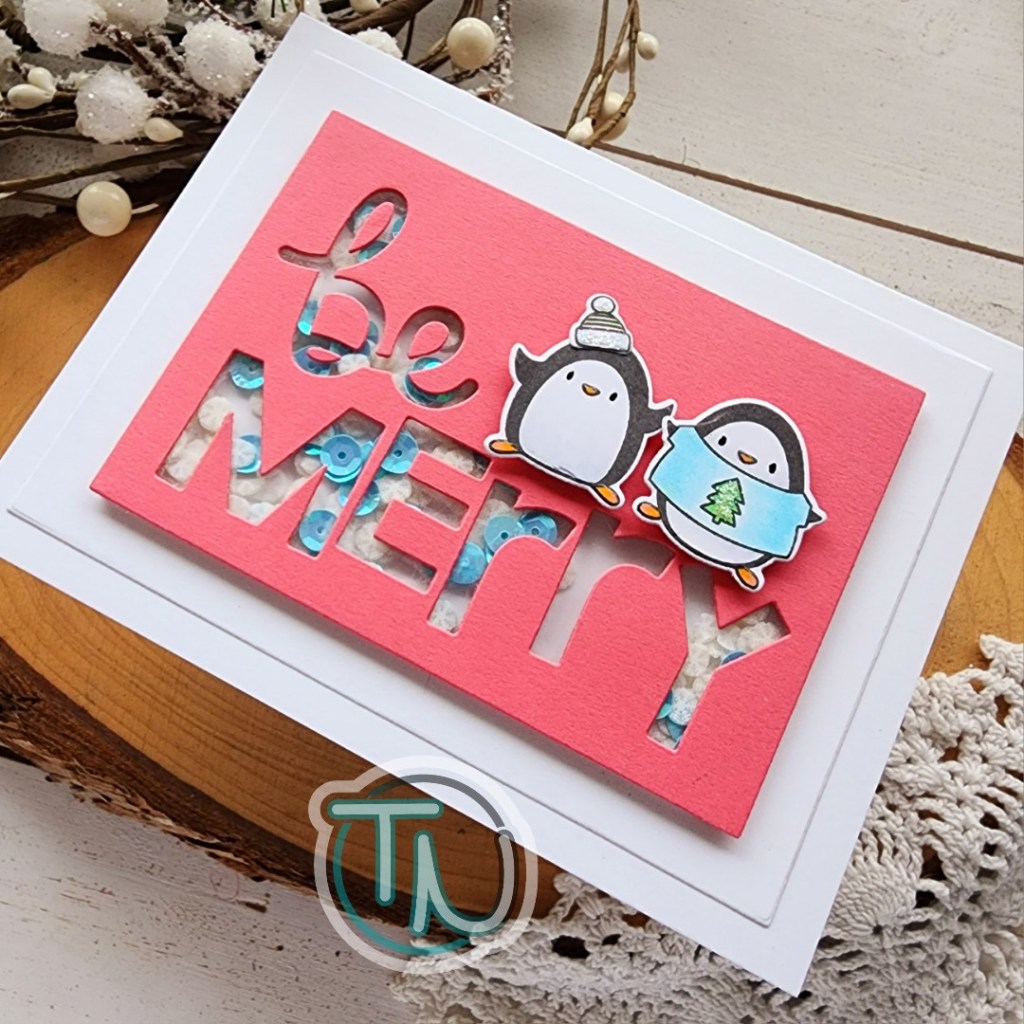
Welcome everyone! Today I have a really simple and fun shaker card to share with you using MFT Stamps products. Then at the end I have a bonus card to share using leftover die cuts I had from the first card. They’re both so much fun and so festive!
I knew I wanted to make a shaker card with the Be Merry dies so I chose my cardstock, die cut a smaller rectangle and then cut the Be Merry from that. Be sure to se those letters aside, especially the little center pieces too! We’ll need it all in the end.
Line the back of your rectangle with tear tape and adhere acetate over the letter openings. Then add foam strips to create a well for your shaker bits. Sprinkle whatever you like – my daughter chose Snowy Day from my shop and blue sequins from our stash – then seal it up with white cardstock that’s about a half inch larger than the panel.
Stamp some adorable penguins from Polar Opposites (this set is retired but use whatever cute critters you have) and color them with copic markers. I used the coordinating dies to cut them out and popped them up over the words with foam squares. I used liquid glue to adhere the inside bits to my letters and then added the shaker mechanism to a white card base.
For finishing touches I added a bit of star dust Stickles to penguin’s hat and shirt, black glaze pen to their eyes and glossy accents to their beaks and feet.
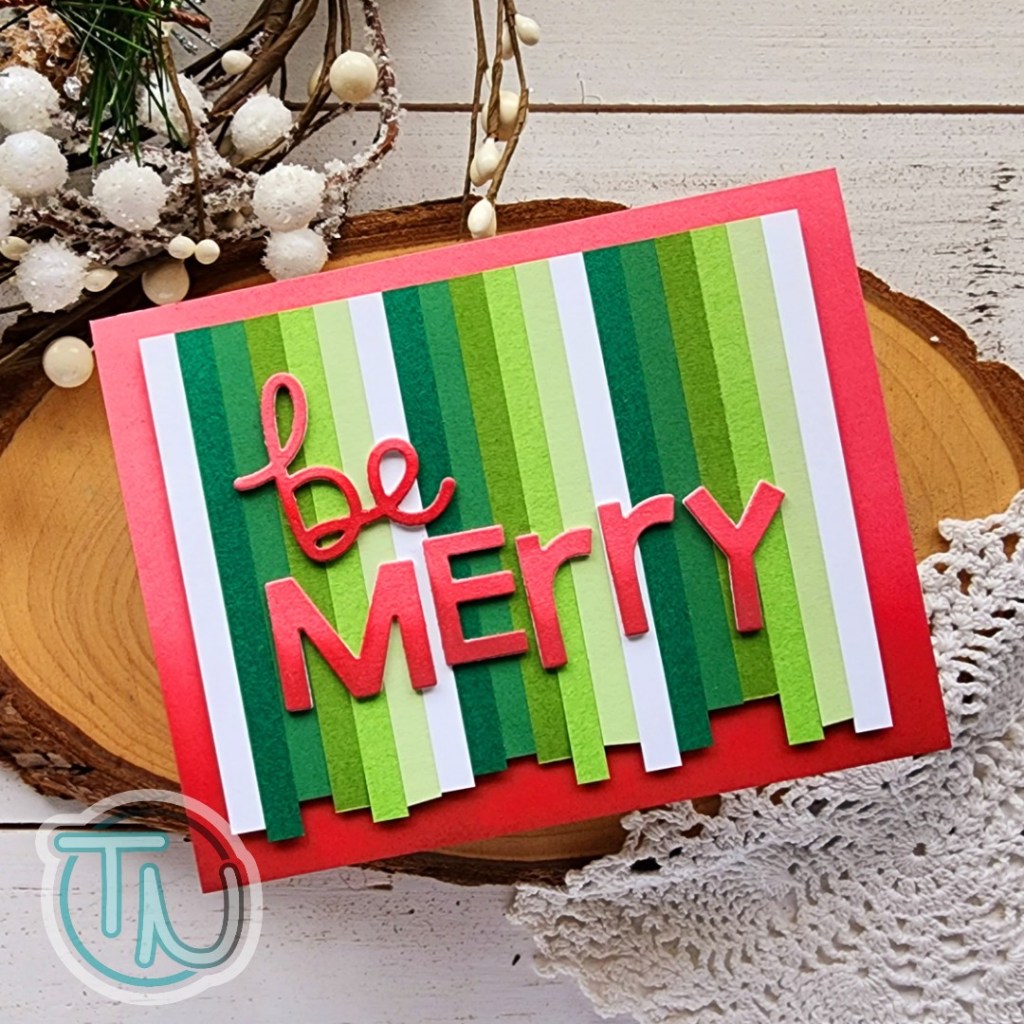
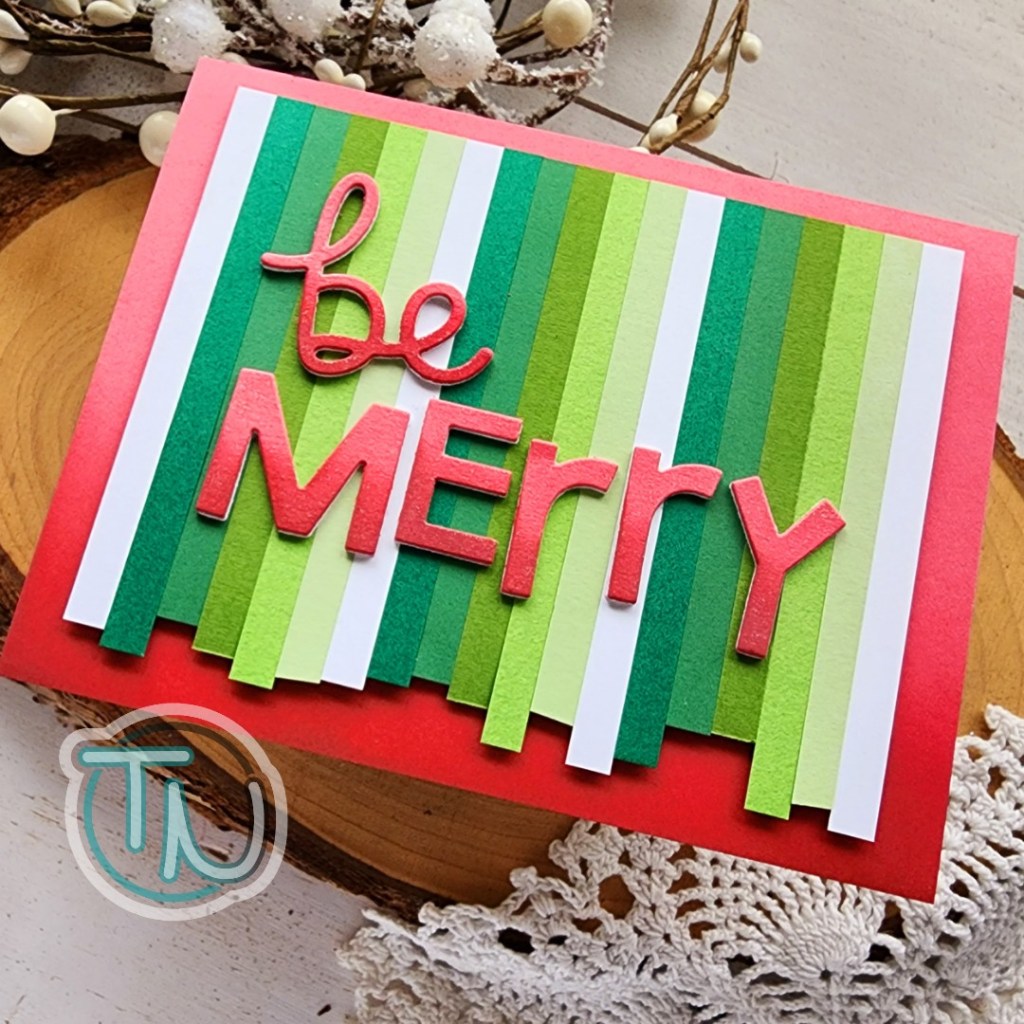
Now, remember those letters we kept from the very beginning die cutting? Let’s not let those go to waste either!
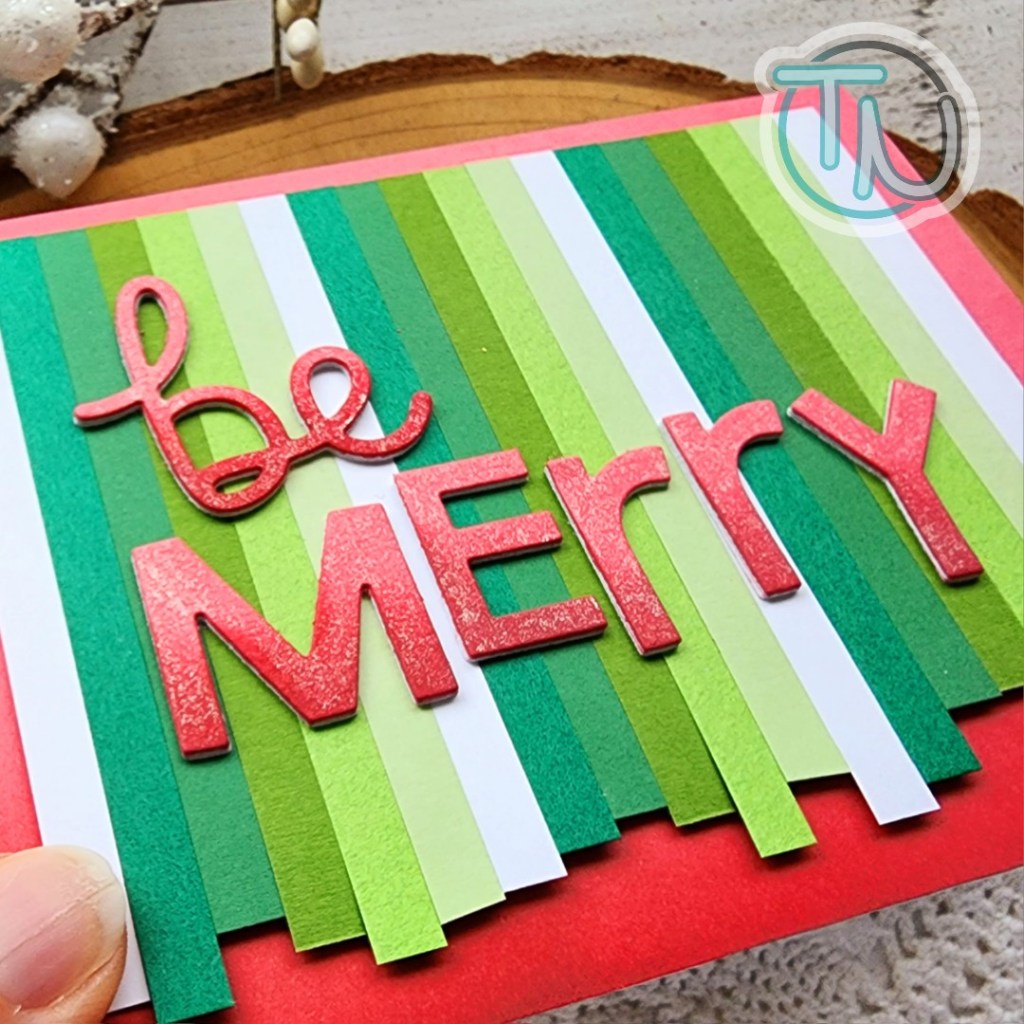
I started by cutting the letters from white cardstock using some scraps 3 more times and glued them together for height and stability. Then I chose an ombre of green to white cardstock from my stash and cut 1/4 inch strips of each one. I adhered them all to a piece of copy paper and trimmed it down to fit on my card base.
Next, I did a little ink blending on my die cut letters to give them some shading at the bottom and mirrored the effect on an A2 piece of the same color cardstock that will go on my card front. I adhered the letters with liquid glue and added foam tape to the strips to pop it up on the red cardstock.
Then I glued the whole panel to a white card base and came in with my Wink of Stella glitter brush pen on the top layer of my letters. This subtle shimmer is super pretty but doesn’t detract from the fun design with all those holiday stripes!
I hope you enjoyed this cards today and find some holiday inspiration!
Hello everyone. Thanks for stopping in today. I recently made a few purchases from MFT Stamps and have been playing with a set here and there when I have a moment. Today I have a card featuring one of those stamp sets and the mini slimline outside the box level up dies that I also snagged finally!
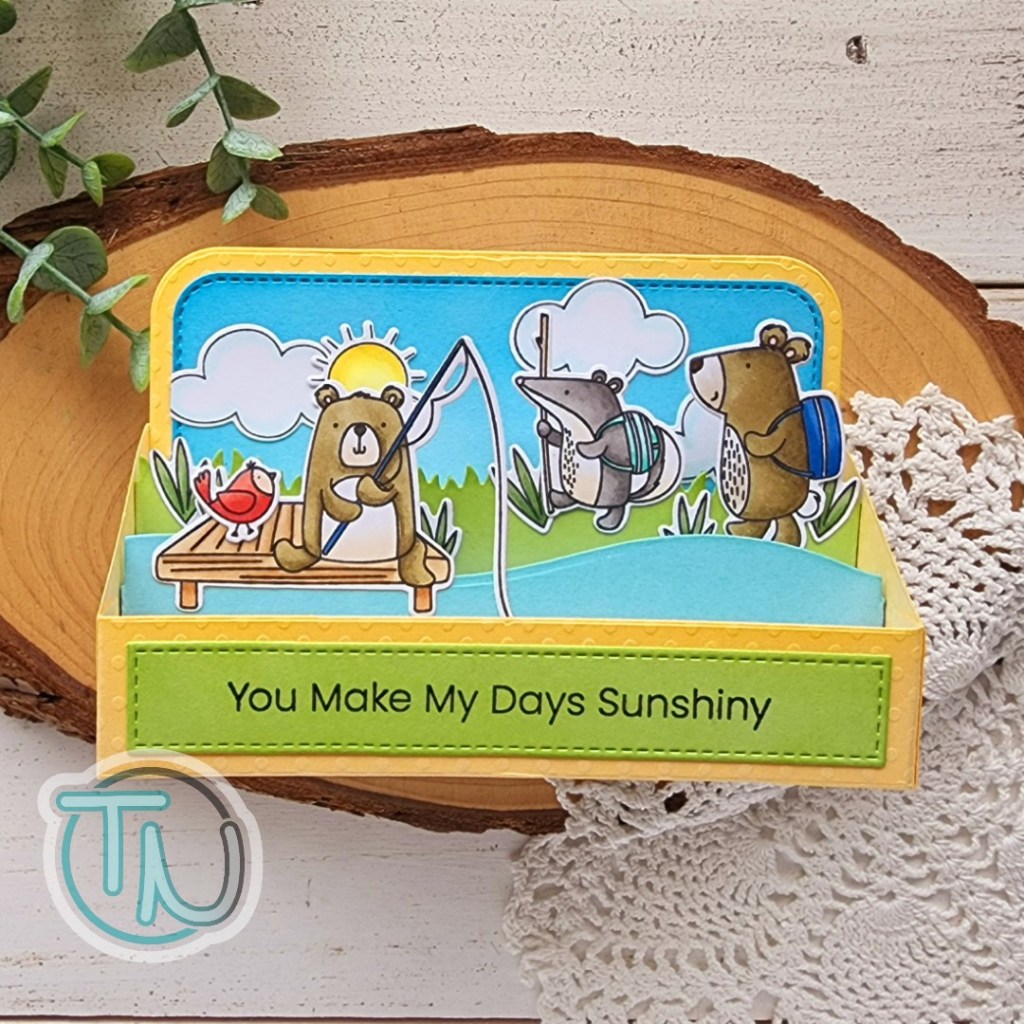
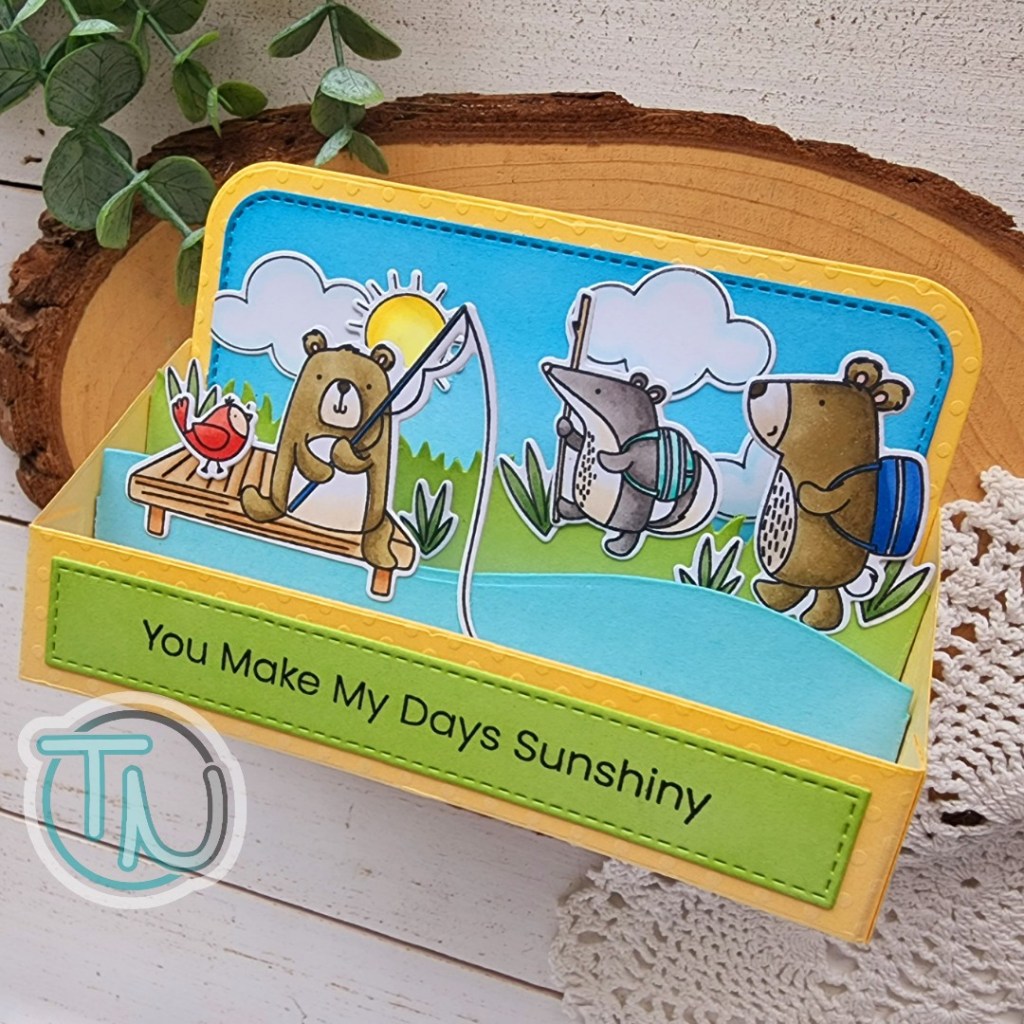
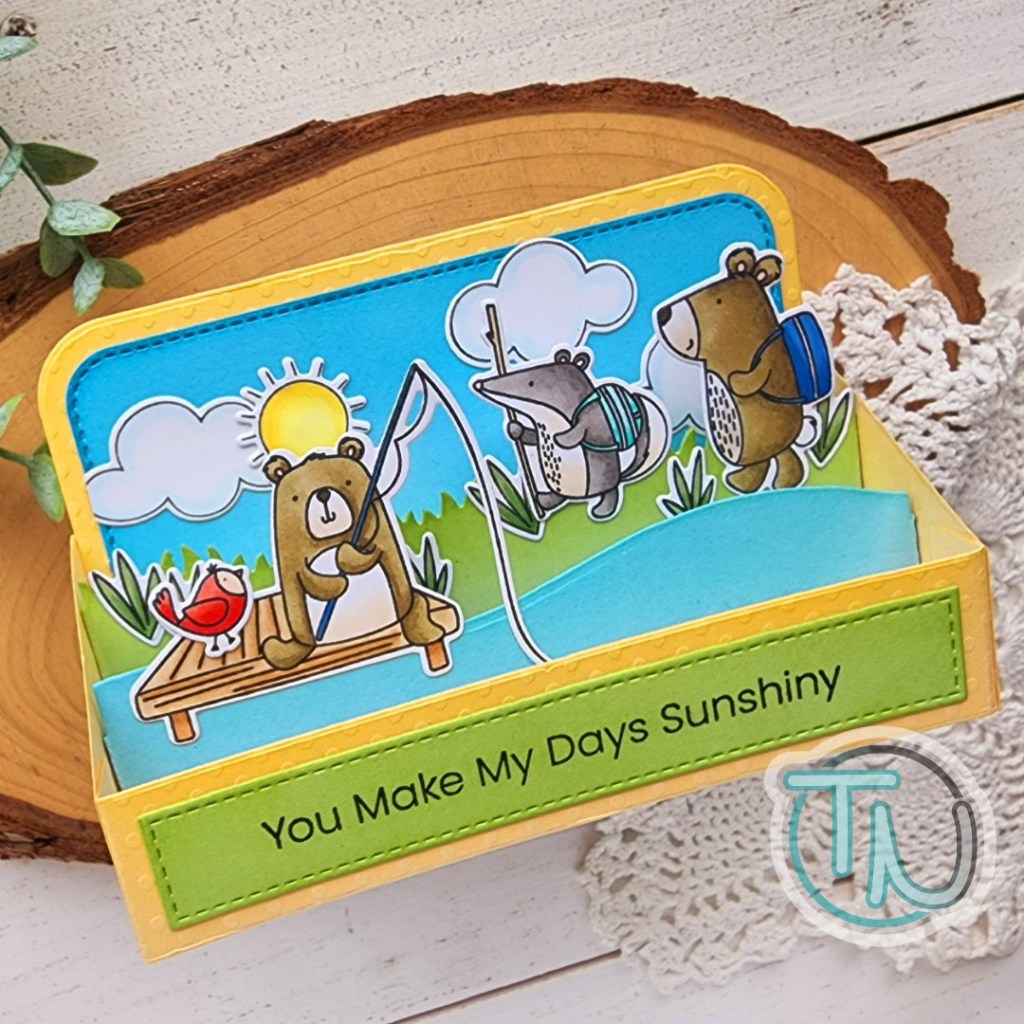
For some reason I really fell in love with these sweet critters from the Outdoor Adventures stamp set. I stamped the images, plus lots of extra grass patches, and colored everything with my copic markers. I used the coordinating dies to cut them out and set them aside to work on my box card pieces.
I cut the main pieces from a yellow dot texture cardstock in my stash and the stitched panels from green. Then I cut a snow drift insert to act as my water and a grassy hill insert for my ground. The back panel is cut from the same blue as the water but I inked the edges with different colors to offset them a bit.
I stamped the sentiment from the You Make My Days Sunshiny stamp set on the stitched panel and then started assembling everything. I used scrappy tape for all of the box pieces and liquid glue to add the images to the inserts.
Once everything was together, the sky looked really sparse so I went digging and found the sunshine and clouds in the same set as the sentiment so I stamped, colored and cut them out too. I think that really finishes off this fun scene, don’t you?
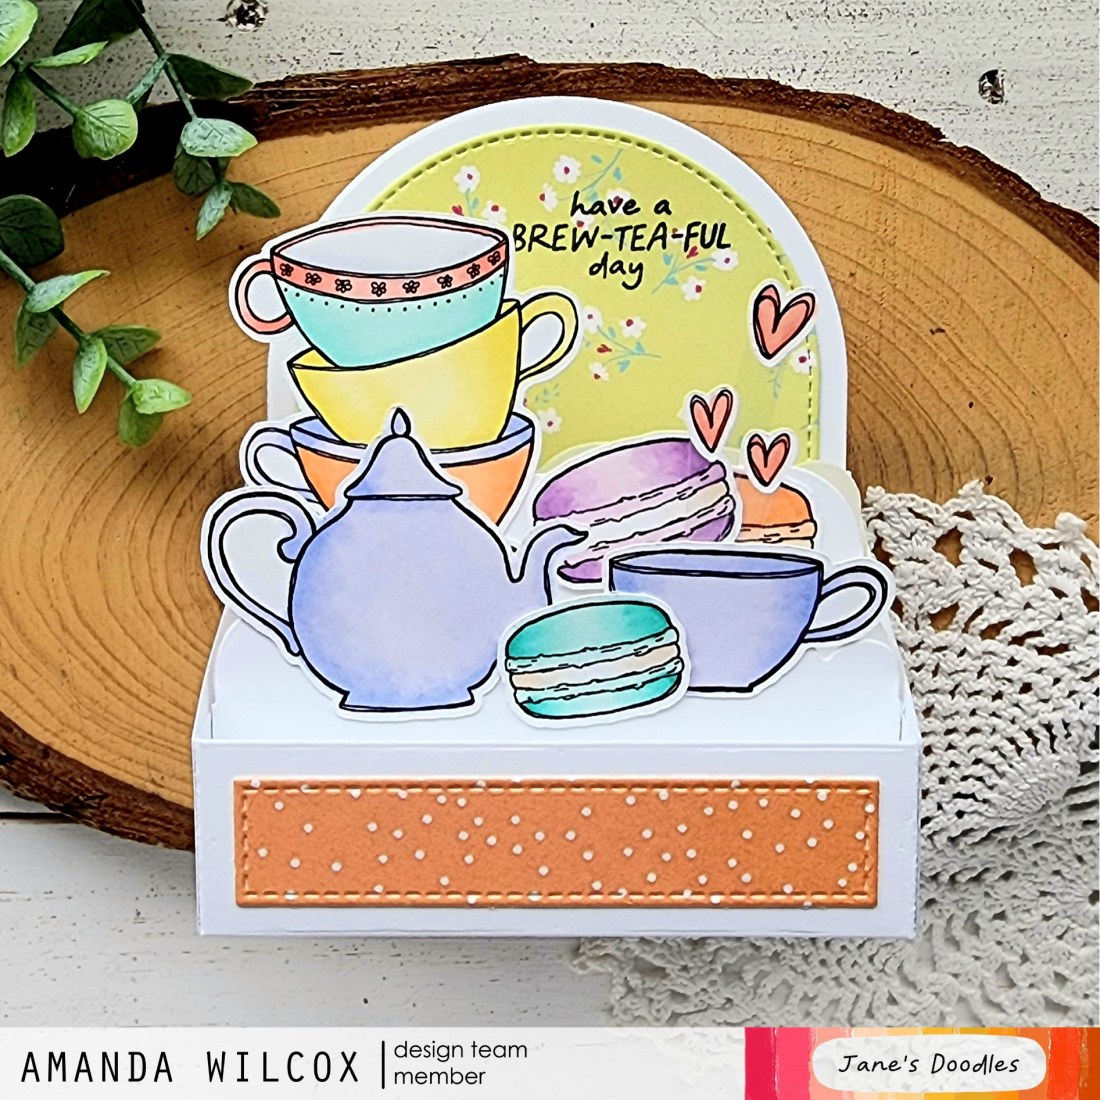
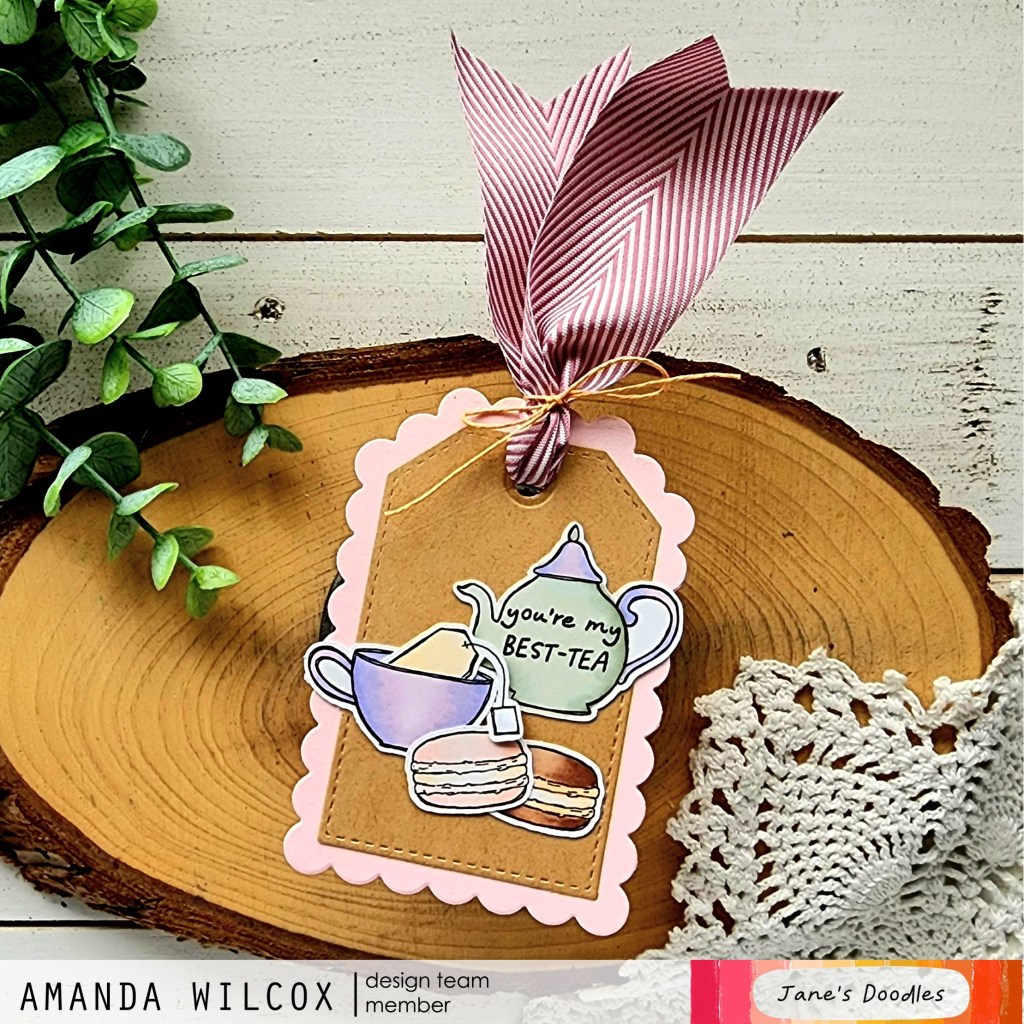
Welcome, welcome! Thanks for stopping by today. I’m sharing a fun box card and a tag using the recently release Tea Time digital stamp set from Jane’s Doodles. This set is packed full of images so I printed everything and just started coloring for fun. In the end I had extra images after arranging my box card so I made a sweet little tag for the heck of it too!
After coloring the images, I went digging through my paper stash for cardstock or patterned paper that coordinated with the colors I had used. I landed on these fun prints from Pink & Main’s All Occasions Florals paper pad. I cut all of the elements for my Outside the Box card from white cardstock, including the cloud layers. I also cut the cloud layers from vellum and stacked them behind but in the end, that gets covered up so you could skip it.
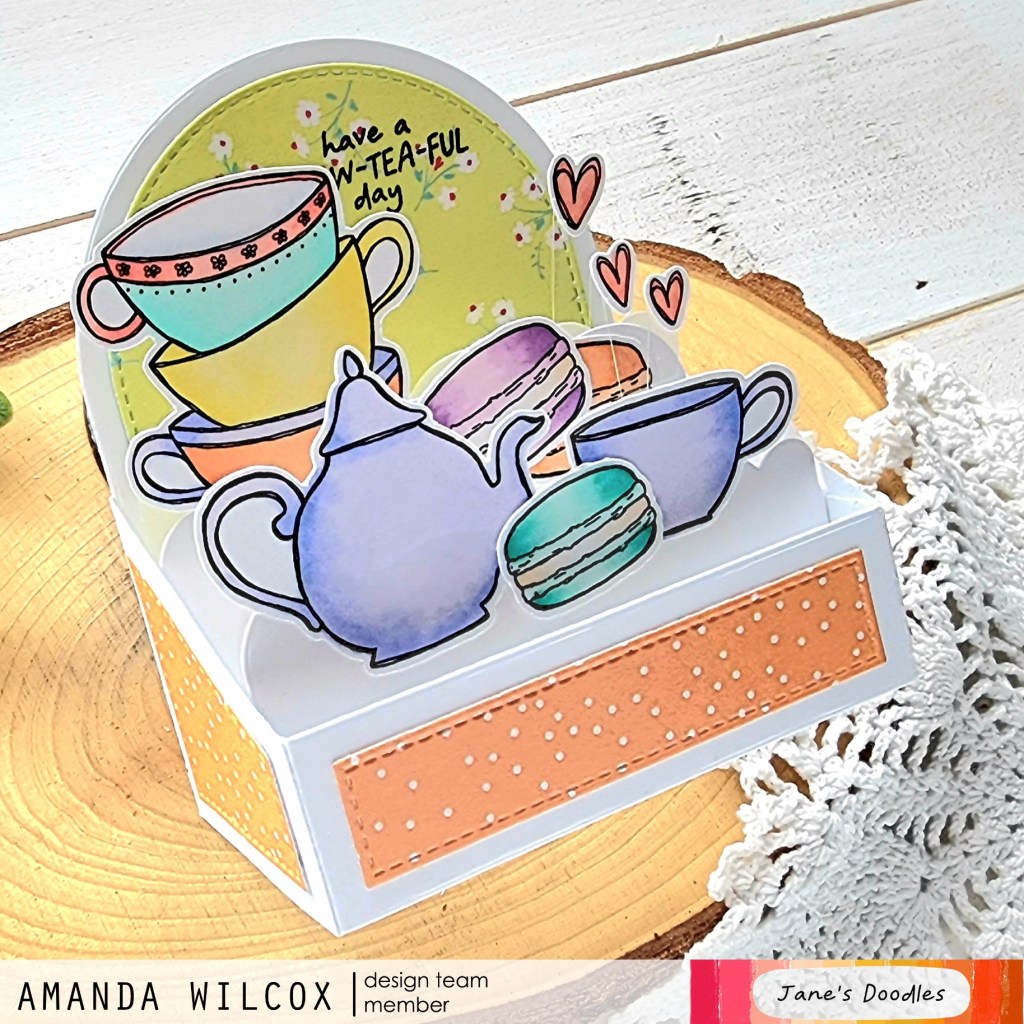
After building the box and adding the decorative elements on the sides and back, I added all of my colored images to the different layers. In the end, I chose a sentiment from the Brew-Tea-Ful stamp set. I added the card folded up into my MISTI and stamped it down on the upper right side of the arch.
Then, for a little extra something, I took the hearts from the Tea Time set I had colored, added them to acetate picks and adhered them with glue dots. I love the look of the hearts floating in the air.
Now, in a completely different color palette, I have a simple little tag that will be perfect to attach to a tea themed gift. I used a craft knife to cut a slit in the teacup so I could slide the teabag inside of it. The sentiment stamped on the teapot is also from Brew-Tea-Ful.
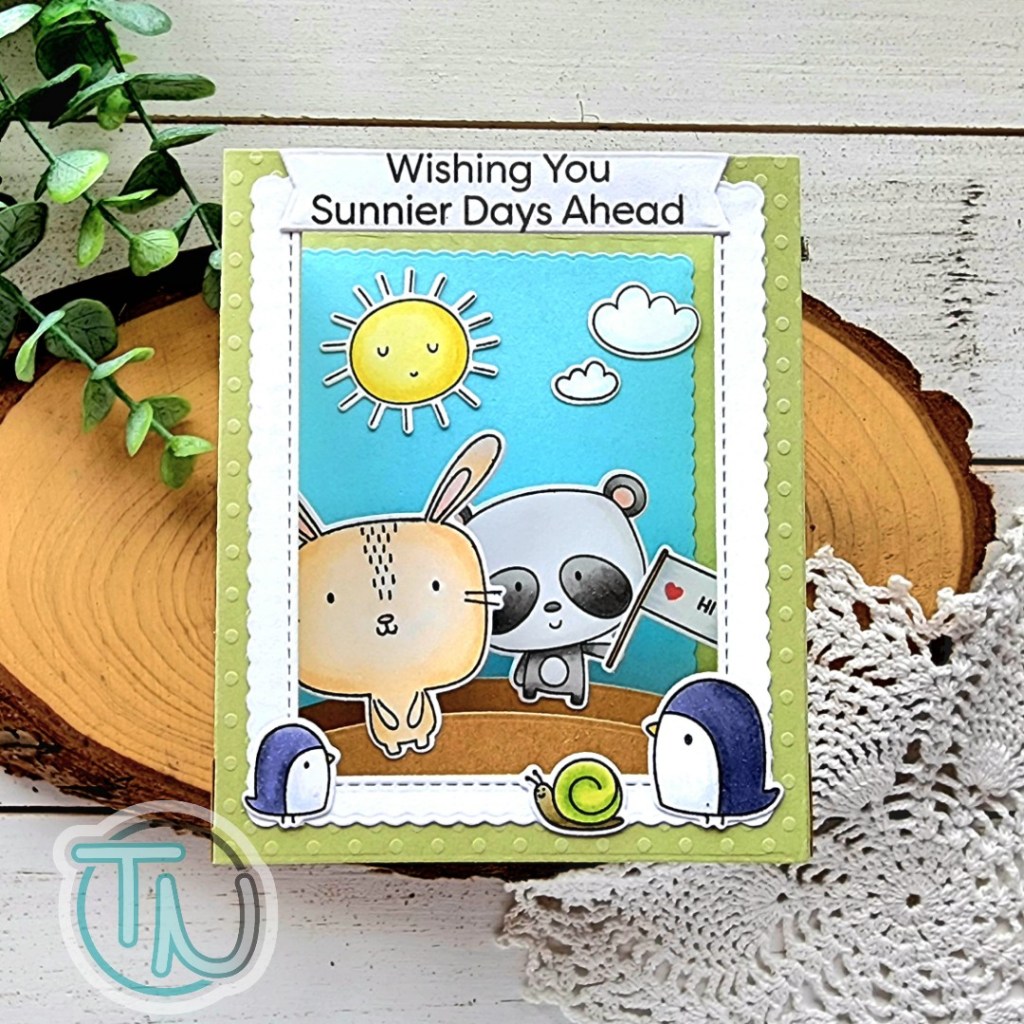
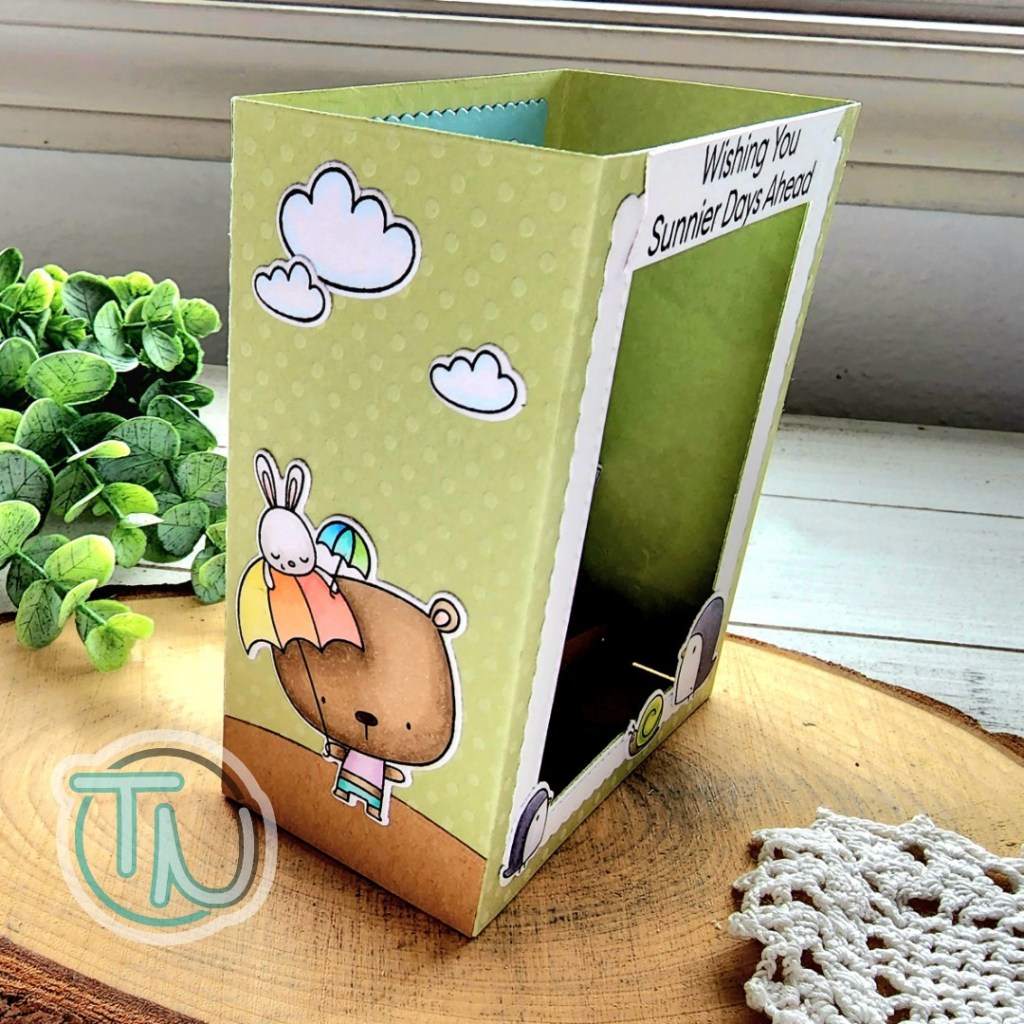
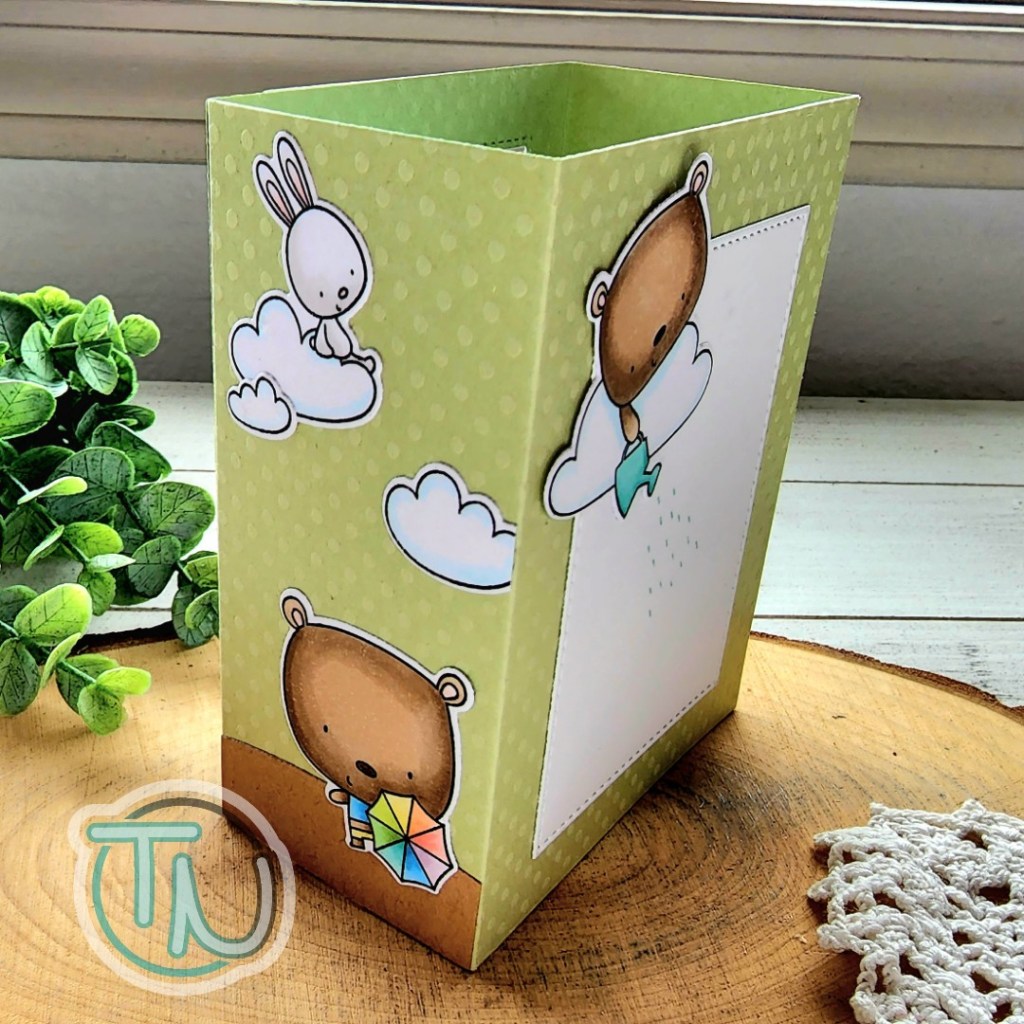
Happy Saturday crafty friends! I have been wanting to create more shadow box cards lately. I keep searching them on Pinterest and watching videos for inspiration and I finally set a night aside to just create one. It was so fun! I totally fussed with it for hours and kept coming back and changing my mind, but I love how it turned out!
I used the Heffy Doodle Big Shadow Box Card die set for my card base and hills. Then I pulled out the Weather With You and Sprinkling You With Love stamp sets from MFT Stamps to decorate it all. I feel like these sets have similar artwork so even though the critters are different, they play well together.
Once I created the box card itself, I started by filling in the inside and front with all of my critters. Then I knew I wanted to decorate the sides so I had colored extra images so I started filling those in too.
After the inside and sides were finished, I didn’t like something about the inside, so I kept fussing and then it hit me that the bear sprinkling water was not working well. So I carefully removed him and added the sunshine instead. Then, I didn’t want to waste this cute bear so I added him to the back panel where I will write my little message. Isn’t that so cute?!?
I almost forgot, the sentiment on the top front is from Weather With You and it’s cut from a Pink & Main Large Sentiment Strip die.
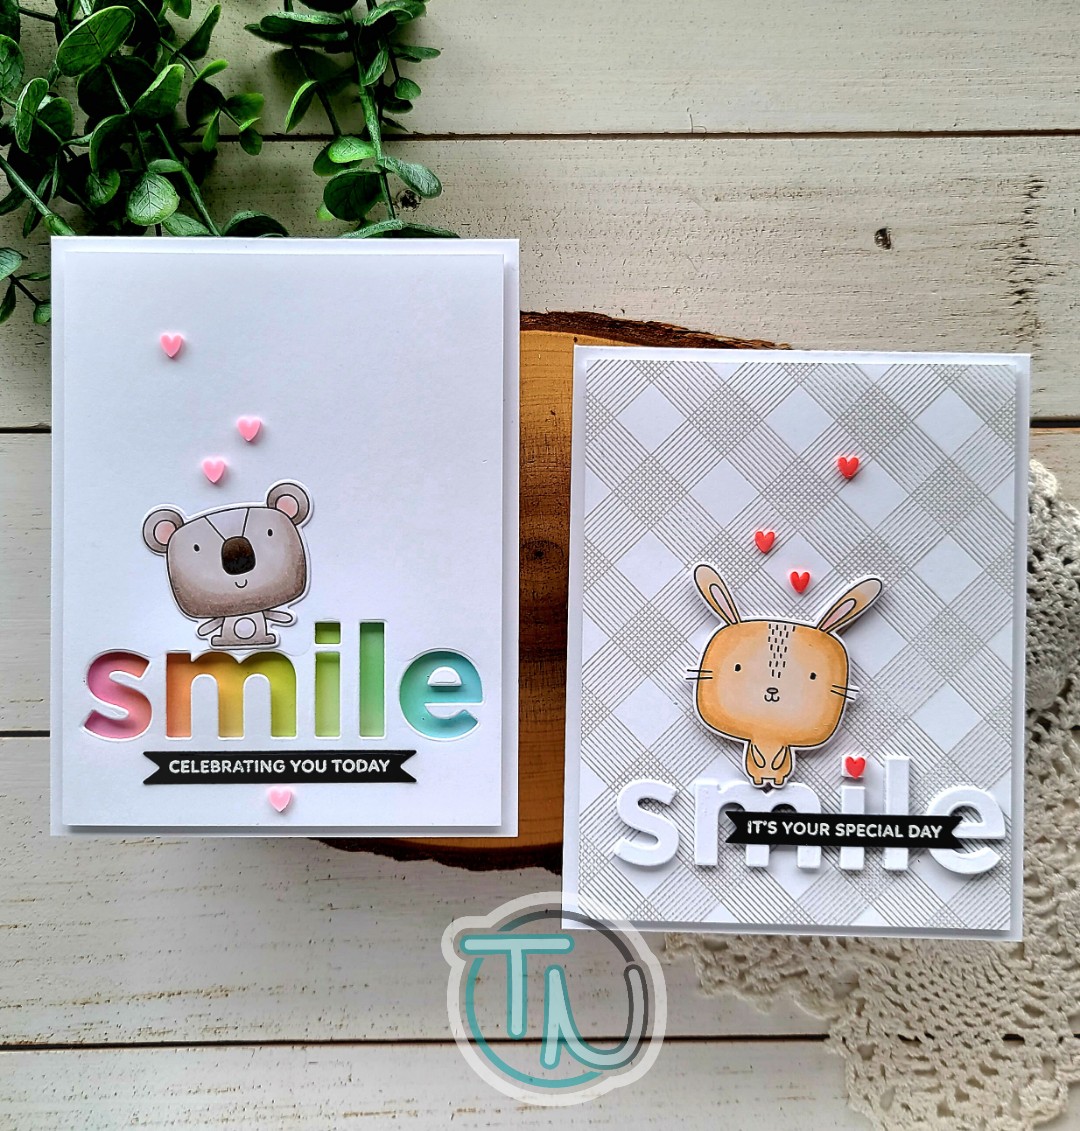
Hi there! I hope your weekend is off to a great start! Today I have a pair of cards to share with you that were inspired by one of the MFT Stamps designers last week. I couldn’t get the design out of my head and when I started creating I immediately had 2 ideas that I wanted to try.
The card on the left is the one that was inspired by Carly. Click HERE to see her card. Mine is a tad different but I’m not much for directly copying designs. Things just morph on their own as I start creating.
As soon as I die cut the word from the white panel for the first card, I had the idea to use it on another card so I had no waste. I love how they both turned out.
On this first card, I cut a white panel down to 4×5.25 inches and die cut the word using the Big Smile die. This has since sold out but you could do the same thing with any alphabet dies you may have, or even change it up completely for a different word.
Using the die cut panel as a guide I taped off the edge of my card base and used blending brushes to ink up a light rainbow where it will show through. Then I added foam tape to the back of the panel and popped it in place.
I stamped and heat embossed a small sentiment on black cardstock and cut it out with a banner die from the Trinity Stamps 4-Bar Card die set. I stamped and colored the koala from Weather With You and cut it out with the coordinating dies too. The banner and koala are adhered with liquid glue directly to the card front.
I finished things off with black glaze pen the the eyes, glossy accents to the nose and a scattering of pink clay hearts from the Twiddler’s Nook Sweethearts embellishment mix.
I think this is such a sweet card! It would be great to add a birthday message to the inside or maybe a congratulations too. It’s so versatile.
After making that first card, I had the letters from cutting the window and I thought it would be fun to do the idea in reverse by stacking the letters for dimension here instead of creating a window. So, I pulled out white scraps and cut the word 4 more times and adhered the layers together with liquid glue.
I cut another panel down to 4×5.25 inches and stamped it in a light gray ink with the All Lined Up Diagonally background stamp. I changed out the critter for the bunny in the same Weather With You stamp set. Popping it up with foam squares before adding another heat embossed sentiment across “smile.” I forgot to mention earlier, the small heat embossed sentiments are from a Pretty Pink Posh set called Let’s Party. I thought they fit perfectly.
This panel is popped up on a white card base with foam tape and the finishing touches are the same. This time I chose red hearts from the same embellishment mix for a little pop of bright on a neutral colored card and I think that is so fun and eye catching.
I love these critters so much and any excuse to ink them up is a good one to me!
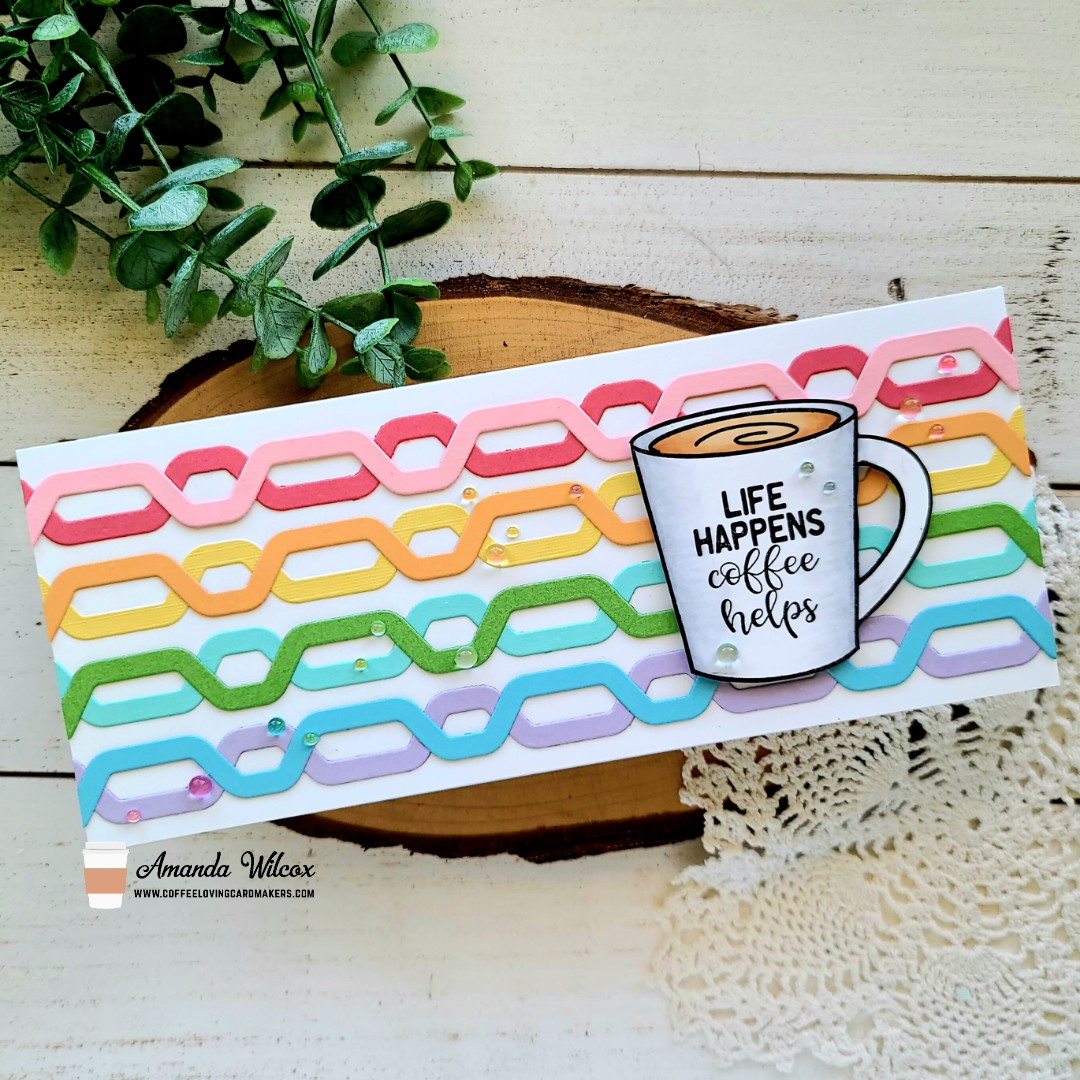
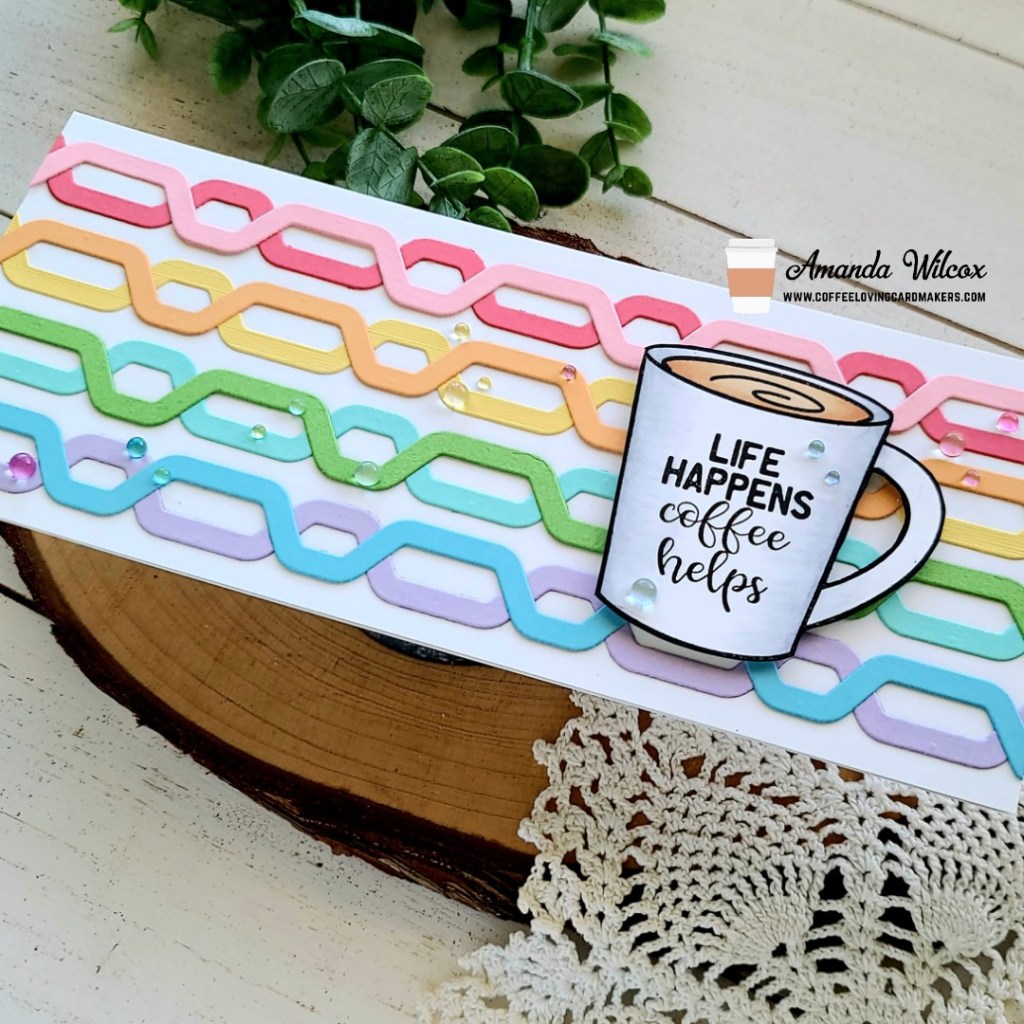
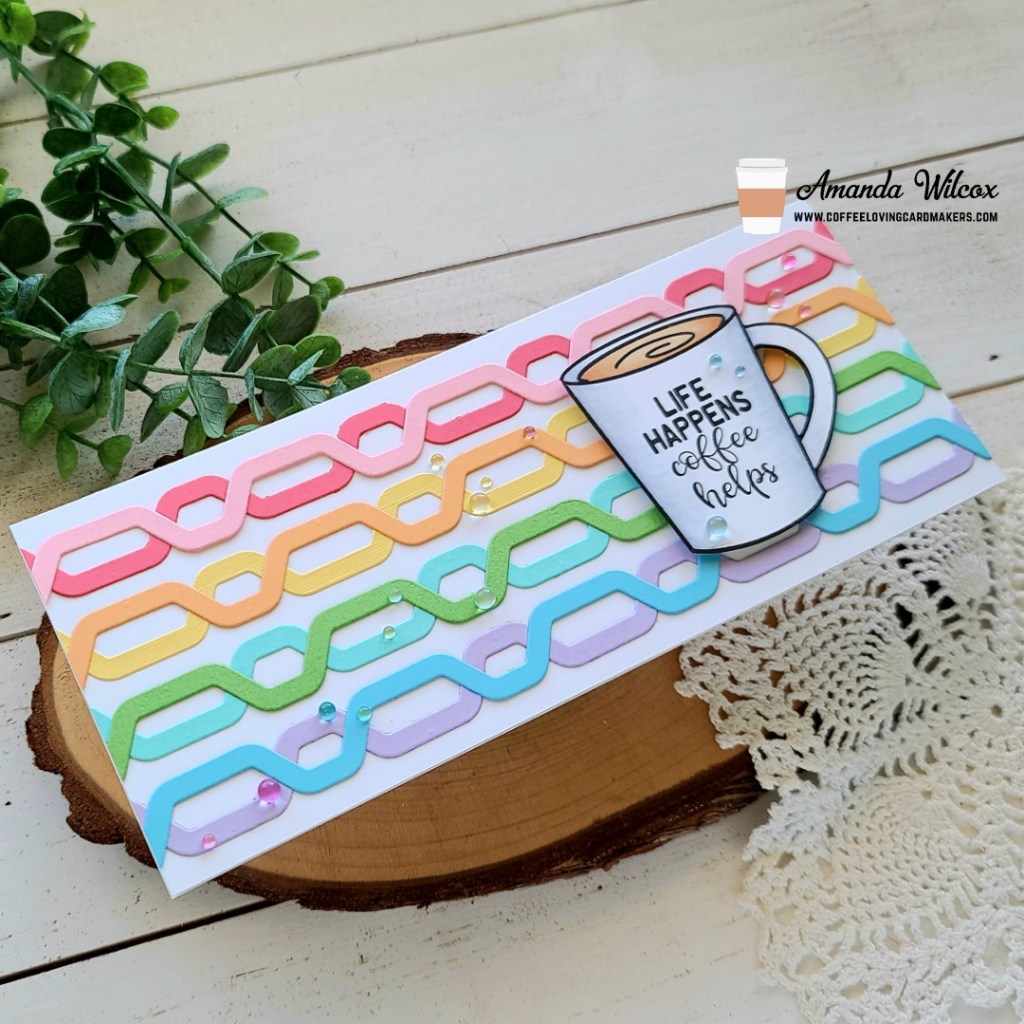
Hello there! It’s time for Tuesday Tea over on the Coffee Loving Cardmakers today. I recently indulged in the overstock sale at Scrapbookpal.com and snagged a few things I had been resisting prior to now. When my order came in I just had to cut this cool MFT Stamps Color Block die immediately and play with it. It’s super fun to intertwine together, stack and layer.
After I cut it out in a rainbow of cardstock and played with it for a while, I came up with this cool background and thought I simple focal image would be perfect to turn it in to a card. When I was moving things around this weekend I rediscovered this awesome couple of stamp sets from Sweet ‘n’ Sassy Stamps – I Like Big Cups and Coffee Talk 2. The immediately came to mind when I was wanting an awesome image for my card.
I stamped the mug, then the sentiment inside, colored it with my copics and fussy cut it out. I always go around the edge with a black marker when I fussy cut things. It gives the image a much more finished look.
I popped the coffee mug up with foam squares and went digging in my stash for embellishments to dress things up a bit. Today I decided to use this awesome rainbow of bubbles from Trinity Stamps called Dewdrops. They are fantastic and add so much to the design today!
Super simple card today but the rainbow makes me smile and I just love both of those stamp sets I used too!
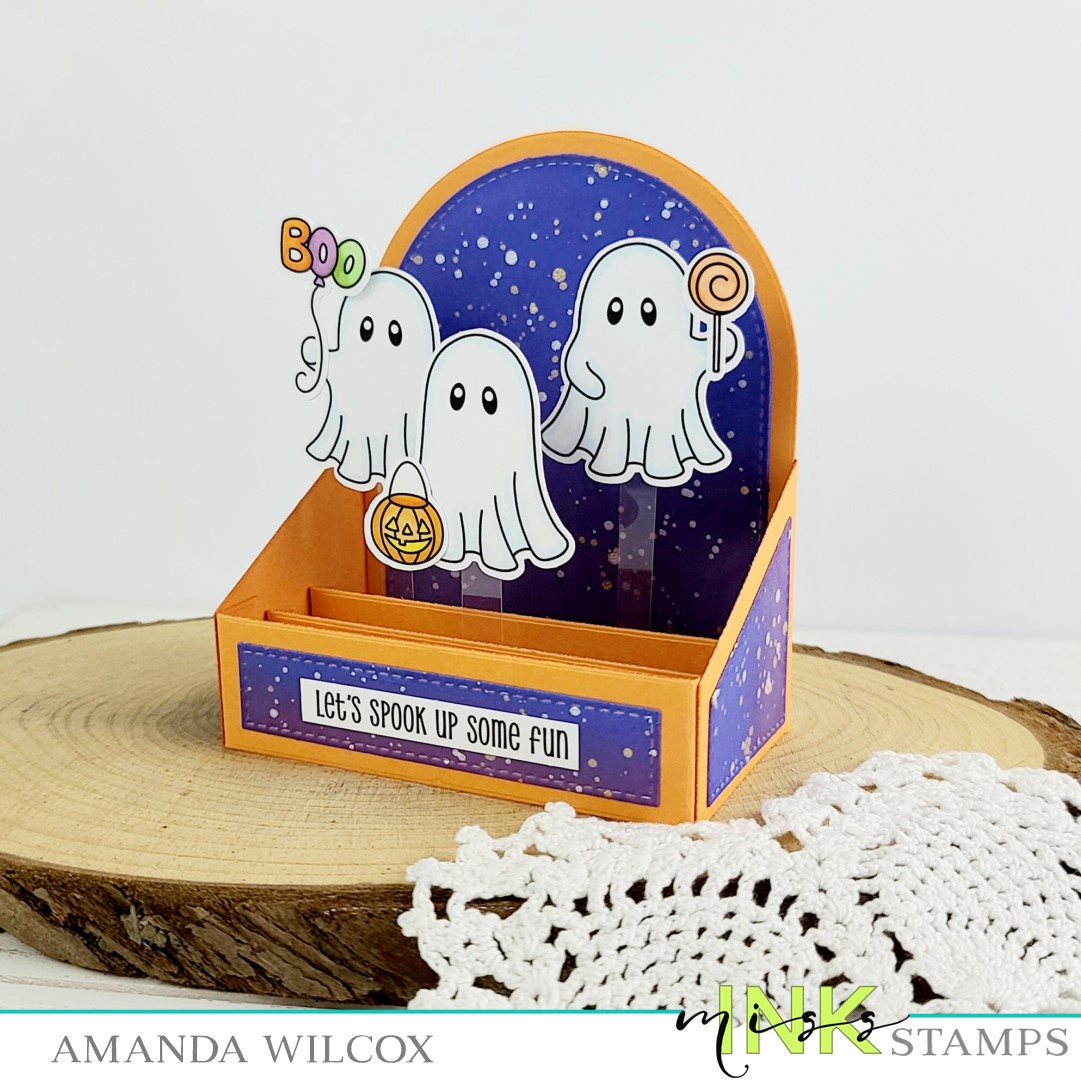
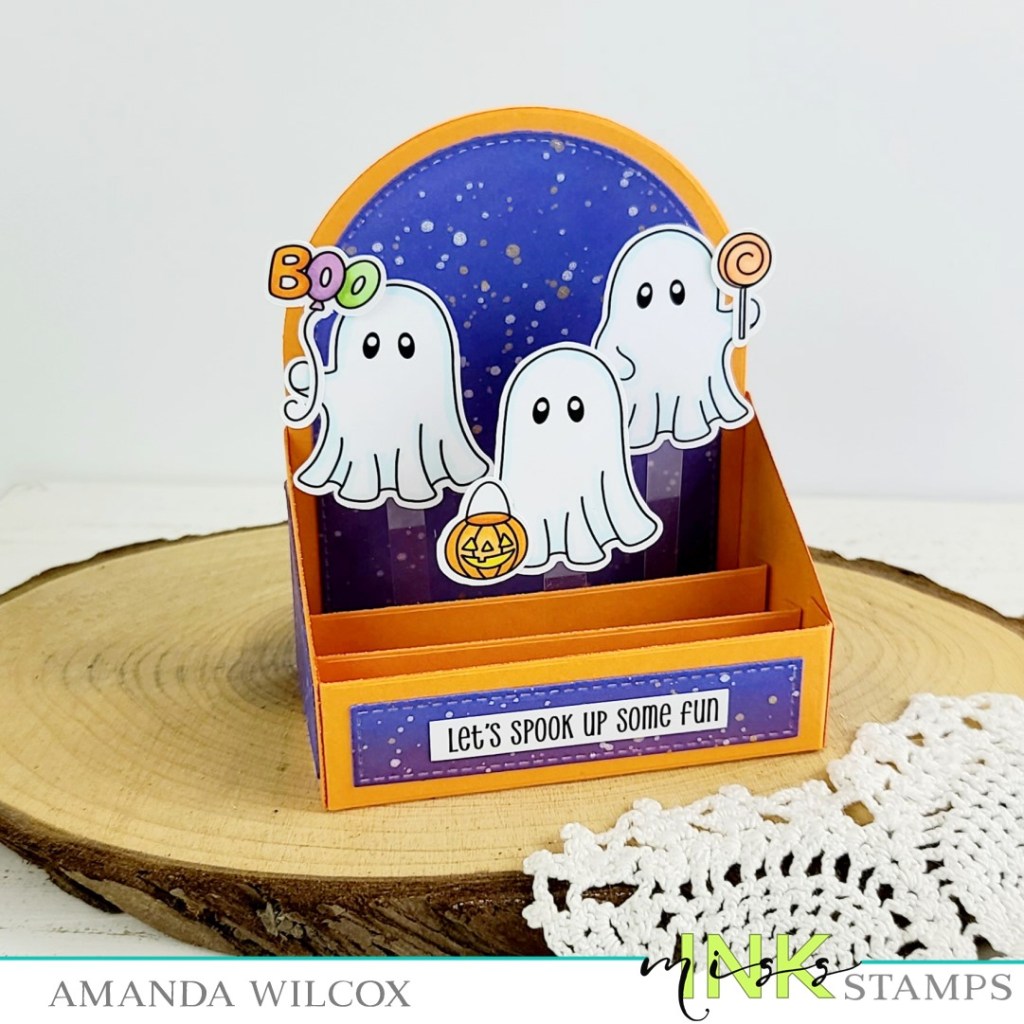
Thanks so much for stopping by today! I have a REALLY FUN box card featuring some Miss Ink Stamps ghosties that are just too cute for words! This set is adorable and the sentiments take it over the top!
To create my card, I stamped images from Boo Sheet and colored them with my copics. I used the scan-n-cut to cut them all out and adhered the supporting small images to each ghost with liquid adhesive.
Next, I cut the pieces of my box card with orange cardstock and the decorative panels from white cardstock. I inked up all the decorative panels with seedless preserves and blueprint sketch distress oxide inks. I spritzed them with water and flicked pearl and gold watercolor on them too. After they were dry, I used scrappy tape to adhere the box together.
I also used scrappy tape to add acetate strips to my ghosts and then adhere them to the different supports going across the inside of the box. I stamped a sentiment and trimmed it into a strip adhering it to the front of the box with liquid adhesive.
I didn’t like the texture my cutting plates left on the back of my box card so I cut another backing piece from white cardstock and adhered it with liquid glue so I have a clean white space on the back to write a fun message to the recipient too!
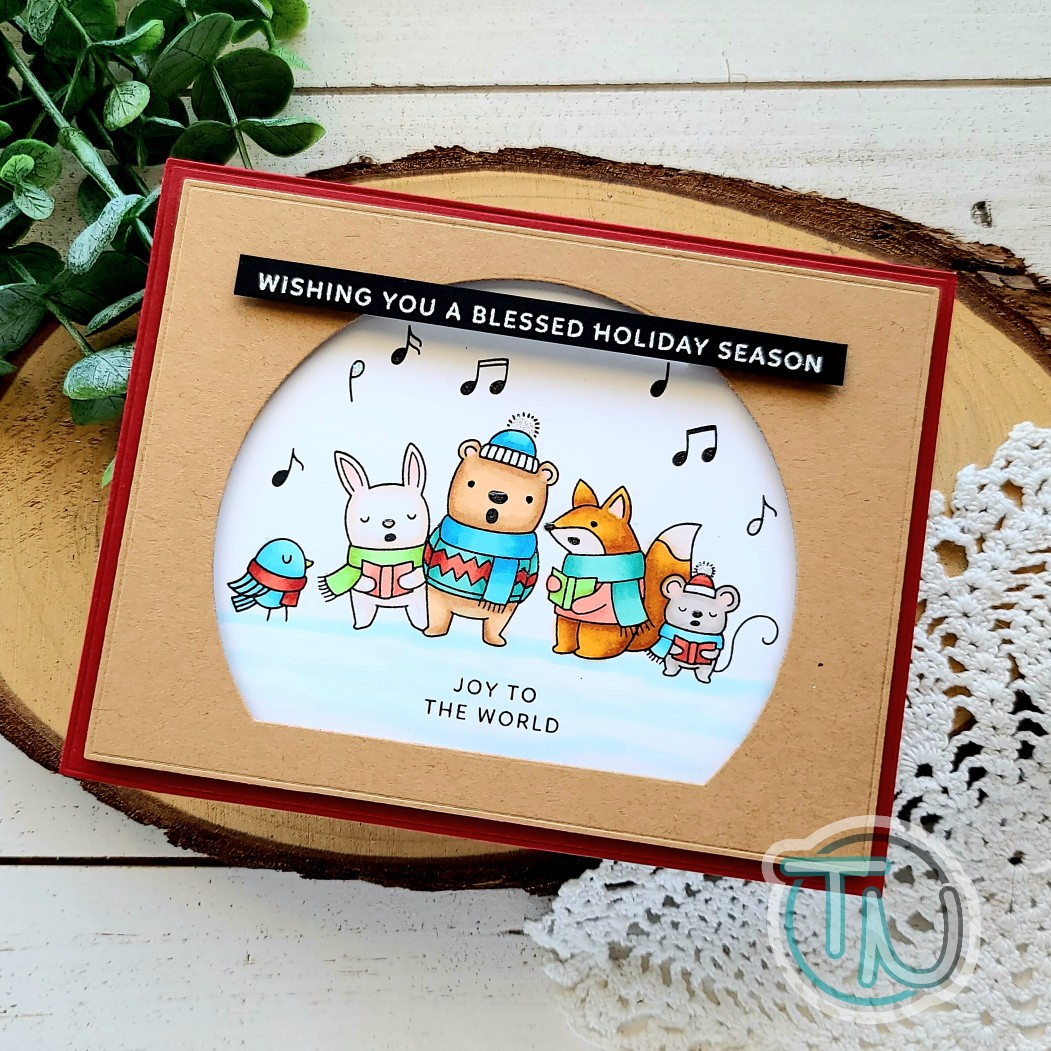
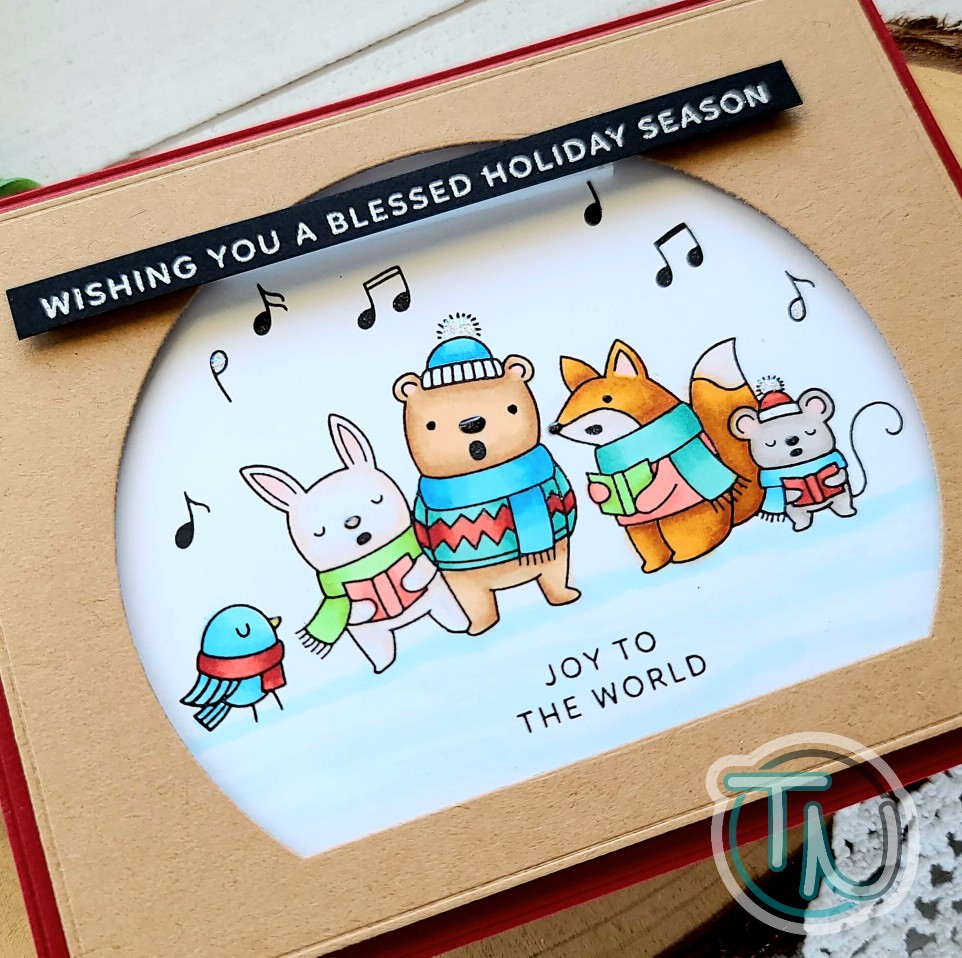
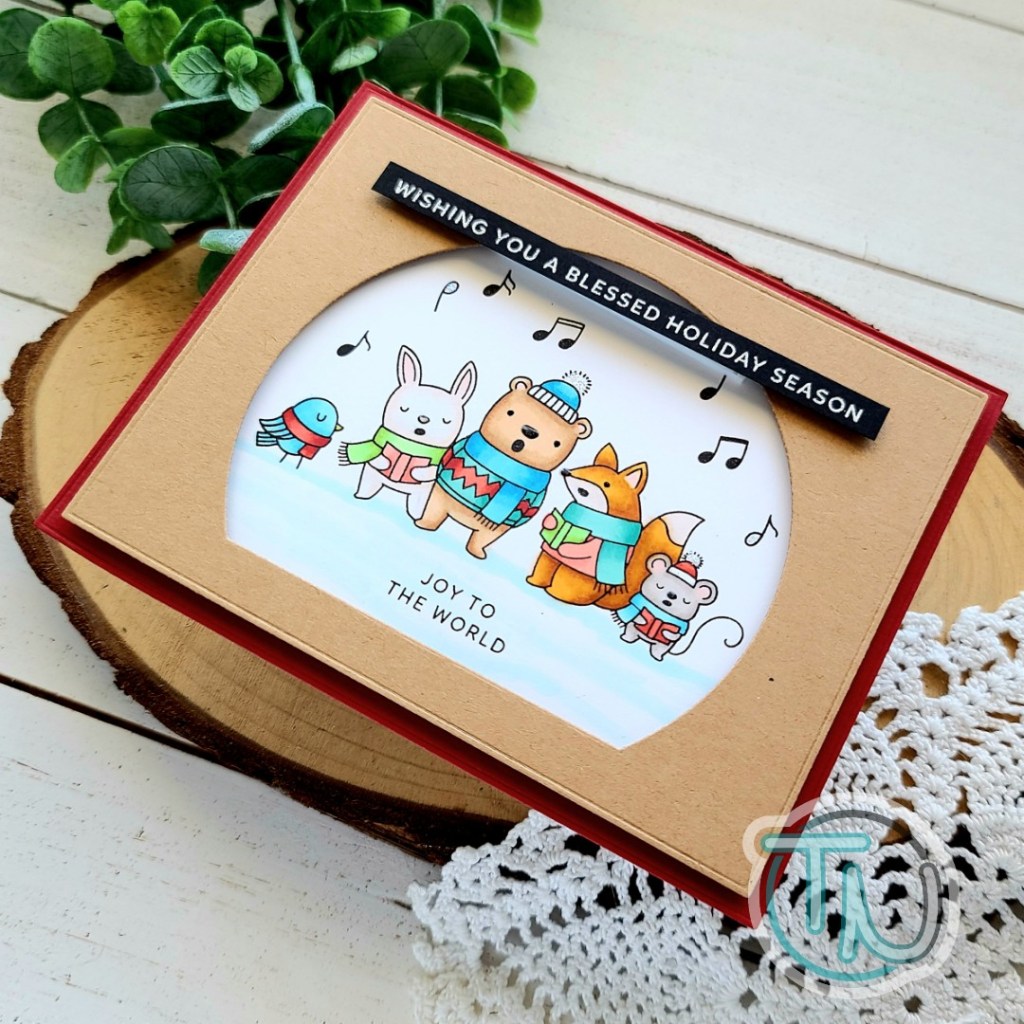
Welcome everyone! Thanks for stopping by today. I’m sharing a clean and simple Christmas card featuring the Caroling Critters from Pretty Pink Posh. I love this set but with no coordinating dies I decided to come up with a window style design for them.
I stamped the image on white cardstock and colored it with my copic markers. Then I used the Trinity Stamps Embossed Edge Rectangle dies to cut a panel from kraft cardstock. For my window opening I used an old MFT arched stax set. I lined the kraft with foam strips and popped it on the scene panel.
I stamped and heat embossed a sentiment from the Joy stamp set and trimmed it into a strip. I added some foam tape to the back of the, doubling the layer in the center so it would lay nicely and placed it over the scene.
I cut another embossed rectangle from red cardstock and adhered it to a white card base and then adhered my scene panel to that.
Moving on to finishing touches, I just added some glossy accents to critter noses and unicorn Stickles to the hat pom poms and open music notes.
I found that this layout idea would work great for me to stamp multiple scenes out and color on the go. Just an idea since it might work for you too.
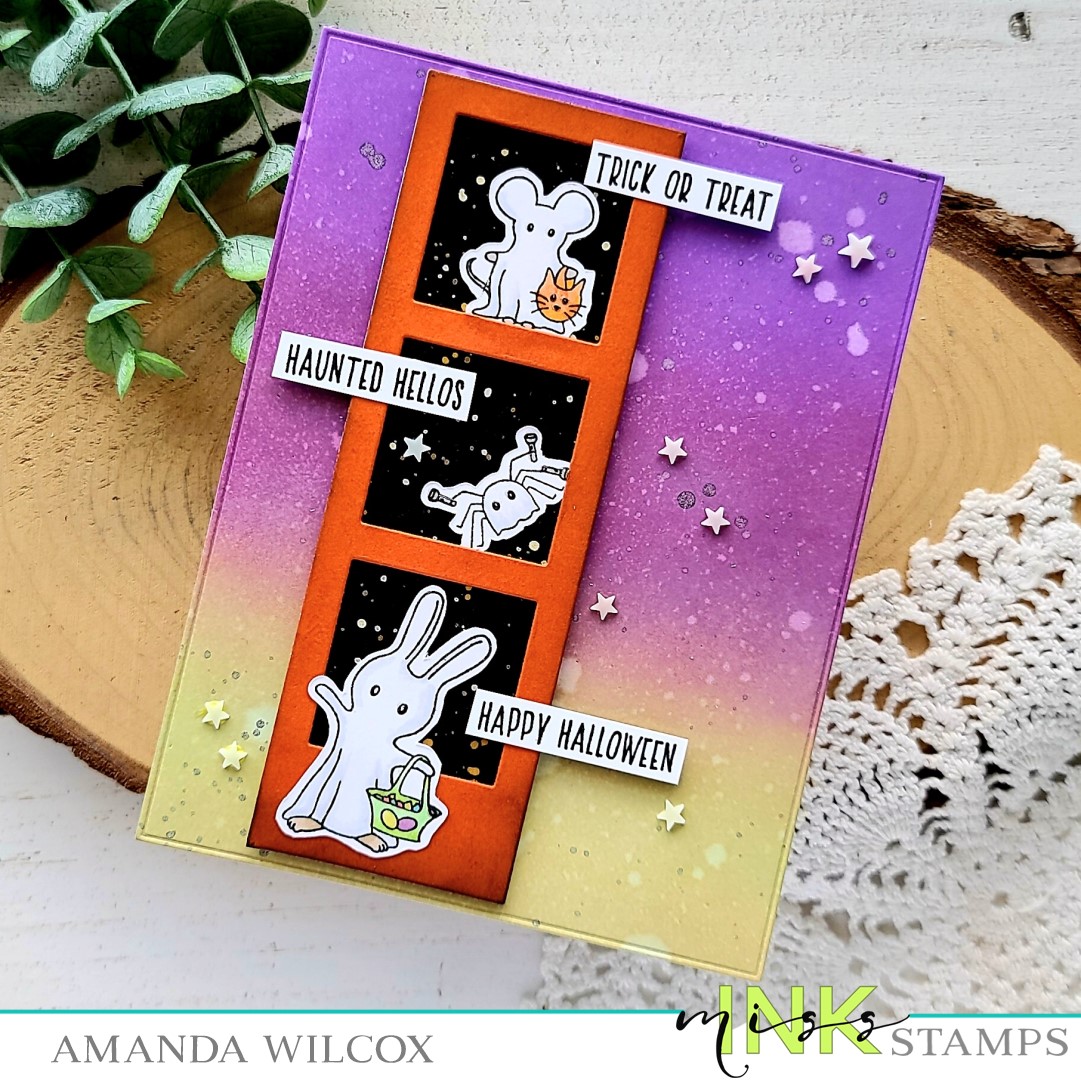
Hello everyone! I’m popping in with a fun card featuring some adorable Halloween critters from Miss Ink Stamps. I got this set last year and love it so much! I was super happy to be able to pull it out again and ink it up.
Today I’ve paired it with some great ink blending and an MFT Stamps photo booth strip die for a fun design element.
I started by stamping and coloring the critters from Boo Crew with my copic markers. Then I used the scan-n-cut to cut them out. Next, I cut the photo booth strip die from orange cardstock and inked the edges up with black soot distress ink. Then I cut a black panel slightly smaller than that and flicked some pearl and gold watercolor on it. Once it was dry I glued the two together and added my critters to it.
Next, I ink blended a panel with distress oxides in wilted violet, seedless preserves and twisted citron. Then I spritzed the panel with water and flicked some watered down black paint on it too. Once the panel was dry I die cut it with a Trinity Stamps Modern Embossed Edge Rectangle die. I adhered the panel to a card base and then popped the photo booth strip up with foam tape.
Last, I stamped a few sentiments from the set on a strip of cardstock and trimmed them apart. I used a combination of liquid glue and foam strips to adhere them in place. For finishing touches I adhered a scattering of glow-in-the-dark stars from Twiddler’s Nook and added a little glossy accents to the critters eyes.