Happy Friday everyone! We’re super excited to announce release day for new Thermoweb products! There are adhesive transfers, toner card fronts, stamps and dies! Even better yet…they all coordinate together! It’s amazing and so much fun!
To celebrate release we’re having an Instagram hop so be sure to head HERE to join in on the fun and get inspired!
For today’s hop I used the new Oh Hello products…adhesive transfers, toner card fronts, stamps and dies! So fun and so easy to use!
Here’s a closer look to see that the top hello is foiled using the toner card fronts, the middle is stamped and heat embossed and the bottom one was an adhesive transfer that I added deco foil flock to instead of foil. Then, I used the coordinating dies to cut all of the hellos out! The bottom sentiment is part of the toner card front options and is foiled the like the top hello. I used a sentiment strip die in my stash to cut that out.
To round things out I added some fabulous glitz glitter gel to the background with one of my favorite Newton’s Nook stencils – Mugs. I love the yellow with gold against all of the teal sentiments.
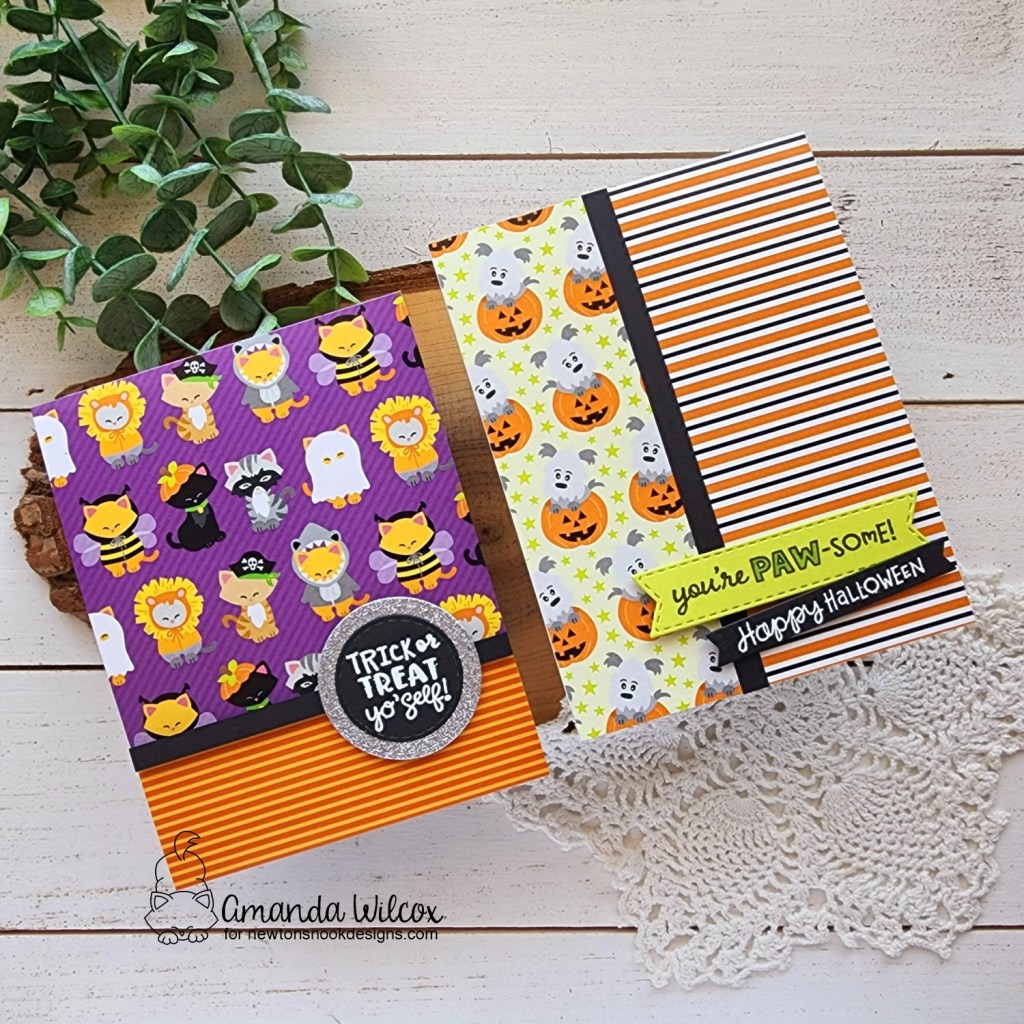
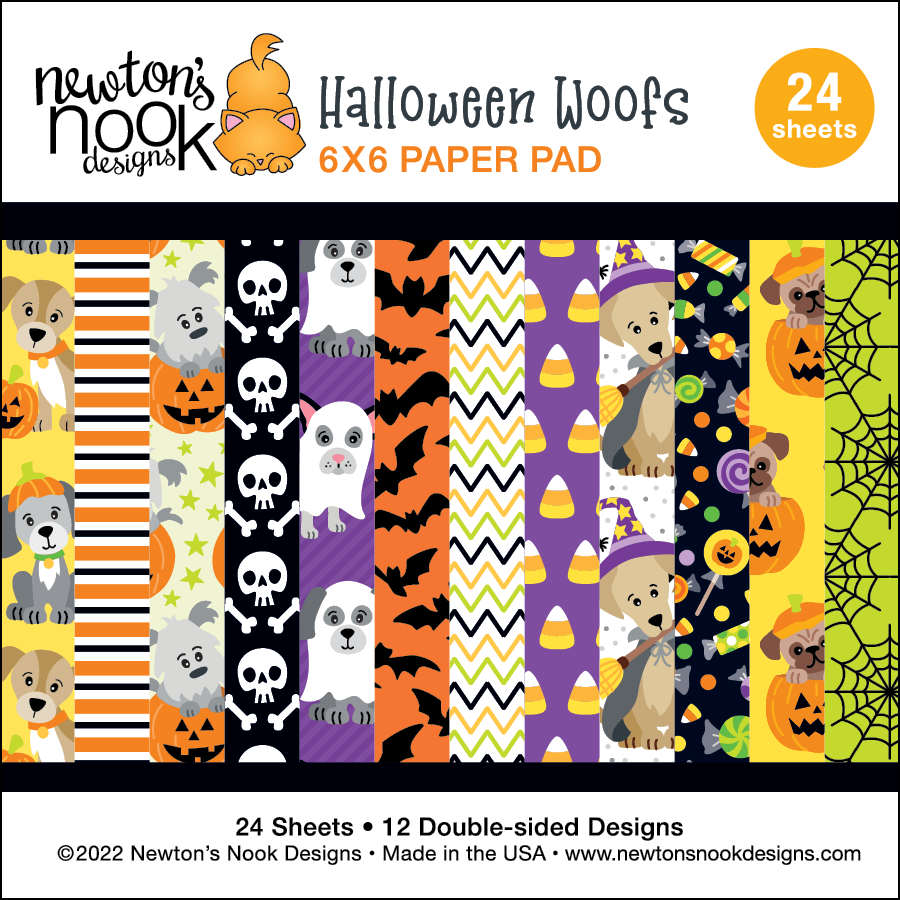
Hello everyone! I’m so glad you’re here! Today I have a couple of fun and super quick to create cards featuring the new Halloween Meows and Halloween Woofs paper pads from the Newton’s Nook release last week.
I fell in love with some of these patterns but couldn’t figure out a way to use the larger patterns without covering up more than I liked. These simple designs were the perfect way to showcase those papers!
Aren’t these papers just so perfect! I love the colors and the critters are perfect compliments for the patterns in the pads too!
This first card features the Halloween Meows paper pad. I cut a piece of the kitty paper measuring 4.25×4 inches and adhered it to a white card base. Then I added the orange strip measuring 4.25×1.5 inches. I cut a 1/4 inch strip of black cardstock and popped it up with foam strips on the seam.
Finally, I used circles from the Circle Frames and Frames Squared die sets to create my sentiment medallion. The sentiment from Halloween Pile is stamps and heat embossed and the circles are added to the card front with foam squares on either side of the black strip so it lays nicely.
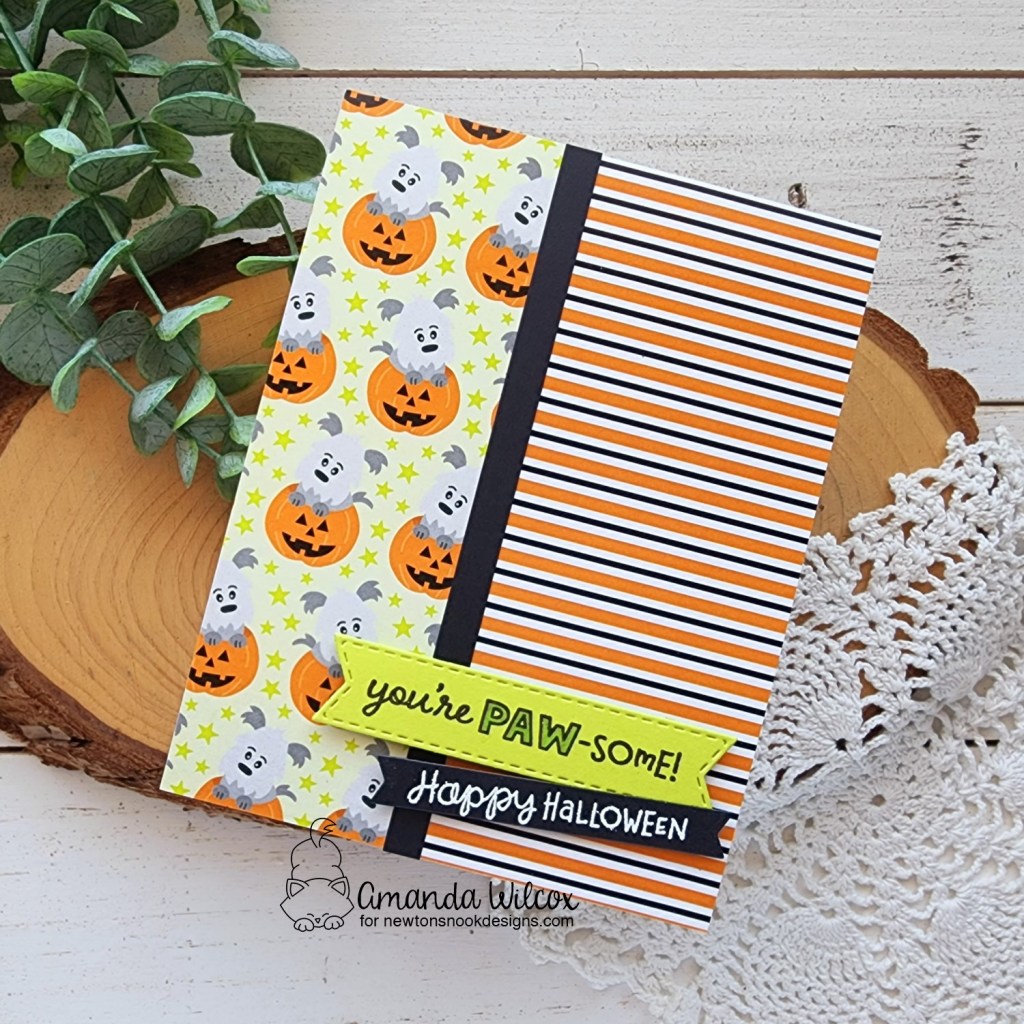
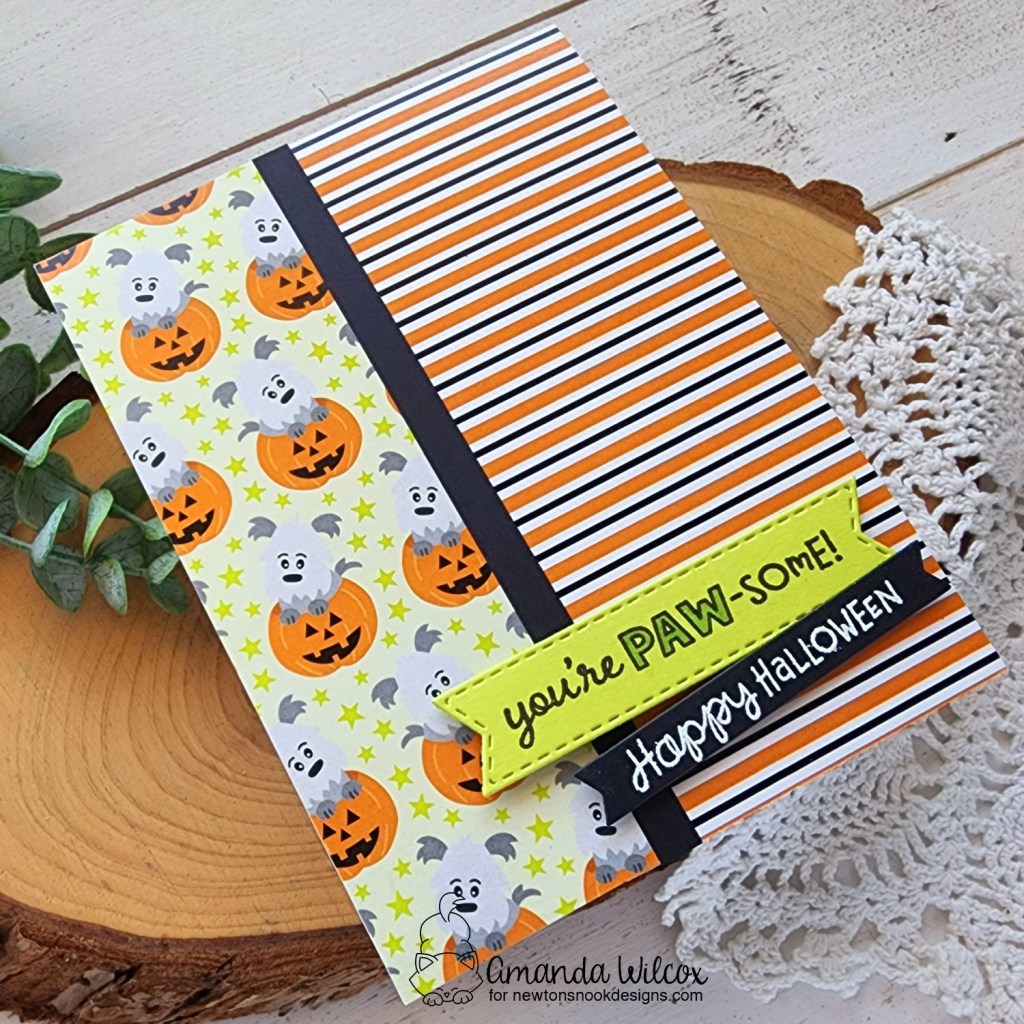
Switching gears to the adorable Halloween Woofs paper pad. I cut two pieces of paper from the pad – the puppies are 5.5×2 inches and the stripes are 5.5×2.25 inches. I added a 1/4 inch strip of black cardstock to hide the seam again, this time with liquid glue.
This time, I went digging for sentiments to make my card a little more individual. The green sentiment is cut with a banner trio die and comes from Heartfelt Woofs. I used a copic marker to color the open letters a darker green to help them stand out a bit. Then I stamped and heat embossed a sentiment from Batty Newton and die cut it with a banner from the A7 Frames & Banners die set. Both banners are added with foam squares.
Aren’t these cards so much fun!?! No coloring required but look at all that visual interest from the patterned paper and fun design elements.
Hello everyone! Today is release day for Newton’s Nook. It’s amazing and I hope you’ll take a chance to look at it all if you haven’t yet. It’s got fall and Halloween goodies that are sure to include something wonderful for everyone!
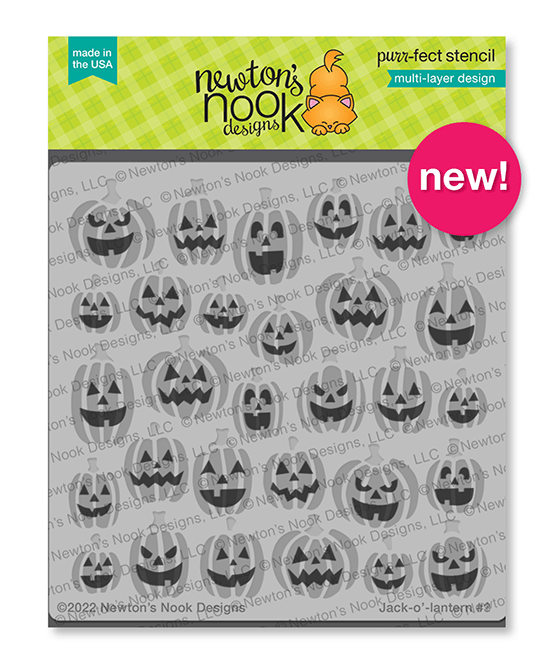
Through release week reveals, I didn’t want my posts to be longer than they already were so I missed out sharing these fun cards featuring the new Jack-o’-Lantern layering stencil set. But we can’t have that so release day seems like the perfect festive day to share them.
I’m totally smitten with layering stencils these days so it’s not surprise that I couldn’t stop at one card with this new set. They are perfectly designed and so fun to create with!
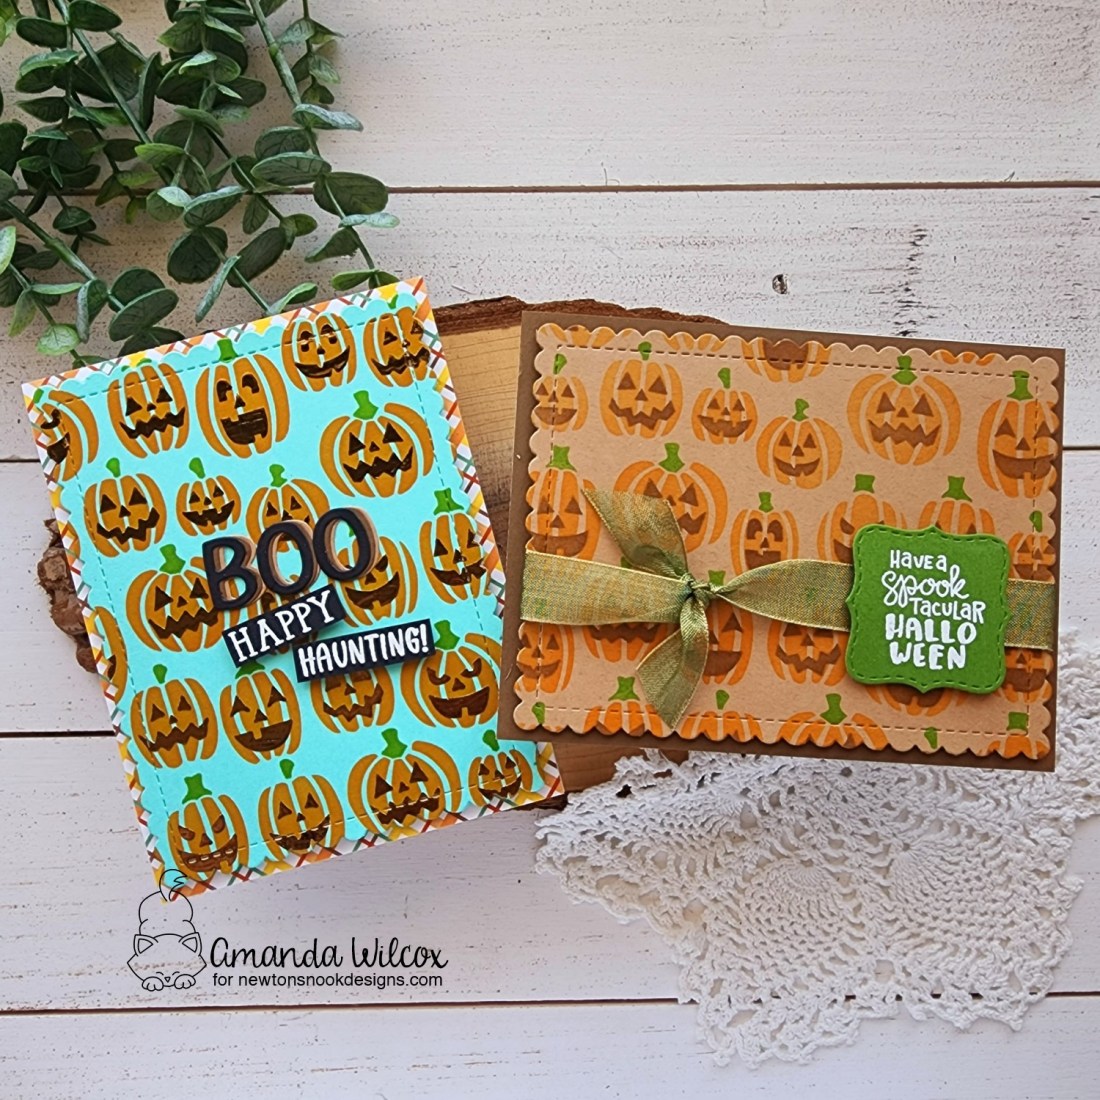
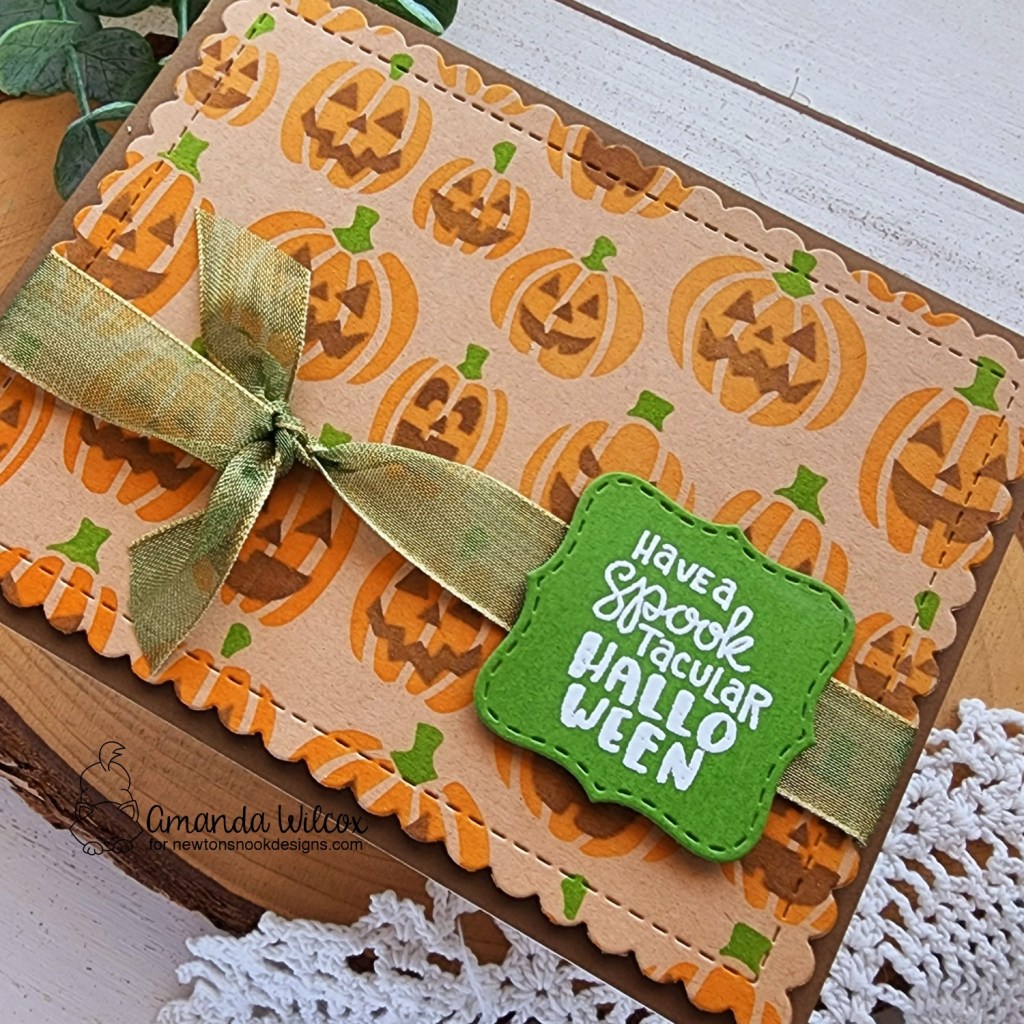
For this first card, I inked up the stencils using dye inks for the orange and green layers, then used distress oxide for the faces so the brown would really cover the pumpkins and show up well. Then I die cut the panel with the largest Frames & Flags die set and tied green organza ribbon around it. Next, I popped it up with foam tape on a brown card base.
Then, I die cut the label shape from the Slimline Frames & Windows die set and heat embossed a sentiment from the new Halloween Pile stamp set before adhering it with foam squares.
This was a quick and easy card to create but it’s so festive and fun. I love it! Next, I stepped up the stenciling just a bit.
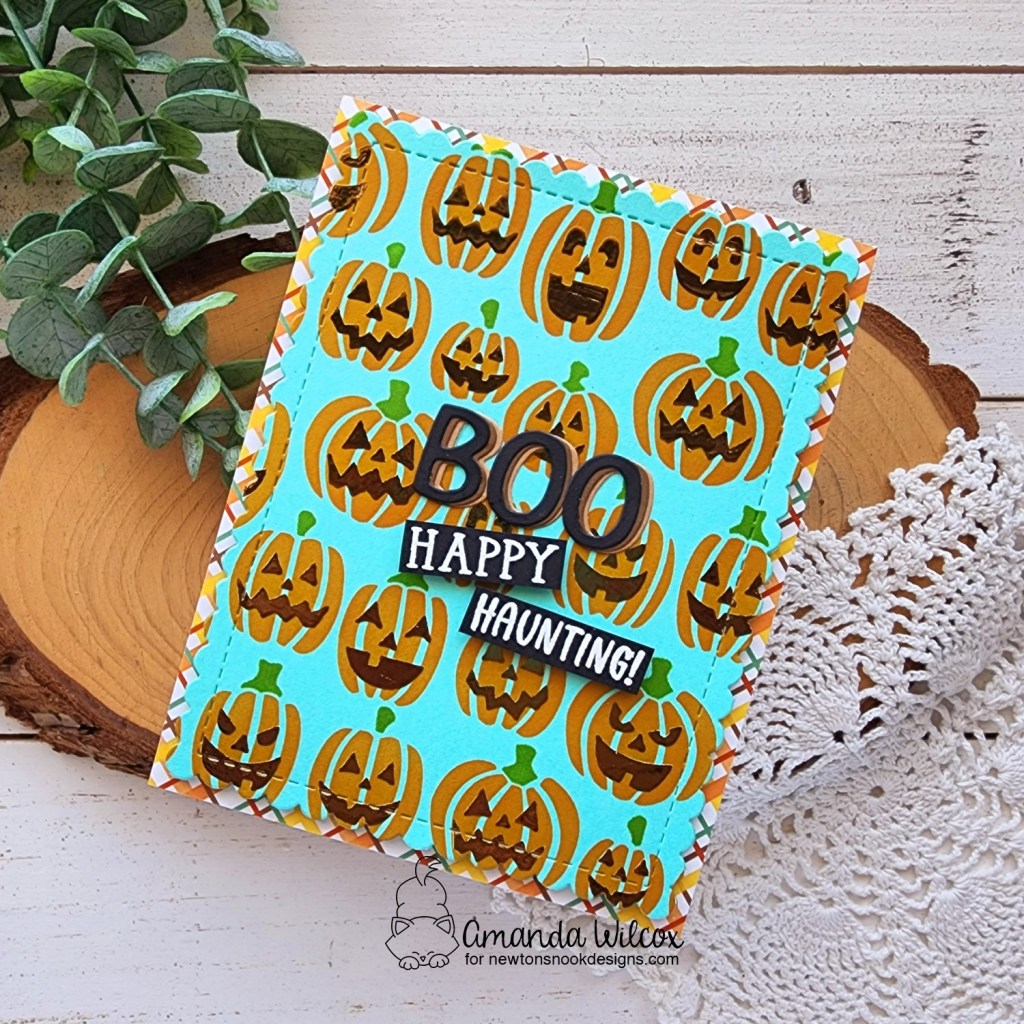
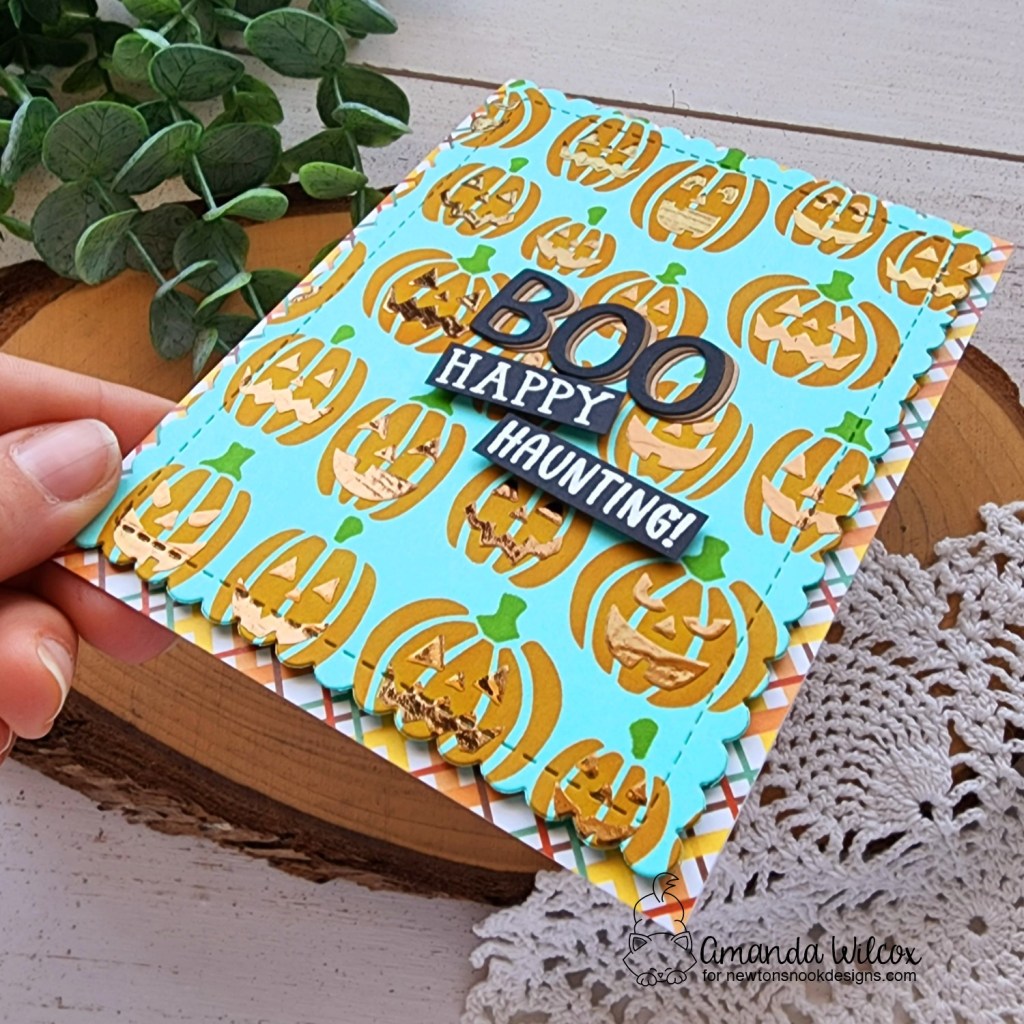
For this card, I used a teal A2 panel for my jack-o-lantern inking with dye inks except for the faces. For that, I spread Thermoweb Transfer Gel Blanco through the stencil and then set it aside to try.
After it was dry, I ran the panel through my laminator with bronze Deco Foil transfer sheet and look at those spooky faces shine! This is so cool in person to play with! I love it!
After foiling, I die cut the panel with the largest Frames & Flags die and added foam tape to the back and adhered it to plaid paper from the new Autumn paper pad.
For my sentiments, I used the Essential Alphabet die set to cut BOO from kraft, brown and black cardstock. I used liquid glue to adhere the letters shifting them just a smidge to the right each time. Then I glued them to the pumpkin panel.
Next, I stamped and heat embossed Happy Haunting from the new Spiderweb Oval stamp set and cut the words apart into fun strips. I popped those up with foam strips and adhered the whole panel to a white card base.
I hope you enjoyed these extra projects today and are able to snag some fun fall goodies for yourself from the new release.
Happy Monday everyone! It’s the beginning of reveals for the Newton’s Nook August release. It’s packed full of fun fall themed goodies and I can’t wait to share it all with you! Let’s have a look at today’s goodies, shall we?
Jack-O’-Lantern Stencil Set
Halloween Woofs Paper Pad
Halloween Meows Paper Pad
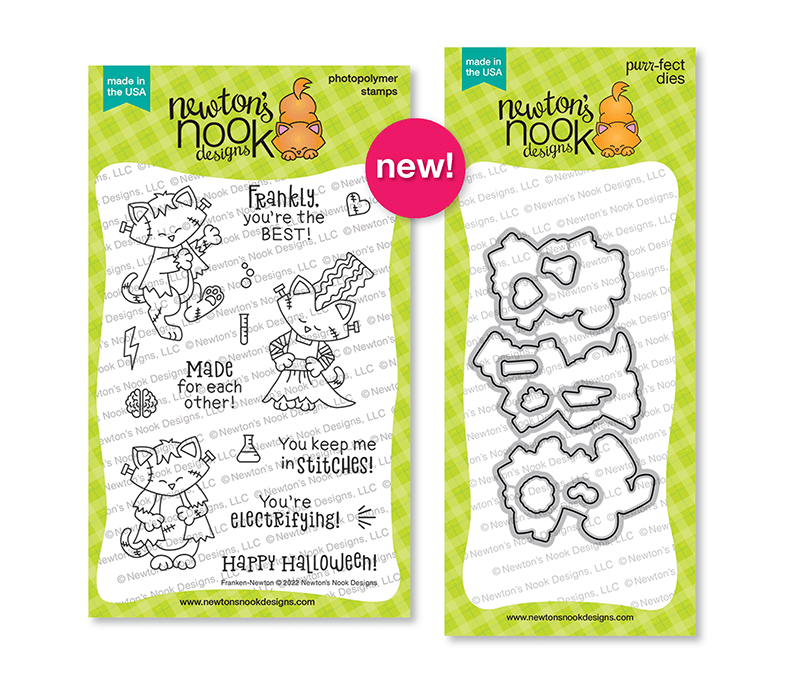
Franken-Newton Stamps and Dies
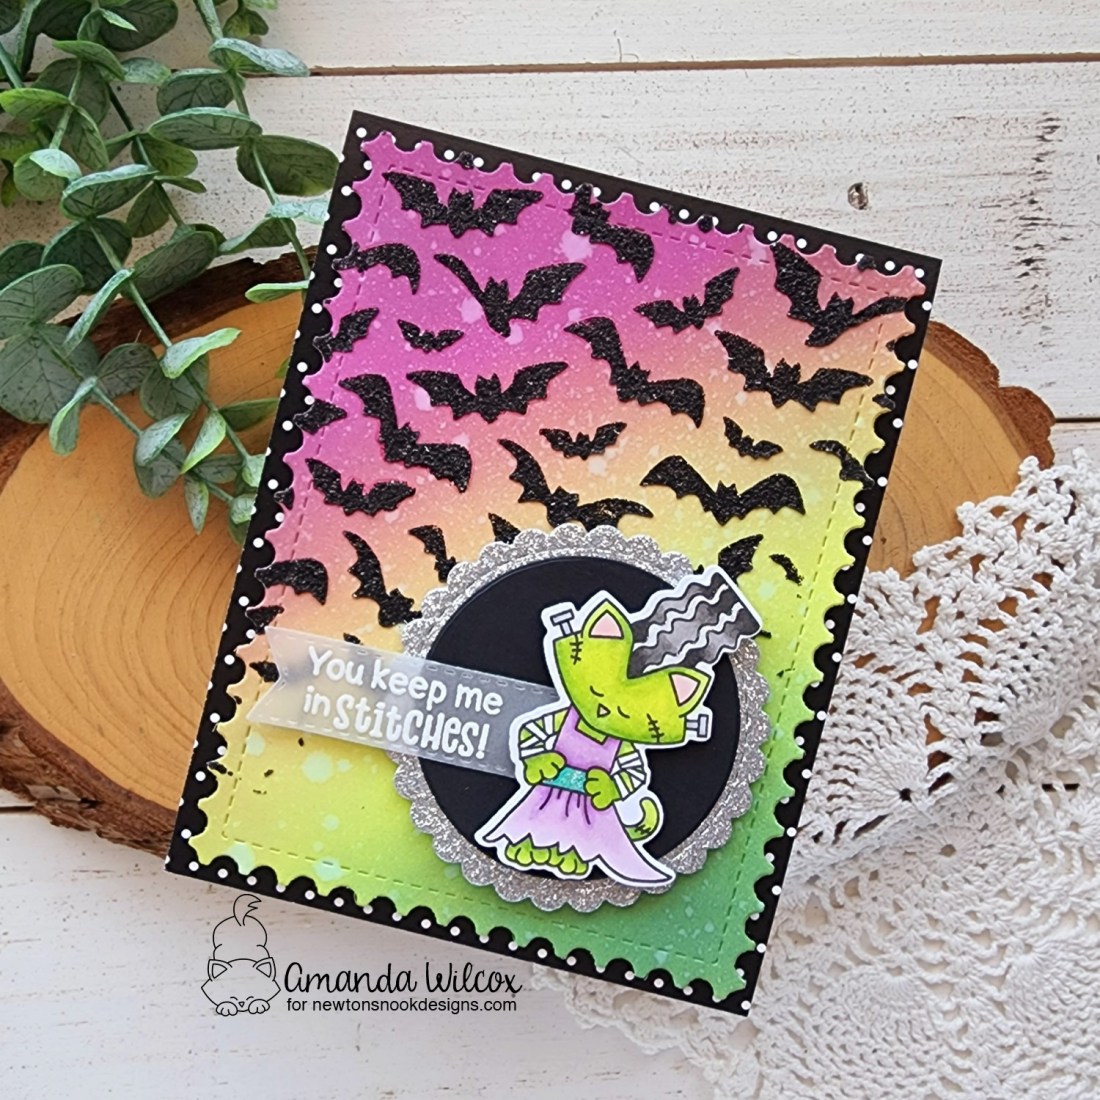
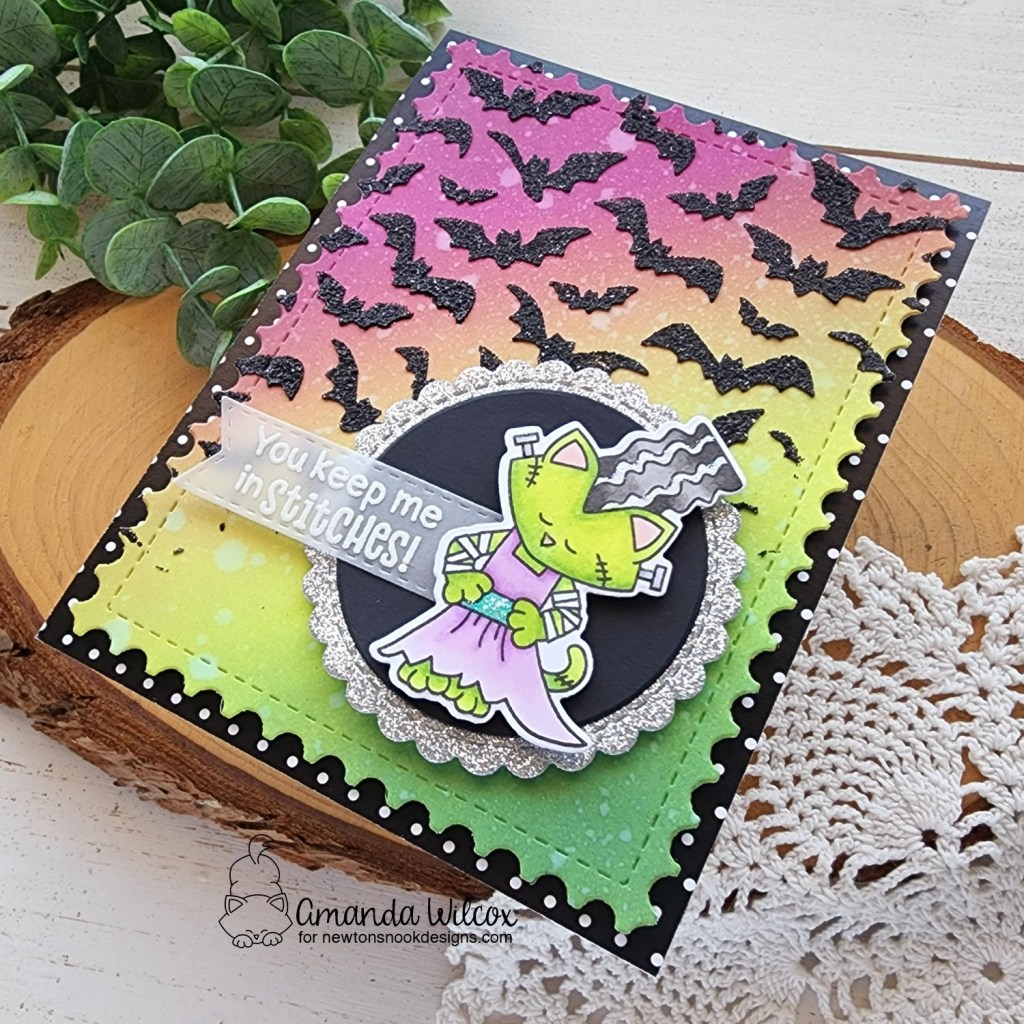
Isn’t this a huge array of amazingness to celebrate all things Halloween!?! I am absolutely in love with it all! I have a couple of cards to share with you today. I’ll start with this adorable Franken-Newton stamps set.
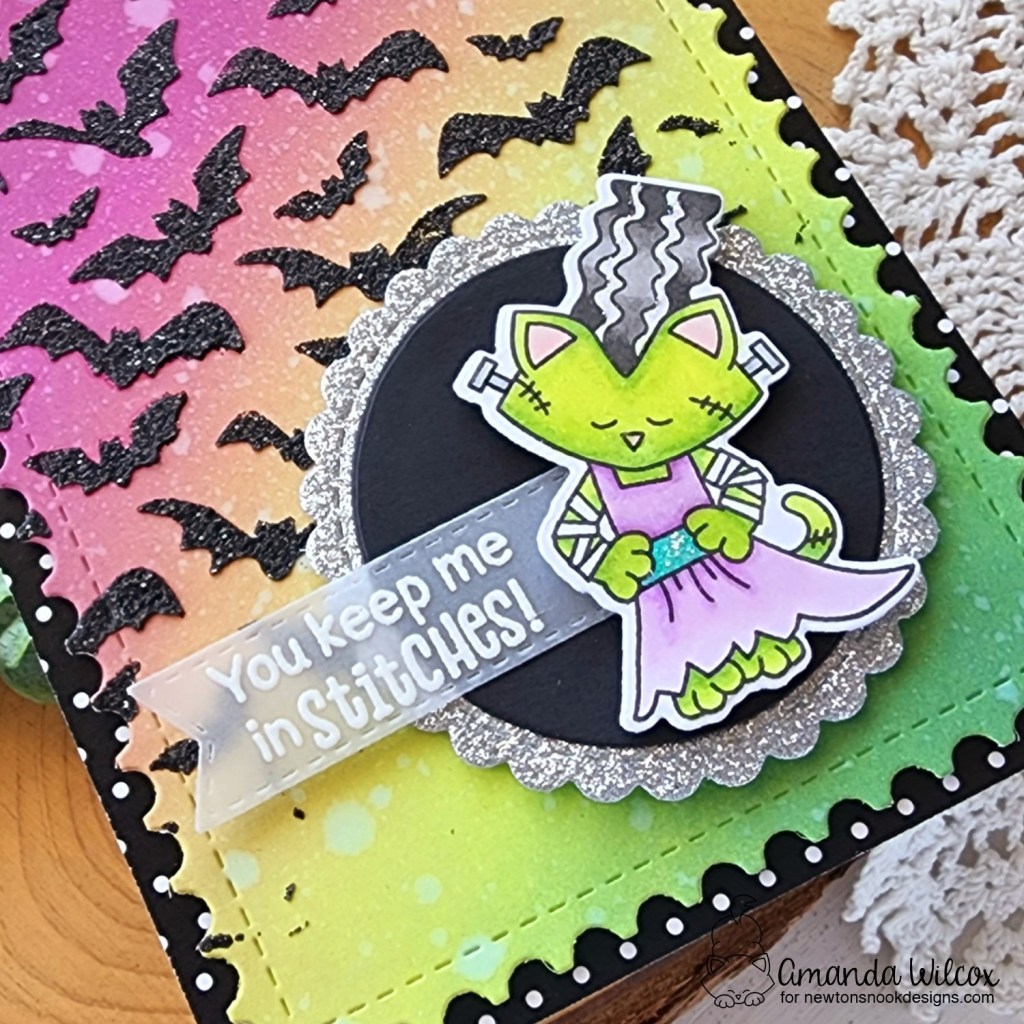
For this card, I chose that super cute Elvira-looking kitty and colored her with my copic markers. I used the coordinating die to cut her out and then chose a sentiment to heat emboss on a banner from the Banner Trio die set.
Next, I used Circle Frames dies to cut a silver scalloped and regular black circle to add my image and sentiment to. Then I switched gears to my background. For that, I ink blended distress oxide ink in mowed lawn, twisted citron and seedless preserves at an angle. Then I spritzed the panel with water and used the Bats stencil to spread glitz glitter gel through. I intentionally did this at an angle like the inking and faded imperfectly as I went down.
Once the glitz gel was dry, I die cut the panel with the largest Framework die and added foam tape to the back before adding it to the black polka dot paper in the Halloween Woofs paper pad. Next, I popped up my circle with foam squares.
For finishing touches, I added glossy accents to the white streaks in the kitty’s hair and her nose and bolts. Then I added stardust Stickled to her belt for some sparkle.
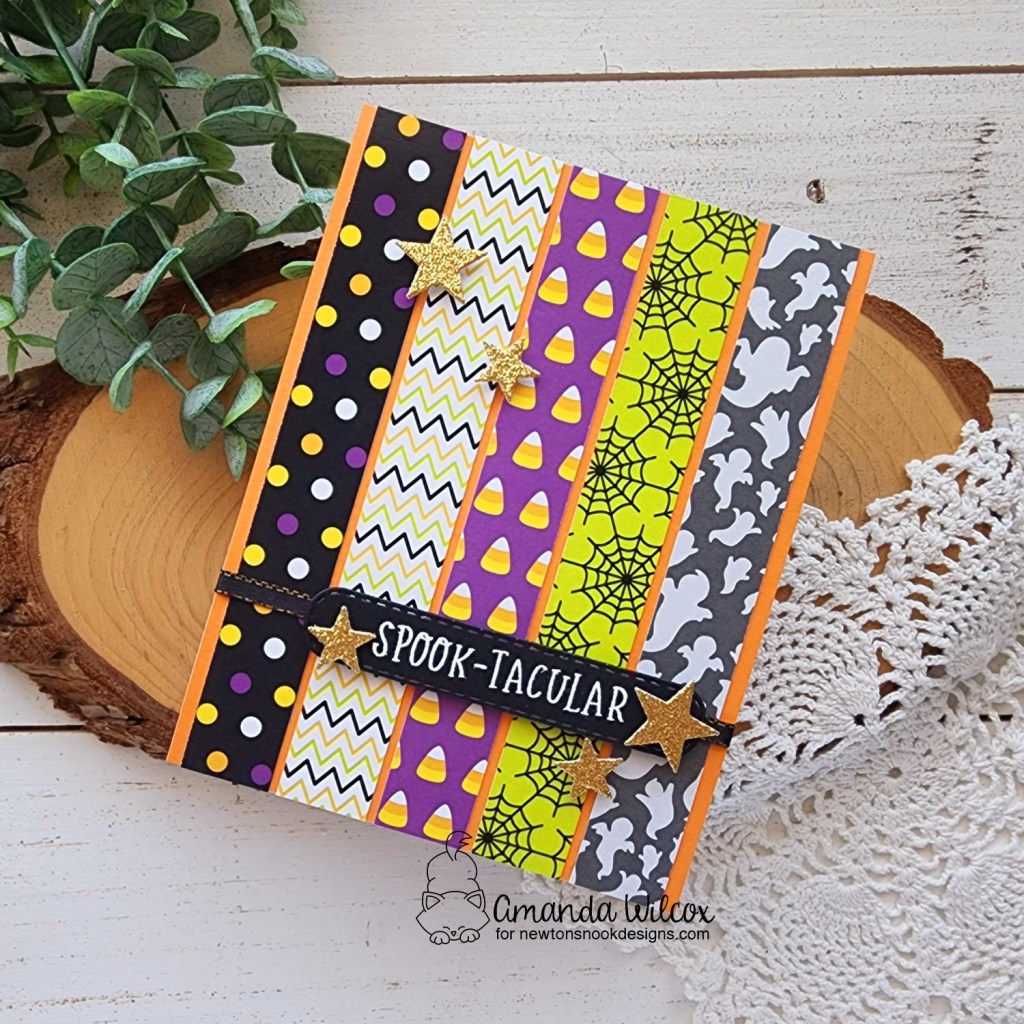
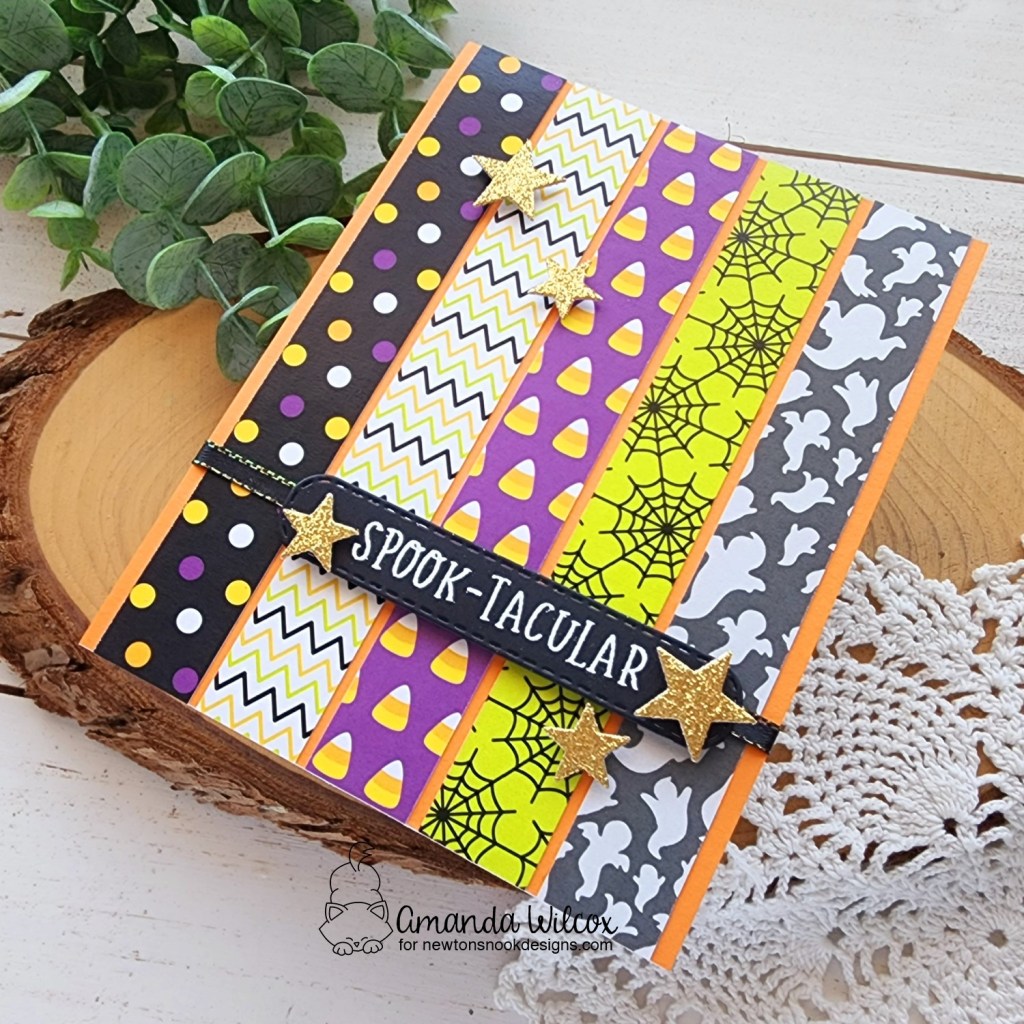
For my next card, I used strips of paper from both of the new Halloween pads. I cut strips 3/4″ wide and adhered them to an A2 size piece of orange cardstock. Then I wrapped ribbon around the panel about 1 1/2 inches up and adhered that to a white card base.
I die cut the rounded banner from the Banner Trio dies and heat embossed a sentiment from Spooky Roundabout on it before popping it up with foam squares over the ribbon. Last, I cut stars from the Sky Scene Builder die set from gold glitter cardstock and popped those up across the card front with foam squares too.
Would you like to win the “Franken-Newton” Stamp Set? This stamp set will be given away to ONE lucky winner!
Here’s how to win: Comment on the NND blog and Design Team blogs (see list below)! Thewinner will be chosen at random from the collective reveal posts. Make sure to check out each of their blogs and comment for your chance to win. You will not know which blog has been chosen so the more you comment on the better your chances are of winning! You have until Thursday August 18th at 9pm ET to comment — winners will be announced on the blog post on Friday August 19th.
Check out all the awesome Design Team Blogs below to enter:
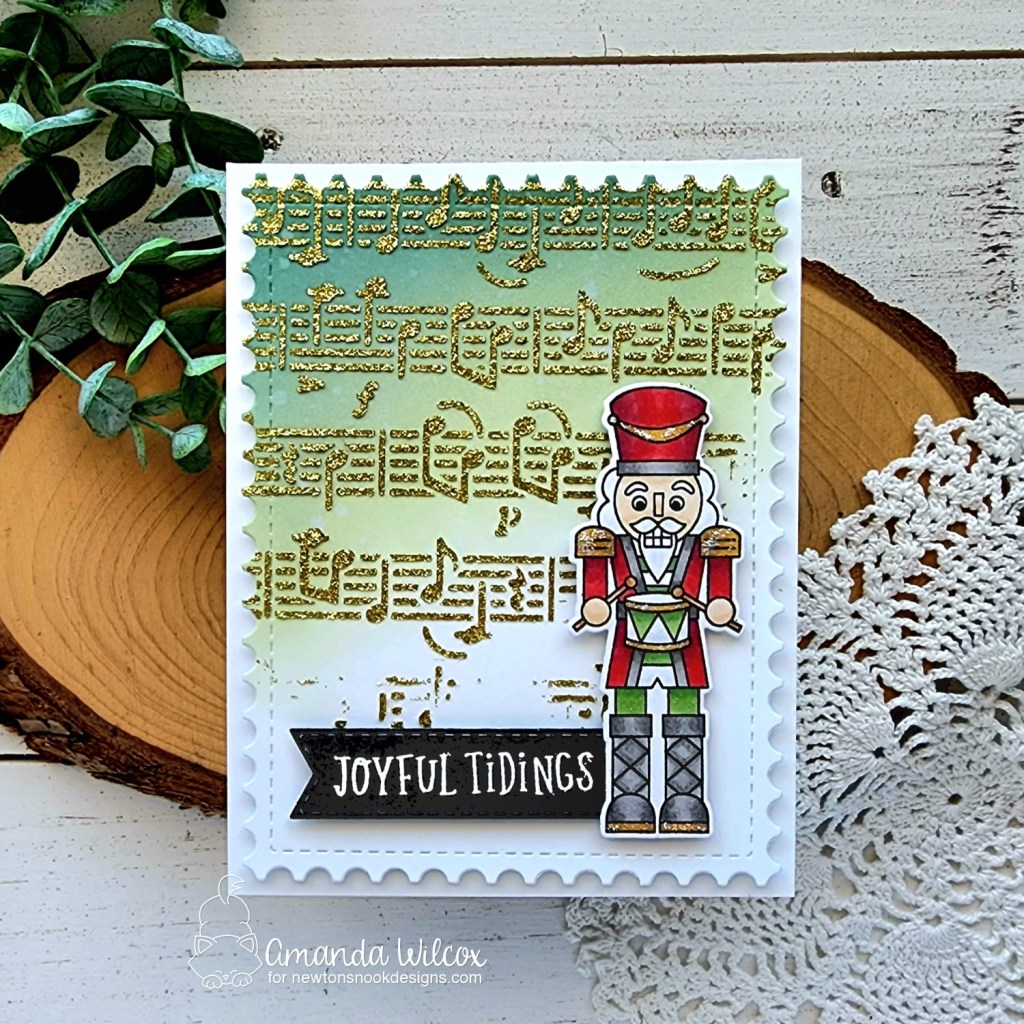
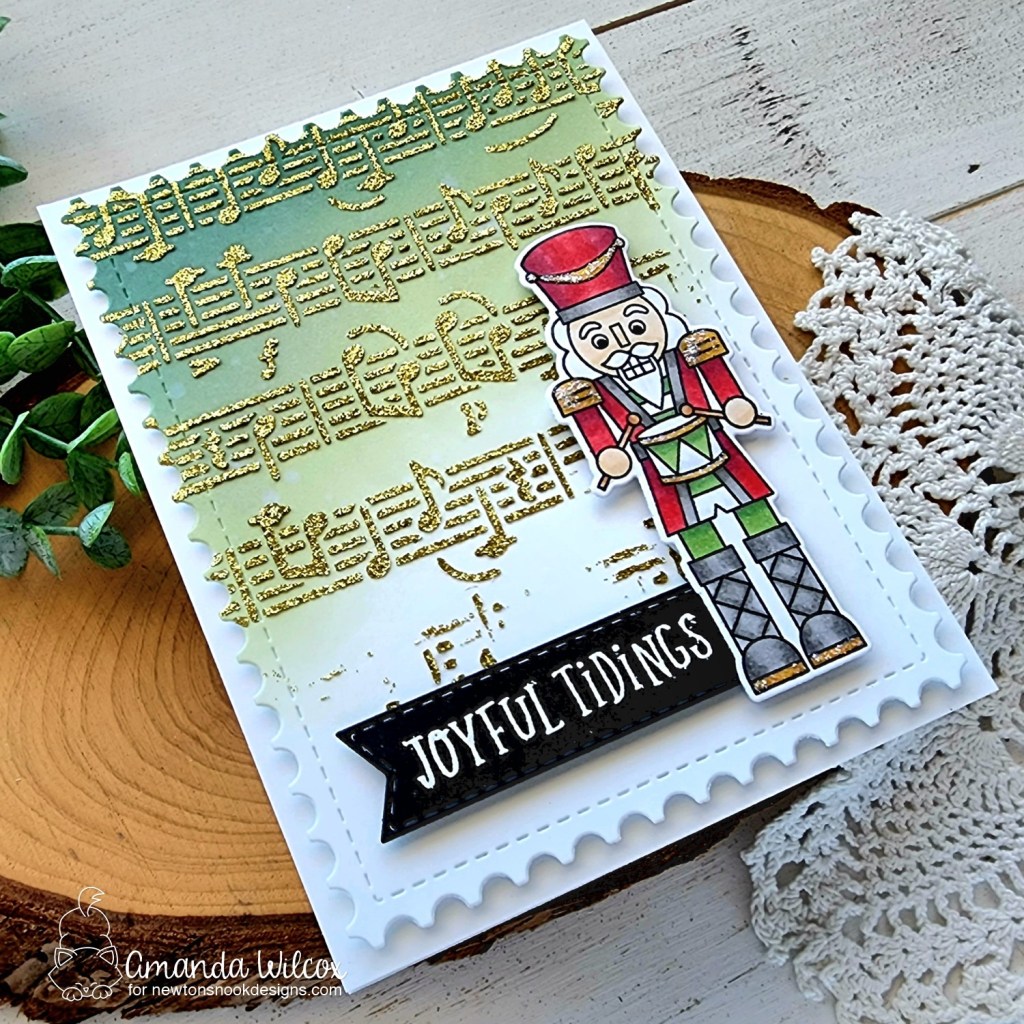
Hello everyone! Guess what today is?!?!? It’s the half-way mark to Christmas! Yeah, the years just seem to fly by. I don’t get it. But I couldn’t resist the temptation to dive into my Newton’s Nook Christmas stash and make a little nutcracker fun to share with you all.
I had a design in mind when I started this card but today I actually started with my background panel and found the copics to coordinate from there. The background is ink blended with distress oxide in rustic wilderness and bundled sage. I faded out to nothing at an angle as I came down. I spritzed the panel with water and blotted it dry before layering the Music stencil over the top and spreading gold glitz glitter gel through it.
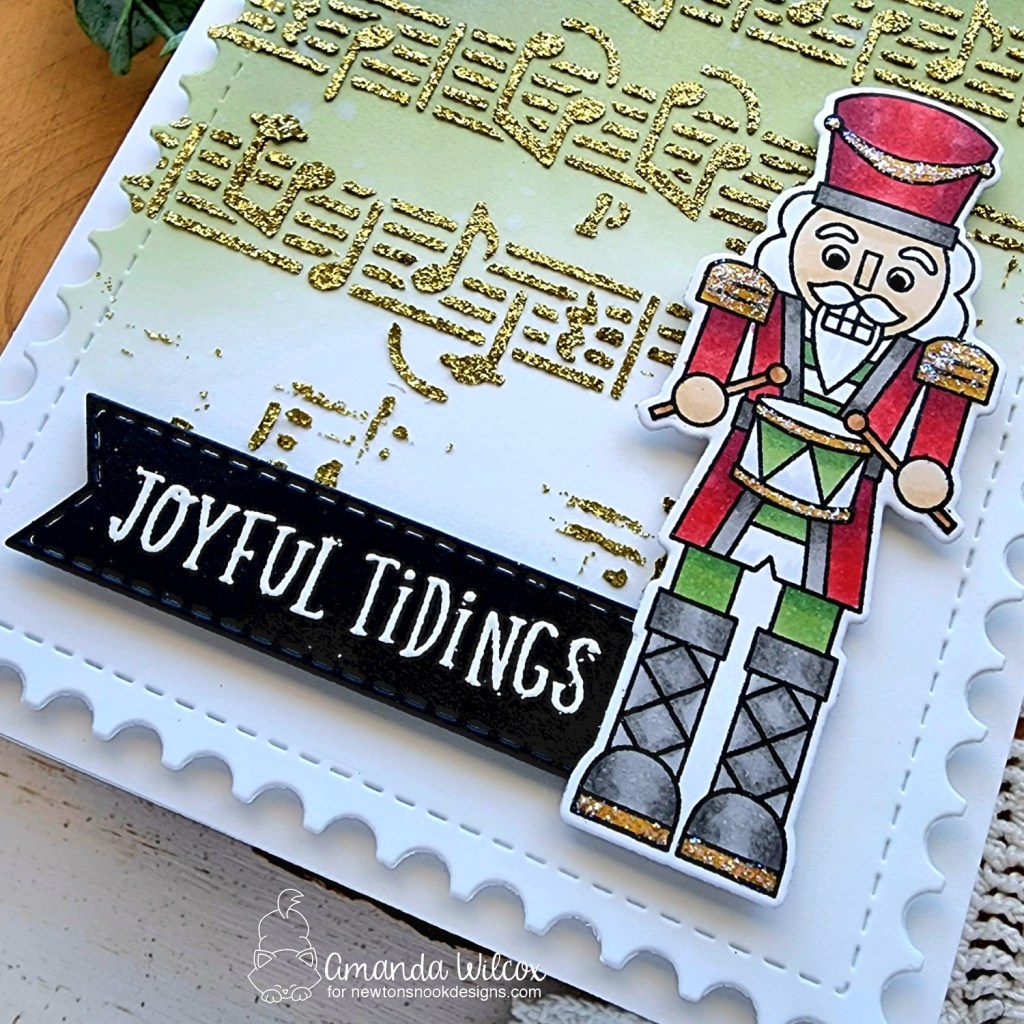
While the panel was drying, I stamped one of the nutcracker images and colored him with my copic markers. Then I used the coordinating die to cut him out and went digging for a different shaped sentiment. I love the sentiments in the set but I really wanted that banner to the left of him so I looked at all my Roundabout and Heartfelt sets, landing on this one from Heartfelt Holidays. I think it’s simple and nice to go with the feel of the card.
Since the Banner Trio dies are solid, I always die cut that part first, then stamp and heat emboss on the shape. At the beginning I kept forgetting and tried to blindly line things up but it never goes well. Lol.
With the glitz gel panel dry, I die cut it with the largest Framework die and popped it up on a white card base with foam tape. Then I glued the banner to the nutcracker, added foam squares to them and popped them up as well.
For finishing touches I came in with stardust Stickles on all the gold parts of the nutcracker. I wanted his gold areas to be shiny like the background. Last, I added black glaze pen to his eyes to make them raised and shiny. I really love that part.
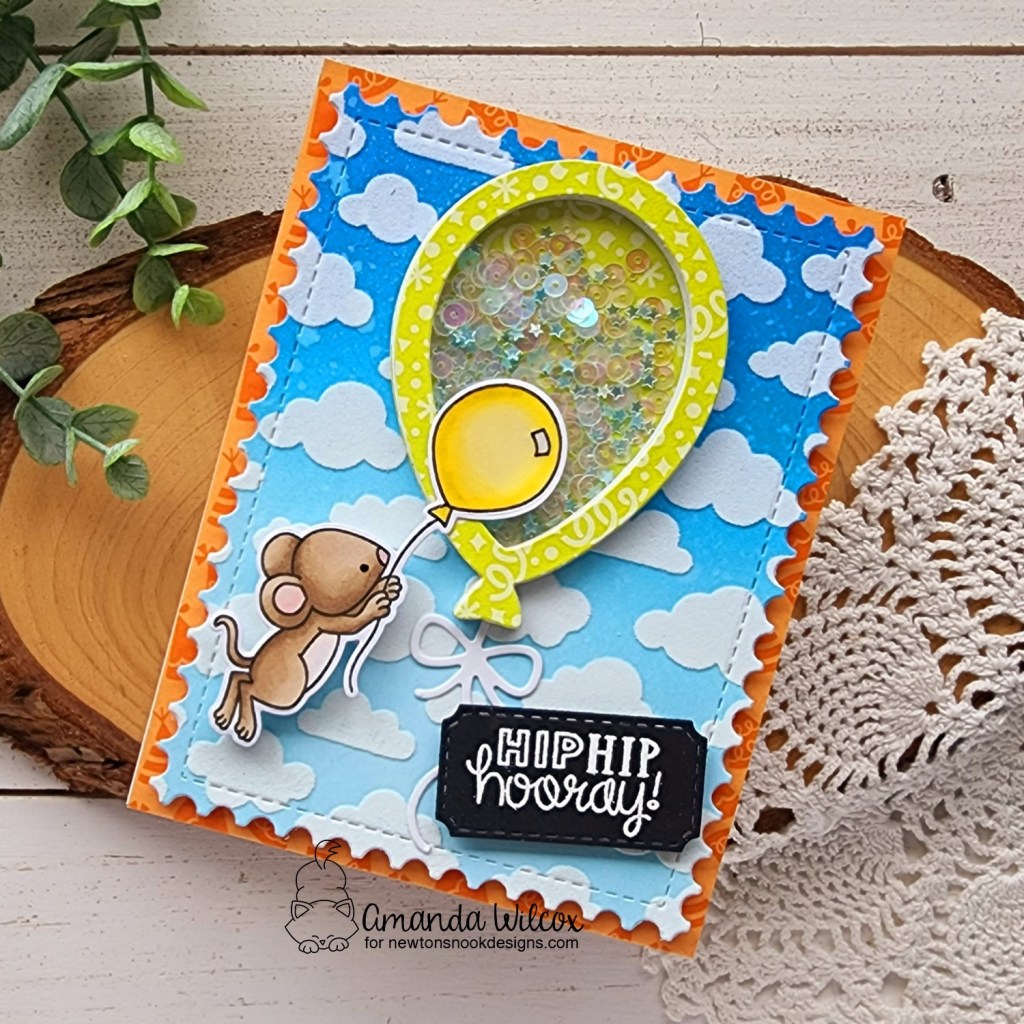
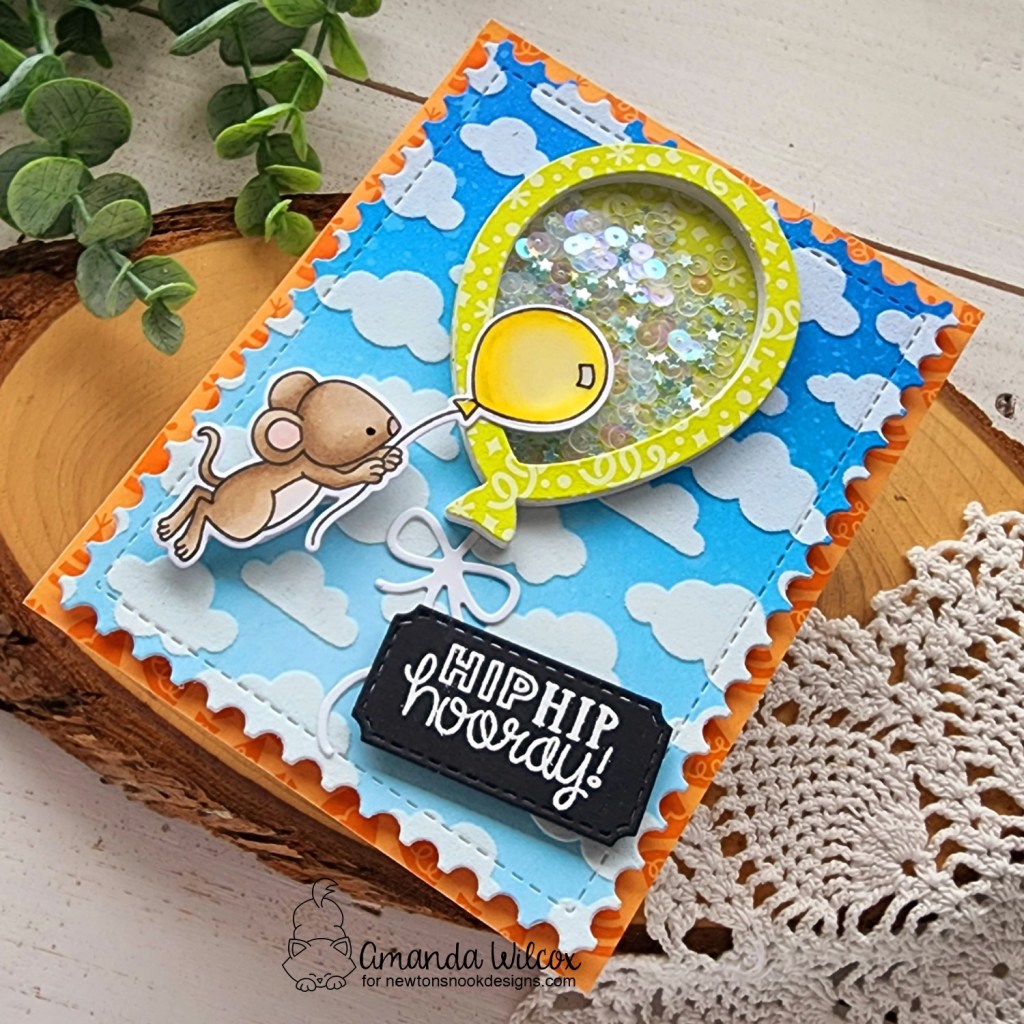
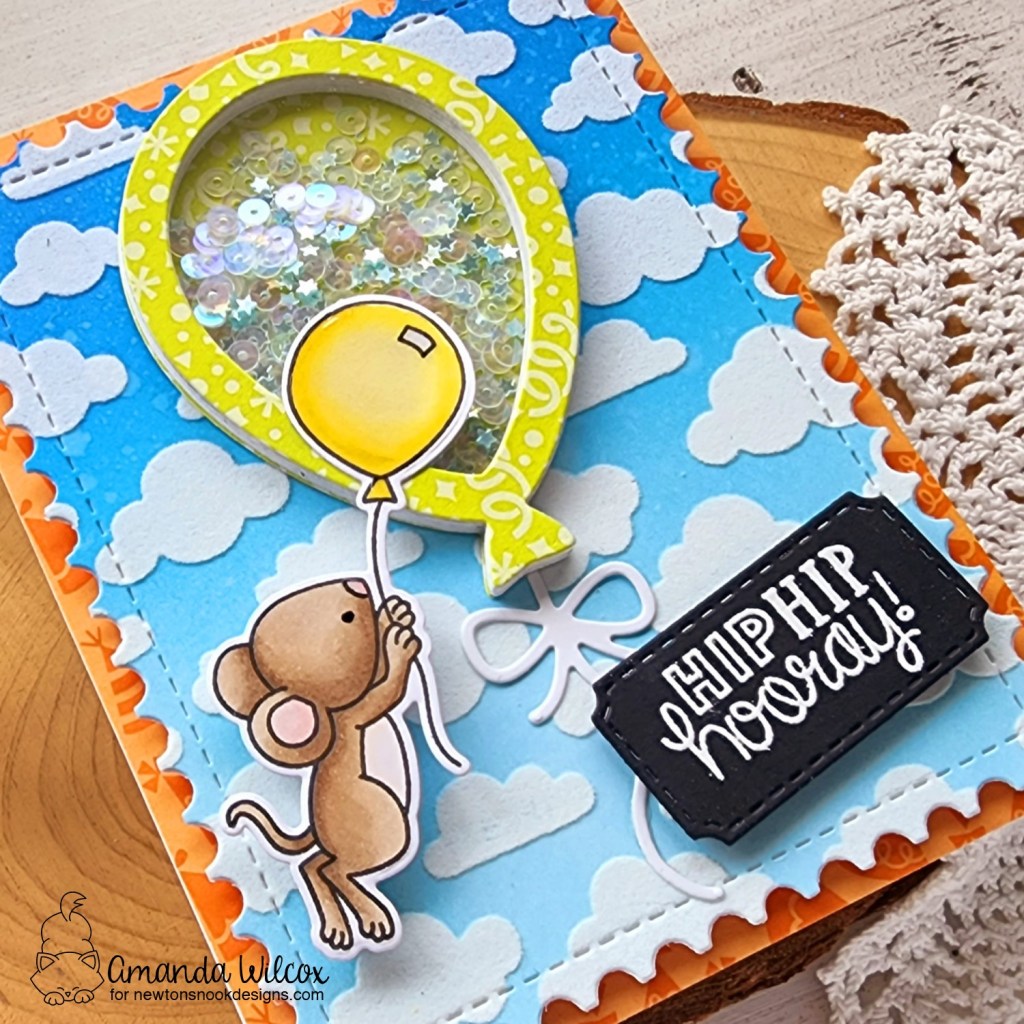
Hello everyone! Thanks for stopping by. Today I’m over on the Newton’s Nook blog sharing this really fun shaker card featuring products from the July Birthday Release! Be sure to check it all out if you haven’t yet. It’s an amazing release and I absolutely love everything!
For today’s card, I knew I wanted to pair this sweet image with the Balloon Shaker dies so I stamped and colored him right away. I used the coordinating dies to cut him out and started cutting and assembling the pieces to my balloon shaker. The top frame and bottom layer are both cut from a piece of paper in the new Birthday Party paper pad that released last week. The shaker bits are just sequins from my stash and I used the stacked die cut technique to create my shaker well in stead of foam strips.
For the background, I inked up a white panel with distress oxide in blueprint sketch, salty ocean and tumbled glass. I spritzed it with water and blotted it dry. Then I added the Cloudy Sky stencil over the top and spread Thermoweb transfer gel blanco through it. I removed the stencil, cleaned up and waited for it to dry. Fast forward, to a heated up laminator and dry transfer gel – I cut a piece of white latte deco foil flock transfer the size of the panel, layered it on top of the stenciled panel, placed them in a Craft & Carrier sheet and ran it through my laminator.
I die cut the flocked panel with the largest Framework die. Then cut the smallest die in that set from black cardstock. Next, I stamped and heat embossed a sentiment from the Birthday Oval set in white on it.
To assemble my card, I cut an orange piece of patterned paper and added it to a white care base. Then I popped the stenciled panel up with foam tape and glued my shaker directly to that with liquid glue. I popped the mouse and sentiment up with foam squares.
For finishing touches, I added black glaze pen to the mouse’s eye and glossy accents to his nose and the whole balloon.
Welcome, welcome everyone! It’s the first day of release reveals for an absolutely incredible birthday release with Newton’s Nook! They are turning 9 years old and this birthday release takes the cake! Let’s get started looking at what we have today.
Birthday Party Paper Pad
Bokeh Balloons stencils
Birthday Mice stamps and dies
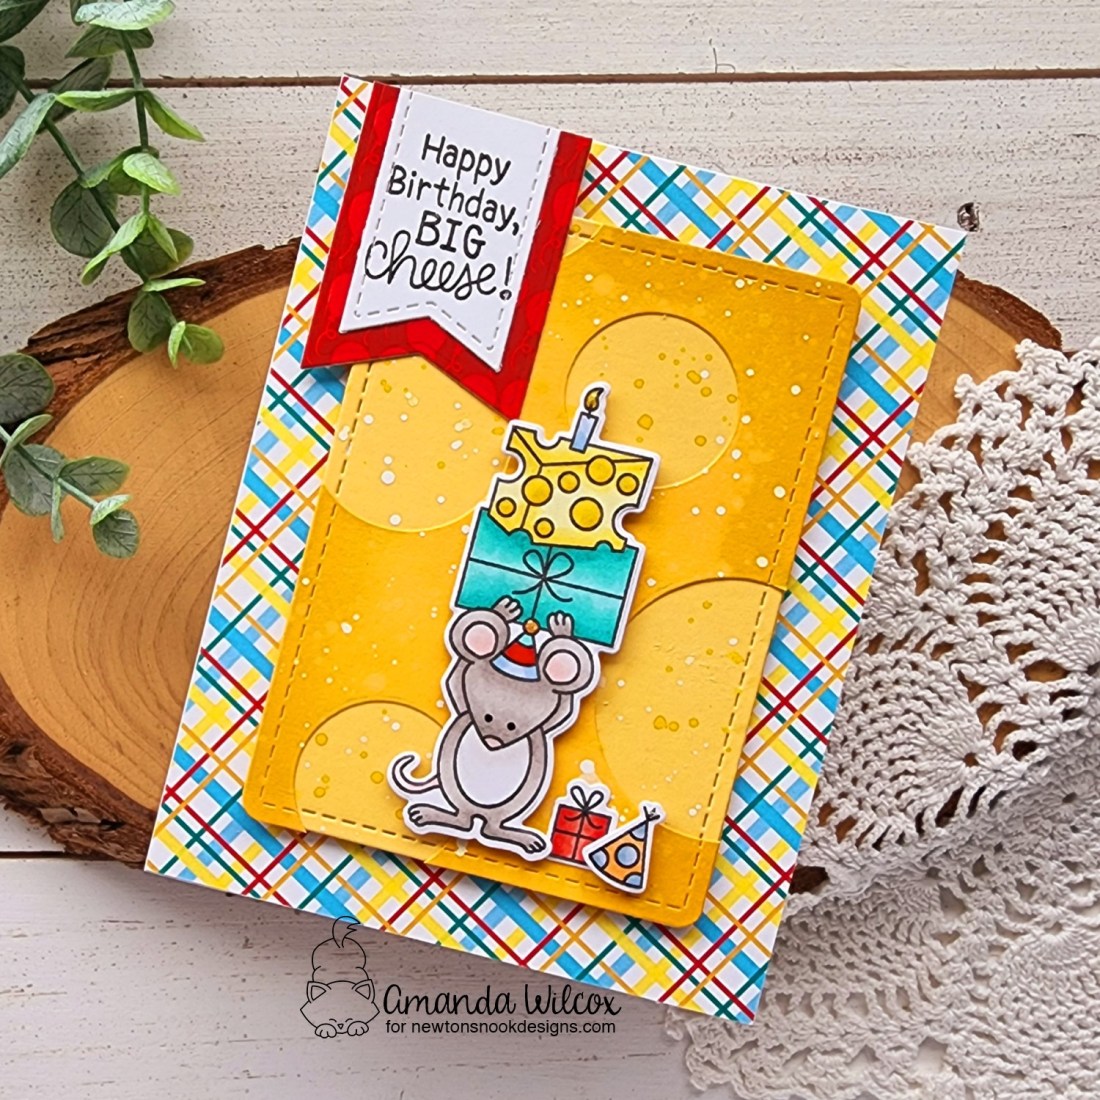
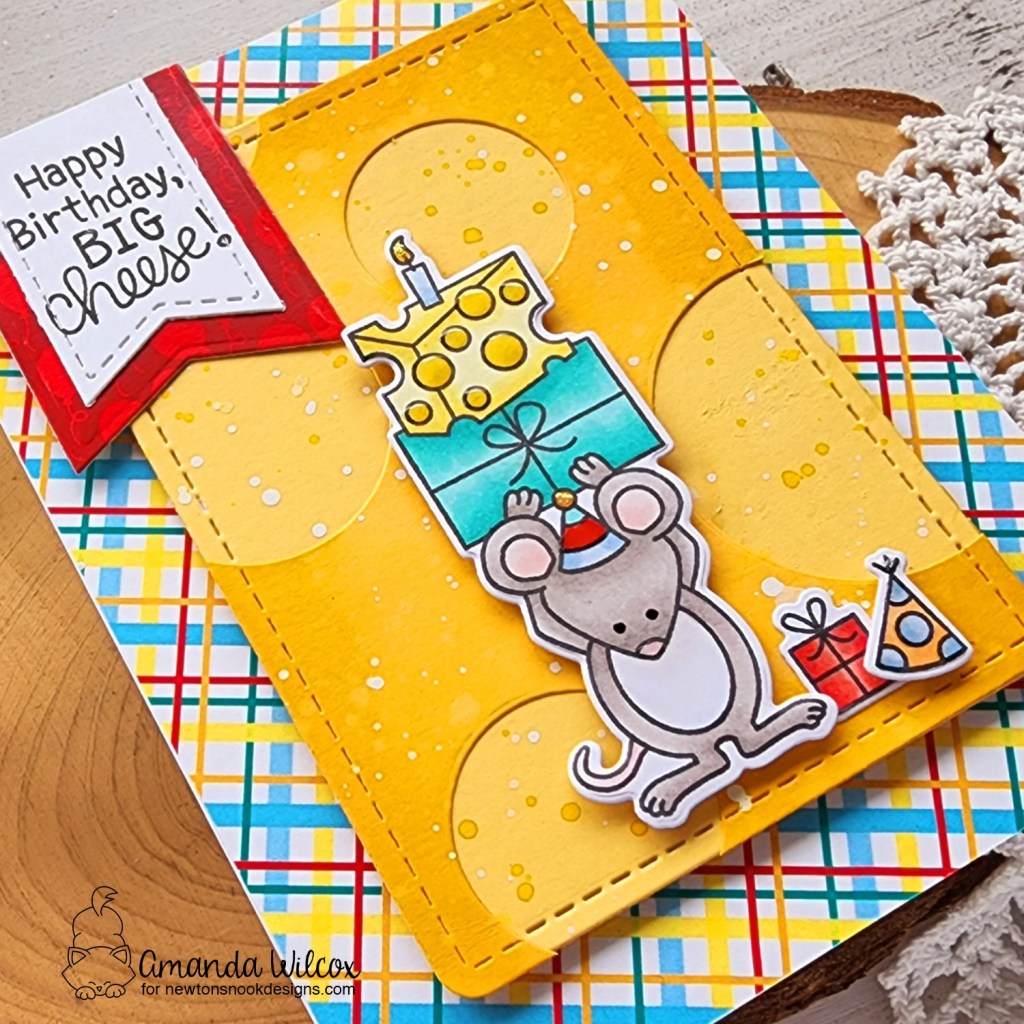
I have a really fun card to share with you today featuring the new paper pad and one of the absolutely Birthday Mice images. Don’t worry, I’ll have so much more to share through the week along with the rest of the team.
As soon as I saw this set, I knew I had to create a giant cheese to go with these fun mice! So I immediately started my card today with that. I used dies from Frames & Flags, Frames Squared and Circle Frames to create a two-layer cheese look. I inked the edges of the yellow cardstock for extra dimension and flicked yellow ink and white paint on the panel too. I love the texture it gives!
I chose a piece of paper from the Birthday Party paper pad and used it as a guide to color the images I stamped out from the set. Once they were colored, I used the coordinating dies to cut them out. I trimmed the plaid paper to A2 size and adhered it to a white card base and added my cheese panel with foam tape. Then I added the images with foam squares too. You all know I like my dimension!
Next, I cut two banners from Frames & Flags die set – the red flag is from the Birthday Party paper pad. Then I stamped the sentiment on the white one and glued them together. I added them to the top left with a combination of foam squares and liquid glue.
For finishing touches I added glossy accents to some parts of the images and a little unicorn Stickles to others. I love the combo of shimmer and shine between the two.
Would you like to win the “Birthday Mice Stamp Set? This stamp set will be given away to ONE lucky winner!
Here’s how to win: Comment on the NND blog and Design Team blogs (see list below)! The winner will be chosen at random from the collective reveal posts. Make sure to check out each of their blogs and comment for your chance to win. You will not know which blog has been chosen so the more you comment on the better your chances are of winning! You have until Thursday July 14th at 9pm ET to comment — winners will be announced on the blog post on Friday July 15th.
Check out all the awesome Design Team Blogs below to enter:
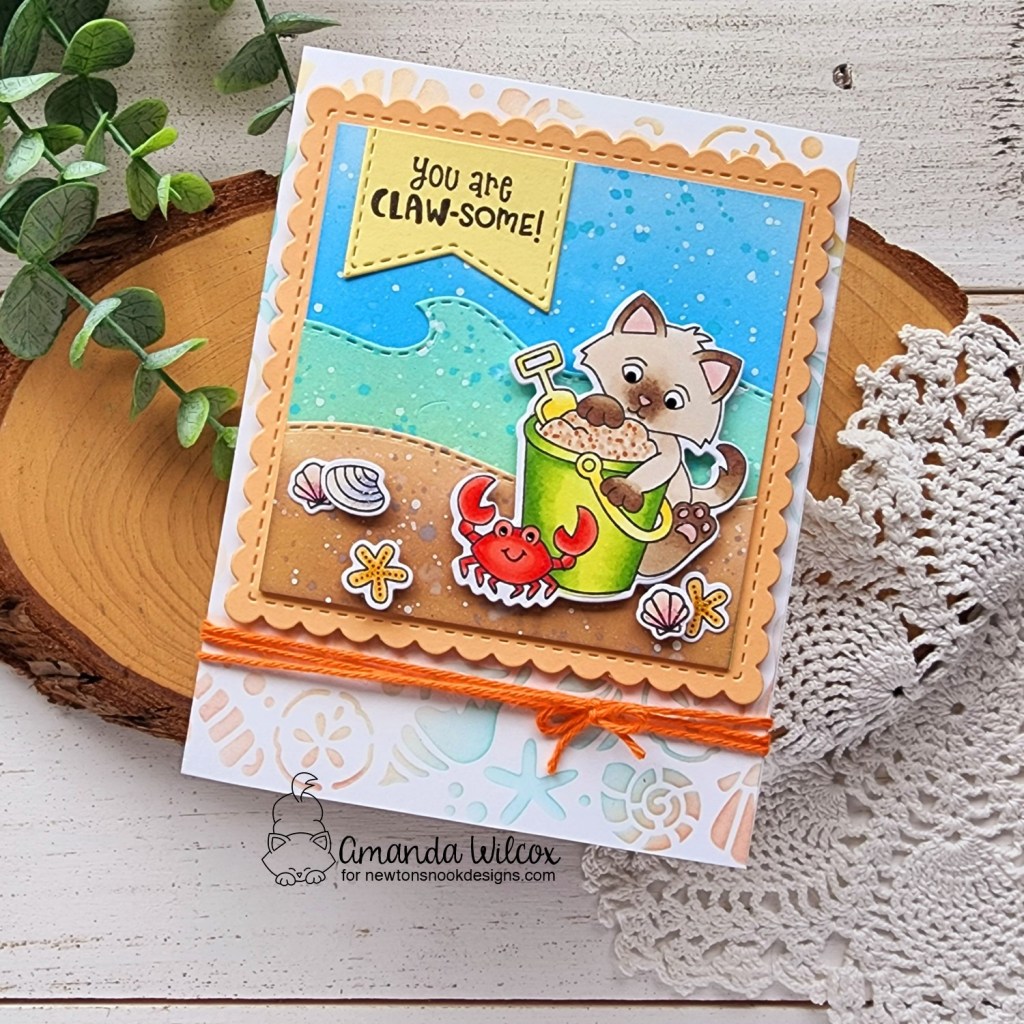
Hello everyone! I’m over on the Newton’s Nook blog today sharing some fantastic summer-themed inspiration using those adorable little kittens playing on the beach.
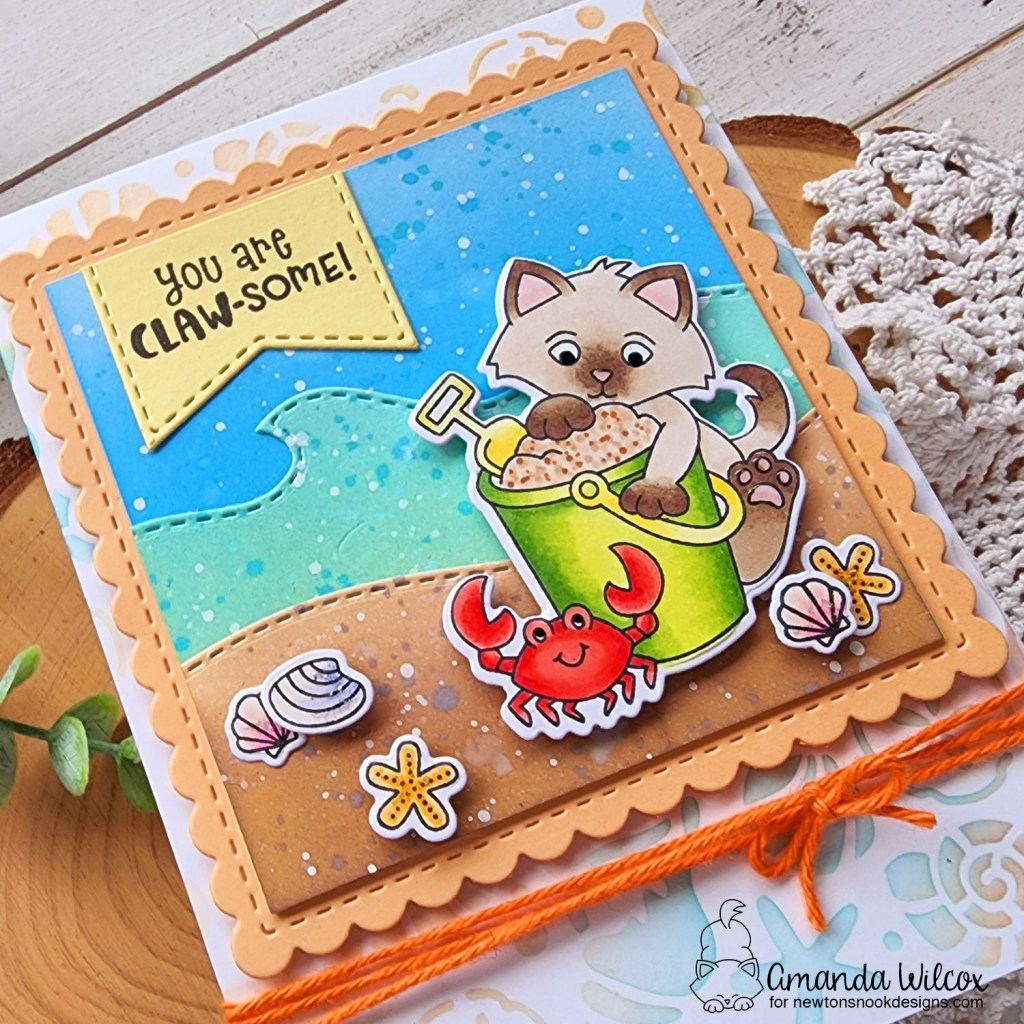
To start my card today, I used my stamps and dies to lay out a mini scene using the Frames Squared dies and Kitten Beach stamps. I figured about how many images I need to fill my scene and then started stamping things. I used copic markers to color them all in and then the coordinating dies to cut them out.
I set them aside while I worked on creating my scene panels using distress oxide inks and the sea border and land border dies.
I started with two white squares measuring about 3.5 inches. I inked the top of one with tumbled glass and salty ocean, then one half of the other with salvaged patina and cracked pistachio and, finally, the other half with tea dye and gathered twigs. I used the sea and land borders die to cut the dual colored square into two sections for my sand and sea and commenced with all the splattering you can imagine!
The sky and sea were splattered with salty ocean and salvaged patina and spritzed with water. The sand was splattered with gathered twigs and spritzed with water. Then all of it was splattered with white acrylic paint for good measure, and fantastic texture too. Lol. I love this part! I used liquid glue and adhered the layers, then added them to an orange scalloped square I cut with the Frames Squared dies.
To resemble the sun in the sky, I cut a flag from Frames & Flags and stamped my sentiment on that. I trimmed it down and glued it in place while also adding all of my images to the scene with either liquid glue or foam squares.
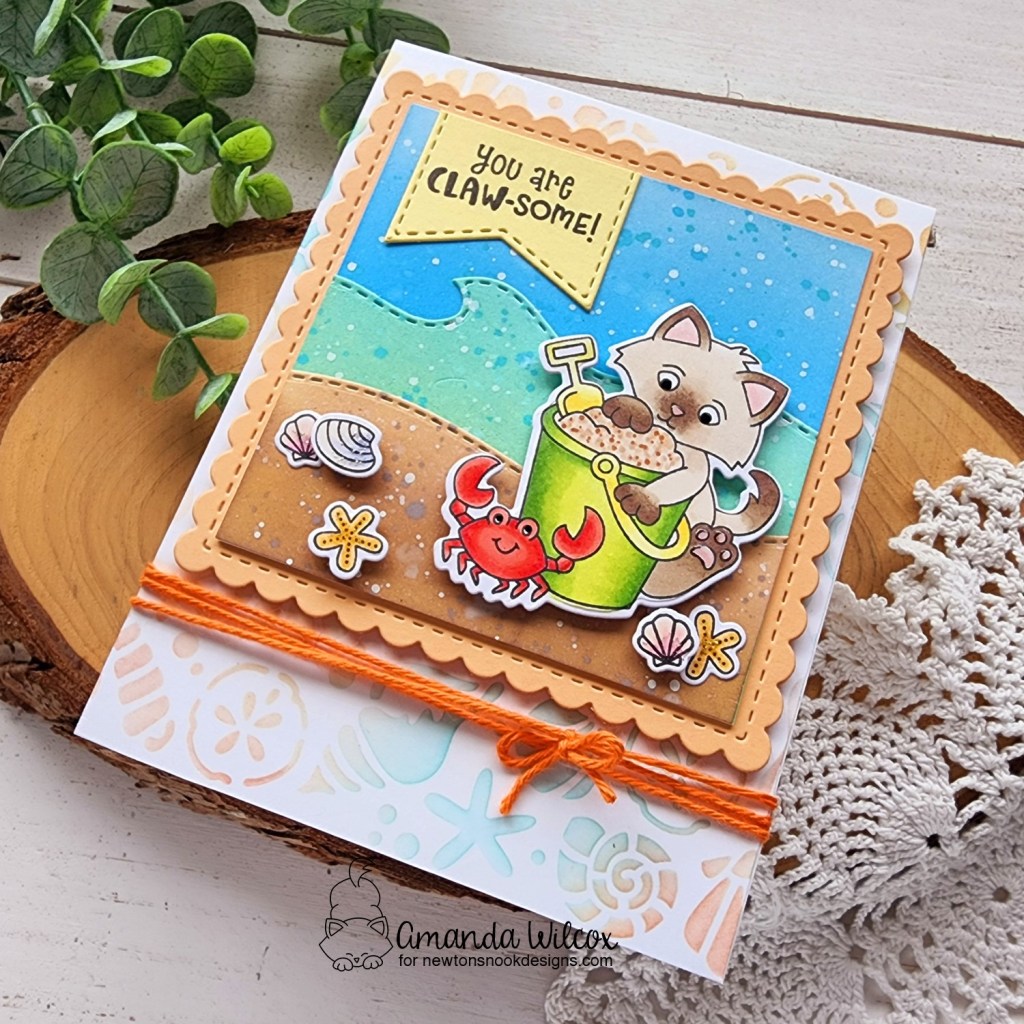
At this point I switched from a square card to adding some fun stenciling and creating a regular A2 size card. I took a white panel and layered the Seashells stencil over top. I inked it with light peach and teal inks and can’t get over how much I love the result! It’s gorgeous and so fun for this card.
Okay, let’s wrap this cute card up. I added the stenciled panel to a card base, then popped the scalloped square up with foam tape. Finally, I wrapped some orange twine around the bottom and tied a bow before adding black glaze pen to the critter eyes, glossy accents to noses and toe beans and unicorn Stickles to the seashells and sea stars.
Phew! We made it! That was a lot of layers but isn’t this card so much fun?!? I love it!
Welcome everyone! Super excited to be starting the release reveals for the Newton’s Nook June release! Get your sunscreen out because we’re ready for summer!!! Let’s take a peek at what’s revealing today.
Summertime paper pad
Palm Tree Line stencil
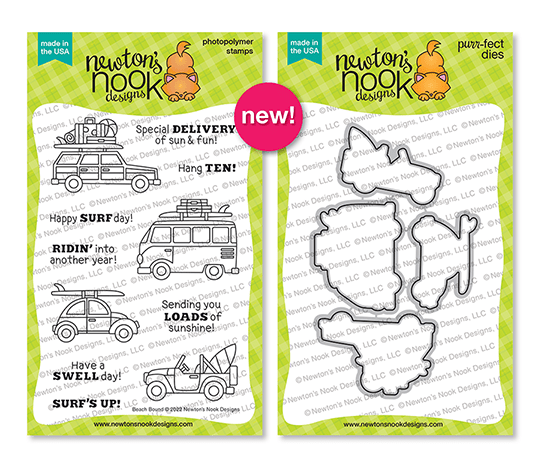
Beach Bound stamps and dies
Isn’t this an incredible way to kick things off??? I can tell you right now, I’m obsessed with this paper pad and having so much fun with everything else too! I have two cards to share with you so let’s get started.
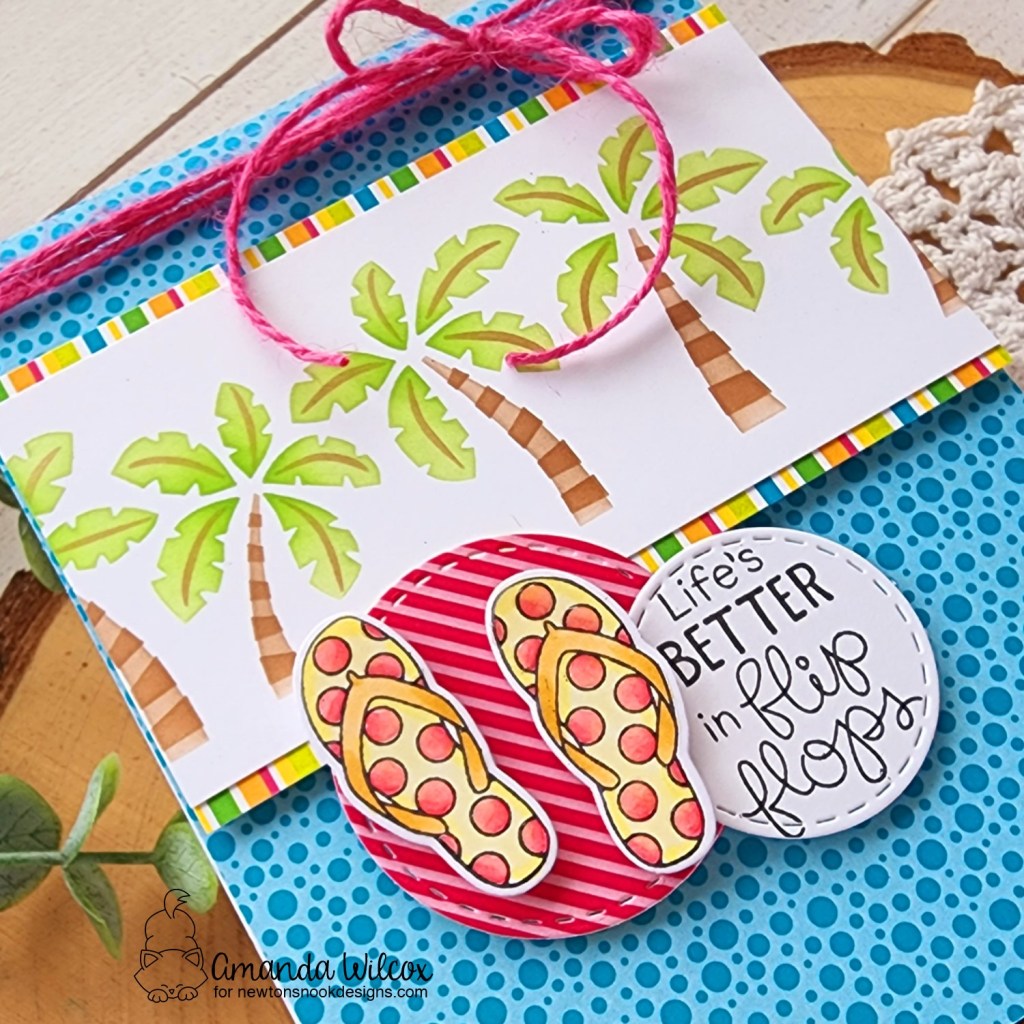
For my first card, I inked up the new palm tree line stencil with various dye inks and trimmed it into a strip. Then I lined the panel with some strips from the paper pad. I popped this up on an A2 size piece of that fun blue bubble print from the paper pad but I thought it needed something else.
I just adore those flip flops from Flip Flop Life so I stamped and colored those, then used the coordinating dies to cut them out. I thought it would be fun to mount them on a circle cut from another print in the paper pad so I used a circle die from Circle Frames and another from Frames Squared for that and my sentiment and added everything with foam squares.
I finished the card off with glossy accents on the flip flops and tied some pink twine around the top of my card.
You better apply a second layer of sunscreen before we move on. You’re going to get a sunburn. Lol.
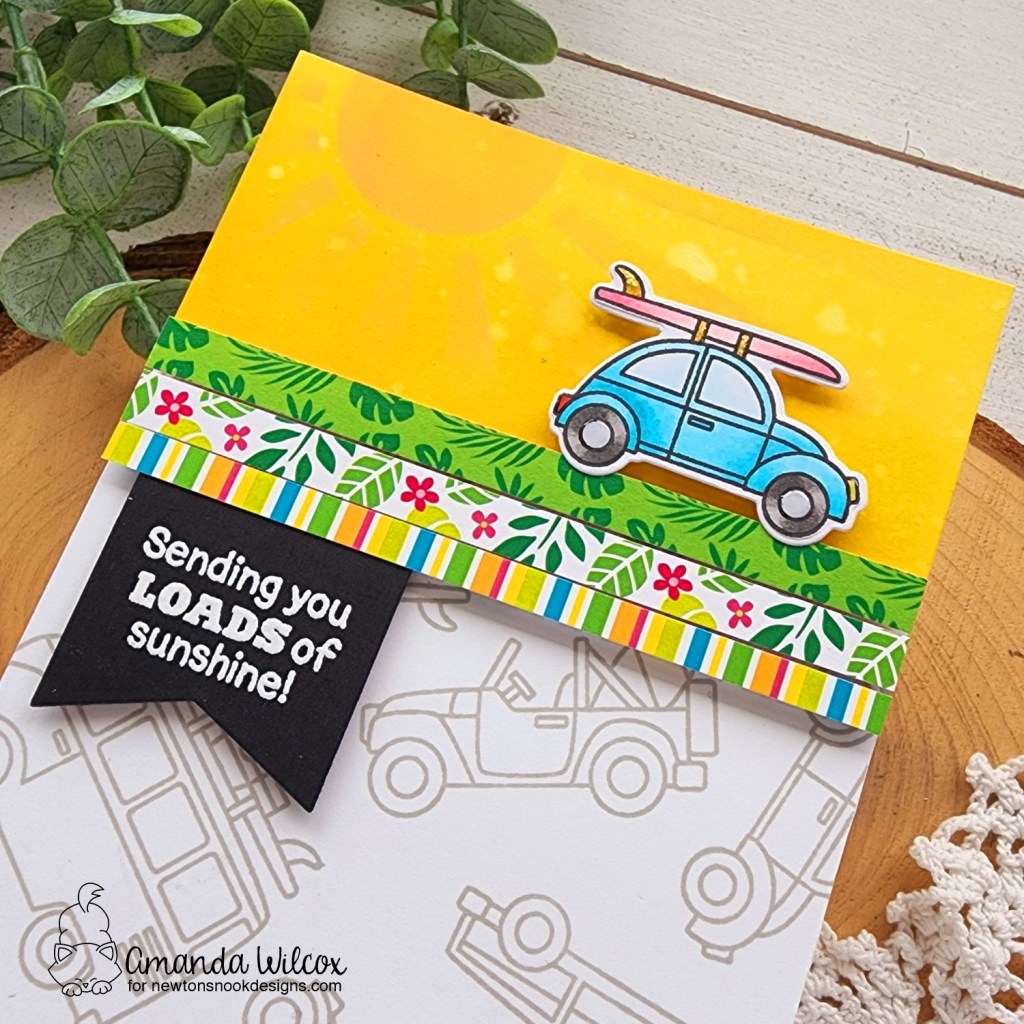
For this card, I took all the vehicles from Beach Bound out and created my own patterned paper stamping them in gray on a white panel. Then I picked one – I just love that Bug – stamped and colored it with copics, then used the coordinating die to cut it out. This time I cut 3 1/4 inch strips from various prints in the paper pad for the border under my car. But the background with the other cars was a little distracting.
To remedy that, I took a strip of white cardstock and inked it up with mustard seed distress oxide ink and spritzed it with water. Then, to give it a little interest I layered the Sunscape stencil over the top and inked a little sunshine in the top left with spiced marmalade distress oxide ink. It’s subtle but I love it.
Now, to assemble all my layers, I used liquid glue to add the yellow panel to the top of the car panel. Then I popped my cute blue bug and the strips of paper up with foam squares and strips. Last, I die cut a banner from the Frames & Flags die set and heat embossed a sentiment from Beach Bound on it. I trimmed the top off and slid it under the striped strip, securing it with foam squares.
For finishing touches I added some glossy accents to the wheels and lights on the car and unicorn Stickles to parts of the surf board.
Would you like to win the “Beach Bound” Stamp Set? This stamp set will be given away to ONE lucky winner!
Here’s how to win: Comment on the NND blog and Design Team blogs (see list below)! Thewinner will be chosen at random from the collective reveal posts. Make sure to check out each of their blogs and comment for your chance to win. You will not know which blog has been chosen so the more you comment on the better your chances are of winning! You have until Thursday June 16th at 9pm ET to comment — winners will be announced on the blog post on Friday June 17th.
Check out all the awesome Design Team Blogs below to enter:
Hey friends! Today I’m over on the Newton’s Nook blog sharing an adorable card that requires no coloring. I used a new paper pad and die set to create adorable kitty images and a fun sentiment to tie it all together.
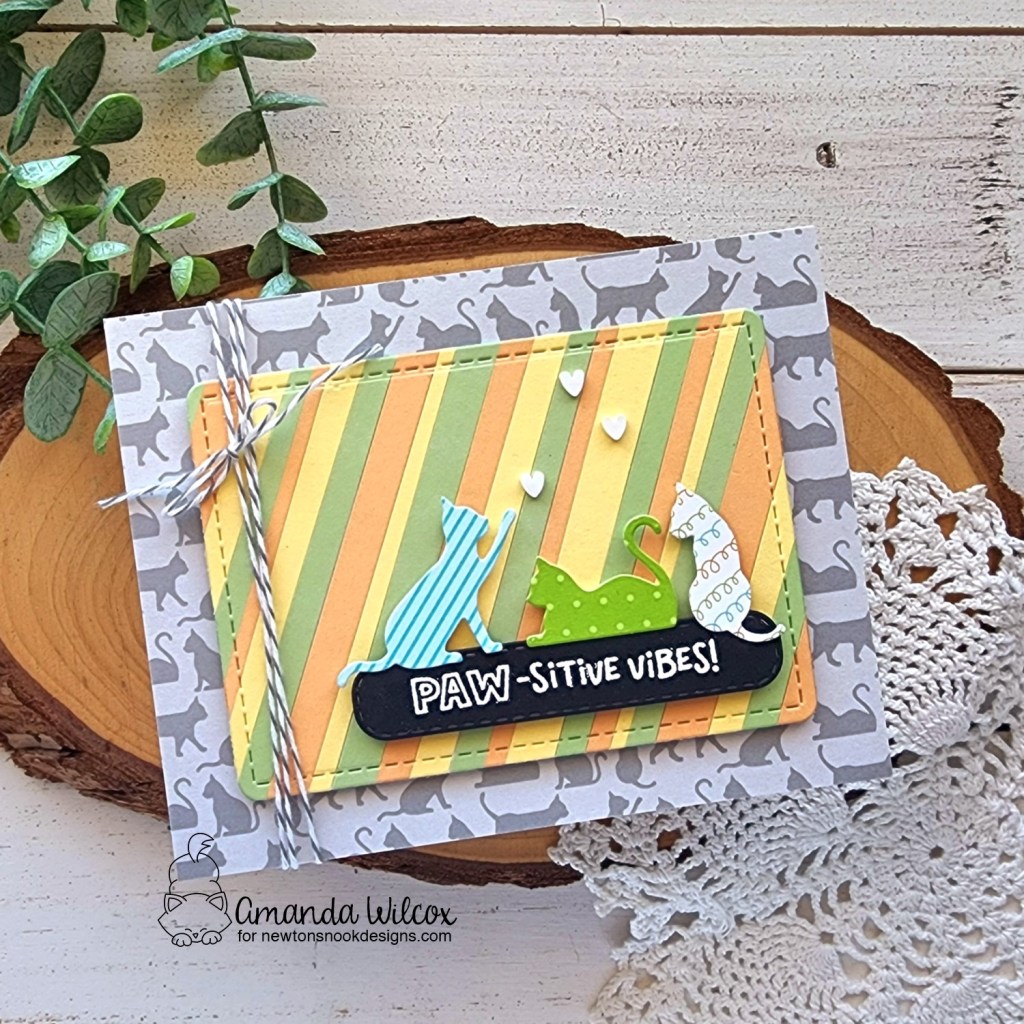
This whole card started with me choosing a simple color palette and cutting strips of cardstock at random widths to create a background. I adhered the strips to a piece of copy paper with tape runner and used the rounded rectangle in the Frames & Flags die set to cut it out. After looking at the panel cut out, I realized I had chosen colors that go great with the new A Cat’s Life paper pad! So I ran with it.
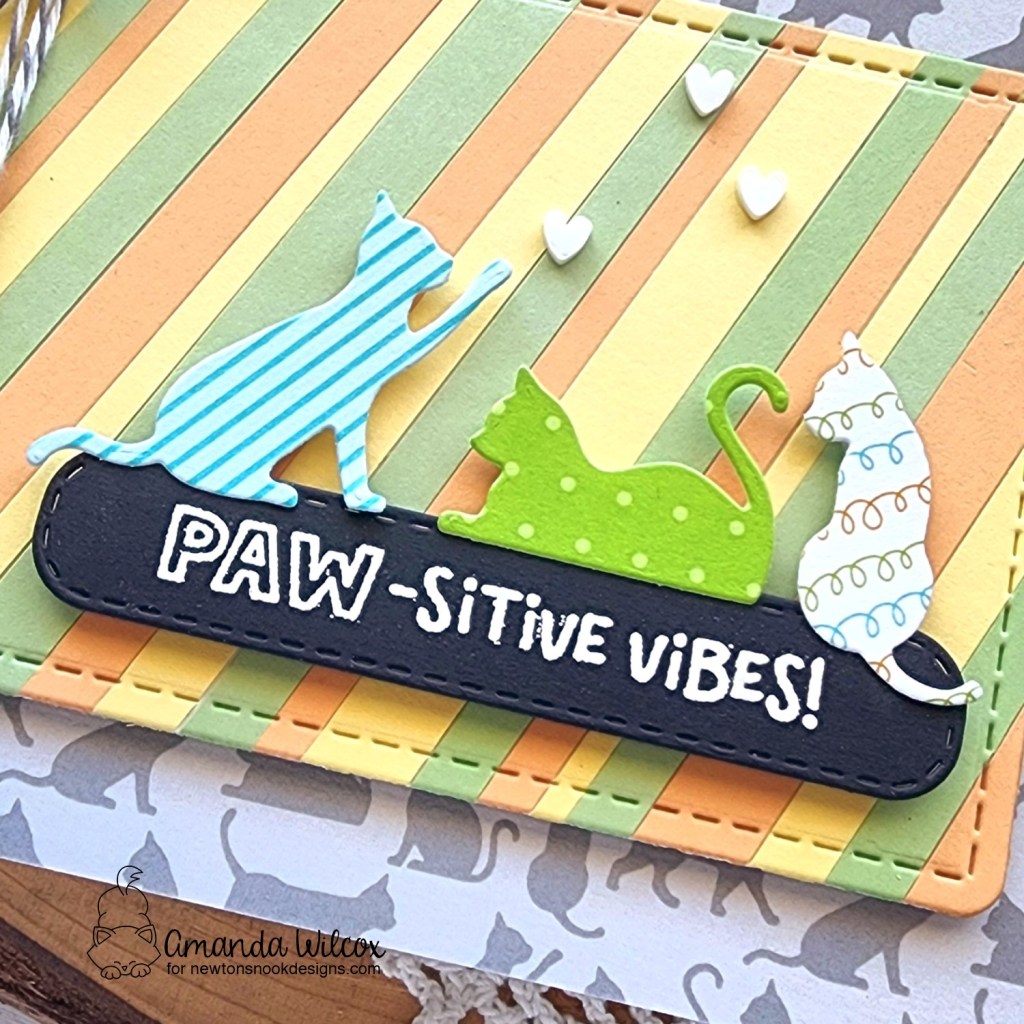
I chose a neutral colored piece from the pad for my card front and glued it down. Then popped the striped panel up with foam tape. Next, I chose 3 more patterns of paper and cut the Cat Silhouettes from them. I haven’t even cut these dies apart yet, and just cut them all from each pattern, keeping the rest for another project later on.
Next, I chose a sentiment from Heartfelt Meows and heat embossed it on a banner from the Banner Trio die set. I added the kitties and sentiment with foam squares onto the striped panel.
For finishing touches, I glued 3 white hearts from the Twiddler’s Nook Sweethearts clay embellishment mix above the cats and tied some gray twine around the left side of the card front.
Super simple and really fun with all of the patterns and textures together!