Newton’s Nook – March Release Day 1

YIPPEE!!!! It’s the start of the Newton’s Nook March Release reveals and I’m so excited to share everything that I’ve created with you! Today we have a few new products to reveal so let’s not waste any time.

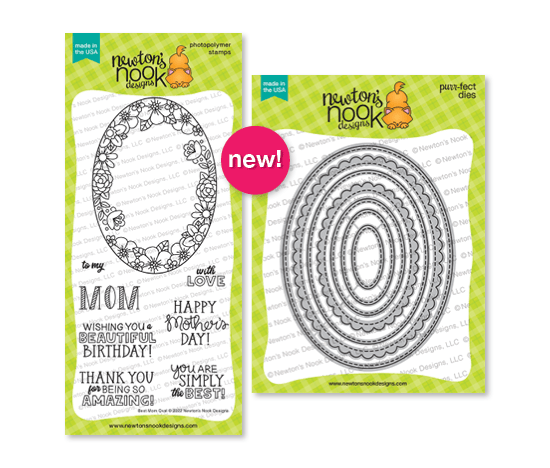
Best Mom Oval stamps and Oval Frames dies

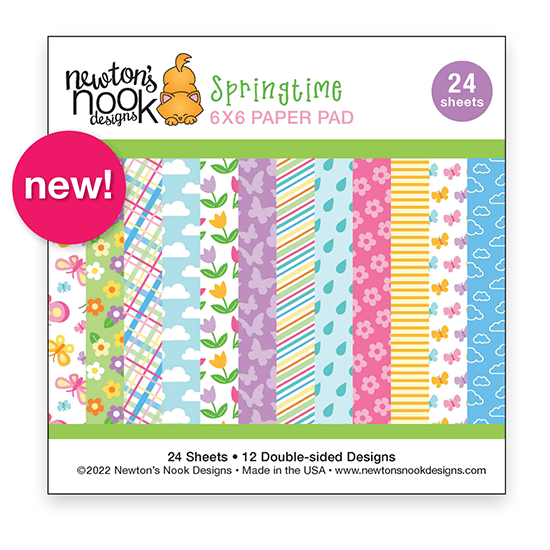
Springtime Paper Pad

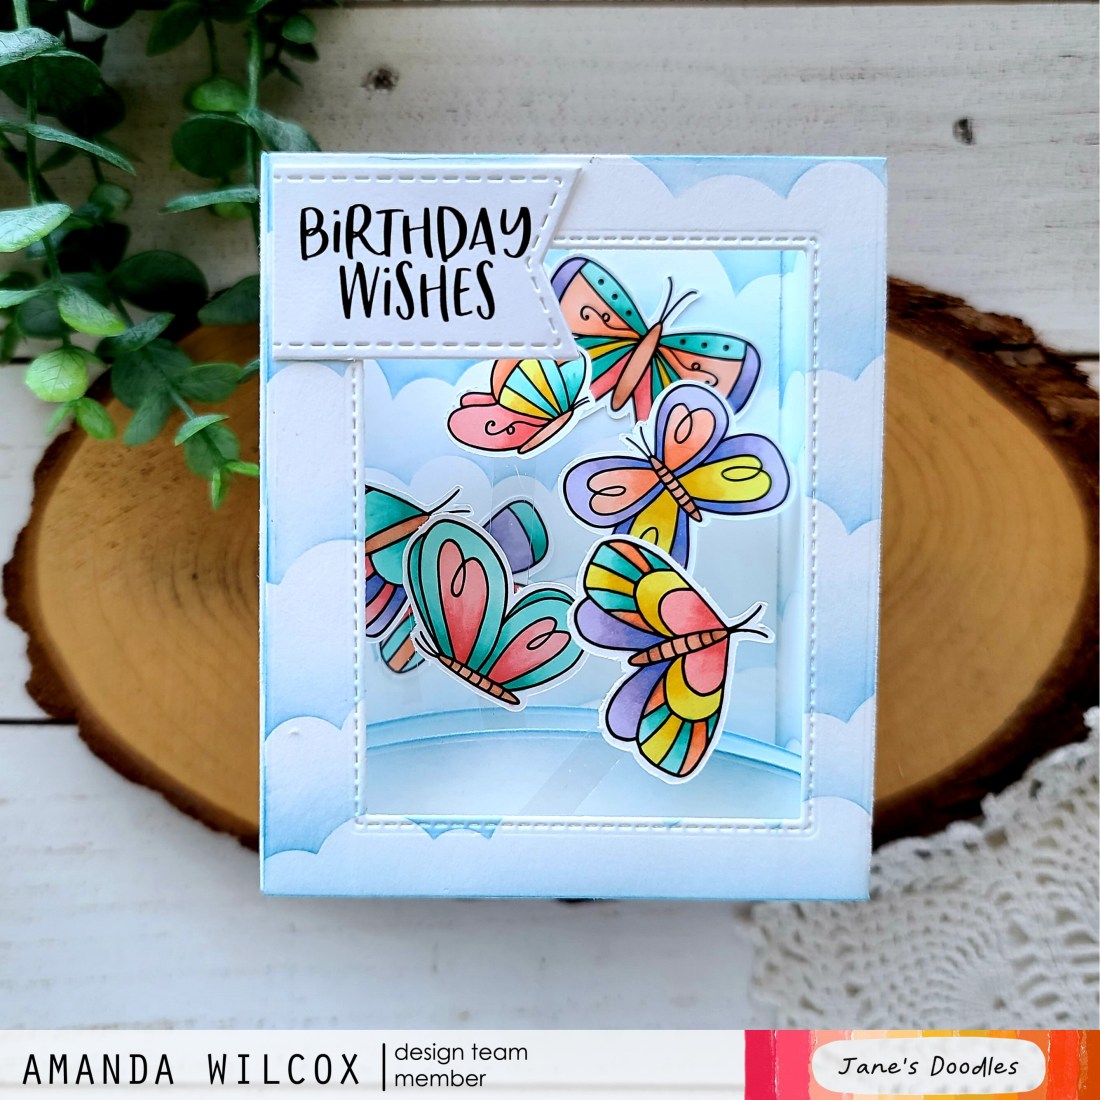
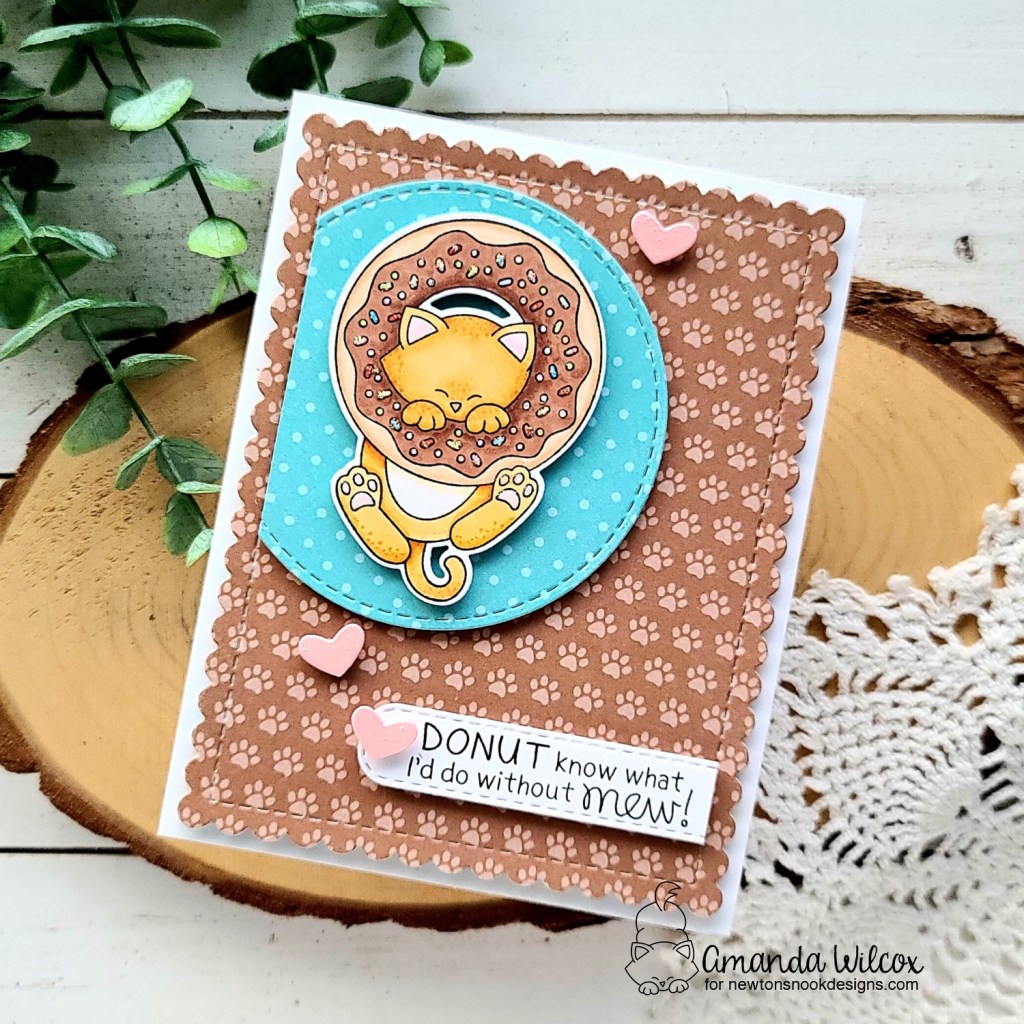
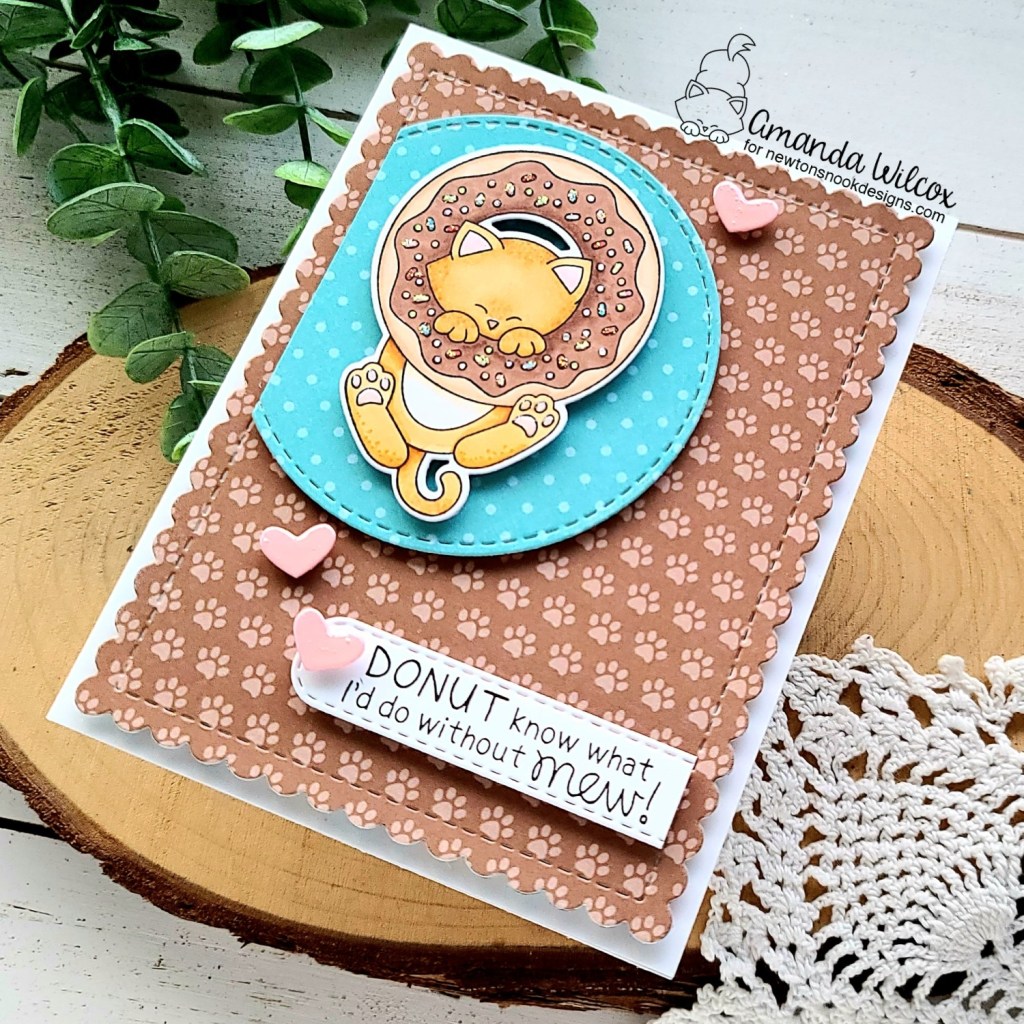
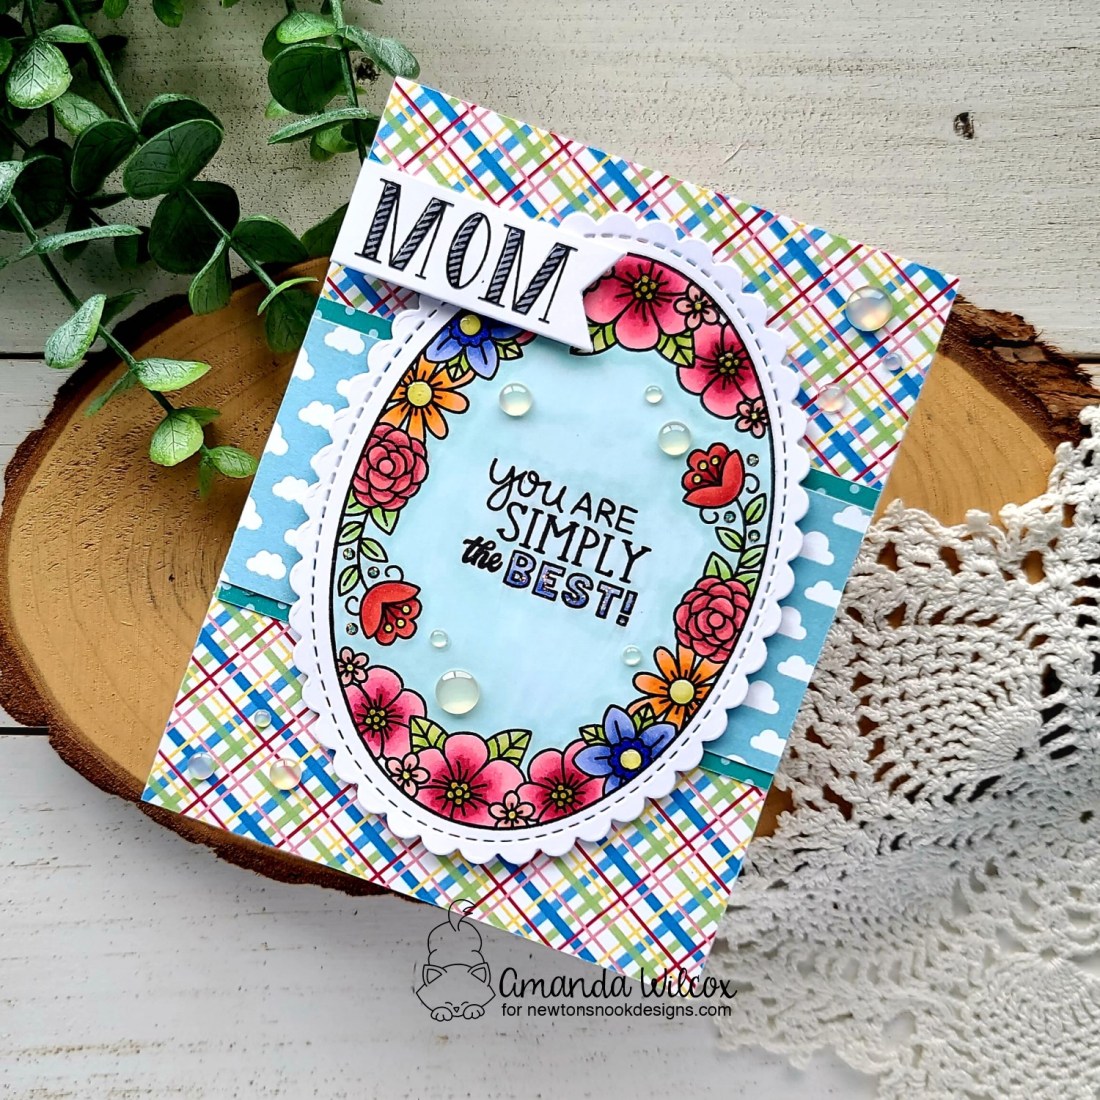
Isn’t this such an awesome start to the release?!? I just love all the possibilities with all of these products! I have one card to share with you today featuring all 3 products.

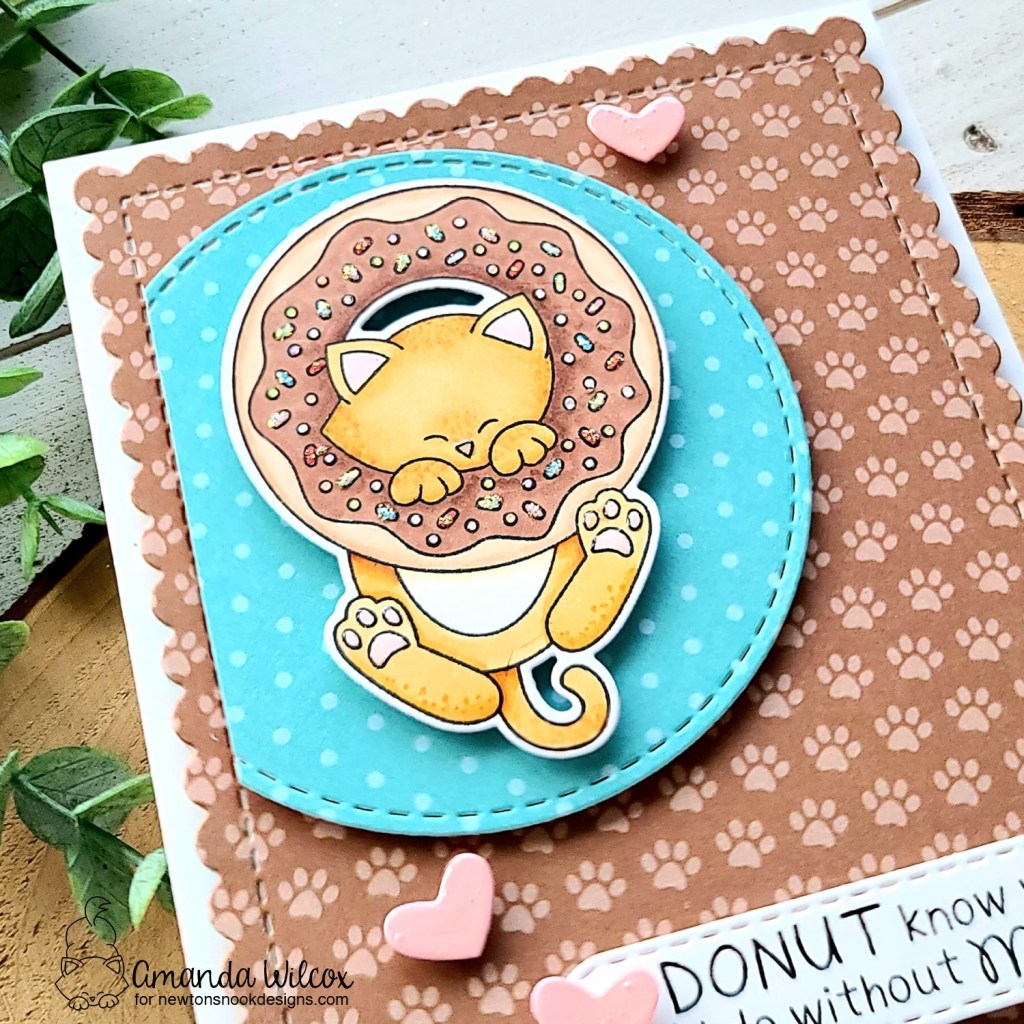
To start my card, I pulled out the plaid paper from the paper pad and used it as inspiration to color my Best Mom Oval image with my copic markers. Once that was finished, I used the new Oval Frames dies to cut it out.

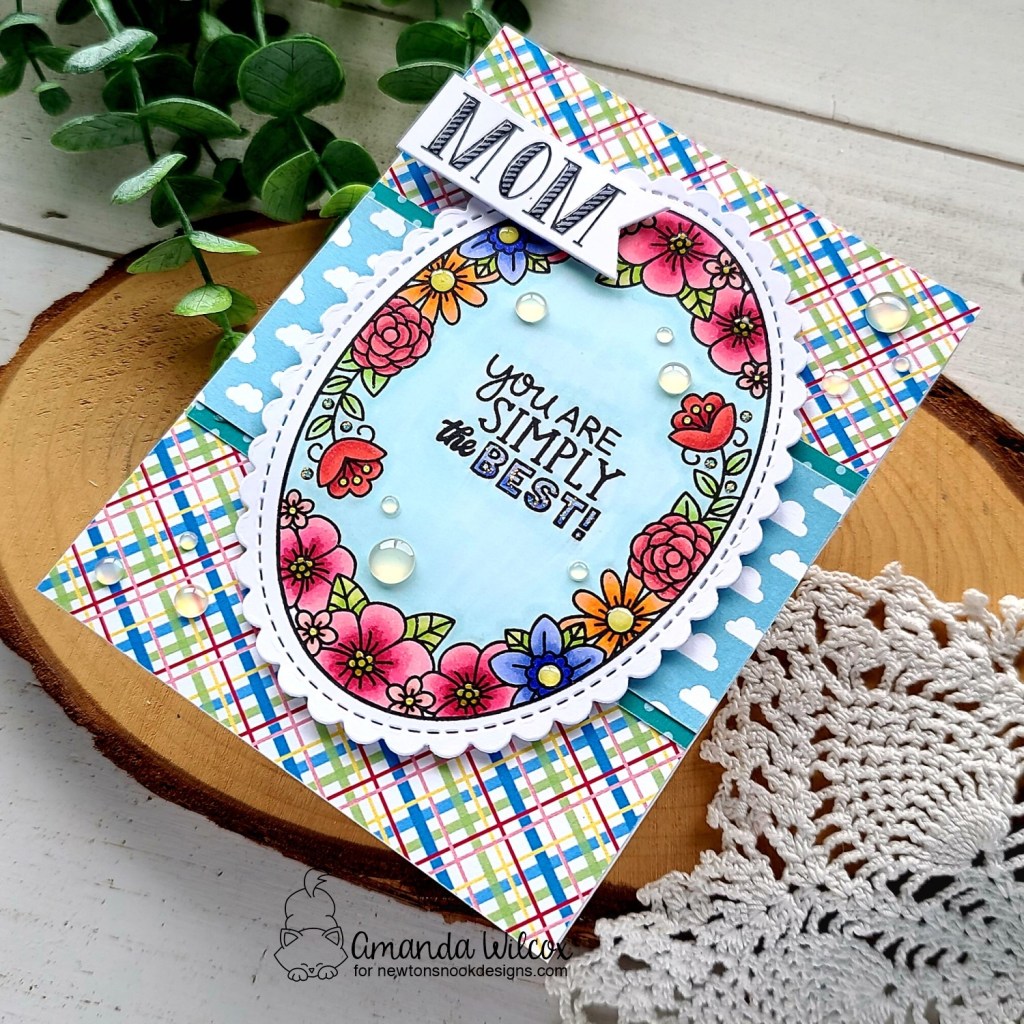
I trimmed the plaid paper to A2 size and adhered it to a white card base. Then I cut a strip of the fun cloud paper and edged it with the teal polka dot print before adhering it next. Then I popped the oval up with foam tape. To round out the design I thought it would be fun to add the “MOM” to a banner and pop it up too. This banner came from the Frames & Flags die set.

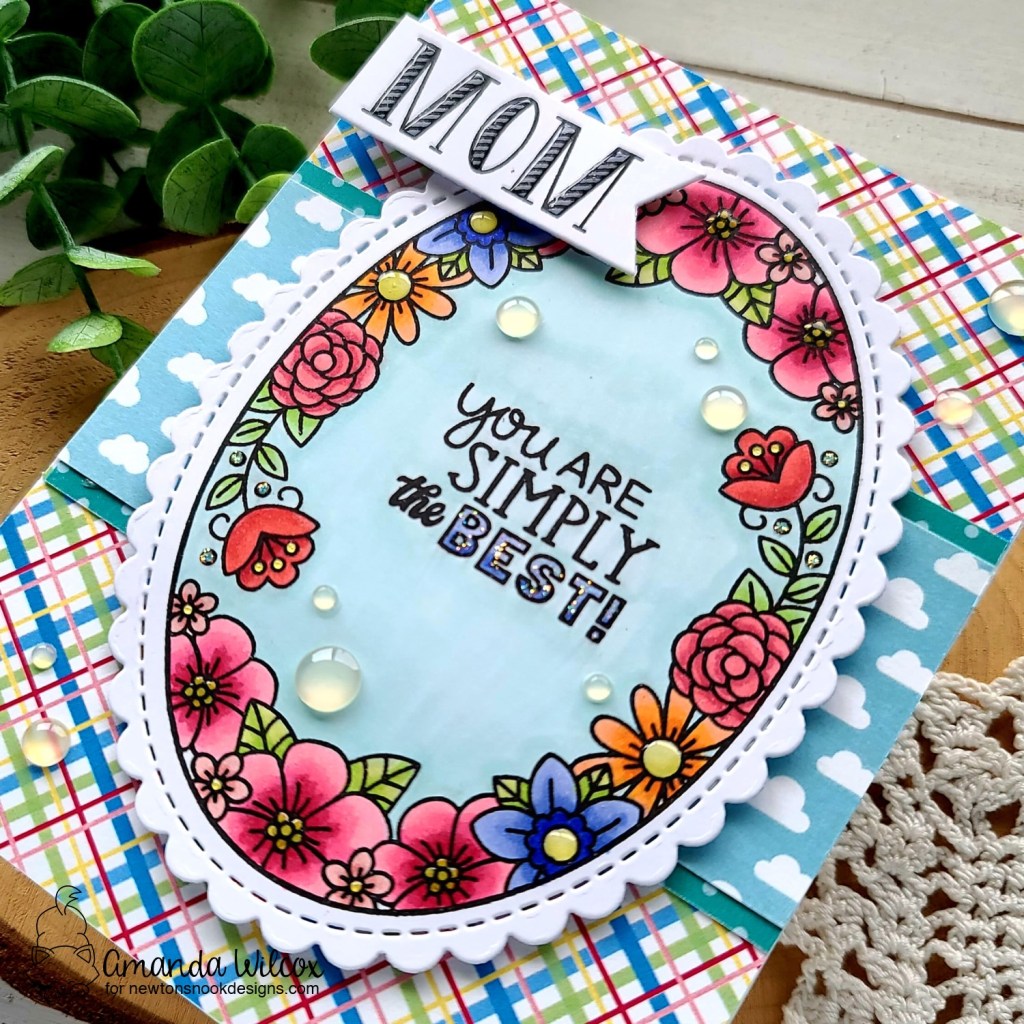
For finishing touches I added some opal droplet embellishments from my stash around the design. Then I added unicorn Stickles to the word “best” and the little dots floating around the red flowers. I added glossy accents the centers of all the flowers and my card is finished.

Would you like to win the “Best Mom Oval” Stamp Set? This stamp set will be given away to ONE lucky winner!

Here’s how to win: Comment on the NND blog and Design Team blogs (see list below)! The winner will be chosen at random from the collective reveal posts. Make sure to check out each of their blogs and comment for your chance to win. You will not know which blog has been chosen so the more you comment on the better your chances are of winning! You have until Wednesday March 16th at 9pm ET to comment  — winners will be announced on the blog post on Thursday March 17th. 

Check out all the awesome Design Team Blogs below to enter:

Newton’s Nook Designs
Donna Idlet
Ellen Haxelmans
Tina Herbeck
Larissa Heskett
Samantha Mann
Zsofia Molnar
Farhana Sarker
Tatiana Trafimovich
Amanda Wilcox

Jane’s Doodles – Butterfly Shadow Box Card

Hello again everyone! I’m back with a bright, springy shadow box card featuring the Doodle Butterflies digital stamps from Jane’s Doodles. I have been on a huge interactive card kick lately so I knew I wanted to put these sweet butterflies in a shadow box card for sure. I love how they look flying around in there.

First, I printed my butterflies and chose a color palette from my copic markers. I randomly colored them all in and cut them out with the scan-n-cut. Then I attached each butterfly to an acetate pick (about 1/4″ wide) and set them aside while I created my shadow box.

Today’s shadow box is created using the Heffy Doodle Big Shadow Box die set. I cut all the elements from heavy white cardstock. Then I used my Newton’s Nook Clouds stencil and a blending brush to ink some clouds on all sides of my box, inside and out. Then I used the ink left in my brush to add a little texture to the inserts that the butterflies will be adhered to. I used scrappy tape to adhere the box together and zots glue dots to add my butterflies in place with the exception of 2 that I glued to the back of the box with liquid glue.

I cut the sentiment with a stitched banner from Newton’s Nook and adhered it to the front of the box and this card is all finished! Isn’t it just so bright and make you ready for spring? I personally am ready for summer and warm weather but I’ll take some spring sunshine when I can get it for now. Haha.

Products used:
Jane’s Doodles – Doodle Butterflies digital stamps
Heffy Doodle Big Shadow Box dies
Newton’s Nook Frames & Flags dies
Newton’s Nook Clouds stencil
Blending brush
Zots glue dots
Scrappy tape – 1/4 inch and 1/8 inch

I appreciate you sharing your time with me. Have a fabulous day!

Newton’s Nook – Just Because Knight Owl

Hey friends! I’m back today with version 2 of my simple sketch design featuring another mini stamp set from Newton’s Nook. This Knight Owl stamp set it adorable but I had a hard time finding ways to use it. Then I reminded myself, that you don’t have to use the sentiments included with the image, duh! So I went digging and found this fun “just because” sentiment in the Heartfelt Blooms stamp set. How fun is that!?!

For today’s card, I stamped and colored the knight owl image with copic markers and used the coordinating die to cut him out. Then I moved on to inking up my background panels. and die cutting the other elements.

Starting with the background, I inked the edges of a dark blue cardstock panel with chipped sapphire distress oxide ink for a little depth before taping down the cascading stars stencil over the top and spreading transfer gel blanco through it. I cleaned up my mess and set the panel aside to dry. Then I too a scrap strip of white cardstock and inked it up with mowed lawn and forest moss distress oxide ink. I spritzed the panel with water and blotted it dry before cutting it with the largest Frames & Flags die and then again with the grass die in the Land Borders set.

Once the star panel was dry, I heated up my laminator and ran it through with Thermoweb gold glitter deco foil by Unity. I absolutely love the tiny shimmer this foil gives off. It’s gorgeous! Then I cut that panel out with the same die from the Frames & Flags set.

Next, I cut a stitched banner and fence from white cardstock. I stamped my sentiment on the banner and started assembling my card. First, I adhered the fence to the grass with liquid glue. Then I added the banner behind the owl using the grass panel as a guide for width. I added foam tape to the star panel, grass/fence panel and owl/banner. I removed the release paper and adhered them together one layer at a time.

For finishing touches, I added white gel pen accents to my image, black glaze pen to his eyes and glossy accents to his beak.

Isn’t this such a fun card and ready to go for any reason you can come up with to send it! I’m so excited to have another happy mail card in my stash to share.

Products used today:
Knight Owl stamps and dies (retiring and on sale)
Heartfelt Blooms stamps
Frames & Flags dies
Banner Trio dies
Fence die
Land Borders dies
Cascading Stars stencil
Thermoweb Transfer Gel Blanco
Thermoweb Deco Foil gold glitter by Unity
Thermoweb stencil pal
Thermoweb foam tape and squares
Glossy accents

I appreciate you sharing your time with me. Have a fabulous day!

Newton’s Nook – Galloping By…

Happy Wednesday friends! Today I’m over on the Newton’s Nook blog sharing a birthday card featuring a couple of the retiring products that are on sale and only available while supplies last! If you have any of the farm collection but don’t have Neigh yet, I highly recommend you snag it. What’s a farm without horses?!?

To create today’s card, I stamped 2 of the horses from Neigh and colored them with my copic markers. I cut them out with the coordinating dies and also stamped and heat embossed my sentiment straight away too. I trimmed the sentiment into strips with my scissors for an imperfect look. Sometimes I just prefer this to banner dies.

Next, I took a piece of kraft cardstock and very messily added gathered twigs distress oxide ink in random places. I spritzed it with water and flicked some watered down ink all over the panel for texture. Then I spread Thermoweb transfer gel blanco through the Hardwood stencil onto the panel and set it aside to dry while I cleaned up and made my tag.

I die cut a white tag with the Fancy Edges Tag dies and inked the bottom with peacock feathers and tumbled glass distress oxide inks. I threaded ribbon through the hole and tied it with twine. Then I added foam squares to my horses and adhered them to that.

With the stenciled panel dry, I heated up my laminator and ran the panel though with a tuscan gold deco foil flock transfer sheet. I peeled the transfer sheet off and ran the panel through my die cutter with the largest Framework die. I added foam tape to the back and popped it on a white card base.

I added foam tape to the tag and adhered it next, then I trimmed the sentiment apart and added foam strips to attach it to the card front.

For finishing touches I just added black glaze pen the the horse’s eyes and then came back with a white gel pen highlight when that was dry. I like the rustic texture of this card so I didn’t add glossy or shimmery anything. I think it’s pretty cool as is!

Products used today:
Neigh stamps and dies
Hardwood stencil
Fancy Edges Tag dies
Framework dies
Thermoweb transfer gel blanco
Thermoweb stencil pal
Thermoweb Deco Foil Flock – tuscan gold
Thermoweb 3D foam tape
Distress Oxide Ink – peacock feathers, tumbled glass, gathered twigs

I appreciate you sharing your time with me. Have a fabulous day!

Newton’s Nook – Hello

Welcome crafty friends! I have needed a few just because cards lately to send to a few specific people and thought this fun design would be one to recreate with lots of different products so I wanted to share it with you. Today’s version is all Newton’s Nook and I just love how it turned out.

I started by inking up a panel with dried marigold distress oxide ink, then I took the Houdstooth stencil and inked Lawn Fawn guava ink through that with a blending brush. Next, I die cut some leaves from the Flower Trio die set and gave them some detail with a copic marker.

I took a scrap of white cardstock and cut it to 1.5×4.25 inches and adhered it at the bottom of my stenciled panel. I arranged the leaves how I wanted them and picked them up with a long piece of post-it tape. I turned them over and added foam squares to the back, removed the release paper and used the post-it tape to line them back up over the seam of the white and stenciled panels. Worked like a charm!

I stamped the typewrite from My Type and colored it with my copic markers, then I stamped a sentiment from the set on the paper and used the coordinating die to cut it out. I added foam squares to the back and popped it up on the leaves.

For finishing touches I glued a scattering of peachy keen jelly drop hearts from Trinity Stamps and added glossy accents to the typewriter buttons.

Isn’t this just so fun! Create a textured background, find something you want to create your border with, choose a focal image and you’re done. I have a few more of these in the works that I’ll be sure to pop in and share as well!

Products used today:
My Type stamps and dies
Houndstooth stencil
Flower Trio dies
Foam squares
Trinity Stamps Jelly Drop Hearts – peachy keen
Bearly Art liquid glue
Distress Oxide Ink – dried marigold
Copic markers

I appreciate you sharing your time with me. Have a fabulous day!

Miss Ink Stamps – So Many Candles…

Happy Thursday everyone! Today I have a bit of Miss Ink Stamps birthday inspiration to share with you. We all need birthday cards from time-to-time and this is a fun one you could customize with the number of candles or even a certain color scheme too.

For my card, I stamped the gnome fireman from Perfect Match and the two candles with flames – lots of candles! I colored it all with my copic markers and used the scan-n-cut to cut it all out.

I took an 4×5.25 inch piece of white cardstock and inked the bottom portion with tea dye and a teeny bit of gathered twigs distress oxide ink to create a cake. Then I inked up a scrap strip of white cardstock with kitsch flamingo and a bit of picked raspberry. I cut the edge of the pink with a Trinity Stamps Celebration Borders die that looks like cake frosting. When I was laying it all out I wanted the look of more candles so I stamped some in the background before layering the frosting on. I used liquid glue to adhere the frosting and then arranged the colored candles on top of that.

I added foam squares to my gnome fireman and popped him in place on the lower left corner of the panel. I die cut a ticket using the Newton’s Nook Framework dies and inked it up the same as the frosting before stamping my sentiment on it and popping it up too. Last, I added foam tape to the whole panel and added it to a white card base.

For finishing touches I added unicorn Stickles to the candle flames and glossy accents to the candles and gnome fireman.

Such a fun little card! I think it would be so fun to make one for a milestone birthday and have the exact number of candles too!

Products used:
Miss Ink Stamps Perfect Match stamps
Trinity Stamps Celebration Borders dies
Newton’s Nook Framework dies
Foam tape
Glossy accents
Stickles – unicorn
Distress Oxide Ink – kitsch flamingo, picked raspberry, tea dye, gathered twigs
Copic markers

I appreciate you sharing your time with me. Have a fabulous day!

Newton’s Nook – Retiring Sale Week

Did you see that Newton’s Nook Designs is having a retiring sale on their website? It’s time to make room for new products so they are retiring select designs! These designs are available at up to 40% off while supplies last so hurry to get your favorites before they’re gone for good! 

All week the NND Design Team will be sharing inspiration using some of their favorite products from our retiring list! Check out what I created today and don’t forget to check the NND Blog each day this week for more fun inspiration!

I decided to create a full card front shaker using the Cosmic Newton set that is retiring. I absolutely adore this set and couldn’t resist the chance to ink it up again. I stamped the images and colored them with my copic markers, then used the coordinating dies to cut them all out. I stamped a sentiment from the set and used a banner from the Frames & Flags dies to cut it out too.

For my background, I inked up a white panel with distress oxide inks in picked raspberry, mustard seed and salty ocean and then went over the whole thing with black soot distress ink. I spritzed the panel with water and blotted it dry before flicking gold and pearl watercolor all over it for a great starry look. Last, I inked up the cascading stars stencil over the whole panel with white pigment ink too.

I trimmed just a sliver off each edge of the inked panel and adhered three sides of the shaker pouch, then filled it up with fun sequins from my stash before sealing the final side. I adhered the panel to a card base and then added my images with tape runner. Liquid glue can be extra slippery on these slick shaker pouches so I try to stick to dry adhesive when creating these.

For finishing touches I added glossy accents to the stars and parts of the spaceship. Isn’t Newton just the cutest peaking out of that window?!? I love him!

Don’t forget to visit the Retiring Products Category to see what is going away and grab your favorites before they are gone for good!

Products used today:
Cosmic Newton stamps and dies
Frames & Flags dies
Cascading Stars stencil
Tonic Studios Shaker Pockets
Thermoweb Tape Runner XL
Glossy accents

I appreciate you sharing your time with me. Have a fabulous day!

Jane’s Doodles – Hugs and Kisses

Happy Valentine’s Day everyone!!! I hope you had a wonderful weekend and today is starting off your week wonderfully. I’m over on the Jane’s Doodles blog today and wanted to squeeze in one more fun Valentine that I created but the design could be adapted easily for year round inspiration and fun.

I started with the mouse digital stamp from Jane’s Doodles – printed and colored him with my copics and then used the scan-n-cut to cut him out. However, this left a big blank white space between his tail and the balloon that bugged me so I took the craft knife and cut it out.

Then I cut the slimline scalloped panel from the Heffy Doodle Slimline Pull Tab die set and folded it in half to create my card base. Next, I used the Pink & Main Layered Slimline dies to cut a white panel that would fit inside. After cutting it out, I realigned the die and cut the other end to create a custom sized panel to fit my mini card front.

I stenciled the panel with the Jane’s Doodles Hearts stencil to create a scene background – green fading up to yellow. Then I came in with a small heart from the Jane’s Doodles Love You stamp set for some tone-on-tone heart accents in the background. I adhered the stenciled background to my card base and popped up the mouse image.

Next, I used a banner die from the Newton’s Nook A7 Frames & Banners die set and cut out a sentiment that printed with my mouse image and popped it up with foam strips.

Last, I opened up my card and stamped a sentiment inside from Love You along with another heart from the same set.

Oh, and there were a couple of small finishing details today too. I added black glaze pen to the mouse’s eyes, Wink of Stella glitter brush pen to the highlight in the balloon and a teeny big of glossy accents on the mouse’s nose too.

Remember, valentines don’t have to be pink and red all the time. When your daughter’s favorite color is yellow…sometimes they’re yellow.

Products used today:
Jane’s Doodles Mouse digital stamp
Jane’s Doodles Hearts stencil
Jane’s Doodles Love You stamps
Heffy Doodle Slimline Pull Tab dies
Newton’s Nook A7 Frames & Banners dies
Pink & Main Layered Slimline dies
Foam squares
Wink of Stella glitter brush pen
Glossy accents

I appreciate you sharing your time with me. Have a fabulous day!

Newton’s Nook – Designer’s Nook Reminder

Hey crafty friends! Popping in super fast with a reminder to sign up for the Newton’s Nook newlsetters…specifically the Designer’s Nook. This one is a weekly project from the Newton’s Nook design team to you. It’s not published anywhere else and often has photo tutorials and tips and tricks to share too!

Click HERE to sign up today and not miss tomorrow’s super fun project!!!

I appreciate you sharing your time with me. Have a fabulous day!

Newton’s Nook – Donut Know What I’d Do…

Happy Wednesday crafty friends! Today I’m over on the Newton’s Nook blog with a fun donut themed card. I kept my colors muted for a more masculine feel to help those in need of some boy-ish Valentine/love inspiration.

I started by stamping and coloring my image from Newton’s Donut with my copic markers. Then I used the coordinating dies to cut him out. Where I had a general design in mind, I hadn’t chose details like backgrounds and such. So I went digging in my stash for a stencil or something that fit but nothing was working. Then I pulled out the new Love & Meows paper pad and found these fantastic patterned papers and everything just fell into place.

I cut the brown paper from the largest Frames & Flags die and the blue paper from the next-to-largest Circle Frame die. Then I cut a banner from the Banner Trio set and stamped my sentiment. Using my image as a guide, I trimmed the side off the circle and also trimmed the extra off the sentiment strip. Now we’re ready to assemble.

We popped the brown panel up with foam tape and popped the circle up on that. Then We added foam squares to Newton and added him next. Finally we added foam squares to the sentiment strip and added it to the bottom right. But things are looking a little plain and boring…

So I went digging and found this teeny heart in the Speech Bubbles die set. I cut it from light pink cardstock 3 times and popped them up with foam squares too. They were just the perfect addition.

For finishing touches I started with glossy accents on Newton’s nose and toe beans. Then I added it to the circle sprinkles on the donut too. Not enough shine. So I came in with unicorn Stickles on the other sprinkles and liked it a little more but this made the hearts look really plain because the patterned paper has a shine. So I went for it and covered the pink hearts with glossy accents and I absolutely love it!

I hope you enjoyed today’s creation and found some inspiration to create something wonderful to share with someone.

Products used today:
Newton’s Donut stamps and dies
Frames & Flags dies
Circle Frames dies
Speech Bubbles dies
Banner Trio dies
Love & Meows paper pad
3D foam tape and squares
Stickles – unicorn
Glossy accents
Copic markers

I appreciate you sharing your time with me. Have a fabulous day!