Newton’s Nook – November Release Day 1

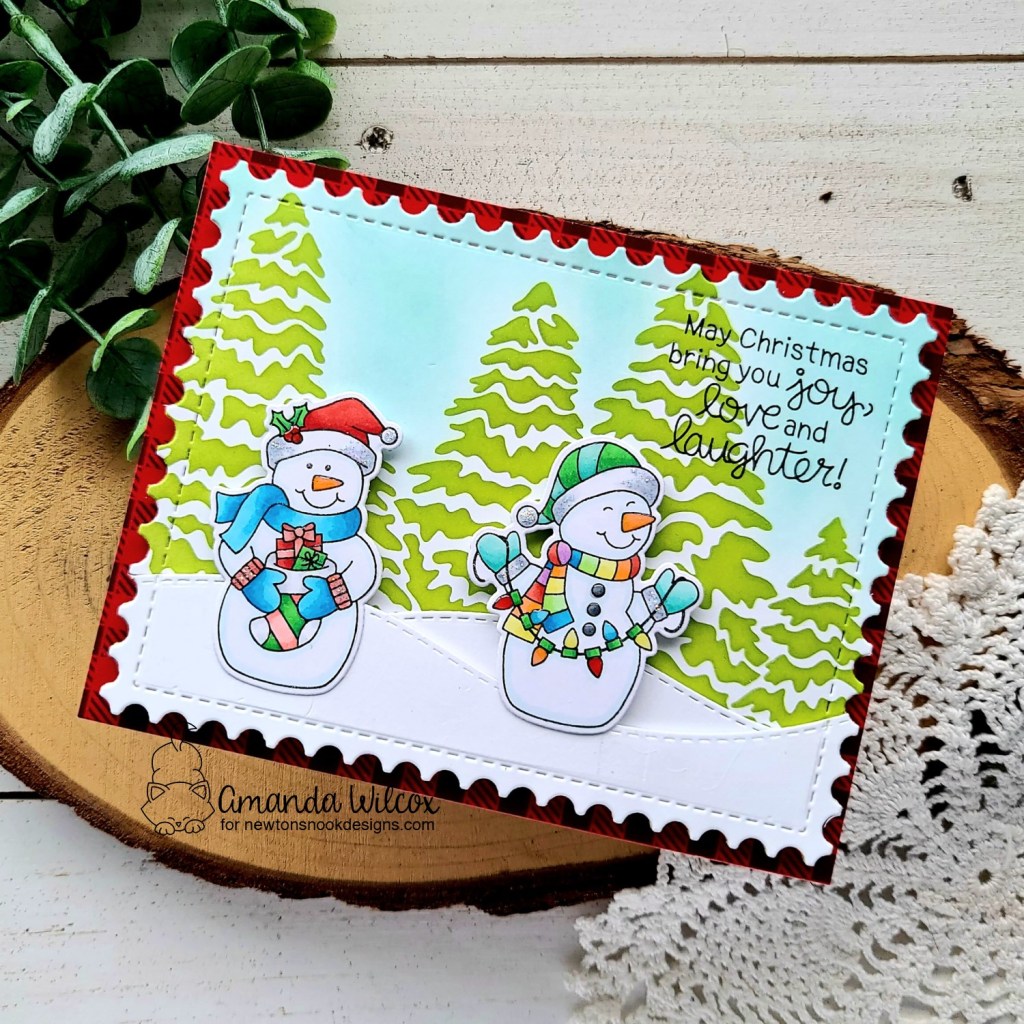
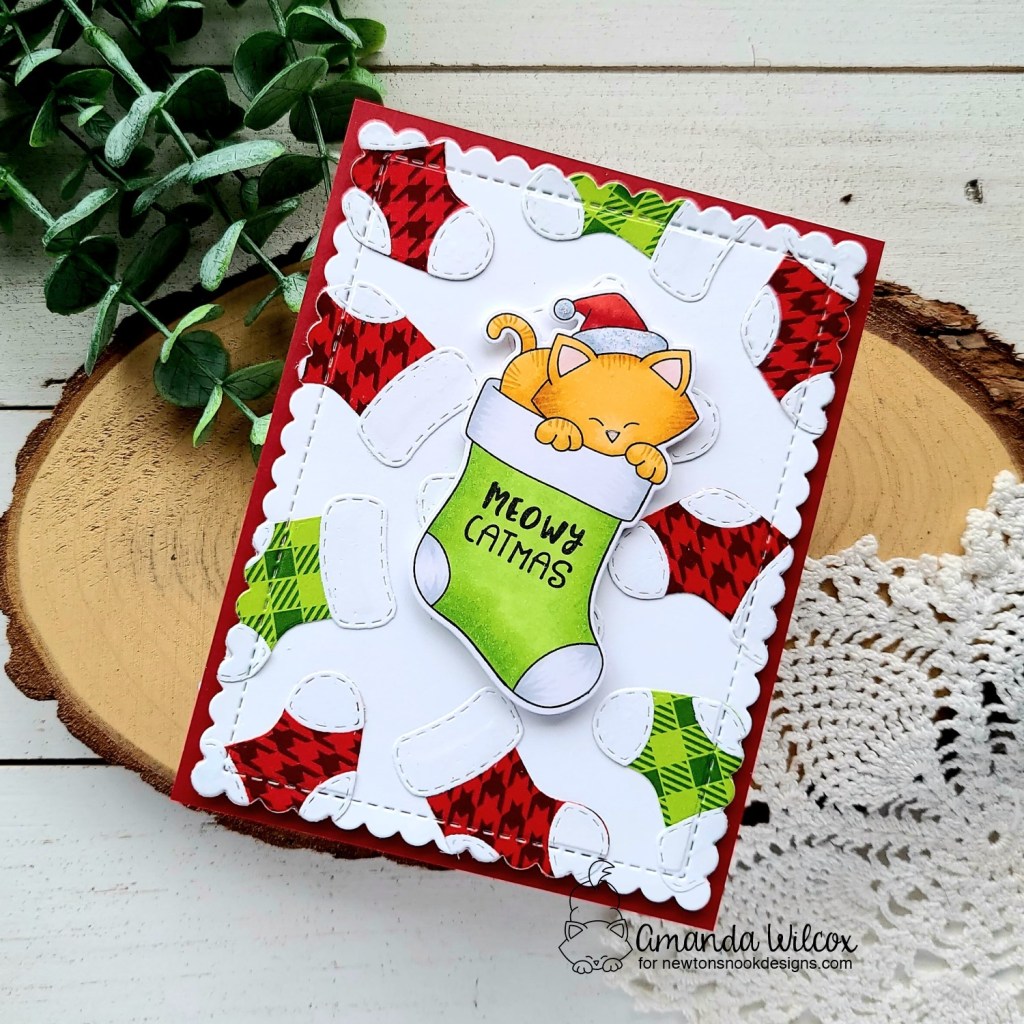
Hey friends! It’s that time again…reveals for another amazing Newton’s Nook release!!! Today we’re starting with a fantastic stamp and die set along with another paper pad! I’m so excited they are continuing with these amazing paper pads because they are addicting! Let’s take a look!

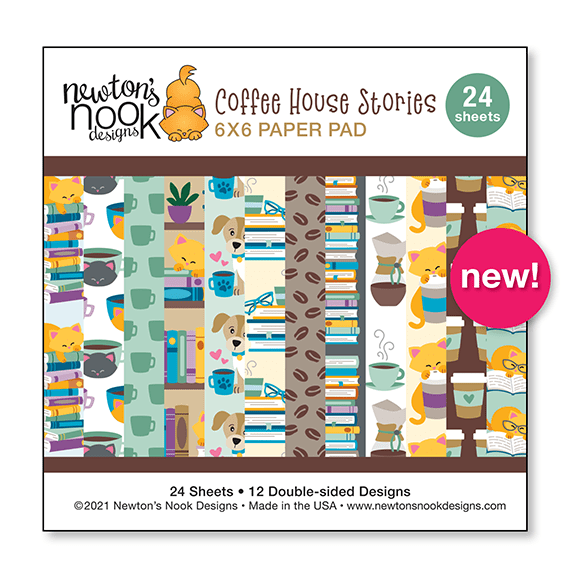
Coffee House Stories Paper Pad

Time for Coffee stamps and dies

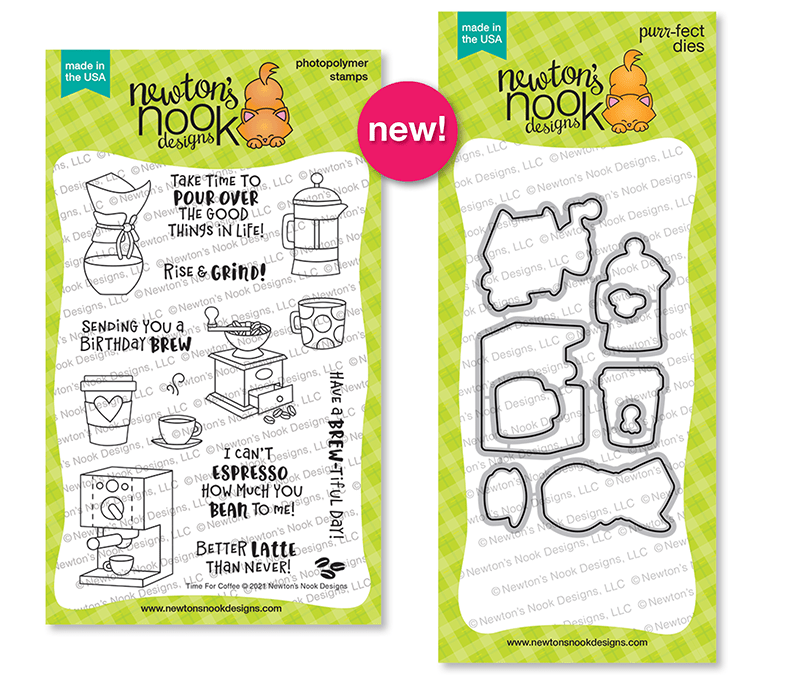
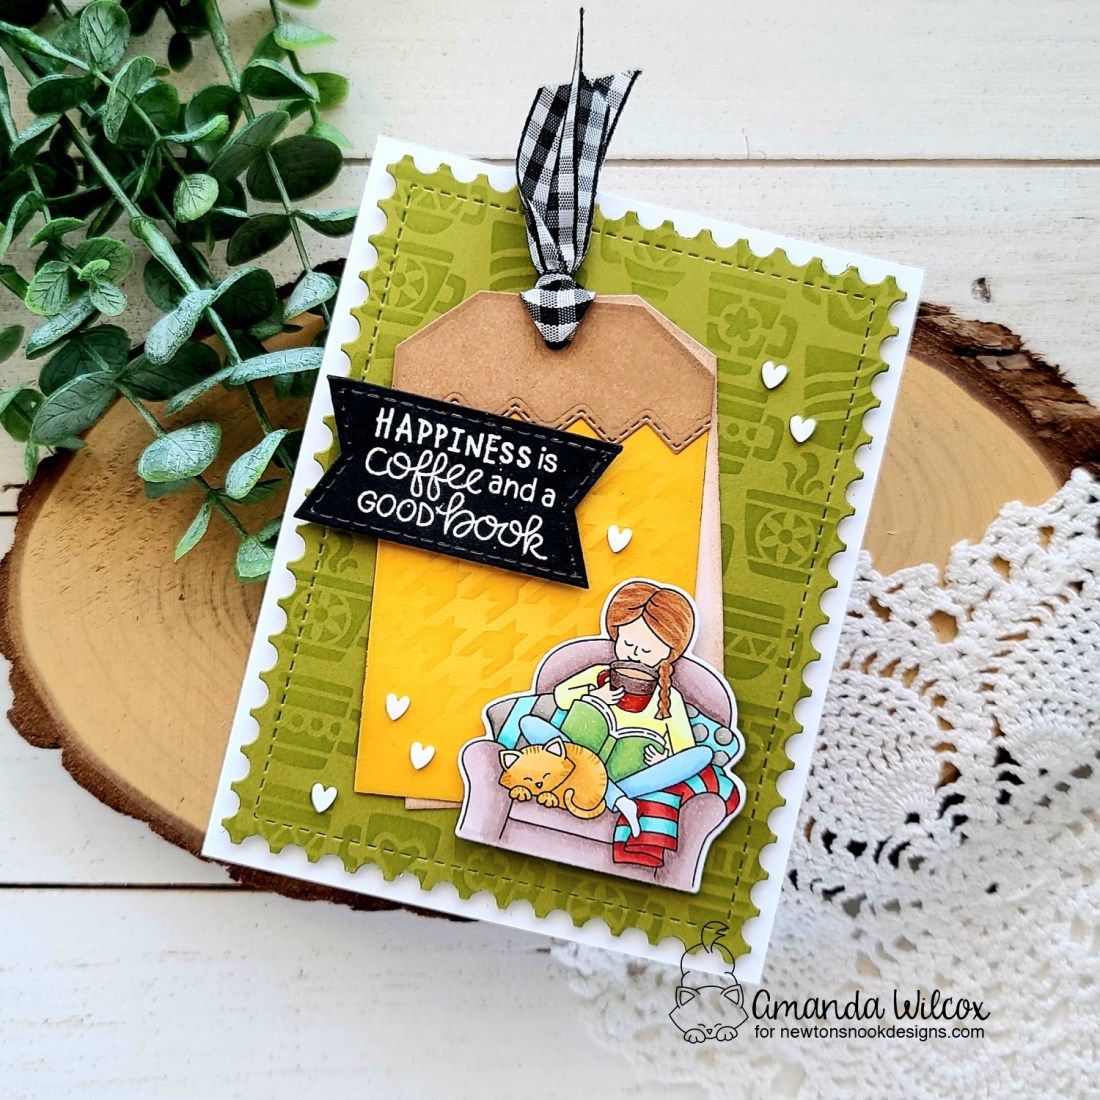
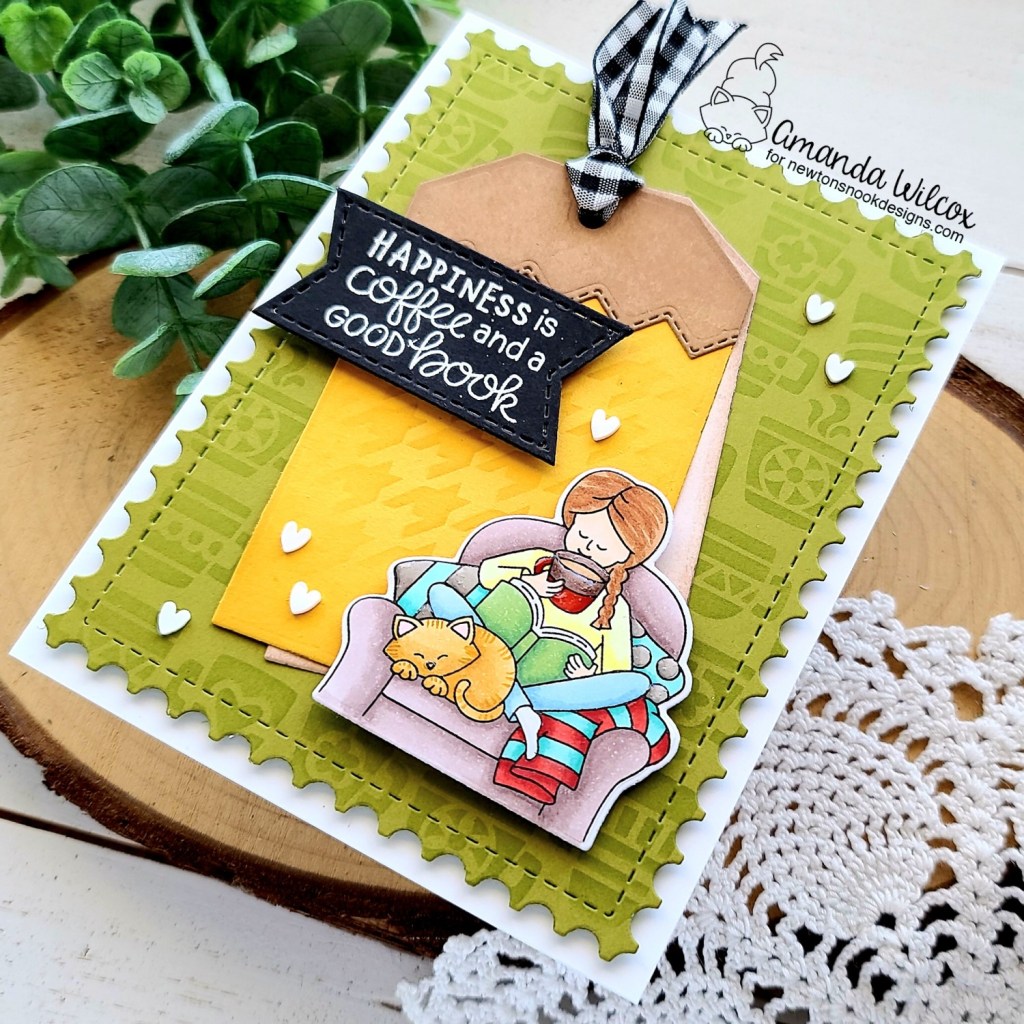
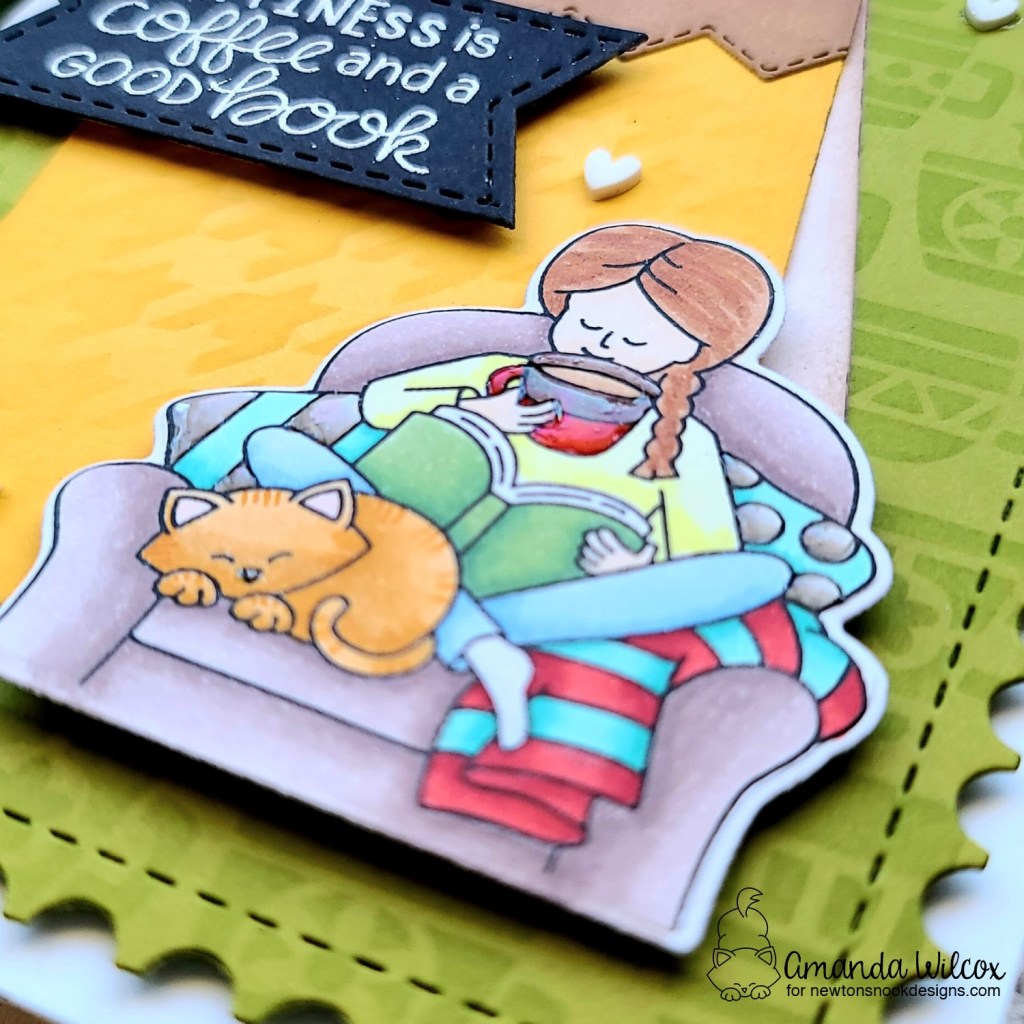
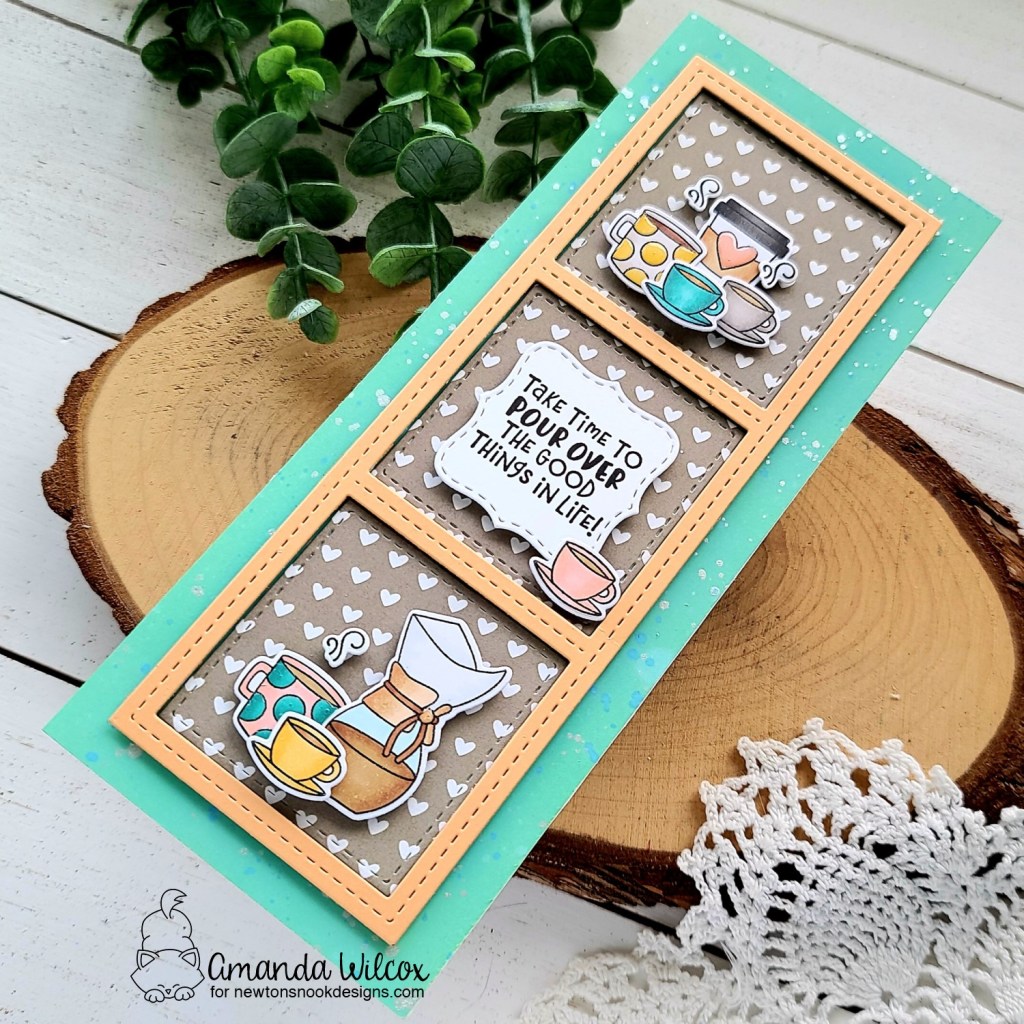
I’m so excited for all of the new caffeinated options these products bring to us! They are fabulous and I had a hard time choosing which ones to use today. So I stamped out a handful and ended up with a fun slimline card to share with you.

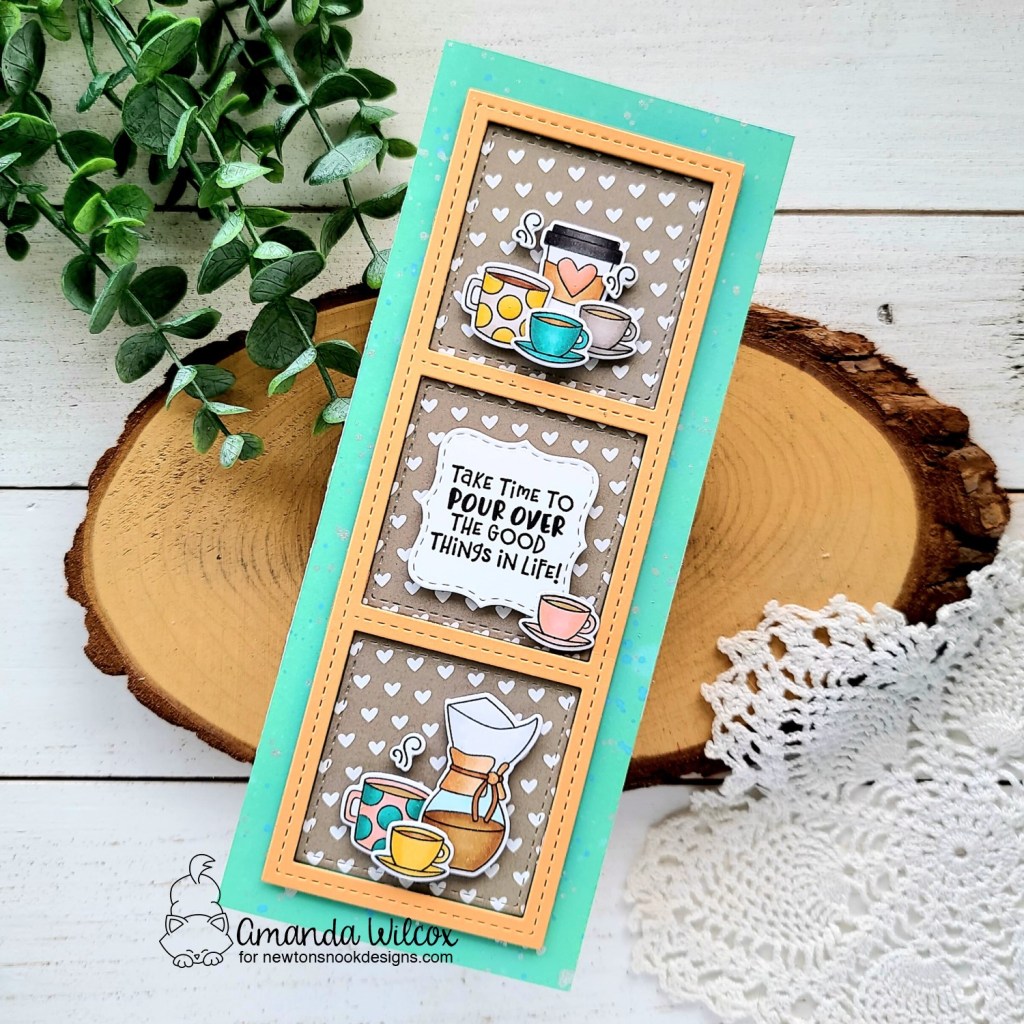
I colored all of the images with copic markers and used the coordinating dies to cut them out. Pulling from the colors I used in the images I die cut the Slimline Frames and Windows frame die from a peach cardstock. Then I inked up a slimline panel with distress oxides in cracked pistachio and mermaid lagoon. Then I spritzed the panel with water and flicked some watered down mermaid lagoon around the edge. For a little shimmer, I also splattered pearl watercolor around it.

I wanted something different for the background of the windows so I immediately went flipping through the new paper pad. Aren’t these neutral hearts just the sweetest?!? I love them! So I cut 3 windows with that paper and started assembling everything.

The inked panel is adhered to a card base with liquid glue and the frame is popped up with foam strips. Then I used the same liquid glue to adhere the heart panels inside the window openings. Next, I used foam squares to adhere all of my images in the top and bottom windows.

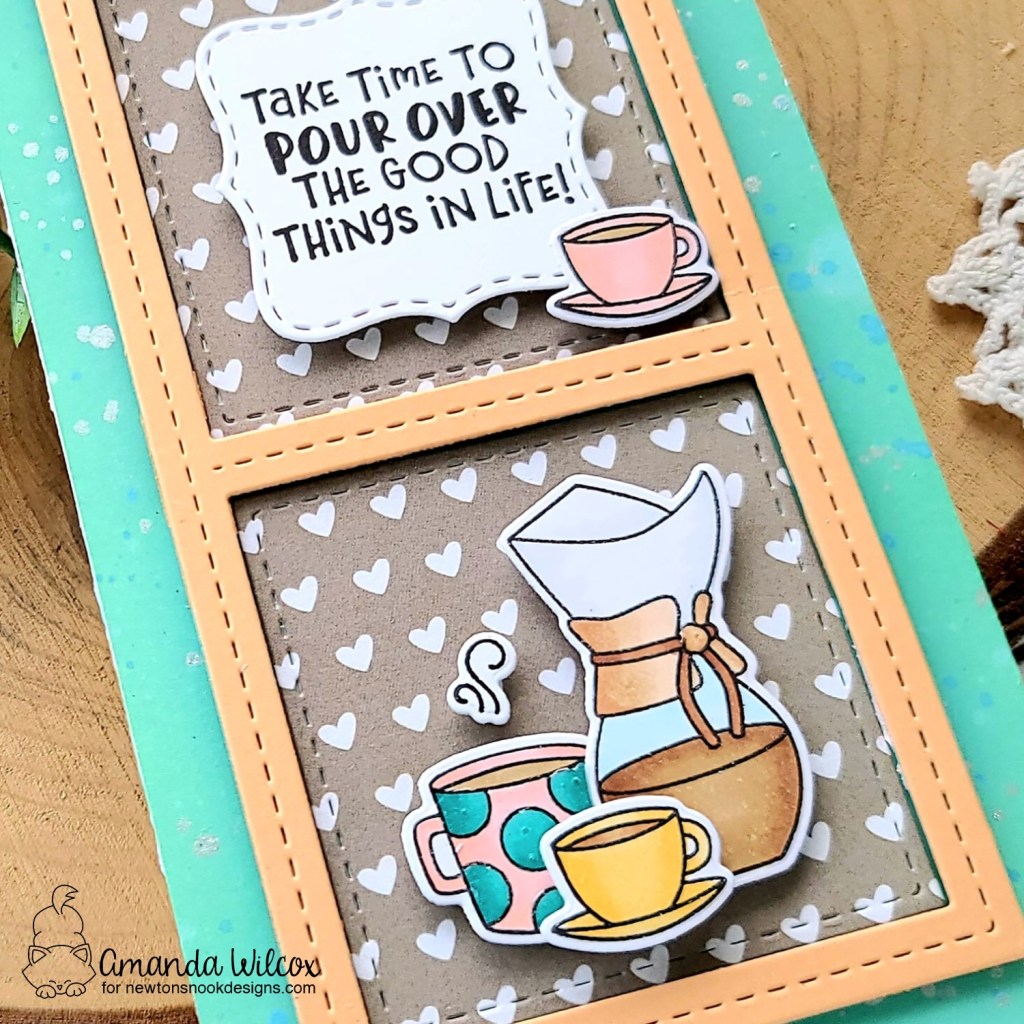
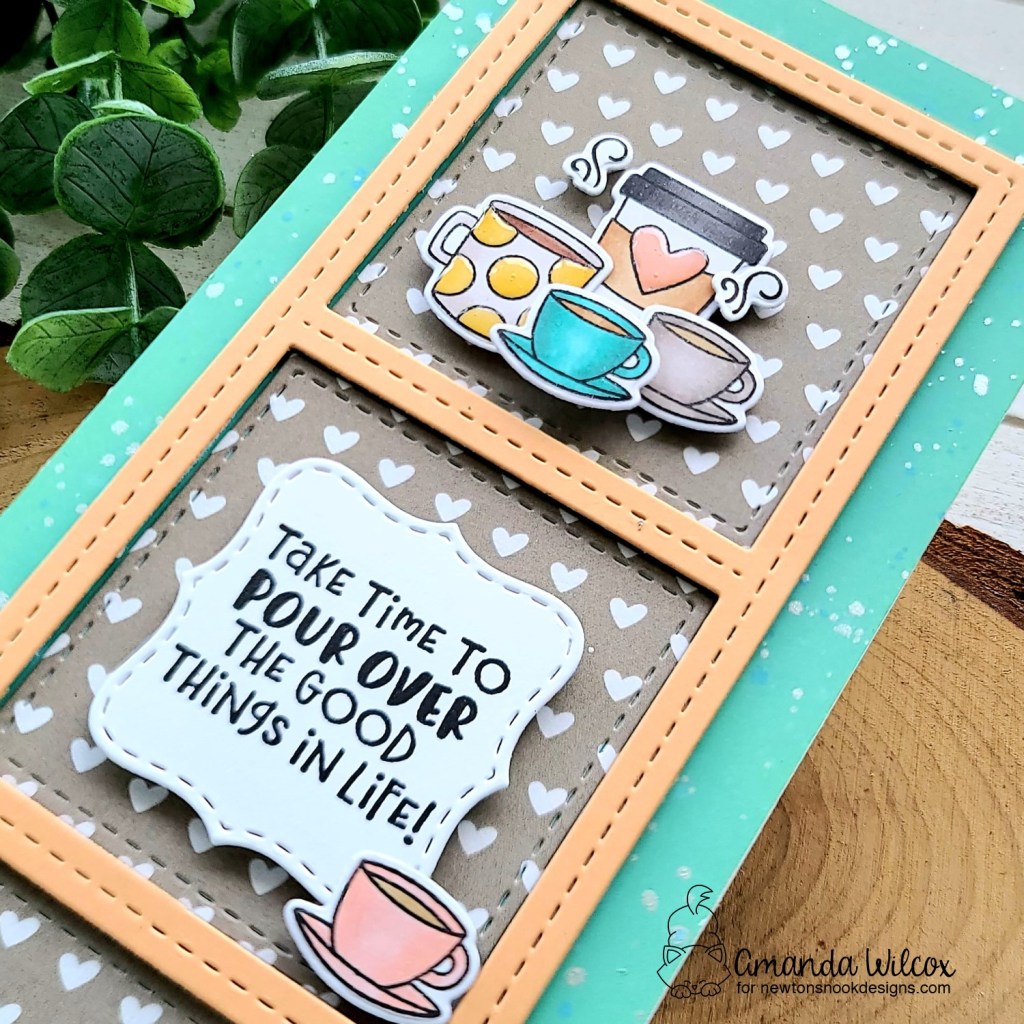
I die cut a label from the Slimline Frames & Windows die set and stamped a sentiment on it before popping it up in the center window. Then I added one more small coffee cup to that window as well.

For finishing touches I went back and stamped some steam images and die cut them, popping them up above a few of the different coffee cups in the design. Then I added glossy accents to various parts of the images like polka dots on mugs, the bead on the pour over carafe and the heart on the to-go cup.

Would you like to win the “Time for Coffee” Stamp Set? This stamp set will be given away to ONE lucky winner!

Here’s how to win: 
Comment on the NND blog and Design Team blogs (see list below)! The winner will be chosen at random from the collective reveal posts. Make sure to check out each of their blogs and comment for your chance to win. You will not know which blog has been chosen so the more you comment on the better your chances are of winning! You have until Wednesday November 17th at 9pm ET to comment  — winners will be announced on the blog post on Thursday, November 18th. 

Check out all the awesome Design Team Blogs below to enter:

Newton’s Nook Designs
Ellen Haxelmans
Tina Herbeck
Larissa Heskett
Samantha Mann
Zsofia Molnar
Maria Russell
Farhana Sarker
Tatiana Trafimovich
Samantha VanArnhem
Amanda Wilcox

Newton’s Nook – Llama Delivery

Oh my goodness friends! I’m super excited for my card share today featuring Newton’s Nook Llama Delivery stamps and dies. It is TOO CUTE for words!

I had a design idea in my head when I stamped the images out so I made sure to stamp a couple extra packages, some music notes and both sentiments. I colored the images with my copic markers, keeping the color palette close to the Meowy Christmas paper pad because I knew I wanted to use it. Then I used the coordinating dies to cut everything out.

I cut the large sentiment out with a Frames & Flags banner and trimmed the other into strips. Then I cut a circle from the Circle Frames set and inked a light blue shadow behind where the llama would be. I flipped through the paper pad and landed on that fabulous plaid, trimmed it down to A2 size and glued it to a white card base. I tied twine around the sentiment banner and popped it up with foam tape along with the circle. I trimmed anything hanging over the edge with my scissors. Then I added glued the gifts directly to the circle and added foam squares toe everything else before popping them all in place.

For finishing touches I came in with glossy accents on various parts of the llama and packages on his back…things like polka dots and stripes, along with his nose because it’s me. 🙂 Then I added a little Wink of Stella glitter brush pen to the background package bows and the music notes at to top.

I seriously had so much fun putting this card together! It was super fun to color and I’m just in love with that paper pad so to see it all come together was awesome!

Products used today:
Llama Delivery stamps and dies
Frames & Flags dies
Circle Frames dies
Meowy Christmas paper pad

I appreciate you sharing your time with me. Have a fabulous day!

Newton’s Nook – You Can Count On Me

Hello friends! Today I have a super festive and adorable Newton’s Nook card to share with you in celebration of them sponsoring the Cat Lovers Hop!

For this card, I had an idea that I wanted to try so I didn’t waste any time adhering the Ghosts stencil to a dark gray panel and spreading Thermoweb transfer gel blanco through it. I set it aside while I stamped and colored images from Count Newton with my copic markers. Then I used the coordinating dies to cut them all out.

I actually did this card in two stages. So the next morning I turned my laminator on to heat up while I decided on background colors and sentiment details. I landed on wilted violet distress oxide on a white panel, spritzed with water and adhered to a card base. Then I stamped my sentiment on a yellow circle from the Circle Frames die set. I inked up the edges with mustard seed distress oxide for a little depth. Finally, I cut a scrap of black cardstock with the scalloped rectangle in Frames & Flags and trimmed the top with the grass die in Land Borders.

With my laminator heated up I ran the stenciled panel through with opal decofoil and it LOOKS SO COOL!!! After foiling I die cut the panel with the same scalloped rectangle in Frames & Flags. For assembly, I added foam tape or squares to everything with the exception of the headstones which were adhered with liquid glue.

Then, for finishing touches I added glossy accents to parts of the gravestones, Newton’s nose and the clasp on his cloak. The black grass looked stark so I used a blending brush and white pigment ink to give it a little ghostly dimension. Just the perfect touch!

Products used today:
Count Newton stamps and dies
Frames & Flags dies
Circle Frames dies
Ghosts stencil
Land Borders dies
Thermoweb Pixie Spray
Thermoweb DecoFoil – opal
Thermoweb Transfer Gel Blanco
Thermoweb Stencil Pal

I appreciate you sharing your time with me. Have a fabulous day!

INK! Pink Hop | Newton’s Nook – Stay Strong

Hello everyone and Happy National Breast Cancer Awareness Day! There are a bunch of us bringing cheer and inspiration over on Instagram with a fun hop!

There’s a great line up of artists and a fabulous array of sponsors for this great hop. Head over to Instagram and comment as you hop along for chances to win prizes from each sponsor.

Today I have a card featuring Newton’s Nook and Thermoweb who are both generous sponsors of today’s hop.

I started by coloring the main image from Newton’s Support with my copic markers. Then I used my scan-n-cut to cut him out. I also die cut a vellum heart from the Heart Frames die set and heat embossed a sentiment on it.

Next, I moved on to my background. I just love this Bokeh Hearts stencil. I inked up one layer with pink dye ink and then spread bubblegum glitz gel from Thermoweb through the second layer. I left it to dry over night and then die cut it with the scalloped rectangle from the Frames & Flags die set.

I cut a pink panel to cover my white card base and popped the stenciled panel up with Thermoweb foam tape. Then I adhered Newton to the vellum heart with Thermoweb foam squares and hid my tape runner for the vellum heart behind Newton.

I finished the front of my card off with some glossy accents on Newton’s nose. But I didn’t want to stop there.

So on the inside of my card I stamped a ribbon in the same ink I used on the stenciling and then another sentiment over the top of that.

Most of the time my cards are blank on the inside for lots of room to write, but this time it was too perfect not to keep that feeling going all the way.

Products used today:
Newton’s Nook Newton’s Support stamps
Newton’s Nook Bokeh Hearts stencils
Newton’s Nook Frames & Flags dies
Newton’s Nook Heart Frames dies
Thermoweb Glitz Glitter Gel – bubblegum
Thermoweb Foam Tape and Foam Squares
Thermoweb XL Tape Runner
Thermoweb Stencil Pal

Now, don’t forget to head to Instagram and comment on the hop stops for chances to win!!!

I appreciate you sharing your time with me. Have a fabulous day!

Newton’s Nook – Main Street Christmas Card

Hello everyone! Today I’m over on the Newton’s Nook blog with some fun holiday card inspiration to share with you!

I pulled out one of my very favorite holiday stamp sets and did some therapeutic coloring the other day. This Main Street Christmas set is super cute and so fun to color in a million different combinations! So that’s what I did. I stamped and colored it with my copics, then cut it out with the coordinating dies.

Next, I stamped and heat embossed Santa in black and some snowflakes in gold glitter and die cut those too.

I inked up a panel with distress oxide inks in abandoned coral, dried marigold and tattered rose. Next, I taped my Music stencil to it and blended white pigment ink through the stencil. It’s subtle but I knew which sentiment I wanted to use and it seemed perfect. Then I flicked some light gold watercolor all over the panel and let it dry.

Once that was dry, I adhered it to a white card base and popped my Main Street image up with foam strips. I used my MISTI to stamp the sentiment below the street and adhered the snowflakes down with liquid glue. Finally I popped Santa up with some foam squares so he didn’t get lost at all.

Then I finished the whole card off with glossy accents on EVERY. SINGLE. WINDOW. Can anyone say hand cramps??? Oh my word, yes! But sooooooooo worth it!!!

Products used on today’s card:
Main Street Christmas stamps and dies
Music stencil
Distress Oxide – abandoned coral, dried marigold, tattered rose
Glossy accents
Foam squares

I appreciate you sharing your time with me. Have a fabulous day!

Newton’s Nook – Designer’s Nook Sneak Peek

Hey friends! We have quite a few new followers here so I wanted to be sure to pop in and let you all know that Newton’s Nook has an exclusive email newsletter that only goes out to subscribers every Tuesday! It’s called Designer’s Nook and it comes straight from the design team with special inspiration just for you!

Here’s a little sneak peek of my project coming out in tomorrow’s edition!

It’s super cute and so much fun so you won’t want to miss out! If you’re not subscribed already, click HERE and be sure to click the Designer’s Nook box when you sign up!

I appreciate you sharing your time with me. Have a fabulous day!

Newton’s Nook – Holiday Home Snowglobe Shaker

Hello my wonderful crafty friends! I’m popping in today to share a super fun card featuring one of the new stamp sets just release yesterday by Newton’s Nook and a different way to use it! The smaller images and the sentiments from the new Holiday Home stamp set fit inside the Snowglobe Shaker dies! It’s a whole new level of fun!

I started by playing around and creating my shaker globe. I die cut the base piece and stamped the house from Holiday Home on it, colored it with my copic markers and then cut the other elements to the shaker. The frame was cut from white cardstock with a little light blue copic coloring to match the scene and the base of the snow globe from kraft and shaded with copic markers as well. I cut a piece of acetate and sealed it all up with foam strips and some shaker bits from my stash.

For my background panel, I taped a kraft panel to the Reindeer stencil. Then, I inked it up with brown ink, cleaned my stencil and taped it back down, shifting it just a smidge. Next, I spread gold glitz glitter gel through it and set it aside to dry. While that was drying I cut a piece of green cardstock and adhered it to a white card base.

I die cut the word “merry” from the Snow Globe Shaker die set 3 times from red cardstock and glued them together with liquid adhesive. Then I adhered them to my shaker. With the glitz panel dry, I die cut it with the largest Frames & Flags die and popped it up with foam tape on my green base.

Finally I added my shaker snow globe to the front with liquid adhesive. For finishing touches I used Wink of Stella glitter brush pen on the die cut word and stamped a sentiment from Holiday Home on the inside of the card.

Wouldn’t these shakers make amazing Christmas gift tags too??? I think so!

Products used today:
Holiday Home stamps and dies
Snow Globe Shaker dies
Reindeer stencil
Thermoweb Glitz Glitter Gel – gold
Foam tape roll
Ultra Bond liquid adhesive

I appreciate you sharing your time with me. Have a fabulous day! And don’t forget to go check out the new Newton’s Nook release!!!

Newton’s Nook – Holiday Release Day 1

Hello there! I’m so excited to, once again, be revealing another super amazing Newton’s Nook release this week! Today is day 1 and we’ve got amazing stuff right out of the gate to share with you!

Meowy Christmas Paper Pad

Newton’s Stocking stamps and dies

Snow Much Cheer stamps and dies

Aren’t these just the most adorable goodies to kick off the week with?!? I’m using the amazing new paper pad throughout the week so keep an eye out for fun ways to use these great patterns! First off, I’ve got a sweet card using Snow Much Cheer.

I stamped and colored the images with my copic markers, then used the coordinating dies to cut them out. For the background of my scene, I inked up the Evergreens stencil and die cut a couple of snow drifts using the Land Borders dies. Then I layered everything together and cut it out with the largest Framework die so the edges lined up correctly.

I cut a piece of gingham paper from the pad and adhered it to a card base before popping up the background scene with foam tape. I adhered the back snow drift with liquid glue and popped the front one up as well. Then I used a combination of liquid glue and foam squares to add my snowmen. Last, I place the card in my MISTI and stamped the sentiment on the top right corner of the scene.

Moving on to finishing touches, I added some glossy accents and unicorn stickles to both of the snowmen. Aren’t they snow much fun!?! I love this new set!

Next up, Newton’s Stocking is such a fun set! I love how the sentiments can fit inside the stocking if you want or they can be used separately too! Options are always fun!

I used the Stylish Stockings die set and the new paper pad to create some fun red and green stockings for my background. After adding the stockings to a white panel I used the largest Frames & Flags die to cut the panel out. Next, I stamped and colored my image with copic markers. Once it was colored I stamped a sentiment from the set inside the stocking and used the coordinating die to cut it out.

I cut a piece of red cardstock and added it to a white card base before popping the background panel up with foam tape and then popping Newton up again.

For finishing touches on this fun card, I added glossy accents to Newton’s nose and unicorn stickles to his hat.

Would you like to win the “Snow Much Cheer” or the “Newton’s Stocking”  Stamp Set? We will choose ONE lucky winner for each stamp set!

Here’s how to win: Comment on the NND blog and Design Team blogs (see list below)! Thewinner will be chosen at random from the collective reveal posts. Make sure to check out each of their blogs and comment for your chance to win. You will not know which blog has been chosen so the more you comment on the better your chances are of winning! You have until Thursday October 14th at 9pm ET to comment  — winners will be announced on the blog post on Friday, October 15th. 

Check out all the awesome Design Team Blogs below to enter:

Newton’s Nook Designs
Ellen Haxelmans
Tina Herbeck
Larissa Heskett
Samantha Mann
Zsofia Molnar
Maria Russell
Farhana Sarker
Tatiana Trafimovich
Samantha VanArnhem
Amanda Wilcox

Coffee Loving Cardmakers – Thanks a Latte Shaker

Welcome! It’s time for another Tuesday Tea with Twiddler’s Nook over on the Coffee Loving Cardmakers and today it’s extra special! We’re celebrating National Coffee Day all week leading up to it and there are giveaways on the blog each day. Click HERE to head over and check out the festivities.

I’m celebrating Thermoweb today with a super fun shaker card featuring stencils and dies from Newton’s Nook, the coffee shaker dies from Lawn Fawn and my shaker bits from the Twiddler’s Nook shop!

Head over and check out the post for all the details on this card plus a chance to win!

Thanks for stopping by. I appreciate you sharing your time with me. Have a fabulous day!

Newton’s Nook – Happiness is Coffee and a Good Book

Hey friends! I’m over on the Newton’s Nook blog today with a fall color themed card for your fellow coffee and book lovers! This Sips & Stories set is so me that I have to pull it out to play from time to time just because.

I started by stamping the image from Sips & Stories and colored it with my copic markers. Then I cut it out with the coordinating die and started playing around with my background. I inked up a green piece of cardstock with the Mugs stencil and die cut it with the largest Framework dies. Then I cut a couple of tags and a topper from the Fancy Edges Tag dies and inked them up with the Houndstooth stencil.

I added foam tape to the back of the mugs panel and adhered it to a white card base. Then I adhered my tags and topper together and threaded some ribbon through the top. These are adhered directly to the mugs panel with liquid glue.

I chose a sentiment from the Sips & Stories set and die cut a banner from the Frames & Flags set to match the size I needed. I achieved this by cutting the whole banner, laying my stamp on the die, realigning the die smaller and just cutting one side off. Then I added foam squares to the sentiment and image and popped them in place.

For finishing touches, I added glossy accents to bits on the pillows, the girl’s mug and Newton’s nose. Then I came in with a scattering of white clay hearts from Twiddler’s Nook Sweethearts mix.

I’m super excited to share this card with the recipient and hope they love it as much as I do!

Products used on today’s card:
Sips & Stories stamps and dies
Fancy Edges Tag dies
Framework dies
Frames & Flags dies
Houndstooth stencil
Mugs stencil
Twiddler’s Nook Sweethearts embellishments
iCraft Ultra Bond liquid adhesive
Thermoweb tape roll
Scrapbook Adhesives foam squares
Blending Buddy brushes
Glossy accents

I appreciate you sharing your time with me. Have a fabulous day!