Hi there! It’s release day for the Newton’s Nook 11th Birthday Release and we’re celebrating with an Instagram hop today!
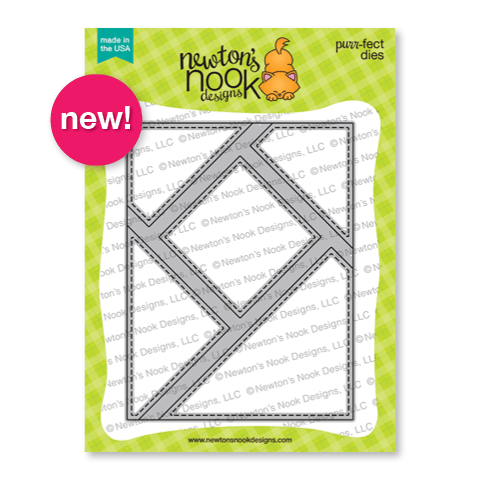
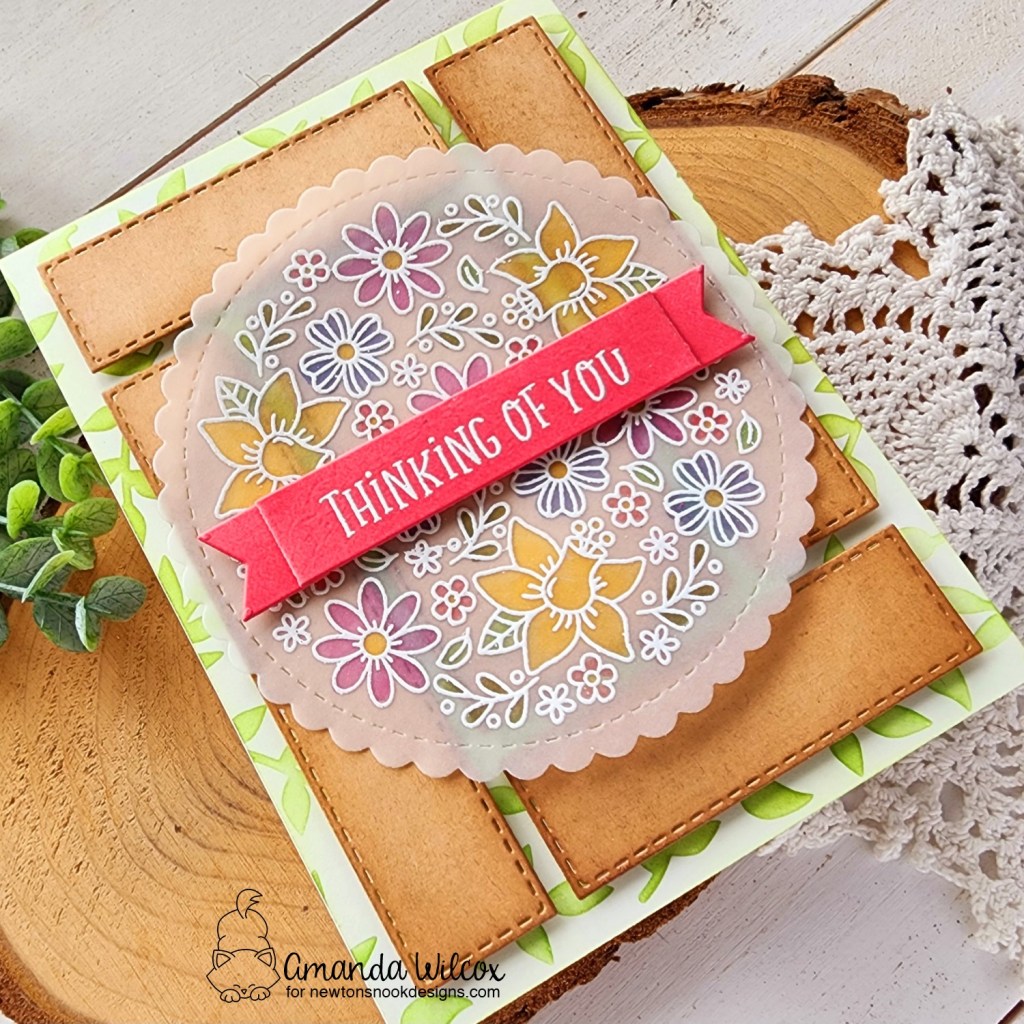
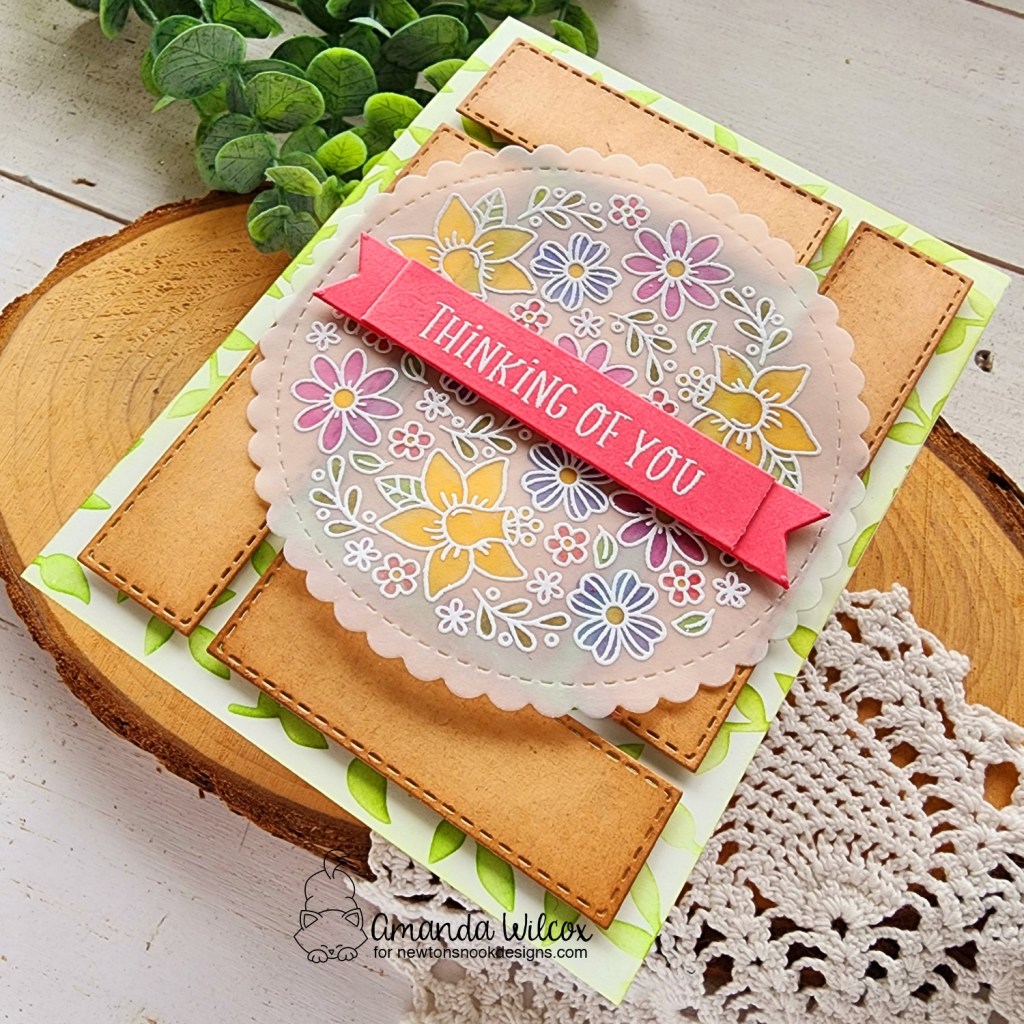
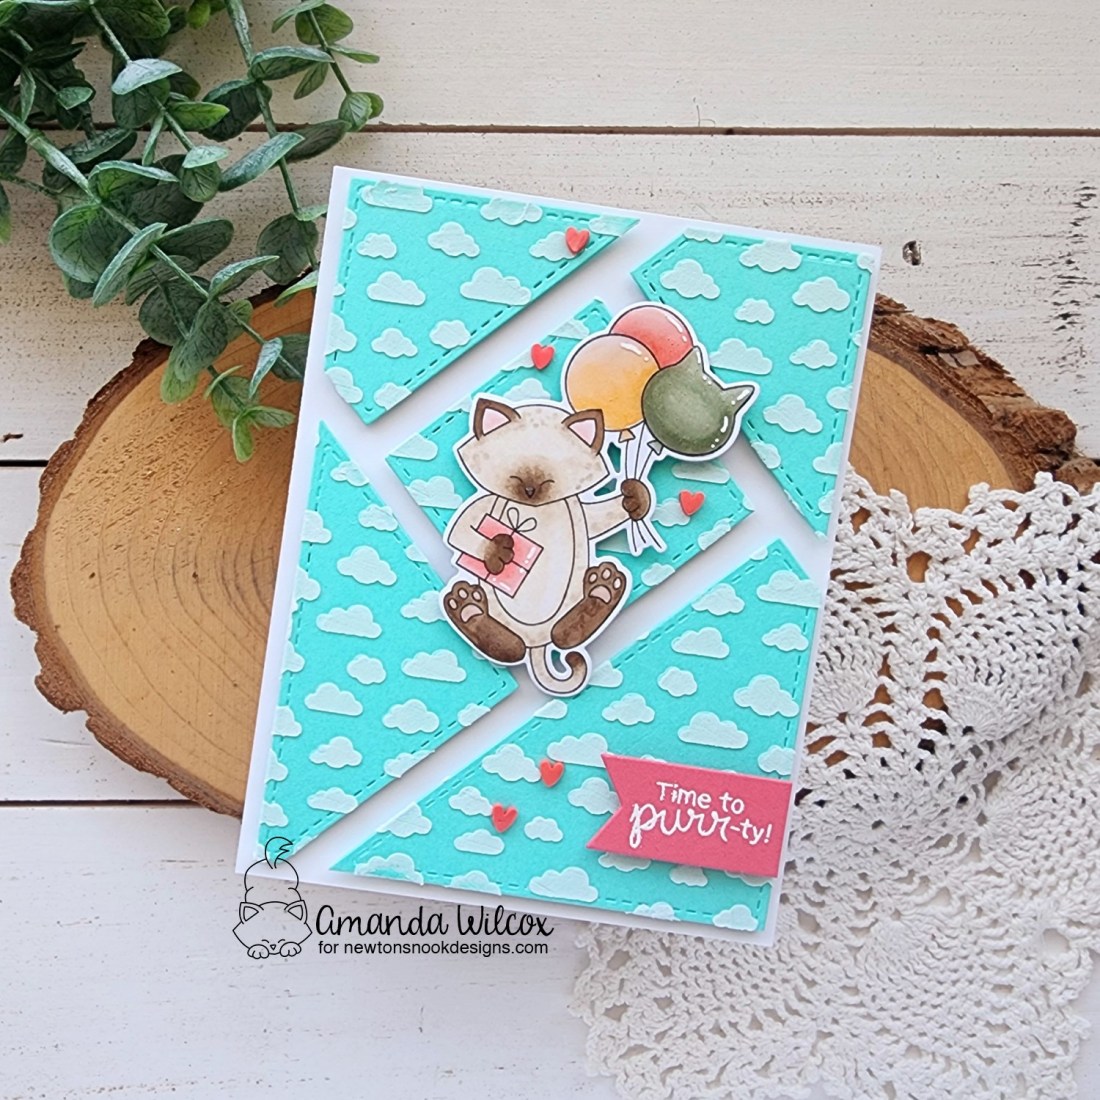
With dies like the 2 new background dies, I like to keep the inserts when I don’t use them on the card at hand because I almost always want them for something later on. This proved true very quickly for my Fractured Card from Monday. I immediately went back and pulled the teal inserts back out to use without the frame piece at all.

Using the die as a guide for placement I adhered the pieces together temporarily with washi tape. Then I layered the petite clouds stencil over top and spread texture paste through it. In reality the whole design is pretty forgiving so I didn’t have to be that picky but I liked it perfectly spaced better than winging it.
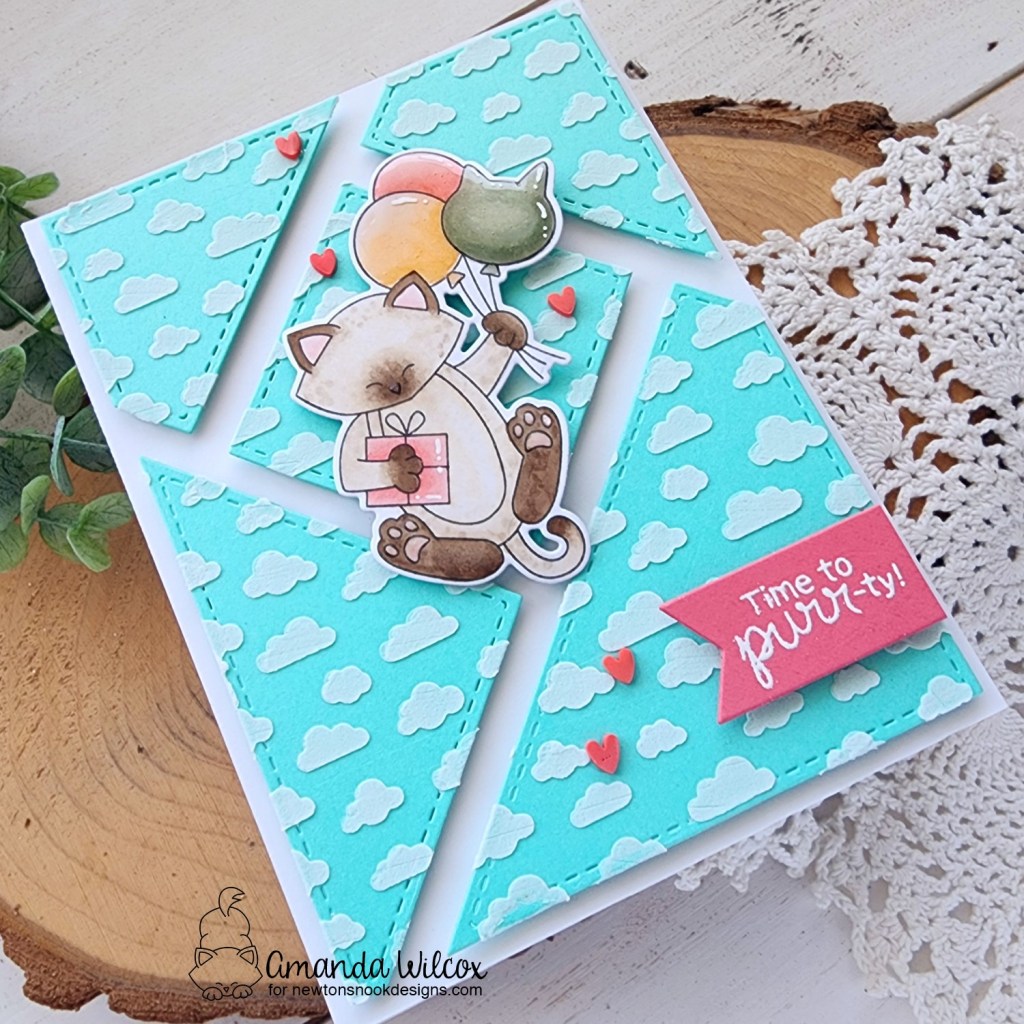
While that was drying, I stamped and colored Newton’s Birthday Balloons and used the coordinating die to cut it out. Going off the colors I used in the image, I pulled out a similar color cardstock to heat emboss my sentiment on after cutting a banner from the Frames & Flags die set.
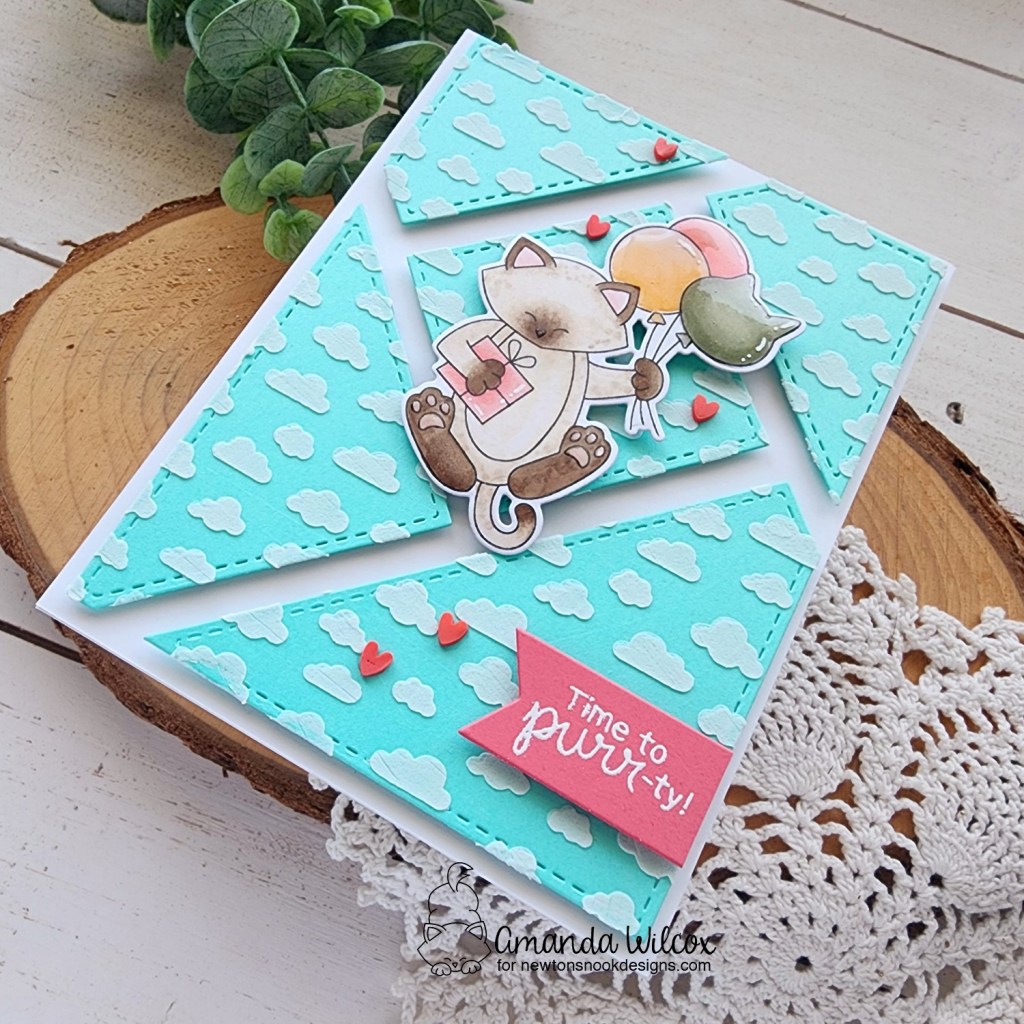
With the clouds almost immediately dry because the heat wave where I live is a real thing! I moved on to assembling everything. For this, I was a little extra again I added foam tape to the back of the panels back from the Fractured Card Layout and placed them back in the die upside down. Then I removed the release paper and pressed a white cardstock panel to them. I liked the placement so I used liquid glue and adhered the panel to a card base.
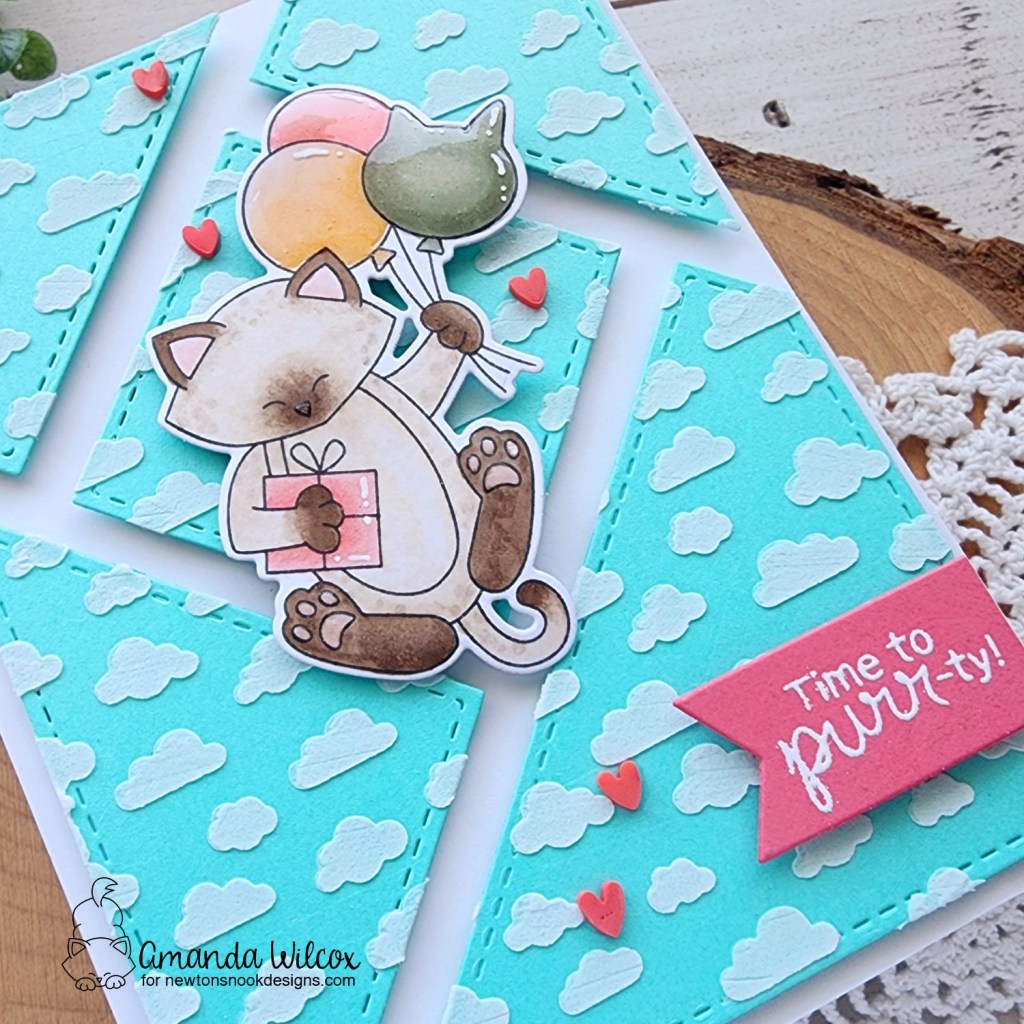
I added Newton and my sentiment banner with foam squares and switched to finishing touches. For that, we went with all the things – glossy accents on Newton’s nose and toe beans, plus the balloons. Then Wink of Stella glitter on the gift and a scattering of red clay hearts. When the glossy accents was dry I came back in with white gel pen highlights on various parts of the image too.
Remember to head over to Instagram and hop along with us for a chance to win a $25 gift card to the Newton’s Nook shop!
Products used:
Newton’s Birthday Balloons stamps and dies
Fractured Card Layout die
Petit Clouds stencil
Foam tape
Liquid glue
Texture paste
Twiddler’s Nook Sweetheart embellishments
Glossy accents
Wink of Stella glitter brush pen
I appreciate you sharing your time with me. Have a fabulous day!