Hi friends! I’m on the Newton’s Nook blog today sharing a fun gate fold valentine using one of my favorite stamp sets – Love Quarry! It’s so much fun and makes it really simple to make valentines for the guys in your life.
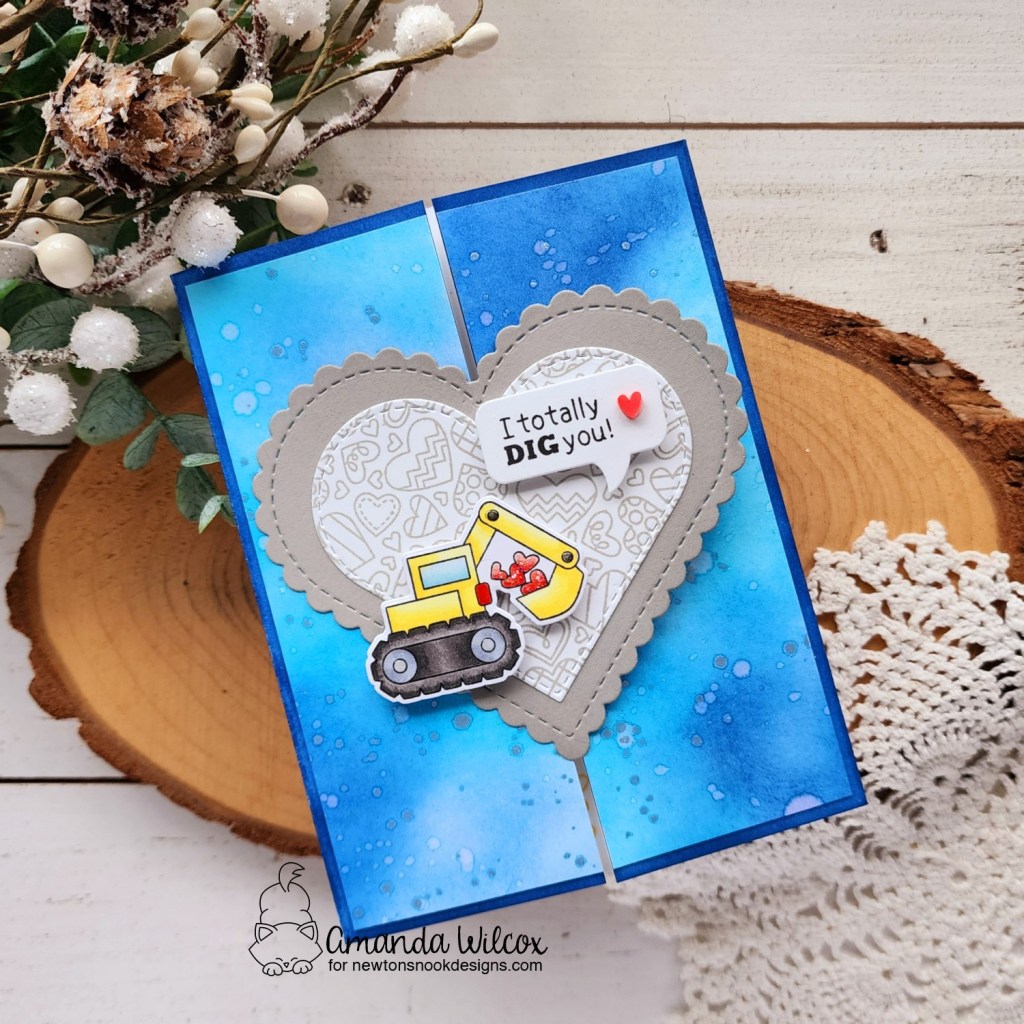
I started my card by working on the excavator, heart layers and sentiment speech bubble. I colored my image with copic markers and used the coordinating die to cut it out. Then I chose a speech bubble to cut out and stamped my sentiment on that. I cut a gray scalloped heart and the next size down in white. I used the Heartfelt Love stamp on the white heart with gray ink so it was subtle but definitely following my love theme.

I created a card base, scoring at 2 1/8 from each side and folding to the center. I inked up a separate panel that measured 4×5.25 inches with a few blue inks randomly and splattered it with water. Then I splattered the panel with unicorn watercolor paint. While that was drying I took the darkest ink I used on that panel and inked the edges of my card front flaps. Then, I cut the splattered panel in half and glued it to my card front.

I used liquid glue to adhere my heart to the left half of the card front only. That way it opens up nicely to reveal a surprise and my handwritten message too. Before we get to the inside, I added glossy accents and stardust Stickles to the excavator and a clay heart to my speech bubble.

This inside sentiment comes from the Heartfelt Love stamp set I used on the front and the accent images are from Love Quarry. Aren’t they so cute?!?
Products used:
Love Quarry stamps and dies
Heartfelt Love stamps
Heart Frames dies
Speech Bubbles dies
Blending brushes
Lawn Fawn inks – fish tank, forget me not, deep sea, carrot and sunflower
Glossy accents
Foam squares
Liquid glue
Twiddler’s Nook Sweethearts clay embellishments
I appreciate you sharing your time with me. Have a fabulous day!