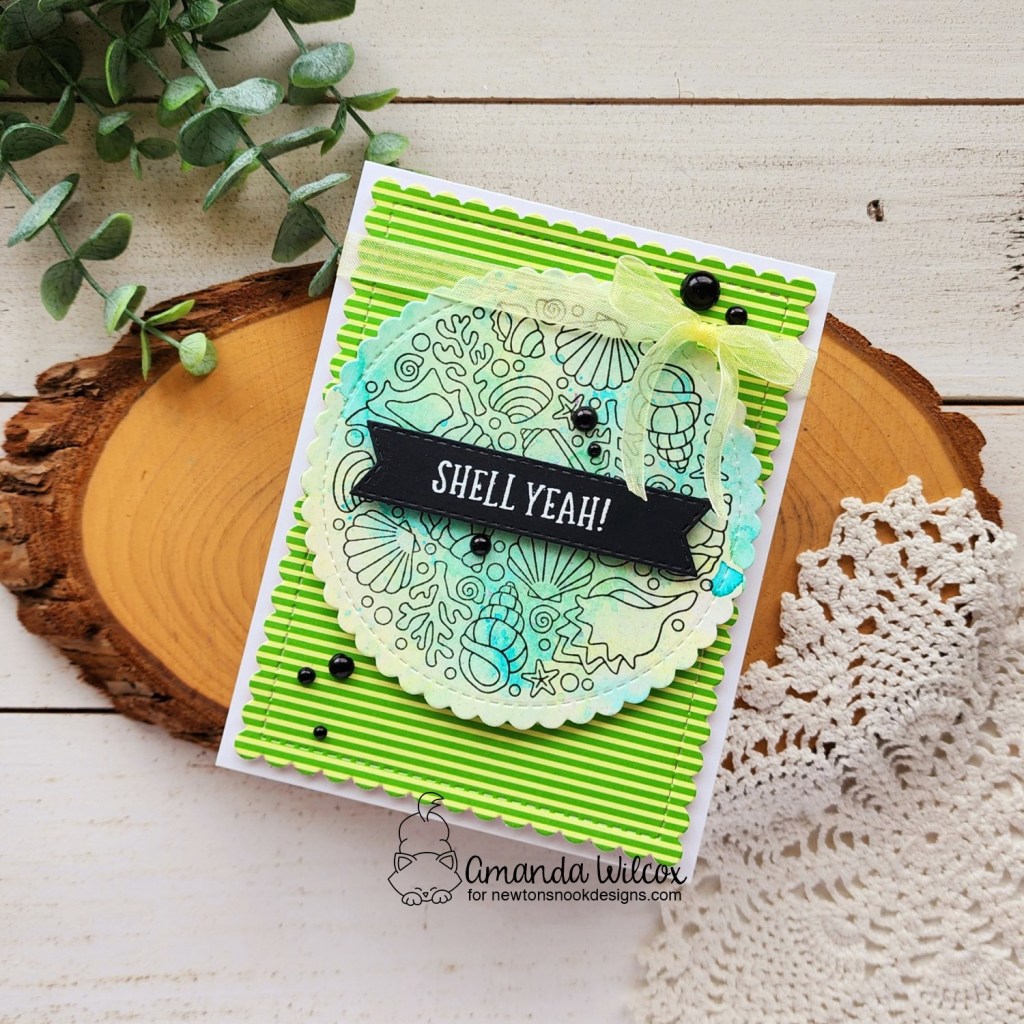
Hi there! I’m so happy to be over on the Newton’s Nook blog again today. This time I’ve gone ocean themed with a different sentiment and an inky, messy fun background! You know this is my favorite!

I was flipping through my stamps, trying to decide what jumped out to play with and this sweet mini set called Newton’s Seashell did just that. It’s such an adorable image and so fun to color. So that’s what I did, then I used the coordinating die to cut it out.

Switching gears to my background panel, I ink blended white cardstock with distress oxide inks in abandoned coral and tattered rose, fading out to nothing. Then I placed the Seashells stencil over the top and spread gold Glitz Glitter Gel through it. After letting the panel dry, I trimmed it to 4×5.5 inches and popped it up on a white card base with foam tape.
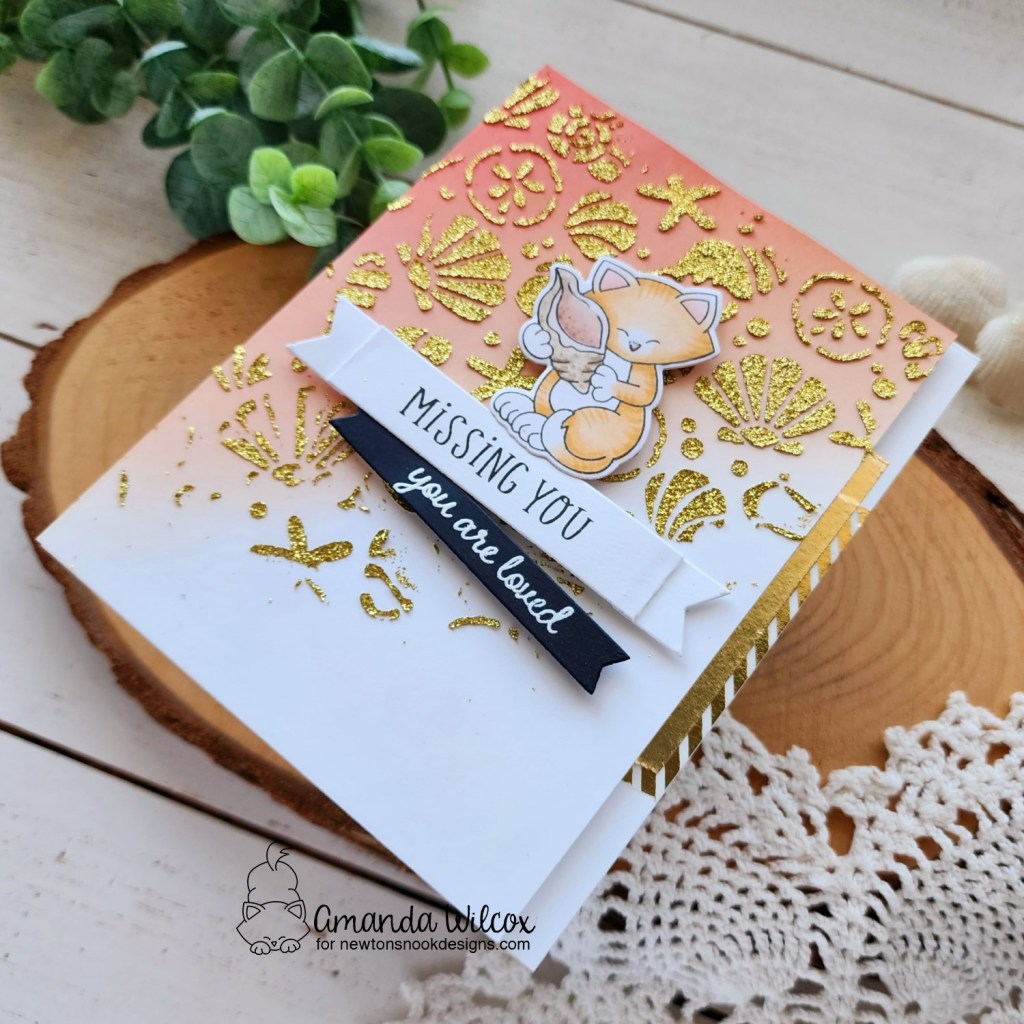
I cut two banners for my sentiments – one from Banner Trio dies and the other from A7 Frames dies. I heat embossed the black one and stamped the other. Then I popped those with the Newton image up on foam squares.
For finishing touches I added Touch of Gloss to the inside of the seashell and Newton’s nose. Last, I added a couple strips of skinny washi tape to the edge of my card for added gold shine and interest.
Products used:
Newton’s Seashell stamps and dies
Seashells stencil
A7 Frames dies
Banner Trio dies
Foam tape and squares
Glitz Glitter Gel – gold
Stencil Pal
Touch of Gloss
Distress Oxide Ink – tattered rose, abandoned coral
I appreciate you sharing your time with me. Have a fabulous day!