Miss Ink Stamps – Nuts About You

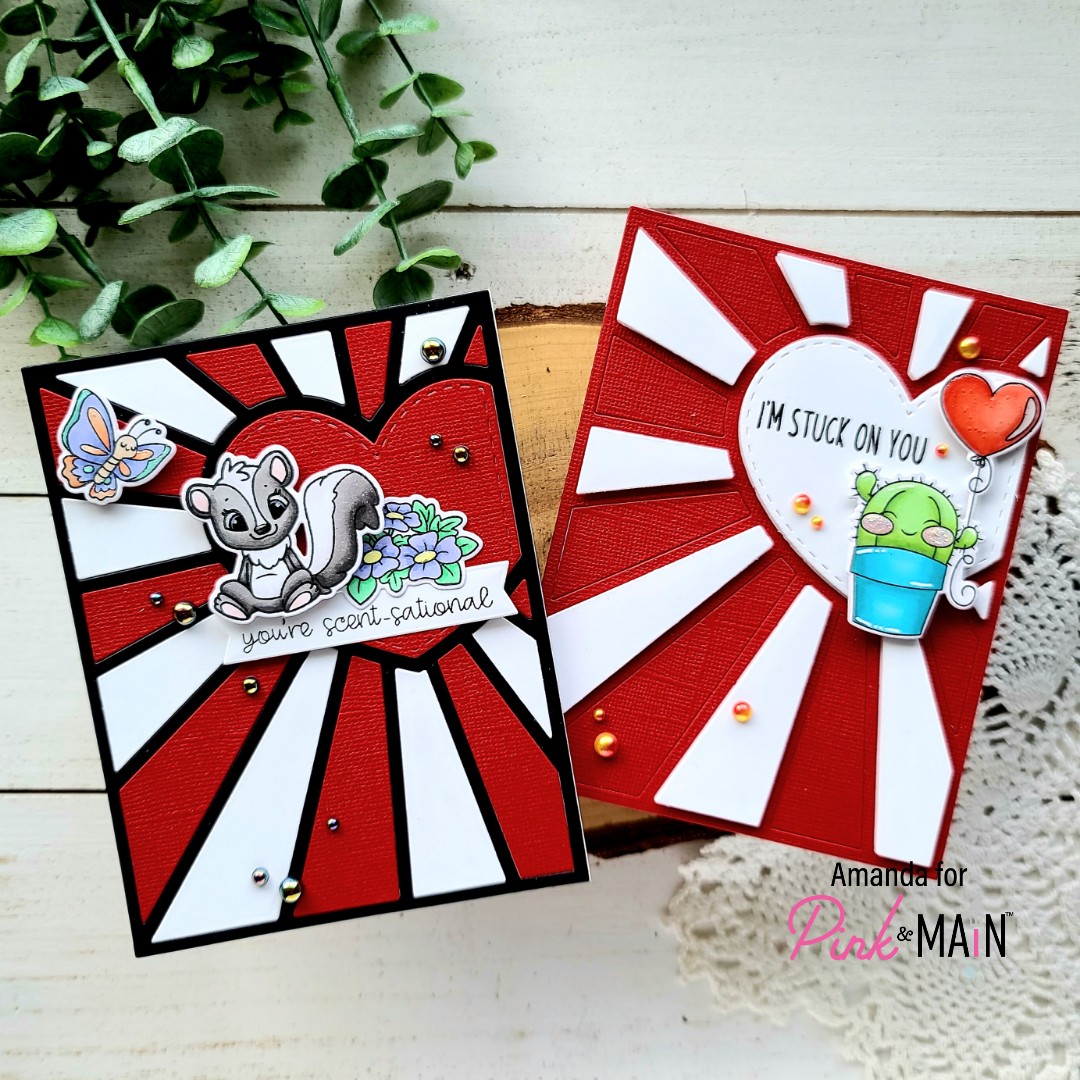
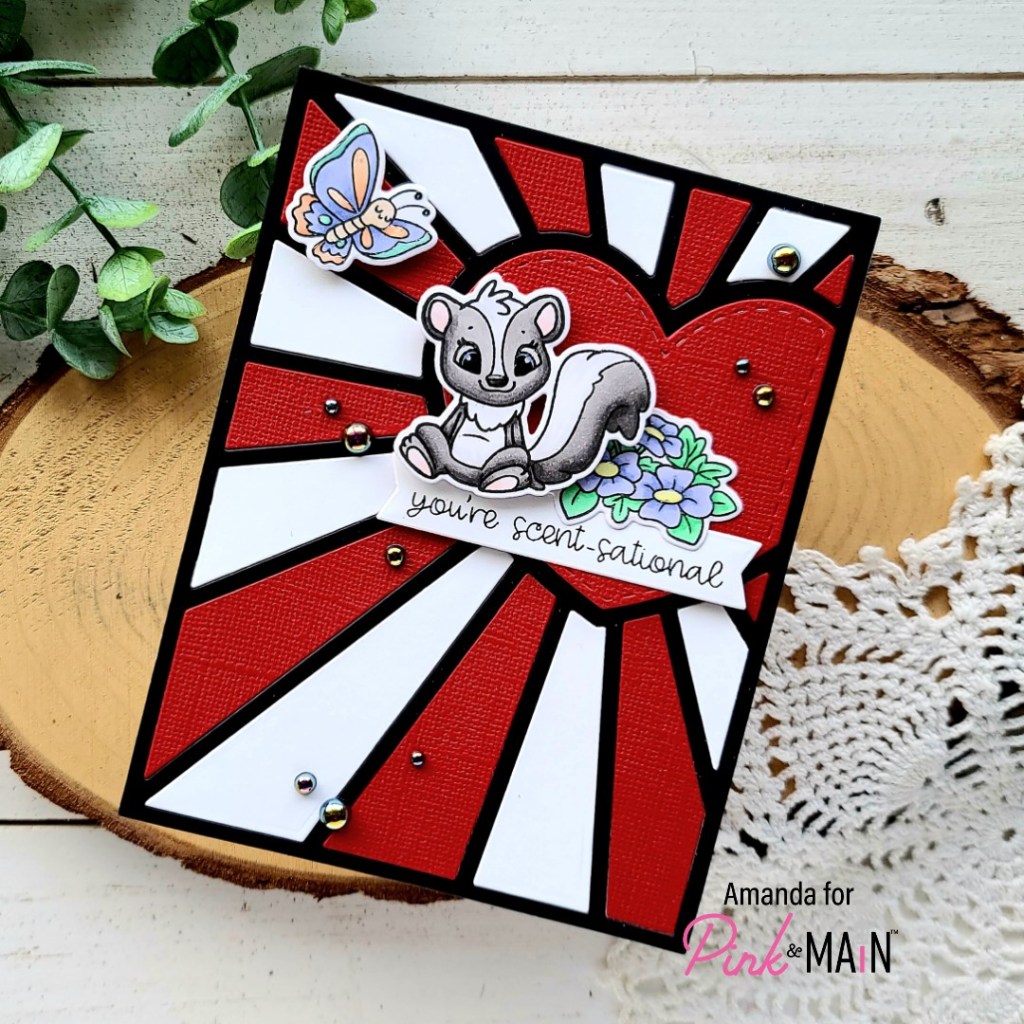
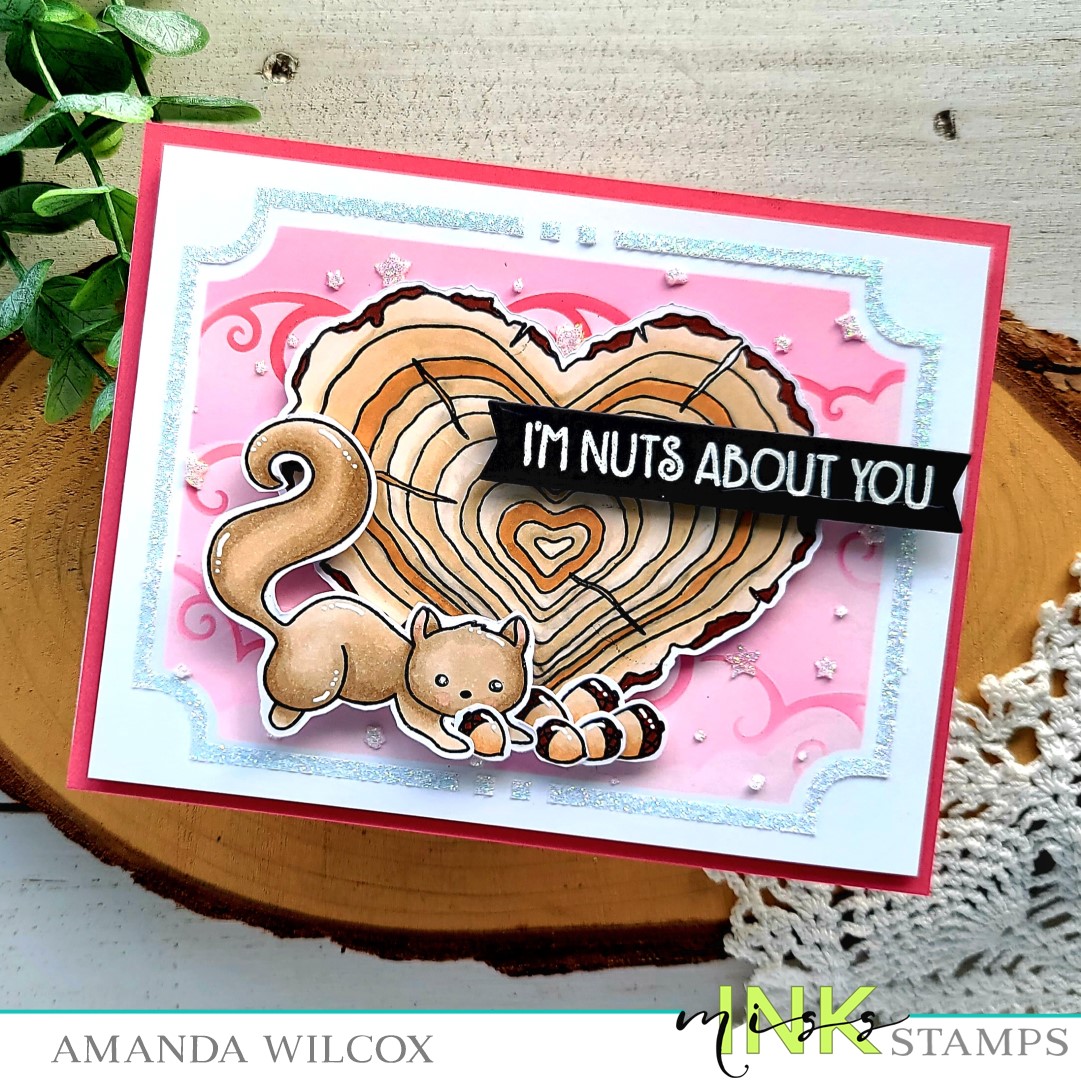
Thanks for stopping by today. I’m over on the Miss Ink Stamps blog with this adorable squirrel professing his nutty love just in time for Valentine’s Day. I layered a bundle of stencils to create the awesome background and couldn’t resist inking up my favorite squirrel and his heart shaped wood slice too!

I started by stamping images from Oh, Nuts! and Have Heart and colored them with my copic markers. Then I cut them out with my scissors and used a combination of liquid glue and foam squares to arrange my little scene. I set that all aside and switch gears to get messy for my background.

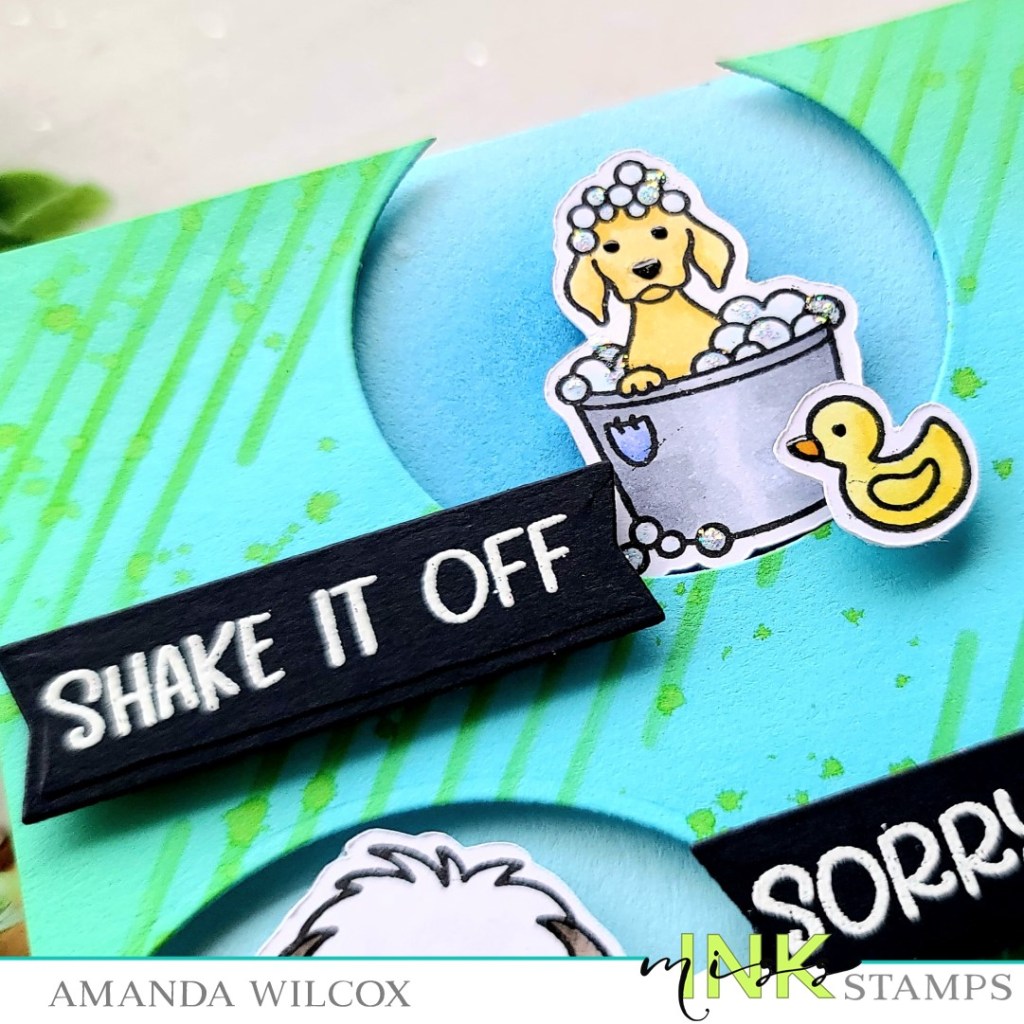
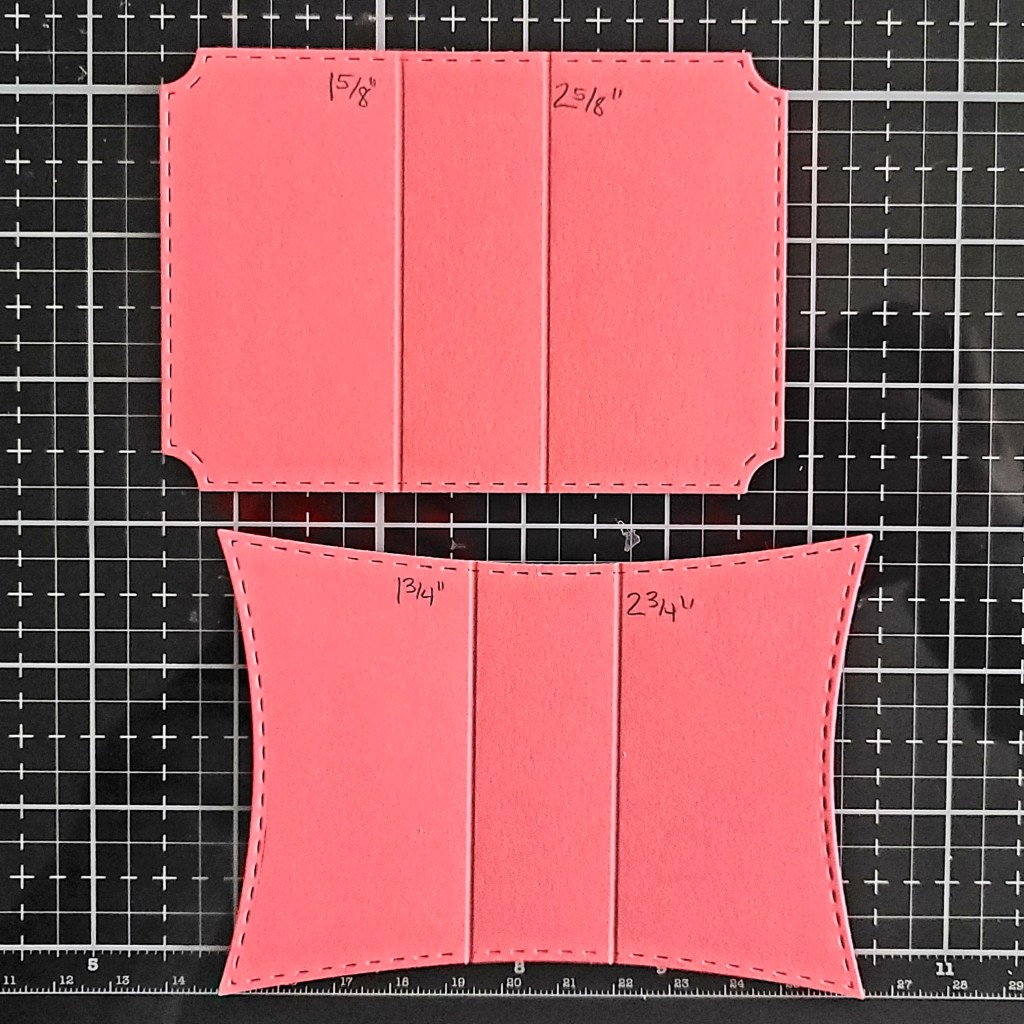
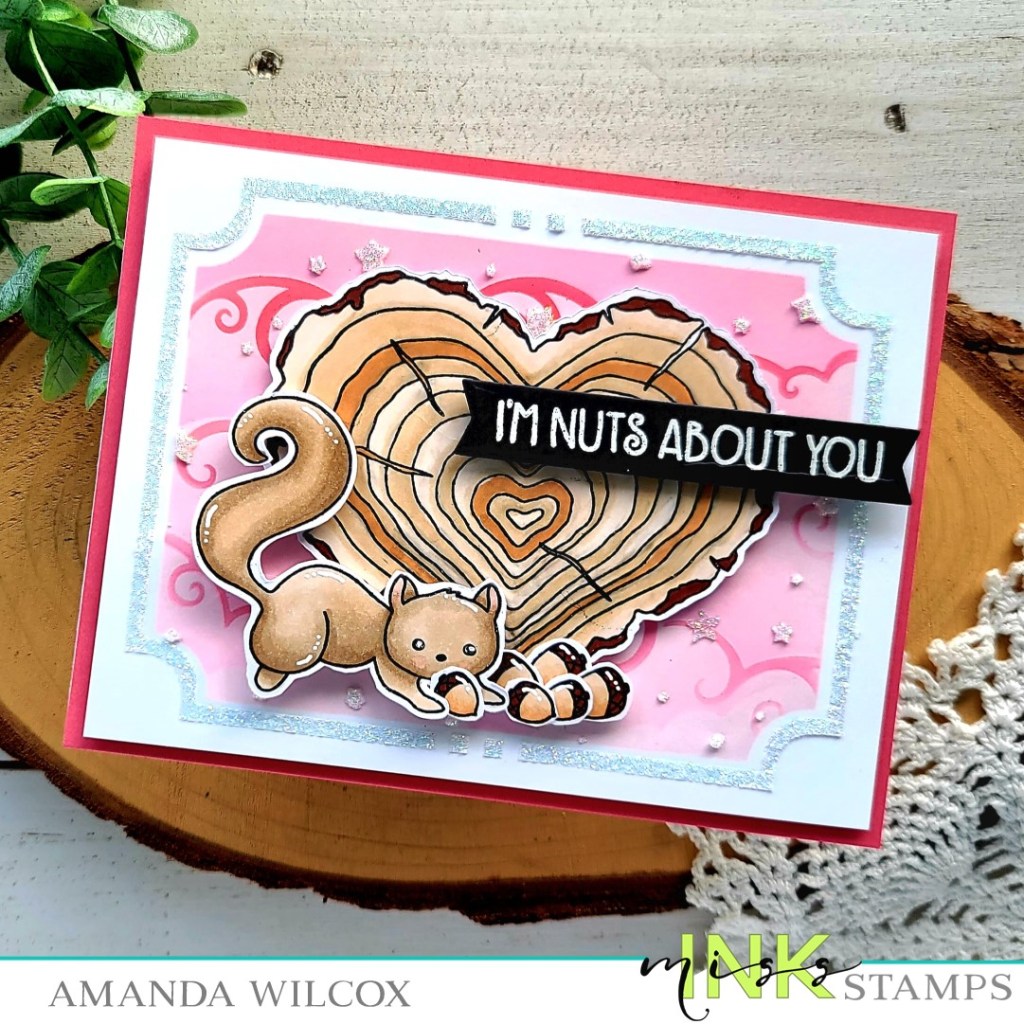
First I taped an A2 size piece of white cardstock to the back of the Ins & Outs Marquis layer with the window opening. I inked it up with kitsch flamingo distress oxide and then added the Scene Builder Clouds stencil and went over it with picked raspberry distress oxide lightly for some clouds. Then I slid the clouds stencil to match the swirls up with my cloud edges and added that detail with a heavier hand.

Now, to get messy I wiped off the edge of the marquis window stencil and layered the Starry Night stencil over the top and spread iridescent glitz glitter gel through that. I removed all of the stencils and let the glitz gel dry for a bit before adding the marquis frame layer and spreading the same glitz gel through that.

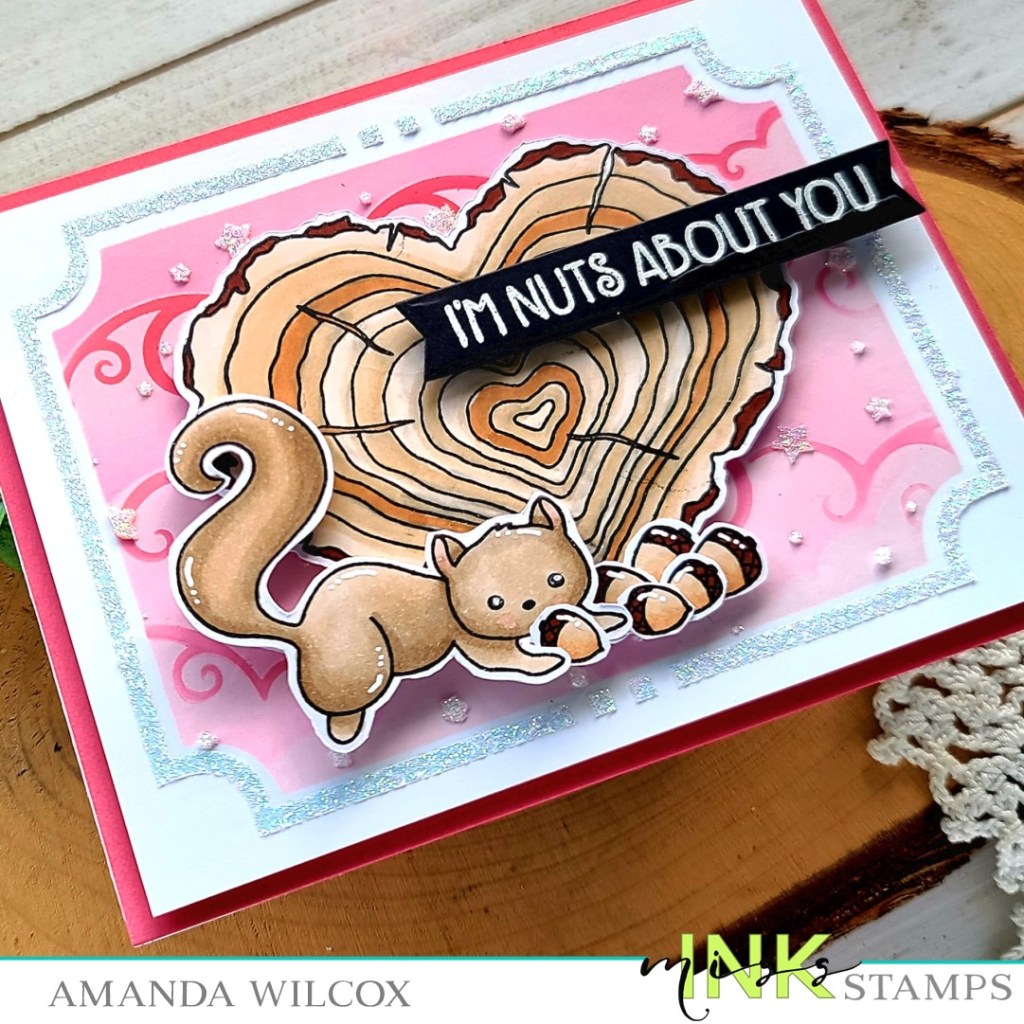
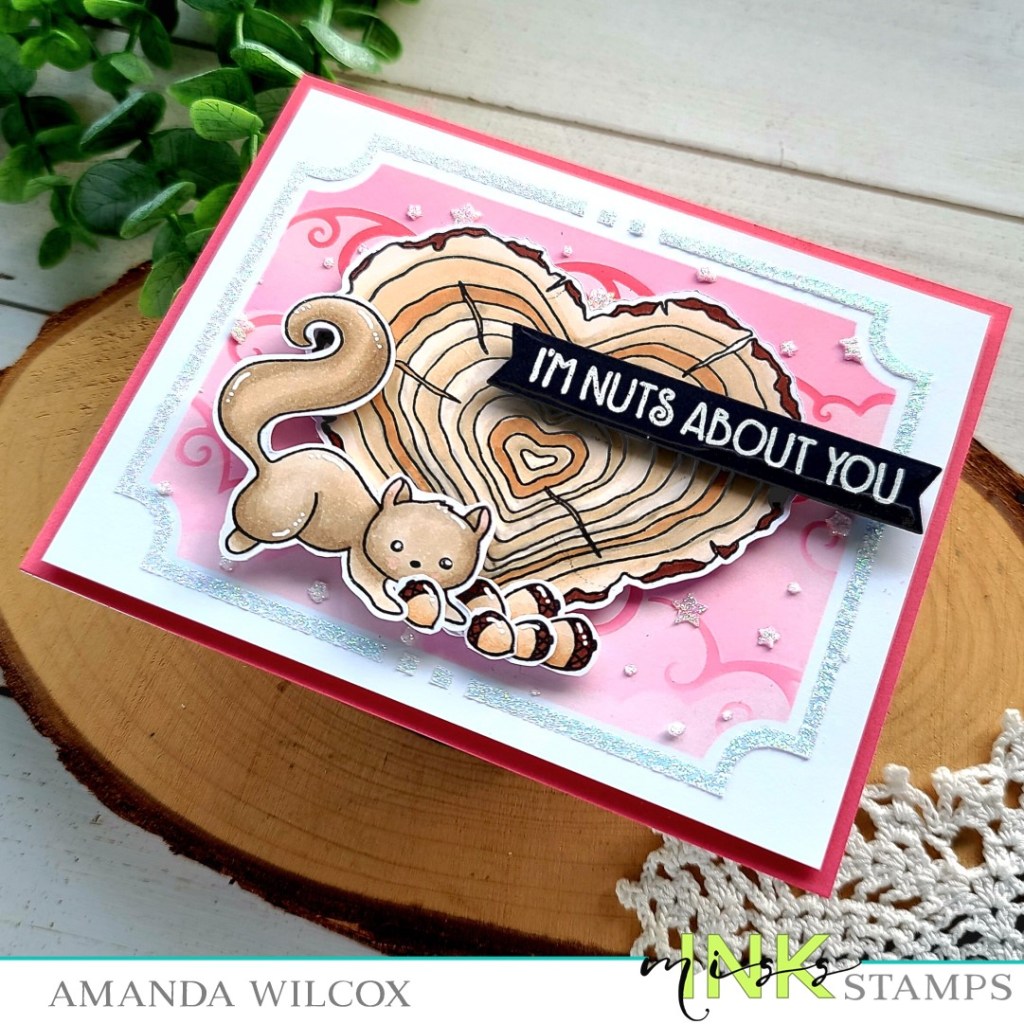
Once everything was completely dry I assembled my card. I decided to have a melon colored base layer that goes with the dark details in the clouds. I trimmed the stenciled panel down to 4×5.25 inches and popped it up with foam tape. Then I added my images with foam tape as well. Last, I stamped and heat embossed a sentiment on black cardstock, cut it out with a banner die and popped it up too.

For finishing touches I added white gel pen highlights to the images, black glaze pen to the squirrel’s eyes and once it was dry came back in with a white gel pen highlight there too.

Products used today:
Oh, Nuts! stamps
Have Heart stamps
Ins & Outs Marquis stencils
Starry Night stencil
Scene Builder Clouds stencil
Thermoweb Glitz Glitter Gel – iridescent
Thermoweb Stencil Pal
Pink & Main Large Sentiment Banner dies
Distress Oxide Ink – kitsch flamingo, picked raspberry
Foam tape and squares

I appreciate you sharing your time with me. Have a fabulous day!

Pink & Main – Quick Card Kit

Hey crafty friends! I’m back with a super fast and SUPER adorable post for you! I have 8 cards to share that I created with the incredible Pink & Main Quick Card Kit | Love You. It’s the most perfect set of products and was so fun to play with!

This kit comes with card bases, envelopes, a sheet of enamel dots and pre-made die cuts and card fronts to combine in any way you wish! However, it also comes with a super helpful layout sheet if you want to just build cards the way the description shows.

I can’t even really express how much fun I had mixing and matching, moving things around and playing with all of these elements! Literally everything on these cards, minus the foam tape to pop things up, came in the kit. I didn’t pull out any additional products!

Aren’t they all just the sweetest!?! I’m over the moon for all these sweet critters! Do you have a favorite?

There’s still time to order this awesome kit if you need a batch of Valentine cards to share or you could change them up for some adorable thinking of you, love you cards for any time of the year too!

Products used today:
Quick Card Kit | Love You
Foam tape

I appreciate you sharing your time with me. Have a fabulous day!

Miss Ink Stamps – Hip Hippo Hooray

Happy Thursday everyone! Thank you for stopping by. Today I have an adorable hippo card using stamps and a bunch of stencils layered for a cool background from Miss Ink Stamps.

I knew the general design I wanted to create so today I jumped straight in with my background panel. I chose a fun purple cardstock from my stash and sprayed the Fine Lines stencil with pixie spray. With delicate stencils like this pixie spray is your best friend, I promise! After letting it sit for a few minutes I pressed the stencil to my panel and inked up with a purple ink for that great tone-on-tone stripe! I love it! Next I used the Hand Drawn Hearts stencil with white pigment ink over the stripes. Then, last but not least, I used the Tiny Snowfall stencil and spread lovely lavender glitz glitter gel from Thermoweb through it.

I set that panel aside to dry and cleaned up my mess. Then I chose images from Hippo Hooray, stamped and colored them with my copics. I used the scan-n-cut to cut them out. For my scene, I die cut a circle with the Trinity Stamps embossed edge circle stack from teal cardstock. I inked up the bottom portion with a blending brush and brown dye ink, then I went around the rest of the edge with teal ink for a little depth.

I adhered the seaweed and rocks with liquid glue and popped all the critters up with foam squares. Then I popped the circle up on the stenciled panel with foam tape and adhered the whole thing to a white card base. Last, I stamped and heat embossed a sentiment on black cardstock and die cut it with a Pink & Main large sentiment strip die. I popped the sentiment up with foam squares and trimmed off the edge.

For finishing touches today I just added loads of fun white gel pen highlights to all the images. Then I added black glaze pen to the critter eyes and after it dried put a tiny white highlight back in. This really makes the eyes come to life. I love it!

Do you layer your stencils over top of each other? It’s a newer technique for me but I just love it every time I play with a new combo!

Products used today:
Miss Ink Stamps Hippo Hooray stamps
Miss Ink Stamps Fine Lines stencil
Miss Ink Stamps Tiny Snowfall stencil
Miss Ink Stamps Hand Drawn Hearts stencil
Trinity Stamps Blending brushes
Trinity Stamps Embossed Edge Circle dies
Pink & Main Large Sentiment Strips dies
Thermoweb Pixie Spray
Thermoweb Glitz Glitter Gel – fresh lavender
Thermoweb Stencil Pal
Thermoweb foam tape and squares

I appreciate you sharing your time with me. Have a fabulous day!

Jane’s Doodles – Love Is In The Air

Welcome everyone! Thanks for stopping by. I’m super excited to be over on the Jane’s Doodles blog today with a sweet card featuring the Love Is In The Air digital stamp set. These pups are absolutely adorable and so fun to color!

I printed out my images and colored them with my copic markers. Then I used the scan-n-cut to cut them all out and switch gears to my background.

I took an A2 white panel and inked up the layered hearts stencil set from Trinity Stamps with yellow dye inks and my blending brushes. I used 2 colors of ink, just a lighter hand on one layer and heavier on the second so the color gets darker with each layer closer to the center. Then I trimmed it down to 4×5.25 inches and splattered it with gold watercolor.

When the watercolor was dry, I popped the panel up with foam tape on a white card base and then added my images with foam squares too. Last, I die cut the sentiment with a large sentiment strip from Pink & Main and popped it up too. I trimmed anything hanging over the edge and moved on to finishing touches.

I started wtih glossy accents on the puppy noses and white gel pen accents but then I came back in with glossy accents on anything that looked metal on the plane, the dog’s goggles and tag. Finally I ended with unicorn Stickles on the clouds for a little more shimmer.

Isn’t this so fun!?! I was inspired by Nichol Spohr to ink my background like this and I just love how it turned out. Click HERE to see her video that inspired me.

Products used today:
Love is in the Air digital stamps
Trinity Stamps Layered Heart stencils
Trinity Stamps blending buddy brush
Pink & Main Large Sentiment Strip dies
Foam tape and squares
Glossy accents
Stickles – unicorn

I appreciate you sharing your time with me. Have a fabulous day!

Pink & Main – Hap-pea When I’m With You

Happy Friday friends! That means it’s time for another fantastic bit of inspiration featuring Pink & Main goodies! I’m sharing this sparkly, non-traditional Valentine card over on their blog today.

This was an idea that popped in my head while I was at work and I could not wait to get home and try it out! I’m so happy it turned out as cute as it did too!

I started by stamping and coloring images from One Smart Cookie with my copic markers. I used the coordinating dies to cut them out and set them aside. I stamped and heat embossed the coordinating sentiment to my main image on black cardstock and cut it out with a large sentiment strip too.

Next, it was time to get inky and messy. I took a white panel and inked up the first layer (solid hearts) of the new conversation hearts stencil set with orange ink. Then I switched to the second layer and used a palette knife to spread glossy gel through the stencil. I removed the stencil and sprinkled emerald super fine glitter all over the panel and set it aside to dry.

Once it was dry, I die cut it with the second to largest stackable rectangle die and added foam tape to the back of it. I popped it on a white card base and die cut the next to largest reverse scallop rectangle frame adding it to the card front with foam strips too. Last, I added my images and sentiment banner with foam squares.

For finishing touches I added white gel pen highlights to the images and glossy accents to the hearts floating above the cute veggie couple.

Isn’t this card so silly and fun!?! I think so and I had so much fun creating it too!

Products used today:
One Smart Cookie stamps and dies
Conversation Hearts stencil
Glossy gel
Palette knife
Emerald super fine glitter
Blending brush
Reverse Scallop Rectangle dies
Large Sentiment Strip dies
Layered Rectangle A2 dies
Foam squares and strips
Glossy accents

I appreciate you sharing your time with me. Have a fabulous day!

Pink & Main – Heart Spotlight Cover Die Cards

Happy Friday everyone!!! I’m over on the Pink & Main blog today celebrating release day!!! Today I have a bundle of cards for you featuring the new heart burst cover plate and images from lots of the new stamp sets too!

The night that I got my release package I started cutting this cover plate out of every color of cardstock I could get my hands on. I had so many ideas and it was so much fun! So today I’ve narrowed it down to 4 cards to share with you. Let’s dive in!

First I cut the background from white, black and red cardstocks. I glued the black frame to a card base and inlayed the white and red bursts with EZ squeeze liquid glue. Then I popped the heart up with foam tape. For the second card, I adhered the red frame to a card base and inlayed the red bursts while popping the white ones up with foam tape, along with the heart as well.

Then for this card, I stamped and colored images from Stinkin’ Sweet with my copic markers. I used the coordinating dies to cut them out and added them with a combination of foam squares and EZ Squeeze liquid glue. I stamped a sentiment from the set and cut it out with a large sentiment strip die and tucked it underneath the images to ground my mini scene.

For finishing touches I added glossy accents to the skunk’s eyes and nose, the flower centers and parts of the butterfly. Then I glued a scattering of pearls from Essential Pearls pack across the whole design.

Isn’t it so bold and still adorable?!? I love it! Now for the second card…

I place my card in my MISTI and stamped a sentiment from Prickly Hugs on the heart. Then I stamped an image from the same set and colored it with my copic markers. I used the coordinating dies to cut it out and added foam adhesive to the back. After removing the release paper, I popped it in place, tucking it right around the sentiment perfectly.

For finishing touches on this fun card, I added some white gel pen highlights and glossy accents to the balloon. Then I just had to add unicorn Stickles to the cacti cheeks. Last I glued a scattering of Unicorn Pearls across the design.

Now, I have a pair of quick and easy but absolutely adorable Valentine cards that you could mass product if you needed.

I cut the heart burst frame from melon and pink cardstocks and still had my white frame from the cards above. For the card on the left I glued the frame and bursts directly to the card base with EZ Squeeze liquid glue. Then, before popping up my heart, I stamped and heat embossed a sentiment from the new My Heart Smile set. Once that was finished I added a little Wink of Stella glitter brush pen to the hearts in the sentiment and glued a scattering of Pastel Pearls across the design.

For the card on the right, I doubled up the frame gluing the light pink one beneath the melon one for a little dimension. Then I inlayed the bursts and popped up the heart with foam squares again. This time for the sentiment, I stamped and heat embossed it on vellum and used the coordinating dies to cut it out. I used R35 and R39 copic markers to color the back size of the vellum for a little interest before using tape runner to adhere it down. I finished this card off with a scattering of the same pearls. Voila!

Aren’t all of these cards just too much fun!!! I can’t wait to play more! I hope you enjoyed today’s projects and have fun shopping the new release!

Products used today:
Heart Burst Cover Plate die
Prickly Hugs stamps and dies
Stinkin’ Sweet stamps and dies
My Heart Smile stamps and dies
Large Sentiment Strip dies
Essentials Pearls
Pastel Pearls
Unicorn Pearls
EZ Squeeze liquid glue
Foam squares
Glossy accents
Stickles – unicorn

I appreciate you sharing your time with me. Have a fabulous day!

Coffee Loving Cardmakers – Peppermint Spice and Everything Nice

Hello again crafty friends! It’s Tuesday Tea with Twiddler’s Nook over on the Coffee Loving Cardmakers blog today and I had an absolute blast creating today’s card. I don’t think I’ve ever been so free thinking with combining products from different companies. It was so fun!

To start my card, I cut the Boo Brew mug and stitching detail from Trinity Stamps from pink cardstock. Then I cut a nested heart to go with it. That’s as far as my planning went. Lol. So I grabbed my blending brushes, Lawn Fawn ballet slippers and guava inks and inked the edges of my die cuts. Then I wanted texture on the background heart so I went looking for a stencil or something. I instantly landed on this Pink & Main woodgrain embossing folder.

I got into my Newton’s Nook stash for my framework dies to cut a background panel and remembered the awesome peppermint candy dies and everything just came together from this point on. I cut the background from white cardstock and then used the petite hearts stencil that was just revealed yesterday (It will be available to purchase on Friday.) I didn’t want everything to be stark white so I used Lawn Fawn pizza crust ink on the edges of the background panel and my card base. To dress up my mug a little I cut the smallest heart from the Heart Frames set from the same cardstock as the large heart and glued it down.

I popped the background panel up with foam tape, then popped the large heart up too. I used a combination of liquid glue and foam squares for my mug and peppermint candies. Then I die cut a stitched banner from Newton’s Nook banner trio die set and stamped a sentiment from the Cup of Cocoa stamp set in ballet slippers ink. I dusted the edges with the same pizza crust ink and popped it up with foam squares too.

I used my scissors to trim off the excess hanging over the edge and moved on to finishing touches. For that I just glue three Trinity Stamps jelly drop hearts down – one to the mug and two by the sentiment banner.

I hope you enjoyed today’s project as much as I did creating it.

Products used today:
Trinity Stamps Nested Heart dies
Trinity Stamps Boo Brew dies
Trinity Stamps Jelly Drop Hearts embellishments
Pink & Main Woodgrain embossing folder
Newton’s Nook Petit Hearts stencil
Newton’s Nook Banner Trio dies
Newton’s Nook Framework dies
Newton’s Nook Cup of Cocoa stamps
Newton’s Nook Peppermint dies
Foam tape

I appreciate you sharing your time with me. Have a fabulous day!

Pink & Main – Thank You

Happy Friday everyone! You’ve made it through another awesome week! I hope you have fun plans for the weekend. My daughter has a dance competition so we’ll be busy and it will be so fun!

Today I’m over on the Pink & Main blog still trying to catch up on thank you cards. It seems as soon as I make a batch and send them, I find reasons to need more.

Today I started by stamping the bunny from Love Ewe and colored it with my copic markers. Then I used the coordinating die to cut it out. Next, I pulled out the Best Friends paper pad and cut the plaid with the largest layered rectangle die. I wanted a little contrast for my bunny so I chose the light blue polka dot paper in the pad and cut it out with the next-to-largest stitched arches die.

I pulled out the big thank you dies and cut the words from white cardstock 4 times, using EZ Squeeze liquid adhesive to glue them together. Then I cut a small circle from another paper in the same pack and stamped sending big hugs from the spotlight sayings stamp set on it.

I adhered the plaid paper to a white card base and popped the stitched arch up with foam tape. Then I popped the bunny up with foam squares, doubling the squares on his feet and tips of the ears so it lays flat. I carefully added some foam strips to the back of the “thank you” dies and added them over those awesome long legs. Last, I added the big hugs circle and trimmed off anything hanging over the edge.

For finishing touches, I added glossy accents to the bunny’s nose and eyes and then a scattering of glitter enamel dots across the whole design.

Isn’t this just the cutest!?! And it’s super fun to pull out sets for other times of the year and extend your use of them too!

Products used today:
Love Ewe stamps and dies
Spotlight Sayings stamps
Big Thank You dies
Stitched Arches dies
Layered A2 Rectangles dies
Layered Circles dies
EZ Squeeze liquid adhesive
Best Friends paper pad
Glitter enamel dots

I appreciate you sharing your time with me. Have a fabulous day!

Miss Ink Stamps – Pamper Yourself

Hello everyone! I’m popping in this afternoon with a fun “it’ll be okay” type card featuring stamps and stencils from Miss Ink Stamps.

You know I love my critters and these Rub-a-dub Doggies are pretty high on that list! I love that they are distinctly different breeds of dogs sudsing up and shaking off! They are super cute!

To create my card, I stamped a few of the pups and some accessories and colored them with my copic markers. I used the scan-n-cut to cut them out and set them aside. Then I took a blue panel and the Between the Lines stencil and inked it up with a green dye ink and a blending brush. Next, I pulled out my set of circle dies, chose 3 sizes that fit the dogs and cut holes in my panel. I thought the panel was a little stark so, without adding more ink to my brush, I inked up the edges of the cardstock. Then I flicked watered down ink all over the panel for extra texture.

Then I cut a very light blue piece of cardstock to go behind the window panel. I used the pups as a guide to ink up a little blue shadow behind each one for some added interest. Then I put foam tape on the stenciled panel and popped it up on the blue panel.

I added foam squares to the back of all the images and filled in each window with its coordinating dog and accessories.

I chose 3 sentiments from the set, stamped and heat embossed them and die cut them with banner dies before popping them up with foam squares too.

For finishing touches I added glossy accents to pup noses, black glaze pen to their eyes and unicorn Stickles to random bubbles.

Isn’t this a fun card to share with someone needing a pick-me-up?!? I think it will be perfect for it!

Products used today:
Rub-a-dub Doggies stamps
Between the Lines stencil
Pink & Main Layered Circle dies
Pink & Main Large Sentiment Strip dies
Blending Buddy brush
Lawn Fawn Cilantro ink
Foam tape and squares
Glossy accents
Stickles – unicorn

I appreciate you sharing your time with me. Have a fabulous day!

Pink & Main – Valentine Treat Holders

Happy Friday friends! Thanks so much for stopping by. Today I’m over on the Pink & Main blog sharing a super fun way to create treat holders. Mine are for Valentine’s Day but these are easily customizable for birthdays or any other holiday too!

These treat holders are so fun and easy to create. They are great for mass producing and completely customizable using products you probably already have! I wanted to share different versions today so you can see that fun dies you might already have could work!

The two die sets I used today were the notched corner dies (top) and concave rectangles dies (bottom). Specifically, I die cut the third largest notched corner die and scored it at 1 5/8″ and 2 5/8″. This gives you an inch wide strip in the middle to adhere your treats. Specifically Hershey Kisses and Rolos work perfectly! Just add a strip of tape runner or glue dots and you can get 3 treats in each one.

For my treat holders today, I cut one of each of the shapes I showed above from pink cardstock and inked it up with the scattered hearts stencil and white pigment ink using my ergonomic blending brush. Then I scored them both and folded them up. I stamped and colored this fun image from Rawr with my copic markers twice before cutting it out with the coordinating dies.

I used the image as a guide where to stamp my sentiment on the bottom between the dinos and then punched a hole in the top center of each one so I could tie it shut with a little twine. I popped my images up with foam squares for a bit of dimension and interest but if you’re making these for kiddos or tons of them you could easily skip that step.

Aren’t they so fun!?! Valentine’s Day is my very favorite holiday to create treat type gifts for and I wanted to share this idea early enough that you might have time to plan and create without the rush and stress.

Products used today:
Notched Corners dies
Concave Rectangles dies
Scattered Hearts stencil
Rawr stamps and dies
Ergonomic blending brush
Foam squares

I appreciate you sharing your time with me. Have a fabulous day!