Spellbinders – Happy Birthday Lion

Hey friends! Happy New Year! I took a bit of time off for the holidays and only did the crafting that I had to for my teams. It was really nice and we did some fun things. Today I’m back with a birthday card that I made for my dad last week. I didn’t want to share it here until he had opened it.

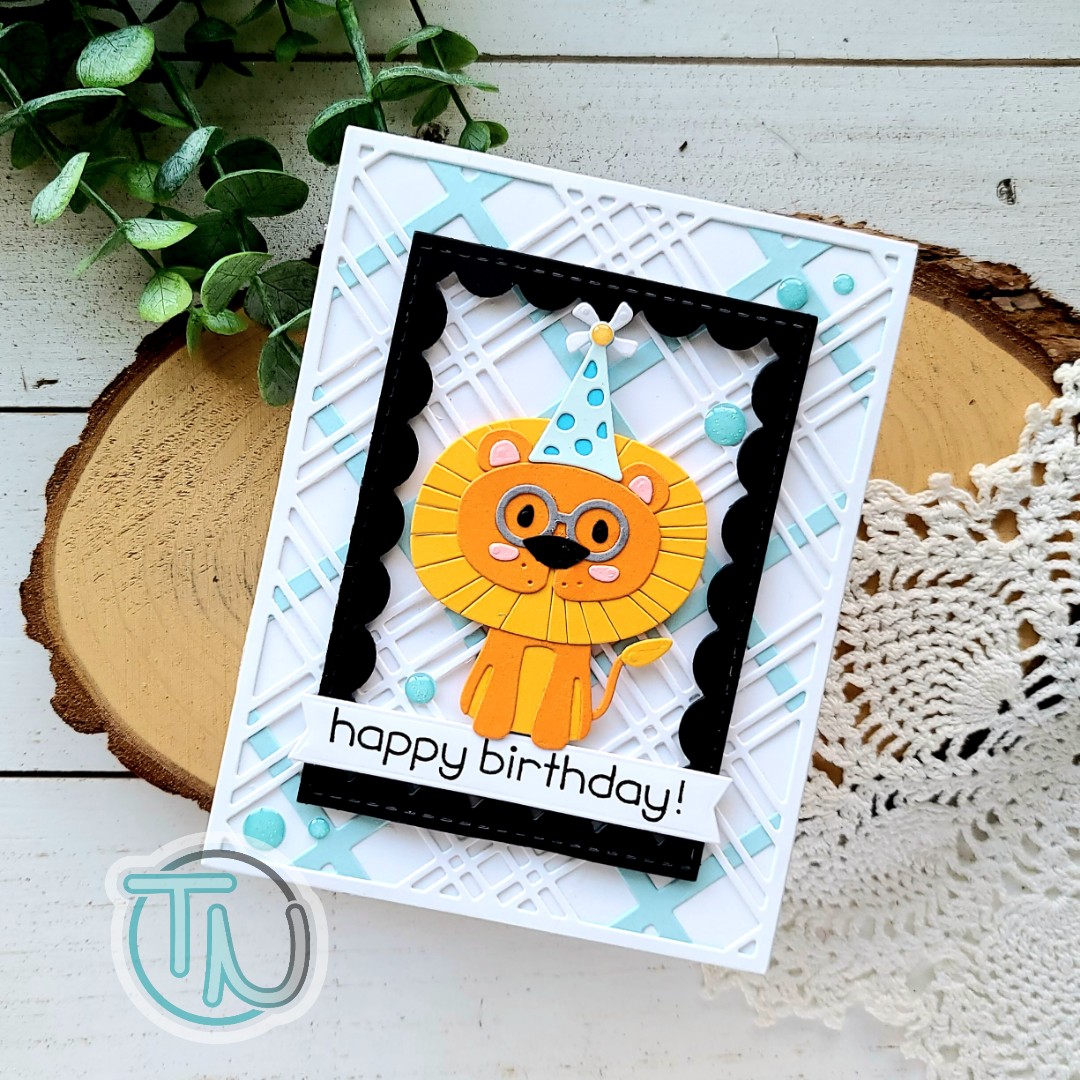
I started by cutting the elements from the Spellbinders Lion, Oh My! set and used liquid glue to adhere them all together. Isn’t he just the most studious party lion ever?!? I love him! Then I pulled out some dies from Pink & Main to create my background.

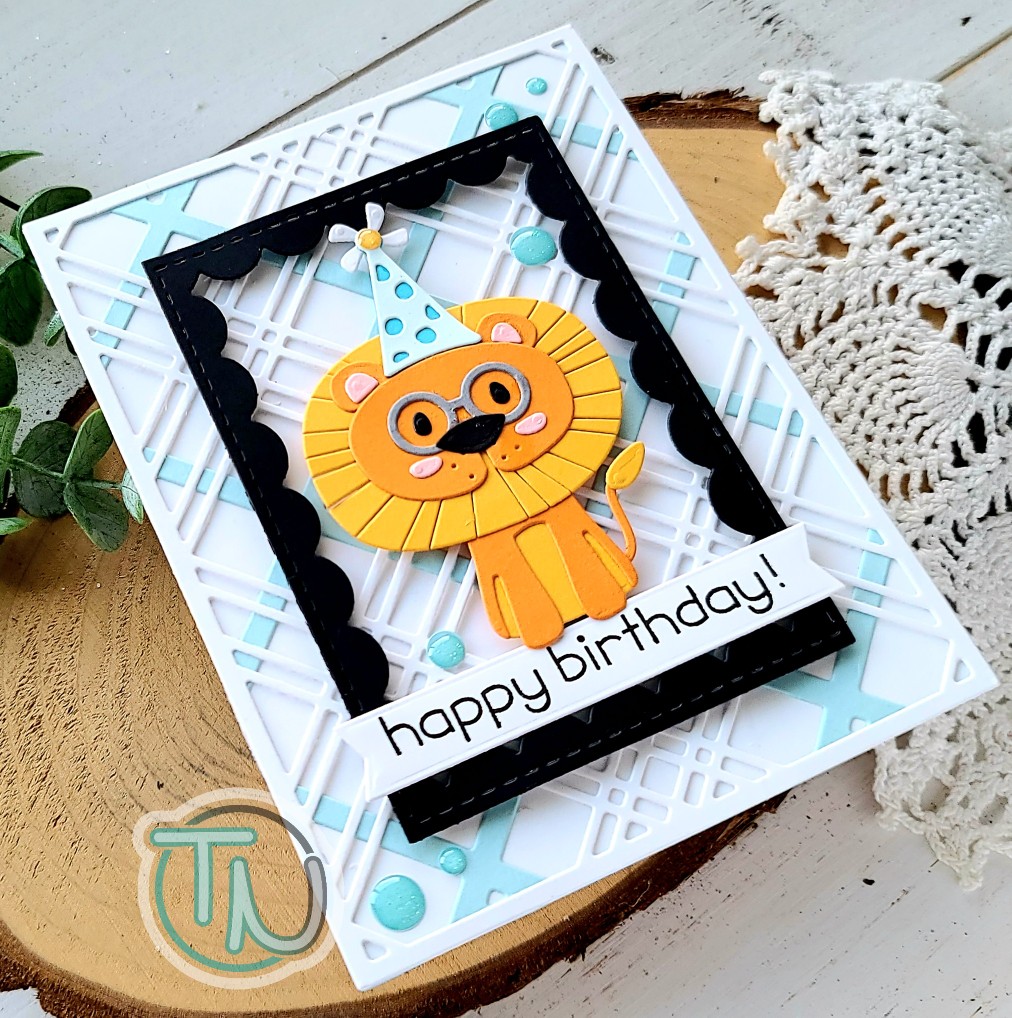
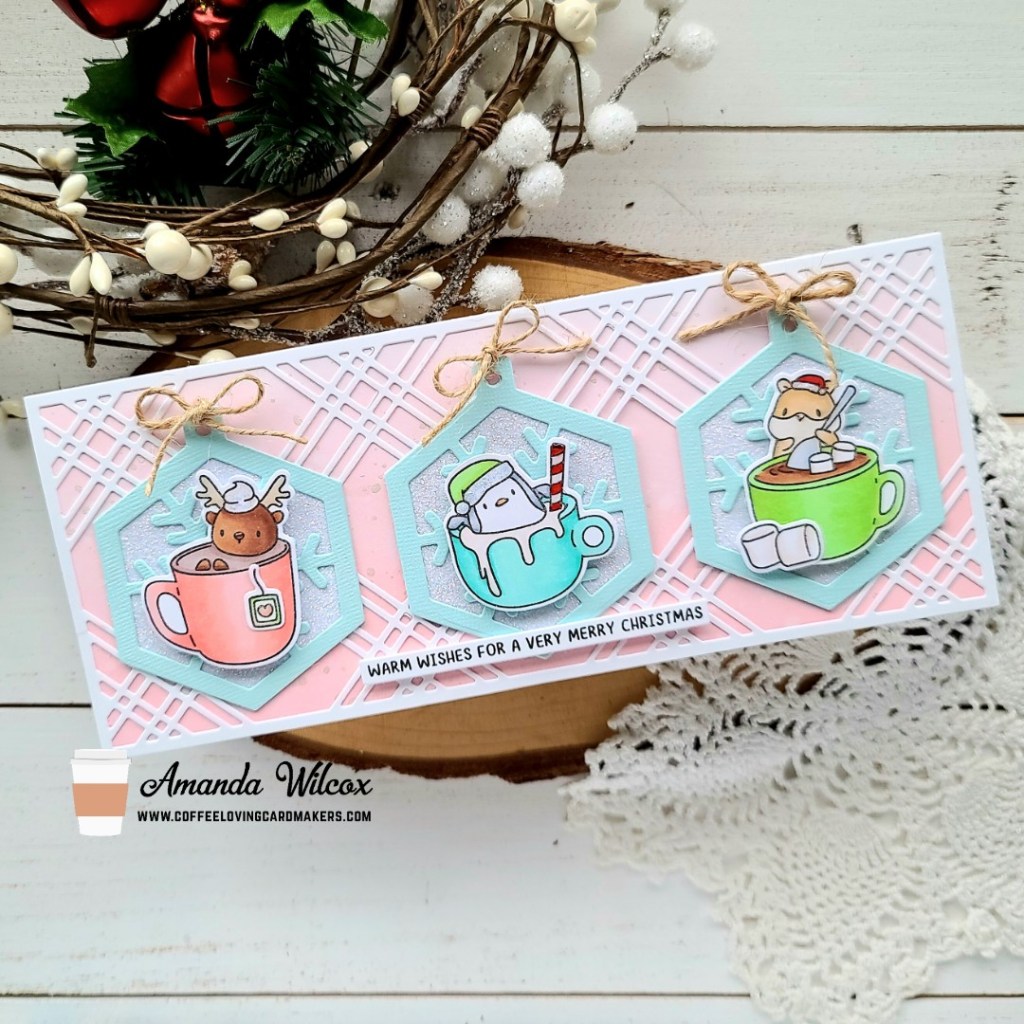
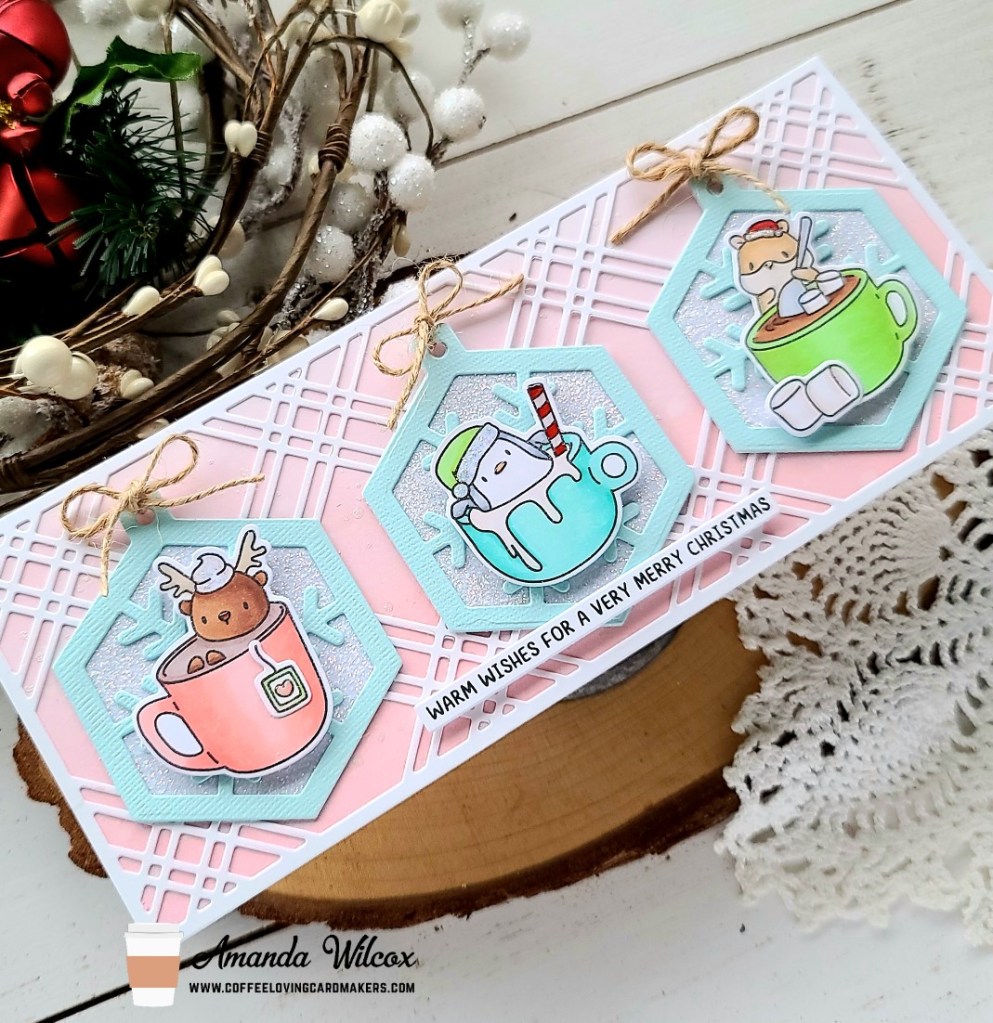
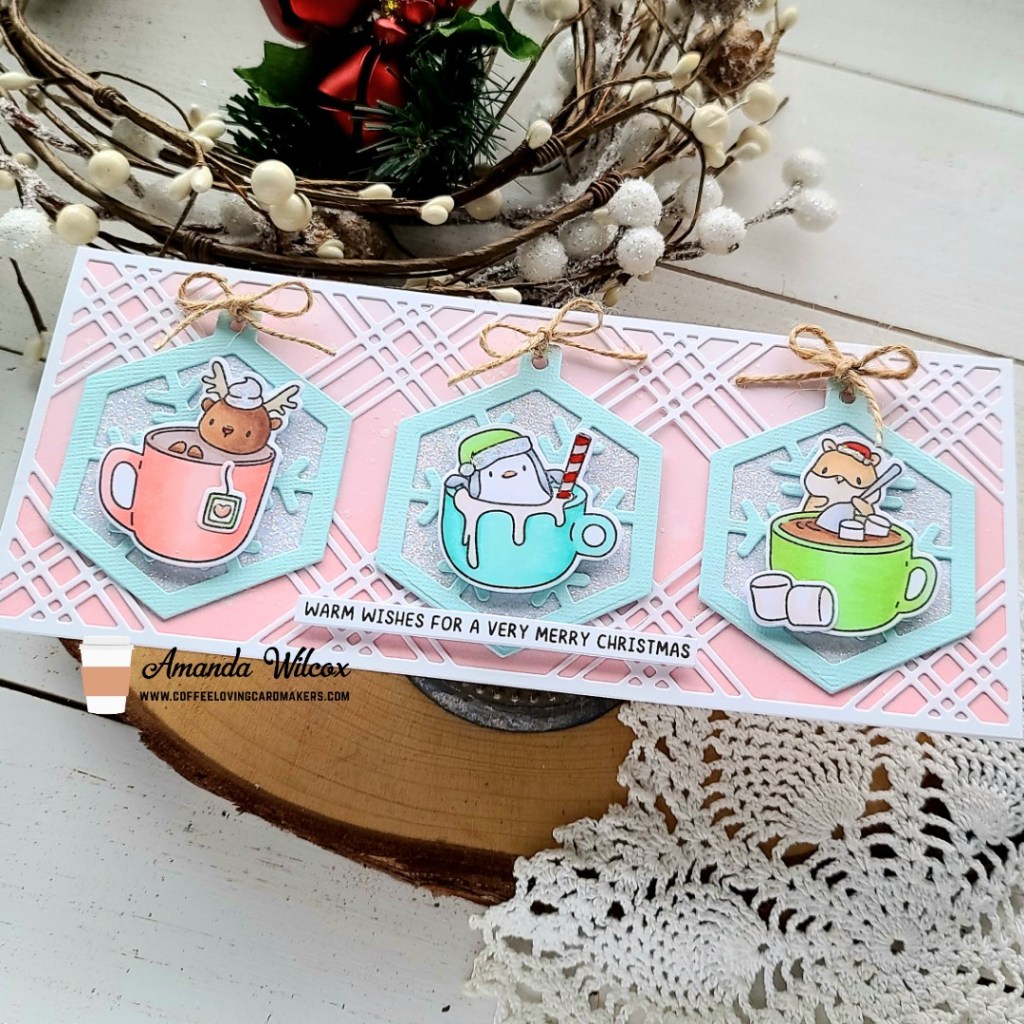
I cut a white card base and folded it. Then I cut the two layers of the Pink & Main Plaid Cover dies from white and light blue and adhered them together. Next, I cut a Reverse Scallop Frame from Pink & Main out of black cardstock and popped it up with foam strips.

I dug through my stash for a good happy birthday sentiment and ultimately landed on a simple one from Lawn Fawn cut out with a Pink & Main Large Sentiment Strip die. I added foam squares to the banner and lion and popped them in place next. Then I finished everything off with a scattering of glitter enamel dots from Pink & Main.

I am so happy with how this card turned out and my dad liked it too! Success!

Products used:
Spellbinders Lion, Oh My! dies
Pink & Main Plaid Cover dies
Pink & Main Reverse Scallop Rectangles dies
Pink & Main Large Sentiment Strip dies
Pink & Main Glitter Enamel Dots
Foam squares and strips

I appreciate you sharing your time with me. Have a fabulous day!

Pink & Main – Woofing You a Great Day

Hello everyone! I’m over on the Pink & Main blog today with an adorable card featuring the stamp and die of the month for December. It is the CUTEST puppy set! I absolutely love all of the images in the set and the sentiments are too cute too!!!

I started my card with a layout in mind so I stamped the images from the set and colored them with my copic markers. Then I used the coordinating dies to cut them out. Then I pulled out the awesome rainbow die from the Rainbow Friend die set and cut it from white cardstock. I pulled all the pieces apart and used my copics to color those as well. I seriously love adding color to dies like this with markers instead of colored cardstock. Then I cut a white circle just a smidge smaller than the scalloped outline and adhered everything to that. This makes it tons easier to add to my card, especially since it’s popped up with foam tape.

I chose a gray patterned paper from the Hooray paper pad and cut it out with the largest Layered Rectangle A2 die. I adhered it to a white card base with EZ Squeeze liquid glue and popped my rainbow panel up. Then I added foam squares to my images and popped them up as well.

I chose a sentiment from the set, stamped it and cut it out with a Large Sentiment Banner die and popped it up as well. The parts of the puppy and sentiment that hang over the rainbow circle have double layer foam squares so it lays flat. I love the depth the extra layer gives everything.

For finishing touches I added black glaze pen to the puppy’s eyes and glossy accents to the nose, bow and shine mark on the balloon. Then I finished the design off with a scattering of gray glitter enamel dots from the Rainbow pack.

It’s almost weird to switch gears from holiday cards to this but also a little refreshing. If you’re interested in subscribing to the stamp and die of the month, click HERE. It’s a steal of a deal and guarantees you super fun happy mail each month to create with!

Products used today:
Puppy Love stamps and dies – Stamp of the Month
Rainbow Friend dies
Layered Rectangle A2 dies
Large Sentiment Strip dies
Hooray paper pad
Rainbow glitter enamel dots
EZ Squeeze liquid glue
Glossy accents
Foam squares and tape

I appreciate you sharing your time with me. Have a fabulous day!

Coffee Loving Cardmakers – Coffee Date!

Hey friends! I’m over on the Coffee Loving Cardmakers blog today having a coffee date with my friend Beata June! Here’s a peek at my card but you’ll have to head to the Coffee Lovers blog to see hers!

For our coffee date we chose a layout and a stamp set to use but everything else was up in the air! Using the Mama Elephant Hot Cocoa stamp set and a slimline – 3 window design idea, this is what I came up with. I colored the images with my copic markers and cut them out with the coordinating dies. I cut the hexatag from glitter cardstock and layered the snowflake version over the top in light blue. Then I tied twine bows at the top for a little texture.

On my background panel I ink blended distress oxide ink in spun sugar and festive berries on a white panel. I spritzed it with water and flicked pearl watercolor all over. Once it was dry, I die cut and adhered a slimline plaid panel from Pink & Main.

To assemble my card, I adhered the tags to the front panel with liquid glue and popped the images up with foam squares. Then I pulled out the Easy Christmas Messages set out, stamped and die cut one, then popped it up with a foam strip.

For finishing touches on this card, I added glossy accents to various things like noses and beaks, peppermint sticks and tea tags. Then I came in with unicorn Stickles on hats and whipped cream for some extra sparkle.

Isn’t this just the sweetest!?! I hope you’re all ready for Christmas tomorrow. I totally am and I’m almost more excited than the kids! So silly but I love it all!

Products used today:
Mama Elephant Hot Cocoa stamps and dies
Mama Elephant Hexatag dies
Mama Elephant Easy Xmas Greetings stamps
Pink & Main Plaid Slimline die
Foam squares
Glossy accents
Stickles – unicorn
Distress Oxide ink – spun sugar, festive berries
Copic markers

Merry Christmas!!! I appreciate you sharing your time with me. Have a fabulous holiday everyone!

Pink & Main – Snow Sweet of You Rainbow

Hello there everyone! Today I’m over on the Pink & Main blog with some wintery rainbow cuteness! I’m sharing a fun thank you style card featuring some adorable snowmen and a few Pink & Main dies as well.

For today’s fun card, I had a general layout in mind but no color scheme. Often when this happens I gravitate toward rainbows…they’re just so darn happy and I love them! So I stamped out my snowmen and colored them up…one in rainbow and one in just a couple of the same colors from the same rainbow. Then I it hit me to continue my rainbow to the background too!

So I pulled out a rainbow of scraps from my cardstock stash and the Diagonal Cover Die set and started cutting pieces. To make assembly easy for me, I used the Layered Rectangle A2 dies and cut one from computer paper that was just a smidge smaller than the rainbow stripes. I adhered them to that with EZ Squeeze liquid glue and then glued that to my white scalloped panel. Then I used a rectangle from the same stack that was just a smidge bigger than the rainbow panel and cut it from vellum.

To adhere everything together I started on the bottom adding the scalloped panel to a white card base with foam tape. Next, I added my snowmen with foam squares and the sentiment with tape runner to the vellum panel and used those areas to hide tape runner to adhere it to the rainbow stripes. (I find that tape runner works best with vellum because the liquid glues cause warping.)

For finishing touches I added a scattering of white glitter enamel dots to the design, glossy accents to the snowman noses and buttons, unicorn Stickles to the pompoms on the hats and black glaze pen to the snowman’s eyes.

Isn’t this adorable!?! I used scraps to create my rainbow so I only ended up with one panel but if you cut the whole panel from every color you could end up with 7 of these and mass produce some super sweet thank you cards! This might be in my future for over the holiday break!

Products used today:
Snow Sweet Set 2 stamps and dies
Diagonal Cover dies
Empty Snow Globe dies
Layered Rectangle A2 dies
EZ Squeeze liquid glue
White Glitter enamel dots
Glossy accents
Stickles – unicorn
foam tape

I appreciate you sharing your time with me. Have a fabulous day!

Pink & Main – Merry Christmas Slimline

Hello crafty friends! Once again we’ve made it through another week and I have some super fun Pink & Main inspiration to share with you. Today I’ve got a slimline card featuring one of the adorable Polly and Pete stamp sets.

I started my card with a general idea in mind but I needed to get some images in my hands to play around with spacing and such. So I pulled out the Polly and Pete Gifts stamp set out and inked it up. I stamped both critters and 3 gifts. I used copic markers to color the images and cut them out with the coordinating dies. After arranging them on my glass mat I landed on a slimline card instead of squishing everything into A2.

For my background I blended distress oxide ink on a white cardstock panel – top to bottom: festive berries, spun sugar, mowed lawn – and spritzed it with water. It was a bit oversized so I die cut it with the largest Layered Slimline die and adhered it to a white card base. Then I cut the reverse scalloped frame from the Blessings Slimline die set and adhered it with liquid glue as well. Then I popped my images up with foam squares.

For my sentiment, I die cut just the Merry Christmas words from the Christmas Greetings die set 3 times – 2 from white and 1 from red – and glued them together before adhering them to the card front.

For finishing touches I added white gel pen accents to the images and unicorn Stickles to the critter’s cheeks and hats. Then I finished my card with a scattering of white pearls from the Essential Pearls set and some Wink of Stella glitter brush pen on the sentiment.

These critters are just so cute and happy! I am technically done sending Christmas cards but I’m still having fun creating so I just might have to find someone to pop it in the mail to.

Products used:
Polly and Pete Gifts stamps and dies
Blessings Slimline dies
Layered Slimline dies
Christmas Greetings dies
Essential Pearls
EZ Squeeze liquid glue
Foam squares
Stickles – unicorn

I appreciate you sharing your time with me. Have a fabulous day!

Pink & Main – Magic of the Season

Hi there! Today I’m over on the Pink & Main blog with a fun little slimline Christmas card to share with you! I know most people have sent their Christmas cards out already but I’m just not ready to be done holiday crafting.

I some fun paper piecing the stockings from Stocking Stuffers with plaid paper from the pad including in the Homespun Holiday card kit. Aren’t they too cute!?! Then I stamped the elf from Stocking Stuffers and colored him with my copic markers. Finally, I used the coordinating dies and cut everything out.

I had the idea that I wanted to use the slimline plaid die but also the smallest panel from the Beautiful Slim Line die set too. So I inked up a piece of white cardstock with distress oxide inks in worn lipstick and and spun sugar. I spritzed the panel with water and splattered some black acrylic paint on it too. While it was drying, I die cut the slim line plaid die from white cardstock, then used EZ squeeze liquid glue to adhere it down. Then, I ran that through my die cut machine with the smaller of the panel dies in the Beautiful die set.

I cut a white slimline card base, then cut a piece of red cardstock as close to matching the red stocking as possible and adhered them together. Then I popped the inked plaid panel up with foam tape and finally popped each of the stocking up with foam squares too.

I wanted a different sentiment, so I went digging and found this perfect one in the Winter Snow Globe Scenes stamp set. So I stamped it and cut it out with a Large Sentiment banner and adhered it to the middle stocking.

For finishing touches I added glossy accents to the gnome’s nose, bell and candy cane. Then I came in with unicorn Stickles for his little cheeks! So fun!!!

I’m curious, are you still holiday crafting or have you switched gears already?

Products used today:
Stocking Stuffers stamps and dies
Winter Snow Globe Scene stamps
Slim Line Plaid die
Beautiful Slim Line dies
Large Sentiment Strip dies
Homespun Christmas card kit
EZ Squeeze liquid glue
Distress Oxide – spun sugar and worn lipstick
Foam tape
Foam squares
Glossy accents
Copic markers
Stickles – unicorn

I appreciate you sharing your time with me. Have a fabulous day!

Pink & Main – Warmest Wishes Snow Globe Shaker Card

Hello everyone! I’m over on the Pink & Main blog today sharing a sweet little snow globe shaker card featuring some of my favorite Christmas mice from last year’s holiday release. I simply couldn’t go without inking them up again.

To create my card, I started with the snow globe elements. I stamped the Empty Snow Globe image and one of the Christmouse images and colored them with my copic markers. Then I curved a sentiment from Christmouse onto the base of the snow globe. I used the coordinating dies to cut everything out, making sure to cut 2 extra snow globe frames and a solid white cardstock snow glob plus an acetate one as well.

I used EZ squeeze liquid glue to adhere all the layers together and filled my shaker with a little sparkling in the clouds flock with glitter and a sprinkle of ice rink glitter too. I added foam tape to the back of the snow globe and set it aside for later.

I flipped through the paper pad included in the Homespun Christmas card kit and found 2 sheets that I liked together. I cut them both with an layered rectangle A2 die. I trimmed them down to 2 inches and 3.5 inches and adhered them to a white card base. Next, I cut a strip of white glitter cardstock .25 inches wide and adhered it with a strip of EZ tear tape.

I removed the release paper on my snow globe and popped it up in the center of the card and finished things off with a small scattering of red pearls from the rainbow pearls pack.

Products used today:
Christmouse stamps and dies
Empty Snow Globe stamps and dies
Layered Rectangle A2 dies
Homespun Christmas Card Kit
EZ squeeze liquid glue
EZ tear tape – 1/4 inch
Ice Rink glitter
Sparkling In the Clouds flock with glitter
Rainbow Pearls

I appreciate you sharing your time with me. Have a fabulous day!

Thermoweb – Plaid Flocked Christmas Cards

Hey friends! I hope your holiday weekend was wonderful and you’re off to a great start this week! I’m popping in to share that I’m on the Thermoweb blog today. I have a set of 4 cards featuring deco foil flock and glitz glitter gel.

I have 2 ways to use the flock transfer sheets on the blog post today – transfer gel and a laminator or straight die cutting. It’s one of my favorite things about the flock transfer sheets.

For these fun Newton’s Nook cards, I used transfer gel and my laminator for the first one and used the negative sheet with some glitz gel for the second. No waste and two super fun cards! Stamps dies and stencils from this are all Newton’s Nook.

Then for this style, one layer on each card is just die cut flock transfer sheet. Sometimes we don’t have time to be messy and wait for the transfer gel to dry. This is a super fun alternative. The dies for these cards are all Pink & Main.

If you’d like the supply list, full details and photo tutorial please head over to the Thermoweb blog and check it all out.

I appreciate you sharing your time with me. Have a fabulous day!

Pink & Main – Santa Claws is Coming to Town

Happy Sunday friends! Thanks for stopping by today. I’m over on the Pink & Main blog sharing a super sweet Christmas card featuring some adorable polar bears and lots of fun techniques.

To start my card, I stamped the fun stocking image from The Best Gift stamp set and colored it with my copics. I used the coordinating die to cut the image out and set it aside. Next, I took a white A2 size panel and inked up the Blizzard stencil with blue dye ink and my ergonomic blending brush. I used EZ squeeze liquid glue to adhere it to a white card base.

Next, I cut a piece of brown woodgrain paper from the Pumpkin Season paper pad to 4.25×3.5 inches. I adhered a strip of 1/4 inche EZ tear tape to the top edge, removed the release paper and rubbed Sparkling Teddy Bear flock with glitter on it. I added foam tape to the back and adhered it to the bottom of my card front.

Next, I added foam squares to the bears and popped them up in the top center of the woodgrain panel. I knew I wanted to use the “Santa Claws” sentiment in the set so I stamped it and die cut it with the smallest Notched Corner die. I adhered it directly to the woodgrain paper below the bears.

For a little extra something to break up how plain the top of my card felt, I die cut Merry Christmas from the Christmas Greetings die set from white cardstock 4 times and red once. I used EZ squeeze liquid glue to adhere the layers together and to my card front.

Now for finishing touches I pulled out my favorite glossy accents and added it to the bear’s noses, cheeks and toe beans. Then I also added it to the patches on the stockings.

Isn’t this just the cutest!?! I am super happy with how this turned out and can’t wait to play with more images in this adorable stamp set!

Products used today:
The Best Gift stamps and dies
Notched Corners dies
Christmas Greetings dies
Blizzard stencil
1/4 inch EZ Tear Tape
EZ Squeeze liquid adhesive
Sparkling Teddy Bear flock with glitter
Pumpkin Season paper pad
foam tape
glossy accents
copic markers

I appreciate you sharing your time with me. Have a fabulous day!

Jane’s Doodles – Merry Mice Tags

Hey friends! Jane’s Doodles released a SUPER CUTE digital stamp yesterday – Merry Mice – and I absolutely could not wait to color these sweet images! I seem to be in a kick of making all things Christmas tags so these cuties just flowed together on their own practically.

After printing the stamps, I colored them with my copic markers and used the scan-n-cut to cut them out. Then I used a circle die from Newton’s Nook to cut one sentiment and a Pink & Main large sentiment strip die to cut another. For the third sentiment I actually pulled out Driving Home for Chrimstas, stamped one from it and used a Newton’s Nook banner die to cut it out.

The tags are all cut from the Newton’s Nook Fancy Tag die set. I cut one from kraft and one from white, then I cut toppers for each tag from white cardstock too. I matched some smaller images from other sets to stamp in the background. These snowflakes are also from Driving Home for Christmas.

I popped the images and sentiments up on foam squares. Then I added brown ribbon and red twine to attach the two tags together for each set. I like being able to write on the white one instead of flipping the main tag over. The candy canes for this tag are from Warm and Cozy.

The background images on this tag are from St. Nick. Once everything was adhered, I came back in with glossy accents on all the mouse noses and things like bows, berries and ornaments.

I already have another set of these fabulous images printed and ready for coloring. I’m hoping to get them colored over the holiday weekend.

Products used today:
Jane’s Doodles Merry Mice digital stamp
Jane’s Doodles Driving Home for Christmas stamps
Jane’s Doodles Warm and Cozy stamps
Jane’s Doodles St. Nick stamps
Newton’s Nook Frames & Flags dies
Newton’s Nook Fancy Edges Tag dies
Pink & Main Large Sentiment Strip dies
Glossy accents

I appreciate you sharing your time with me. Have a fabulous day!

*This blog uses affiliate links whenever possible; at no additional cost to you.*