Pink & Main – Happy Fall Die Cut Card

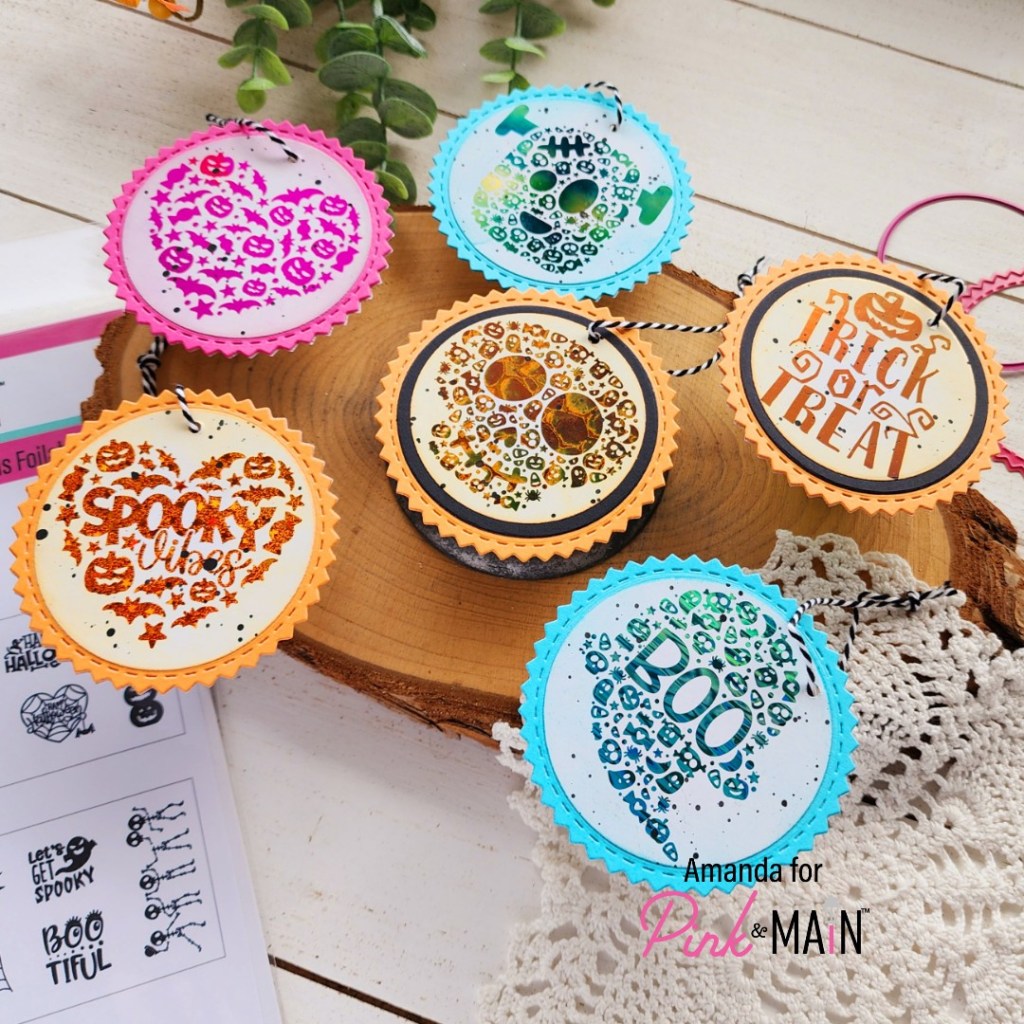
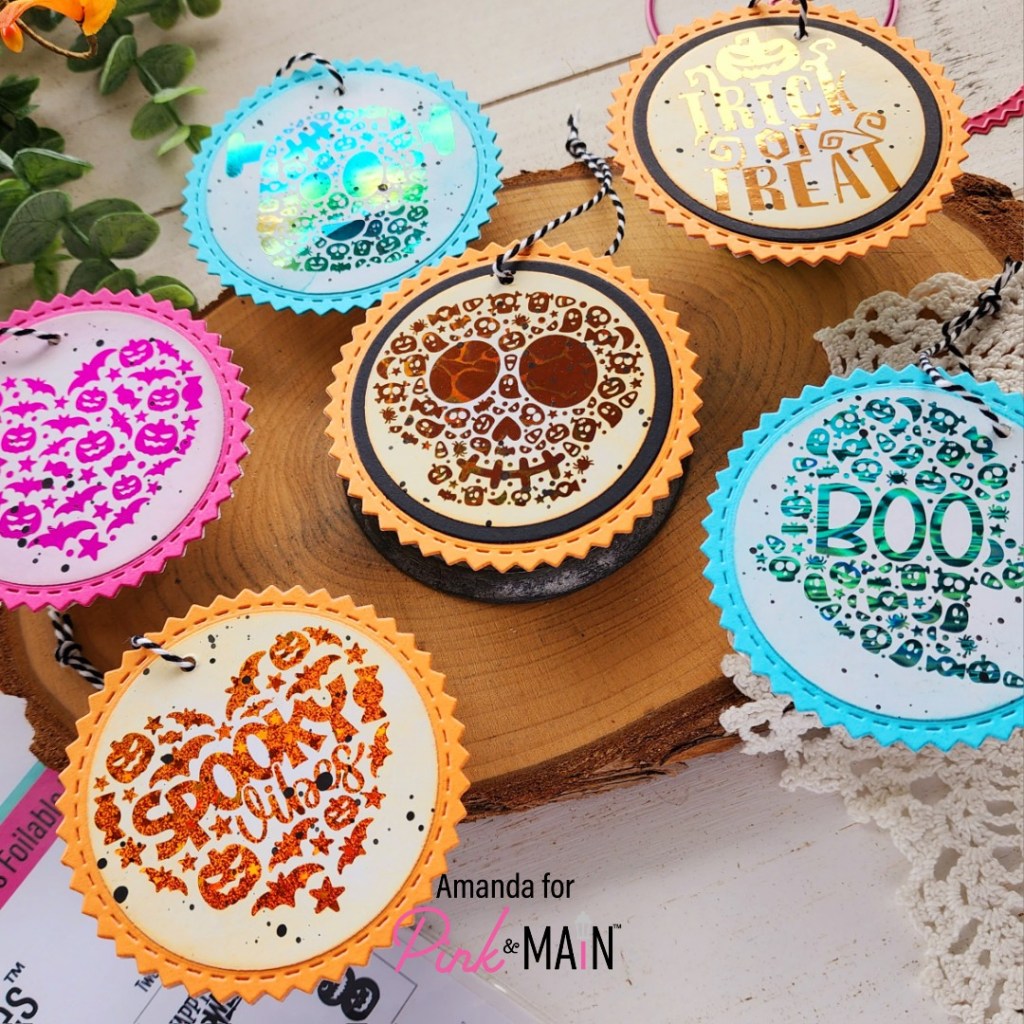
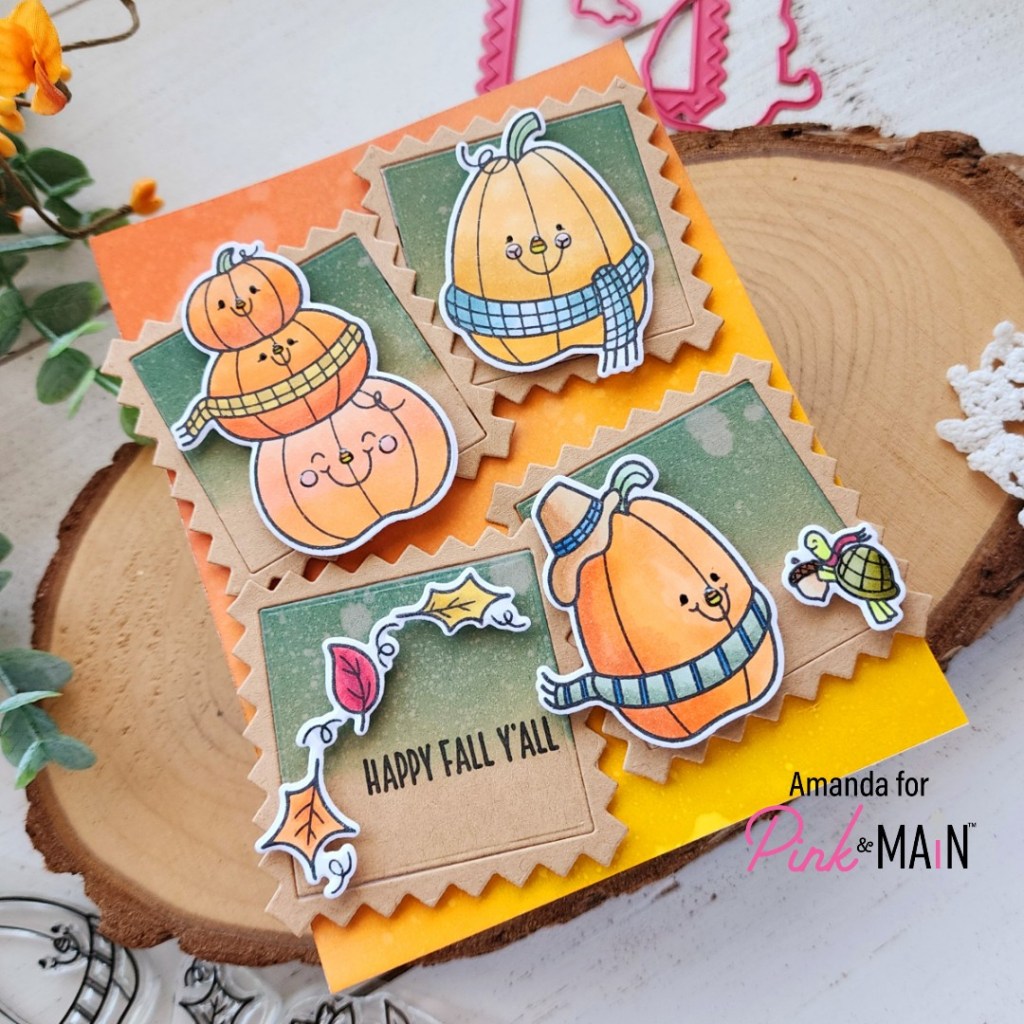
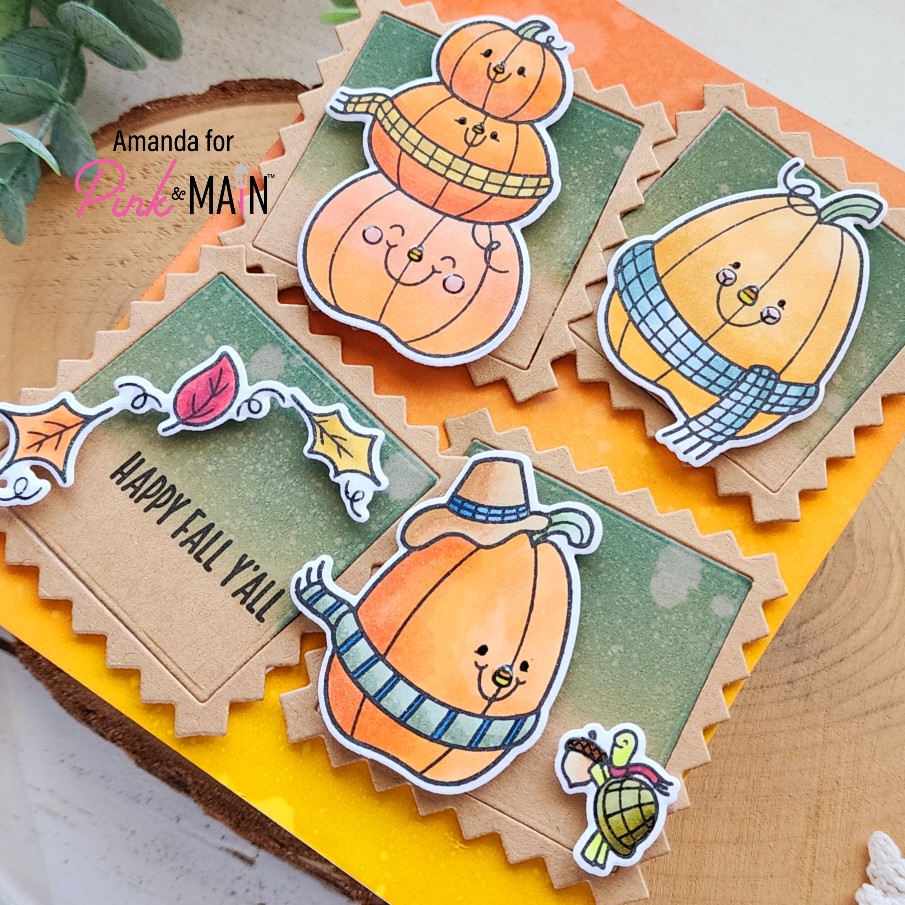
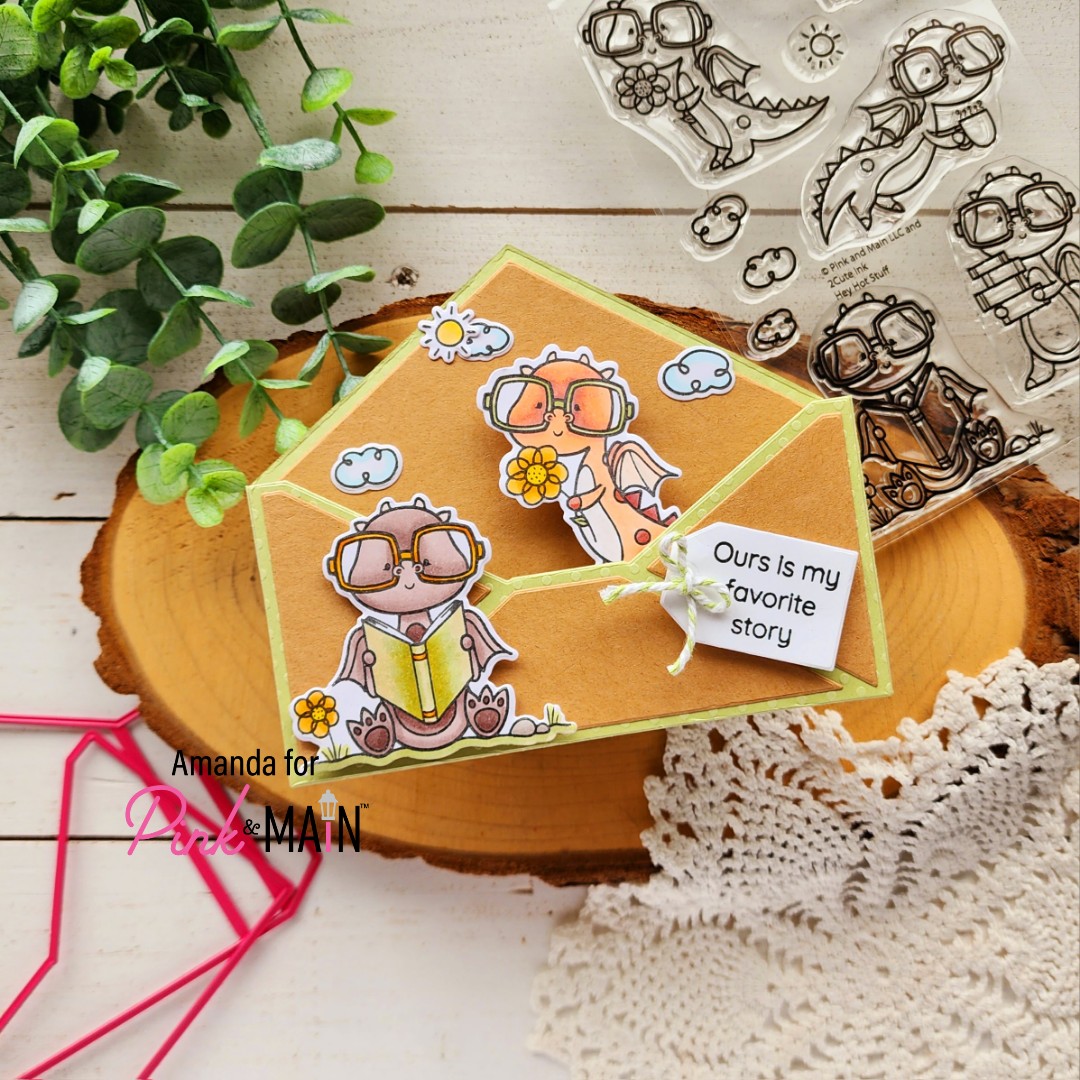
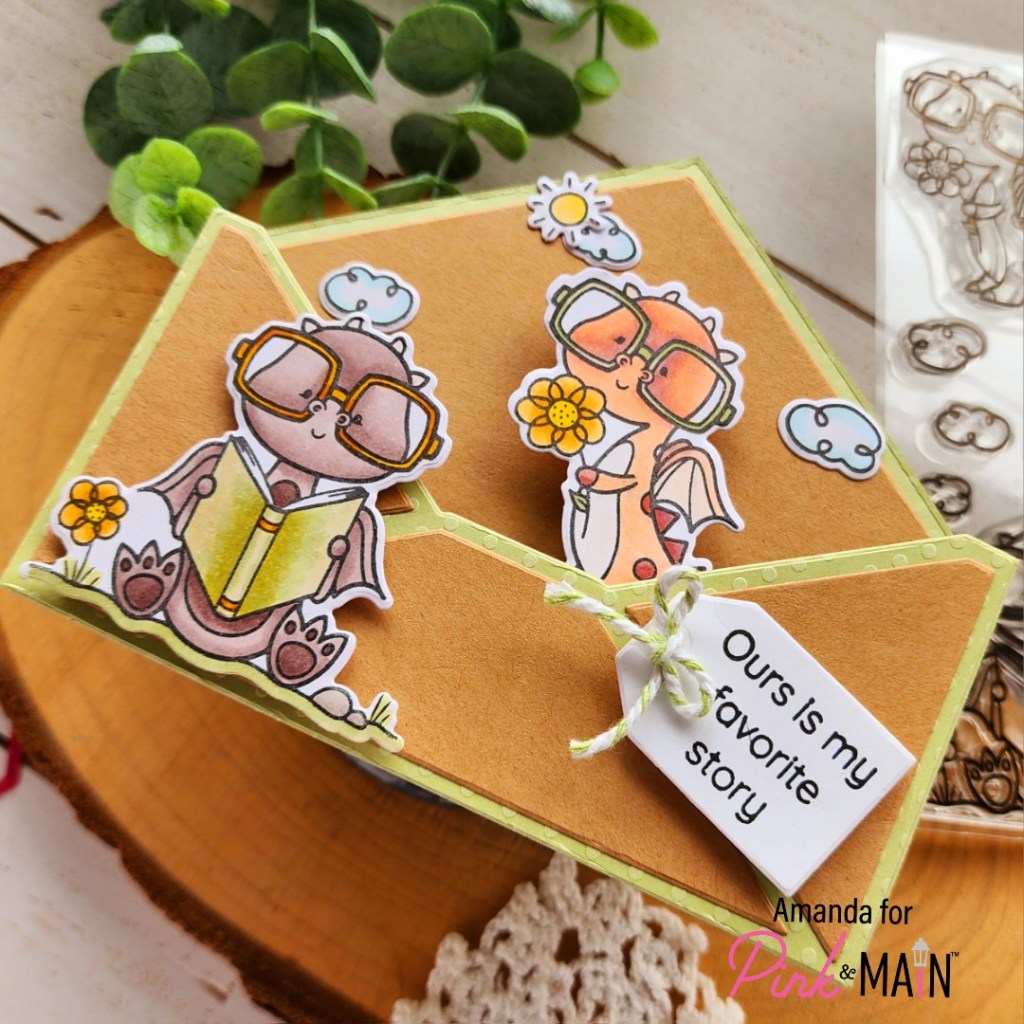
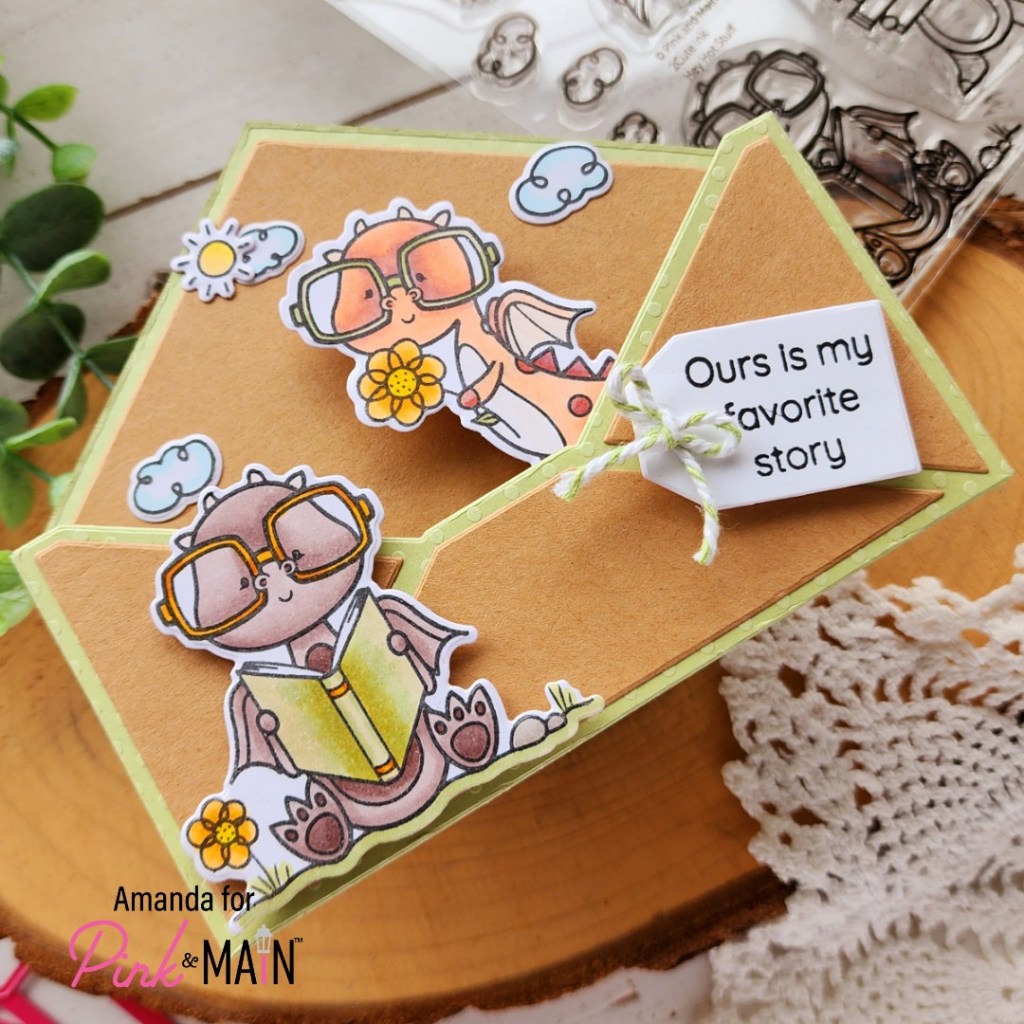
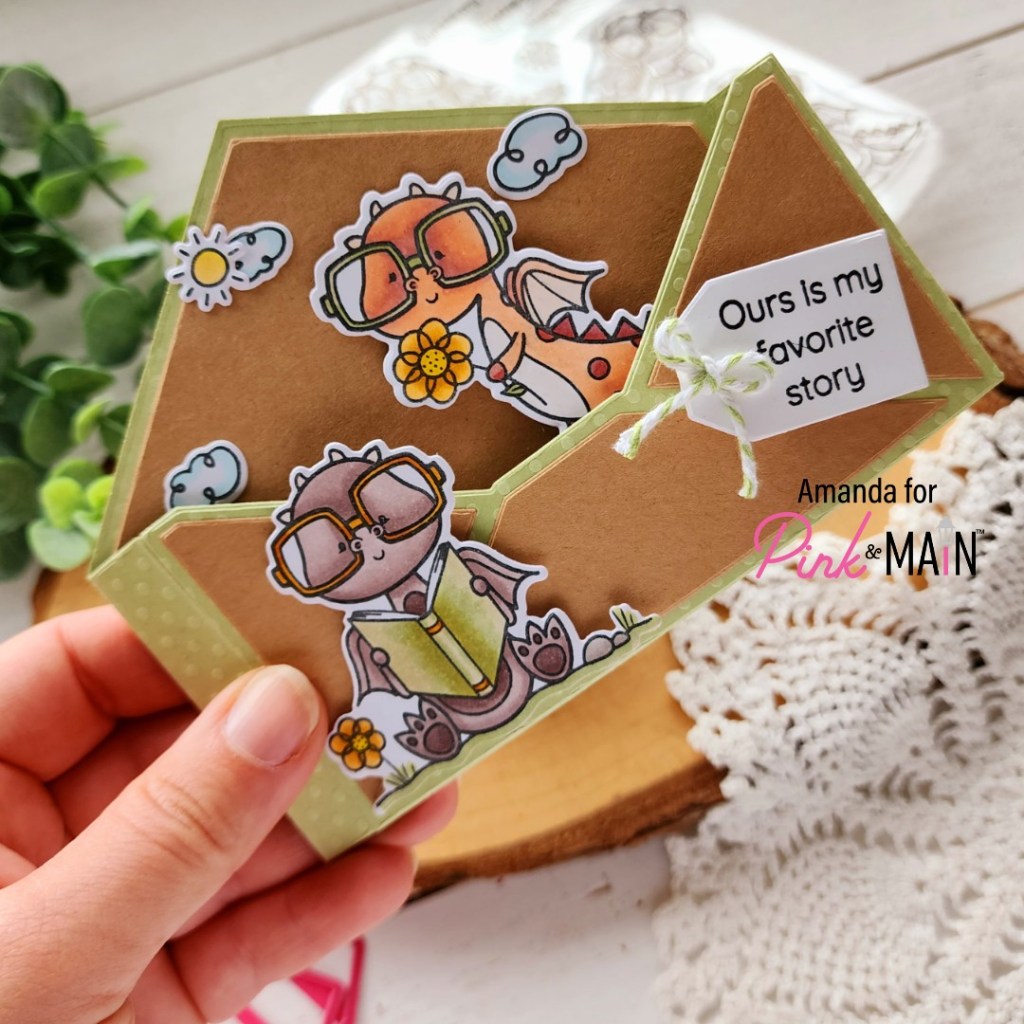
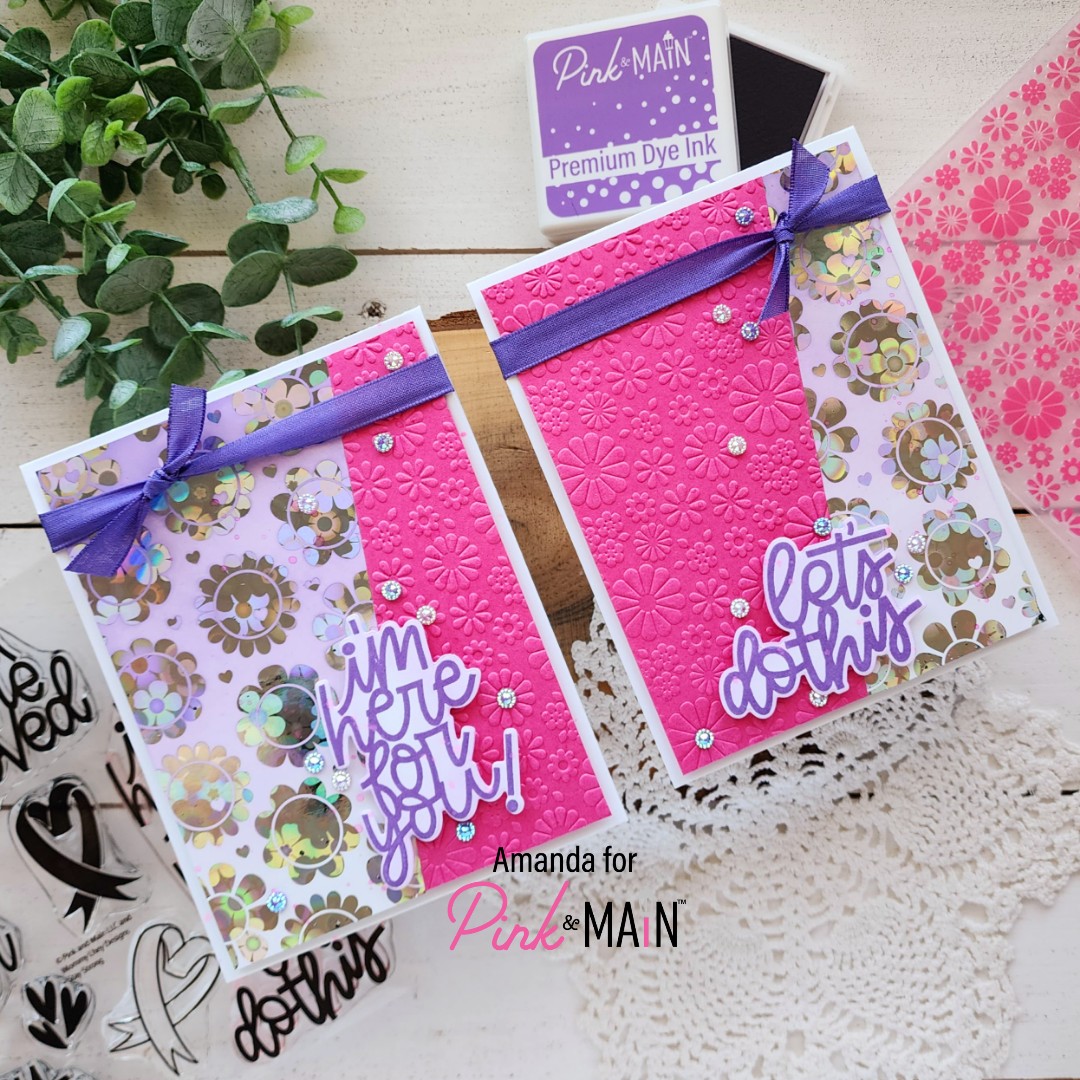
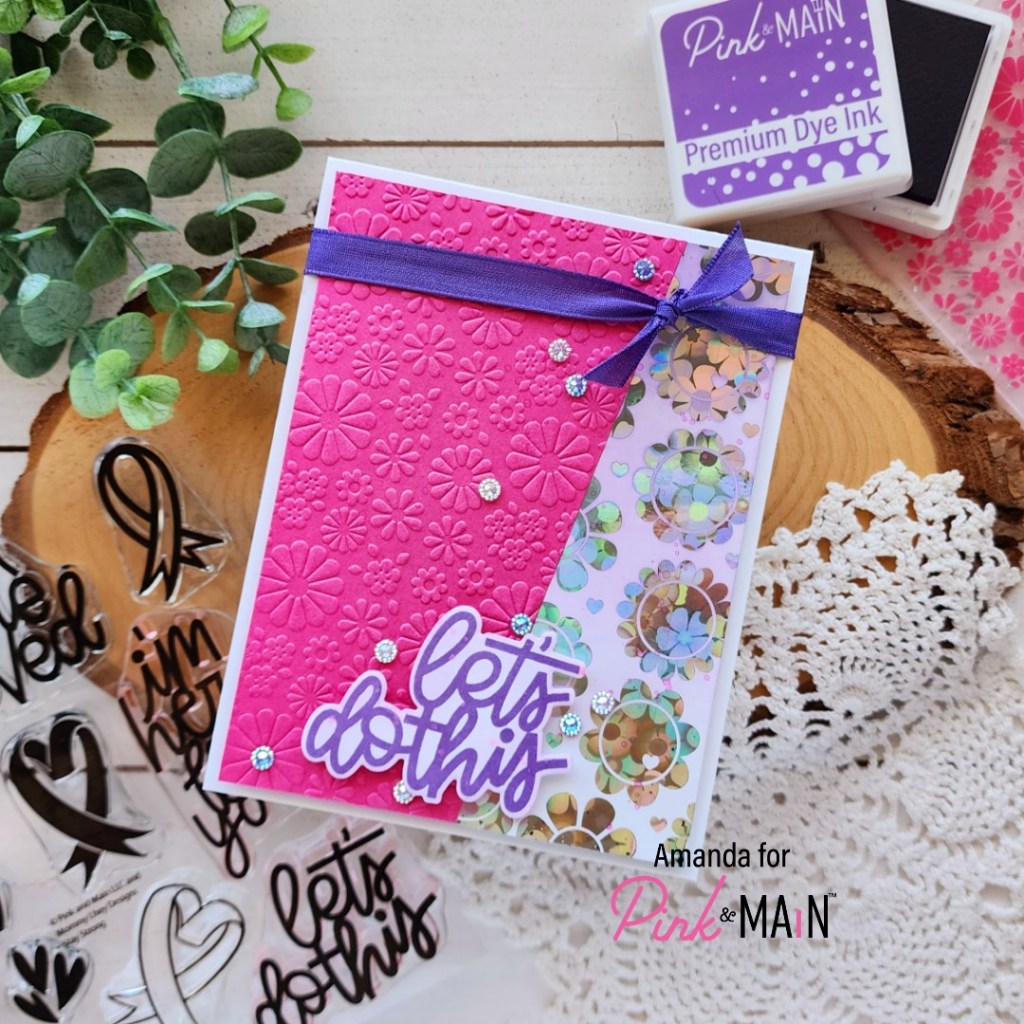
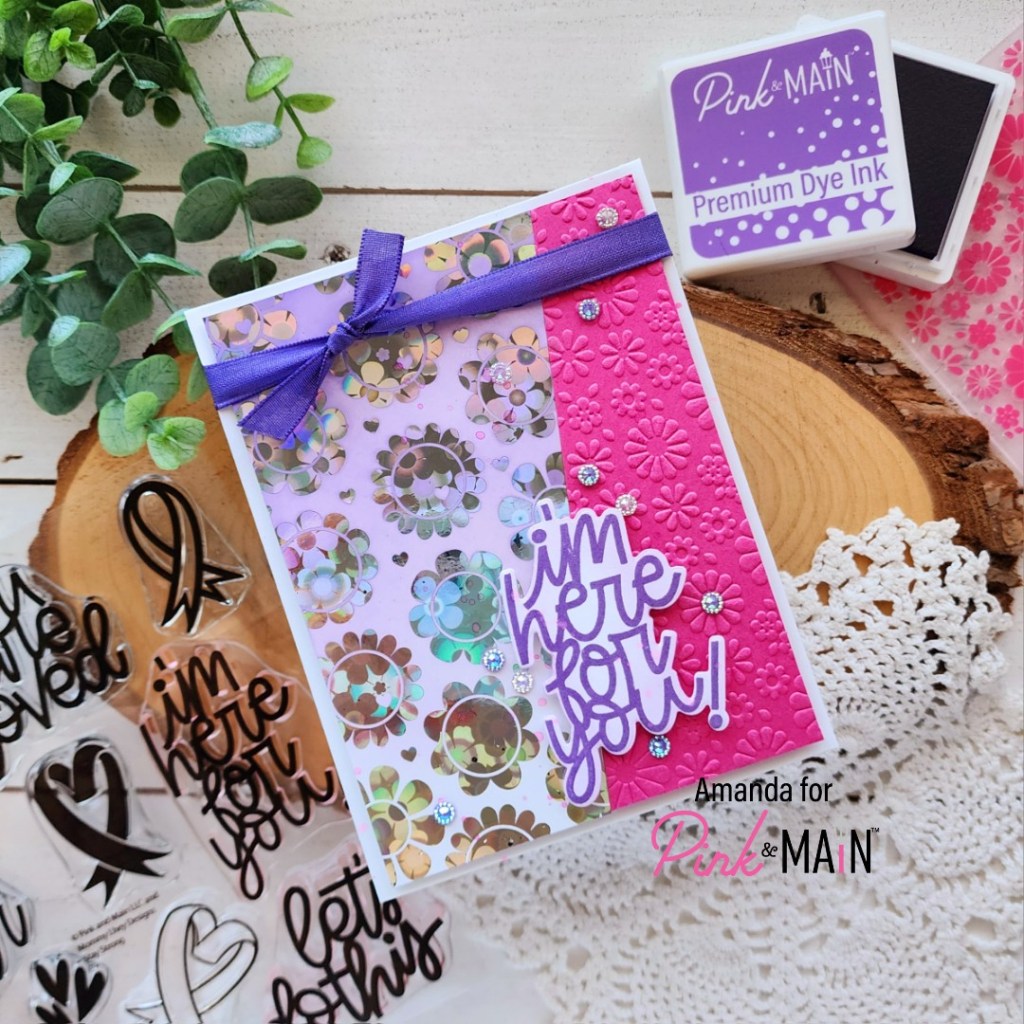
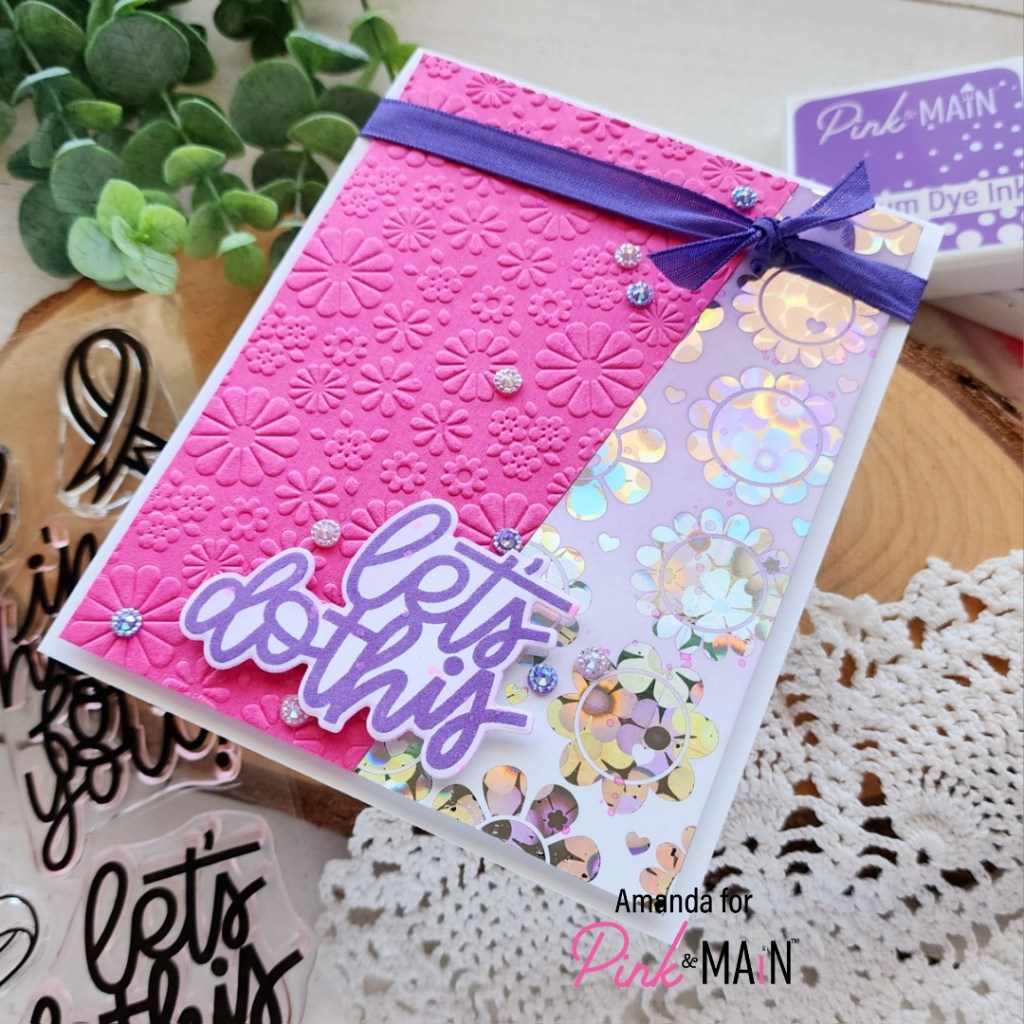
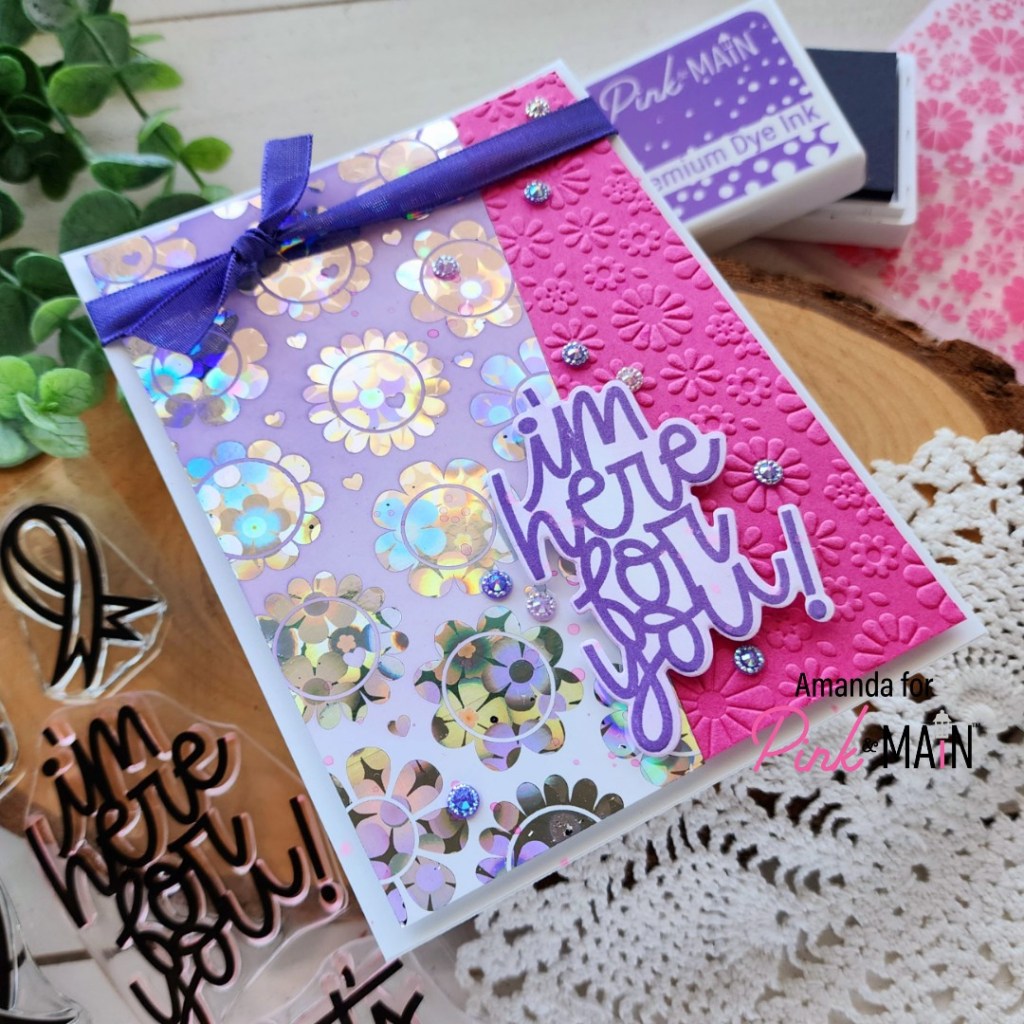
Hello everyone! I’m on the Pink & Main blog today sharing a card featuring just two die sets. The new Fancy Frame dies are gorgeous and come with some little dies in the center that are perfect for adorning those frames. Add that with a sentiment – stamped or die cut – and you have a gorgeous and easy to create card!

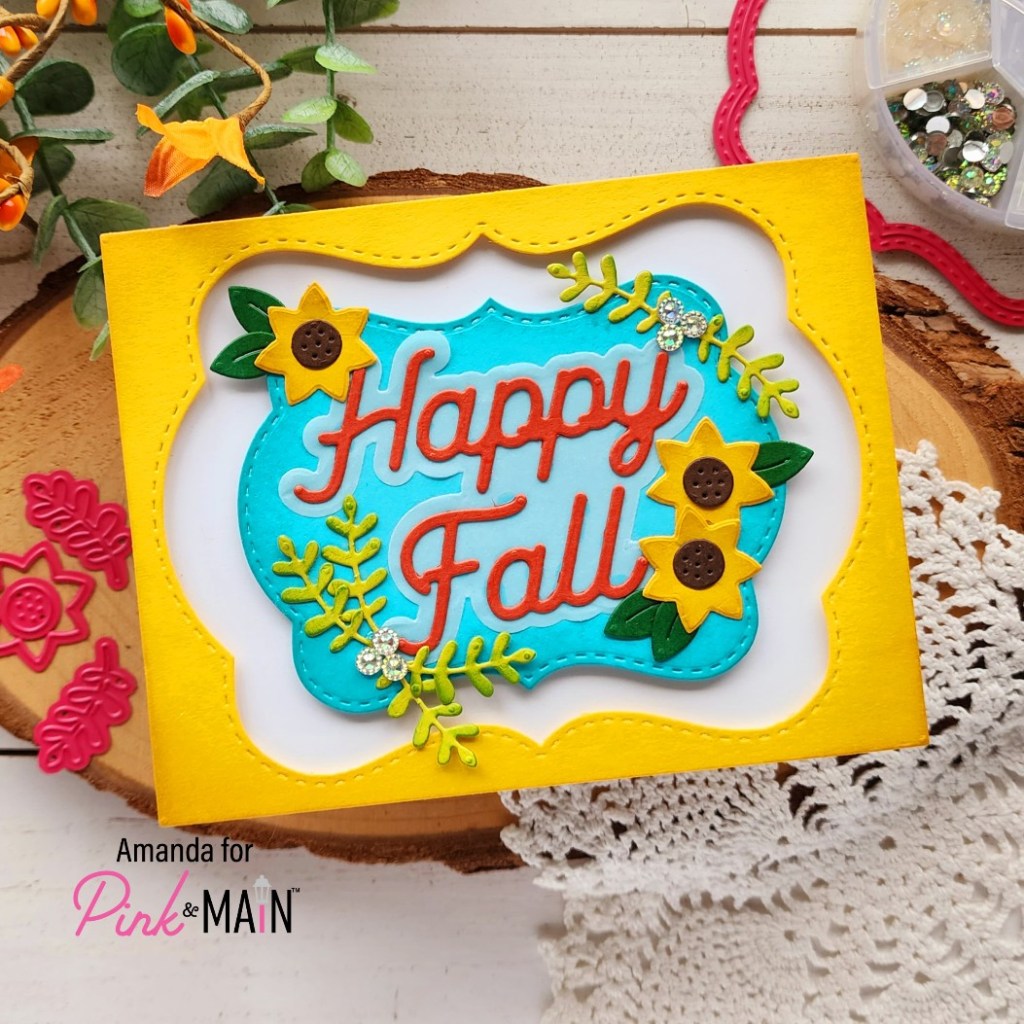
Today, along with those Pink & Main dies, I’m using all their cardstock colors too. They’re so rich and vibrant; perfect for this type of card. I did a little ink blending around the edges of my die cuts for some depth but that’s definitely not a must if you don’t like the look or don’t have the time.

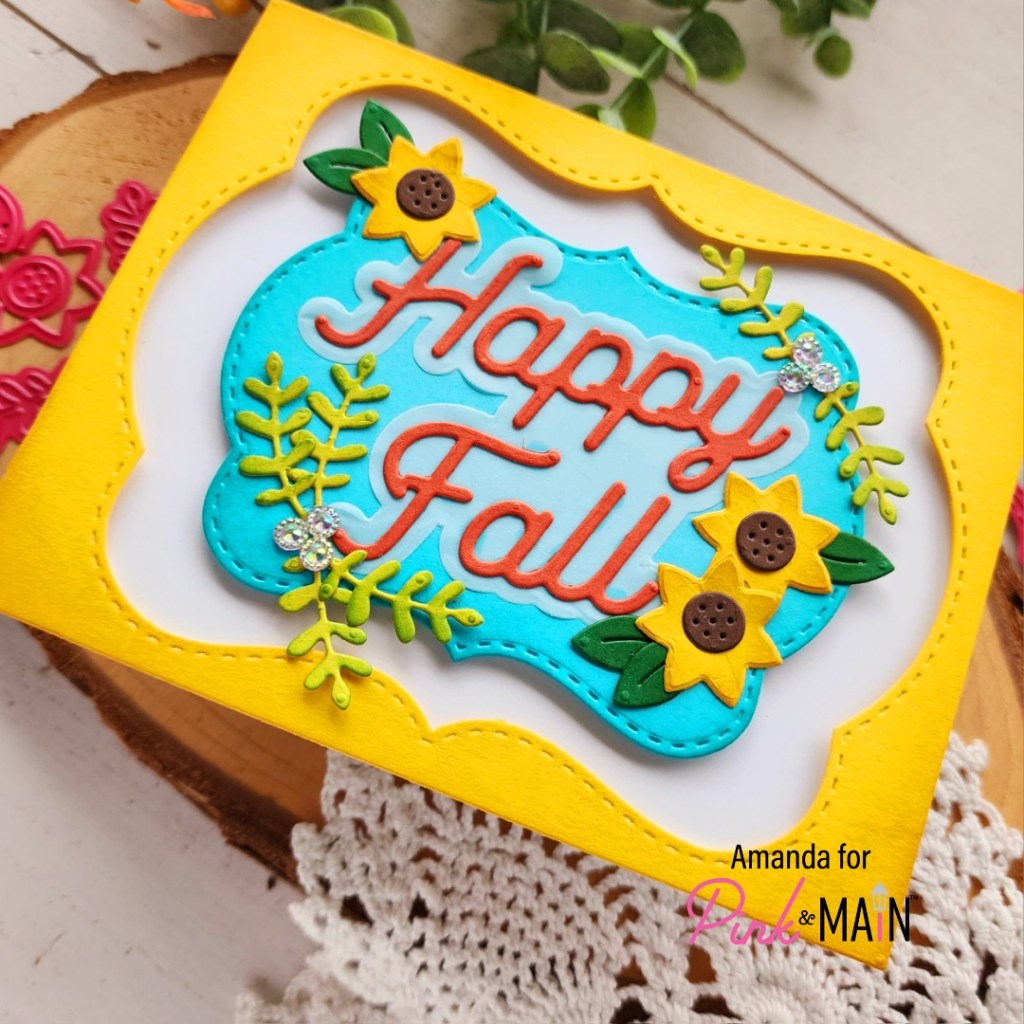
After cutting all the pieces, I used EZ Squeeze liquid glue to adhere everything together and then to the blue frame. Once that had dried for a minute I added foam tape to the back of everything and popped it all up on a white card base. I really love the white breaking up the blue and yellow portions.

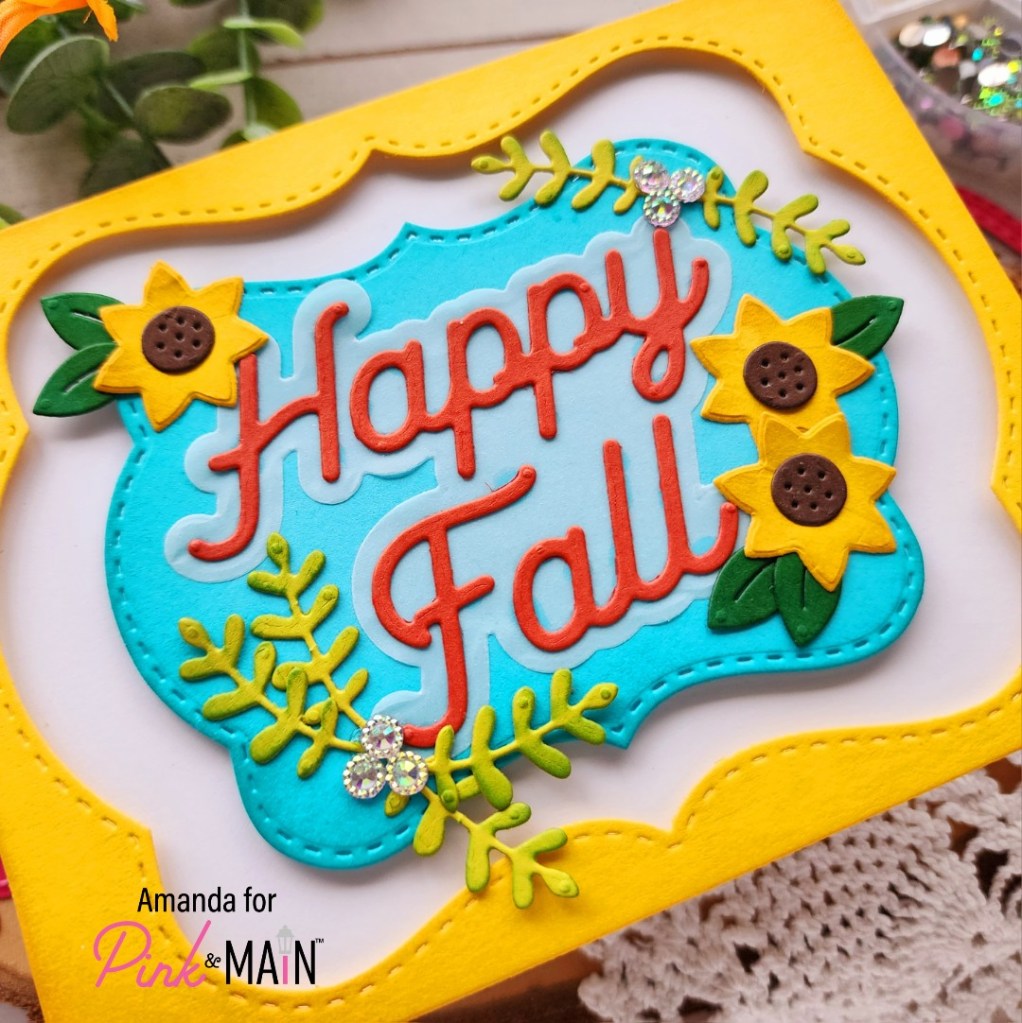
To finish things off and add a little sparkle, I pulled out my Ballroom gems and added a few where the vines meet on both spots. I love this little bit of sparkle and the bright, happy colors of the whole design together.

Products used:
Fancy Frame dies
Autumn Greetings dies
Ballroom Gems embellishments
Foam tape roll
EZ Squeeze liquid glue
Cardstock – school bus, on the green, wildflowers, river walk, coffee shop and the park

I appreciate you sharing your time with me. Have a fabulous day!

Pink & Main – Sneak Peek Week: Holiday Fun with Stencils, Dies and Stamps

Welcome everyone! Thank you for stopping by. Today is my turn for sneak peek week with the Pink & Main September release! As always, it’s fun, adorable and super versatile! I pulled out a few new products to play with for today’s card.

I went with a non-traditional color palette for a holiday card and had so much fun with it! The new candy cane stencil is a two-part stencil so I inked the first with pink and spread glossy gel through the second. After removing the second stencil layer I sprinkled the panel with super fine glitter so I had sparkly candy canes in the background.

While that was drying, I die cut my sentiment from the new holiday sentiments die set and inked up my card front too. I wanted to add a little something below my sentiment though so I went back to the new release and snagged the sweet image from Joy to the World to stamp and color.

Once the glitter background panel was dry, I die cut it with a Concave Stitched rectangle and assembled everything with foam tape. For finishing touches I added Touch of Gloss to the bells and stardust Stickles to the holly berries so they matched the candy canes.

I hope you’re excited for Friday! There is so much amazing coming your way!

Products used:
Holiday Sentiments dies
Joy to the World stamps and dies
Candy Cane stencils

Concave Stitched Rectangles dies
Dye Ink – dress shop and the park
Blending brushes
Glossy gel
Super Fine Glitter – icicle
Touch of Gloss
EZ Squeeze liquid glue
Stickles – stardust

I appreciate you sharing your time with me. Have a fabulous day!

Pink & Main – Halloween Gift Tags with Foilables

Happy Wednesday everyone! I’m on the Pink & Main blog today sharing a fun use of some of the new Foilables for Halloween. I love giving little gifts for the holidays through the year but definitely for Halloween! So when I saw the new Halloween Icons Foilables pack I couldn’t resist making some gift tags with them.

I started by picking my favorite sheet from the pack. They’re all fantastic but there’s something about these mini images making up a bigger image that I thought was extra cool! Then I used the Layered Circles dies to cut them all out. I went digging through my foil and decided to showcase six different foils for you today…but you could absolutely just use one if your selection isn’t out of control yet like mine is. They will look amazing no matter what.

I ran these through my mini Minc machine three at a time so they had space without overlapping. After removing the foil transfer I inked the edges of each circle with a corresponding ink color. Then I splattered them all with black paint for extra texture and distressing. You know my style…I love splatter!

Next, I pulled out the Zig Zag Circles and cut the size up from the foiled circles in corresponding cardstock colors and also white. I used EZ Squeeze liquid glue to adhere the zigzags together before gluing the foiled ones on top. Then I just a hole punch from my drawer and threaded some twine through each one.

I intend to add these to a little bag or box of candy for coworkers on Halloween. How would you use them?

Products used:
Foilables – Halloween Icons
CheerFoil – sparkle orange, fairy wings peach, pebbles bronze, watercolor green, boysenberry and waterfall teal
Layered Circles dies
Zig Zag Circles dies
EZ Squeeze liquid glue
Mini Minc Machine
Ergonomic blending brushes

I appreciate you sharing your time with me. Have a fabulous day!

Pink & Main – Happy Fall Y’all

Welcome, welcome! So glad you’re here!!! I’m on the Pink & Main blog today and I’m fully embracing all things fall. The new Pick of the Patch stamps are absolutely adorable. At first I was choosing one image to create with but when I saw that little turtle handing his acorn to the pumpkin, my heart melted and I switched gears.

So, I stamped my images from Pick of the Patch and colored them with copic markers before cutting them out with the coordinating dies. Next, I chose a frame from the Square Frames die set. This set has four frames, all the same size but with different borders to choose from. Today I’m going with zig zag. I kept the inside that cuts out and inked the top part with rustic wilderness distress oxide ink.

I lined the back of each frame with foam tape, using this to hold the frame and insert together. Then I added all of my images with foam squares. *Note, I did stamp my sentiment on one before adding any foam so it would stamp nice and clean.*

For my background, I blended distress oxide ink in ripe persimmon, rusty hinge and mustard seed at an angle across the panel. I spritzed it with water and blotted it dry before gluing that to a white card base. Next, I just removed release paper and added all of my pumpkin filled frames.

For finishing touches I added black glaze pen to all the pumpkin eyes and Touch of Gloss to the cheeks, noses, acorn and turtle shell. Then I felt like the sentiment frame was lacking shine so I added more Touch of Gloss to the swirls between the leaves too.

I’m so happy about the season change and the crisp mornings that are starting to arrive. How about you?

Products used:
Pick of the Patch stamps and dies
Square Frames dies
Foam Tape
Touch of Gloss
Distress Oxide – rustic wilderness, mustard seed, rusty hinge, ripe persimmon

I appreciate you sharing your time with me. Have a fabulous day!

Pink & Main – Hello Sunshine Circle Shaped Card

Hi crafty friends! I hope your week is going fabulously! I’m popping in today with a card I’m sharing on the Pink & Main blog. I absolutely love these sweet hedgehogs and their sunflowers and thought the sentiment went great with a previously release sentiment die so I tried them out together.

After stamping and coloring my images from Sunny Side of Life I used the coordinating dies to cut them out. Then I went back and stamped a sentiment inside one of the sunflowers. I love that these fit in there!

Next I cut the elements from Hello Sunshine and used liquid glue to adhere them all together. At this point I decided it would be so fun to create a circle shaped card so I arranged my sentiment and images to decide the right size circles to cut. I cut 2 zigzag circles and one regular one, all from white cardstock.

I ink blended with distress oxide inks on one zigzag and the regular circle to add color. I chose shabby shutters, tumbled glass and gathered twigs. Then I glued the flower stems to the hello and added everything to the smooth circle with foam squares and liquid glue. Then I popped that up on the ink blended zigzag circle.

With the second zigzag circle, I scored a line about an inch from the top and adhered them together only at this point. that way the fold doesn’t interfere with my card front at all but there’s lots of space to write a message still.

Products used today:
Sunny Side of Life stamps and dies
Hello Sunshine dies
Layered Circles dies
Zigzag Circles dies
Foam tape
Distress Oxide Ink – shabby shutters, tumbled glass, gathered twigs
Liquid glue

I appreciate you sharing your time with me. Have a fabulous day!

Pink & Main – New Fall Foilables Mix and Match with Stamped Images

Hi everyone! I’m over on the Pink & Main blog today with a fun fall card using the one of the new Foilables card fronts and some sweet critters from a new stamp set too. They work so fabulously together. I love it!

I started by foiling one of the Thankful Pumpkin Foilable panels. I chose bronze for the sentiment and fairy wings peach CheerFoils for the pumpkin. Then I stamped and colored some cute critters from the Warm and Cozy stamp set. I used the coordinating dies to cut them out and started putting things together.

When deciding my placement I didn’t love the white border on my card base so I inked it up with shabby shutters distress oxide ink. I spritzed it with water and popped the foiled panel up on it with foam tape. Then I splattered the whole thing with black paint for some distressing.

I popped up my critters with foam squares and added Touch of Gloss to all their noses, the pumpkin stem and acorn hats. I like the little bit of shine on the images with the beautiful foiling in the background.

Products used today:
Thankful Pumpkin Foilables
CheerFoil – bronze and fairy wings peach
Mini Minc Machine

Warm and Cozy stamps and dies
Foam tape and squares
Distress Oxide – shabby shutters
Touch of Gloss

I appreciate you sharing your time with me. Have a fabulous day!

Pink & Main – Sneak Peek Week

Hello again! I’m on the Pink & Main blog today for sneak peek week using the August release which will be available on Friday! For all my coffee loving friends and those of us dying for fall, get ready!!!

There’s a new stamp and die set comping on Friday called Thanks a Latte and I’m completely smitten with it! Adorable images and some fun sentiments to go with it. Today I’m pairing a couple of those with a new Crosshatch die that gives great texture to your backgrounds!

To step up the fall feel of my card, I used the Leaves embossing folder on my panel and some Sunny Water Gems watercolor before gluing the crosshatch down. I popped my images and sentiment up on that. Then, I added the whole panel to a white card base with foam tape.

For finishing touches I added black glaze pen to the eyes on the cups and touch of gloss to the stripes and leaves too.

It’s been over 100 degrees here for too many days in a row and this Oregon girl was not built for the heat. Playing with fall is quite a welcome distraction.

Products used:
Thanks a Latte stamps and dies
Crosshatch die
Leave embossing folder
Water Gems watercolor
Foam tape
Touch of Gloss

I appreciate you sharing your time with me. Have a fabulous day!

Pink & Main – Hello Beautiful with Foiling and Ink Blending Background

Happy Wednesday everyone! Considering I thought Monday was Tuesday, I’m grateful the week is finally moving along. Today I’m on the Pink & Main blog sharing this gorgeous tropical vibe card using Foilables with some ink blending for a stunning background.

To start things off, I heated up my Minc machine and foiled one of the Cloudy Day Foilables with Waterfall CheerFoil. I am over the moon for the effect this foil gives! It’s incredible! After foiling I pulled out distress oxide inks – lemonade, carved pumpkin and abandoned coral – and blended a sunset sky. I spritzed it with water and blotted that off with a paper towel. Then, I used a clean microfiber cloth to buff the ink off the foiling. This really does make a huge difference in the vibrancy of your foiling when ink blending.

Next, I stamped an image from Aloha Flowers and colored it with copic markers. Then I used the coordinating die to cut it out. I also chose a sentiment from that set to heat emboss and die cut. I added foam to the back of each and popped them up on my foiled background.

I ran out of black cardstock so I blended the edges of my card base with black soot distress oxide ink and then popped the whole panel up with foam tape on that.

For finishing touches I just added Touch of Gloss to all of the flower centers. I like that little bit of shine to go with the beautiful foiling.

Products used:
Aloha Flowers stamps and dies
Cloudy Day Foilables
Waterfall CheerFoil
Mini Minc Machine
Distress Oxide Ink – lemonade, carved pumpkin, abandoned coral, black soot
Foam tape
Touch of Gloss

Magic Anti Static Brush
Watermark & Embossing Ink
Embossing Powder – icicle

I appreciate you sharing your time with me. Have a fabulous day!

Pink & Main – Ours is My Favorite Story Box Card

Hello again everyone! I’m over on the Pink & Main blog with a sweet envelope box card to share with you. I love the fun shape of this die set and have been wanting to try different images with it for a while now.

Today I cut the elements for my envelope box card from light green and kraft cardstock, with a white tag so it didn’t blend in. I used EZ tear tape to adhere all of the pieces – 1/4″ and 1/8″ depending on the size of the tab and liquid glue to add the kraft details.

I stamped and colored images from Hey Hot Stuff with copic markers, then used the coordinating dies to cut them all out. To get my sentiment to fit on the tag, I used tape to mask off portions and make sure to clean the stamp really good between each line so there wasn’t anything left on the section prior.

I added the front drag and tag with foam squares, the second dragon inside with liquid glue, along with the sky pieces in the back.

It all folds perfectly flat and mails in a regular envelope. There’s just enough depth for it to stand for display and give fun dimension to whatever you have spilling out of your envelope too.

Products used:
Hey Hot Stuff stamps and dies
Envelope Pop Up Card dies
EZ Tear Tape – 1/4″ and 1/8″
EZ Squeeze liquid glue
Foam squares

I appreciate you sharing your time with me. Have a fabulous day!

Pink & Main – Two-for-One Designs with Foiling and Embossing

Hello everyone! I’m over on the Pink & Main blog today sharing two cards that I created by making two backgrounds, cutting them in half and swapping them. I added a sentiment, some embellishments and have two super cute cards to share!

For these cards, I used the new Many Flowers embossing folder on a piece of Dress Shop cardstock. Then I foiled the new Big Posies foilable panel with silver flowers CheerFoil. I ink blended the foiled panel with Night Sky ink fading as I went down. Then, I held the two pieces together and used my paper trimmer to cut them at a diagonal. Next I simply swapped one half for another and held the pieces together with washi tape. I added foam tape to the back and popped the backgrounds up on white card bases.

For my sentiments, I chose two from Stay Strong and stamped them on white cardstock with Night Sky ink. After die cutting them with the coordinating dies, I inked the edges with the leftover ink in my blending brush from earlier and added foam squares to the back so I can pop them up too.

For a little shimmer I splattered both card fronts with flamingo Water Gems. For this step, I sprinkled a tiny bit of powder on an acrylic block and added a few drops of water. After mixing it with my paint brush I just flicked it all over both cards. The pink is very close to the Dress Shop cardstock but it still adds sparkle even to that part of the card.

After the splatters were dry, I glued a scattering of purple On the Town Gems across both designs. There are dark and light in the colorways of this embellishment pack and I used both purples for variety.

Finally, I tied some purple ribbon around the top of both cards to finish off the designs. I like having things across the card – top and bottom – so your eye is drawn all over, not focused on one area only.

Products used:
Stay Strong stamps and dies
Many Flower embossing folder
Big Posies Foilable panel
Silver Flowers CheerFoil
Mini Minc Machine
Dress Shop cardstock
Night Sky ink
On the Town gems
Ergonomic blending brush
Water Gems watercolor
Foam tape
Liquid glue

I appreciate you sharing your time with me. Have a fabulous day!