Pink & Main – Just a Note Bee-Cause Shaker Card with Foiling Fun Background

Hey friends! I’m over on the Pink & Main blog today sharing a fun shaker card featuring some of the Foilables and gorgeous CheerFoils too. Have you picked up your awesome pink Mini Minc Machine yet? This is a game changer in the world of foils. It gives such consistent, awesome results. I’m seriously in love with it.

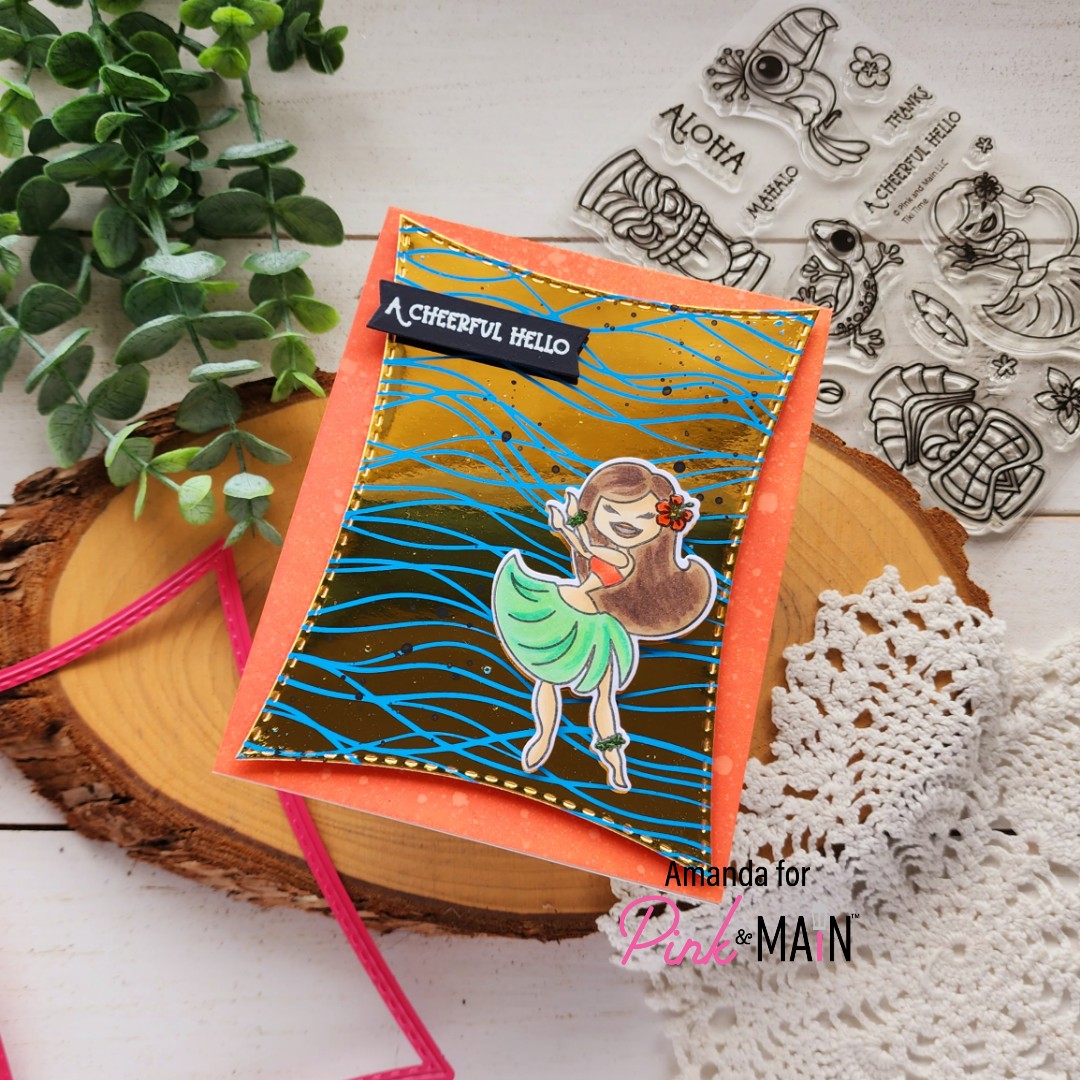
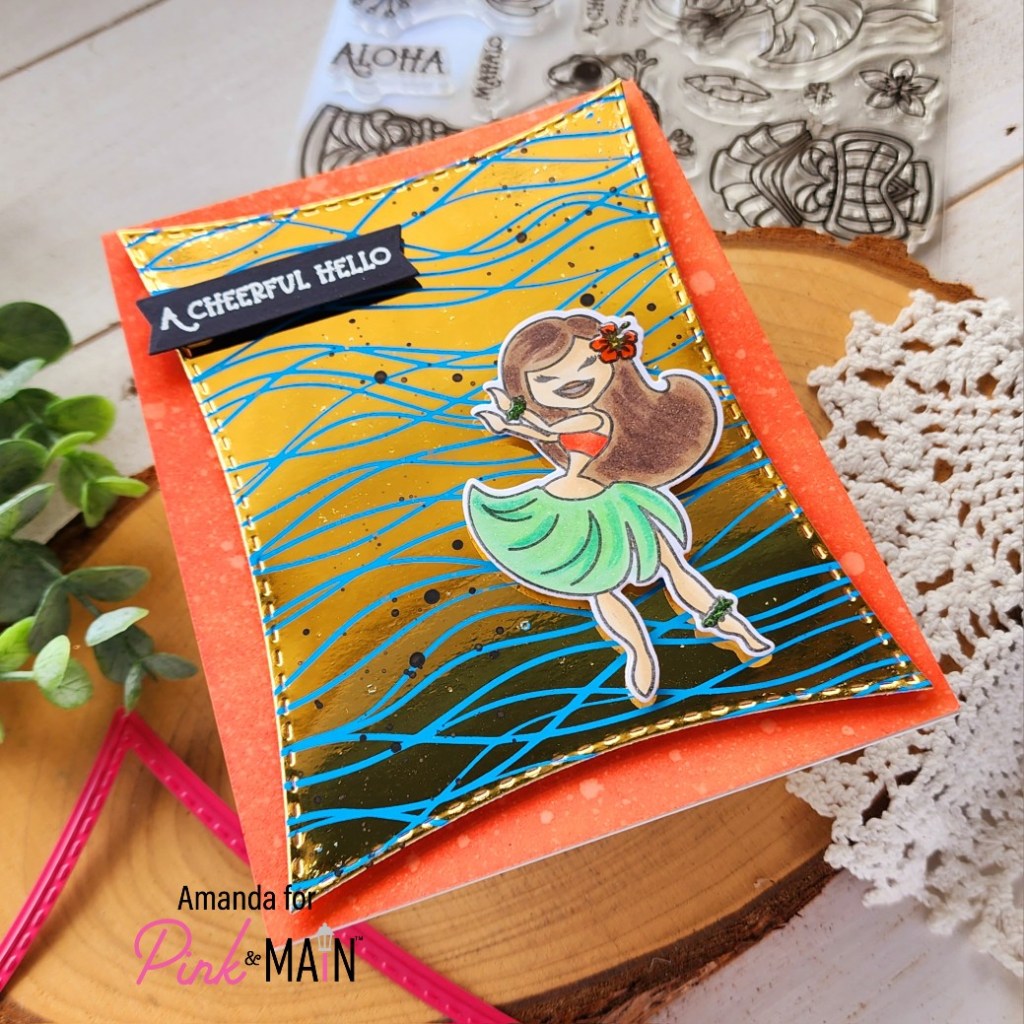
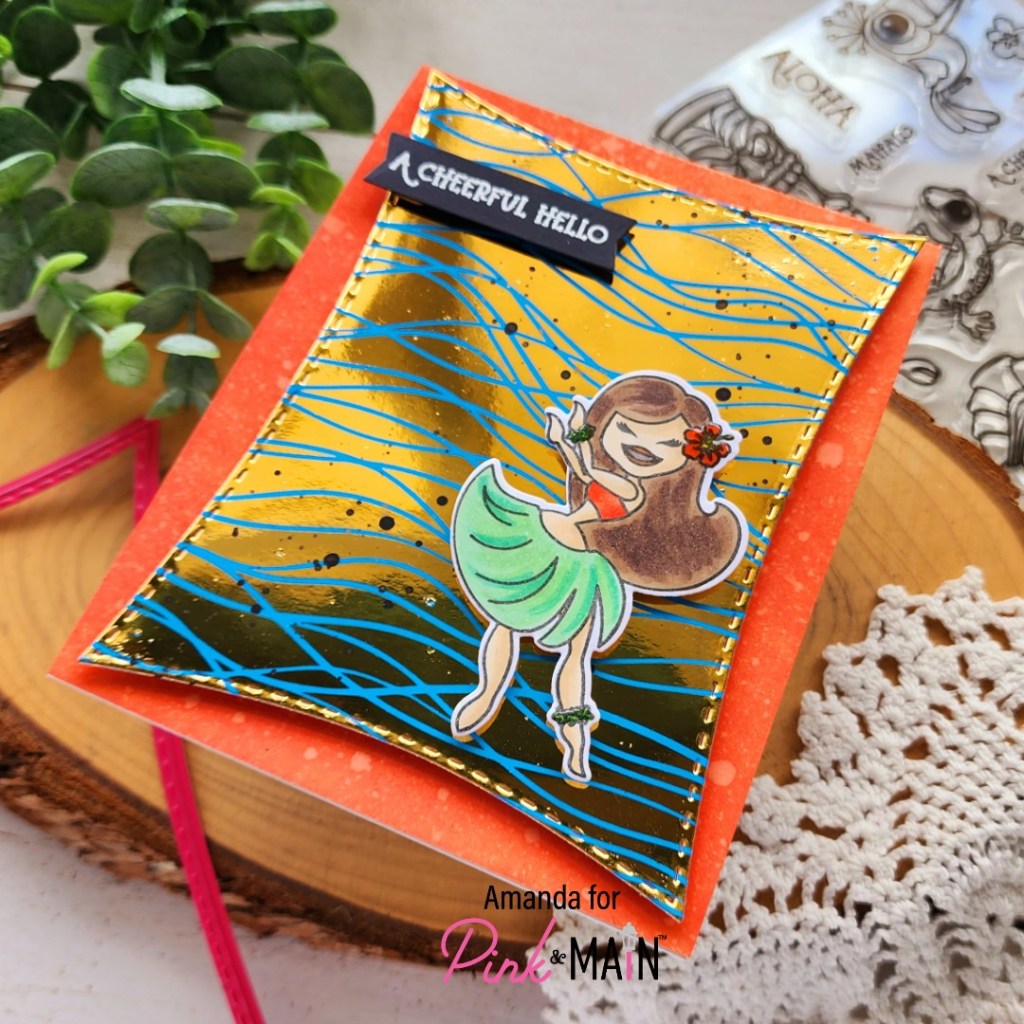
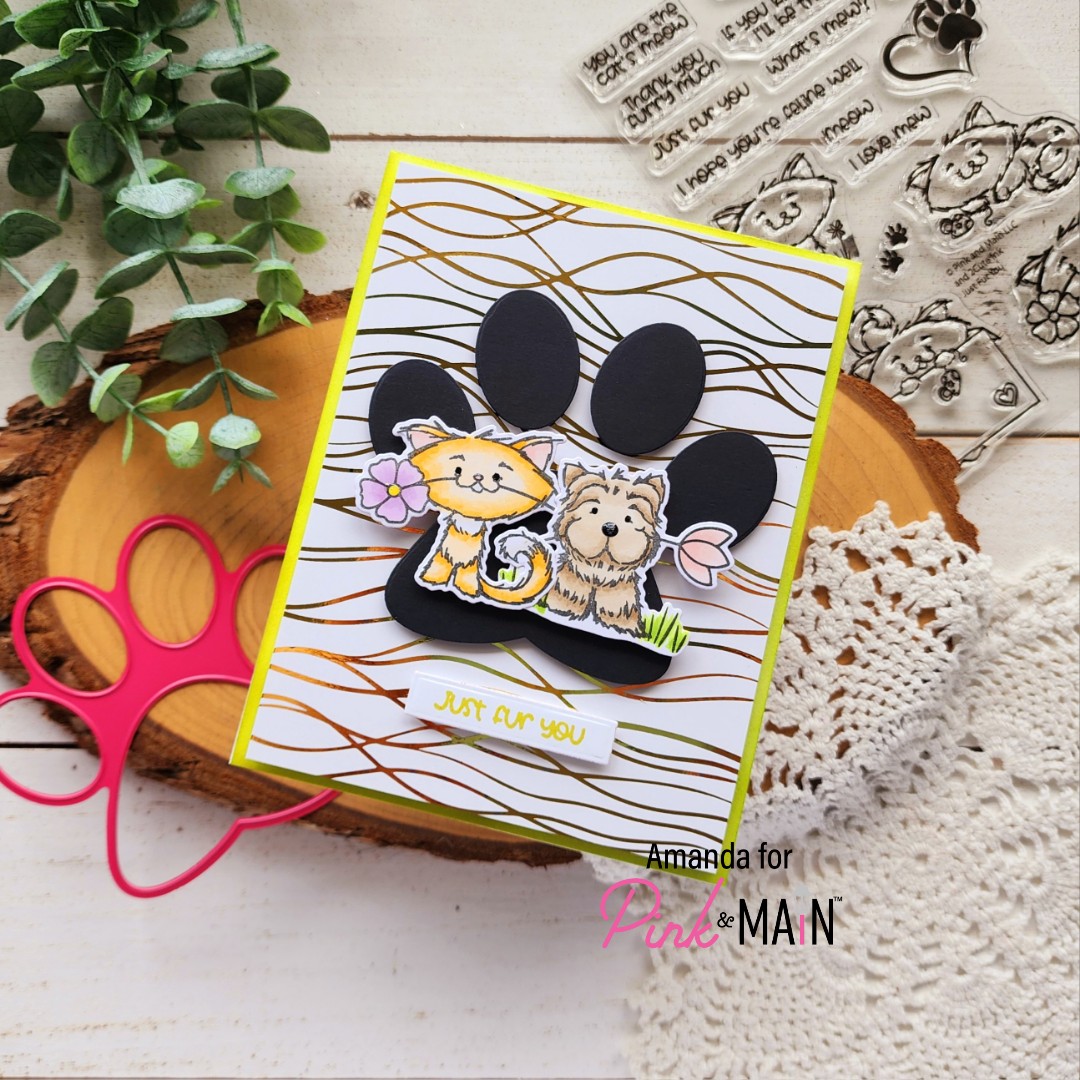
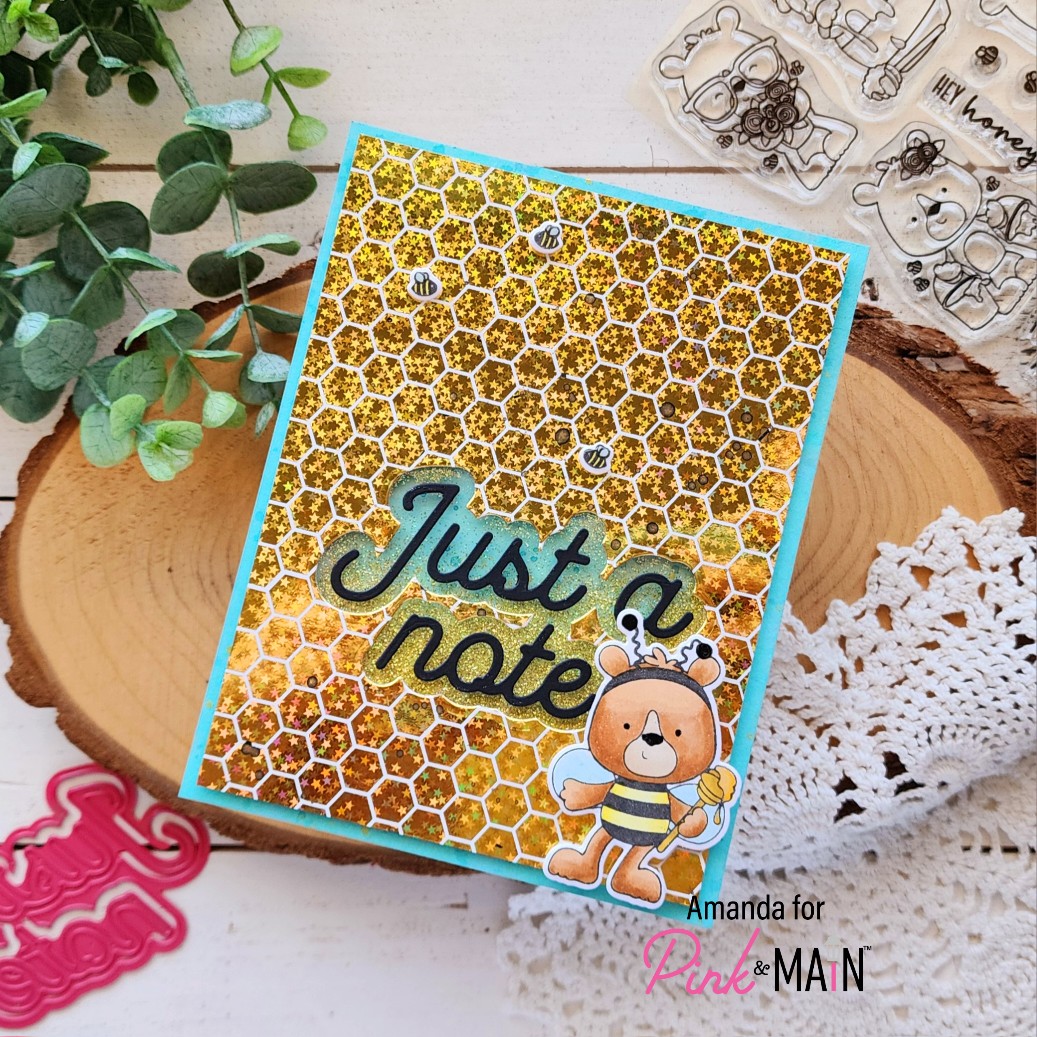
Starting things off I foiled one of the backgrounds in the Beeyoutiful Foilable Kit with Starry Gold CheerFoil. Then I used the shadow die from my sentiment to cut a window. I covered the window with acetate using EZ Tear Tape and lined the back of the panel with foam tape creating a well for my shaker glitter.

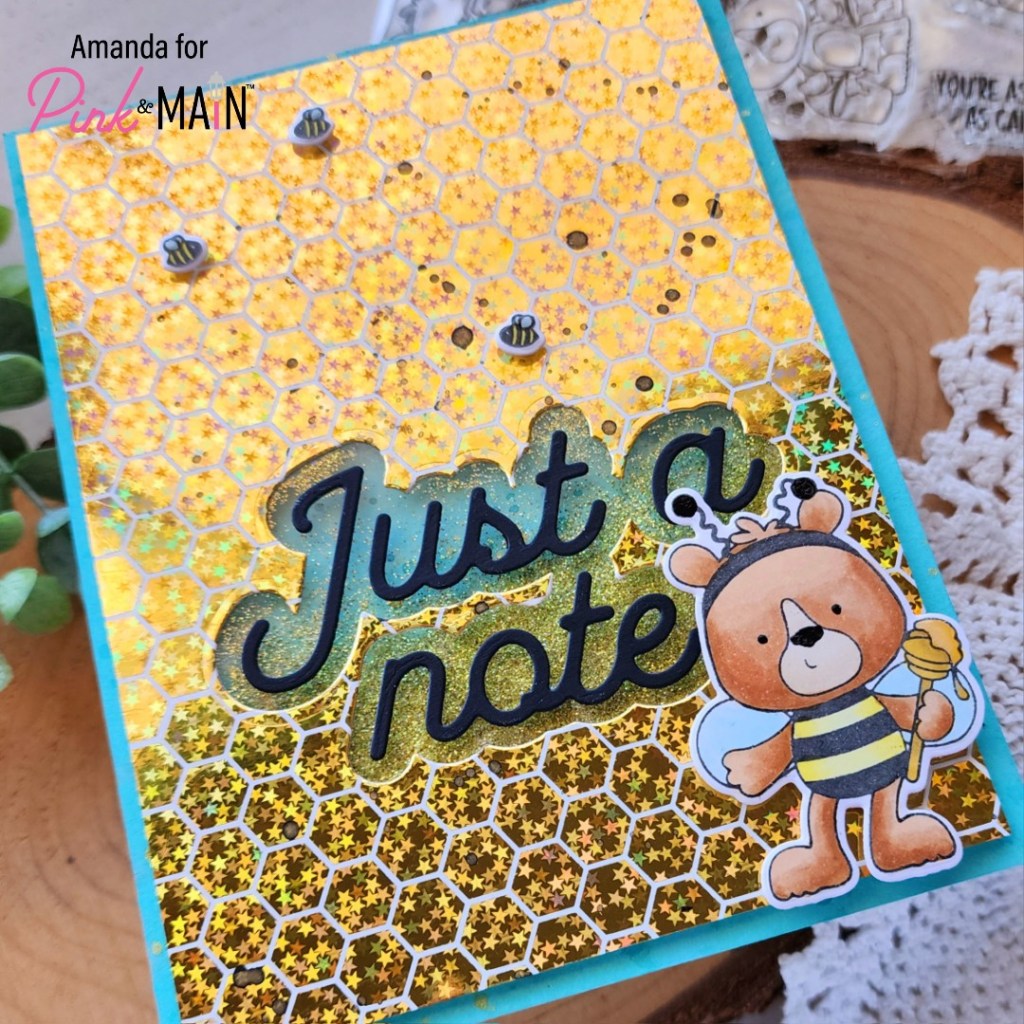
Next, I took a piece of teal cardstock and inked the edges with salvaged patina distress ink. I spritzed it with water but the effect was minor so I splattered it with peacock feathers ink and gold watercolor instead. That gave a really pretty look. I added some lemonade super fine glitter where the window would fall and adhered my foiled panel, sealing the glitter in place.

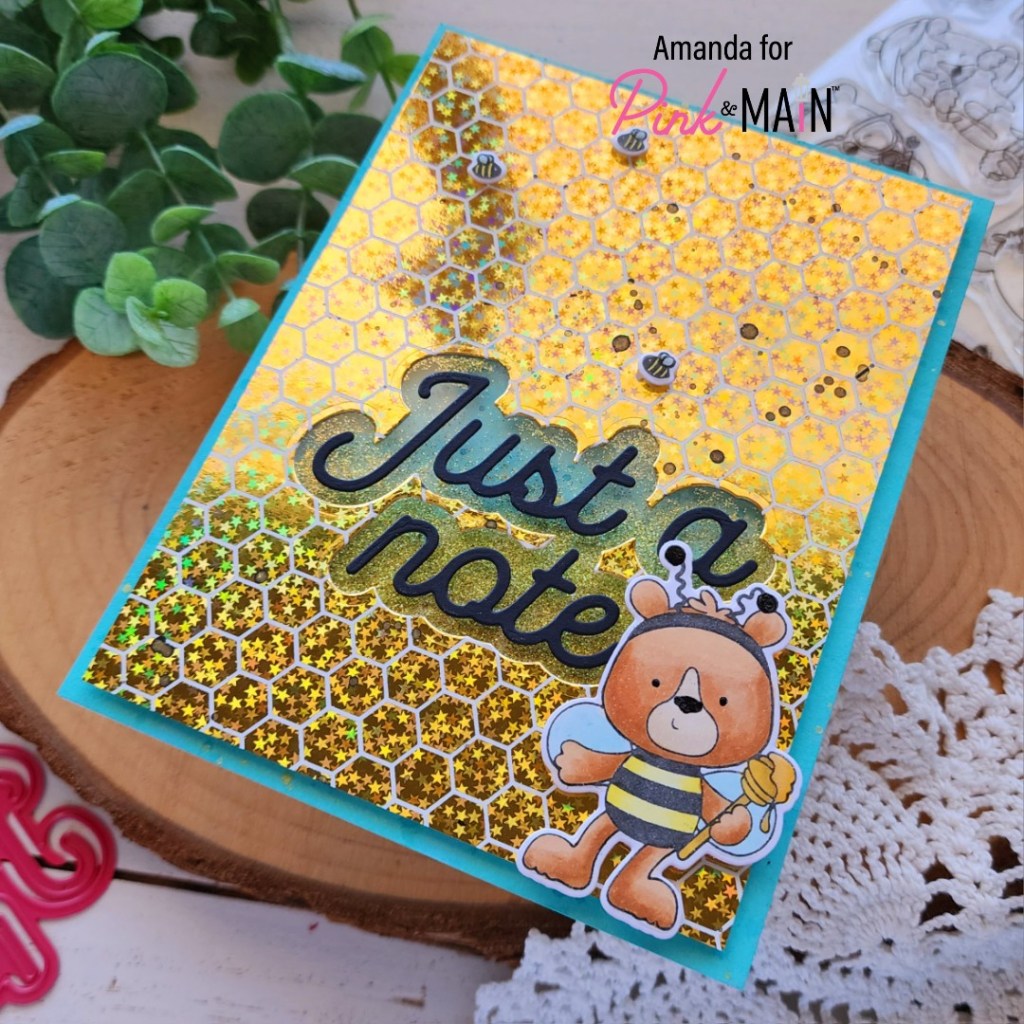
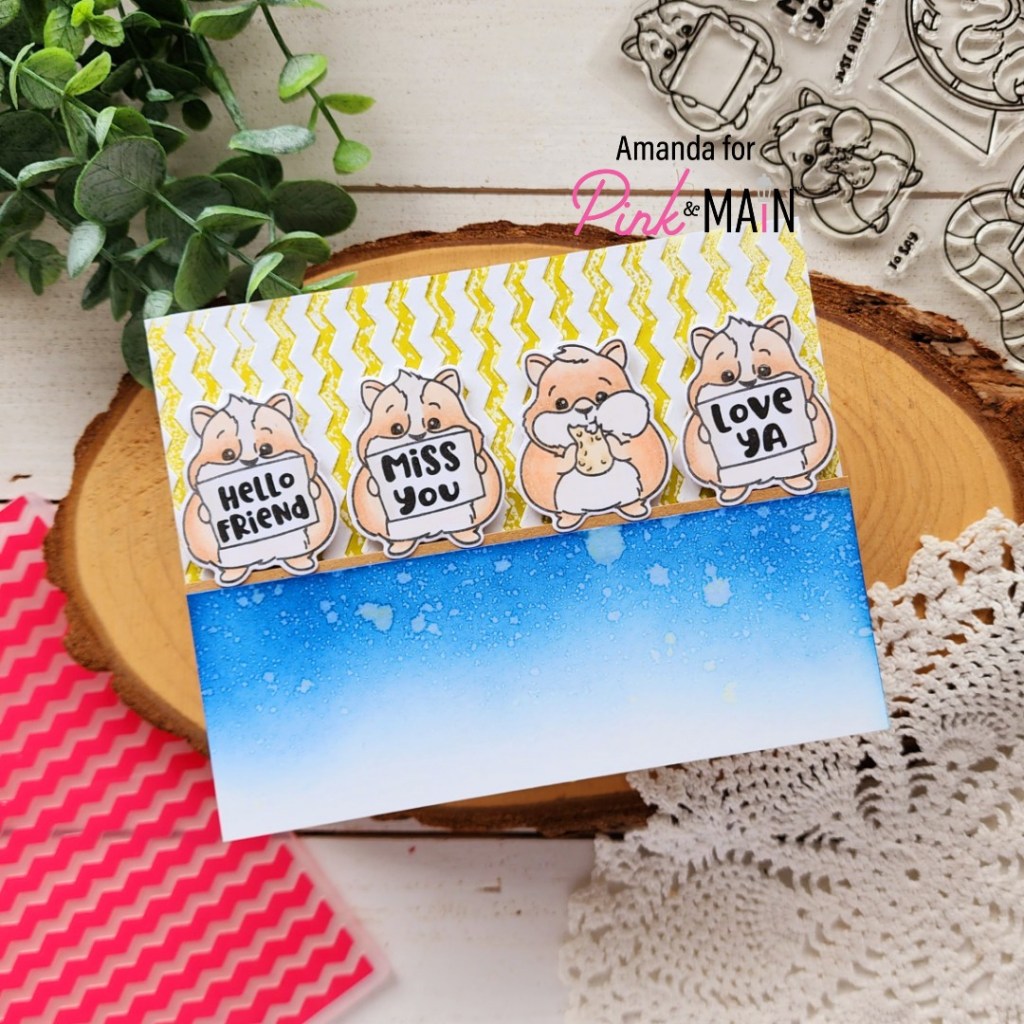
I die cut the sentiment from black cardstock and adhered it in place with liquid glue. Then I stamped some images from Hap-Bee and colored them with my copic markers. I used the coordinating dies to cut them all out and added foam squares to the back to attach them to my card front.

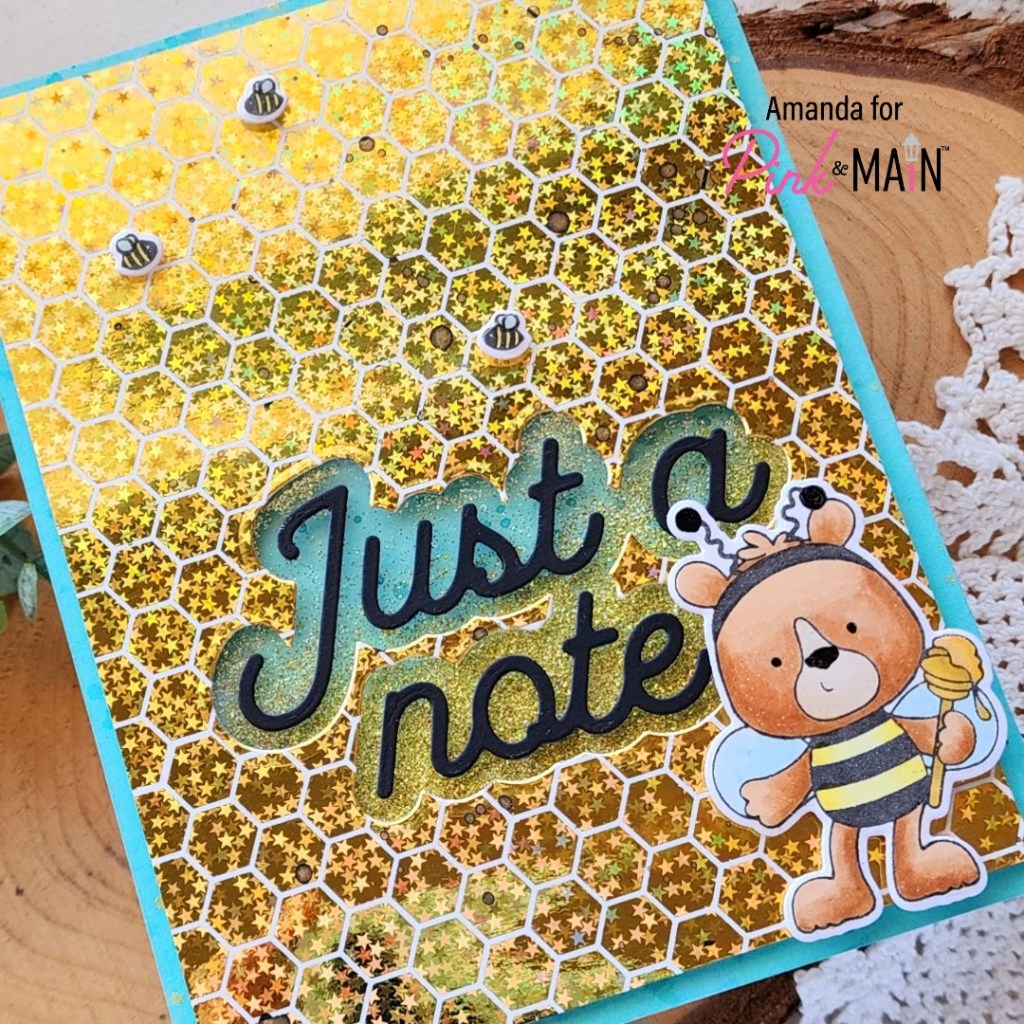
Using EZ Squeeze liquid glue, I adhered the panel to a white card base. Then added Touch of Gloss to the bee wings and black glaze pen to the eyes, nose and antennae on the bear. Last, I added a little Touch of Gloss to the honey on the bear’s honey stick.

Shake! Shake! This sweet card is finished in all its shiny glory.

Products used:
Hap-Bee stamps and dies
Simple Greetings dies
Mini Minc Machine
Beeyoutiful Foilable Kit
Starry Gold CheerFoil
Super Fine Glitter – lemonade
Touch of Gloss
Foam tape
EZ Squeeze liquid glue
EZ Tear Tape – 1/4″

I appreciate you sharing your time with me. Have a fabulous day!

Pink & Main – Hello Friend Hammies with Inked Embossing Folder

Hello everyone! Thanks for stopping by. Today I’m sharing a fun card on the Pink & Main blog featuring these sweet Hammies and my sentiment choices are still making me giggle.

It’s easy for me to overlook but some stamp sets might have less or smaller images and those are the most perfect ones to repeat on your card like a pattern. For instance these cuties with their messages and the one I relate to most with his snack in hand!

I started by stamping and coloring my hammies. Once they were colored, I put them back in my MISTI and stamped the sentiments in the signs. After that, I used the coordinating dies to cut them all out.

Next, I pulled out my chevron embossing folder and a piece of white cardstock. I inked up one side of the embossing folder with The Park ink using a brayer roller. I carefully closed it up and ran it through my die cutter to emboss and ink the panel at the same time. It’s a little blotchy but looks so cool and just adds interest to the background.

Finally, I inked up a strip of white cardstock with Barbershop ink and a blending brush fading into white. Then I spritzed it with water and blotted it dry. I used EZ tear tape to add a strip of kraft cardstock to the top and popped it up with foam tape on the embossed panel. I glued that to a white card base with EZ squeeze liquid glue and added my hamsters with foam squares.

For finishing touches I just added some Touch of Gloss to the hamsters eyes so they were shiny in the light.

Also, still giggling about the sentiments on their signs. I really love this card and can’t wait to mail it! I know just the perfect person for it!

Products used:
Hammies stamps and dies
Chevron embossing folder
Dye Inks – The Park and Barbershop
Foam tape
EZ tear tape – 1/4″
EZ squeeze liquid glue

Ergonomic blending brushes
Touch of gloss

I appreciate you sharing your time with me. Have a fabulous day!

Pink & Main – A Cheerful Hello with Negative Foiling

Welcome back everyone! I’m over on the Pink & Main blog today playing with CheerFoils again but this time, I’ve used the negative foil from last week’s card. Remember you can do that to extend the use of your supplies, have little or no waste and Pink & Main has FABULOUS colored toner sheets so your negative isn’t just black.

Last week I foiled the Making Waves Foilable card front with gold CheerFoil but I saved that negative because it came out so perfect. Sometimes I might foil the negative right away and other times, like this one, I’m non-committal on the color I want the background so I just hold onto the foil. This time I chose blue for a watery, tropical vibe. Then I die cut the panel with a Concave Rectangle and splattered the panel with black acrylic paint. This adds cool texture and pulls your eye away from any imperfections too.

I stamped and colored the sweet hula girl from Tiki Time and colored her with copic markers. Then I stamped and heat embossed a sentiment on a Large Sentiment Strip. I added foam tape to all of my pieces and switched gears to choosing a color for my card front.

After trying multiple colors I landed on cracking campfire distress oxide that goes with the details on the hula girl. After inking the card front up, I splattered it with water and blotted it dry. Then I adhered all the elements and came in with some Touch of Gloss details on the girl.

Sometimes this much foil can be overwhelming for me but I really can’t express how awesome this card is in person and how cool the shine is to play with in the light. I love it!

Products used:
Tiki Time stamps and dies
Large Sentiment Strip dies
Concave Rectangle dies
Making Waves Foilables
CheerFoil – gold

Rainbow Toner Sheets
Mini Minc Machine
Touch of Gloss
Foam tape
Magic Anti-static Brush
Watermark & Embossing Ink
Embossing Powder – icicle
Distress Oxide Ink – crackling campfire

I appreciate you sharing your time with me. Have a fabulous day!

Pink & Main – Just Fur You Fun with Foiling

Welcome crafty friends! I’m on the Pink & Main blog today sharing a sweet pet themed just because card using some of the new amazing foiling products. Pairing these awesome foilable card fronts and gorgeous foils with the new Minc machine from Pink & Main, you can’t go wrong! They foil beautifully, quickly and it’s so fun to create with!

When I looked at the new Just Fur You and Top Dog stamp sets, I had to put these sweeties holding flowers together! It was just too perfect. So I stamped and colored them with copic markers before using the coordinating dies to cut them out.

I love the visual texture of the new Making Waves foilable background so I decided to run that through my Minc with gold foil. Pulling from the green grass in the puppy image, I inked the edges of my card base with The Park dye ink and also stamped my sentiment in the same color. I used a sentiment banner from Sunny Greetings dies to cut it out and started arranging my card.

Something was definitely missing so I went back to the drawing board. That’s when I remembered this AWESOME new giant paw in the Paw Prints die set. It’s perfect! So I cut it from black cardstock and popped the pieces up with foam squares. I added my images and sentiment the same way and popped the foiled panel up with foam tape on the inked card base.

For finishing touches I just added a little touch of gloss to the puppy and kitty noses and black glaze pen to their eyes.

It turned out so cute and fun with all the foiled shiny texture and sweet images! I love it!

Products used:
Just Fur You stamps and dies
Top Dog stamps and dies
Paw Prints dies
Sunny Greetings dies
Making Waves foilables
CheerFoil – gold
Mini Minc Machine
Foam tape and squares
The Park ink
Ergonomic blending brush
Touch of gloss
Glaze pen – black

I appreciate you sharing your time with me. Have a fabulous day!

Pink & Main – Patriotic Reach for the Stars

Hi everyone! I’m on the Pink & Main blog today with a little inspiration using a new background die and the June Pup freebie stamps and dies! I’m having a blast with this collection and so happy to have a patriotic version to add to the mix.

I stamped my image and colored it with copic markers before using the coordinating die to cut it out. Then I switched to my background using the new Making Waves cover die and a Stop Sign cardstock panel behind it.

I used EZ Squeeze liquid glue to adhere the background layers together and then to a white card base. I wanted something to separate my pup from the background so I chose a zig zag circle just a smidge bigger than him and cut it out from vellum. I added the pup to the vellum with foam squares and hid tape runner behind that to adhere the vellum to the card front.

I chose my sentiment and heat embossed it with licorice embossing powder on white cardstock, using the coordinating die to cut it out too. I wanted more stars to add to the mix so I went digging and found these awesome size stars in the Flip Flops and Shades die set. I cut them from silver foil cardstock and added them with a combination of liquid glue and foam squares.

For finishing touches I just added Touch of Gloss to my puppy’s nose, eye and the stars on his hat. This way there is shine at all angles of the card – the pup, the stars and the heat embossed sentiment. It’s perfect!

Remember you can get June Pup free with purchase until June 23. You get the stamps with a $50 purchase and the coordinating die added if you spend $75!

Products used today:
June Pup stamps and dies
Making Waves cover die
Zig Zag Circles dies
Flip Flops and Shades dies
Stop Sign cardstock
EZ Squeeze liquid glue
Touch of Gloss
Magic Anti-static Brush
Embossing & Watermark Ink
Embossing Powder – licorice
Foam squares

I appreciate you sharing your time with me. Have a fabulous day!

Pink & Main – June Sneak Peek

Welcome friends! I’m over on the Pink & Main blog today for sneak peek week sharing a sneak of a fantastic addition to my very favorite long-legged critters! This kitty is too cute for words and I couldn’t get him open fast enough to stamp. I love it!!!

Like I said, I stamped my images straight away and colored them with my copic markers. Then I used the coordinating dies to cut them out and set them aside. I had a few different ideas in mind but ended up really wanting to play with the upcoming paw print stencil too, so that’s what I stuck with.

I inked up a white panel that measures 4×5.5 inches with distress oxide inks. I started with spiced marmalade and went to mustard seed, then squeezed lemonade at the top. I like this blend for a dark orange/yellow combo. I spritzed the panel with water and blotted it dry. Then I layered the paw print stencil over top and went in with rusty hinge distress oxide ink.

I popped the panel up with foam tape on a white card base and added a strip of washi tape from my stash to the edge. Then I stamped a sentiment on a large sentiment strip and popped it, with the images up on foam squares.

For finishing touches I added black glaze pen to the critter eyes and white gel pen highlights around the images. Last, I added stardust Stickles to the kitty’s cheeks. I absolutely love doing this with these critters and couldn’t resist myself.

Be sure to stay tuned for more sneak peeks and then release day on Friday!!!

Products used:
Pawsome Friend stamps and dies
Paw Prints stencil

Large Sentiment Strips dies
Foam tape and squares
Distress Oxide Ink – rusty hinge, spiced marmalade, mustard seed, squeezed lemonade
Black glaze pen
White gel pen

I appreciate you sharing your time with me. Have a fabulous day!

Pink & Main – Sweet Summer Greetings

Happy Wednesday everyone! This week is chugging along and I’m happy to be on the Pink & Main website with some mid-week inspiration to share. I am dreaming of summer vacation and playing on the beach so these sweet penguins were perfect to fit my mood.

They were the stamp of the month in May but don’t worry, you can still snag them in the shop and sign up for this months stamp of the month so you don’t miss out anymore. I’ll share links at the bottom of this post.

I chose these two sandy cuties to create a mini scene with today. I stamped and colored them with copic markers before using the coordinating dies to cut them out.

Then I cut out a wide stitched arch from white cardstock and inked it up lightly with distress oxide inks for sand and sky. I started with tea dye for the sand and added a little gathered twigs at the bottom. Then I added mermaid lagoon to the top for a pretty sky and spritzed the whole panel with water. Then I flicked ground espresso ink on the sandy part of the panel and more mermaid lagoon on the top.

This die set can cut your sentiments out if you’d like but I chose to stamp mine on the scene panel today. Once that was done, I added my images with foam squares and then added foam tape to the back of the arch panel.

I cut down a piece of yellow gingham paper from the Warm Basics paper pad and added it to a white card base before adding the scene panel to that.

For finishing touches I added some white gel pen highlights to the images. Then black glaze pen to the penguin’s eyes that are open and finally some Touch of Gloss to the sun and penguin beaks.

We’re spending a week camping at the beach for 4th of July and it can’t come quick enough! I’m so excited and start daydreaming every time I create with these fun beachy stamps.

Products used today:
Summer Penguins stamps and dies
Stamp of the Month Subscription
Wide Stitched Arches dies
Warm Basics paper pad
Foam tape and squares
Touch of Gloss
Ergonomic blending brushes
Distress Oxide Ink – gathered twigs, tea dye, ground espresso, mermaid lagoon

I appreciate you sharing your time with me. Have a fabulous day!

Pink & Main – Aloha

Hello everyone. I’m so glad you stopped by. Today I have a tropical tiki card featuring a new stamp and die set from Pink & Main called Tiki Time. I’m always drawn to these sort of tropical themes, they make me want to go on vacation.

I stamped and colored my images with copic markers before using the coordinating dies to cut everything out. Then I cut 4 concave rectangles from white cardstock and ink blended each in a gradient with different Pink & Main dye inks. I wanted things bright and fun so I chose construction, night sky, lakeside and the park.

Next, I used an embossing folder to add texture to my background panel and adhered it to a card base. I added foam tape to the back of the concave rectangles and popped them up at an angle, leaning toward the center of the panel.

Then I popped my images up on those with foam squares. I kept the tiki guys opposite each other and made sure the lizard and toucan were on contrasting colored panels.

I stamped and heat embossed aloha on black cardstock and trimmed it out with my scissors. Then I popped it up in the center with foam squares as well. For finishing touches I added Touch of Gloss to the critters’ eyes and stardust Stickles to their spots and dots for a little sparkle too.

Anyone else ready to run away to a tropical island with me? I promise I can pack really fast!

Products used today:
Tiki Time stamps and dies
Concave Rectangles dies
Catch a Wave embossing folder (Retired, I apologize I forgot. Try substituting curly waves stencil or rough waters foilables)
Ink – construction, the park, lakeside, night sky, embossing and watermark
Magic anti-static brush
Embossing powder – icicle
Blending brushes
Foam tape
Liquid glue
Stickles – stardust
Touch of Gloss

I appreciate you sharing your time with me. Have a fabulous day!

Pink & Main – May Pup

Hey friends! I’m over on the Pink & Main blog today with some sweet doggo inspiration featuring the May Pup stamps and dies. If you’ve followed since January, you’ll know that this set is a gift with minimum purchase for a short time after each release and then it’s also available in the shop if you just want to pick it up. They are themed for each month and are absolutely adorable!

I stamped and colored the pup and his beach ball with copic markers before using the coordinating dies to cut them out. Then I grabbed the new Warm Basics paper pad and chose a couple of fun patterns for my background. I cut the yellow from the third-to-largest Stitched Diamond die and used the largest Layered Rectangle on the stripes.

Next, I stamped and heat embossed the sentiment from May Pup and used the coordinating die to cut it out as well. Can we just take a moment to say how AWESOME it is when die sets also have the match for sentiments?!? I love it so much! It seriously makes my day.

Now that everything is ready I started assembling my pieces. I glued the stripes to a white card base with EZ Squeeze liquid glue. Then I popped the diamond up with foam tape. Next I added the pup, beach ball and sentiment with foam squares. Be sure to double your foam where they overhang the diamond so they still lay nice and flat. This only equaled like 2 1/2 extra foam squares and it’s totally worth it!

Now that this pup is ready for fun in the sun, I moved on to finishing touches. Today I added Touch of Gloss to the sunglasses, beak on the floaty and center of the beach ball. It just gives a little shine to everything which catches your eye in the light. Then I added white gel pen highlights to all the images. Finally, I added a scattering of Pretty Posies glitter enamel dots. I love that they match the paper pad so perfectly!

Are you ready for fun in the sun? I really am! We’re taking the longest camping trip ever (I think) for July 4th and I’m so excited I think about it every day and it’s a month and a half away still!

Products used today:
May Pup stamps and dies
Stitched Diamond dies
Layered Rectangles dies
Foam tape and squares
Touch of Gloss
Magic Anti-static Brush
Embossing and Watermark Ink
Icicle embossing powder
Warm Basics paper pad
Pretty Posites glitter enamel dots
EZ Squeeze liquid glue

I appreciate you sharing your time with me. Have a fabulous day!

Pink & Main – May Sneak Peek Sprinkles of Joy

Hi again! I’m over on the Pink & Main blog today with a sneak peek of the upcoming May release. Who doesn’t love ice cream? Seriously, it’s probably my most desired sweet treat so I just had to color this cutie up when I saw her!

I also don’t love choosing a flavor so multiple scoops, means multiple flavors of ice cream! I stamped my sweet girl and her giant ice cream cone, plus the cherry for the top and colored everything with copic markers. Then I used the coordinating dies to cut them out. I used liquid glue to attach the cherry and set them aside.

I ran a piece of brown cardstock through my die cut machine in the Grid embossing folder, then I used the largest Concave Rectangle die to cut it out. I love how this looks like the ice cream cone! Isn’t that fun!?! I added this panel to a white card base with foam tape. Then switched gears to my sentiments.

First, I took white cardstock scraps and colored parts of them with the same copic markers as the ice cream scoops. Then I stamped my sentiment on one and cut it out and used the upcoming Simple Sentiments dies to cut out the shadow for HI so they coordinate with the image. I also cut HI from white cardstock three times and glued them together before gluing them to the shadow.

Next, I added my image and sentiments to the card front with foam squares and tape. I added Touch of Gloss to the cherry on the ice cream, highlights of the ice cream scoops and the little girl’s shoes. Last, I scattered glitter enamel dots from the Blessings pack across the design.

Products used today:
Sprinkles of Joy stamps and dies
Simple Sentiments dies
Concave Rectangles dies
Grid embossing folder
Foam tape
EZ Squeeze liquid glue
Touch of Gloss
Glitter Enamel Dots – blessings

I appreciate you sharing your time with me! Stay tuned for release day on Friday where you can see it all and snag your next round of crafty goodness!