Pink & Main – Minc Release Foiling Fun Hop

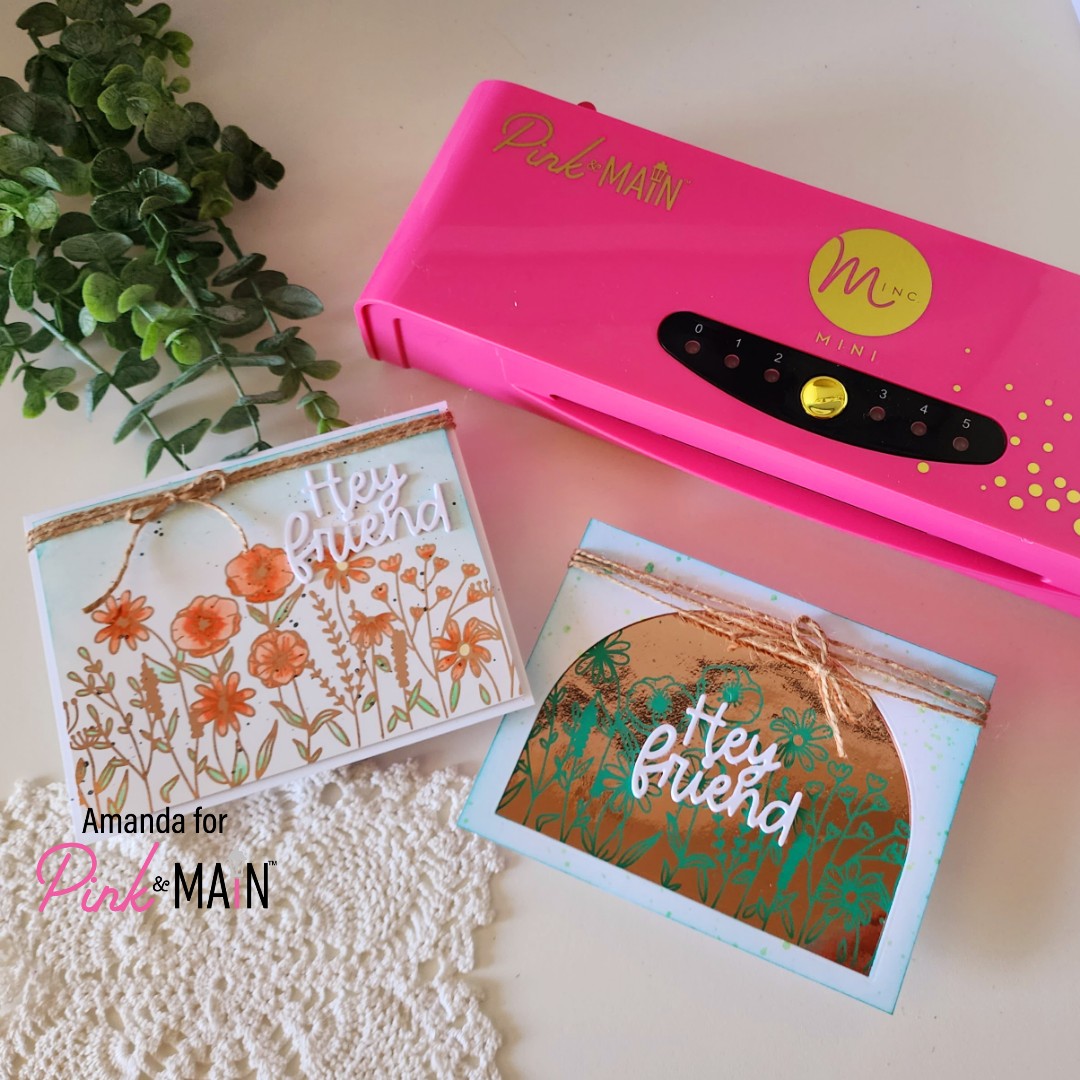
Hey friends! I’m popping in with some extra fun today! We’re highlighting the recently released Pink & Main Minc Machine and CheerFoils! I created a couple of cards to share but also want to share my opinion given that I have extra experience and knowledge of other brands as well.

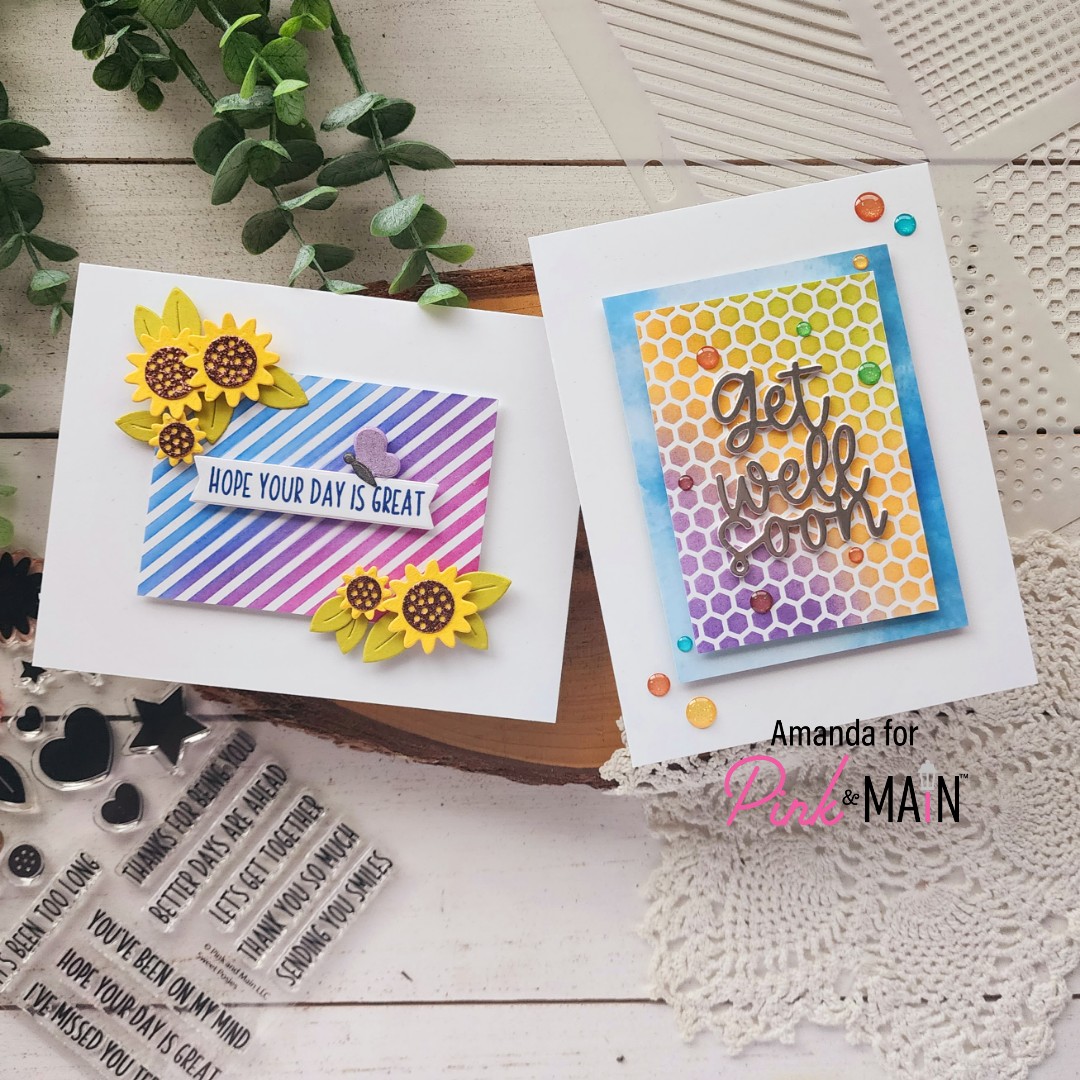
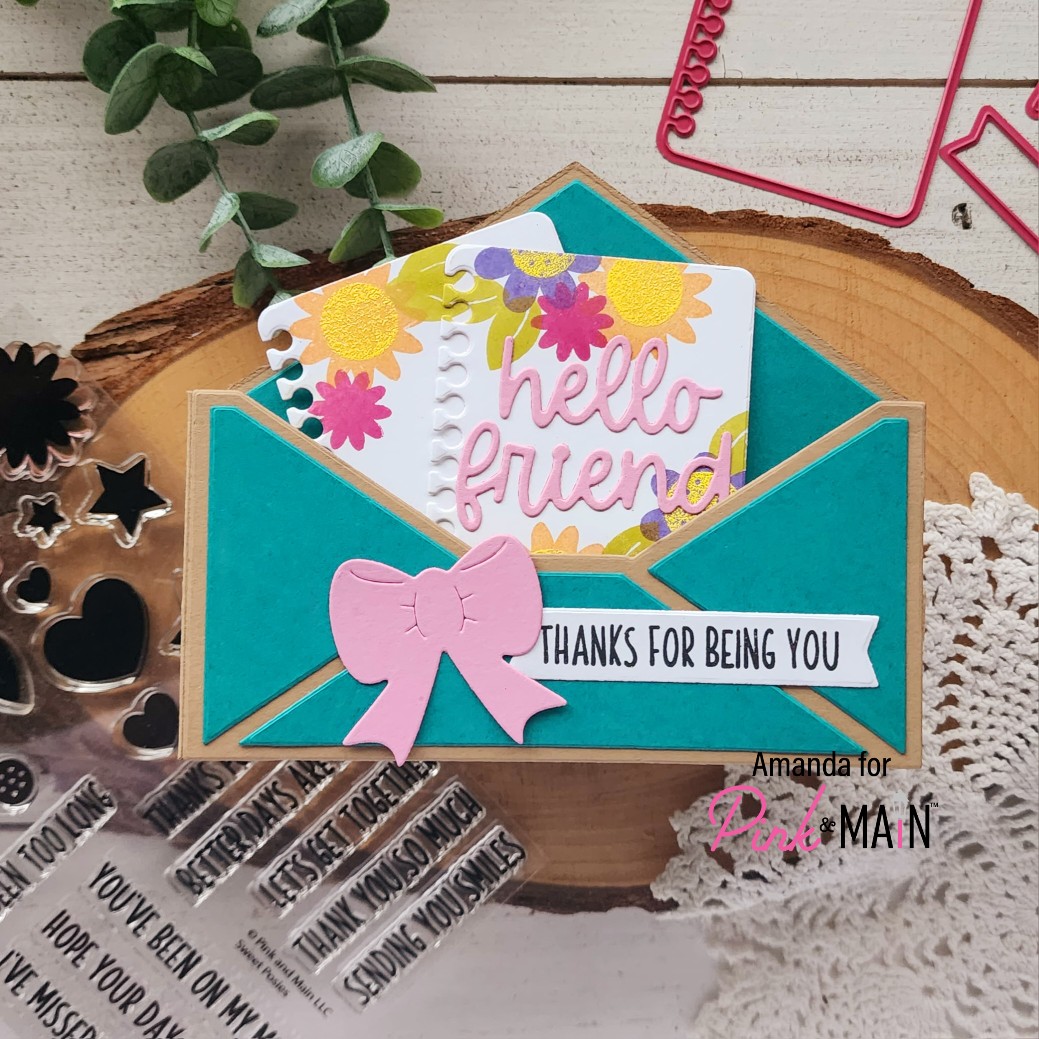
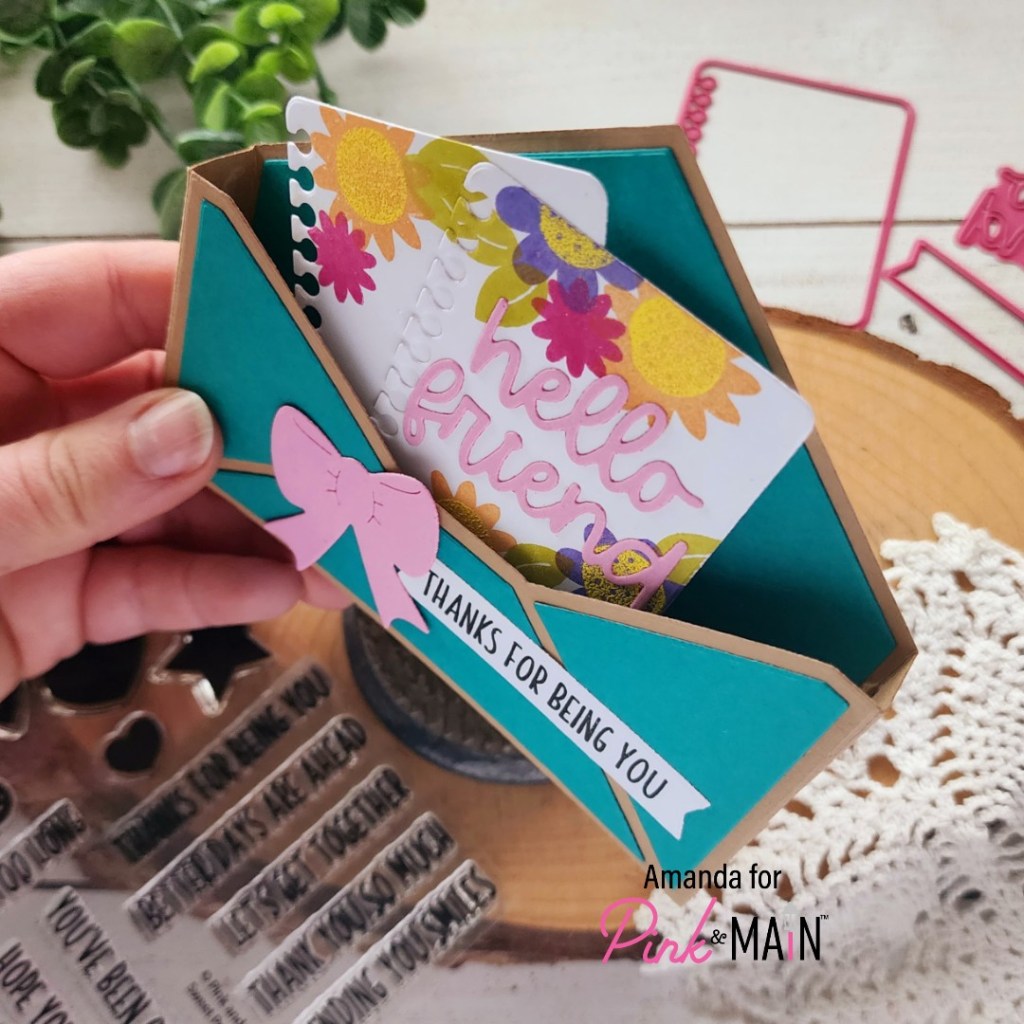
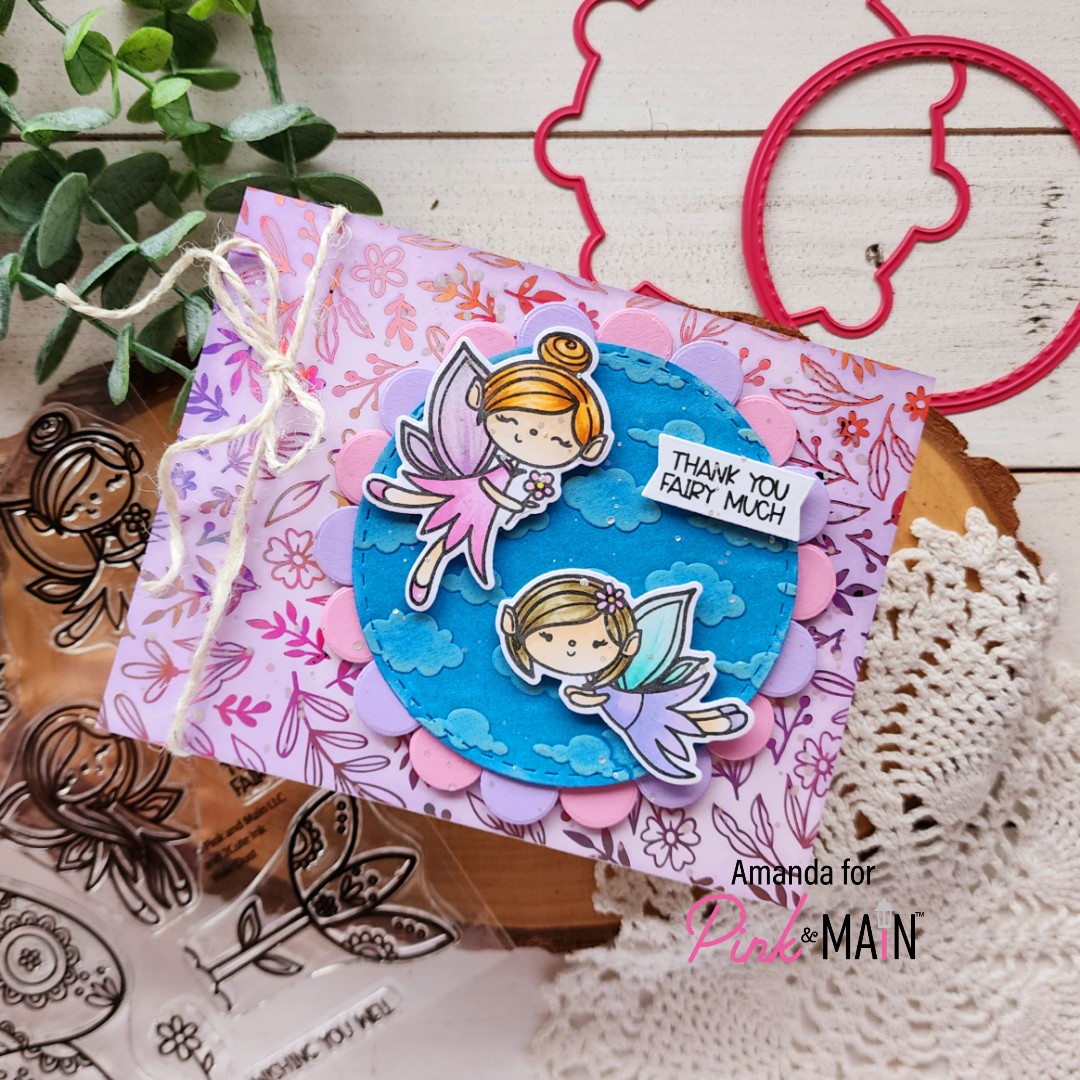
I foiled one of the Wildflowers foilables panels with rose gold CheerFoil and colored the images in with my copic markers. I love that you can color over foiling! Then I took my negative and foiled it over a teal Garden Color Toner Sheet to get a two-for-one out of my foil!

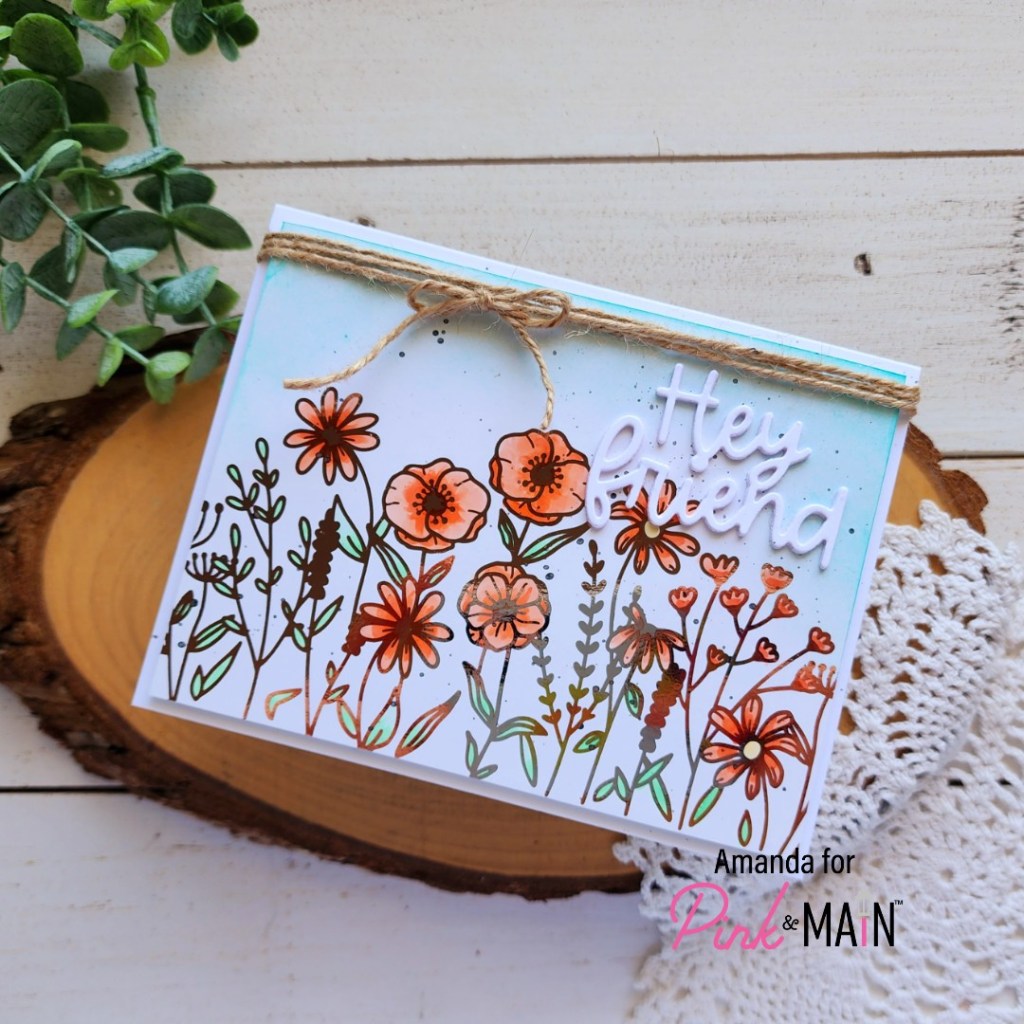
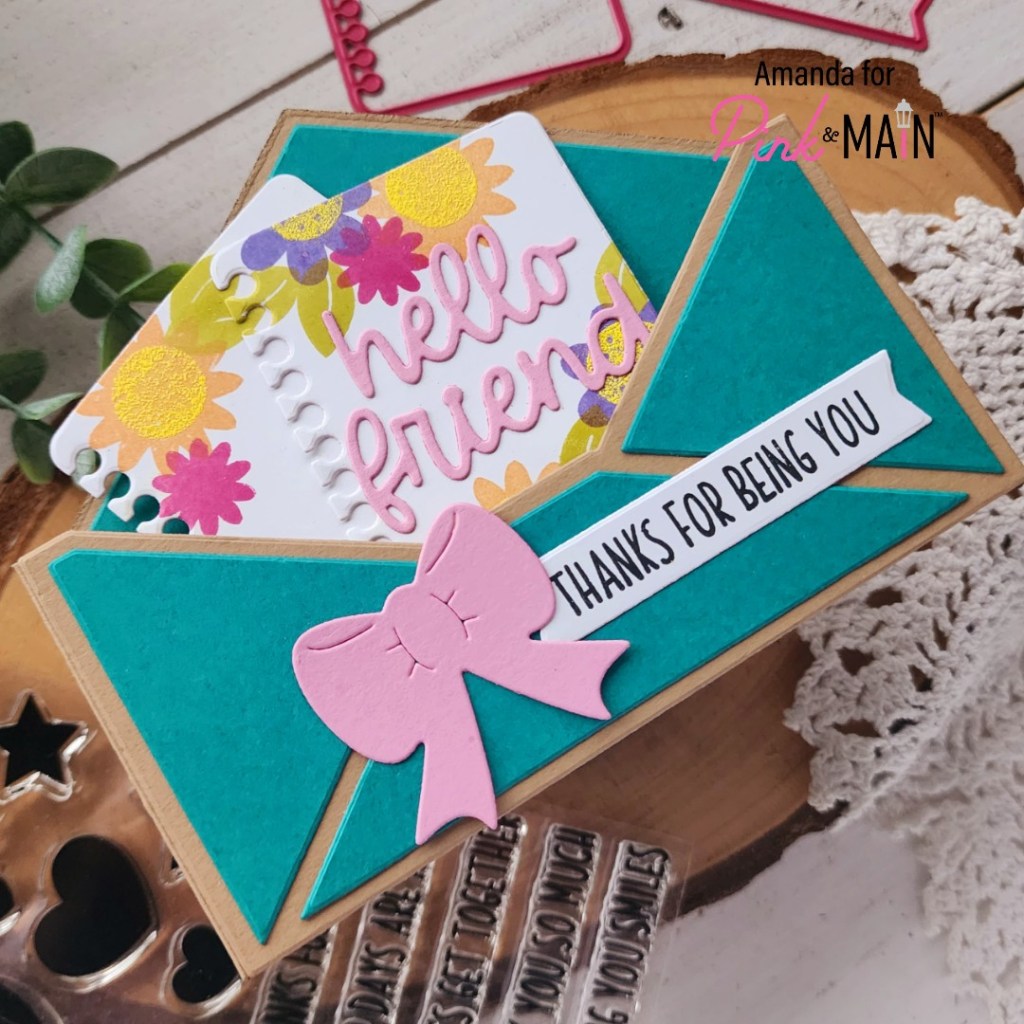
After coloring the first foiled panel, I trimmed it to 4×5.25 inches and inked a light teal sky before splattering the panel with a bit of black acrylic paint. Then I used the sentiment die from Wide Stitched Arches dies four times on white cardstock. I glued them together with EZ Squeeze liquid glue and glued them to the panel.

I added the panel to a white card base with foam tape and then wrapped some twine around it and tied it in a bow. Check out that gorgeous shine in the light!!!

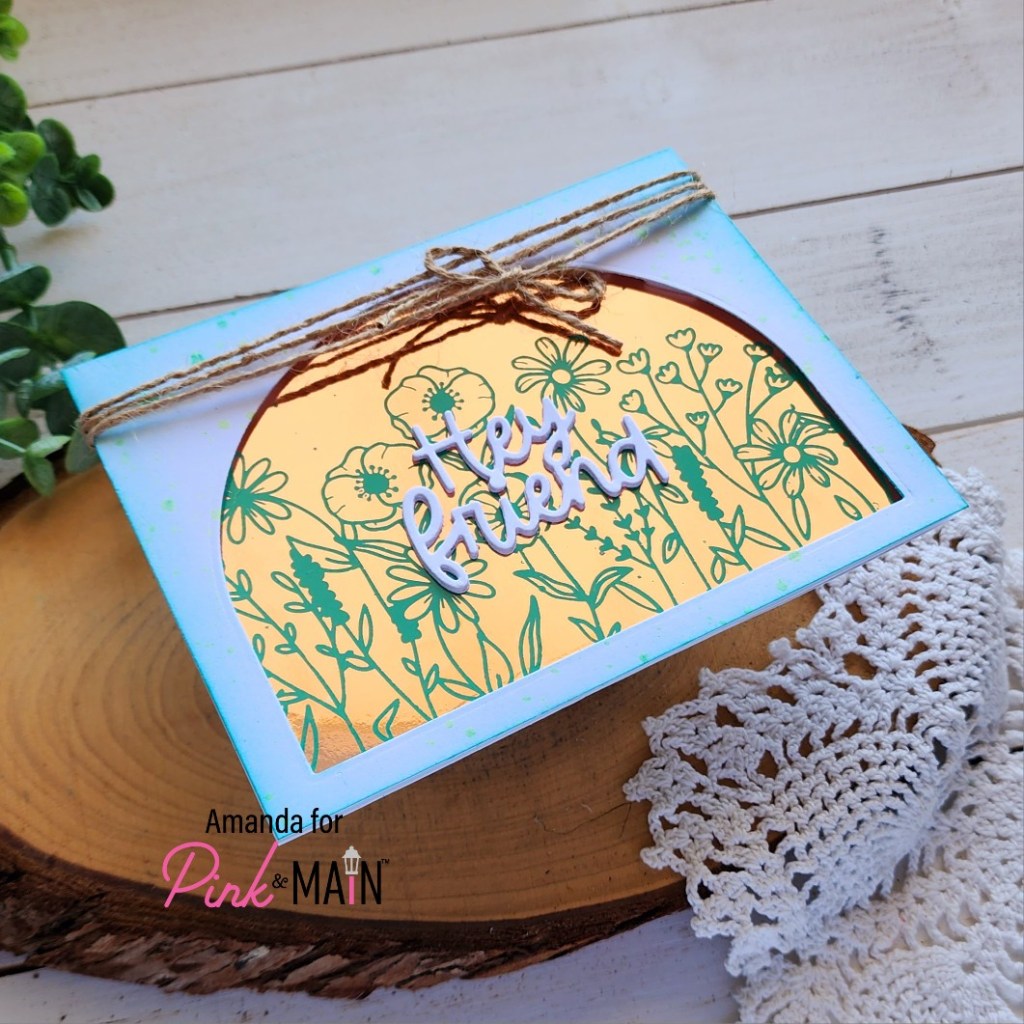
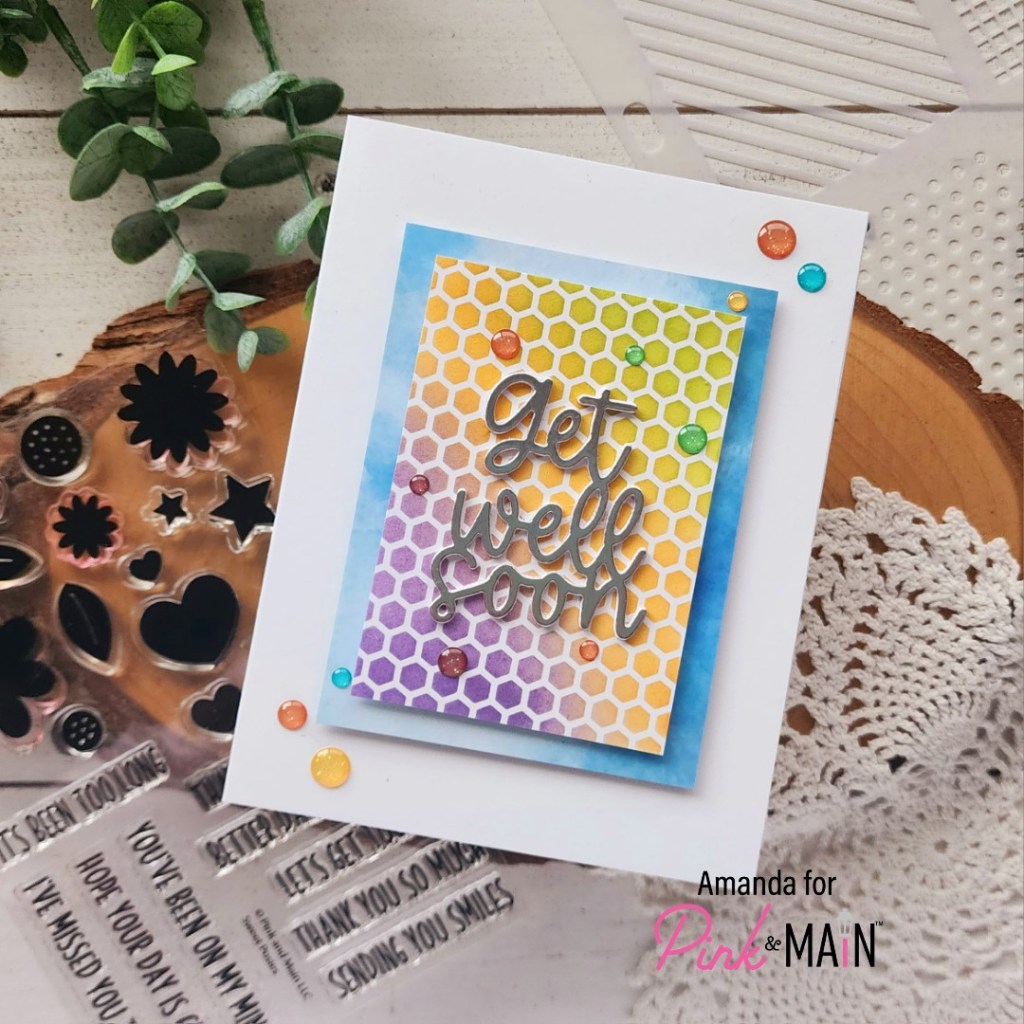
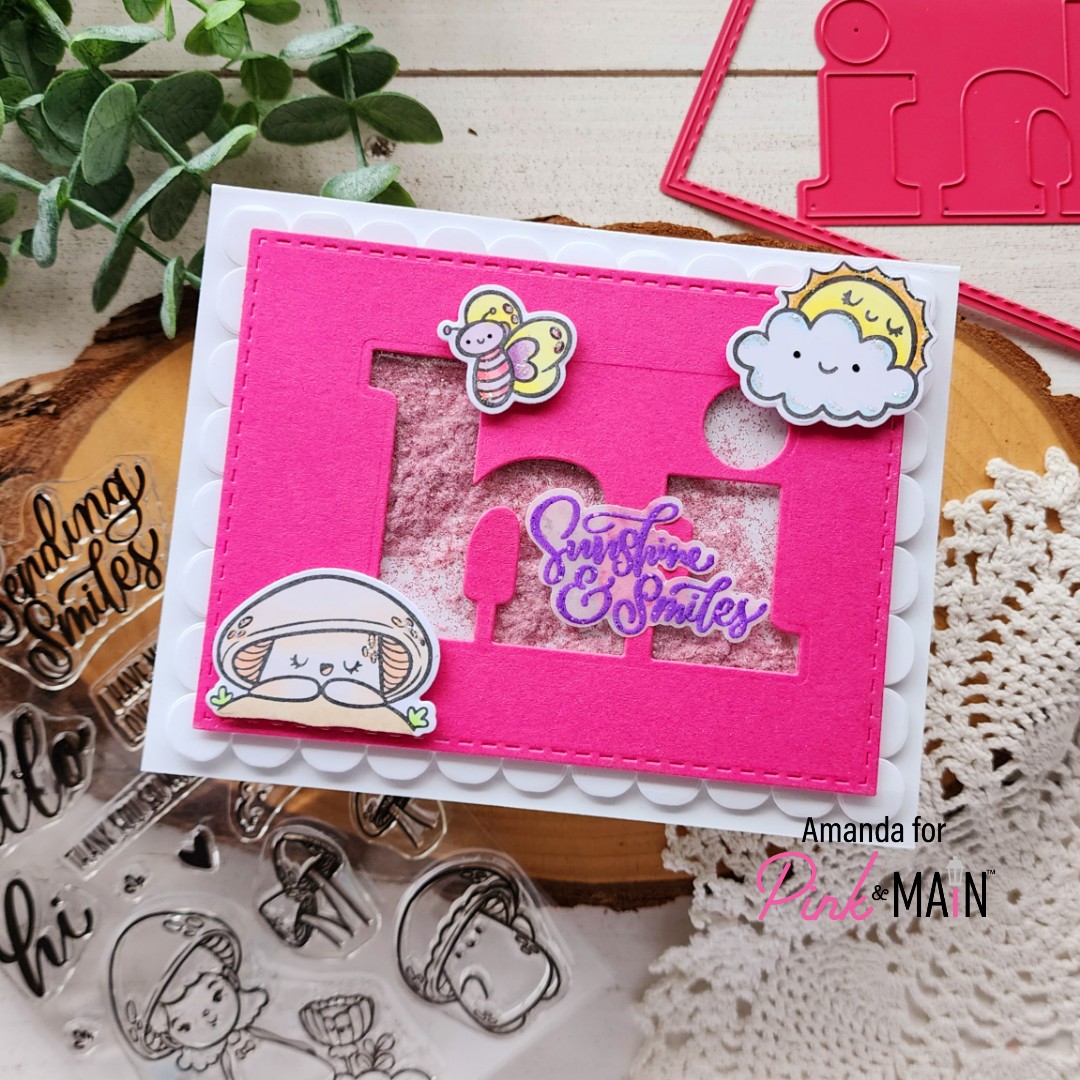
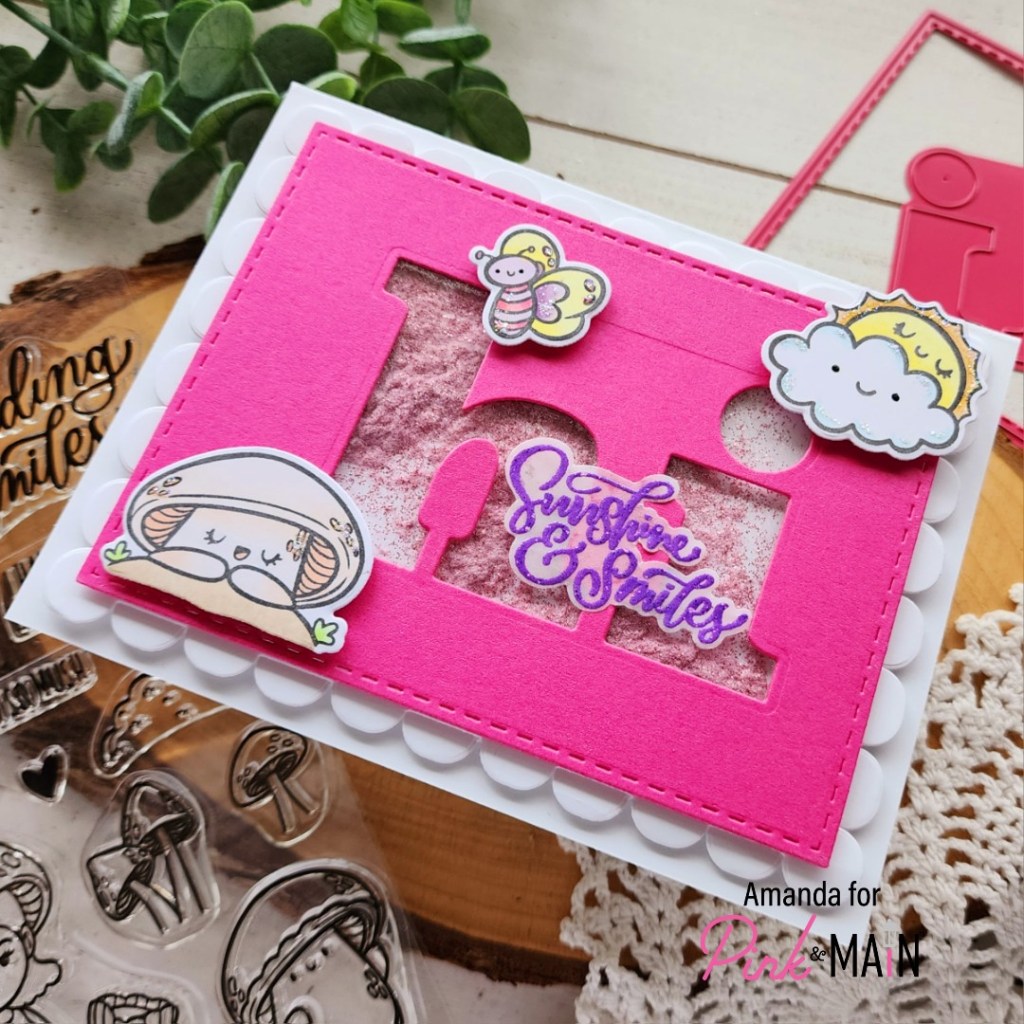
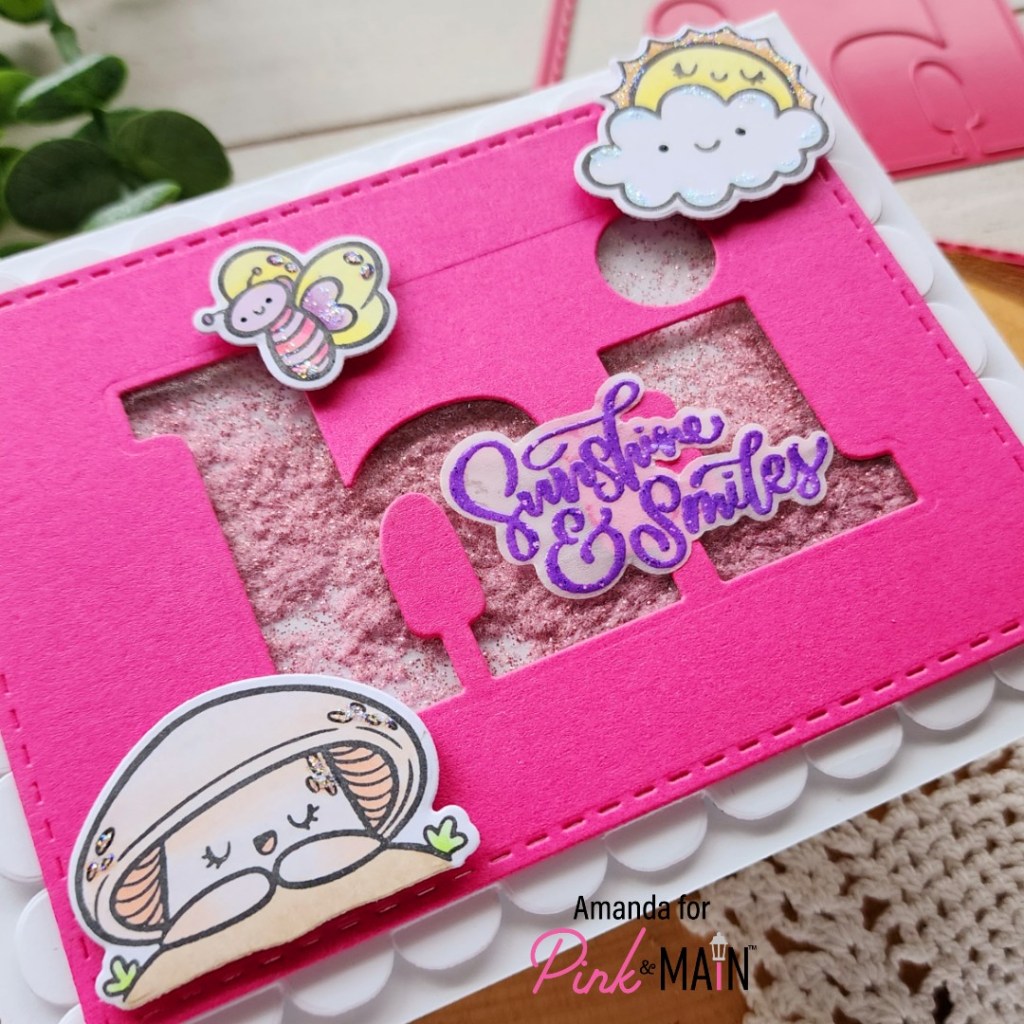
Next, I had the reverse foiling panel which is SO COOL!!! Pink & Main is the first to have colored toner sheets so your negative doesn’t have to always be black. These colors are beautiful!

For this card, I kept to the same products but using the Wide Stitched Arches to cut a window from a panel and popped it up over the top of the foiled panel. I added the same hey friend sentiment to the center and wrapped the same twine around the top too.

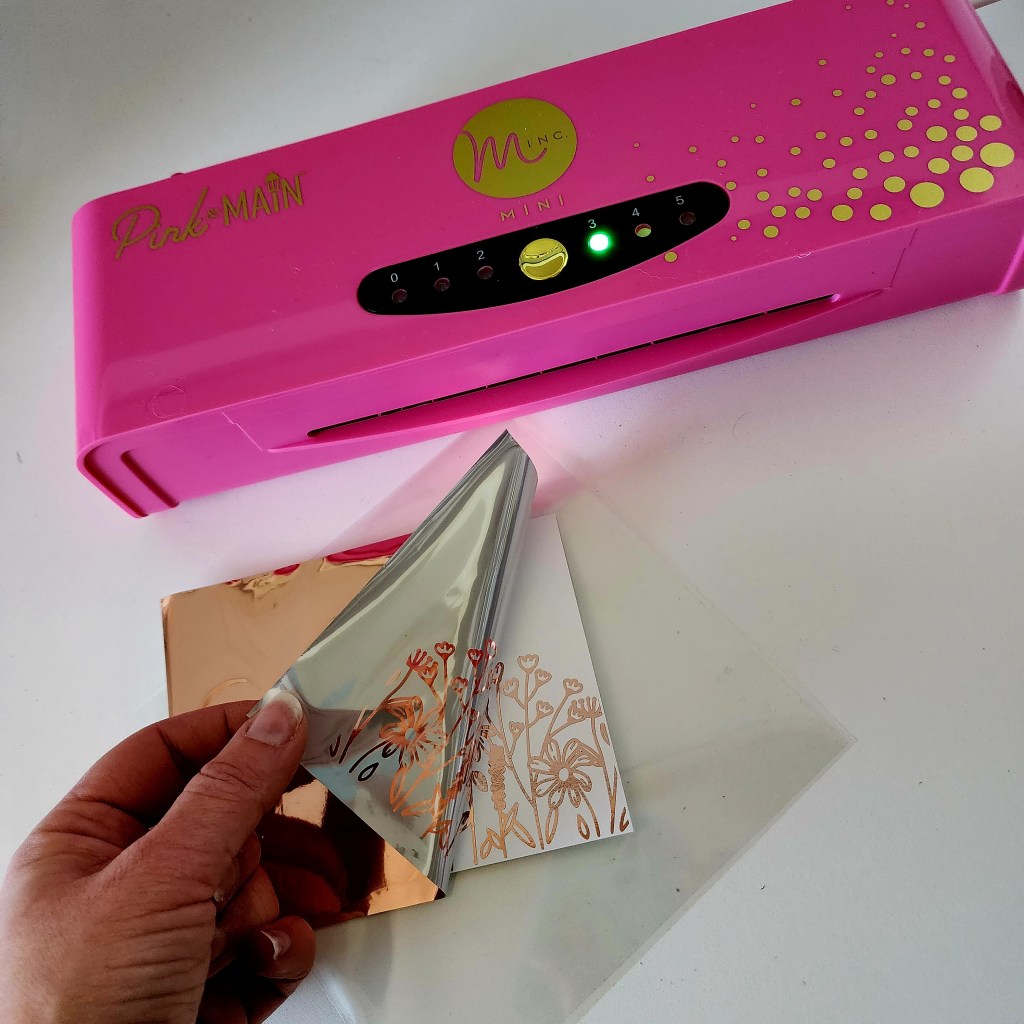
Now, check it out…I’m going to be so real right now. I have done a TON of foiling over the last few years. I could not believe how quick the Minc heated up, how easy it was to use and MOST OF ALL how beautiful it foiled!

I had a blast creating these two cards, and, honestly, kept foiling after these were done because I didn’t believe it was going so well. I highly recommend snagging one of these sweet Pink & Main Minc machines if you like or want to try foiling at all.

REMEMBER

There’s an Instagram Hop going on where you could win a new Minc plus all the goodies to start foiling too. So, head there, hop and check out the inspiration, leaving comments along the way to increase your chances of winning.

Products used today:
Minc
CheerFoils – rose gold
Foilables – garden color toner sheets, wildflowers

Foam tape
EZ Squeeze liquid glue
Wide Stitched Arches dies

I appreciate you sharing your time with me. Have a fabulous day!

Pink & Main – You Can Have the Worms…

Hello everyone! I’m over on the Pink & Main blog today playing with different layers and a funny chicken that I can very much relate to. Lol!

When I started this card, I had two things in mind – that chicken and sentiment plus the stenciling for my background. So I started by stamping and coloring the image, using the coordinating die to cut it out and then inked up a scrap of streetlight cardstock with yellow and brown inks. This combo gave me a hay bail vibe so I went with it. After trimming the yellow panel down a few different sizes, I pulled out the Mod Stitched Rectangle dies and cut it out with that for a fun, different shape.

For added layers, I cut another mod rectangle two sizes bigger using a piece of patterned paper from the Pumpkin Season paper pad. Using a different pattern from the same paper pad to cut one of the Square Frames too. Now we can assemble all our pieces.

I adhered the largest mod rectangle with EZ Squeeze liquid glue to a white card base, then popped the stenciled panel up with foam tape. The square frame is glued directly to that and my chicken is popped up with foam as well.

For finishing touches I added a scattering of glitter enamel dots that coordinate with the color paper they are stuck to. Then I added Touch of Gloss to the bunny slippers and chicken’s glasses.

Products used today:
Mod Stitched Rectangle dies
Square Frame dies
Chicken In stamps and dies
Pumpkin Season paper pad
Streetlight cardstock

Touch of Gloss
Foam tape
EZ Squeeze liquid glue
Woven stencil
Ergonomic blending brush
Floral Hearts glitter enamel dots

I appreciate you sharing your time with me. Have a fabulous day!

Pink & Main – Stenciled Panel Focal Point Cards

Hello everyone! Today I’m on the Pink & Main blog with a pair of cards using the new Rectangle Patterns stencil to create two different cards. This new stencil has four different patterns on it creating the perfect size for a small central focal point on your card, or they meet up to cover your whole panel if you’d like as well.

I used a few Pink & Main inks blended together on these panels to create beautiful backgrounds, then trimmed them out to use as stand out focal points on my cards.

This first one is a simple design but so pretty and eye catching. A great design when you need something in a pinch for any occasion if you just swap out your sentiment. Mine came from the new Envelope Pop Up Card die set and I cut it from silver foil cardstock for a little something extra.

My inked panel is popped up on blue patterned paper with foam tape, which is popped up again on a white card base. I simply finished the design off with a scattering of glitter enamel dots for added interest and bringing a little color into the white space along the edge.

My second card was really fun to build but adding the stenciled panel with foam tape and then adorning opposite corners of the panel with flowers from the Envelope Pop Up Card dies. The flowers are cut from the park and streetlight cardstock with the centers using copper glitter cardstock from the Fall Glitter paper pack. I think it makes them look like sunflowers which I love!

Next, I stamped a sentiment from Sweet Posies using barbershop ink and cut it with the banner from the Envelope Pop Up Card dies. I added it with foam squares and also popped a little butterfly up above it. I used a marker to color the body and then added Wink of Stella glitter brush pen for shimmer.

Remember when ink blending, if you use your basic primary color combos (blue + pink = purple), you can expand your colors with less ink pads too!

Products used:
Envelope Pop Up Card dies
Sweet Posies stamps
Rectangle Patterns stencil
Inks – barbershop, dress shop, construction, the park, night sky
Cardstock – the park and streetlight, fall glitter pack
Ergonomic blending brushes
EZ Squeeze liquid glue
Foam tape and squares
Wink of Stella glitter brush pen
Glitter enamel dots – floral hearts

I appreciate you sharing your time with me. Have a fabulous day!

Pink & Main – Hello Friend Envelope Pop Up Card

Hi there everyone! I’m really excited to share my card from the Pink & Main blog today. It features new products from the April release and is SO MUCH FUN! These new envelope pop up card dies are super easy to use and so fun to create with!!! The possibilities are endless, seriously!

To create my card, I die cut all the elements from the Envelope Pop Up Card die set using Pink & Main cardstocks – salon, river walk and pebble colors. Then I cut a couple of the sweet notebook paper shapes from white cardstock and stamped them with the Sweet Posies stamp set using Pink & Main inks, heat embossing the flower centers with ray of sunshine embossing powder.

I used EZ squeeze liquid glue to attach the details to my envelope, then 1/4″ EZ tear tape to adhere the pieces of my pop up box together. I added “hello friend” to one of the paper die cut pieces and then glued them together before attaching them to the inside of the envelope.

I stamped a sentiment from sweet posies but die cut it with the banner in the envelope pop up set and added it to the front of the envelope with a sweet pink bow.

When you’re all finished creating your card, it just folds over to one side and fits perfectly in an envelope for mailing. I just adore this new set and can’t wait to have different fun things spilling out of the envelope. Such a genius take on a box card. Don’t you think?

Products used:
Envelope Pop Up Card dies
Sweet Posies stamps
Ink – dress shop, night sky, construction, the park and embossing
Cardstock – salon, lakeside and pebble
Magic anti-static brush
Embossing powder – ray of sunshine
EZ Tear Tape – 1/4″
EZ Squeeze liquid glue

I appreciate you sharing your time with me. Have a fabulous day!

Pink & Main – Sending Sunshine & Smiles Shaker Card

Welcome crafty friends! I’m over on the Pink & Main blog today with another peek at the upcoming release for April. We had a little flub last week and were rushing the month faster than we meant to. So you get two weeks of sneak peeks instead of one.

Today’s design started one way and definitely didn’t turn out as planned. But when this happens we just improvise or make changes. No big deal. The original plan was to put that sweet mushroom on top of the “h” in hi but it just wasn’t working for me. I went back to the drawing board and found these other sweet images in a different upcoming set and thing the end result is pretty darn cute!

The layered scallops rectangle die set is fabulous and comes with two sizes of scallop layers and two sizes of stitched rectangles to give a finished look on top, PLUS the awesome giant “hi” and even more! Such an amazing set and made it really easy with a little acetate and foam tape to create a shaker.

Today’s shaker filler is sparkling cotton candy flock with glitter. It just seems to float around when you shake it which is so fun and doesn’t add a bunch of extra bulk or weight to the card.

My images come from Sunshine Days and Mush Love. The are from Mommy Lhey is just adorable and so fun to color and create with. You’re going to love these new sets so much!

I chose to stamp and heat emboss my sentiment in grape soda embossing powder on vellum before die cutting it and carefully adhering it with a thin layer of liquid glue. Isn’t it a fun touch?

For finishing touches I added black glaze pen to the butterfly and sun’s eyes and stardust Stickles to elements of the cloud, sun, mushroom and butterfly. A little extra sparkle never hurt anyone and I love it!

Products used:
Mush Love stamps and dies
Sunshine Days stamps and dies
Layered Scallops Rectangles dies

Foam tape
Magic Anti-static Brush
Embossing & Watermark Ink
Embossing powder – grape soda
Flock with Glitter – sparkling cotton candy
EZ Squeeze liquid glue
Stickles – stardust
Black glaze pen

I appreciate you sharing your time with me. Have a fabulous day!

Pink & Main – Thank You Fairy Much

Happy Wednesday everyone! It’s sneak peek week for the upcoming April release for Pink & Main. To say this is a big release packed with amazing is really an understatement. I hope you enjoy sneak peeks and can’t wait to see what you all choose to stock up on come release day!

For my card today, I paired some upcoming fairy cuteness with a new embossing folder, scalloped circle dies and the new fabulous foilable sheets! Phew! So many amazing products to create with leads to endless possibilities for crafting.

After foiling my panel, I inked it up with a very light hand using night sky ink. Then I popped the scalloped circle panel up with foam tape and popped the fairies and sentiment up with foam squares too.

I almost forgot but before adding the fairies, I took a brayer roller to add white pigment ink to the clouds on the embossed panel. It helps them stand out and gives a cool look.

Finally I splattered pearl watercolor over the whole panel before adhering it to a card base and tying some glittery twine around the left side. For finishing touches I just added some Touch of Gloss to the flower centers and fairy’s shoes. Then I added Wink of Stella glitter brush pen to the fairy wings too.

I hope you’re as excited for release day as I am! Check the Pink & Main store first thing Friday to snag some new crafty goodness.

Products used today:
Pixie Dust stamps and dies
Clouds embossing folder
Layered Scallops Circles dies

Large Sentiment Strips dies
Fairy Wings CheerFoil
Ergonomic blending brush
Night Sky ink
Full Bloom foilable kit
Foam tape
Touch of Gloss
LH Colors pearl watercolor

I appreciate you sharing your time with me. Have a fabulous day!

Pink & Main – You Are My Sunshine

Happy Wednesday everyone! It’s Pink & Main day on the blog and today I finally get to share this sweet baby card with you featuring the new stamp and die set Welcome Baby. This might be my most favorite baby set of all time. It’s super versatile and absolutely adorable!

I kept my colors a little gender neutral today so I could have a card in my stash for those parents who don’t find out or maybe I get extra excited and want to send a congrats card before they know. These are very real possibilities people. And I totally couldn’t resist decorating the onesie with the you are my sunshine sentiment. It’s my favorite next to that dinosaur!

For my background, I cut a white panel down to 4×5.5 inches and inked up the left edge with construction ink over the Scattered Stars stencil. I popped this panel up with foam tape on a white card base and added a little washi tape strip for interest.

Next, I popped the onesie up with foam squares. The coordinating die set comes with the letters to cut the word baby so I decided to add it below the onesie with construction cardstock.

For finishing touches I added stardust Stickles to the bottom of the die cut letters. I like the extra sparkle and interest it gives the otherwise flat addition to the design.

Then I added Touch of Gloss to the snaps and sun on the onesie and stardust Stickles to the cloud. Final finishing touches are those couple of glitter enamel dots from the In the Garden pack.

Do you keep different occasion cards in your stash like baby or wedding cards? I’m not very good at it but when I have them on hand I am always pleased with myself. Lol.

Products used today:
Welcome Baby stamps and dies
Scattered Stars stencil
Ergonomic Blending Brush
Construction ink and cardstock
In the Garden enamel dots
Touch of Gloss
Foam tape and squares
Stickles – stardust

I appreciate you sharing your time with me. Have a fabulous day!

Pink & Main – Make A Wish

Happy Wednesday everyone! Today is like my Friday since I’m on vacation the rest of the week from my day job so I’m extra chipper! I’m over on the Pink & Main blog sharing a glittery fun birthday card with you featuring the new Make A Wish stamp and die set.

I started by playing around with the fabulous ice cream cone pieces and my dye inks. I used Lawn Fawn pizza crust for the cone which I think is perfect and then Pink & Main construction, dress shop and night sky. I stamped the detail layer with watermark & embossing ink and heat embossed them with icicle embossing powder. Isn’t the sparkly tops on the ice cream cones so fun!?! Next, I used EZ Squeeze liquid glue to adhere the ice cream to the cones and set them aside.

For my background panel, I chose the next-to-largest Wide Stitched Arches die and cut it from river walk cardstock. I splattered it with pearl watercolor and let it dry. Knowing the main colors I was working with, I went digging in my patterned paper and chose the light pink stripes from the year round dots & stripes paper pad for my card front.

After adhering the pink background to a card base, I popped the wide arch panel up with foam tape. Then I added the ice cream cones with foam squares. *Note that I added double foam squares where they hang over the arches so they still lay nice and flat.*

Finally I stamped a sentiment from the Make A Wish stamp set with lakeside ink and die cut it out. Next, I added Touch of Gloss to the flame and sprinkled lemonade super fine glitter on it to give the candle flame a little extra. Once that was dry, I added foam squares to the back and popped it up on the ice cream cones.

Products used today:
Make a Wish stamps and dies
Wide Stitched Arches dies
Year Round Dots & Stripes paper pad
River Walk cardstock
Premium Dye Ink – construction, dress shop, night sky and lakeside
Watermark & Embossing Ink
Magic Anti-static Brush
Icicle embossing powder
EZ Squeeze liquid glue
Touch of Gloss
Super Fine Glitter – lemonade
Foam tape and squares
LH Colors watercolor – pearl

I appreciate you sharing your time with me. Have a fabulous day!

Pink & Main – Sweetest Birthday Wishes

Hey friends! I’m over on the Pink & Main blog today with some sweet birthday wishes and a fun technique to try.

I started my card with a design idea in my head so I stamped a bunch of images from Sweet Birthday which happens to be the stamp and die of the month for March! You can get a super deal on this set if you sign up before the end of the month. After coloring the images with copic markers, I used the coordinating dies to cut them all out. I used EZ Squeeze liquid glue to adhere the party hats to a couple of the images missing one and set them aside to dry.

Next, I took a white panel and the new Fireworks embossing folder. I used a brayer roller with construction ink on the flat side of the embossing folder. Next, I placed the white panel on the other side and closed the folder. After running it through my die cut machine with the embossing folder sandwich, I had this awesome panel where the raised, embossed areas are white but the panel is orange. Isn’t that so cool!?! It’s really fun to play around with.

I adhered the embossed panel to a white card base and popped my images up with foam squares across the center of the card front. Then I stamped and heat embossed a sentiment from the set and cut it out with a sentiment strip from Sunny Greetings and popped it up too.

For finishing touches I added black glaze pen to all the eyes and stardust Stickles to the top of the party hats. Then I used Touch of Gloss on things like cherries, cheeks and the balloon.

I hope you’ll try this fun background technique. It gives your embossing folders a new lease on life, which is awesome because they are a craft tool that is less expensive and fun to create with!

Products used:
Sweet Birthday stamps and dies (Stamp and Die of the Month)
Fireworks embossing folder
Touch of Gloss
Magic Anti Static Brush
Ink – embossing and construction
Embossing Powder – icicle
EZ Squeeze liquid glue
Stickles – stardust
Brayer roller
Foam squares

I appreciate you sharing your time with me. Have a fabulous day!

Pink & Main – New Release Birthday Sneak Peek

Hi everyone! It’s release week for Pink & Main and I’ve got a fun sneak peek to share with you. So much birthday fun to be had this time, it was hard to choose what products to play with first. You’re going to love it all!

I used glossy gel by itself to create a subtle textured background with the awesome upcoming Celebrate stencil. This is only half of the fun! Then I created a super cool party hat with a new stand alone die set.

But I’m not done yet. The sweet little party snail and sentiment are included in the All About You stamps and dies. All of my cardstock colors are from Pink & Main too which lends to a bright and happy card anyone is sure to smile receiving!

For finishing touches I added some glitter enamel dots to the party hats and Touch of Gloss to the snail and his bowtie, plus the gift he’s carrying too.

Stay tuned for more sneak peeks from the rest of the design team until release on Friday! Then you can shop ’til you drop!

Products used today:
All About You stamps and dies
Dotted Cover dies
Party Hat dies
Celebrate Stencil
Glitter enamel dots
Touch of Gloss
Glossy Gel
Ergonomic Blending Brush
Foam tape
Cardstock – construction, lakeside and dress shop
Ink – dress shop

I appreciate you sharing your time with me. Have a fabulous day!