Pink & Main – Happy New Year

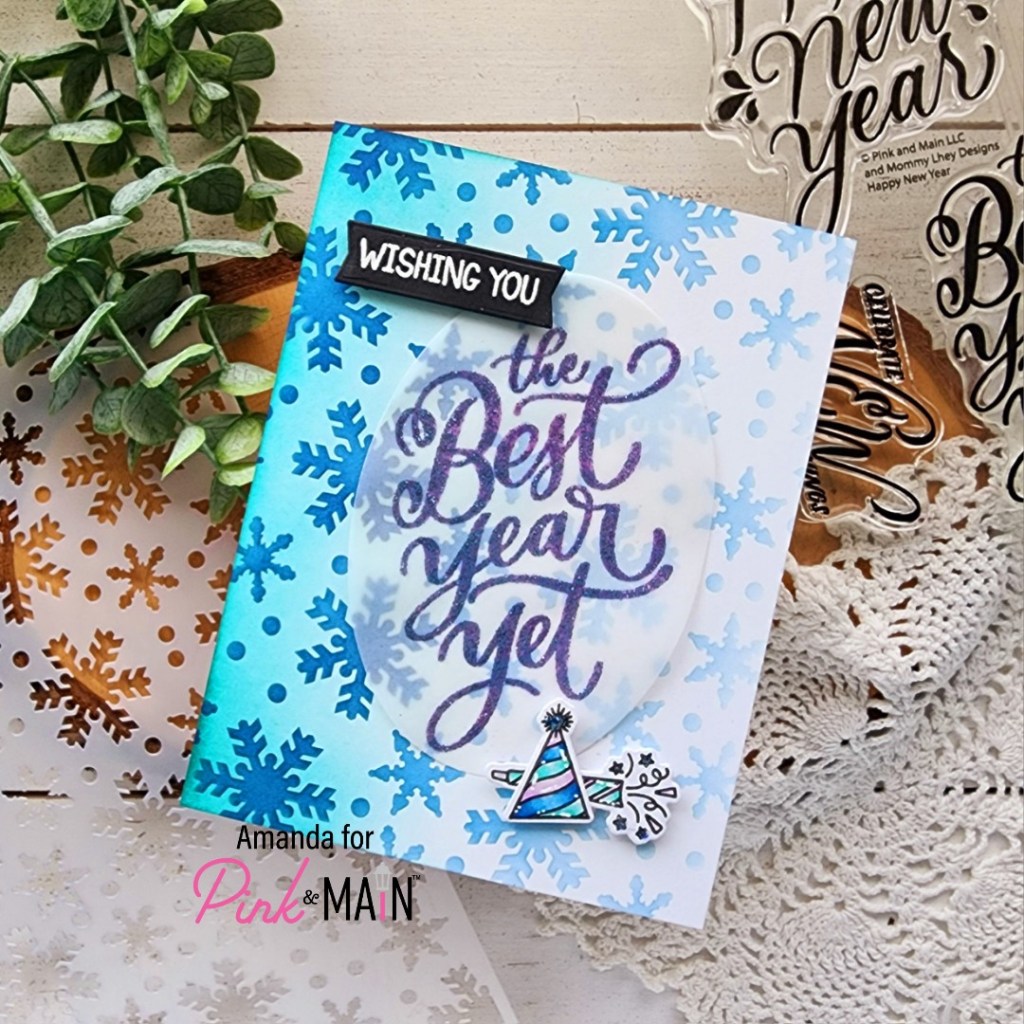
Hello and welcome everyone! I’m over on the Pink & Main blog today sharing one more fun card and I couldn’t resist pulling out the gorgeous New Year sets one more time before the big day is here.

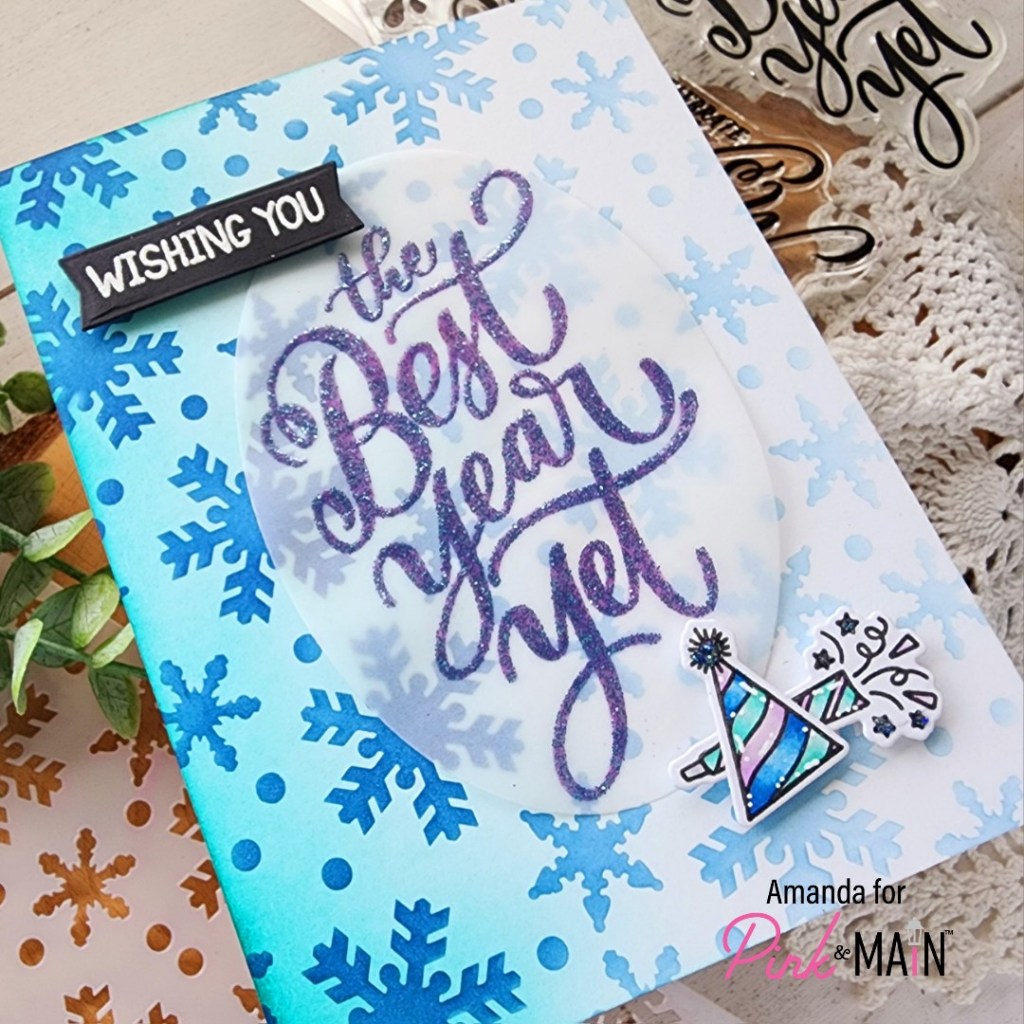
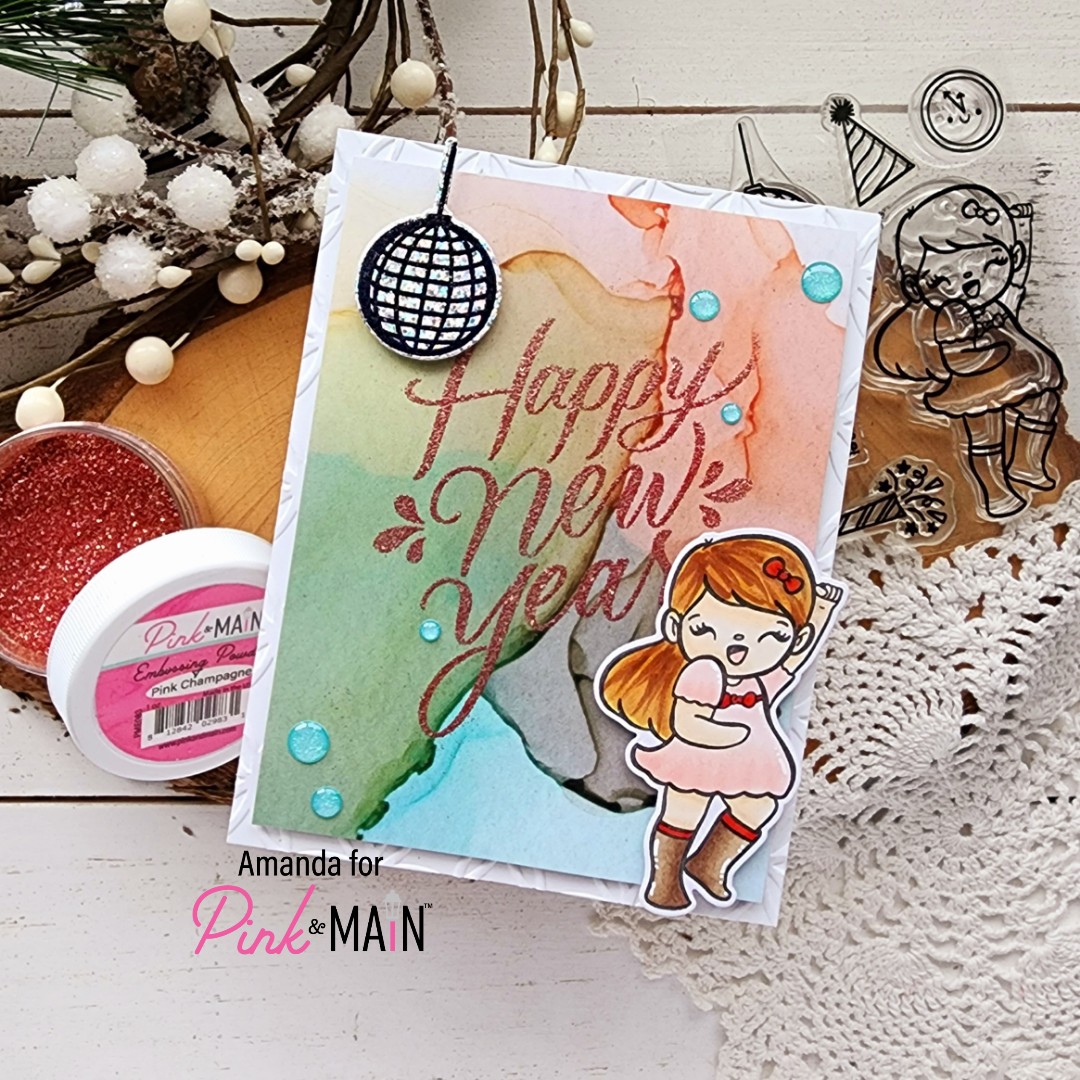
I used a couple of paper pads to “cheat” really awesome effects today. First, I stamped and heat embossed the disco ball from Party Time on one of the papers from the Holographic Set 1 paper pad. The way it shines is the light is so cool, just like a disco ball! Then, instead of getting out my inks for a background, I chose one of my very favorite sheets from the Inked Oasis paper pad. Then I stamped and heat embossed “Happy New Year” in pink champagne embossing powder! So stunning!

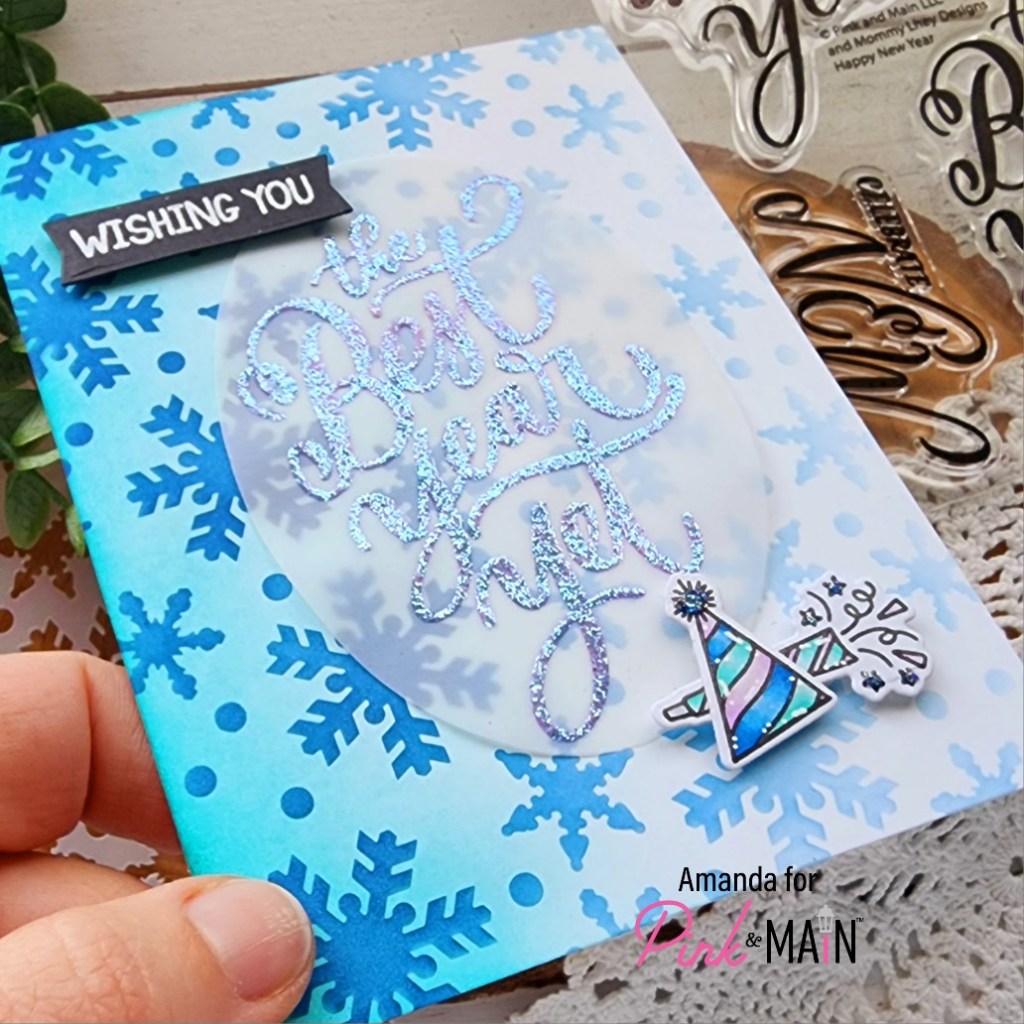
I also stamped the girl from Party Time and colored her with copic markers. I used the coordinating die to cut her out and added foam squares to attach her to the heat embossed panel. I did the same with the disco ball. But when I was going to put my card together, I wanted a little something else. So I took an A2 piece of white cardstock and embossed it using the Roundabout embossing folder.

I glued that to a white card base and popped my scene panel up with foam tape. Isn’t this just so much fun!?! I love the colors and all the sparkle and shine. Perfect for a new year celebration!

For finishing touches, I added Touch of Gloss to the girl’s bows and white gel pen highlights to her dress and boots. She’s totally ready to ring in the New Year! Last of all, I added a scattering of Snow Day glitter enamel dots and my card is finished!

Products used:
Party Time stamps and dies
Happy New Year stamps
Roundabout embossing folder
Inked Oasis paper pad
Holographic Set 1 paper pad
Snow Day glitter enamel dots
Touch of Gloss
Embossing Powder – pink champagne
Embossing & Watermark Ink
Magic Anti-static Brush

I appreciate you sharing your time with me. Have a fabulous day!

Pink & Main – Love You S’more

Hello everyone! It’s been a bit since I’ve been on here. Today I’m over on the Pink & Main blog switching gears from Christmas to more of a Valentine feel using one of the new stamps from the December release – Hello Winter. It’s got another round of those adorable s’mores snowmen doing adorable things with punny and cute sentiments to go with them all.

As soon as I saw the adorable “couldn’t love you s’more” sentiment I just had to pair it with this guy reaching out for a hug. It also led me directly to my awesome heart cover dies from last year that I’m obsessed with. I decided it would be fun to make a glitter shaker card so let’s do it!

I started by ink blending a white panel with distress oxide ink in spun sugar and festive berries. I spritzed it with water and let it dry. Then I die cut the Heart Spotlight cover die from white cardstock. I lined it with EZ Tear Tape and added acetate to the back. Then I carefully lined the edges and some of the rays with foam strips. Adding strips to the rays adds stability but also makes it like a maze for the glitter to move around so it doesn’t all stay in the same place when it’s shaking.

I used my Magic Anti-static brush to reduce static on the inked panel and also the acetate before sprinkling some raspberry super fine glitter on the acetate side. This way I know the glitter is between the foam strips and doesn’t impede them adhering to the cardstock. I removed the backing paper and added the inked panel to seal it all up.

I stamped and colored my s’more guy with copic markers before die cutting him with the coordinating die, along with those cute hearts floating up. I added foam squares to the back of everything and popped it in place over the large heart.

Next, I inked a scrap of cardstock with more festive berries distress oxide ink and heat embossed the sentiment in white. I used a layered circle die to cut it out and popped it up too.

For finishing touches, I added white gel pen dots to the scarf for texture and Touch of Gloss to the buttons, nose, cheeks are hearts. This way we have shimmer from the glitter shaker and shine from the cute snowman s’more! Best of both worlds together.

I love that this fun stamp set gets you through so many winter holidays and occasions, and them some! It’s so good!

Products used today:
Hello Winter stamps and dies
Heart Spotlight cover die
Layered Circle dies
Super Fine Glitter – raspberry
EZ Tear Tape – 1/8 inch
EZ Squeeze Glue

Magic Anti-static Brush
Watermark & Embossing Ink
Embossing Powder – frosting
Distress Oxide Ink – spun sugar and festive berries
Foam strips and squares
Touch of Gloss

I appreciate you sharing your time with me. Have a fabulous day!

Pink & Main – Snow Kind of You

Hello everyone! I’m over on the Pink & Main blog today with a sneak peek of the December release and some inspiration using the Stamp and Die of the Month – Snow One Like You. How sweet are these little penguins having a snow ball fight?!? I totally adore them!

I started off by playing with the upcoming Snowflake embossing folder. I inked up one side with my Embossing & Watermark ink pad, then I ran it through the die cut machine with white cardstock. Then I sprinkled on some new denim embossing powder. This new deep blue is so gorgeous! I heated that up and set the panel aside. Next, I grabbed a scrap of white cardstock and smeared my embossing ink across the long edge and covered it with more denim embossing powder.

But wait! I wasn’t done playing with some of the new colors of embossing powder coming your way so I stamped some snowflakes from the stamp set and embossed them with chameleon. It totally changes color and is so gorgeous! I used the coordinating dies to cut those out and set them aside too.

Finally, I stamped two of the penguins from Snow One Like You and colored them with my copic markers. I used the coordinating dies to cut them out and started arranging my mini scenes. That’s when I thought it would be fun to use sentiment strips as my ground for each one. So I stamped and heat embossed those and used my favorite strip dies from the Sunny Greeting die set to cut them out.

I adhered a strip of the embossing scrap to the edge of my note card. Then I trimmed the snowflakes down to 4×5.5 inches and popped them up with foam tape. I also added foam squares to the snowflakes, images and sentiment strips before adhering them to the card front too.

I kept the finishing touches simple because there is so much sparkle in the embossing powder. I added Touch of Gloss to the penguin beaks and this guy’s feet. Then I also came in and added some to the edges of their snowballs and hills.

I like to have winter themed thank you cards on hand for gifts during the holidays so I’m really happy to have such a variety of fabulous sentiments in this stamp set. The images are so adorable and fun to color too!

Products used today:
Snow One Like You stamps and dies
Snowflakes embossing folder
Embossing & Watermark Ink
Embossing Powder – denim and chameleon
Sunny Greetings dies
Touch of Gloss
EZ Squeeze liquid glue
Foam tape and squares

I appreciate you sharing your time with me. Have a fabulous day!

Pink & Main – Winter Cardinals Tag

Hello everyone! I’m back on the Pink & Main blog today and wanted to share my project with you. I create one special tag for everyone in my family at Christmas and I’m a bit behind. This weekend I got some fun inspiration when we had snow flurries and I was watching the puffy flakes fall.

For this tag, I started by die cutting all the layers for my snowflake tag. I used one of the incredible papers from the Holographic 2 pad, along with green ,white and vellum. I stacked them together, adhering each layer with foam squares or strips except the vellum which is adhered with liquid glue hiding underneath the foam strips on the layer above it.

Then I chose this sweet bird from Winter Cardinals and colored him with my copic markers. I made him blue to stand out from the snowflake and candy canes. Then I color matched my markers and the green cardstock layer to make his scarf coordinate. I love it! He is popped up with foam squares as well. I love dimension and since this is a gift tag, I didn’t have to worry about it being “mailable” which was a bonus!

For finishing touches, I added a few white gel pen highlights to the image and black glaze pen to his eyes. Then I came in with star dust Stickles on both candy canes and a teeny bit of Touch of Gloss on his beak.

I die cut a second full snowflake shape from white cardstock to give me somewhere to write to and from and glued it to the back of the green layer. I also chose a sentiment from Winter Cardinals to stamp before adhering it. Then I strung some red sparkle twine through the snowflake layers and my tag is all finished!

Products used today:
Winter Cardinals stamps and dies
Stacked Snowflakes dies
Holographic 2 paper pad
EZ Squeeze liquid glue
Foam squares
Touch of Gloss
Stickles – star dust

I appreciate you sharing your time with me. Have a fabulous day!

Ellen Hutson – Merry Christmas Reindeer Die Cut Card

Welcome to my crafty space! I’m so glad you’re here today! I have a (mostly) die cut card to share with you today that is totally adorable and super fun! I used the new Ellen Hutson Sew Cute Deer die set with paper instead of felt stitching. Don’t worry, I’ll be stitching him up in felt very soon too! I just love making those fun ornaments!

Today though, I have this really fun card to share using him as a fabulous focal point on your Christmas cards! I cut all the pieces from various cardsotck colors, using glitter cardstock for the nose. I used liquid glue to adhere all the pieces together and set him aside.

Then I cut a piece of white cardstock from the Pink & Main Plaid cover die and adhered it to a white card base. Next, I stamped the sentiment and used a Pink & Main Mod Stitched Rectangle die to cut it out. Laying the reindeer and sentiment on my card front, I decided on placement. Holding the reindeer in place, I flipped it over and made marks where I would be trimming it off. This helped me keep the foam tape inside those areas to pop him up.

So, then I added the foam tape, adhered the reindeer and trimmed the edges. I used a combination of foam squares and liquid glue to adhere the sentiment rectangle.

Isn’t this just adorable and fun!?! It would be a fun design to mass produce if you have a lot of cards to make but still give great visual texture and interest.

Products used today:
Ellen Hutson Sew Cute Deer dies
Ellen Hutson It’s Christmastime stamps
Pink & Main Plaid cover die
Pink & Main Mod Stitched Rectangle dies
Liquid glue
Foam tape

I appreciate you sharing your time with me. Have a fabulous day!

Ellen Hutson/Newton’s Nook – Greetings from the North Pole

Hello everyone. Thanks for stopping by today. I was able to play with some new things that have been sitting on my desk for a minute this last weekend and I’m excited to start sharing them with you. Today I have a card featuring one of the new amazing sets from Ellen Hutson. It’s a little out of my comfort zone to try stamping in color rather than grabbing my copics and coloring everything in. But I really had a blast playing around and creating this card.

The stamp set is called North Pole Greetings. I used Catherine Pooler inks to stamp the images and Pink & Main embossing powder for the words. I cut everything out with the coordinating dies and liquid glue to adhere the little pieces together.

For my background, I inked up a white panel with the Newton’s Nook Snowfall stencil and more Catherine Pooler ink. Once the stenciling was finished, I used the ink left in my blending brush to add a little color around the edges and take away the stark white. Then I die cut the largest Newton’s Nook Framework die from vellum and heat embossed the rest of my sentiment in black.

I adhered the stamped images to the vellum with foam squares and hid tape runner behind them on the vellum to attach that to the stenciled panel. Then I added the panel to a white card base and my card is all finished.

Isn’t this super cute! I just adore that “greetings from” sentiment for Christmas. I think it’s whimsical and sweet.

Products used:
Ellen Hutson Greetings From stamps and dies
Newton’s Nook Snowfall stencil
Newton’s Nook Framework dies
Catherine Pooler Ink – Zen Garden and Urban Oasis mini collections
Foam squares
Liquid glue
Twiddler’s Nook Blending brush
Pink & Main embossing powder – licorice and frosting
Pink & Main Magic Anti-static brush
Pink & Main Watermark & Embossing ink

I appreciate you sharing your time with me. Have a fabulous day!

Pink & Main – Santa Claws is Coming to Town

Hello everyone! I’m over on the Pink & Main blog today shopping my stash for some adorable Christmas critters. I can’t believe it but I still need more Christmas cards this year! How are you doing on your list?

After a bit of deliberation, I decided on these absolutely adorable bears from The Best Gift. I stamped and colored them with copic markers before using the coordinating die to cut them out. Then I chose a sentiment from the set to heat emboss on black cardstock and use an Extra Large Sentiment Strip to cut it out.

I used the plaid embossing folder on an A2 piece of white cardstock and a blending brush with green dye ink to give a little interest to my background. Then I splattered the background with the same ink and adhered it to a white card base.

I added foam squares to the back of my sentiment strip and image and popped them in place. For finishing touches I used Touch of Gloss on their noses, cheeks and toe beans.

Aren’t they just adorable!?! I love all the images in this set. Next up is the Santa bear for a gift tag this year!

Products used:
The Best Gift stamps and dies
Plaid embossing folder
Extra Large Sentiment Strip dies
Touch of Gloss
Magic Anti-static Brush
Embossing & Watermark ink
Frosting embossing powder
Foam squares

I appreciate you sharing your time with me. Have a fabulous day!

Pink & Main – Season’s Greetings

Hello crafty friends! Have you been working on Christmas cards yet? I am feeling a bit behind this year so I’m still working on some. Today I have this gorgeous, no coloring needed, card to share featuring Pink & Main stamps, dies, ink and embossing powders. So pretty!

I started this card by stamping a bundle of pine branches and pinecones from the Pine Boughs stamp set. I used the coordinating dies to cut everything out and started arranging them in the corners of an A2 blank card base. Once I had my placement, I taped them together with Pixie Tape and carefully added glue between the layers from the back side so I didn’t lose my positioning.

Next, I blended distress oxide ink on a 4×5.25 inch piece of white cardstock. I chose candied apple and festive berries today. I blended lighter toward the center at an angle. Then I splattered the panel with water and aged mahogany distress oxide ink. Once the panel was dry, I popped it up on an A2 card base with foam tape.

Next, I adhered the pine boughs with a combination of liquid glue and foam squares for the different sections. I stamped and heat embossed a sentiment from the same stamp set with platinum ring embossing powder, die cut it and popped it up as well.

For finishing touches I added a scattering of crystal clear enamel dots across the whole design. You could trim off the excess branches hanging over the edge but I really liked how they looked so I plan to just make a larger envelop to send this one out in.

Products used:
Pine Boughs stamps and dies
Magic Anti-static powder brush
Embossing & Watermark Ink
Platinum Ring embossing powder
EZ Squeeze liquid glue
Crystal Clear enamel dots
Pixie tape
Foam tape and squares
Distress oxide ink – festive berries, candied apple, aged mahogany

I appreciate you sharing your time with me. Have a fabulous day!

Pink & Main – November Sneak Peek

Hey friends! I’m super excited to share with you my sneak peek for the November Pink & Main release! It’s not huge but it’s absolutely amazing and you’re going to LOVE IT!!!

Today I’m sneaking images and sentiments from Party Time and Happy New Year stamp sets. But, that’s not all friends!!! I’m doing a little ink blending using brand new ink pads!!! The colors I used today were Barbershop and Lakeside. They blended like butter and are gorgeous colors!

Still not done though. I stamped and heat embossed that gorgeous bit sentiment using the brand new Hydrangea embossing powder. It’s the most beautiful color shifting embossing powder I’ve ever seen! You’re going to love this!

The most sparkles ever, I swear! This isn’t even close to everything in the release. So much amazing coming your way on Friday, friends!

Products used today:
Party Time stamps and dies
Happy New Year stamps
Blizzard stencil
Large Sentiment Strip dies
Ergonomic Blending Brushes
Ink Pads – embossing & watermark, barbershop and lakeside
Embossing powder – hydrangea and frosting
Magic Anti-Static Brush
Touch of Gloss
Foam squares
Tape runner
Stickles – star dust

I appreciate you sharing your time with me. Have a fabulous day!

Pink & Main – Happy Harvest

Welcome everyone! I’m over on the Pink & Main blog today sharing some harvesty fall inspiration for you. Most everyone has switched to Christmas crafting but I really enjoy holding on to fall themes as long as I can. I love these colors and pumpkins are one of my favorite things!

I started by stamping and coloring the image in Happy Harvest with my copic markers. I used the coordinating die to cut it out. Then, I used the image as a guide to choose which size Wide Stitched Arch to use. Once I decided, I cut it from kraft cardstock and embossed it with the Sun Ray embossing folder.

I trimmed a piece of The Park cardstock down to A2 size and used the Leafy stencil to ink it up. I used green, brown and orange on the stencil, then came in with green around the edges. Next, I used what brown was still in my blending brush to ink up the kraft arch too.

For assembly, I glued the background panel to a white card base and popped the arch up with foam tape. Then I added the pumpkin image with foam squares. I stamped and heat embossed a sentiment from Happy Harvest and used the coordinating die to cut it out before popping it up too.

For finishing touches, I added A Touch of Gloss to all of the acorns and then wrapped jute twine around the top, tying it in a knot. I added white gel pen highlights to all the other parts of the image and my card is finished.

I hope you enjoyed a bit more fall inspiration before Thanksgiving and here and gone.

Products used:
Happy Harvest stamps and dies
Wide Stitched Arches dies
Sun Ray embossing folder
Leafy stencil
Ergonomic Blending Brushes
EZ Squeeze liquid glue
Embossing and Watermark Ink
Magic Anti-Static Brush
Embossing powder – frosting
Foam tape and squares
A Touch of Gloss

I appreciate you sharing your time with me. Have a fabulous day!