Pink & Main – If the Broom Fits Mini Slimline

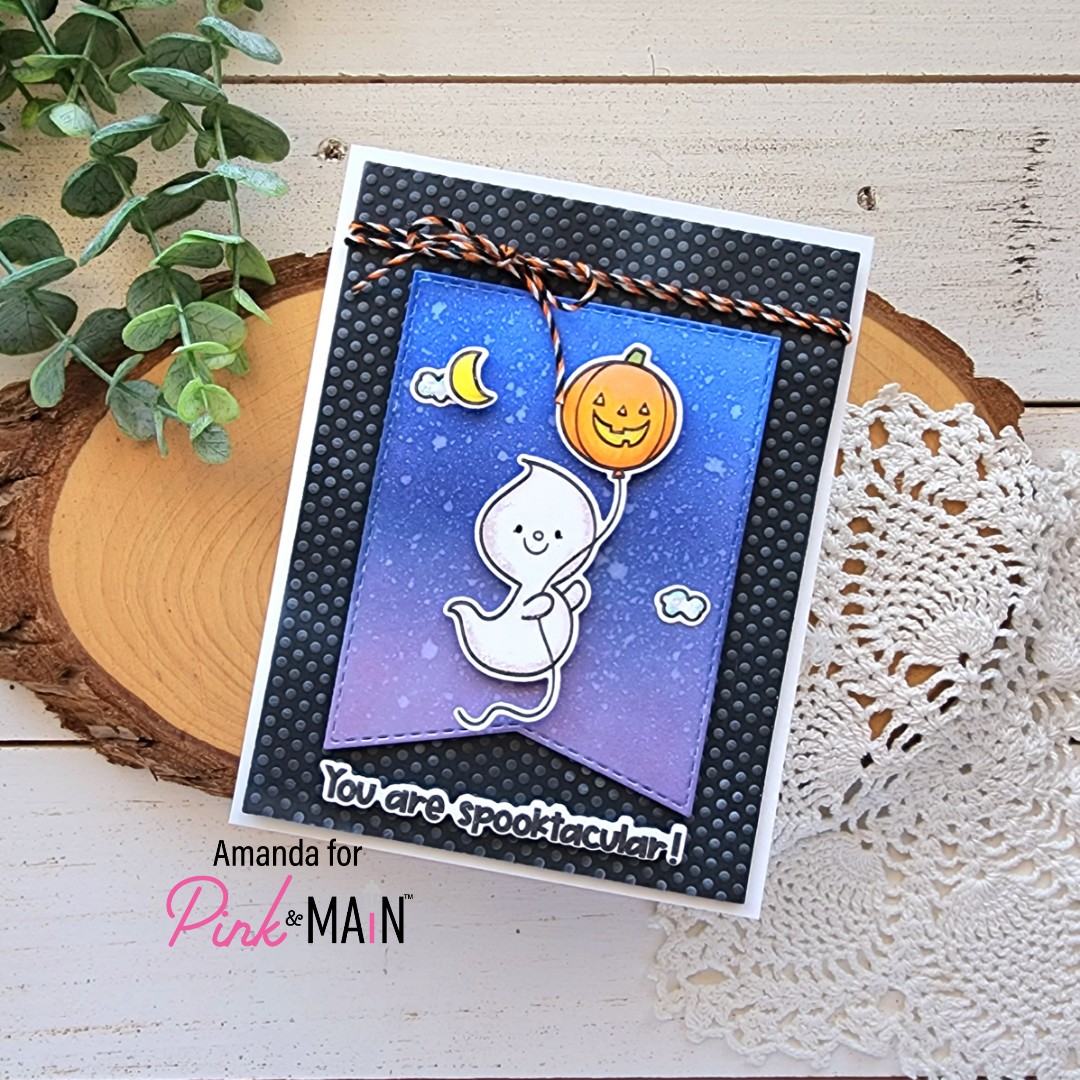
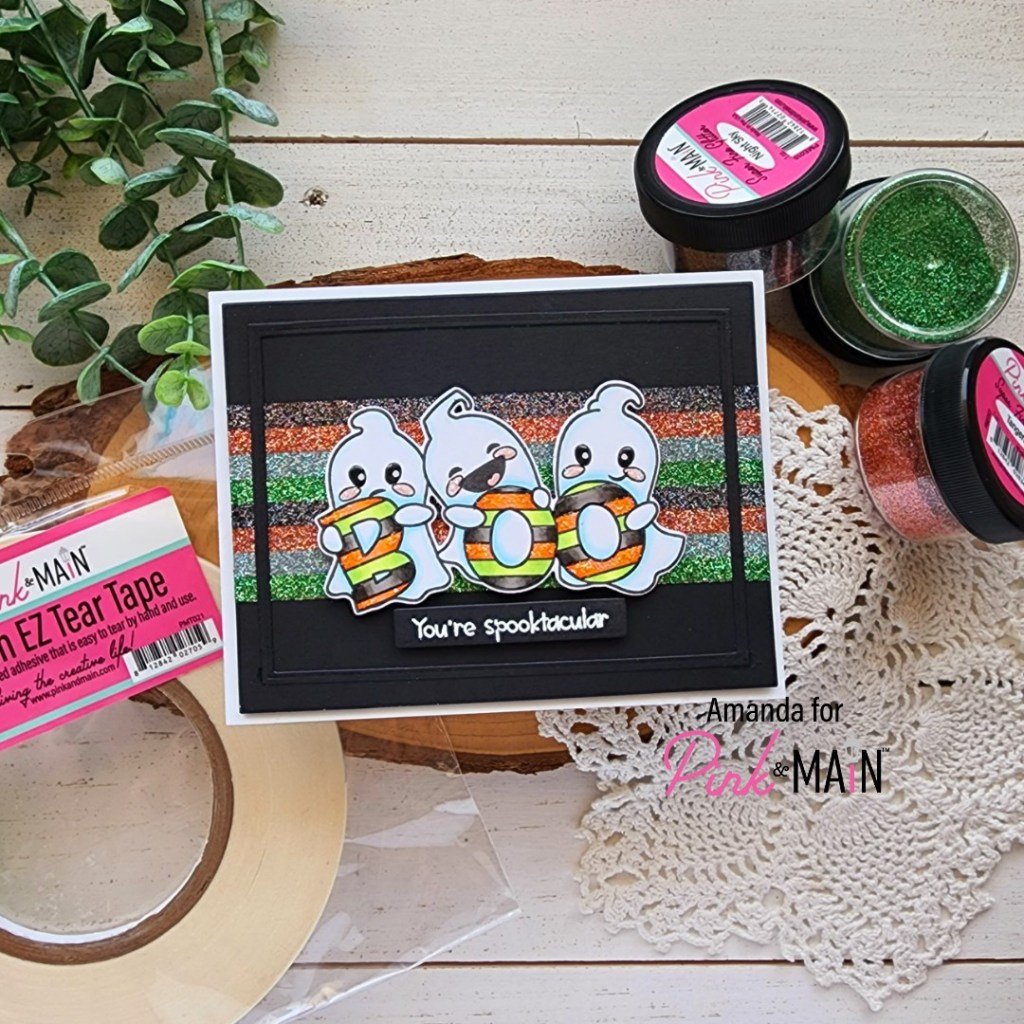
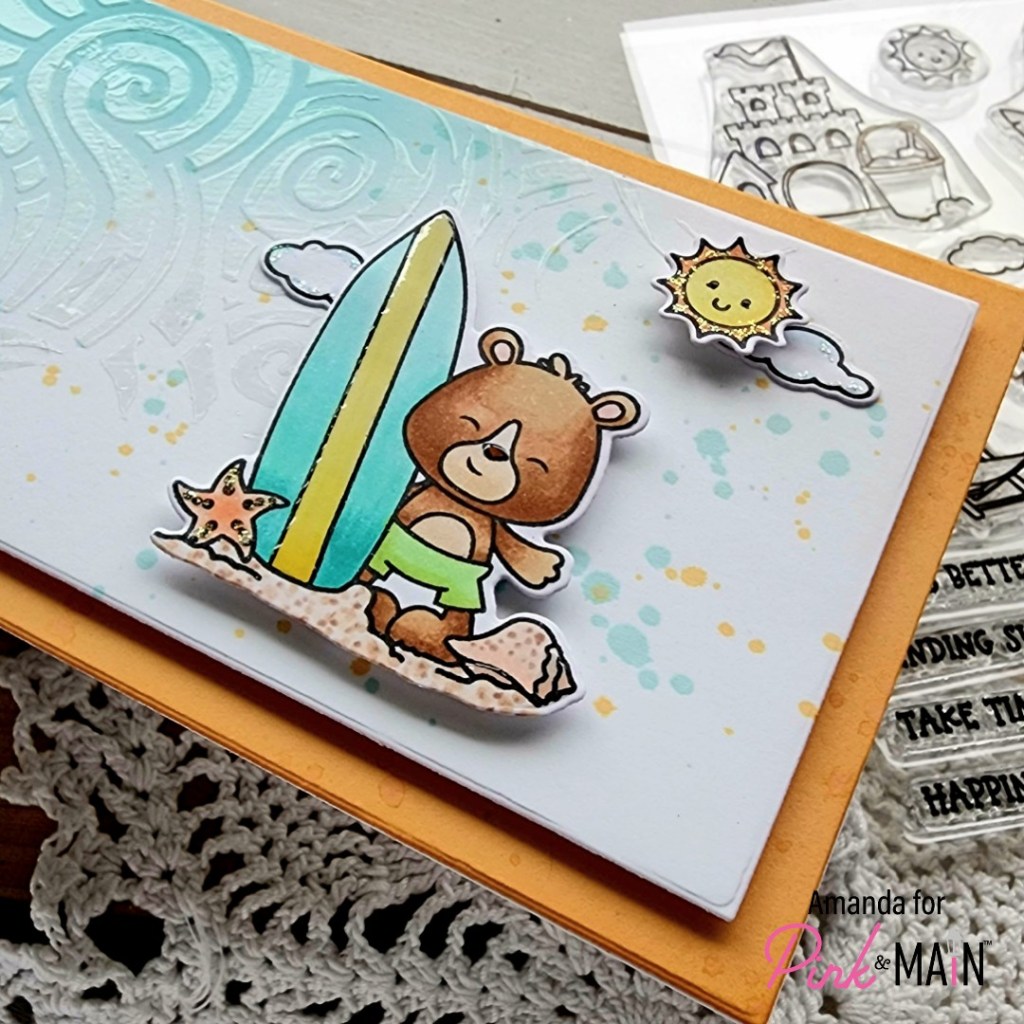
Happy Wednesday once again friends! Today I’m on the Pink & Main blog with a mini slimline card featuring these adorable witchy spiders in Halloween Brew. I couldn’t choose just one to use to I created a fun scene with both of them. I hope you enjoy it!

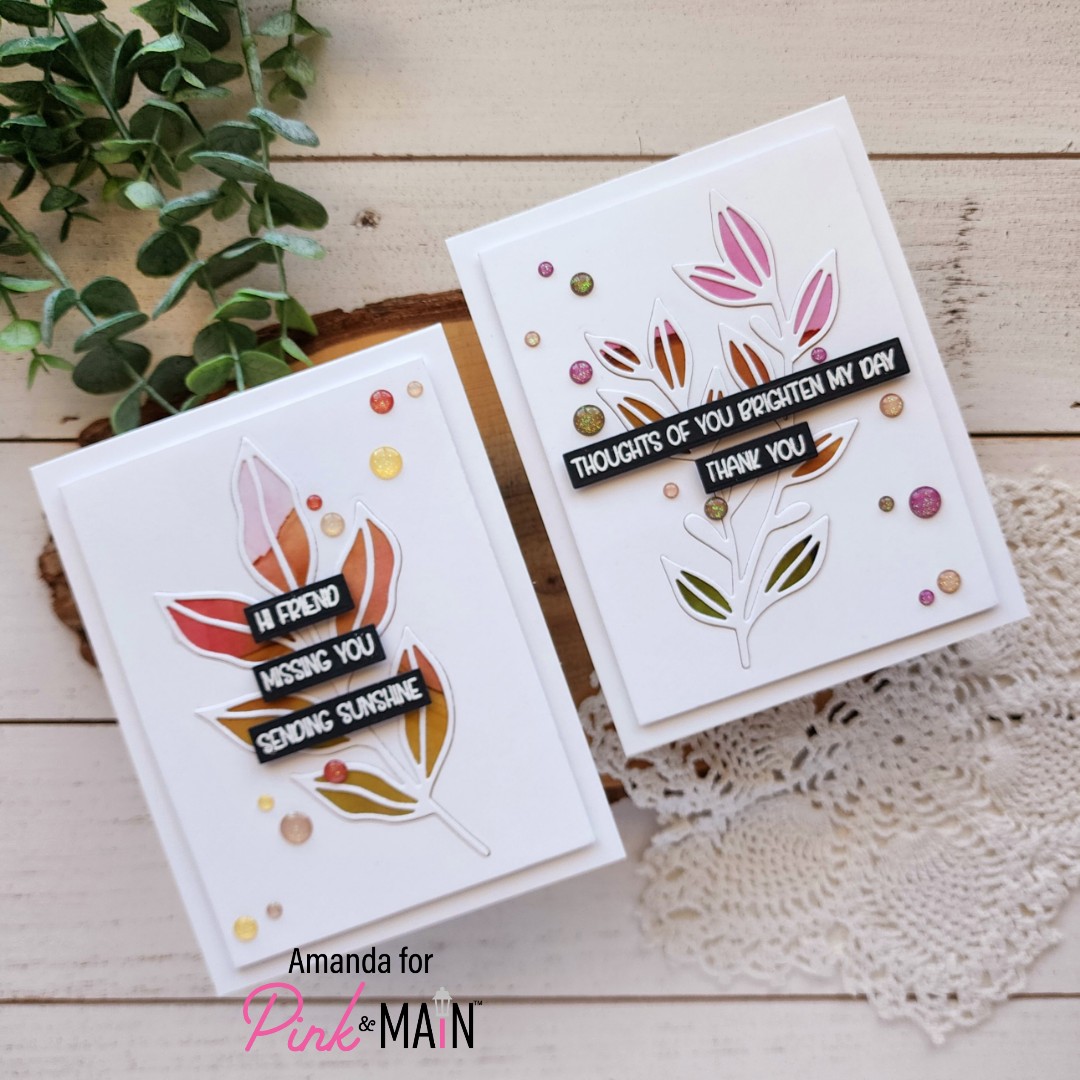
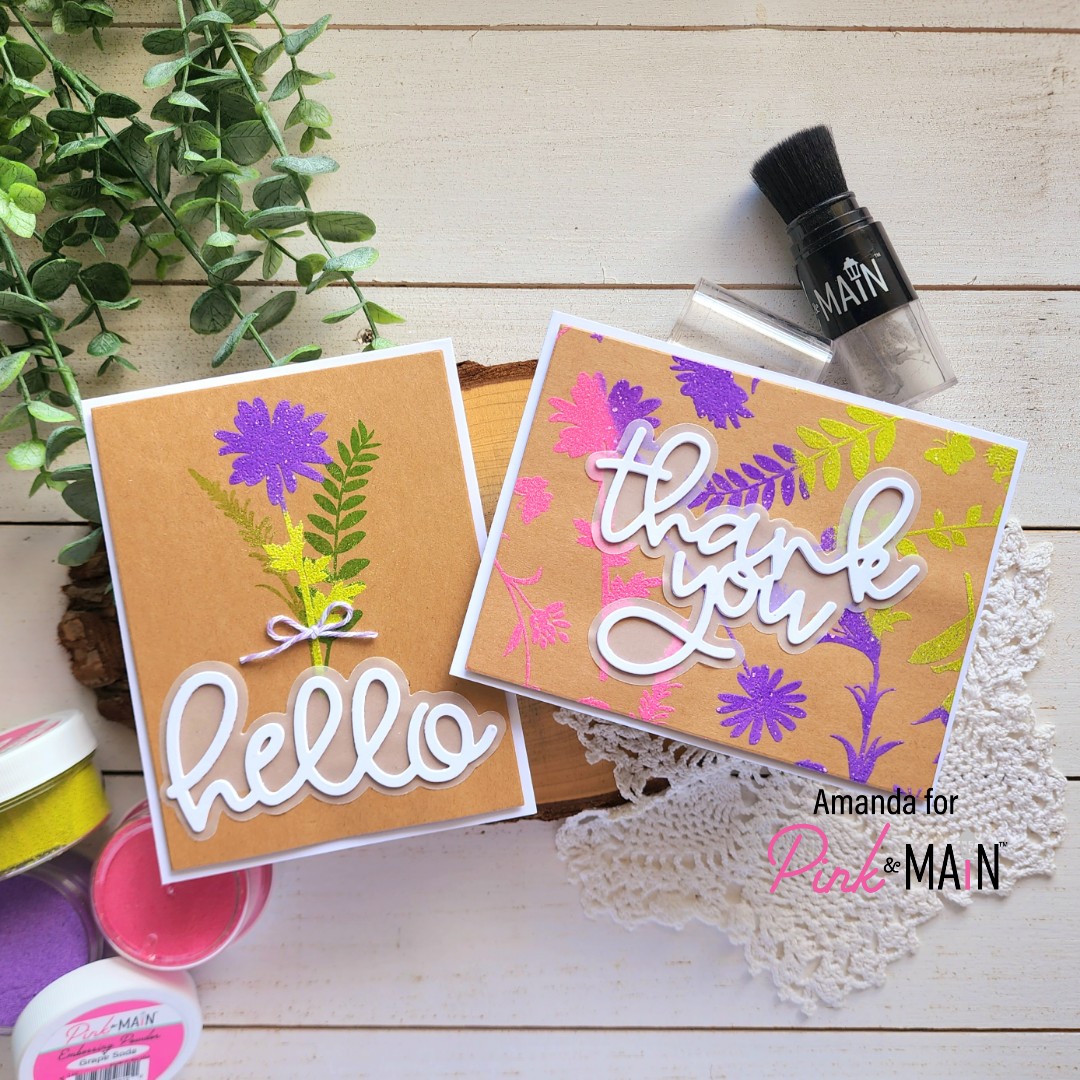
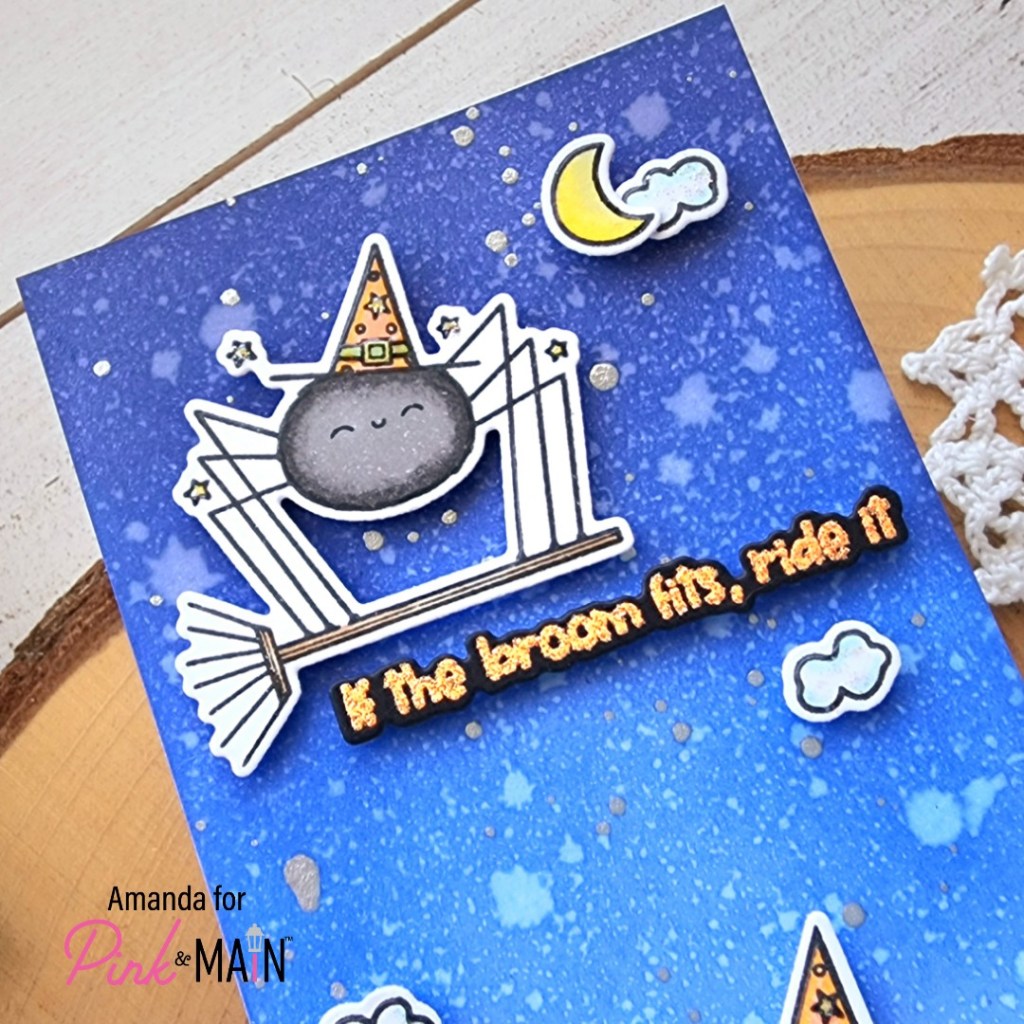
I stamped and colored my images from Halloween Brew, plus a few tiny scene setting images from Cute Ghosts, with my copic markers. I used the coordinating dies from both sets to cut them all out. Then I stamped and heat embossed my sentiments with the new Sherbet embossing powder. It’s bright and glittery and wonderful! I love it! These sets come with coordinating dies for the sentiments, (HUGE WIN!) so I cut those out too.

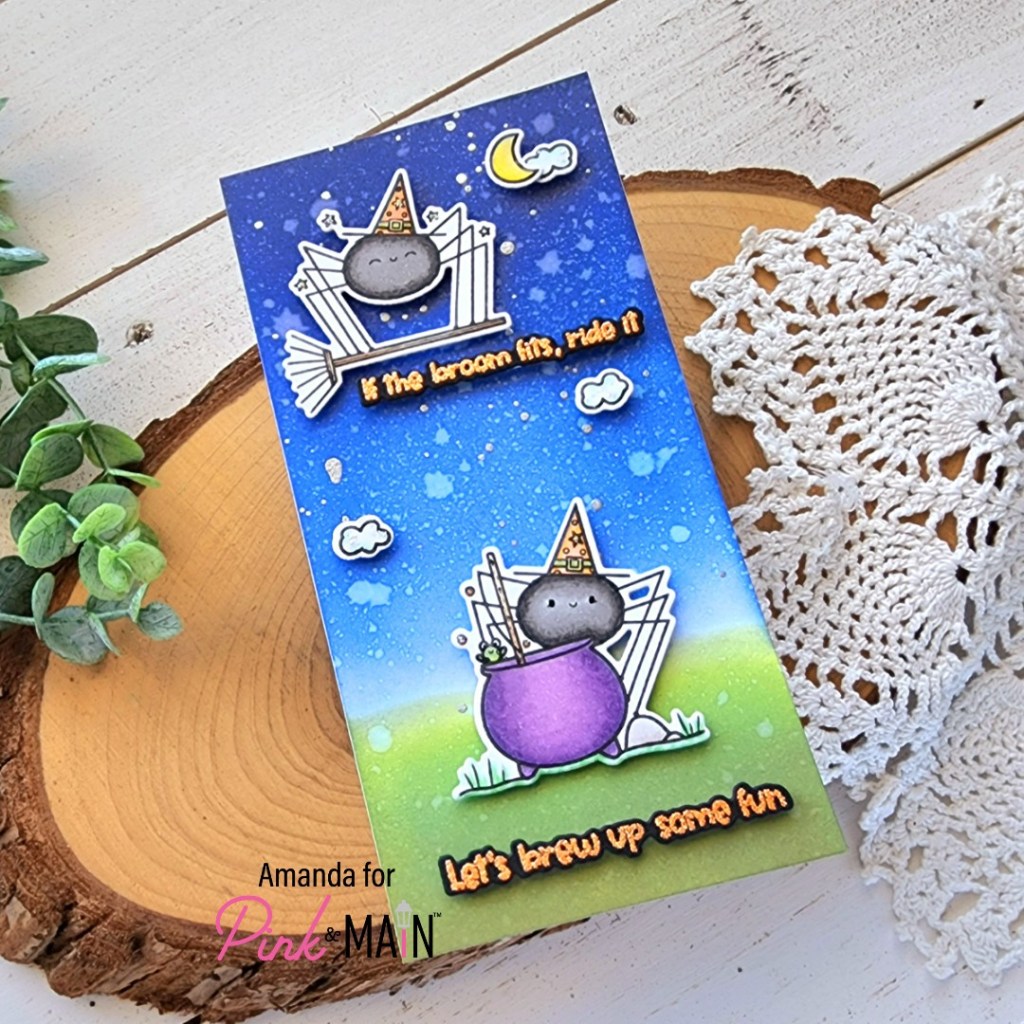
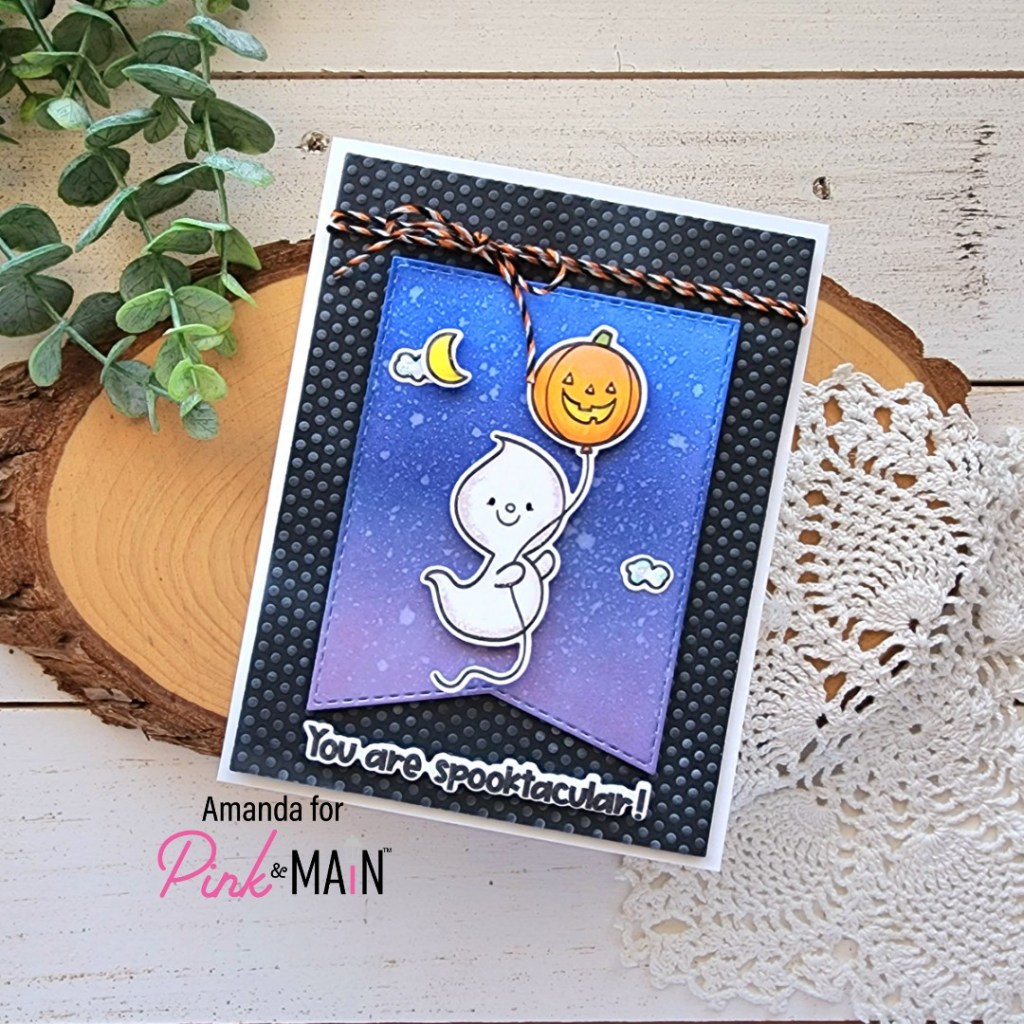
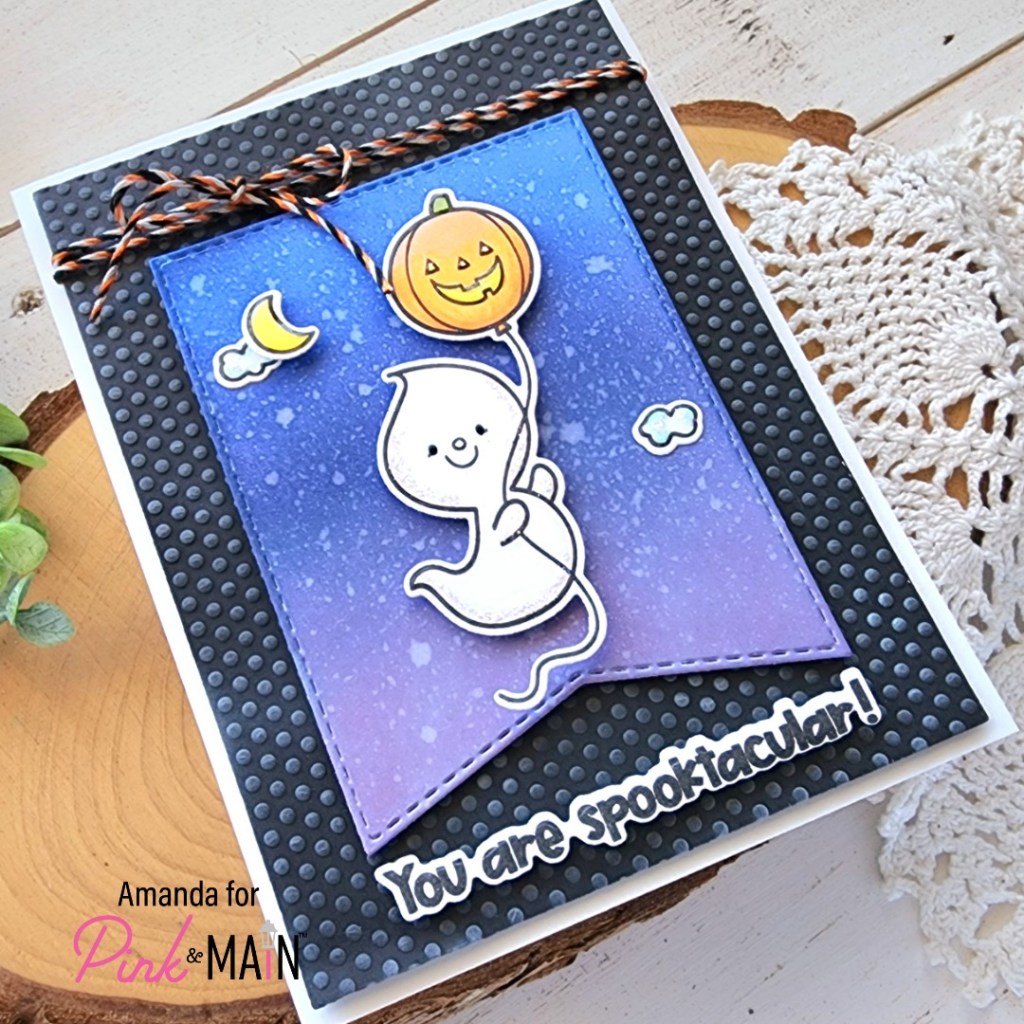
Since this is a mini slimline, I cut a piece of white cardstock to 3×6 inches and ink blended it for my scene with distress oxide colors. The grass is mowed lawn and forest moss. The sky is chipped sapphire with blueprint sketch and a touch of black soot at the top. I spritzed the panel with water and blotted it dry, then used my LH Colors silver watercolor to add starry splatters to my scene.

I adhered the panel to a mini slimline card base and started adding all of my images with foam squares and strips. It’s all so stinking cute!

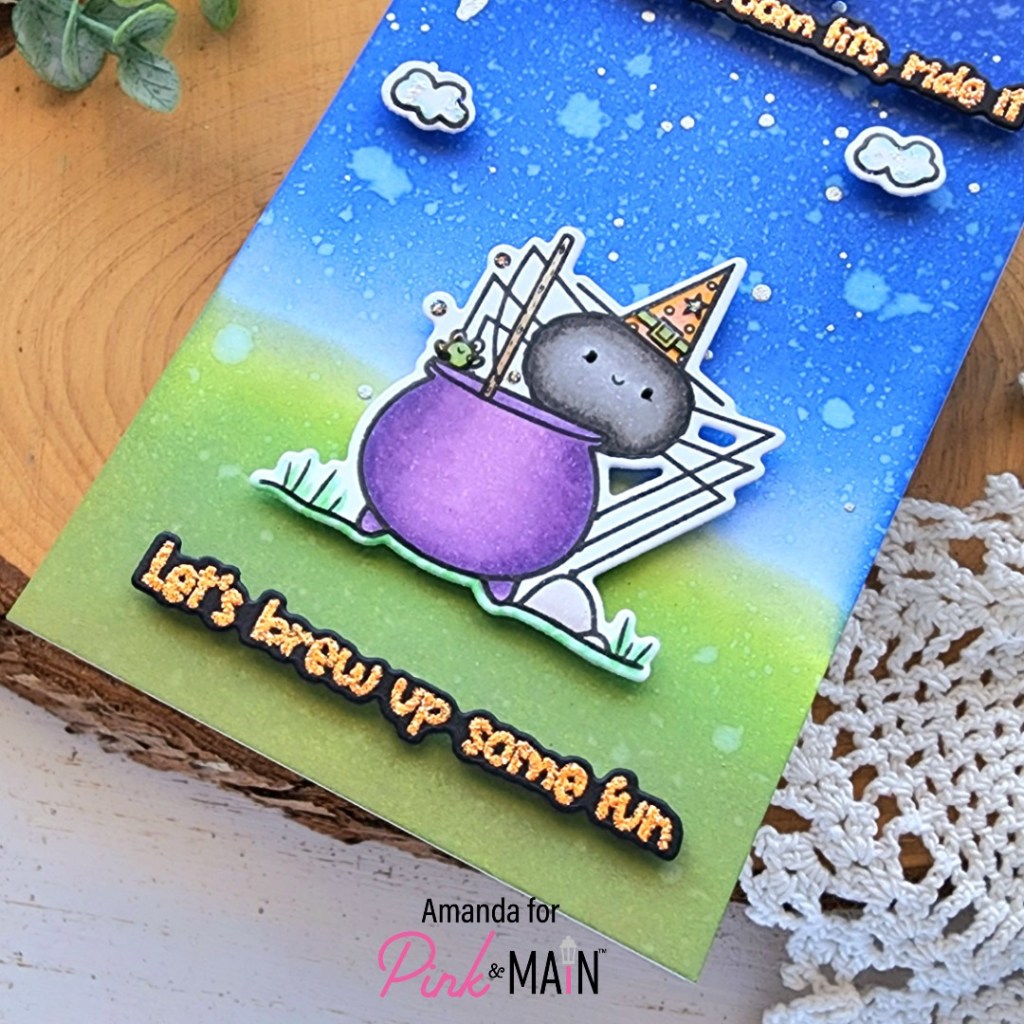
For finishing touches, I added glossy accents and stardust Stickles to various parts of the images like the frog and witchy hats, clouds and moon.

I hope you enjoyed today’s project. I really love these sweet images and hope to create some fun gift tags with them soon for treat bags to give at Halloween. How would you use them?

Products used:
Halloween Brew stamps and dies
Cute Ghosts stamps and dies

Sherbet embossing powder
Magic Anti Static Brush
Embossing & Watermark Ink
Distress Oxide Ink – mowed lawn, forest moss, black soot, chipped sapphire, blueprint sketch
LH Colors watercolor – silver
Foam squares and strips
Glossy accents
Stickles – stardust

I appreciate you sharing your time with me. Have a fabulous day!

Pink & Main – Leafy Dies 1 & 2 for Quick, Beautiful Cards

Happy Wednesday friends! I’m over on the Pink & Main blog today with a pair of cards featuring the Leafy 1 and Leafy 2 dies. These are separate foliage sets that come with a solid and an outline die for each design. I love a good two-for-one so I did my die cutting at the same time and created these cards simultaneously.

First, I chose a piece of paper from the Inked Oasis paper pad and cut the shadow die from both leafy die sets from it. Then I used the outline die to cut the center out of a 4×5.25 inch piece of white cardstock. Since I was using the whole thing, I was careful to place it exactly where I wanted it on my card front.

I lined the back of the main panel with foam tape and inserted the patterned paper shadow in the opening. Then I used liquid glue to adhere the outline over the top. I placed an acrylic block on top while I stamped and heat embossed sentiments from Sunny Greetings on black cardstock.

Once the sentiments were finished and die cut, I added them to the foliage panels with foam strips and then added the whole thing to white card bases.

For finishing touches on these cards, I chose enamel dots that went with the colors in the patterned paper. I love the look of embellishments like this scattered at an angle across a design.

Because the leaves were die cut from different parts of the same piece of paper, it was fun to pull different colors from each to give a different look to each card.

Products used today:
Leafy 1 dies
Leafy 2 dies

Sunny Greetings stamps and dies
Enamel dots
EZ Squeeze liquid glue
Foam tape

I appreciate you sharing your time with me. Have a fabulous day!

Pink & Main – Spooktacular Sneak Peek

Hey friends! I’m over on the Pink & Main blog today with a sneak peek of the upcoming August release. It is packed with incredible fall and Halloween themed goodies and you’re going to love it all!

Today I chose images from the upcoming Cute Ghosts and Halloween Brew to create a little scene. I ink blended a white cardstock panel with distress oxide inks in wilted violet, blueprint sketch and chipped sapphire. After spritzing the panel with water and blotting it dry, I die cut it with a Large Fish Tail Banner. I glued the clouds directly to the panel and popped the moon and ghost up with foam squares.

Next, I used the Micro Dots embossing folder on a 4×5.25 inch black panel and lightly used an blending brush to add white pigment ink to the dots for a little texture. Then I added foam tape to the back of the panel, leaving space to wrap twine around it and the panel will still lay nicely. Then I adhered it to a white card base and popped the banner up with foam tape as well.

I stamped and die cut a sentiment from Cute Ghosts and popped it up with foam strips and added glossy accents and stardust Stickles for finishing touches on the ghost, balloon, moon and clouds.

Have you started Halloween and fall crafting yet? I started really early this year and it has made my heart so happy! You have no idea!

Products used today:
Cute Ghosts stamps and dies
Halloween Brew stamps and dies
Micro Dots embossing folder

Large Fish Tail Banner dies
Ergonomic Blending Brush
EZ Squeeze liquid glue
Foam tape
Distress Oxide Ink – wilted violet, blueprint sketch, chipped sapphire
Glossy accents
Stickles – stardust

I appreciate you sharing your time with me. Have a fabulous day!

Pink & Main – You’re Spooktacular

Welcome friends! Today I’m over on the Pink & Main blog with some adorable Halloween inspiration featuring one of my favorite sets from last year. These ghosts are so much fun to color and create with!

I started by stamping the super cute trio of ghosts and colored them with my copic markers. I used the coordinating die to cut the image out and set it aside to create my sparkly background.

I started with an A2 piece of black cardstock and used the 1/4″ EZ Tear Tape to add strips to the center of it. I peeled the backing paper from two strips at a time and then sprinkled super fine glitter on them until all of them were covered. This is one of my favorite ways to use glitter on cards. Then I used the next-to-largest layered rectangle die to trim the panel down. I think the pressure from the die cutter really sets the glitter and I also like the finished look the die gives.

To assemble my card, I used foam tape to pop the glittered panel up on a white card base. Then added my ghosts with foam squares. I stamped and heat embossed a sentiment on black cardstock before die cutting it with a sentiment strip from Sunny Greetings and popping it up with foam strips. For a more finished look, I used the layered rectangle dies to cut a frame and added it with EZ Squeeze liquid glue.

For finishing touches, I added glossy accents to the ghost’s eyes on the ends and black stripes in the letters. Then I added stardust Stickles to their cheeks and the orange stripes. I think it ties in really well with the glittery background and just adds more fun.

Products used today:
Hello Bootiful stamps and dies
Sunny Greetings dies
Layered Rectangle dies
EZ Tear Tape – 1/4″
EZ Squeeze liquid glue
Super Fine Glitter – tangerine, emerald, ice rink and night sky
Foam tape, squares and strips
Glossy accents
Stickles – stardust

I appreciate you sharing your time with me. Have a fabulous day!

Pink & Main – Foiling Fun with Toner Paper

Welcome everyone! Thanks for stopping by. Today I have a really cool card to share with you featuring the new Black and White paper pad. This paper is toner printed so you can foil on it! Everything that is black will be foiled if you run it through a laminator.

I specifically chose a print with lots of black so most of my card front would be foiled. Then I chose my foil – gold shattered glass – and heated up my laminator.

A few pro tips for foiling on toner! First, take a clean microfiber cloth and wipe the back of your foil carefully and the front of your paper. This removes the oils from your fingers which inhibit the foiling process. Once you’ve done that, be careful to only handle the edges. Second, make sure your laminator is really good and hot. I let mine heat up twice as long as suggested. Third, look at the back of your foil. There are usually striation lines going one direction in the foil. You want these to go through your machine parallel to the opening. It helps keep wrinkles down.

With my panel foiled, I used the largest A2 rectangle die to cut the panel down and saved the leftover for another project later on. I love distressing for two reasons. First, it’s cool to look at and, second, it hides imperfections wonderfully! So I splattered my panel with some black paint and let it dry.

While that was drying, I used two more layered rectangle dies to create a thin frame. I used liquid glue to adhere it after the paint was dry.

I wanted to focus to be on the awesome foiling so I stamped and heat embossed an image from Floral Wings with licorice embossing powder and used the coordinating die to cut it out. Then I stamped and heat embossed a sentiment with frosting embossing powder and used another layered rectangle to cut that out. Both things were added with foam squares and my card is finished.

I hope you’ll give foiling a try and I also hope that my tips are helpful to you too!

Products used:
Floral Wings stamps and dies
Layered Rectangles dies
EZ Squeeze liquid glue
Watermark & Embossing Ink
Magic anti-static brush
Embossing powder – licorice and frosting
Deco Foil – gold shattered glass
Foam squares

I appreciate you sharing your time with me. Have a fabulous day!

Pink & Main – Best Wishes Stencil Layering

Happy Friday everyone! I’m so glad you stopped by. Today I have more Pink & Main inspiration featuring a new layering stencil to add color to your image. I don’t know about all of you but I’m really having fun with these types of products. Today I stepped it up a bit at the end and really love the outcome.

I started by stamping the Simple Bouquet image in dark gray ink. Then I used the layering stencils to apply my color. Then I placed the image back in my MISTI and stamped the sentiment in the banner.

There are a ton of options in the set that match the curve of the banners perfectly. It’s so perfect and fun to mix and match them different ways!

Next, I die cut the next-to-largest Stitched Arch die from white cardstock and ran it through my die cut machine with the new Many Hearts embossing folder. I popped this up with foam tape on a kraft card base and then popped my image up with foam tape on that.

This is when I had that genius idea to step things up with the stenciling and use glossy gel with super fine glitter. Definitely not the order I recommend but I was VERY careful and thank goodness it all worked out!

So, I replaced the detail stencil layer over my flowers, spread the glossy gel through it and sprinkled on ice rink glitter. I tapped off the excess and left it all to dry before using a dry paint brush to really brush off the excess.

Once that was done, I decided to tie some baker’s twine around the top of my card and tie it in a bow. Such a cute little addition and I really think it finishes things off well.

Products used today:
Simple Bouquet stamps, dies and stencils
Stitched Arches dies
Many Hearts embossing folder
Ergonomic blending brushes
Glossy gel
Super Fine Glitter – ice rink
Foam tape

I appreciate you sharing your time with me. Have a fabulous day!

Pink & Main – Happy Bee-day!

Welcome, welcome crafty friends! I’m so glad you’re here today. I’m over on the Pink & Main blog sharing this adorable bee themed birthday card. You all know that I love to get inky and messy so today’s card is not unusual for me at all and I just love how it turned out!

I planned my layout a bit in advance by laying the stamps on the plain white scalloped die cut to see how they would fit together. I liked it so I stamped and colored everything with copic markers. I used the coordinating dies to cut everything out and set it all aside while I worked on the background.

Originally I cut a smaller rectangle from colored cardstock and used the second die in the Dotted Cover dies set to cut the polka dots. The texture was not working for me at all. It was too much and distracting from the images. So I went back to square one and thought I’d start with inking. I taped off the edges and used distress oxide in salvaged patina and dried marigold randomly on the panel. I spritzed that with water and flicked ink of both colors all over. Now, I was getting somewhere! But it needed something else. So I layered the Rainbow Fun stencil over top and spread Glossy Gel through it.

I love it so much! So, then I added all my images with foam squares, heat embossed a sentiment and cut it with a circle die and popped the whole thing up on a white card base.

For finishing touches I added black glaze pen to the bees’ eyes, nose, hands and feet. Then I used stardust stickles on the wings and glossy accents on the sun. Eeeep! Isn’t is so cute?!?

Products used today:
Sweeter Than Honey stamps and dies (Stamp of the Month)
Dotted Cover dies
Layered Circle dies
Rainbow Fun stencil
Glossy gel
Magic Anti-static Brush
Watermark & Embossing Ink
Embossing Powder – frosting
Foam tape
Distress Oxide – salvaged patina and dried marigold
Glossy accents
Stickles – stardust

I appreciate you sharing your time with me. Have a fabulous day!

Pink & Main – Wildflowers Heat Embossed Cards

Happy Friday friends! Today I’m on the Pink & Main blog for release day! This is a gorgeous release with lots of variety in products. Today I have a pair of cards featuring the new Wildflowers stamp set and a few of the beautiful embossing powder colors that came out a few months ago.

To create these cards, I started with A2 size panels of kraft cardstock and the Wildflowers stamp set. First, I arranged all of the images from the set creating a full background. I stamped it with the Watermark & Embossing Ink and sprinkled embossing powders on it one section at a time. For this card I chose Sour Apple, Bubblegum and Grape Soda. Once the panel was covered, I heated it up with my heat gun and set it aside to cool.

Next, I cut the panel down with a Stacking Rectangle die and added foam tape to the back before popping it on a white card base. Next, I cut the Big Thank You from white cardstock four times along with the shadow from vellum once. I used EZ Squeeze liquid glue to adhere the layers together and add it to my card front too.

This is a simple design but it’s so pretty and I love the color pop from the embossing powders. Next, I have a card that highlights the images differently but uses the same technique.

For this card, I placed the panel in my MISTI and used the flower image as a guide where to stamp the foliage images because I wanted them “behind” the flower stem. I stamped two foliage images with different green dye inks, then stamped the flower with Watermark & Embossing Ink. I carefully sprinkled Sour Apple on the stem and Grape Soda on the flower portion. Then heated it up to melt the powder.

This time I used the Big Hello dies to cut from white cardstock and vellum, adhering them together with liquid glue once again. The rest of the card is assembled the same way but I decided to add a little twine bow around the bottom of the stems to finish the card off.

I thought this was a fun way to use silhouette stamps without making them black and I love the colored embossing powders that pop off the neutral elements too!

Products used today:
Wildflowers stamps
Big Thank You dies
Big Hello dies
Layered Rectangles A2 dies
Watermark & Embossing Ink
Embossing Powders – sour apple, grape soda, bubblegum
Magic Anti-static Powder Tool
EZ Squeeze liquid glue
3D foam tape

I appreciate you sharing your time with me. Have a fabulous day!

Pink & Main – Die Cut Cards

Happy Friday everyone! I’m popping in today with a couple of cards featuring the Pink & Main July release. I was feeling a bit of a creative funk last weekend and didn’t know what to make. I had this feeling of wanting to create but nothing sparked my interest. When this happens I start with one of two things – create backgrounds with inks or embossing OR play with dies. This time I grabbed a couple of new dies and just started cutting things out. After just a minute of cutting and arranging the dies in different ways, I had a couple of ideas pop in my head. Here’s what I ended up with.

The new Seashells Emboss & Cut Folder is so cool, I can’t even explain it! I put a piece of white cardstock inside, ran it through my die cut machine with the embossing folder sandwich and VOILA! I opened it to find five perfectly die cut and embossed seashells! They were so cool, I didn’t want to do anything to them.

So I arranged them in a line close to 5.5 inches wide and glued them together. I adhered them to a strip of paper from the Inked Oasis paper pack and popped that up on a black cardstock panel with foam tape. To cut the harshness of the black paper, I inked the top edge with a teeny bit of white pigment ink. It makes it look chalky and I love it!

Then I stamped and heat embossed a sentiment from Aloha Flowers, used the coordinating dies to cut it out and popped it up with foam squares. Such a simple card but it turned out beautifully!

For the second card, I had cut the “hello” portion of the Hello Sunshine word dies to start and then had the idea to create a die cut background.

After cutting “hello” from the whole A2 size panel, I trimmed it down to 4×5.25 inches and chose another piece of paper from Inked Oasis to layer behind it. I used EZ Squeeze liquid glue to adhere them together and popped them up on a white card base with foam tape.

I knew I wanted to draw attention to the one complete “hello” I strategically placed so I glued three layers of white die cuts together and then cut it from yellow cardstock once. I drug the bottom part of the letters through my Embossing/Watermark Ink pad and sprinkled on Ray of Sunshine embossing powder. I heat set it and glued these letters on top of the white, then added them in their place on the card front.

To finish this card off, I stamped and heat embossed another sentiment from Floral Shells and cut it into a strip. I popped it up with foam strips and then added yellow enamel dots scattered around the design.

Aren’t these cards so fun!?! Just remember that if you’re feeling crafty but don’t know what to create…choose one simple thing to start “playing” with and see if it takes you anywhere. Usually, once you get started things just fall into place.

Products used today:
Seashells Emboss & Cut Folder
Hello Sunshine word dies
Floral Shells stamps
Aloha Flowers stamps and dies
Inked Oasis paper pad
Ergonomic Blending Brush
Enamel Dots
EZ Squeeze liquid glue
Embossing/Watermark Ink
Ray of Sunshine embossing powder
Magic Anti-static Tool

I appreciate you sharing your time with me. Have a fabulous day!

Pink & Main – Sending Sunny Smiles

Happy Friday crafty friends! Today, I’m over on the Pink & Main blog with a super fun and summery feeling slimline card. I wanted some stencil texture for my background but not anything bold so I decided to try Glossy Gel on its own. It’s so cool! Have you tried it yet?

To start my card, I stamped and colored images from the new Summer Snow Globe Scenes stamp set and colored them with copics. I used the coordinating dies to cut them out and set them aside while I got messy.

I started by inking an oversized panel with teal ink from the top left, fading down to nothing. Then I sprayed the Curly Waves stencil with pixie spray and placed it over the panel. I spread Glossy Gel through the stencil fading like the ink. I removed the stencil, cleaned up and set it aside to dry.

Once the panel was dry, I pulled out the Layered Slim Line dies and cut the largest from orange cardstock and then skipped one and used the next size down to cut the stenciled panel. I splattered the orange and stencil panels with orange ink, then also splattered the stencil panel with the same teal ink for extra texture. Next, I added the images with a combination of foam squares and EZ Squeeze liquid glue on the far right end.

Then, I wrapped orange twine around the other end, stamped and die cut the sentiment and added it with foam squares. I added foam tape to the back of the whole panel, avoiding the twine and popped it up on the orange panel. Finally, I added liquid glue to that and added it to a slimline card base.

For finishing touches, I added glossy accents to the stripe on the surf board, parts of the seashell and the bear’s nose. Then I added black glaze pen to the sun’s eyes and unicorn Stickles to the rays o f the sun and starfish too.

Have you tried out the fun glossy gel yet? I’d love to know in the comments if you always add glitter or flock, or if you’ve tried it alone like I did today.

Products used:
Summer Snow Globe Scenes stamps and dies
Curly Waves stencil
Glossy Gel
Palette knives
Layered Slim Line dies
Sunny Greetings dies
EZ Squeeze liquid glue
Foam tape and squares
Pixie Spray
Stickles – unicorn
Glossy accents

I appreciate you sharing your time with me. Have a fabulous day!