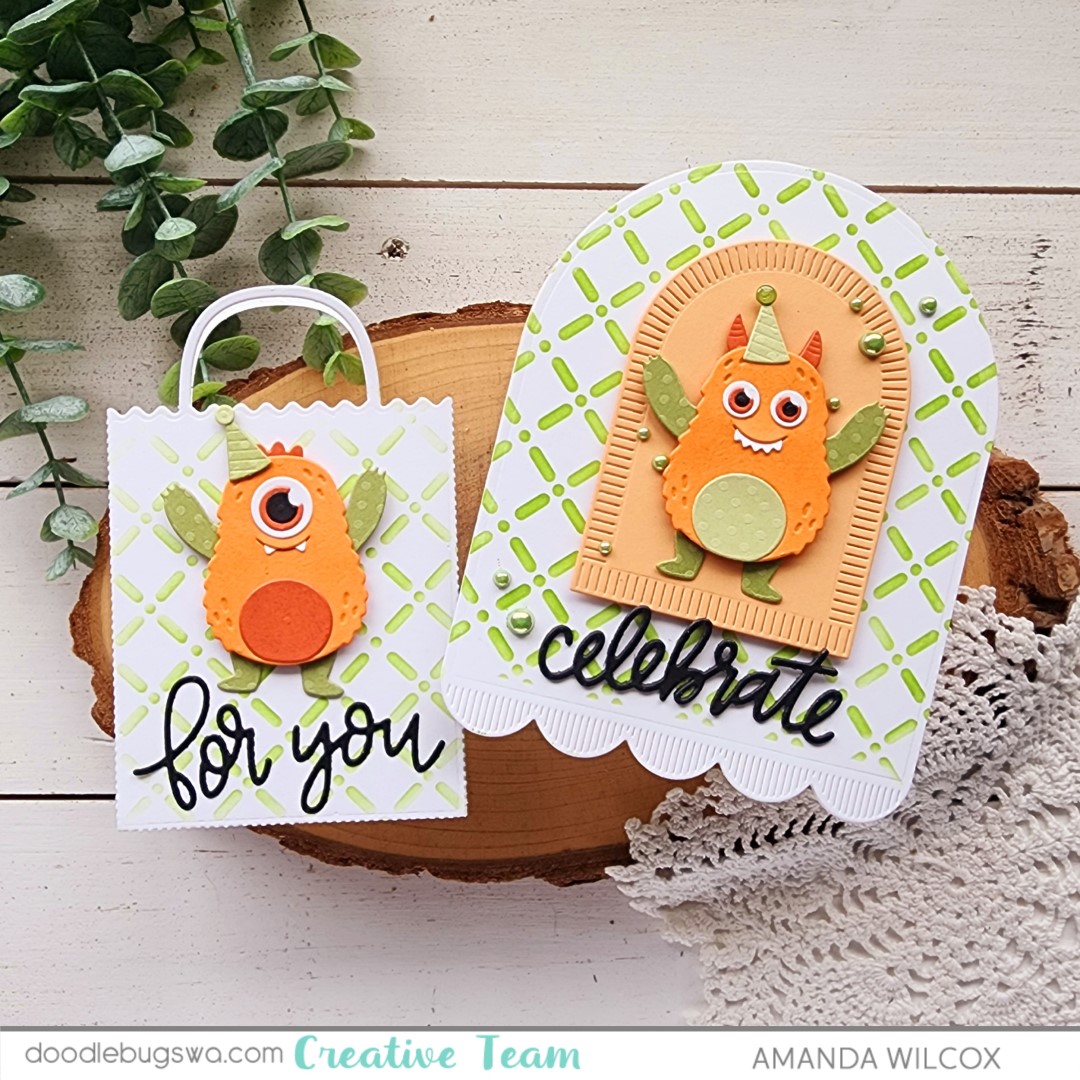
Doodlebugs – Dancing Monster Celebration Wishes with a Shaped Card and Gift Card Holder

Welcome to a monstrous mix-it-up Monday everyone!!! I’m super excited to share my creations today. They were so fun to make! Words don’t really express how much I think everyone should try making one of these dancing creations from Spellbinders. They are really easy and so fun, almost as much fun to give as to get!

I started these projects by die cutting pieces from the Spellbinders Dancin’ Birthday Monster set. I mixed and matched them, creating two monsters for the heck of it. That’s when I decided it would be great to make a card and gift card holder set! I cut card layers with the Spellbinders Make a Wish Arch Labels dies – two of the largest and one of the next-to-smallest.
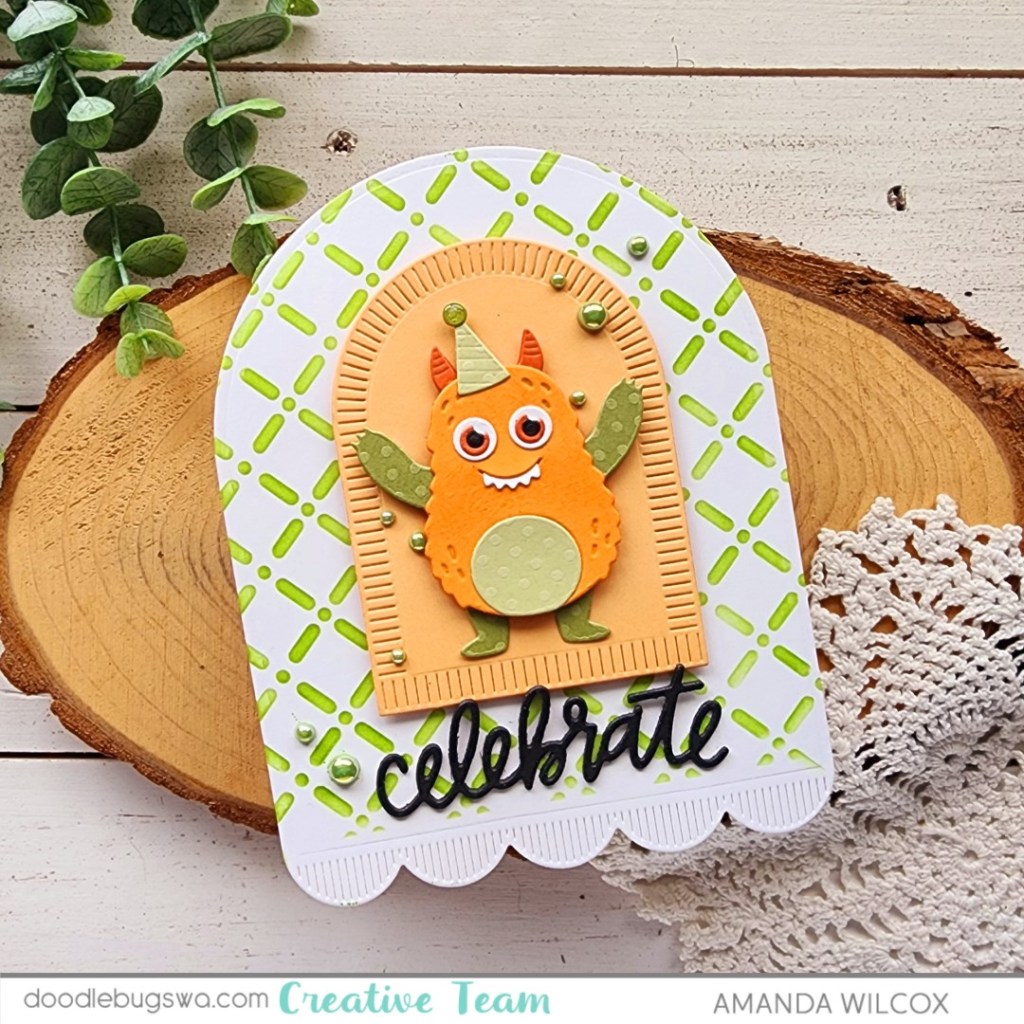
I ink blended the Pretty Pink Posh Trellis stencil with Lawn Fawn jalapeno ink, then popped up the orange arch and also the monster. I die cut the word “celebrate” from the Pretty Pink Posh Gift Card Bag die set three times from black cardstock and glued it underneath the arch.

For the card, I finished things off with a scattering of Pretty Pink Posh pistachio pearls and a little glossy accents on the top of the birthday hat.

Next, I created my gift card holder using the Pretty Pink Posh Gift Card Bag die set.

After cutting the front and back of the bag from white cardstock, I inked both sides with the Trellis stencil just like the card front. Then I popped up the monster with foam squares and glued my sentiment underneath him. The sentiment is also part of the Gift Card Bag dies.
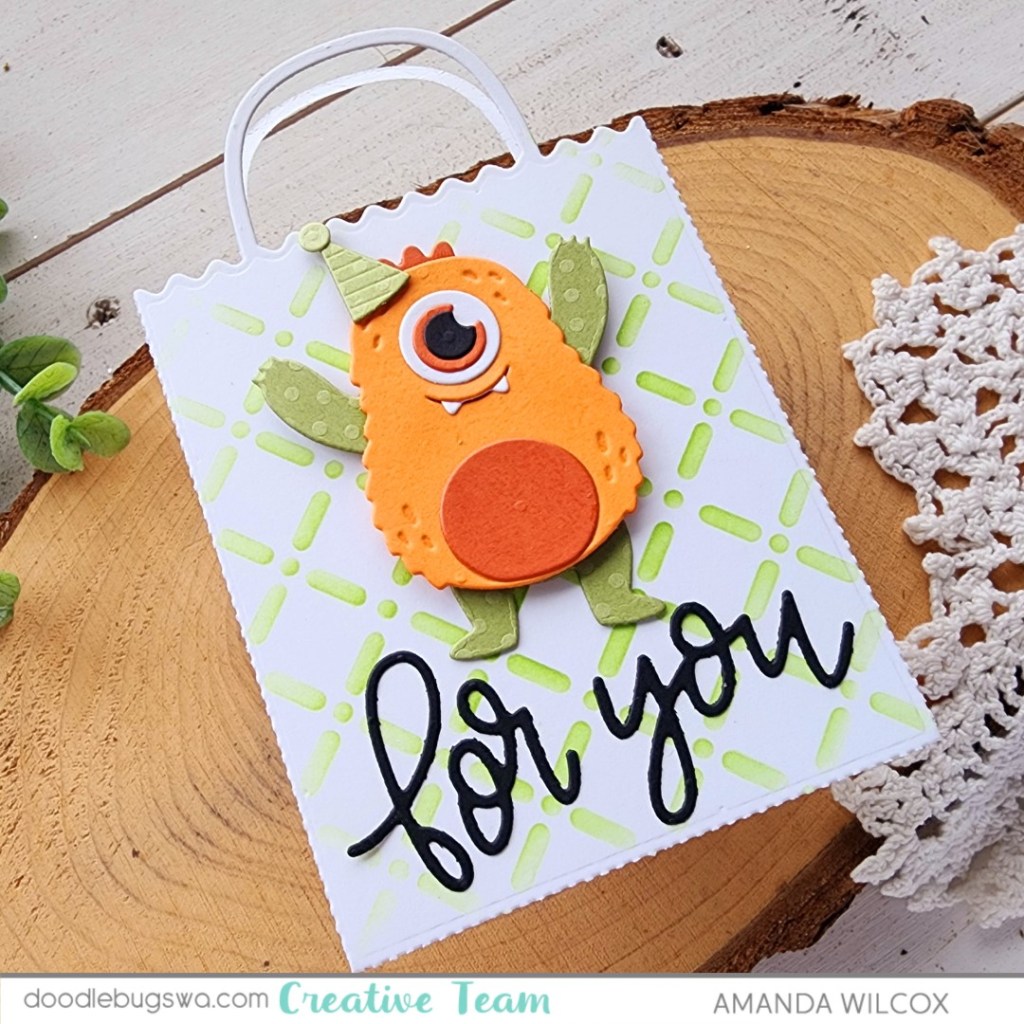
Dancin’ Character Tip: You’ll see with the Spellbinders dancing characters, the legs have a tab at the top with a hole in it. To attach them to anything, add a foam circle to your base (card front or gift card bag), slide the hole over the foam circle, remove the foam release paper and adhere your character body on top. Be sure that the foam squares on your character don’t impede the movement of the legs though. I just added them to the top half to make sure I was safe.

Please leave me a comment or send an email if this isn’t clear and you’d like a step-by-step photo tutorial.

Products used:
Spellbinders Dancin’ Birthday Monster dies
Spellbinders Make a Wish Arch Labels dies
Pretty Pink Posh Trellis stencil
Pretty Pink Posh Gift Card Bag dies
Pretty Pink Posh pistachio pearls
Liquid glue
Foam circles, squares and tape
Blending brush
Lawn Fawn jalapeno ink
Glossy accents
Tear tape – 1/8 inch

I appreciate you sharing your time with me. Have a fabulous day!
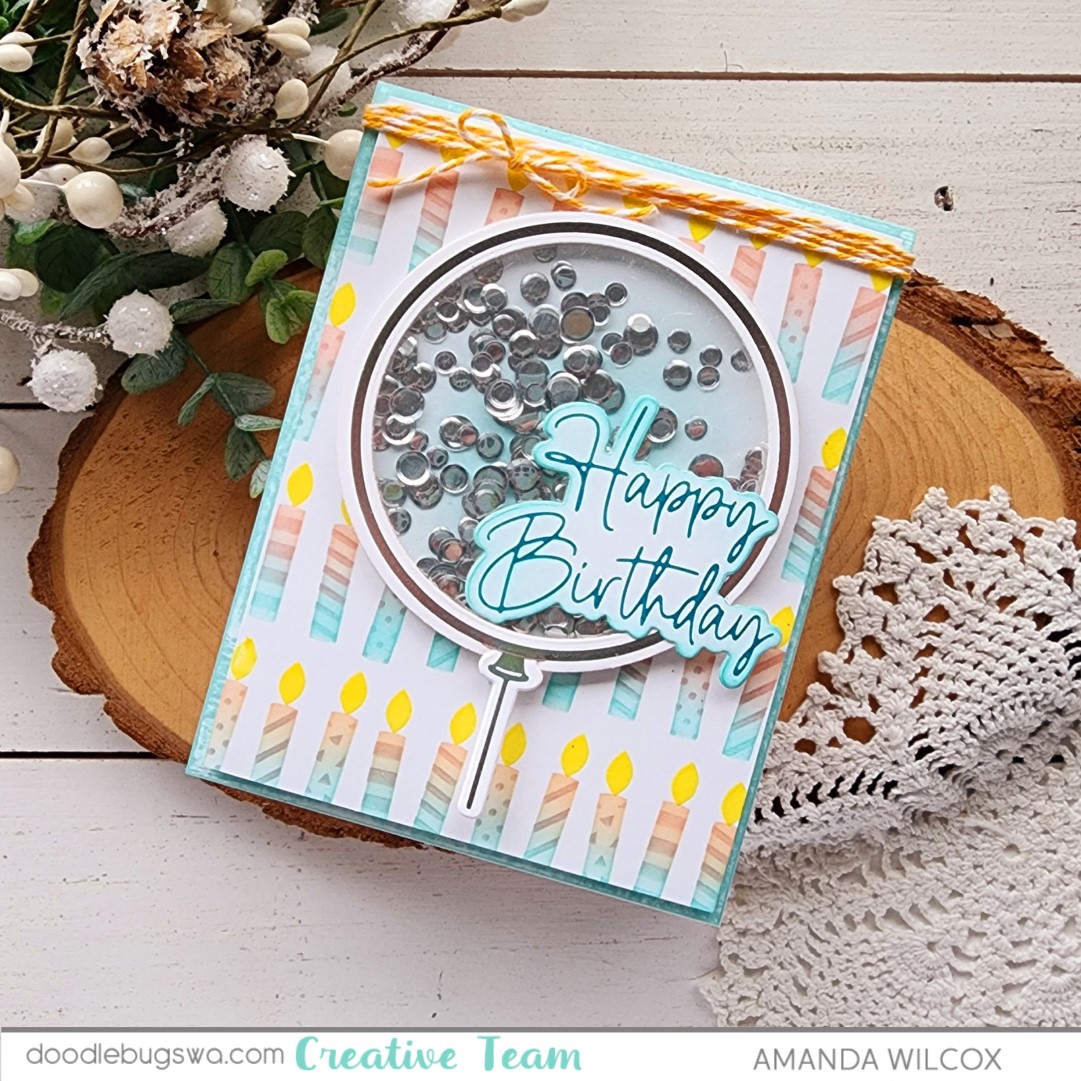
Doodlebugs – Hot Foiling, Stenciling and Shaking All Make a Great Birthday Card

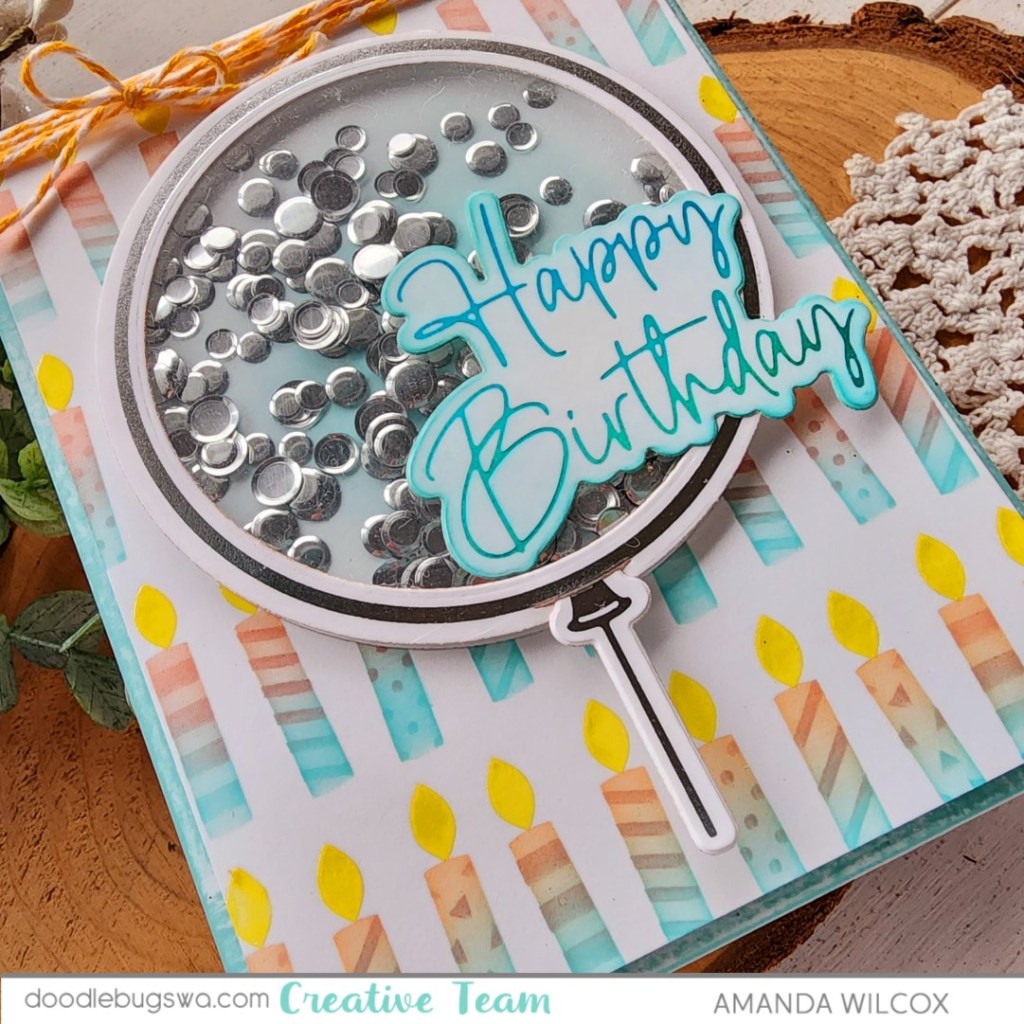
Hey friends! Let’s mix things up with a fun birthday shaker card on the Doodlebugs blog today! I pulled out some fabulous hot foil plates from Spellbinders and combined them with Pretty Pink Posh stencils for my background and the combo couldn’t be more perfect!

I started by hot foiling the Spellbinders Giant Party Balloon and the sentiment in the set. The balloon pieces are silver and the sentiment is moondust hot foil. To accentuate the moondust foil I went around the edge with a blending brush and Lawn Fawn mermaid ink after die cutting it out.

I wanted to make a shaker and this Giant Party Balloon set comes with the inner circle die to make that a reality. How fun is that! So I cut another large circle from white cardstock and inked the center with mermaid ink like the sentiment. Plus I cut an acetate circle and threw all my elements together with liquid glue and foam strips, inserting Spellbinders silver smooth discs as my shaker bits.

Next, I pulled out the Pretty Pink Posh Layered Candles stencil set. I inked the bottom of each candle row with mermaid and the top with peach fuzz. I replaced the candle layer with the detail layer and did the same thing again. Then for the flames, I spread Brutus Monroe yellow Chroma Glaze. It gives a shiny finish which is fun for the background of our blingy shaker balloon.

Finally, I took the mermaid ink pad and drug it across all four sides of my card base. I popped the stenciled panel up with foam tape and glued the balloon directly to that with liquid glue. Then I glued the sentiment to the front of my balloon as well.

To finish my card off, I tied some orange bakers twine around the top into a bow.

Products used:
Spellbinders Giant Party Balloon hot foil plates and dies
Spellbinders smooth discs – silver
Spellbinders hot foil – moondust and silver
Pretty Pink Posh – Layered Candles stencils
Foam tape
Liquid glue
Blending brushes
Lawn Fawn Ink – mermaid and peach fuzz

Brutus Monroe Chroma Glaze – yellow

I appreciate you sharing your time with me. Have a fabulous day!

Doodlebugs – Sending Love and Hugs Die Cut Card

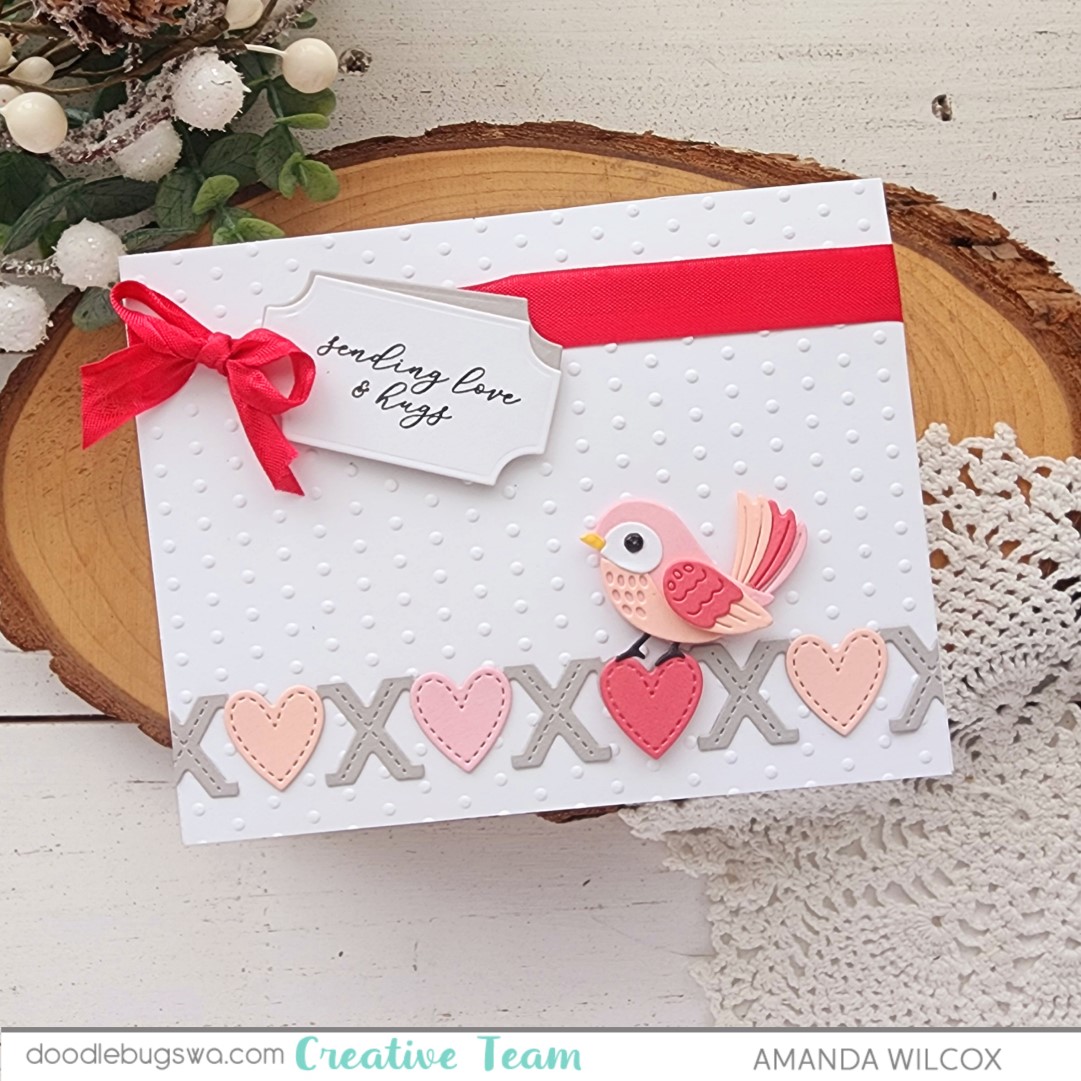
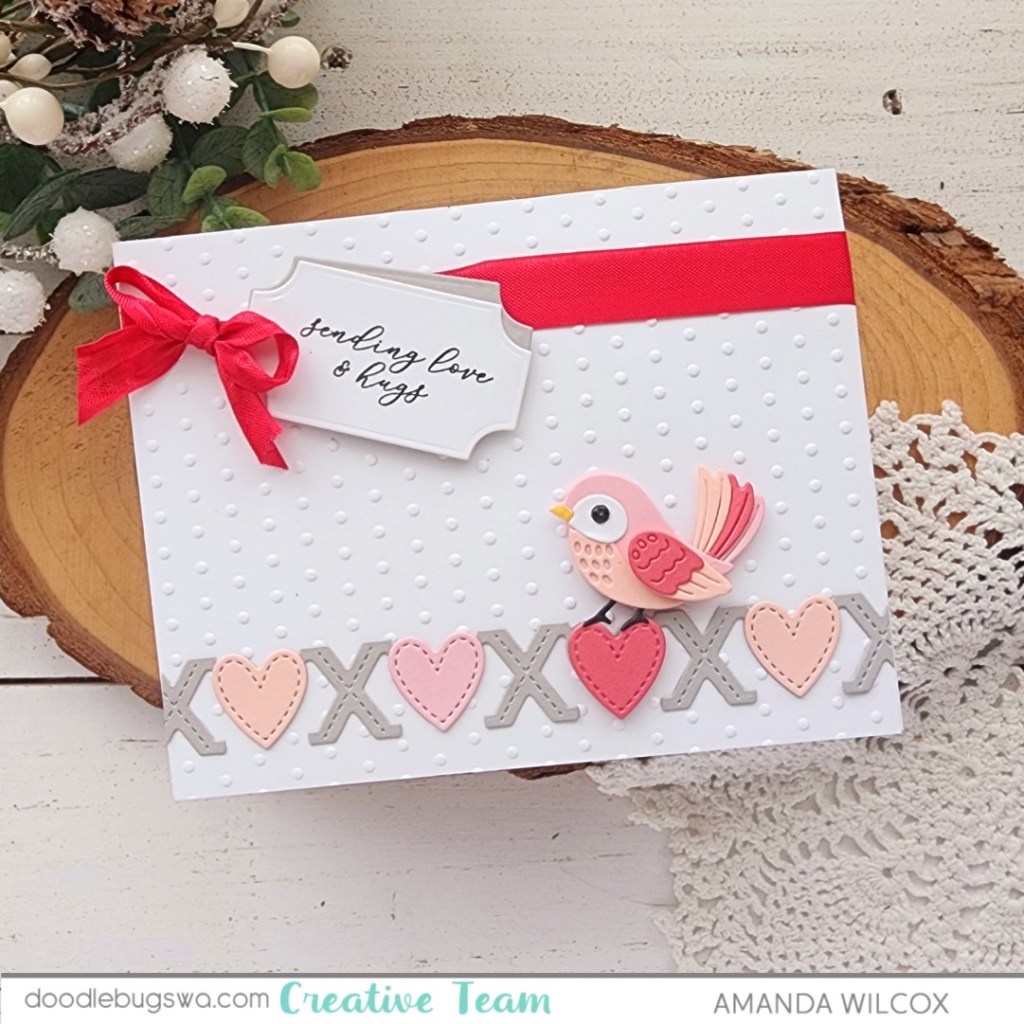
Happy Monday friends! We’re mixing things up on the Doodlebugs blog for another bit of valentine inspiration before the big day arrives. I had fun with dies and embossing today.

I adore this new Pretty Pink Posh XOXO border so that’s where things started for this card. I just cut the main piece from light gray cardstock and one heart from light pink. I still wasn’t sold on what to do so I went digging in my stash and came across the adorable Spellbinders Sweet Birdie.

I used some pink, melon and peach cardstocks from my stash to create my bird and cut a heart for the border from each color too. I glued all the hearts directly to the border except the darkest one which is popped up with a foam square. I ran a white panel through the die cutter with the Spellbinders Tiny Dots embossing folder for my background and glued the border to the bottom. Then I popped the birdie up with foam squares to match the popped up heart.

I stumbled on this ribbon in my stash to tie around the top of my panel and added a tag from the Spellbinders Envelope of Wonder collection. The sentiment comes from the stamp set in that collection too. After tying the bow I added foam squares to the tags to keep them in place.

For finishing touches I just added glossy accents to the birdie’s eye and beak. Isn’t this such a sweet valentine?

Products used:
Pretty Pink Posh XOXO border die
Spellbinders Tiny Dots embossing folder
Spellbinders Sweet Birdie dies
Spellbinders Envelope of Wonder dies
Spellbinders Envelope of Wonder Sentiments stamps
Foam squares
Liquid glue
Glossy accents

I appreciate you sharing your time with me. Have a fabulous day!

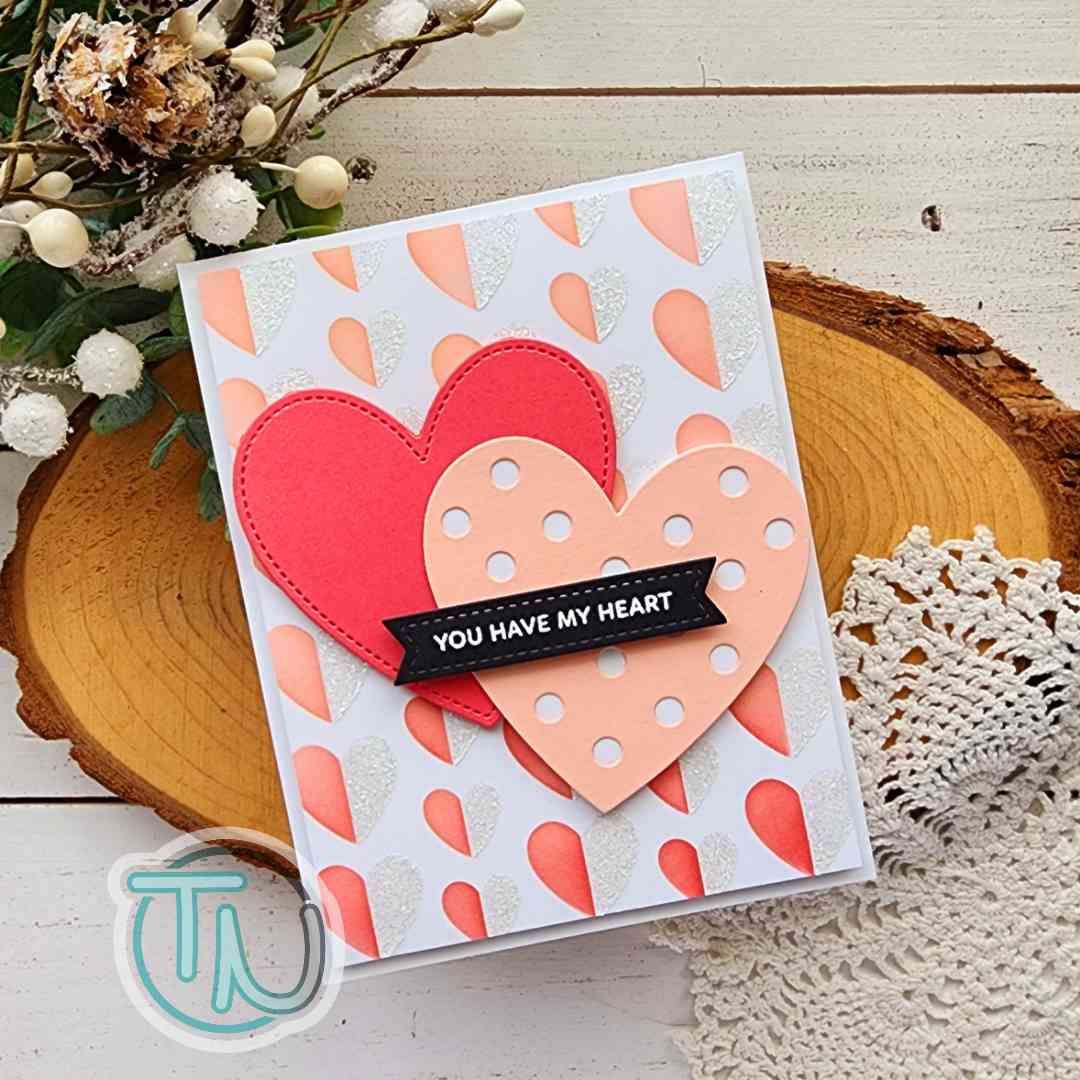
Pretty Pink Posh – Quick and Simple Valentines

Hey there! I’m so glad you stopped by today. I’m sharing a fairly quick and simple valentine card using stencils and dies from the January Pretty Pink Posh release. These products are not getting old in the slightest so I hope you’re not bored seeing ways to use them! They’re so fun to create with in different ways.

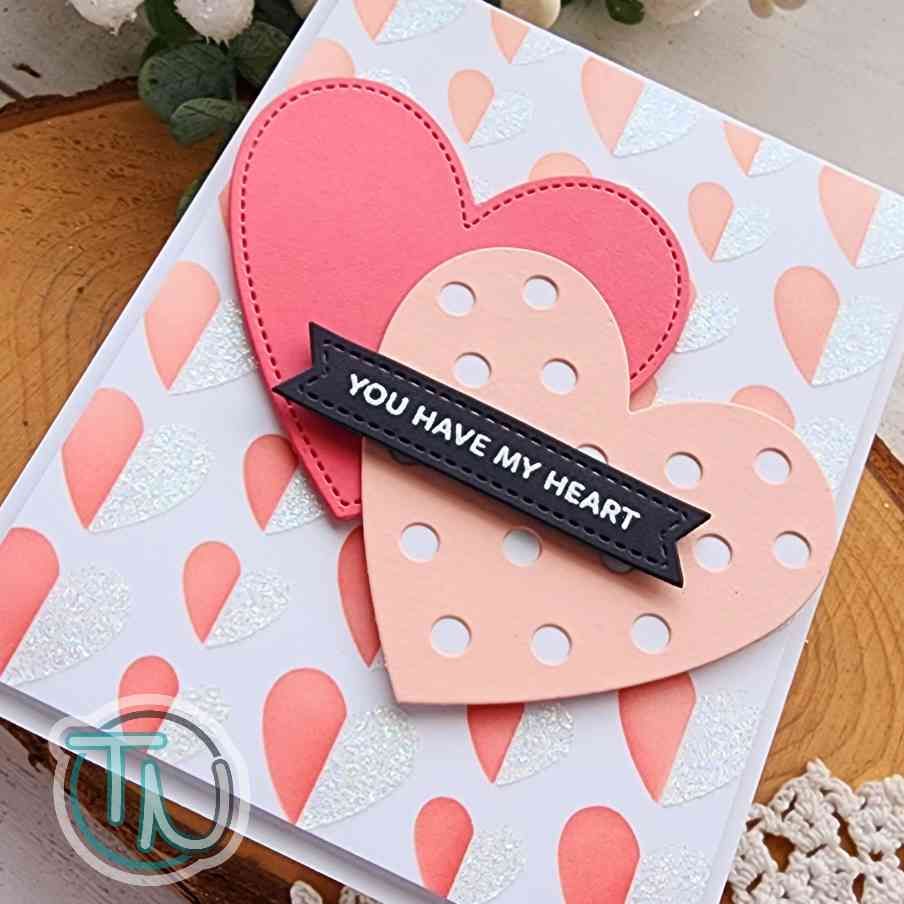
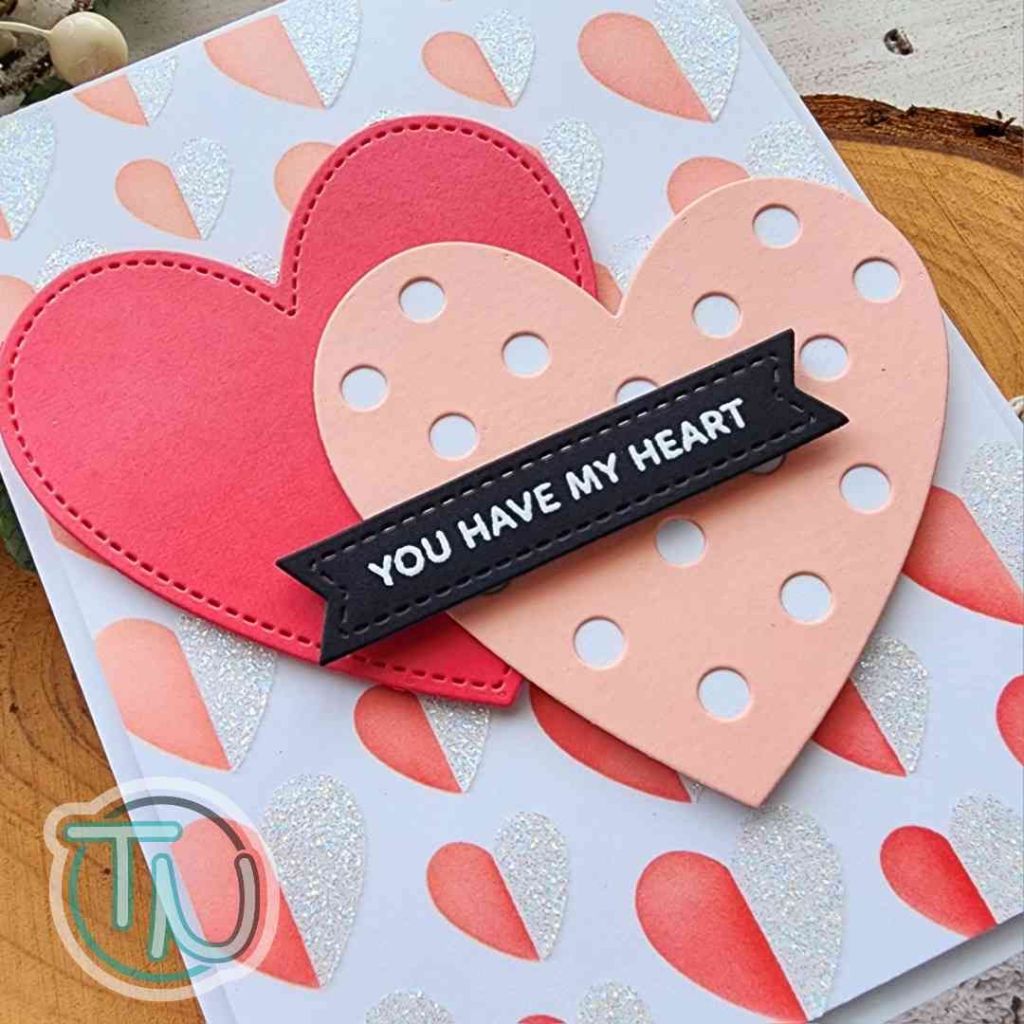
Today I started by playing with the Half Hearts stencil. I inked it up in an ombre effect light to dark from top to bottom. I used Lawn Fawn guava and peach fuzz inks with my blending brushes. Then for the second stencil layer, I spread iridescent glitz gel through it so I had some sparkle.

While that was drying I went through my cardstock stash and found almost perfect matches to the ink colors to cut hearts from. I used the new Stitched Hearts dies and liquid glue to adhere them together. Then I stamped and heat embossed a sentiment from Sentiment Strips | Valentine stamps and the Sentiment Strips dies.

To assemble everything, I popped the stenciled panel up on a white card base, glued my hearts together and popped them up with foam tape. Then Took my sentiment banner and popped it up with a foam strip over the hearts.

This card came together so quick but you could make it even quicker by substituting the glitz gel for more ink blending instead.

Products used:
Half Hearts stencils
Stitched Hearts dies
Sentiment Strips dies
Sentiment Strips | Valentine stamps

Foam tape
Liquid glue
Glitz gel – iridescent
Lawn Fawn ink – guava and peach fuzz

I appreciate you sharing your time with me. Have a fabulous day!

Twiddler’s Nook Spooktacular IG Hop

I can’t believe today is finally here. This has been months in the making and I’m excited to share with you the Twiddler’s Nook Spooktacular Instagram Hop! It’s a hop for us Halloween loving card makers where we come together on the 31st of each month from January through October to share fun inspiration and highlight the awesome products we offer at Twiddler’s Nook.

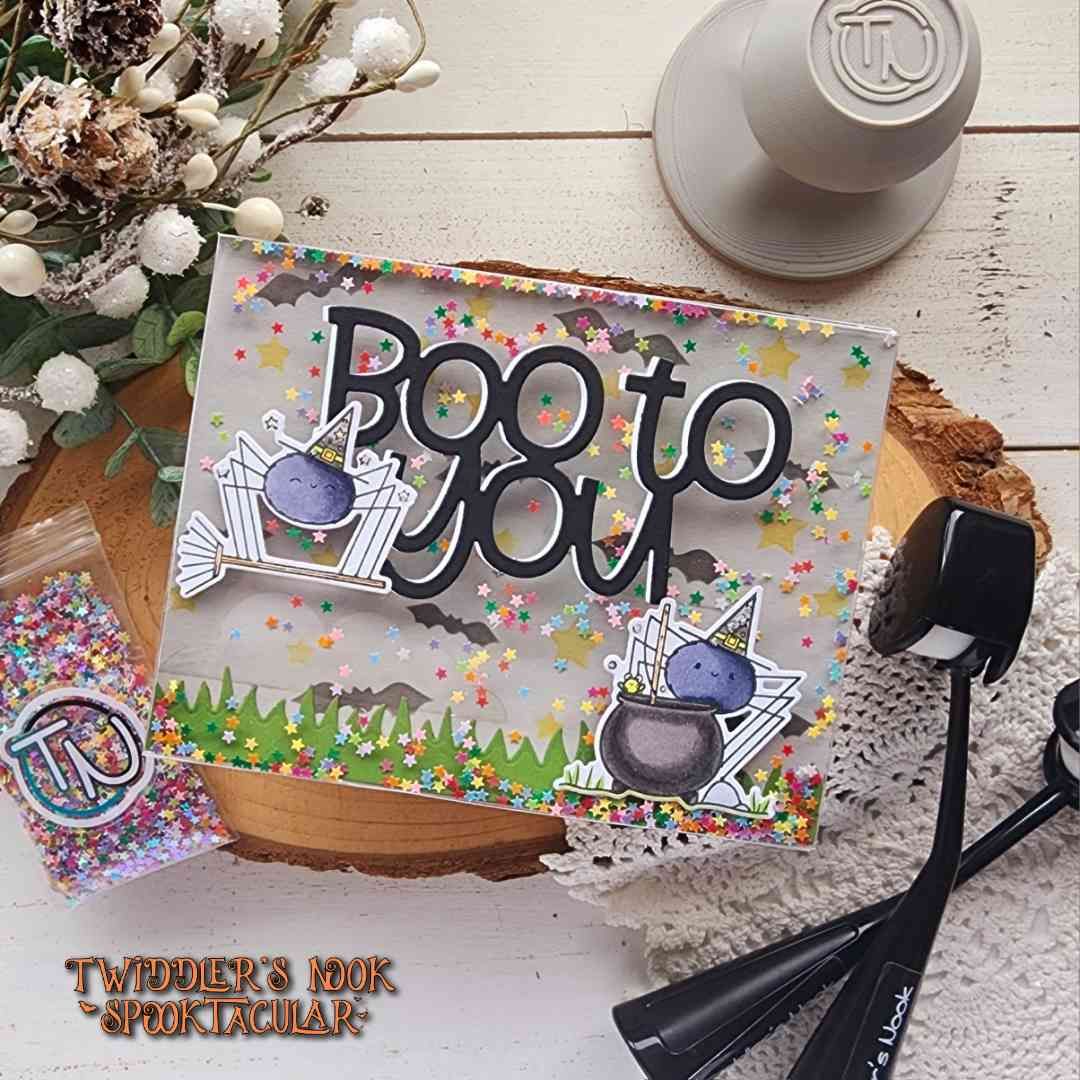
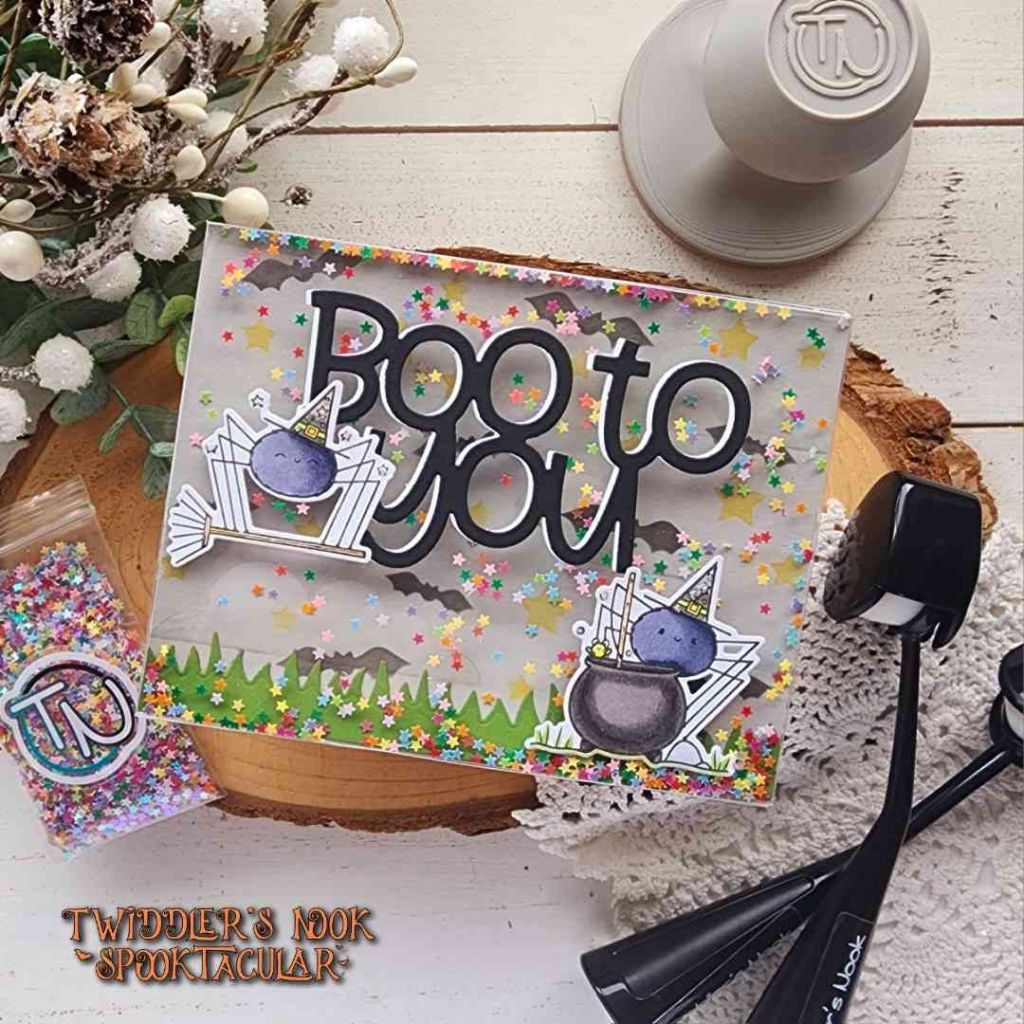
Today I’m sharing a fun shaker card using the Rainbow Wishes confetti as my shaker bits. I thought it was fun to add some color instead of my typical “Halloween” colors. I also used a Tonic Studios full panel shaker window which makes creating shaker cards a breeze and fun with no thick borders to hide your foam tape.

The images come from one of my favorite Pink & Main sets called Halloween Brew. Instead of going with a sentiment from the stamp set, I pulled out the Mama Elephant Big Boo and Trick dies.

For a little added spook, I used the Twiddler’s Nook blending brushes on a piece of gray cardstock with the Pretty Pink Posh Spooky Sky stencil set.

With all the layers put together, I finished things off with stardust Stickles on the stars and bubbles on my images.

Products used today:
Twiddler’s Nook blending brushes
Twiddler’s Nook Wishing on Rainbow Stars confetti
Twiddler’s Nook Pressure Pal

Tonic Studios shaker pouch
Pink & Main Halloween Brew stamps and dies
Mama Elephant Big Boo and Trick dies
Newton’s Nook Land Border dies
Pretty Pink Posh Spooky Sky stencils
Stickles – stardust
Pink & Main EZ Squeeze liquid glue

If you’d like to join us on the hop, head over to Instagram and comment for a chance to win a $20 gift certificate to the Twiddler’s Nook shop. You have until February 3 to comment. The winner will be announced on February 5.

I appreciate you sharing your time with me. Have a fabulous day!
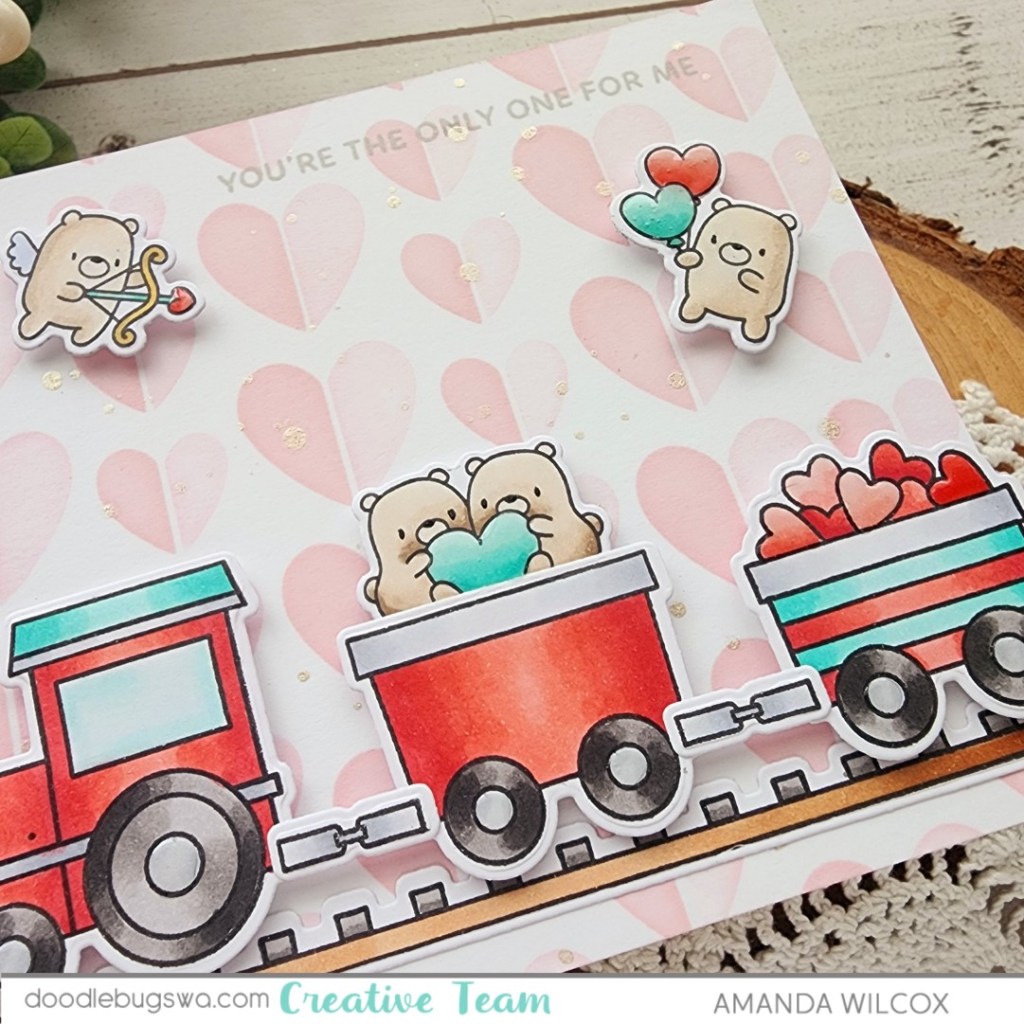
Doodlebugs – Valentine Train with Stenciled Background

Choo! Choo! We’re boarding the sweetest train you’ll ever see to the Doodlebugs blog today. It’s mix it up Monday and I’m excited to share my ideas for today’s post.

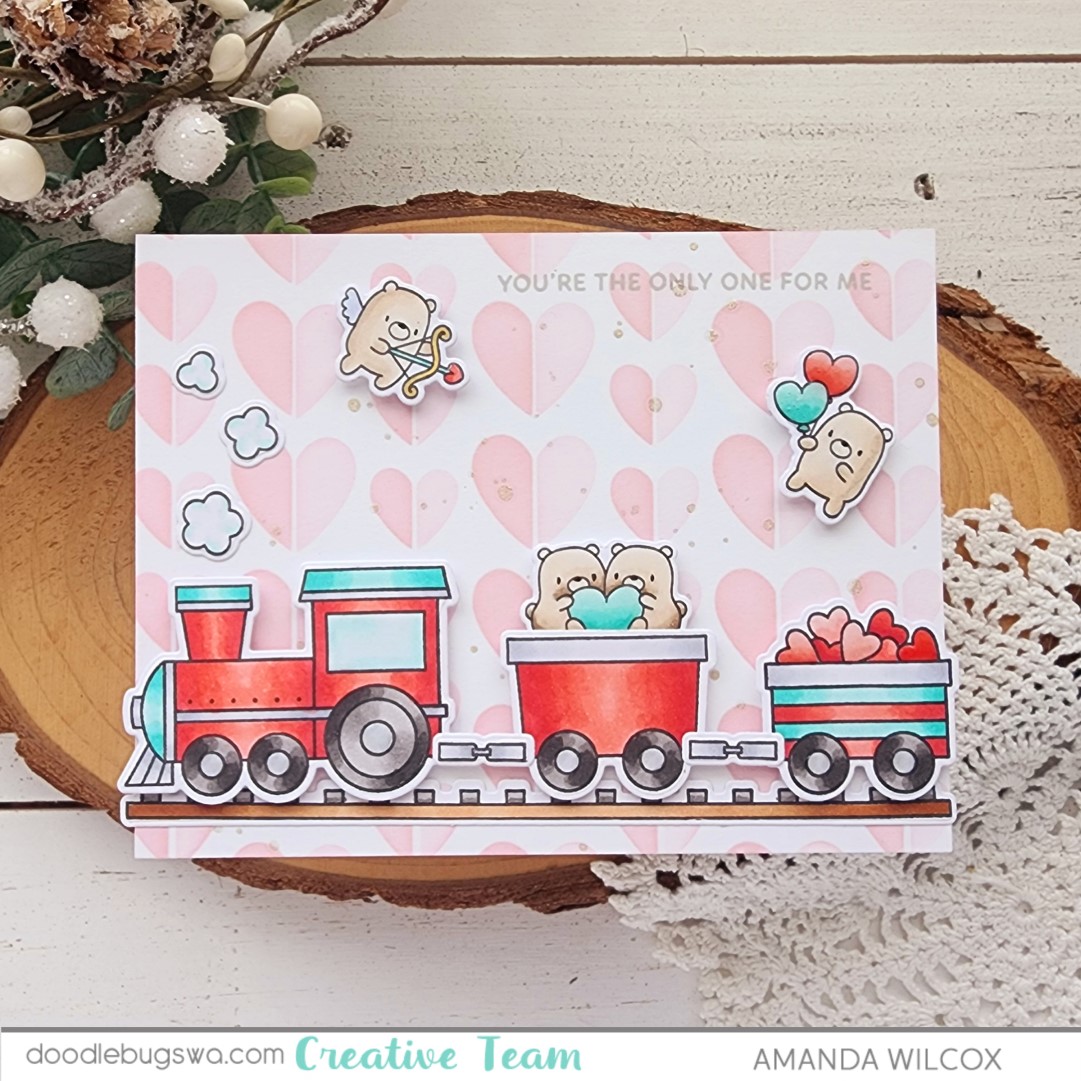
I was recently playing with the newest Pretty Pink Posh release, coloring this adorable Valentine Train set and brainstorming what I could add to the empty train car. I love that it’s included in the set because it immediately makes this a set for all occasions. Today I was happy to keep with the valentine theme and pull in some adorable Mama Elephant Little Agenda Bears to the mix.

I used the coordinating dies to cut everything out and liquid glue to assemble it all. Then I inked up the new Pretty Pink Posh Half Hearts stencil using Lawn Fawn ballet slippers ink. After the panel was inked, I splattered it with watercolor paints and let it dry.

For assembly, I glued the panel to a white card base and added the train track to the bottom. Then I added the train with foam squares and the puffs of smoke with liquid glue. Last, I popped up my couple of bears in the sky with foam squares too. I placed the card in my MISTI and stamped a sentiment from Pretty Pink Posh Sentiment Strips | Valentine in a light gray ink.

For finishing touches I added black glaze pen to the bears eyes and noses and glossy accents to things like random hearts and train wheels. Not too much but a little shine here and there to go with the shimmer in the watercolor.

Products used:
Pretty Pink Posh Valentine Train stamps and dies
Pretty Pink Posh Half Hearts stencils
Pretty Pink Posh Sentiment Strips | Valentine stamps
Mama Elephant Little Agenda Bears stamps and dies
Sakura black glaze pen
Liquid glue
Blending brushes
Lawn Fawn ink – ballet slippers and narwhal
Glossy accents

LH Colors watercolor – vanilla

I appreciate you sharing your time with me. Have a fabulous day!
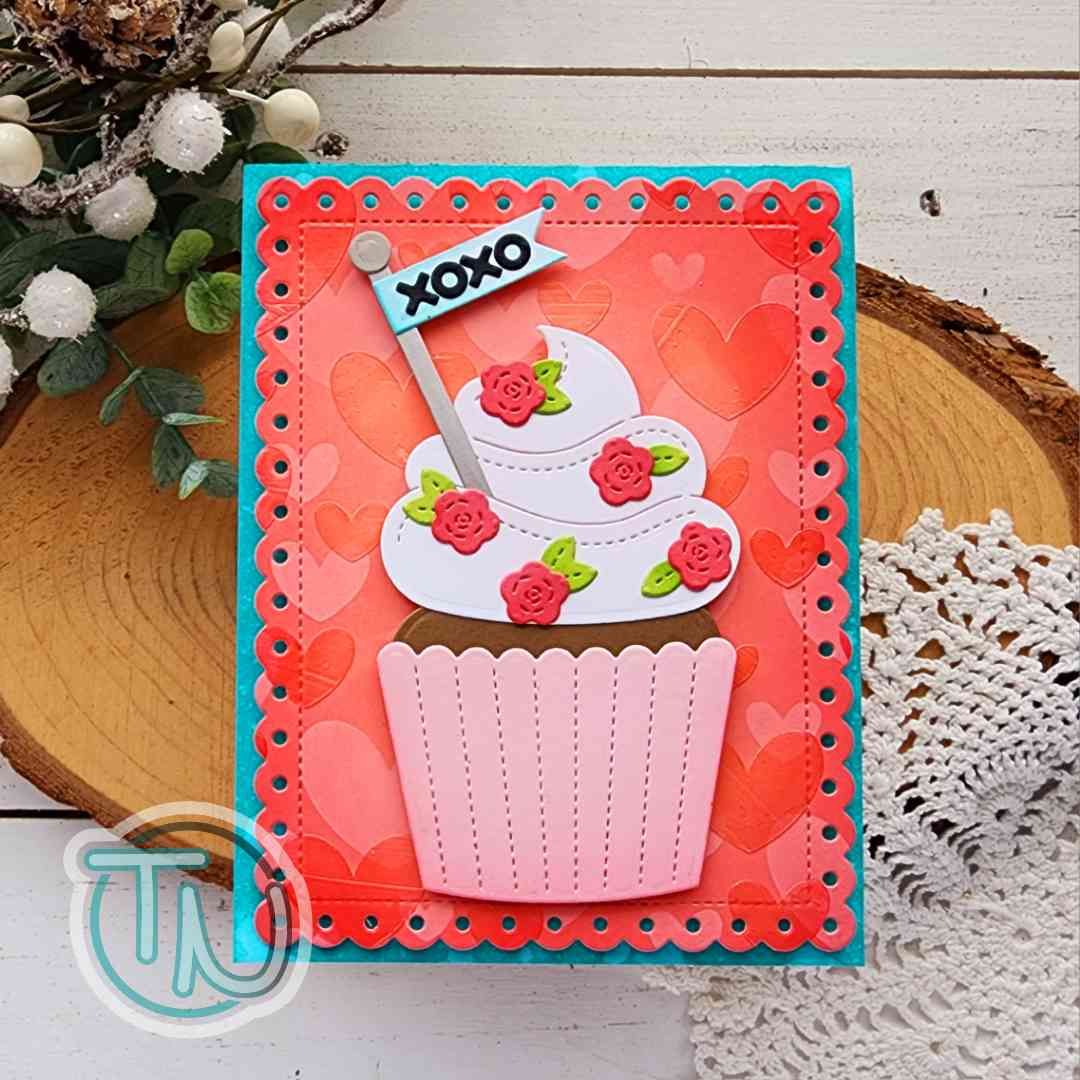
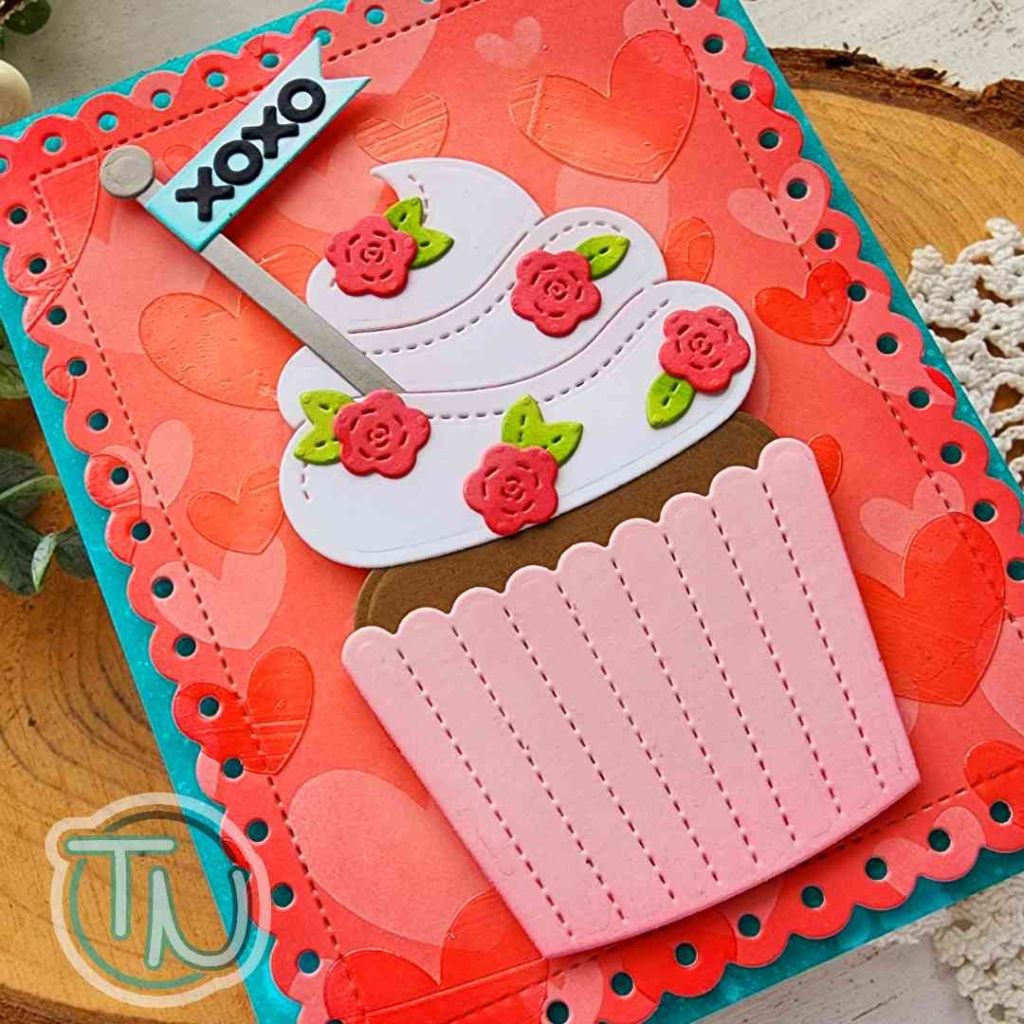
Pretty Pink Posh – Valentine Cupcake

Happy Wednesday everyone! I am SO EXCITED to share today’s card with you! I had an absolute blast creating today’s card. I used some fabulous goodies from the most recent Pretty Pink Posh release. The way this card evolved as it came together almost had a mind of its own and it was fabulous!

I started by just playing around creating my die cut cupcake. I love these flowers and actually started with a little trio, then I thought it would be cuter if they adorned the frosting on the whole cupcake. I used liquid glue and reverse tweezers to hold things in place while they dried.

Next I inked up a background panel with distress oxide inks in candied apple and abandoned coral. I let that dry overnight and came back the next day to use the Layered Hearts stencils. The first layer is spun sugar distress oxide ink pounced on so the light ink would sit on top of the darker reds. Then I spread Pink & Main glossy gel through the second stencil layer and let the panel dry.

When the panel was dry I cut it out with the largest Eyelet Rectangle die. I inked the edges of my card base with peacock feathers distress oxide ink and splattered it with water before popping the stenciled panel up with foam tape. Then I added the cupcake to the with foam tape as well.

Products used:
Big Valentine Cupcake dies
Layered Hearts stencils
Eyelet Rectangles dies

Distress Oxide Ink – candied apple, abandoned coral, peacock feathers, spun sugar
Foam tape
Glossy gel
Liquid glue
Palette knife

I appreciate you sharing your time with me. Have a fabulous day!
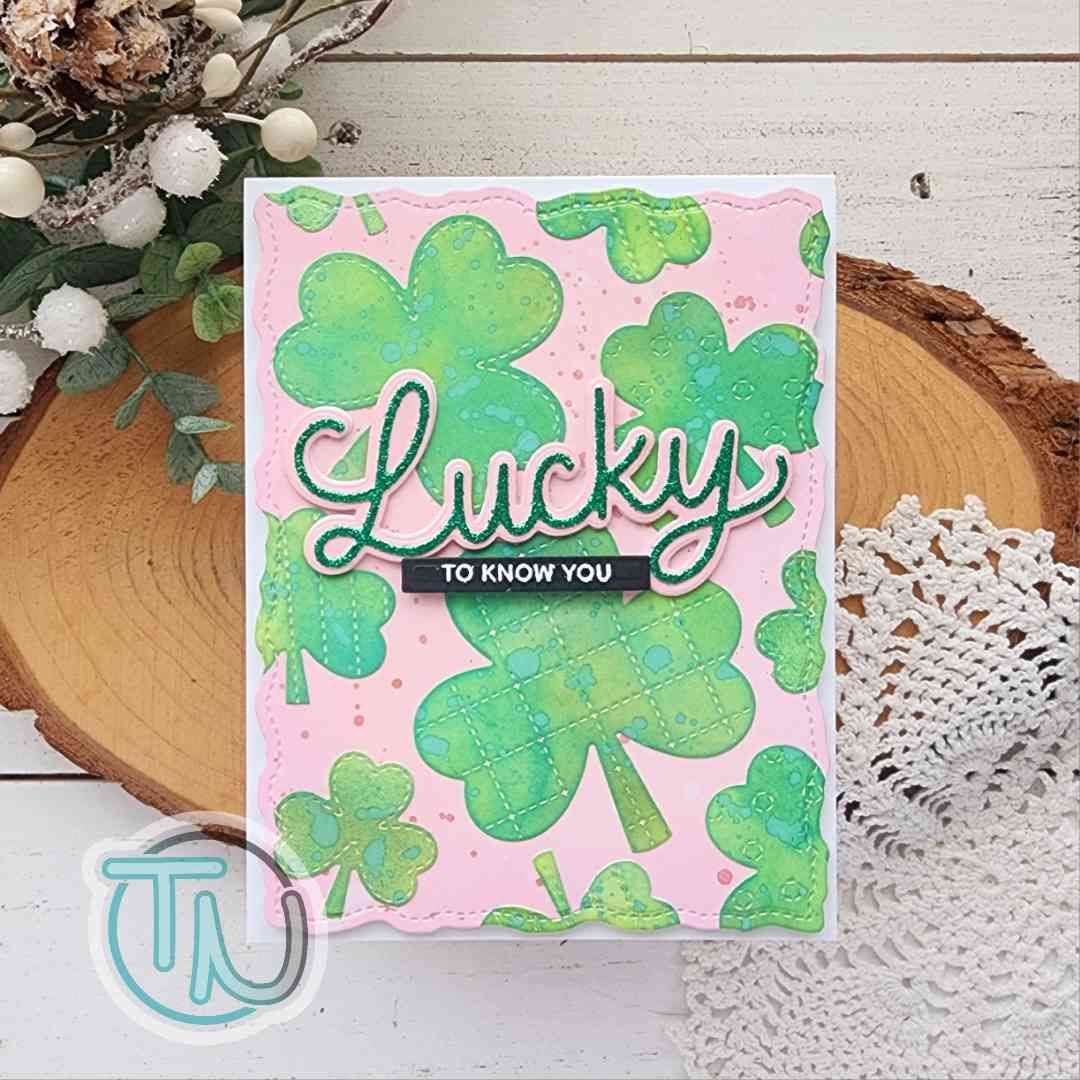
Pretty Pink Posh – Lucky to Know You Distress Oxide Play

Hey friends! I’ve been playing with the January release from Pretty Pink Posh a ton over this long weekend. We ended up with snow/ice and so much cold that it wasn’t even anything to play in outside so I took it as permission to stay home and craft! It was fabulous!!!

For this card I got extra inky and messy with distress oxide inks and watercolors to and visual texture and shimmer to the design. I inked up a panel with spun sugar distress oxide ink, spritzed it with water and flicked pink watercolor on it. While that was drying I inked up a panel with a bunch of green distress oxide inks using just the ink left on the sponge. I die cut that with all the different Stitched Shamrocks dies.

When the watercolor was dry I used liquid glue to adhere all the shamrocks, filling the panel as much as possible by trimming excess and gluing the rest to a different edge. Then I die cut the whole panel with the largest Stitched Torn Rectangle. I popped this up on a white card base with foam tape.

I cut Lucky from green glitter paper and pink cardstock, glued them together and popped them up on the card front with foam squares. I finished the sentiment by using the Lucky stamp set. I die cut it with a Sentiment Strip die and popped it up with a foam strip under the glittery lucky.

There is something about this pink and green combo that has me full of heart eyes. I love it!!!

Products used:
Stitched Torn Rectangles dies
Lucky stamps
Lucky Shadow dies
Stitched Shamrocks dies

Liquid glue
Foam strips

Magic anti-static brush
Embossing and watermark ink
Embossing powder – frosting

Distress Oxide Ink – spun sugar, pine needles, mowed lawn, shabby shutters, twisted citron, lucky clover
LH Colors watercolor

I appreciate you sharing your time with me. Have a fabulous day!

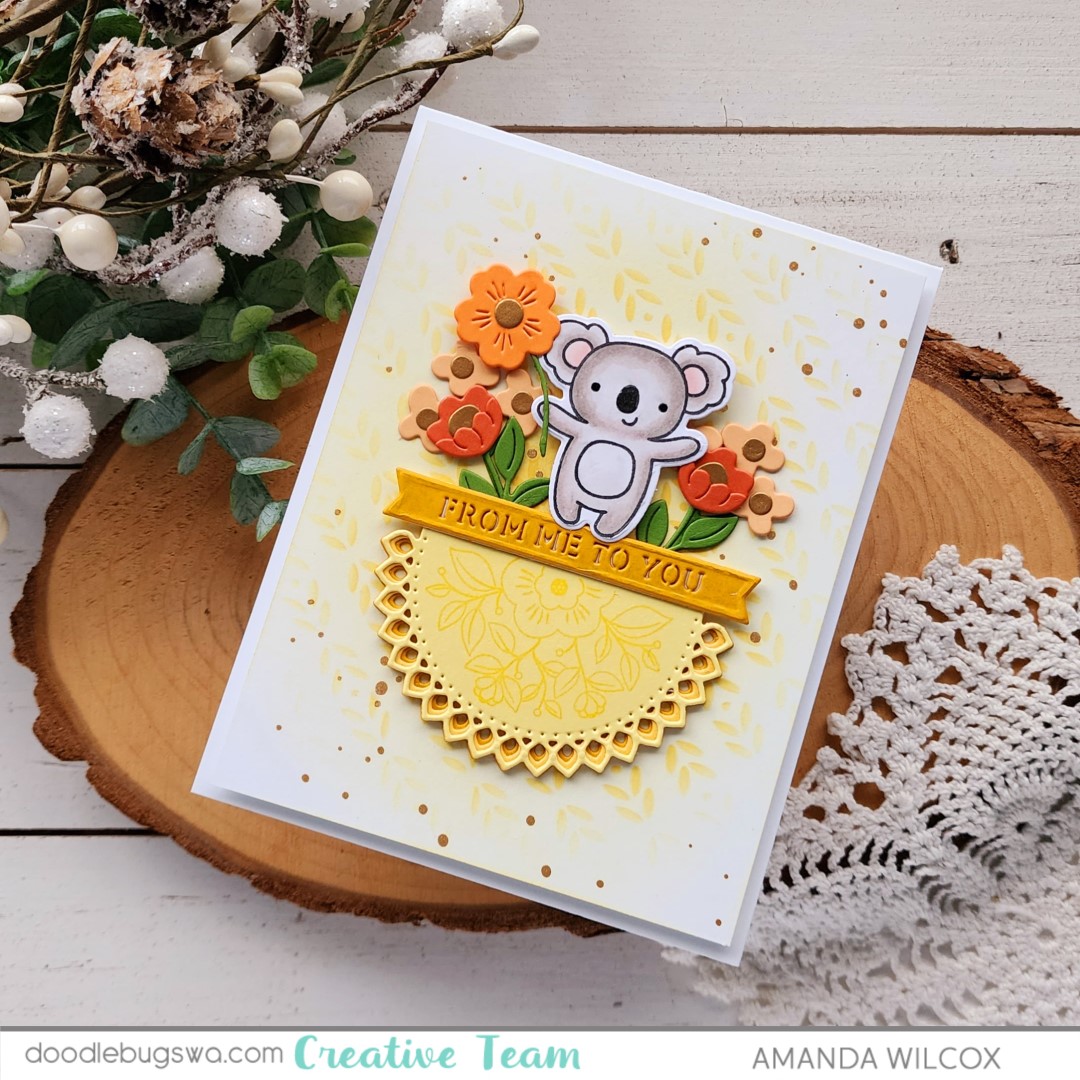
Doodlebugs – From Me To You

Welcome everyone. I’m so glad you’re here. It’s Mix It Up Monday on the Doodlebugs blog and we’re playing with Spellbinders and Pretty Pink Posh today. I decided to NOT stitch on some glorious stitching dies to show you that you don’t always have to, even if it feels like it.

I tend to be an all or nothing girl and when a die set comes with options, I feel like I need to use them all or I’m not doing something right. However, the stitching portion of this Spellbinders die set is optional…as in, it’s a separate die, and today I didn’t use it. What do you think?

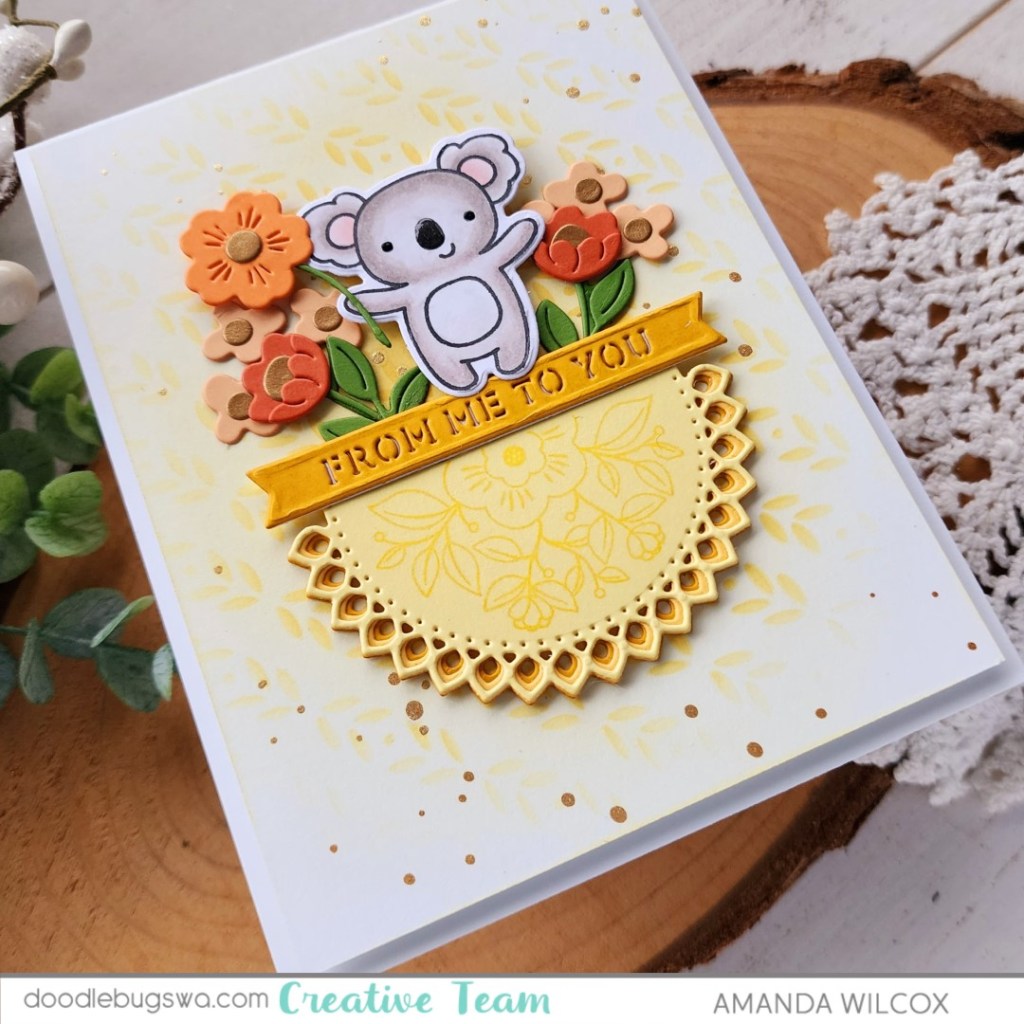
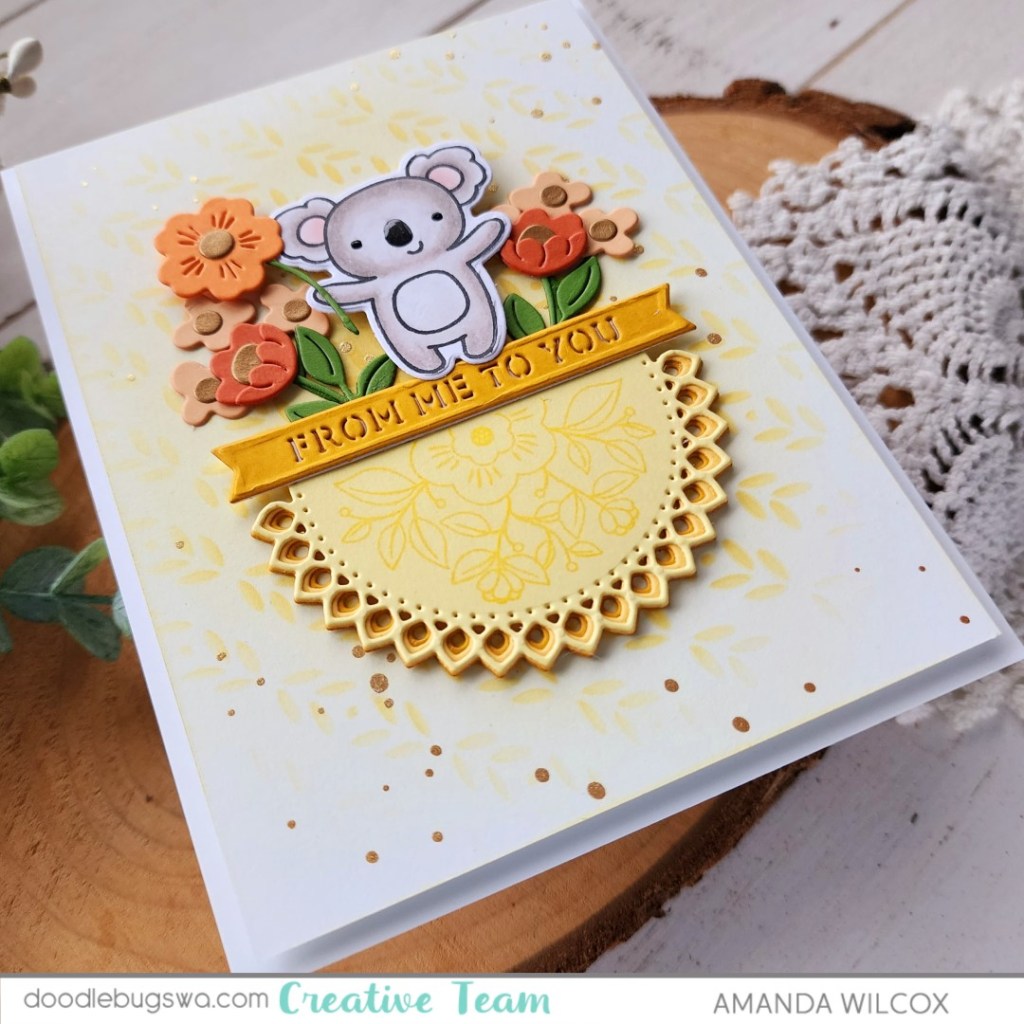
The Spellbinders die set in question is called Kaleidoscope Arch and it happens to have a coordinating stamp set too. Today, instead of cutting the stitching holes, I added some detail with tone-on-tone stamping using the floral image in the stamp set. I cut all the layers from yellow cardstocks in my stash and glued them together with liquid glue, including the sentiment banner. Then I popped the whole thing in my MISTI and stamped the floral image with yellow ink.

Next, I chose orange cardstocks and a good green to die cut all of my floral pieces. These are also included in the Kaleidoscope Arch dies. I used gold metallic paper for the flower centers and adhered everything together with liquid glue. You all know I love my critters, so I went digging and found this sweet koala from Pretty Pink Posh Crafty Critters to color and die cut. When I was playing with placement for the florals and koala I thought it would be cut if he help a flower so I cut another one and glued everything in place…again, liquid glue. I really value that wiggle room time you get with that versus a tape runner that adheres immediately.

For my background, I took a piece of white cardstock cut to 4×5.25 inches and layered the Pretty Pink Posh Deco Leaves stencil at an angle. I blended No. 2 Pencil ink with a blending brush, removed the stencil and added more of the same color focusing on the center and fading out. Then I splattered the panel with gold watercolor and let it dry.

Okay, now that everything is dry we can layer everything together. I added foam tape to the stenciled panel and popped it up on a white card base. Then I added foam squares behind the koala and the flower he is holding but that’s all. Everything else has layers behind so this little bit of foam keeps everything the same height. I removed foam release paper and added liquid glue to everything else and popped my focal image in the center of the card front.

For finishing touches I added Sakura black glaze pen to the koala’s eyes and glossy accents to his nose. Isn’t it the cutest!?!

Products used:
Spellbinders Kaleidoscope Arch stamps and dies
Pretty Pink Posh Crafty Critters stamps and dies
Pretty Pink Posh Deco Leaves stencil
Lawn Fawn No. 2 Pencil ink
Blending brush
Gold watercolor
Foam squares
Glossy accents
Liquid glue
Sakura black glaze pen

I appreciate you sharing your time with me. Have a fabulous day!

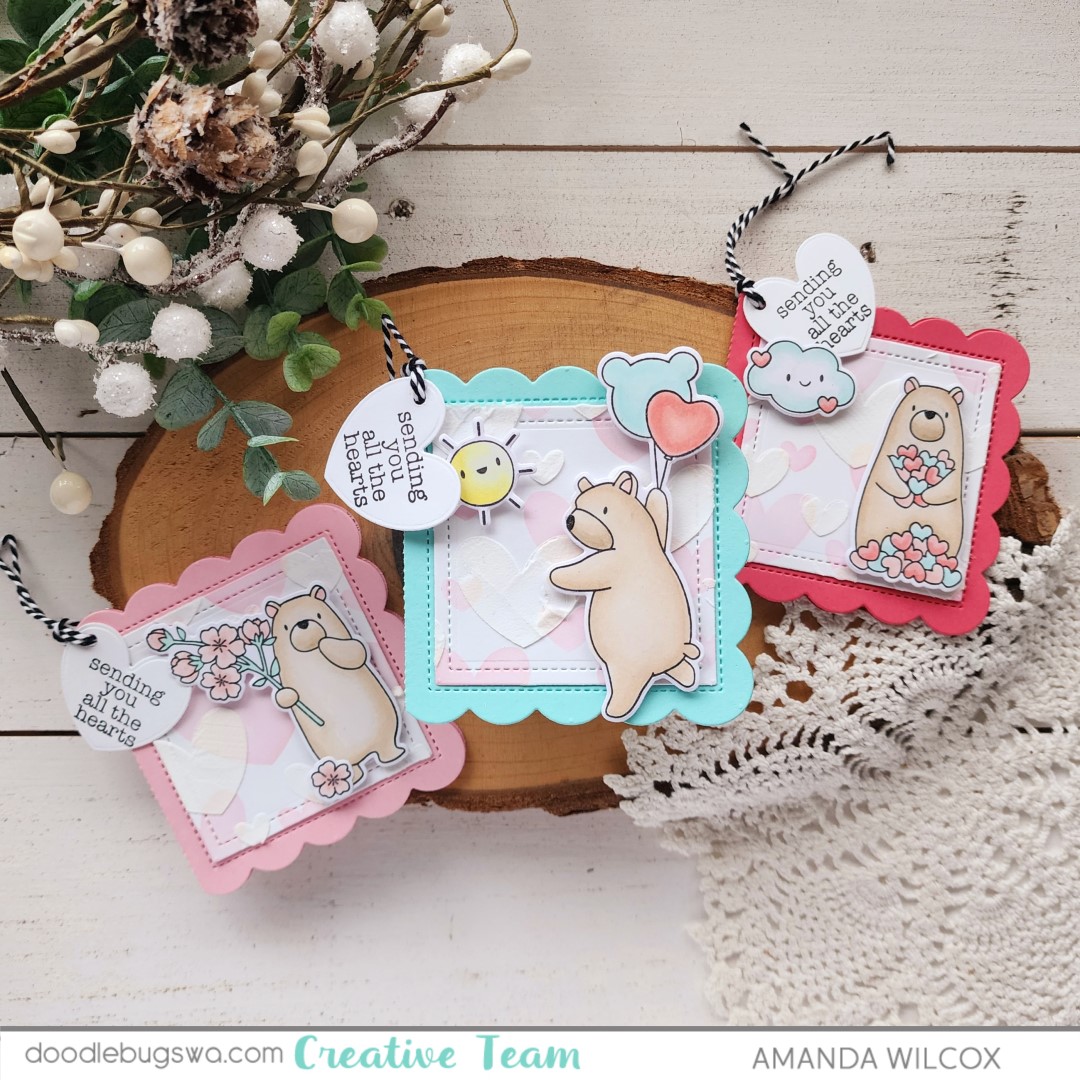
Doodlebugs – Mini Valentines Note Cards Make Great Tags

Welcome to Mix it up Monday for the Doodlebugs blog. Once again, we are mixing our favorite companies together on the same projects. Today we’ve got awesome Pretty Pink Posh stencils and dies with a splash of Mama Elephant stamps and dies. I made a trio of mini note cards and turned them into tags. These are fabulous for tying to a goodie bag of treats or to the handle of a gift bag too!

I started this project by stamping and coloring all of the images from Mama Elephant Beary Good Day with my copic markers. I used the coordinating dies to cut the images out and set them aside to cut my note card pieces.

I chose the Pretty Pink Posh Mini Scallop Card for today’s project. I cut the inside square panel from white cardstock three times. Then I took the Pretty Pink Posh Layered Hearts stencil and inked one layer with Lawn Fawn ballet slippers ink and the second layer I spread texture paste through and let it sit to dry. I cut the actual scalloped card from a few different cardstocks in my stash while those were drying.

I used liquid glue to adhere the stenciled panel to the front of each card and then popped the images up on each one with foam squares. Instead of fitting a sentiment on each card somewhere, I chose my favorite one and stamped it on a heart from Mama Elephant’s Heart Pocket dies.

I punched a whole in each card and heart and threaded them together with some baker’s twine. Then I used a Wink of Stella glitter brush pen to add some shimmer to something on each card – flower centers, certain tiny hearts, the sun, a balloon – you get the idea. Then I also added glossy accents to the bear’s noses on each card.

I’m super excited to be gearing up for Valentine’s Day already. I absolutely love giving valentines to everyone I know! It’s so fun.

Products used:
Mama Elephant Heart Pocket dies
Mama Elephant Beary Good Day stamps and dies
Pretty Pink Posh Mini Scallop Card dies
Pretty Pink Posh Layered Hearts stencils
Blending brush
Lawn Fawn ballet slippers ink
Liquid glue
Glossy accents
Texture paste
Wink of Stella glitter brush pen
Stencil pal

I appreciate you sharing your time with me. Have a fabulous day!