Pretty Pink Posh – September Release Instagram Hop

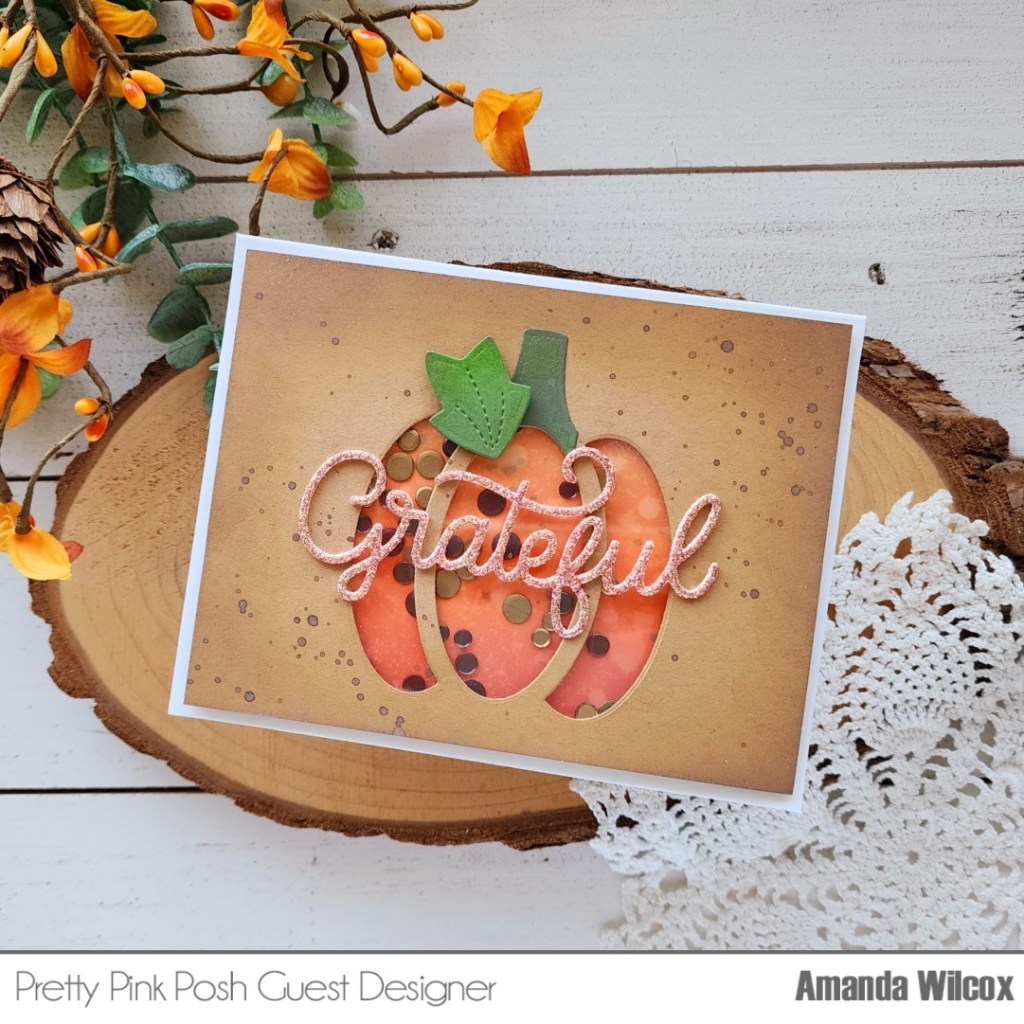
Hey friends! Just popping in today to let you know that I’m participating in the Pretty Pink Posh Instagram Hop today! I have this gorgeous stenciled card to share and you have chances to win one of three $30 gift cards to the PPP shop if you head over, comment and hop along too!

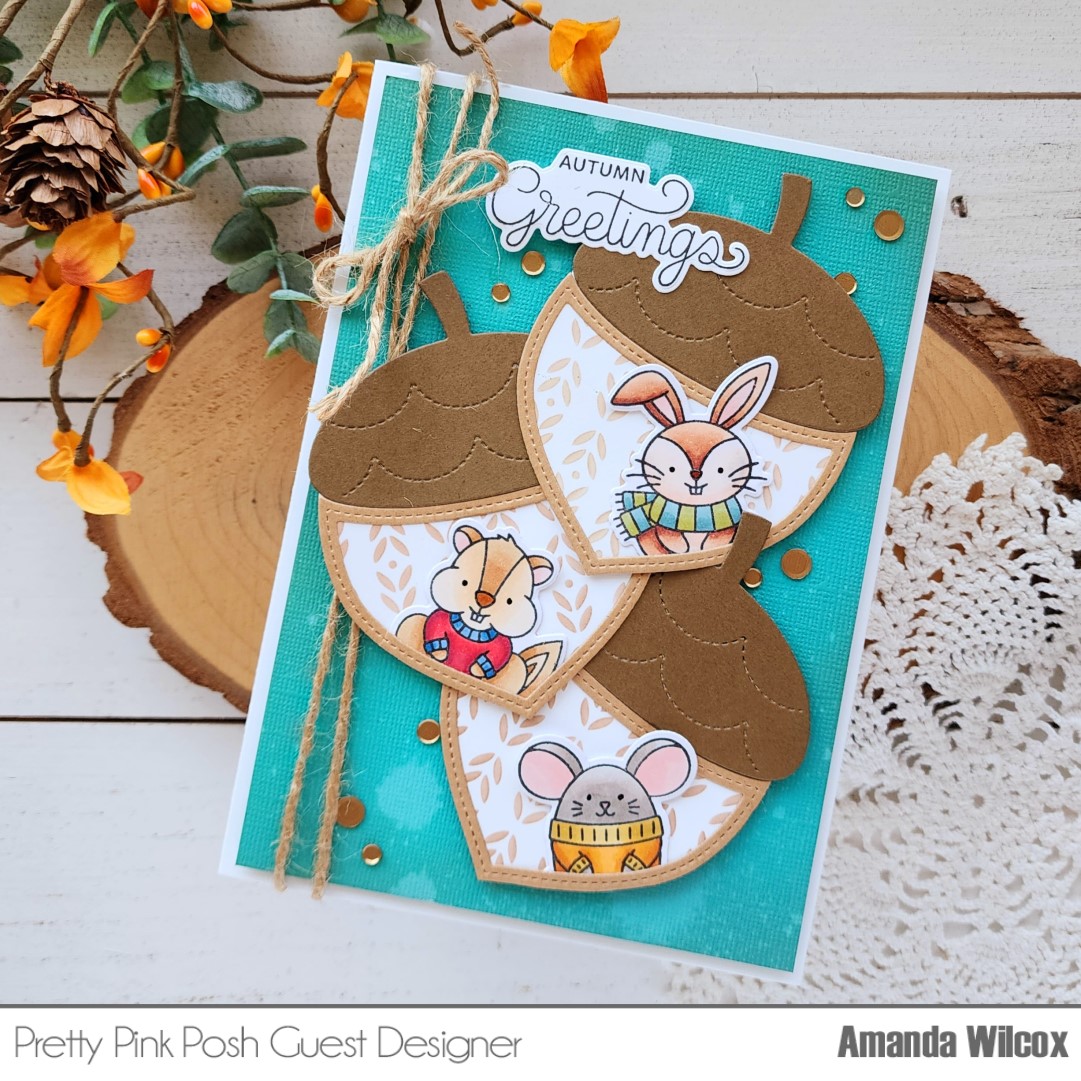
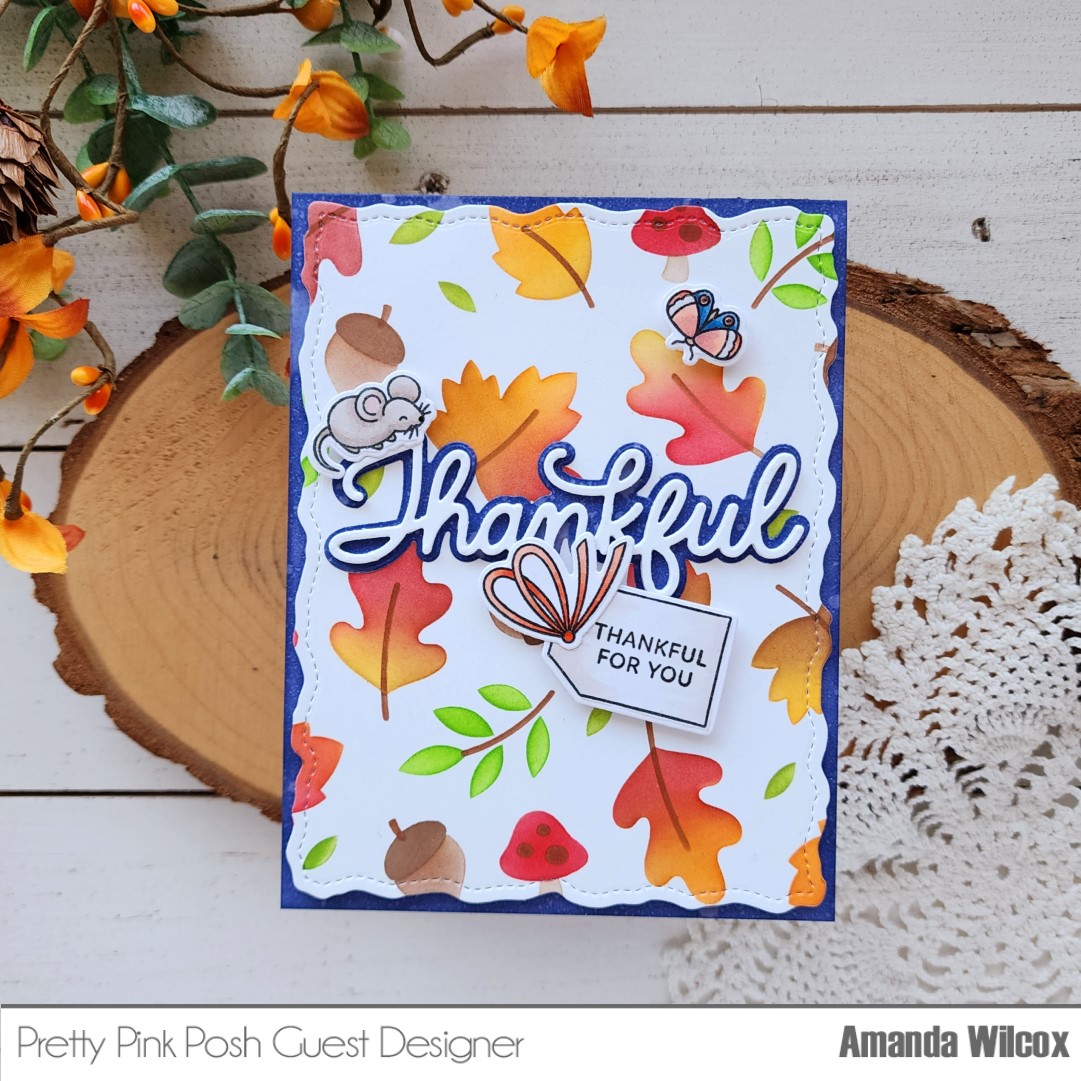
This was a simple card to create but I’m still in awe of how pretty it turned out and how easy the new Layered Woodland stencils are to use! I used all Lawn Fawn dye inks with blending brushes, then die cut my panel with the largest Stitched Torn Rectangle die.

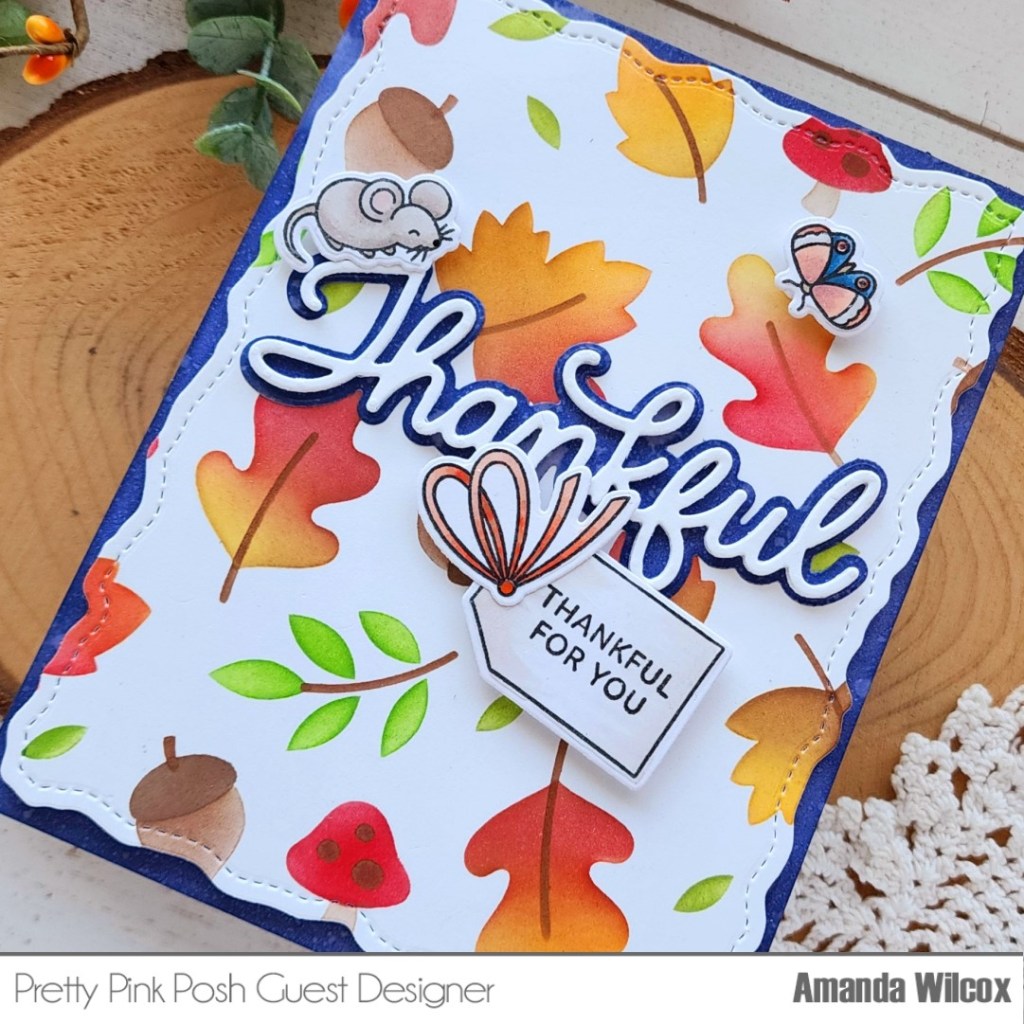
I cut the new Thankful Script word from white cardstock 4 times and glued them together, then cut the shadow once from white cardstock but I inked it with chipped sapphire distress oxide ink before adhering the word to it. I also inked my card base with the same to tie them in together.

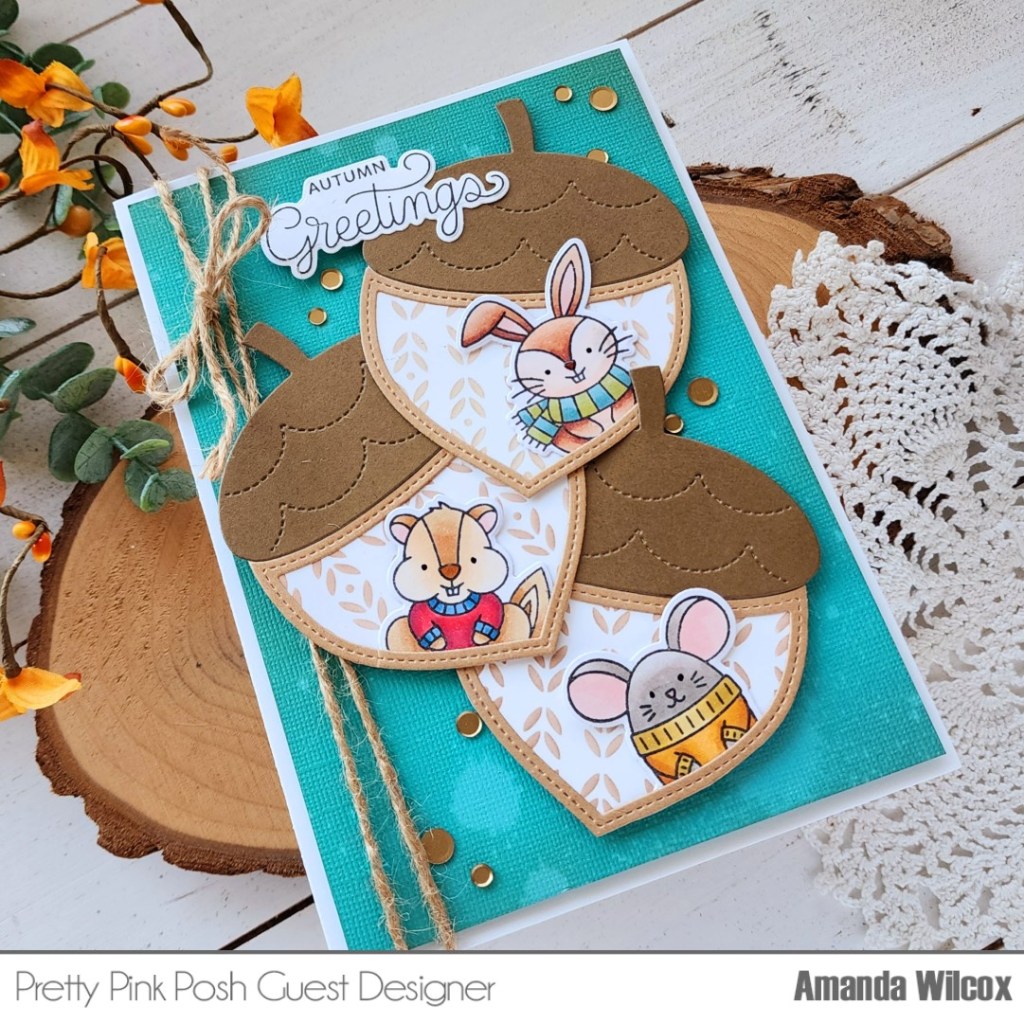
I popped the stenciled panel up with foam tape on my card base and use liquid glue to adhere my sentiment. Then I pulled some images from the new Fall Jar stamp set to color and add to the design.

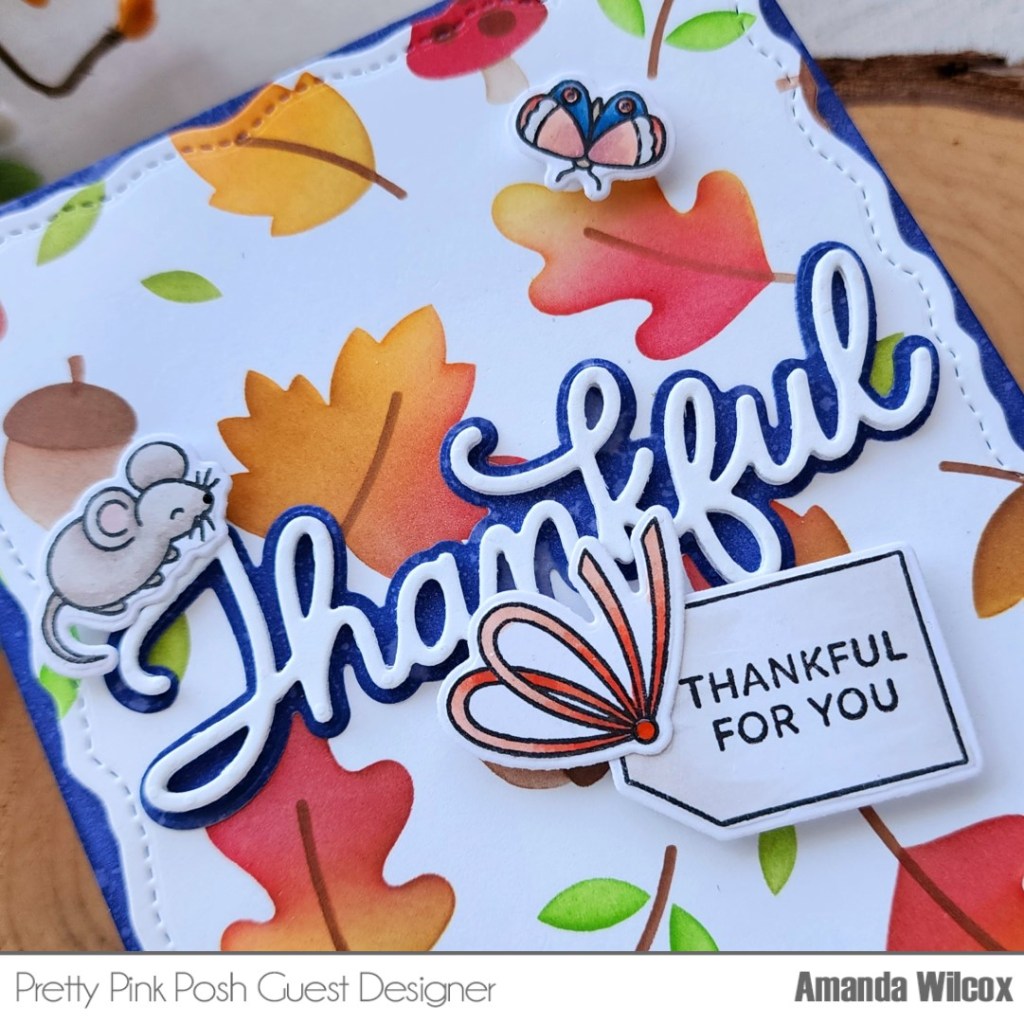
For finishing touches I added black glaze pen to the mouse’s nose, then Touch of Gloss to the center of the bow and parts of the moth (or butterfly, whichever you prefer).

I had so much fun pulling this card together, especially adding that mouse to the top of my sentiment. Just makes me smile every time I look at him.

Products used:
Fall Jar stamps and dies
Layered Woodland stencils
Stitched Torn Rectangles dies
Thankful Script dies
Distress Oxide Ink – chipped sapphire
Lawn Fawn dye inks
Blending brushes
Foam tape and squares
Liquid glue

Remember to head to Instagram to comment and hop for a chance to win a $30 gift card to the PPP shop!

I appreciate you sharing your time with me. Have a fabulous day!

Pretty Pink Posh – Acorns and Cozy Fall Critters

Welcome everyone. I’m excited to be on the Pretty Pink Posh blog sharing a card I created using the new Acorn Shaker dies and those adorable Cozy Fall Critters. Today’s card is a 5×7 card so that I could fit all three acorns on it without cutting too much off the edge. If you don’t like making large cards, you could reflect the design with only two acorns on a standard A2 card and it would be cute as can be!

I started with the acorns first. I inked up a couple white panels with the new Deco Leaves stencil, then traced the acorn shaker die and cut them out. Then I cut the pieces for my acorns with kraft and brown cardstock. Next, I stamped and colored critters from Cozy Fall Critters, then cut them out with the coordinating dies. I used liquid glue to assemble the layers together and then trimmed off any excess from the stenciled panels and my critters.

I created a white 5×7 inch card base and also trimmed a piece of teal cardstock to 4.75×6.75 inches. I inked the edges with peacock feathers and gathered twigs distress oxide inks and splattered the panel with water. After blotting it dry, I added foam tape to the back and adhered it to my card base.

Next, I positioned my acorns on the card front and used liquid glue to adhere them to each other. After letting it dry for a minute, I flipped them over and added foam tape to the back of them. I tied some jute twine around the left side of my card and then placed my acorns on the front.

Last, I stamped a sentiment from Autumn Pumpkins and die cut it using the coordinating die. Then I added a scattering of espresso confetti bits around the design. A few other finishing touches were adding black glaze pen to the critter’s eyes and glossy accents their noses.

Products used today:
Cozy Fall Critters stamps and dies
Acorn Shaker dies
Autumn Pumpkins stamps and dies
Deco Leaves stencil
Espresso Confetti Bits
Distress Oxide Ink – gathered twigs and peacock feathers
Foam tape
Liquid glue
Glossy accents

I appreciate you sharing your time with me. Have a fabulous day!

Doodlebugs – Coloring Your Die Cuts with Ink Blending Fall Card

Hi there! I’m on the Doodlebugs blog for Mix-it-up-Monday. Today we’ve got Spellbinders dies with Pretty Pink Posh stamps and dies. But the big thing I want to touch on today is a fun and easy way to add gorgeous color to your die cuts…ink blending before you cut!

Today I created a shaped card using the Spellbinders Envelope of Wonder and Autumn Wonder die sets. The envelope base comes in the Envelope of Wonder set, then there are add on sets for autumn, Halloween and Christmas so far. You can snag a bundle of all the sets to save some money at Doodlebugs if you’re quick. This is a really fun set and I’m sure once you get the first one, you’ll be back for more.

To start today, I cut the envelope base using kraft cardstock and tear tape to adhere all the pieces. I set that aside and took a piece of white cardstock and an array of fall coloring distress oxide inks. I just covered the whole panel with no rhyme or reason and not a lot of blending between colors either. I started light adding blobs here and there, working my way to my darkest. I used colors like mustard seed, crackling campfire, gathered twigs and forest moss. I spritzed the panel with a distress sprayer and blotted it dry. Then I used a heat tool to completely dry the panel before die cutting all of my Autumn Wonder elements. I have a stack of A2 white cardstock panels ready to go at all times and I’ll be honest that I went back and blended a second panel of just leaves, plus a white panel for the mushroom stems and such to fill my envelope to my liking.

Once those were all cut out, I stamped a sweet squirrel from Pretty Pink Posh Cozy Fall Critters and colored him with copic markers. Then I used the coordinating die to cut him out. I also die cut Pretty Pink Posh Give Thanks Script from brown glitter paper.

I arranged everything in my envelope and used press ‘n seal to pick it all up, added liquid glue and carefully slid it back in the envelope. Last, I used liquid glue to add my sentiment, big acorn and mushroom to the front. Then I popped the squirrel and his small acorn up with foam squares.

For finishing touches I added black glaze pen to the squirrel’s eyes and glossy accents to his nose. I just can’t resist those little touches, especially with critters!

My daughter promptly stole this card from me so it won’t be going in the mail but I think I’ll definitely be trying out some of those other add on sets to the Envelope of Wonder for Halloween and, of course, Christmas too! They’re too cute!

Products used:
Spellbinders Envelope of Wonder dies
Spellbinders Autumn Wonder dies
Pretty Pink Posh Cozy Fall Critters stamps and dies
Pretty Pink Posh Give Thanks Script dies
Distress Oxide Ink – mustard seed, gathered twigs, crackling campfire, aged mahogany, forest moss, tea dye
Liquid glue
Foam squares
Tear tape
Sakura Glaze Pen – black
Glossy Accents

I appreciate you sharing your time with me. Have a fabulous day!

Pretty Pink Posh – September Release Blog Hop Day 3

Hi there! I’m so excited to be joining the Pretty Pink Posh September Release Hop for day 3. If you missed the first 2 days, be sure to head to the PPP hop and catch up on all that inspiration and increase your chances of winning one of those $30 gift cards too!

Today I have a fun shaker card to share with you featuring the new Pumpkin Shaker dies and last year’s Grateful Script die for a beautiful sentiment.

I started by trimming a piece of kraft cardstock to 4×5.25 inches and then used the part of the pumpkin shaker die set that just cuts the windows. I inked the edges of the panel with gathered twigs distress oxide ink and splattered it with ground espresso. I cut the leaf and stem from green cardstock and inked them with rustic wilderness ink for dimension, then glued them to the kraft panel, popping up the leaf over the stem. Next, I lined the back of my panel with acetate and then foam tape, avoiding my shaker window.

I took a piece of white cardstock smaller than my kraft panel and inked it with ripe persimmon and spiced marmalade distress oxide ink. I splattered it with water and blotted it dry. Then I sprinkled some matte gold and espresso confetti bits on the panel and sealed them up with the pumpkin window panel.

I used liquid glue to adhere my shaker panel to white card base. Then, I pulled out the grateful script die that released last year and cut it out with Spellbinders peach die cutting glitter foam. I adhered this with liquid glue as well.

Then my card is all finished. I love how it turned out. Elegant and pretty, perfect for fall.

Products used:
Pumpkin Shaker dies
Grateful Script die
Confetti Bits – matte gold and espresso
Distress Oxide Ink – ripe persimmon, spiced marmalade, rustic wilderness, gathered twigs, ground espresso
Foam tape and squares
Liquid glue
Spellbinders die cutting foam – peach

Don’t forget to hop along and comment as you go. You have the chance to win one of three $30 gift cards to the Pretty Pink Posh shop!

BLOG HOP DAY 3

Pretty Pink Posh blog 
Gemma Campbell
Lynn Put
Dana Kirby
Rebecca Keppel
Melody Rupple
Carly Minner
Amanda Wilcox

Comments must be left by 11:59 PM PST on 9/19/2023. Winners will be announced on the PPP blog.

Doodlebugs – Spooky Scene with Mama Elephant and Pretty Pink Posh

Hey friends! I’m on the Doodlebugs blog today creating a fun spooky scene with Mama Elephant and Pretty Pink Posh stamps and dies. I had so much fun coloring and inking and I just love how this turned out. It’s so fun! Also, fall crafting is my favorite so that might have something to do with it too.

I started this card by deciding my layout on the Mama Elephant Stardust Trail cover plate and then stamped out all the images. I colored them with copic markers and used the coordinating dies to cut them out. The images are from a combo of Mama Elephant Hey Pumpkin and Pretty Pink Posh Halloween Signs.

Then I die cut the Stardust Trail cover plate from white cardstock and used blending brushes with Lawn Fawn dye inks to add my color. Then I used gold watercolor and painted a piece of white cardstock that would show behind the star cutouts. I used liquid glue to adhere them together and then to a card base.

Then I added foam squares to pop all my images up with foam squares. For finishing touches I added glossy accents to the kitty’s nose and black glaze pen to his eyes. I needed more sparkle so I also added stardust Stickles to the bubbling cauldron.

I think these spooky characters are just the cutest and can’t wait for Halloween to come. We’re already decorating at our house because we love it so much! That way we get two months of spooky before things switch to just fall and turkeys. Do you decorate for Halloween?

Products used:
Mama Elephant Hey Pumpkin stamps and dies
Mama Elephant Stardust Trail cover plate
Pretty Pink Posh Halloween Signs stamps and dies
Lawn Fawn Ink – artichoke, grape soda, deep sea, sunflower
Blending brushes
Gold watercolor
Liquid glue
Foam squares
Stickles – stardust
Glossy accents
Sakura Glaze Pen – black

I appreciate you sharing your time with me. Have a fabulous day! 

Doodlebugs – Christmas Mix and Match Fun

Hi there! Have you gotten any early start on holiday crafting this year? I feel like it really became a thing with companies doing Christmas in July releases which helped my motivation. I also noticed that Christmas crafting now compared to later on, my color choices are brighter and different which is sort of cool and fun!

I recently picked up some new goodies from Doodlebugs with the intent of mixing them together for some holiday cards. This was the first result from that. I started by playing with the Spellbinders Christmas Bird Poinsettia die cutting pieces and arranging them different ways. I used liquid glue to adhere everything except I added the poinsettia with foam squares for some dimension.

Then I inked up a panel with the Pretty Pink Posh Argyle stencil set using mermaid and jalapeno Lawn Fawn inks. After stenciling, I glued the panel to a top folding card base and then glued my foliage down on that.

Next, I heat embossed and die cut a sentiment from Mama Elephant’s Everything Nice sentiment set. I love these bold sentiments and have all of the collections. They come in handy and are a fabulous font! I added the sentiment with foam squares and liquid glue.

Since my foliage has some pretty gold shiny pieces, I didn’t add any finishing touches. They were kind of built in when I added that shiny-ness everywhere as I went along.

Products used:
Spellbinders Christmas Bird Poinsettia dies
Pretty Pink Posh Argyle stencils
Mama Elephant Everything Nice stamps and dies
Lawn Fawn ink – jalapeno and mermaid
Blending brushes
Liquid glue
Foam squares
Embossing powder
Anti-static powder bag
VersaMark ink

I appreciate you sharing your time with me. Have a fabulous day!

Doodlebugs – Just Wanted to Say…

Happy Monday everyone! I’m on the Doodlebugs blog today sharing a fun combo with Spellbinders and Pretty Pink Posh, throwing in one of my favorite Mama Elephant sentiment sets too!

Sometimes it’s crazy making and sometimes it’s fun when you have an idea and the creation of said idea does not turn out how it was going in your head. That’s exactly what happened here but I still love it and really had fun creating this card!

Let’s start by die cutting a bunch of the Spellbinders Modern Ovals – I chose the fourth one in from the smallest. I taped three of them to my work surface and ink blended the Pretty Pink Posh Trellis stencil using Lawn Fawn guava ink and a blending brush.

I arranged them on my card front, originally planning to pop them all up, along with die cutting my sentiment. But as I started to play, I liked the idea of the sentiment on one of the ovals – it fits perfectly – and only popping that one up for a little added interest to that specific spot. So I glued everything down and popped that one up. Then I trimmed off the excess with my scissors.

Next, I stamped and colored images from Pretty Pink Posh Crafty Critters with my copic markers. I used the coordinating dies to cut them out and added them above the sentiment with foam squares.

Last, I decided to stamp the mini sentiment intro to the blank oval on the top for fun. I was quite smitten with myself when I thought of that. It’s so fun! And finally, for finishing touches I just added black glaze pen to the mouse’s eyes and glossy accents to his nose and parts of the crafty supplies.

Products used:
Pretty Pink Posh Crafty Critters stamps and dies
Pretty Pink Posh Trellis stencil
Spellbinders Modern Ovals dies
Mama Elephant So Appreciate stamps
Embossing Ink
Embossing Powder – white
Foam squares
Lawn Fawn Ink – guava
Blending brush
Glossy accents
Sakura Glaze Pen – black

I appreciate you sharing your time with me. Have a fabulous day!

Doodlebugs – Mini Note Card Two Ways, Blingy or Simple

Welcome back everyone! I’m so glad you stopped by today. I’m on the Doodlebugs blog with a pair of mini note cards in two variations. Both are super cute but maybe one is more comfortable or to your bling level liking. Enjoy!

First up, I went all things extra and hot foiled my sentiment, plus glitz gelled my stencil! Shiny and glittery and fabulous! This Pretty Pink Posh mini note die set is super fun and I’m going to be making a ton of these over time. They’re fun for purses, lunch boxes and RAKs at the store too!

I used the adorable Spellbinders Sweet Birdie die to adorn my card front and I love it! I used fun colored cardstock from my stash and liquid glue to assemble him. Then, after hot foiling my Pretty Pink Posh Smile sentiment, I die cut it, gluing and additional two layers to the back so it had a little dimension. The bird is popped up with a foam square so it stands out too.

After creating that first card, I thought about people who don’t hot foil or like to get messy like I do and wanted to create and equally adorable, but simpler version of the same card. So here we are! I used a blending brush and darker teal ink for my stenciling this time.

Plus I used the regular die and shadow for my sentiment instead of the hot foil plate and shadow die. I did add two extra layers to the shadow on this sentiment just like the first one and popped my birdie up with a foam square again too.

A little side-by-side action for you to see the differences at the same time. The impact is definitely more in person, with the light hitting the glitz gel and foiling but I really love both cards!

What’s your vote?

Products used today:
Spellbinders Sweet Birdie dies
Spellbinders Hot Foil – moondust
Pretty Pink Posh Mini Scallop Card dies
Pretty Pink Posh Large Smile hot foil plate and dies
Pretty Pink Posh Starburst stencil
Liquid glue
Foam squares
Blending brush
Lawn Fawn ink – mermaid
Thermoweb Glitz Gel – iridescent

I appreciate you sharing your time with me. Have a fabulous day!

Pretty Pink Posh | Spellbinders – Love You Berry Much

Hi there! I’m popping in late today to share a fun card I created this weekend with Spellbinders dies and embossing folder plus Pretty Pink Posh stamps and stencil! I really had a blast creating this card and I think it’s good to share what really happened behind the scenes…

First, here’s my completed project. Completely different than my original vision. First, I stamped and colored my images from Pretty Pink Posh Fresh Berries. Then I used the coordinating dies to cut them out. Next, I pulled out an envelope die because my berries were going to spill out of it. This 100% did not work! I was super frustrated and tried really hard to force it.

After walking away, I came back and started playing with the images in different arrangements. With a fresh mind and a blank slate, erasing all preexisting hopes for my envelope idea, I came up with the final arrangement you see.

I used the Spellbinders Tiny Dots embossing folder on a 4×5.25 inch white panel and popped it up with foam tape. Then I cut two Spellbinders Four Petal Labels from two different blue cardstocks. I used the Pretty Pink Posh Starburst stencil on the light blue with Lawn Fawn Blue Jay ink. After gluing the labels together I splattered them with water and then white paint for texture.

Using the images as a guide I stamped the first half of my sentiment in Blue Jay ink and then popped the berries and second part of the sentiment up with foam squares. I came in with a little Touch of Gloss on the flower centers and left it at that.

This card was a bit of a journey but I’m so happy with it and thing it’s so adorable!

So, reminder…don’t give up. Sometimes you have to walk away and try again later. Whether it’s a different idea or a new take on the same one, something wonderful will work out!

Products used:
Pretty Pink Posh Fresh Berries stamps and dies
Pretty Pink Posh Starburst stencil

Spellbinders Four Petal Label dies
Spellbinders Tiny Dots embossing folder
Foam tape
Touch of Gloss
Liquid glue
Lawn Fawn blue jay ink
Blending brush

I appreciate you sharing your time with me. Have a fabulous day!

Doodlebugs – Mini Note Card with Pretty Pink Posh, Mama Elephant and Spellbinders

Hi everyone! Today I’m sharing a mini note card featuring dies from Pretty Pink Posh, stamps from Mama Elephant and embossing folder and stamps from Spellbinders. This little card was so fun to create and I think they’re going to be a little addictive. They will be so fun to pop in lunch boxes or leave places for my family.

I really wanted to color this adorable image from Mama Elephant Storytime stamps, so that’s where I started…with no other plan in place. Sometimes this is the most therapeutic craft sessions. No pressure, just do something you want and if it turns into a completed project, cool. If not, you got to relax and color.

However, after I die cut this adorable image, it struck me that it might fit the Pretty Pink Posh Sweet Note card. And it did, perfectly! So I cut the base from white cardstock and the stitched square from teal. Then I added some texture to the square using the Spellbinders Tiny Dots embossing folder. The embossed panel is glued to the card with liquid glue and the image is popped up with foam squares.

Then I found this perfect sentiment in the Spellbinders I’ve Got You Covered stamp set. After I stamped it, I just trimmed it into a strip and added it with a foam strip. For finishing touches I added some white gel pen highlights, black glaze pen to open eyes and stardust Stickles to the clouds and sun. Last, I did put little dots of glossy accents on noses and the frog’s crown.

Do you give little notes to your family members? I can’t be the only one. Lol!

Products used:
Mama Elephant Storytime stamps and dies
Pretty Pink Posh Sweet Note dies
Spellbinders Tiny Dots embossing folder
Spellbinders I’ve Got You Covered stamps
Liquid glue
Foam squares and strips
Glossy accents
Stickles – stardust
Sakura Glaze pen – black

I appreciate you sharing your time with me. Have a fabulous day!