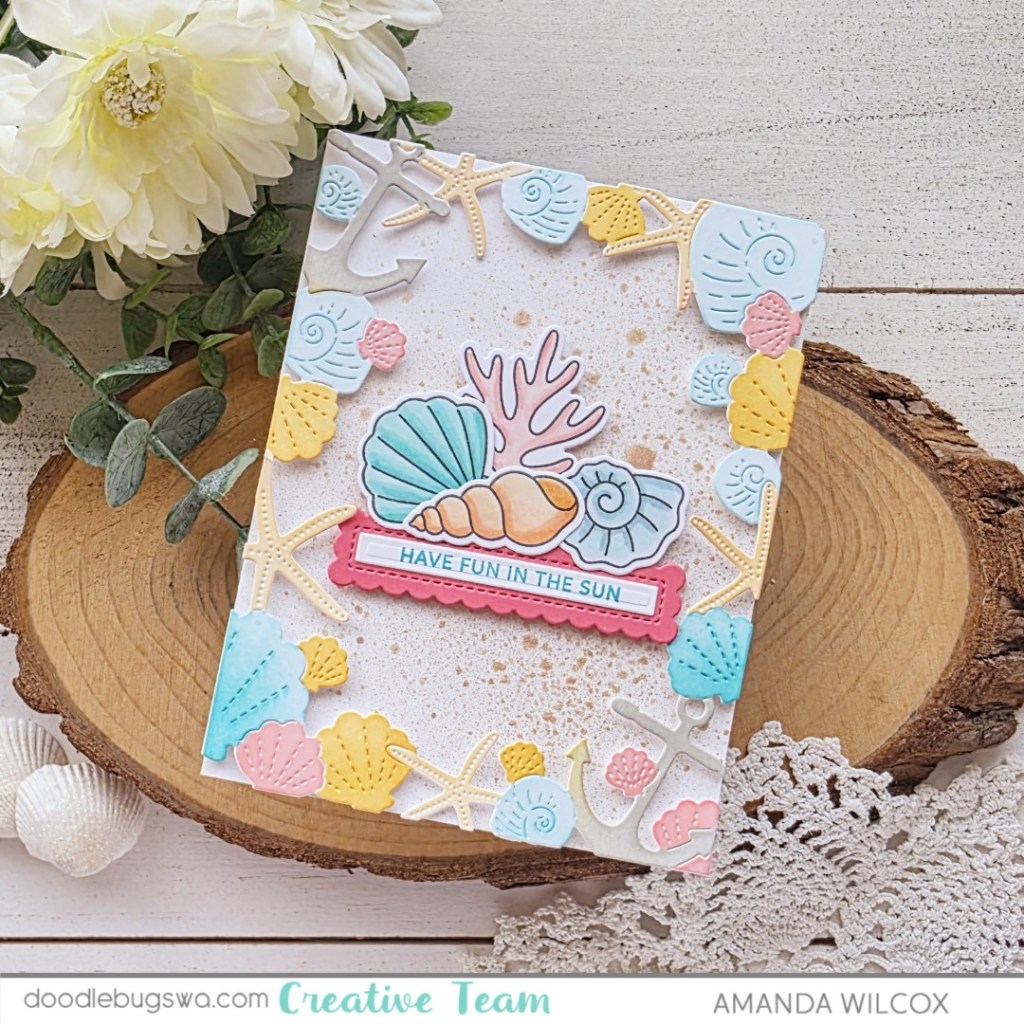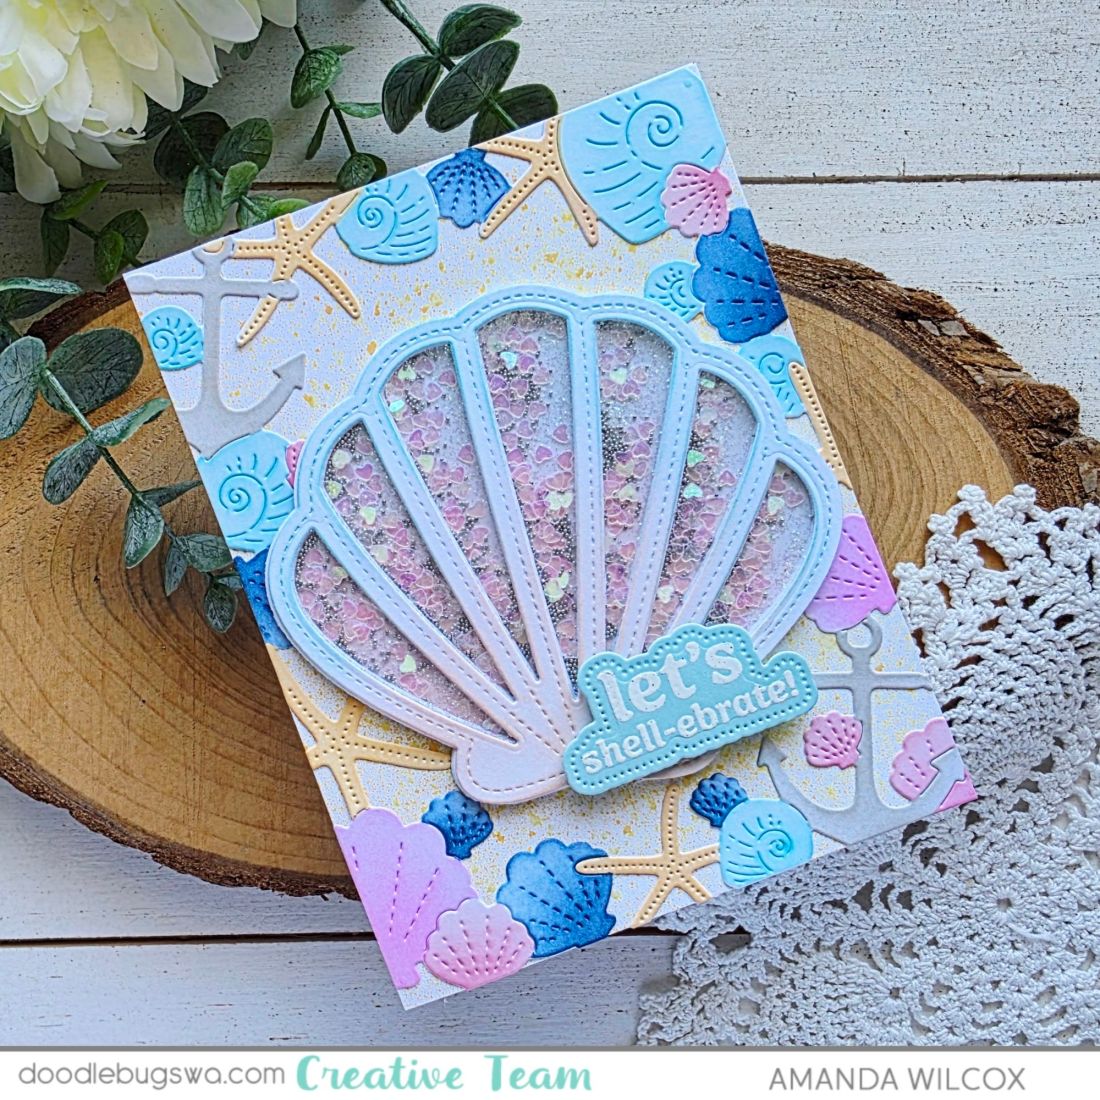
Hi friends! I’m on the Doodlebugs blog today with a really fun seashell shaker card to share with you. I mixed and matched more of the Pretty Pink Posh and Waffle Flower June beach releases to make this one. They just play so well together, it’s natural.

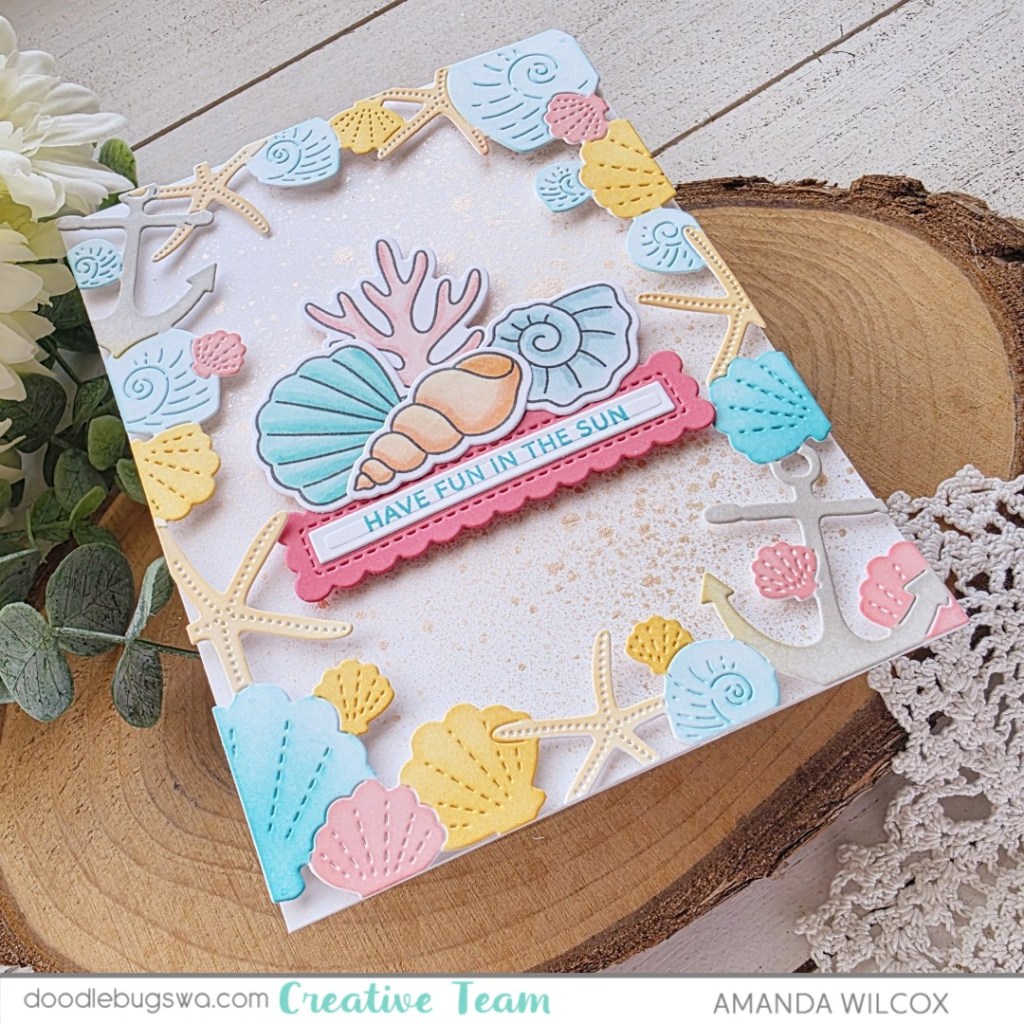
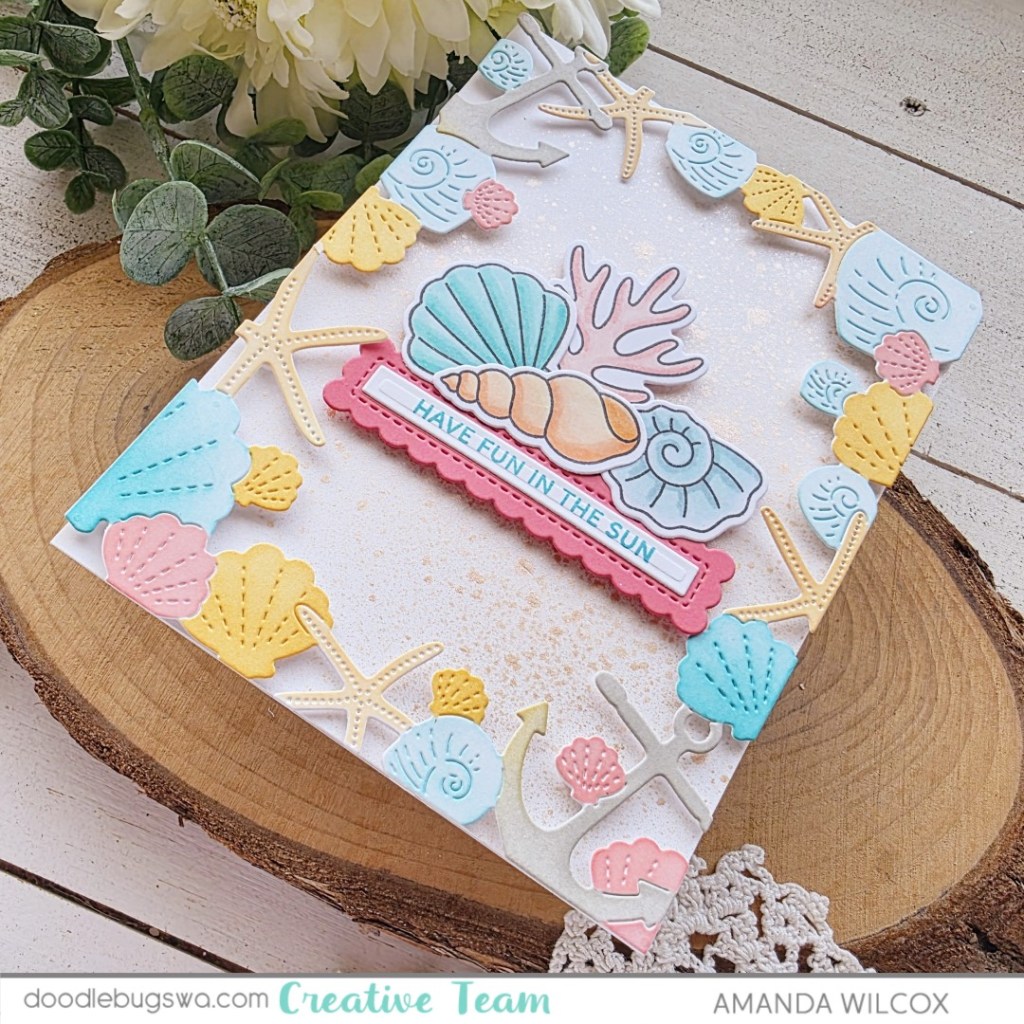
I started this card by playing with the Waffle Flower Seashell Frame die and stencil combo. I cut the frame from white cardstock and chose an assortment of Lawn Fawn dye inks to color it in, one layer at a time.
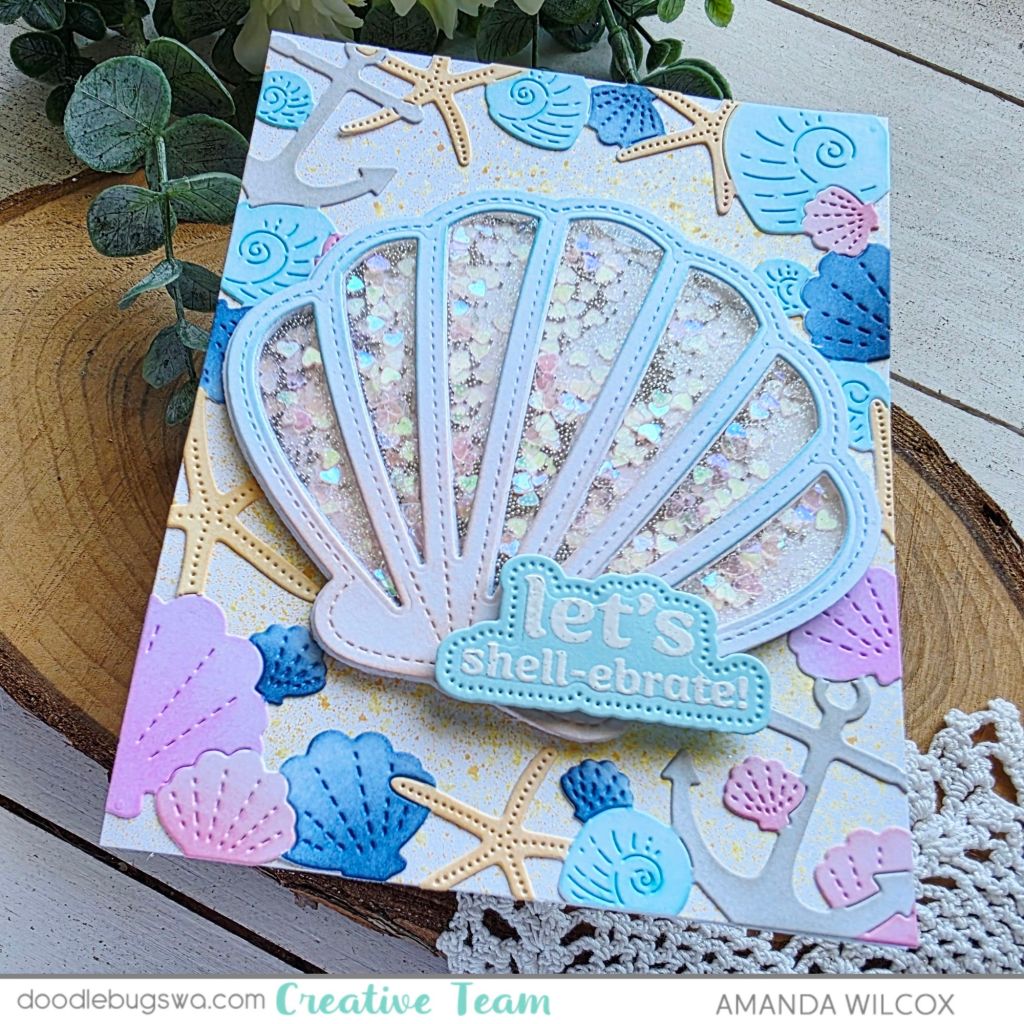
Next, I cut the Pretty Pink Posh Seashell Shaker die – solid once from white cardstock and once from acetate, then I cut the shaker frame from white cardstock 6 time. I inked one of them lightly with teal and apricot inks. I glued all of the white frames to the solid base, and glued the inked frame to the acetate. Next, I filled the shaker wells with glitter, microbeads and heart confetti before gluing the top layer in place.
While that was drying, I took a piece of white cardstock and spritzed it with Distress Oxide Spray and Distress Spritz for color and shimmer.
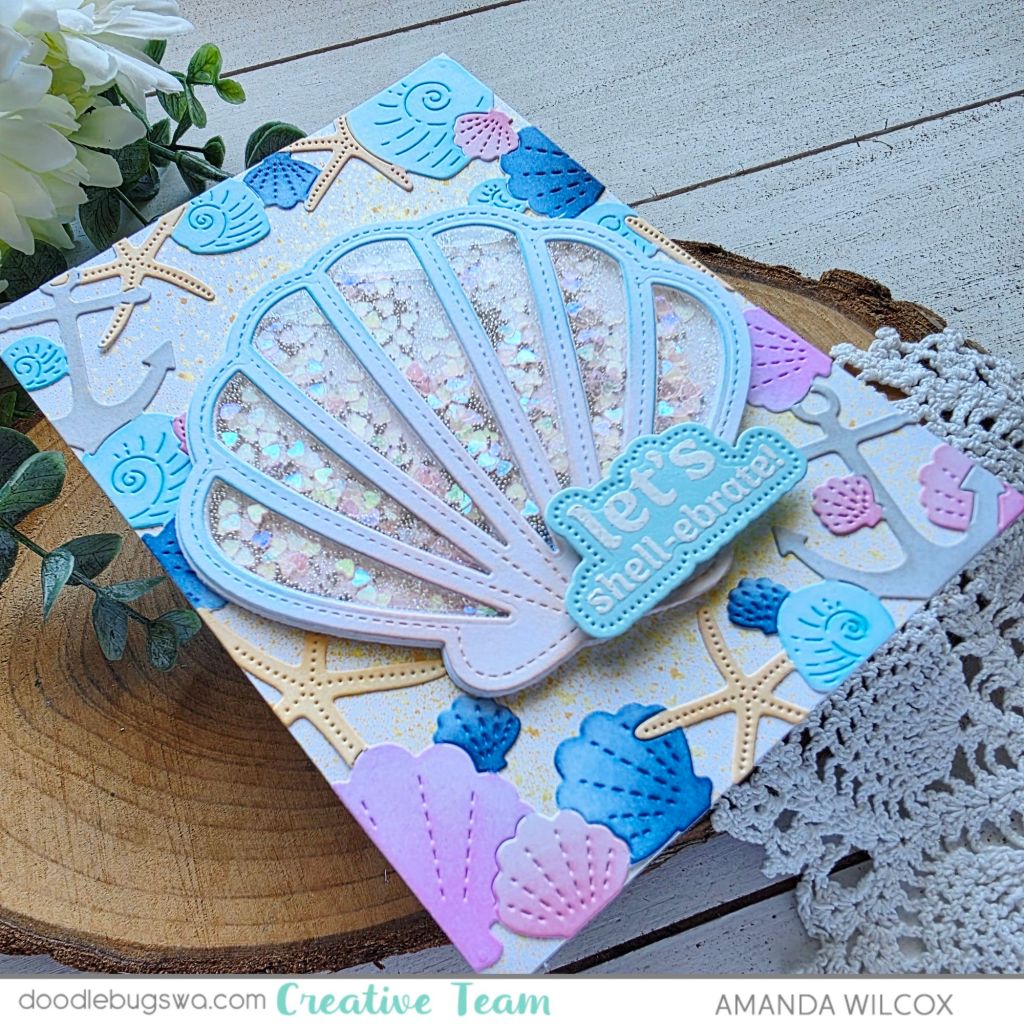
Last, I stamped and heat embossed a sentiment from the Waffle Flower Coastal Greetings stamp and die combo. Now, with all the elements finished and dry, I started assembling the layers with liquid glue, except the sentiment which I popped up with foam squares.
Products used:
Waffle Flower Coastal Greetings stamps and dies
Waffle Flower Seashell Frame die and stencil
Pretty Pink Posh Seashell Shaker dies
Lawn Fawn inks – juice box, blue jay, guava, peach fuzz, mermaid
Embossing and watermark ink
Embossing powder – white
Magic anti-static bag
Foam squares
Liquid glue
Blending brushes
I appreciate you sharing your time with me. Have a fabulous day!