Happy Mix it up Monday again everyone! I’m excited to be playing with the new interactive dies from Lawn Fawn! I love this style of interactive card. They are honestly easy to create and really fun to decorate with any theme of products!

I highly recommend watching Lawn Fawn intro videos for any and all interactive dies. Kelly Marie does a fantastic job explaining the parts and how to assemble it all. Here is the link to this one specifically – Intro to Pull ‘n Slide Surprise.

To create my card, I pulled out the Pretty Pink Posh Fresh Berries stamps and dies. I stamped a ton of berries, the basket and extra leaves. I colored everything with copic markers and used the coordinating dies to cut it all out. Next, I followed the video to create my interactive mechanism using patterned papers for fun visual interest.

With the interactive portion done, I adhered my berries and basket with liquid glue to the bottom half of the sliding part so my box of berries pops up instead of folding in half. Remember to be mindful of where you’re gluing things on this style of card.
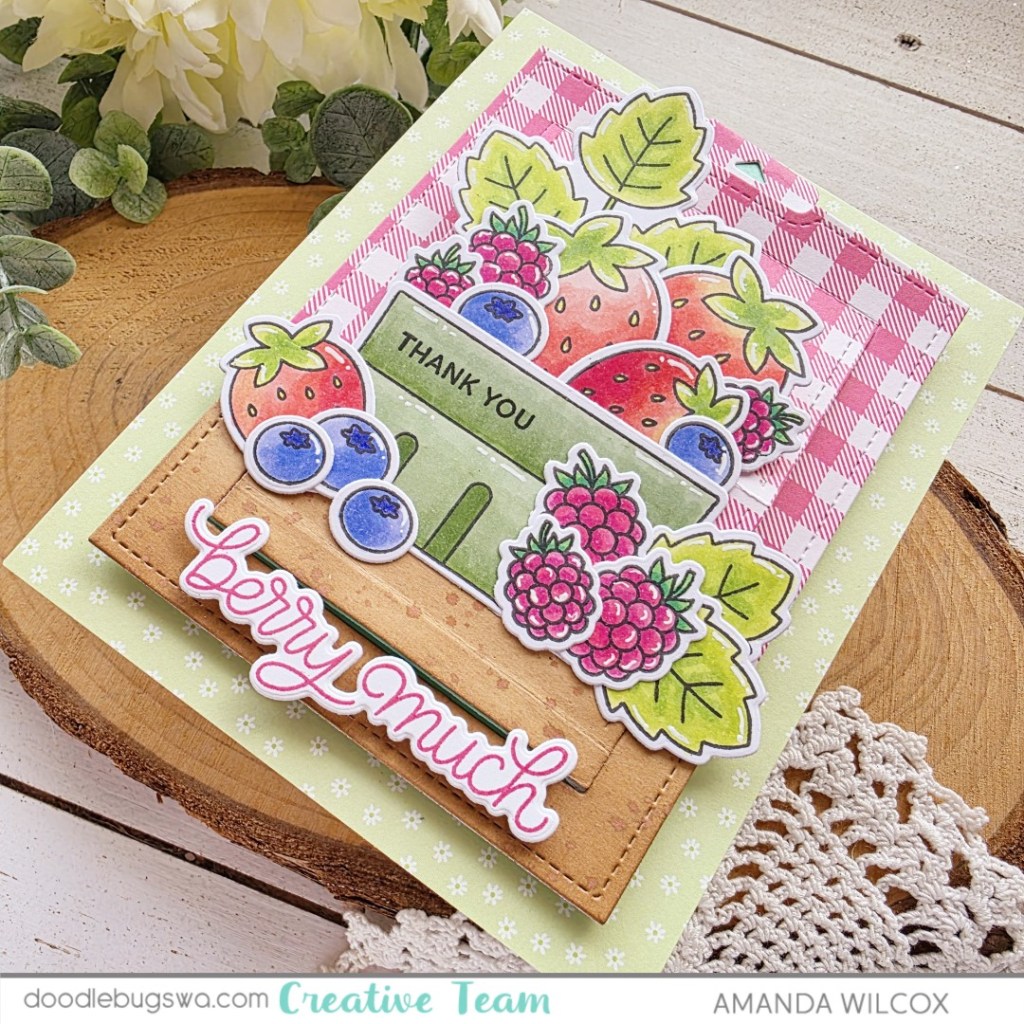
I carefully used an acrylic block to stamp the smaller portion of my sentiment on the berry basket and then stamped and die cut the other portion to pop up at the bottom of the scene. Finally, I added white gel pen highlights all over the images.
Do you like making interactive cards? It’s been a while but I really do enjoy it and hope this was my intro to getting back into the swing of things.
Products used:
Lawn Fawn Pull n’ Slide Surprise dies
Lawn Fawn patterned papers
Pretty Pink Posh Fresh Berries stamps and dies
Foam squares
Liquid glue
Tear tape – 1/4 inch
Lawn Fawn raspberry ink
Sakura gelly roll pen – white
I appreciate you sharing your time with me. Have a fabulous day!