Hi friends! It’s Mix it up Monday and today I have a couple of mini note cards to share with you. I love these for lunch boxes, leaving in mailboxes at work or attaching to gifts like a tag. They’re small and pretty quick to create but also really fun to make and give!

I started with the Pretty Pink Posh Mini Scallop Card dies. I cut two card bases and four stitched squares so I had a layer for the front and a clean slate for the inside to write on. On the white panels for the front I inked them up with the Pretty Pink Posh Starburst stencil using Lawn Fawn no. 2 pencil and deep sea inks.

For both cards, I used Mama Elephant Banner Greetings dies for the sentiments and the Write With Me stamp and die set. I chose the penguin for this card and used the scribble star from the set for the background. In my mind he’s painting the stars.

After adhering the layers together with liquid glue and foam squares, I added glossy accents to bits of the penguin and his brush. Lastly, I added white gel pen highlights all over the image.
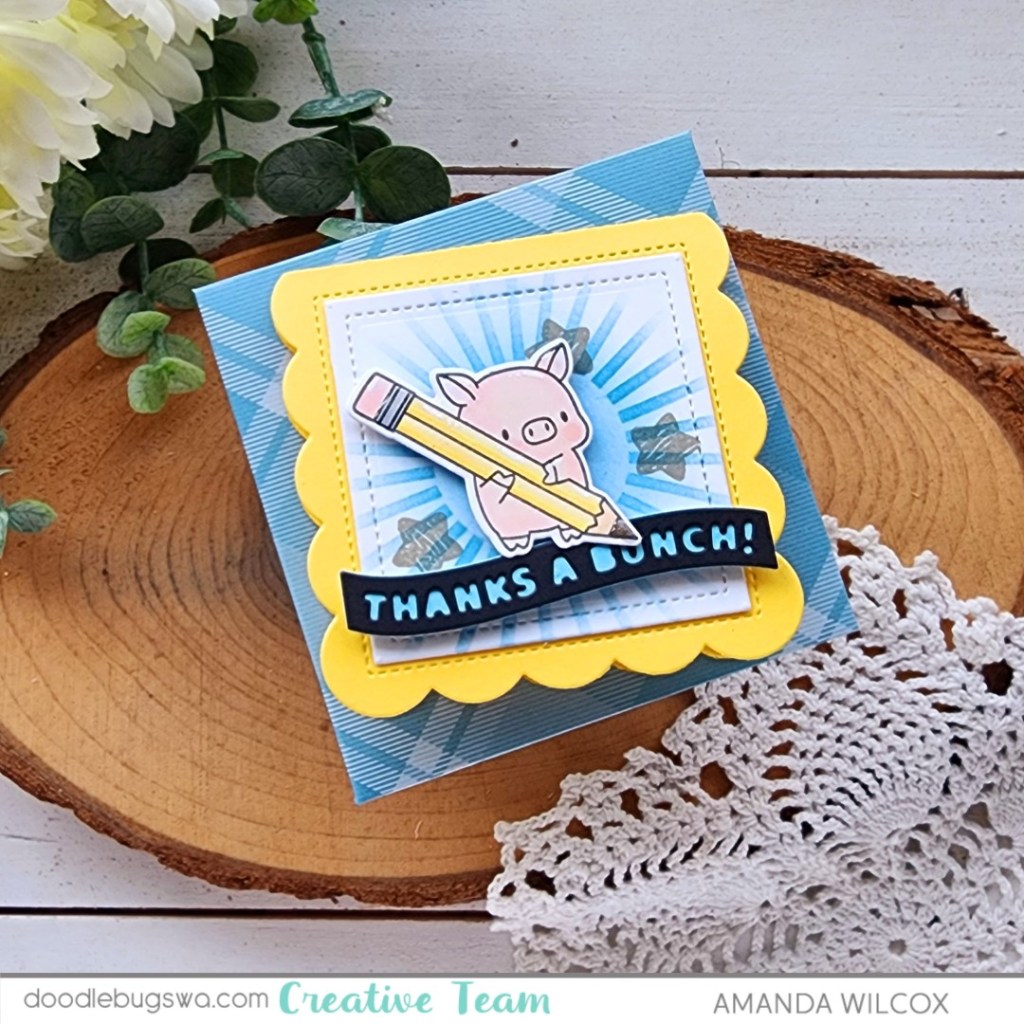
For my second card, I chose the adorable piggy image. I love how the pink pig stands out off the yellow and blue scheme of the rest of the design. I stamped these stars with gray ink envisioning him scribbling them all over with his pencil.

Same for with this card, after assembling the layers with liquid glue and foam squares, I added glossy accents to parts of the pencil and white gel pen highlights all over.
To really make these fun, I used my envelope punch board and some patterned paper from my stash to create coordinating envelopes for each one.
I appreciate you sharing your time with me. Have a fabulous day!