Happy Valentine’s Day everyone! I wanted to pop in and share some love for everyone here today! My inspiration features stencils and pastes from Ranger Ink with dies from Spellbinders – all designed by Simon Hurley.
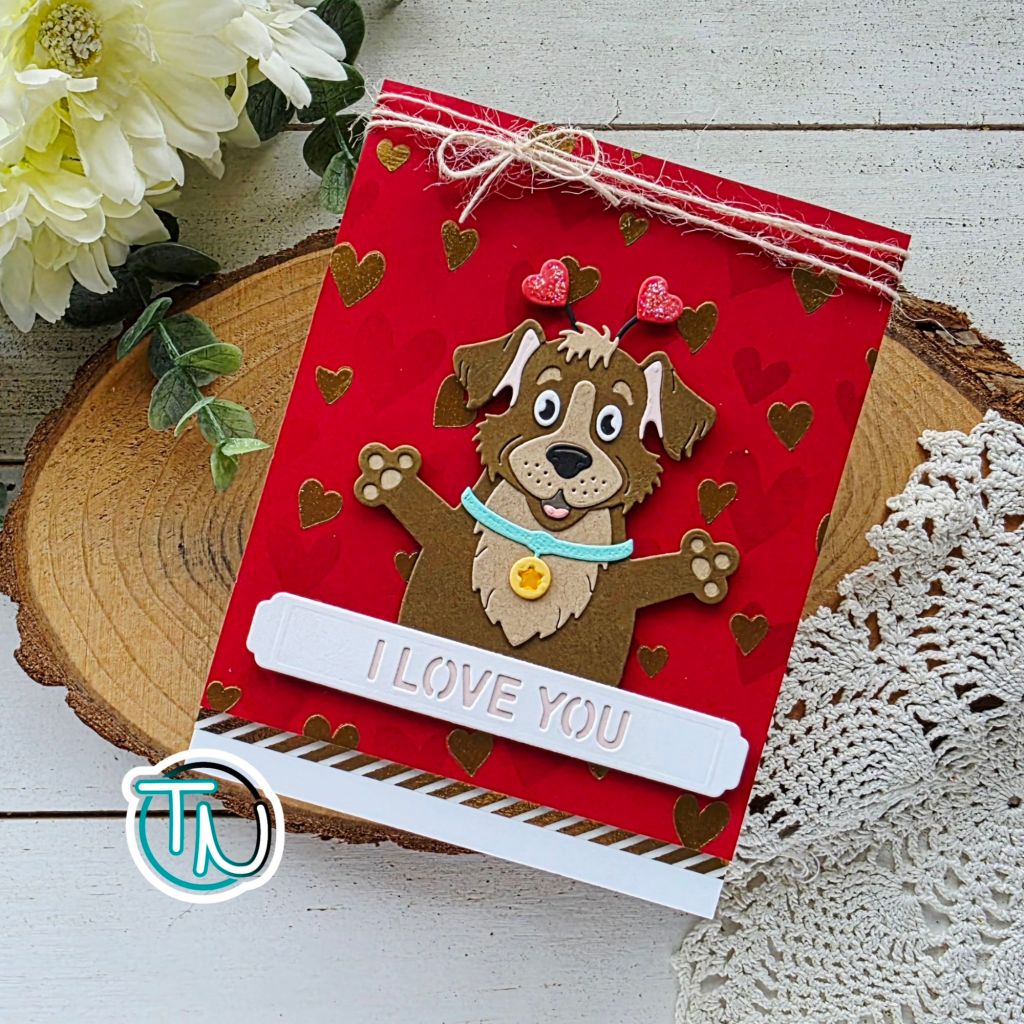
I started with the Happy Hearts stencil set. The first layer is love bomb ink on red cardstock and the second layer is gold rush lunar paste. I used the Simon Hurley blending brushes and paste tools on this step.
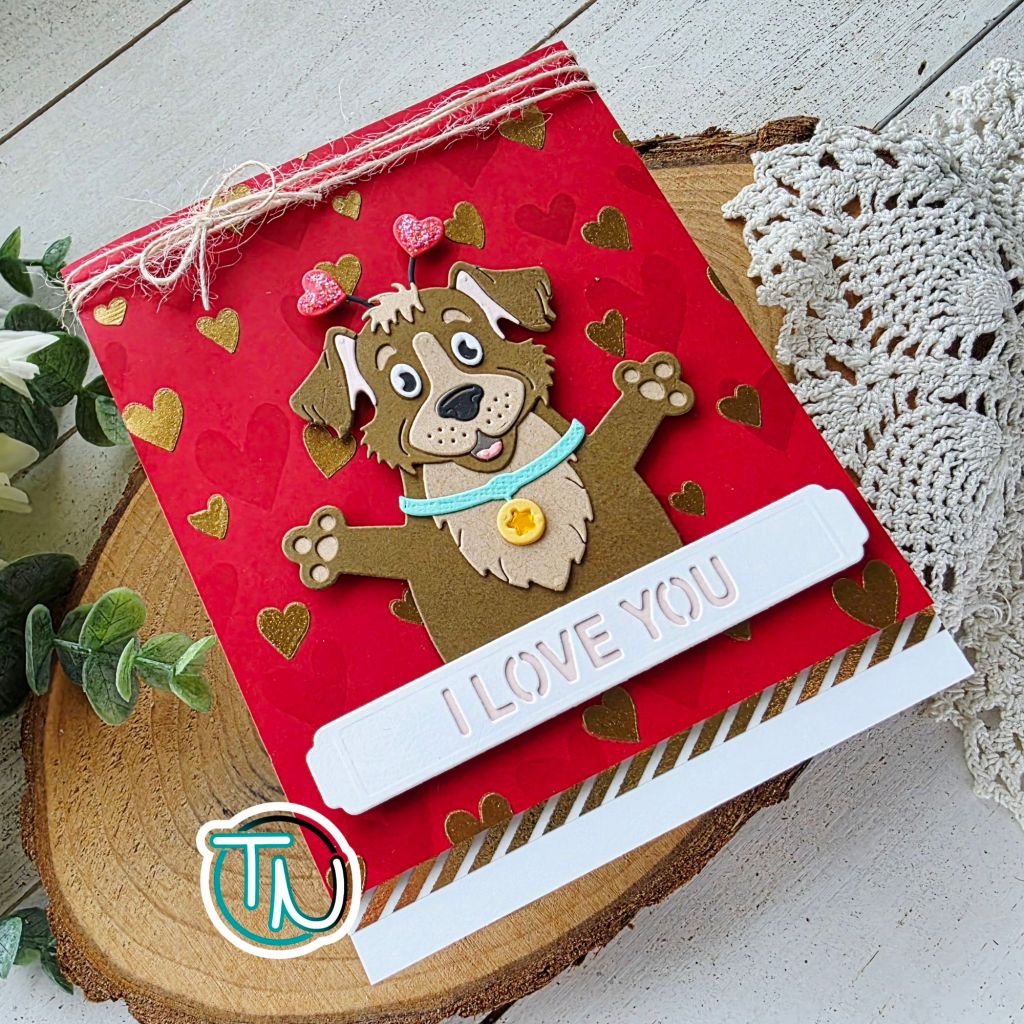
While that panel was drying, I pulled out the Darling Dog die set from Spellbinders and proceeded to cut and glue all the bits and pieces together. Isn’t he the cutest ever?!? Yes, the correct answer is yes he is! I also cut the banner from this die set, gluing the layers together and then glued the banner to the bottom edge of the pup.
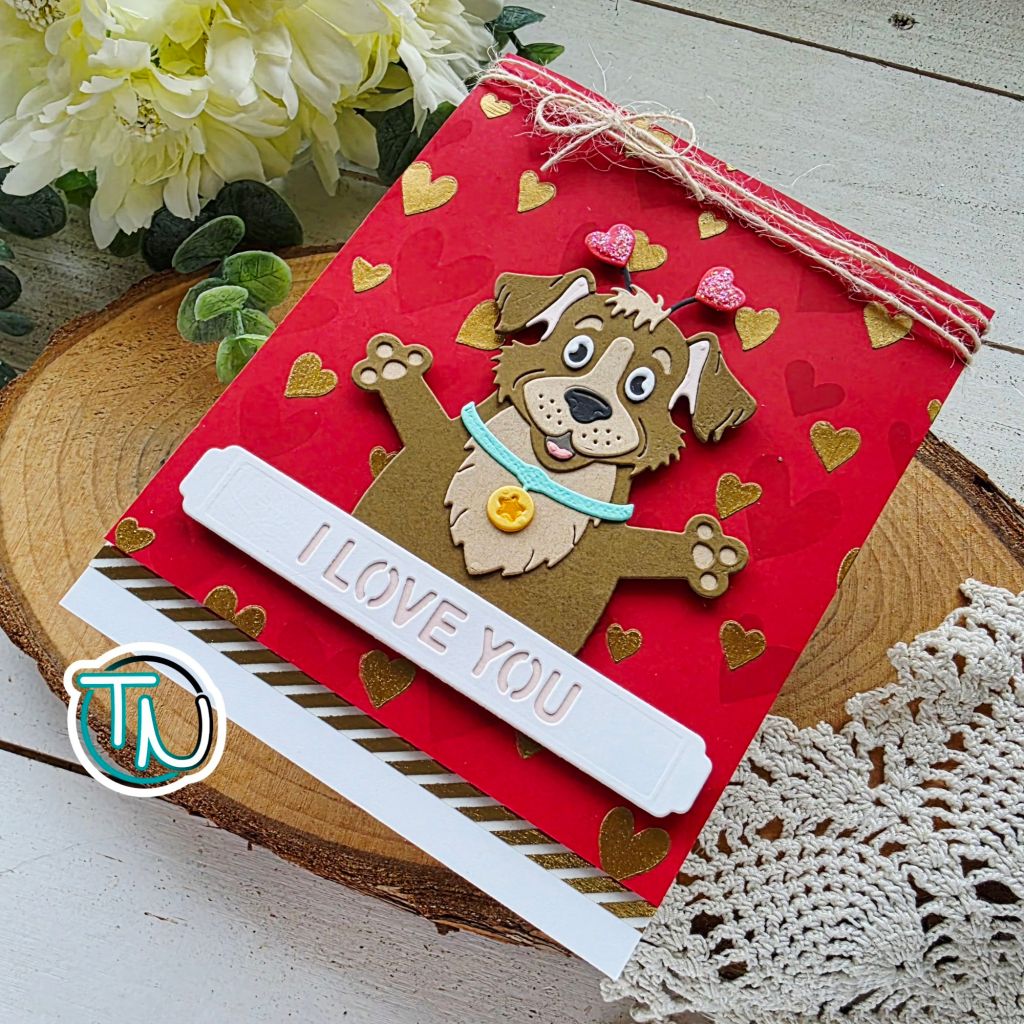
When the panel was dry, I trimmed the bottom edge by about 3/4 inch and popped it up on a white card base. I came in with some washi tape below that edge before adding my puppy and banner with foam squares.
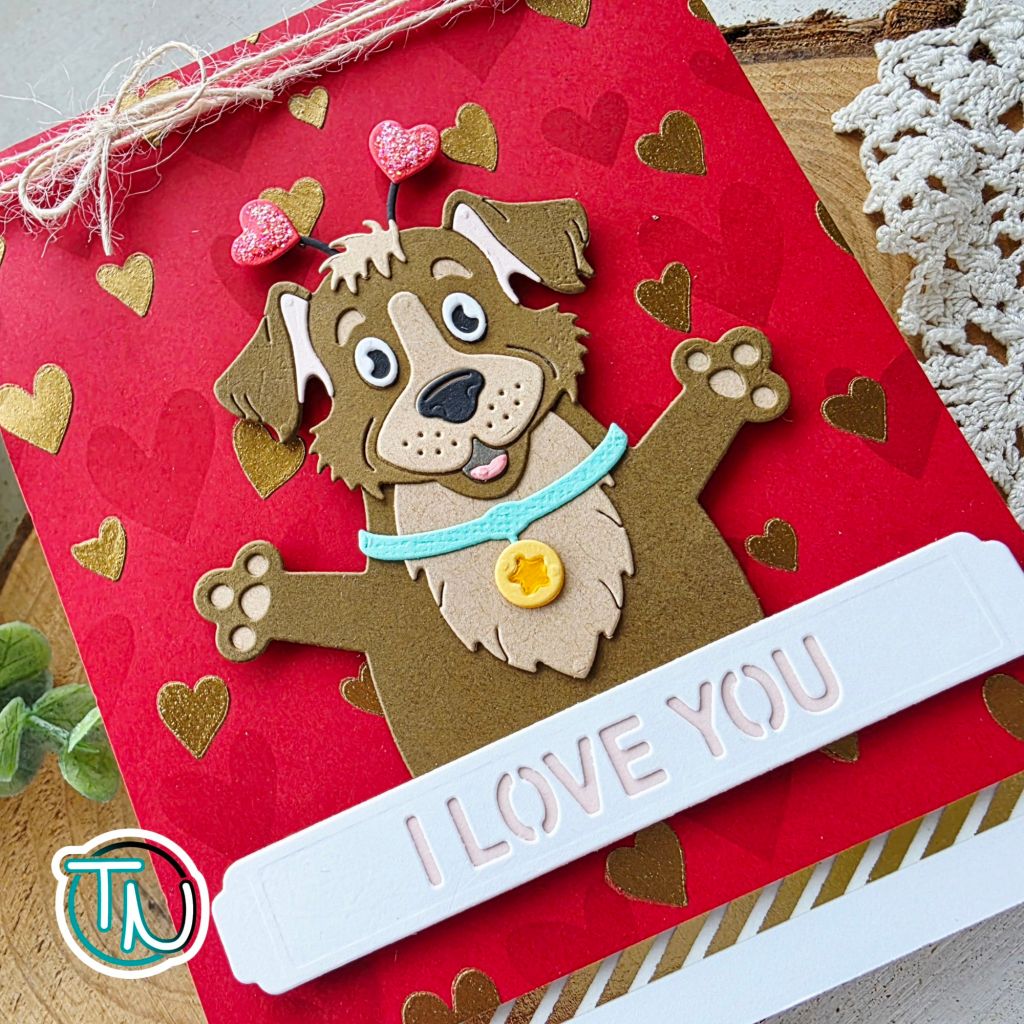
For finishing touches I wrapped jute twine around the top of the card and tied it in a bow. Then I added stardust Stickles to the headband hearts and glossy accents to the star on the collar tag.
I appreciate you sharing your time with me. Have a fabulous day!