Hey friends! I’m back today with another sneak peek of the Trinity Stamps release that goes live on Friday! It’s absolutely incredible and I’m over the moon in love with so much of it. I can’t wait for you all to see it and see what you create with it too!
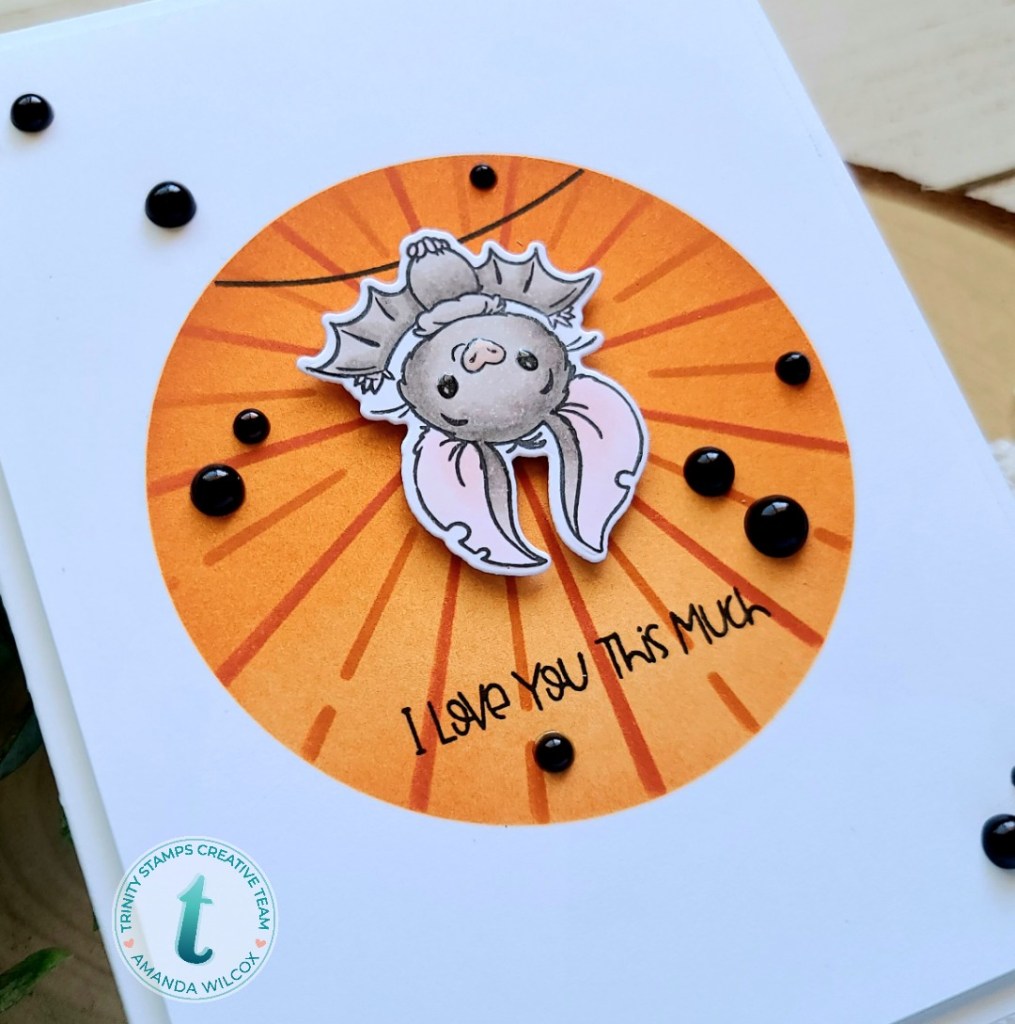
I’m just batty for this card! It couldn’t have turned out more perfect and those that know me, know how much I love bats! I can’t wait for you to see the whole set. It’s amazing and so much fun!
Hey friends! What a better way to start the week off than with some super adorable and fun sneak peeks of the upcoming Trinity Stamps release!
We’re ending the week with 2 days of Instagram hops (Thursday and Friday) and the release going live on Friday. It’s super fun and full of all the great fall feels.
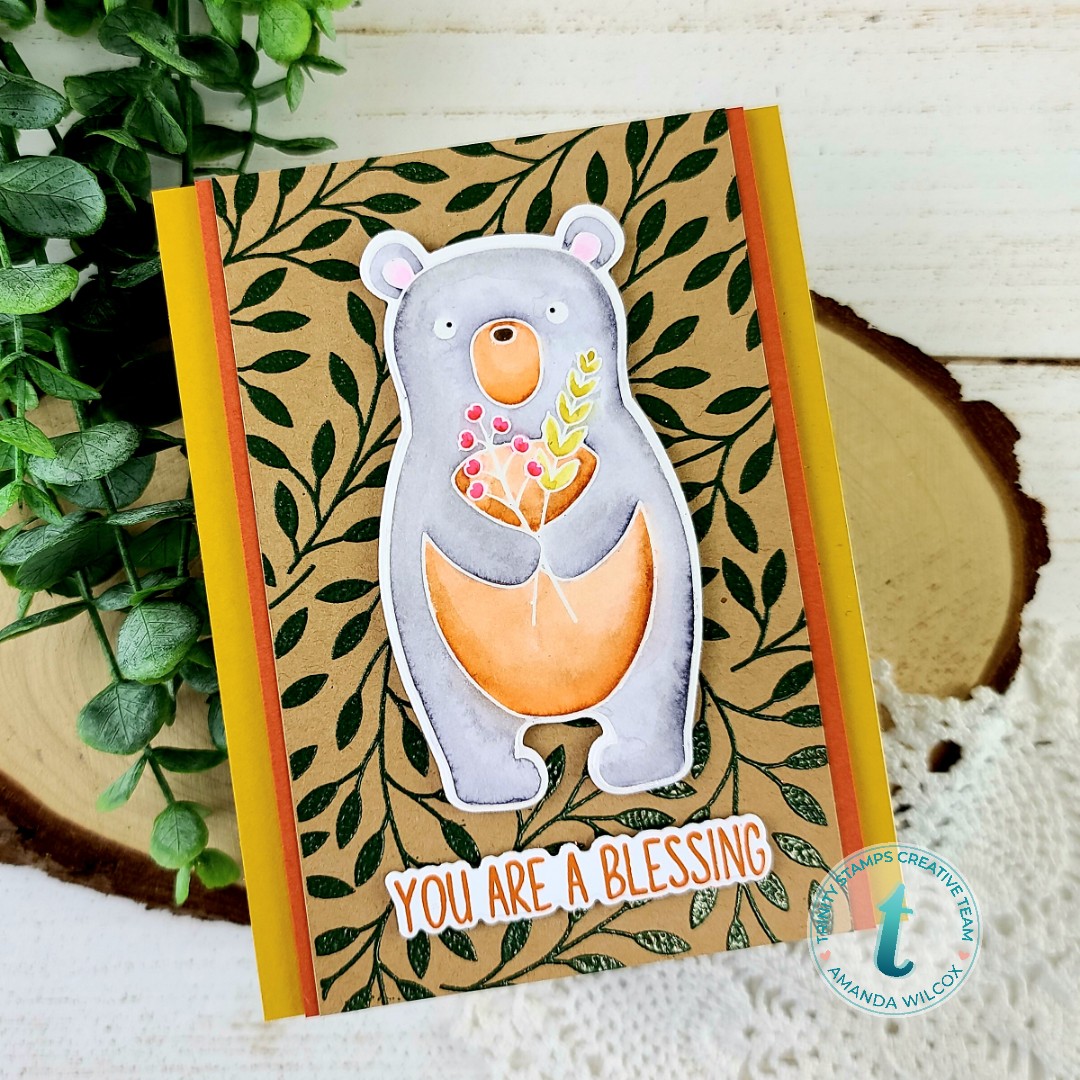
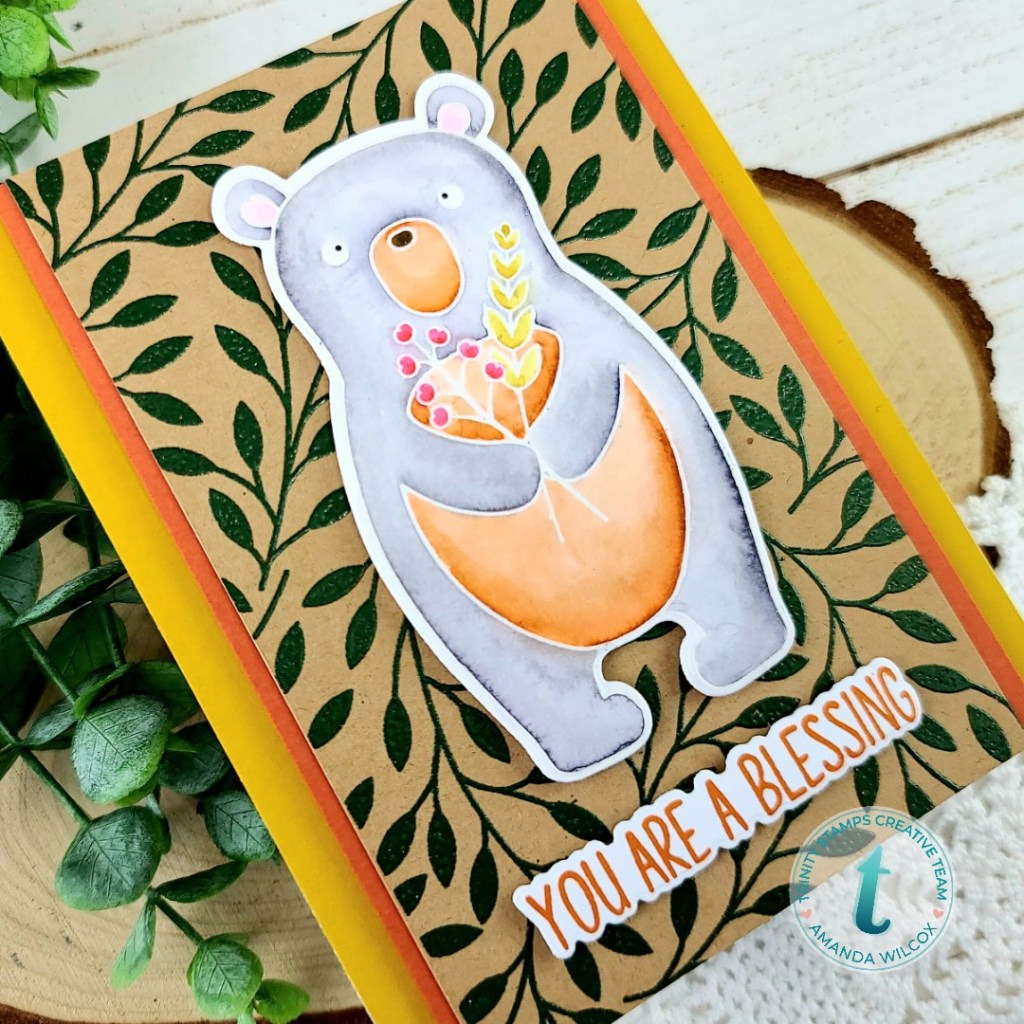
I’ve been in a heat embossing phase again so I did that with this cute bear and used my Zig Clean Color Real Brush markers on him for a watercolor look. Isn’t he the sweetest! And check out that super fun foliage background I heat embossed too! I
I just love these rich, deep fall colors. They make me soooo happy and ready for all things pumpkin and fall! So fun!
Is there anything you’re hoping to see in this release? I’ll be back with a couple more sneak peeks before you see it all on Friday so stay tuned!
I appreciate you sharing your time with me. Have a fabulous day!
Hey there! It’s time for Tuesday Tea once again and I’m sharing some super fun fall inspiration over on the Coffee Loving Cardmakers blog.
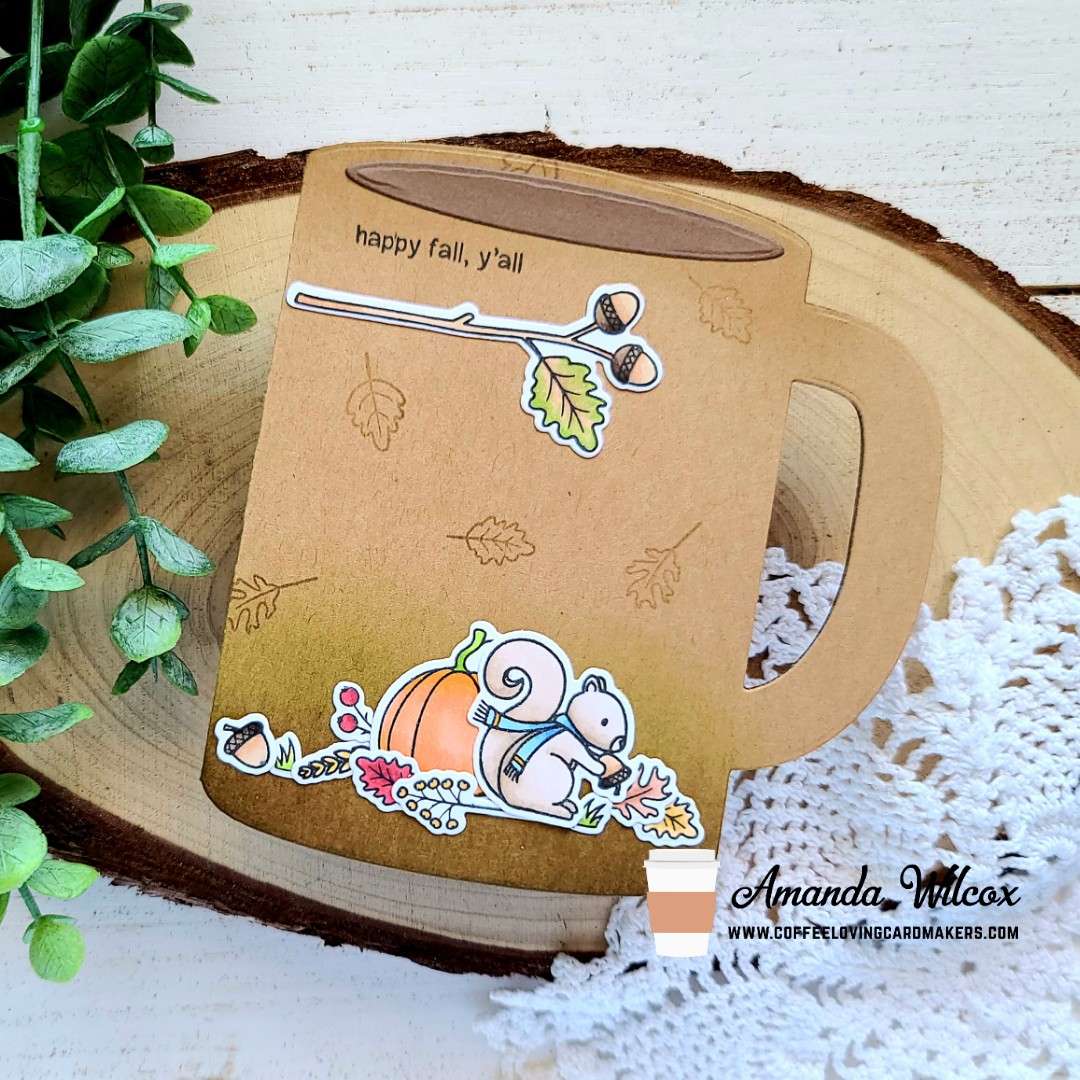
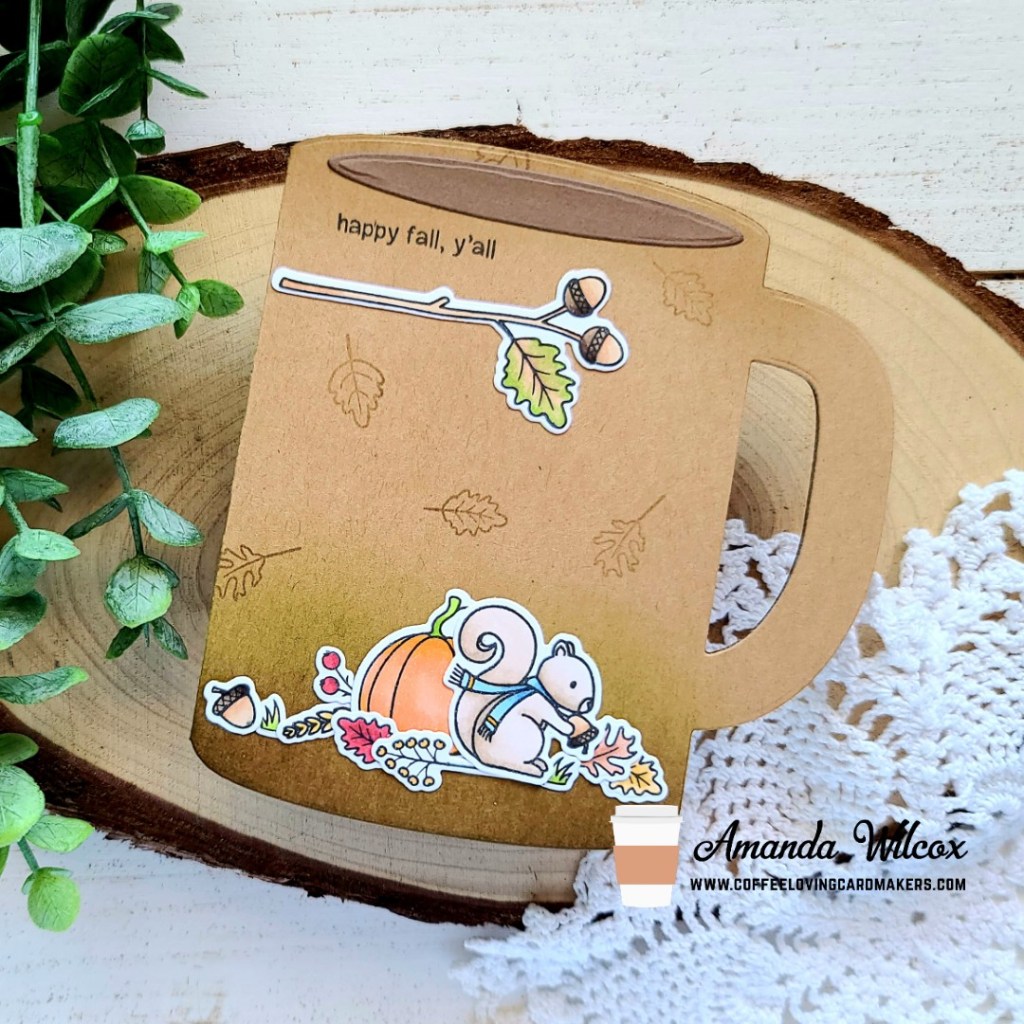
I hadn’t played with my Trinity Stamps coffee mug die for a while so I pulled it out and started going through my stamps for inspiration and landed on this little set, Nutty Squirrel, from Trinity Stamps last fall that I just love.
I stamped out my nutty squirrel images and colored them with my copics, then I used the coordinating dies to cut it all out. I die cut my mug and used blending buddy brushes with some dye inks to ink up the bottom with brown and green and I rounded out the top with some brown shading too. I took the leaf images and stamped them in the background with light brown ink and started adhering my images with liquid glue.
I decorated the front and back of my coffee mug since I had enough images and thought it would be extra fun. After those were all adhered I stamped my sentiment above the branch on the front using my MISTI and this fun card is all done.
I am very ready for all things fall which made this card extra fun to create. I also added the extra layer to the inside of the mug that makes it a gift card holder so we can share a little pick-me-up with whoever the recipient ends up being.
I appreciate you sharing your time with me. Have a fabulous day!
Hi there! Thanks for stopping in today. I’m sharing a really fun card using a technique I’d never tried before with one of my embossing folders. I hope you enjoy it! Let’s go!
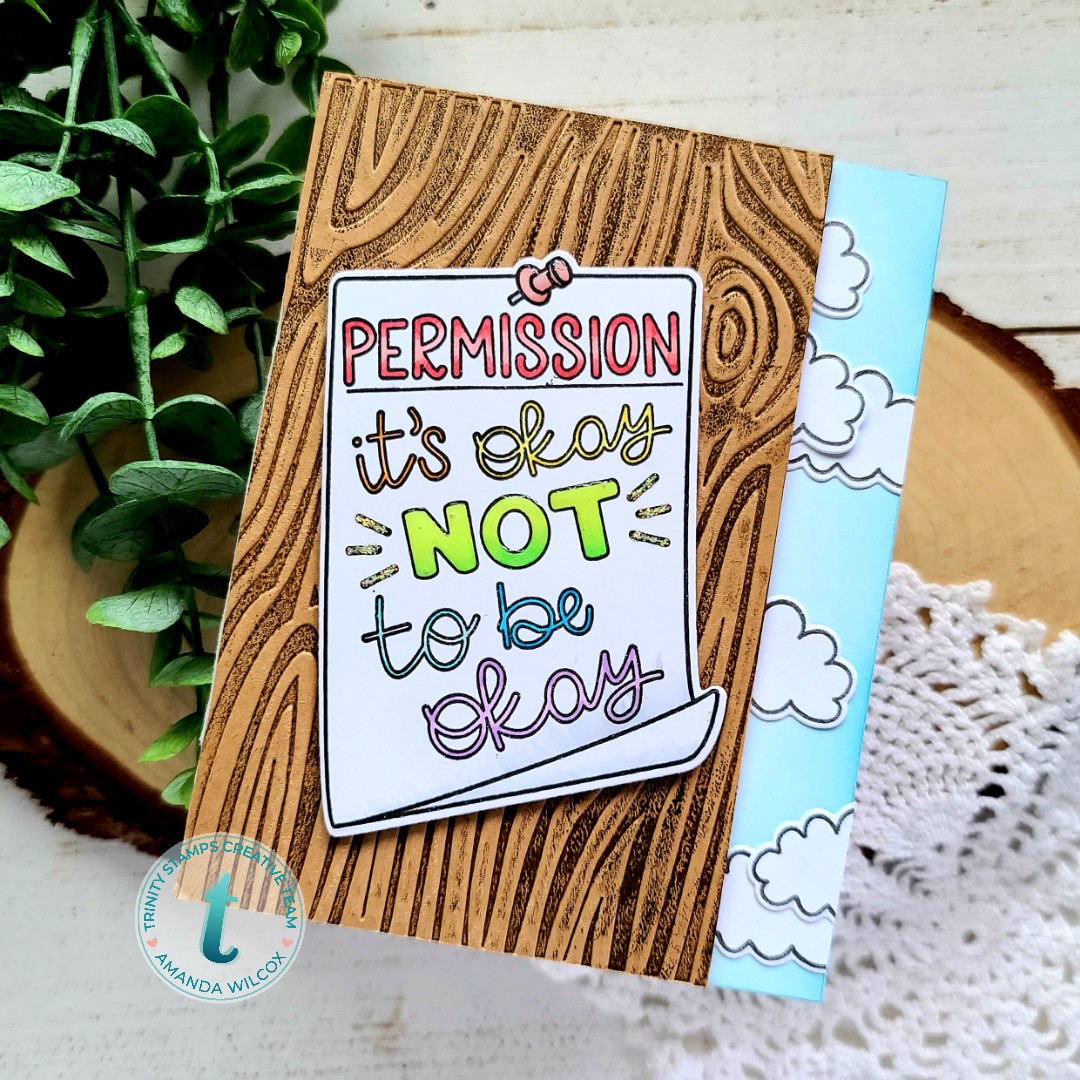
I started by stamping the image from Trinity Stamps It’s Okay, colored it with copic markers and used the coordinating dies to cut it out. Then I took a kraft panel and my wood-grain embossing folder. I blotted brown ink on one side of the folder and ran it through my die cut machine to emboss it. It inked up the raised portion of the embossing and left this really cool look! I just love how it turned out! Don’t you?
I used my blending buddy brush and a light blue ink to give a little color to the edge of a white card base and then pulled out the cloud image from Hang On. I stamped and die cut a handful of those and glued them in place, trimming the excess off the edge. Then I trimmed the embossed panel to 3.5×5.5 inches and popped it up with foam tape. I wanted this to look like a tree in the park or maybe a telephone pole on the street with a message for anyone passing by.
For finishing touches I added a little glossy accents to the pushpin and the word “not” and some Stickles to the dashes for a little glimmer.
This card fits perfectly with the Trinity Stamps Crafty Troop Challenge. Have you checked it out this month yet? Be sure to grab your goodies and play along too! There’s always a gift certificate to the Trinity shop up for grabs!
I appreciate you sharing your time with me. Have a fabulous day!
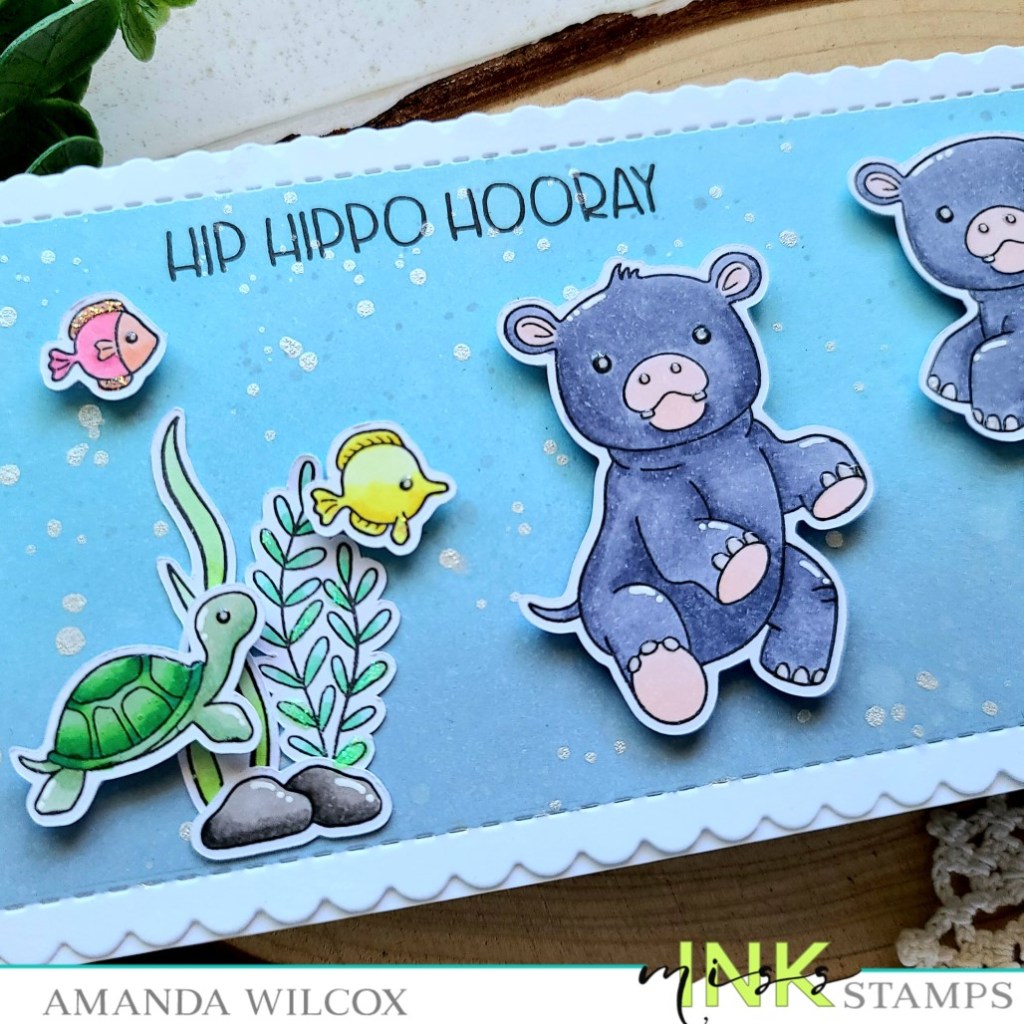
Oh my word, y’all!!! I am over the moon in love with these new cute hippos from Miss Ink Stamps. They are just the cutest and so are all the little extra critters that come with them to set your scenes. I had way too much fun playing with these guys!
I knew I wanted a full scene so I stamped extra of everything from Hippo Hooray and colored them with my copics. Then I used my scan-n-cut and cut everything out. I pulled out the slimline scalloped die from Trinity Stamps and cut a white panel. I masked off outside of the stitching lines and inked up the center for a little muted water scene with distress oxides in tumbled glass and weathered wood. I spritzed the panel with water, and flicked pearl watercolor and weathered wood distress oxide ink as well.
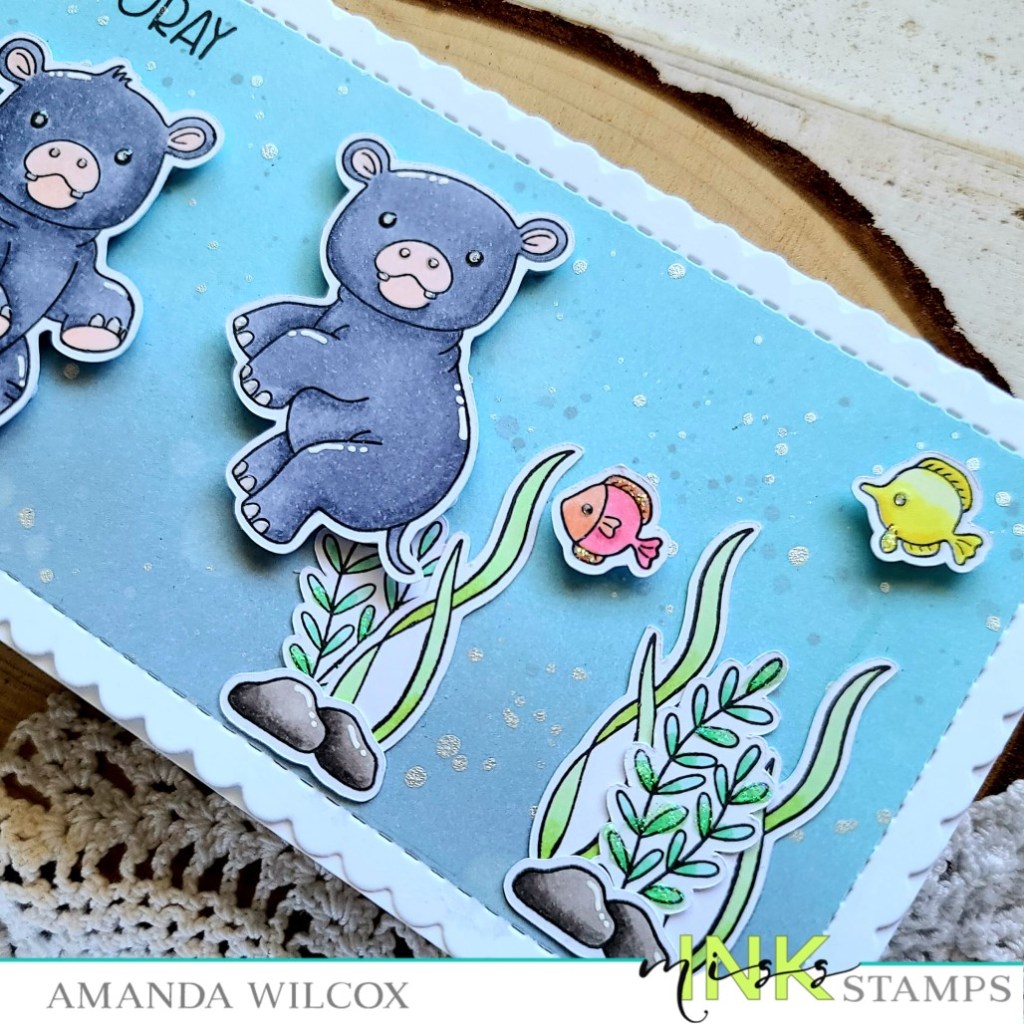
Then I started arranging my images how I wanted them. Once that was decided I stamped my sentiment with VersaFine onyx black ink. The seaweed and rocks are all adhered with liquid glue and the critters are all popped up with foam squares.
Finally, I moved on to finishing touches for the whole design. I added white gel pen accents to various images first. Then, I took some Stickles and added it to random seaweed leaves and fish fins. Finally, I added glossy accents to parts of the hippos and turtle for a little extra shine and interest.
I appreciate you sharing your time with me. Have a fabulous day!
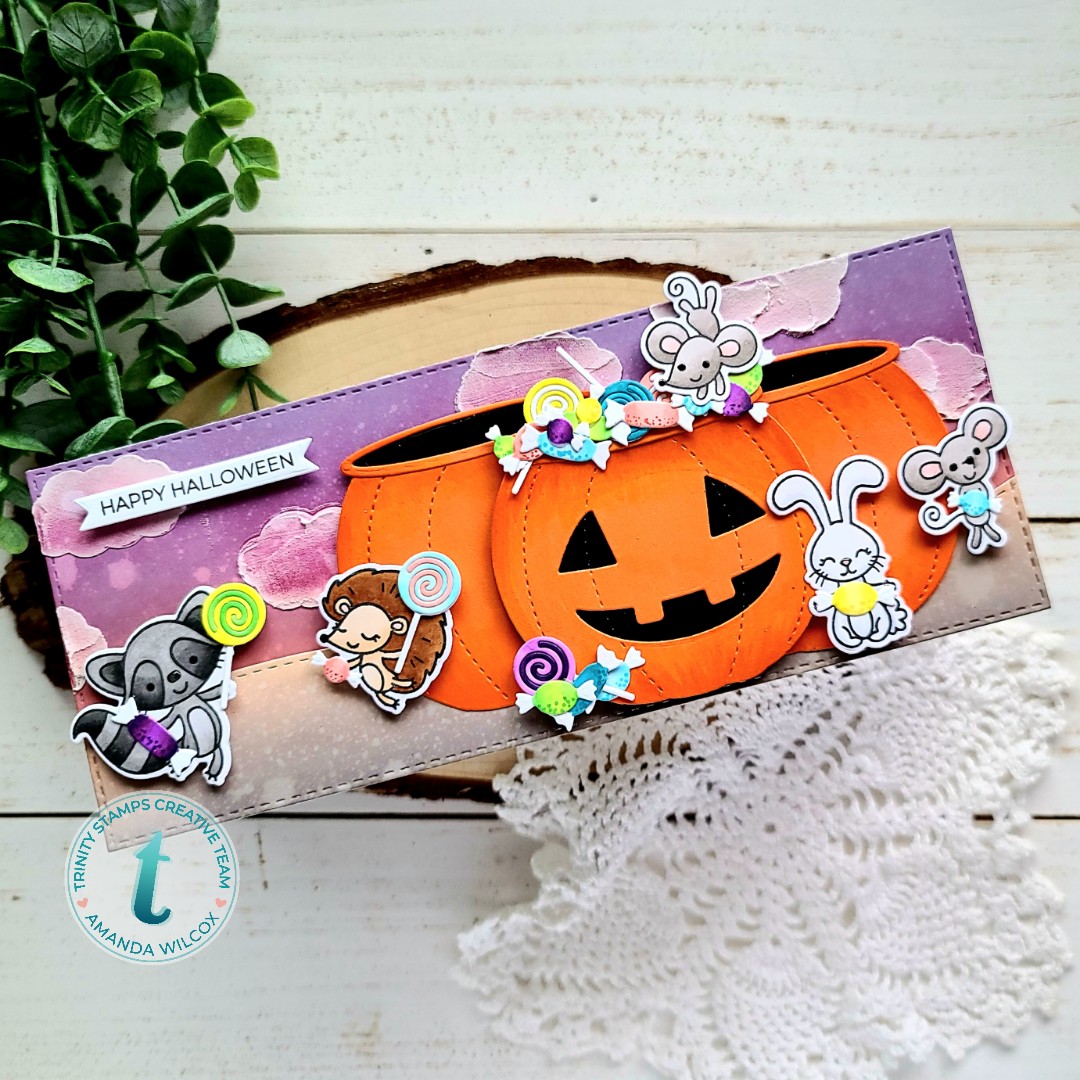
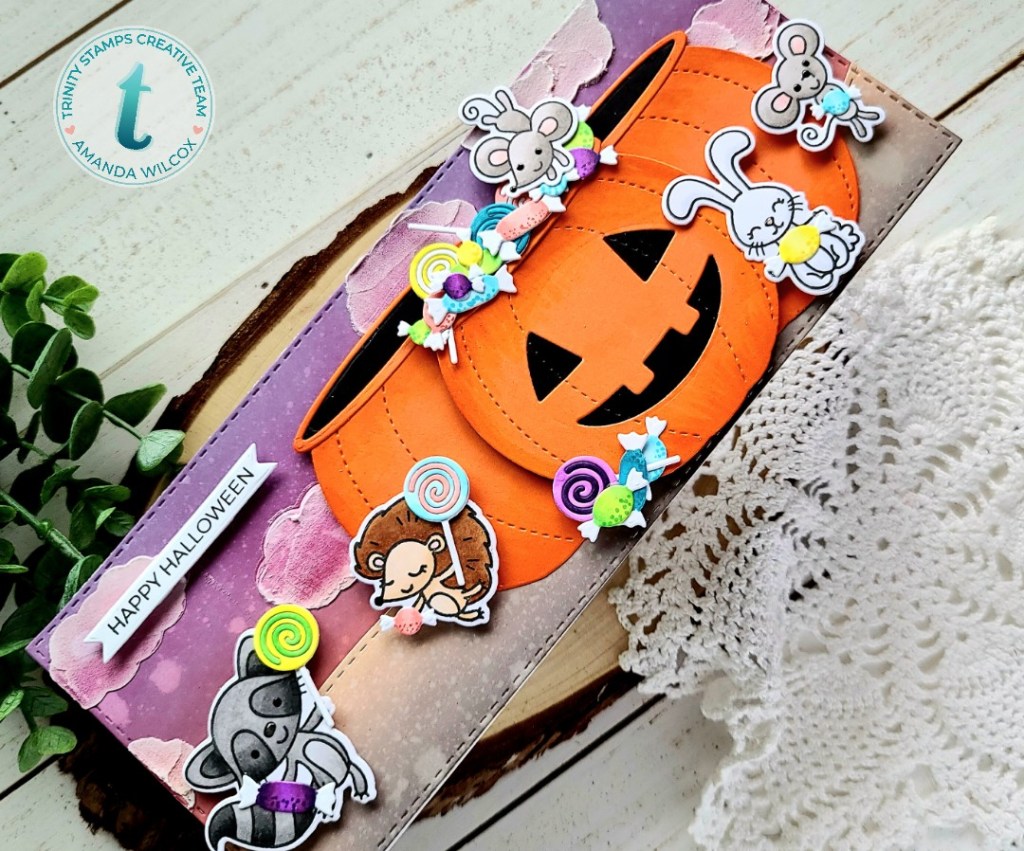
Hey there! Thanks for stopping by! Today, I’m over on the Trinity Stamps blog with this fantastic Halloween themed card featuring some of my very favorite critters raiding the candy buckets for a sugar high!
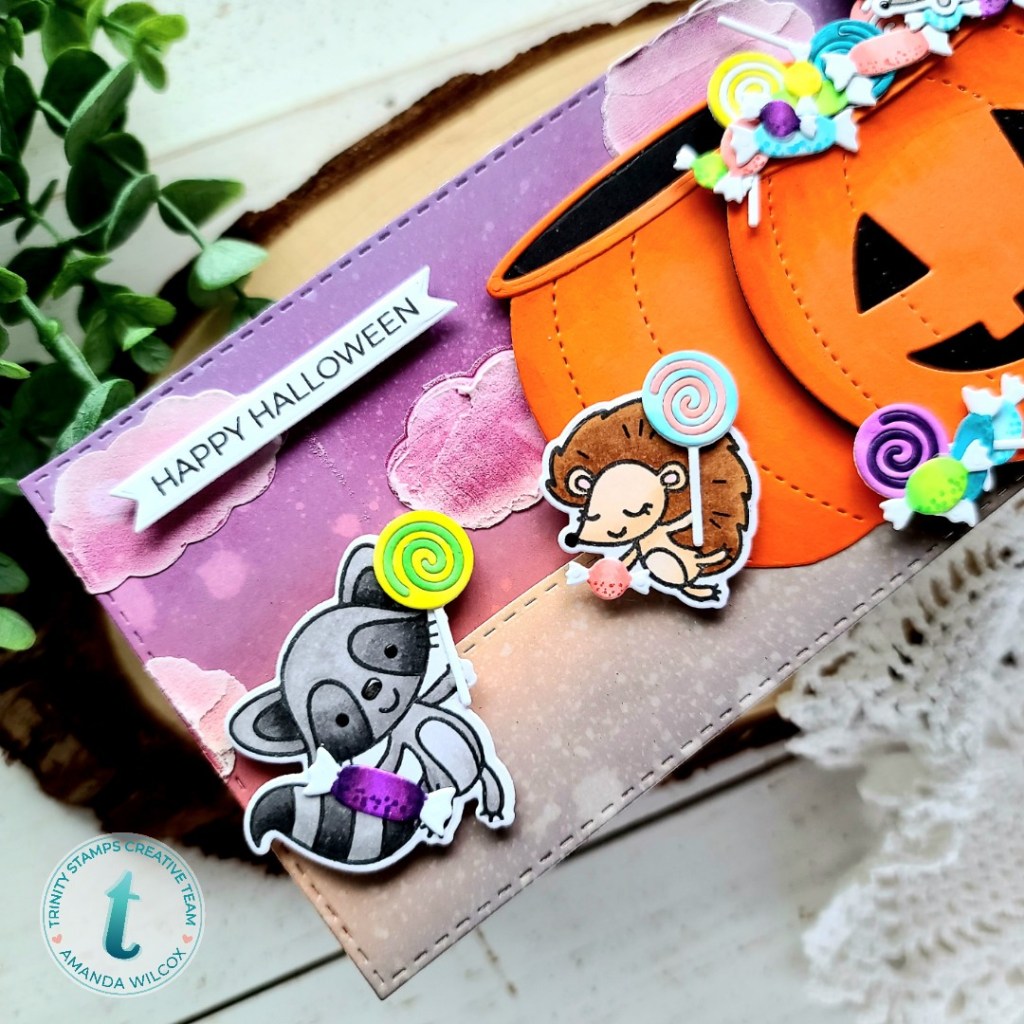
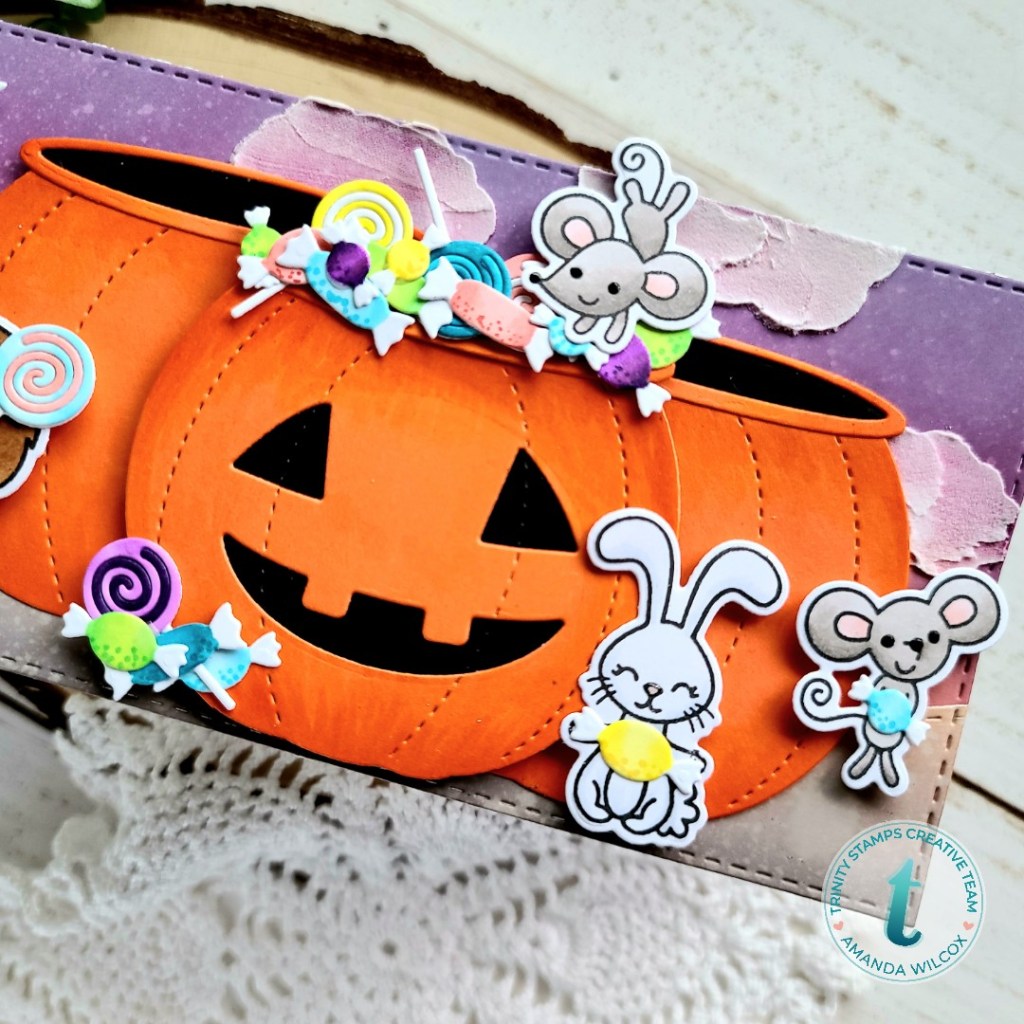
I had the general idea in my head so I stamped out my critters from Mouse House and Bunny Burrow and colored them with my copics. Then I used the coordinating dies to cut them all out and moved on the the harvest buckets. I started with just one and quickly decided it would be fun to fill in the background with a couple more that they had already emptied. I used copics on colored cardstock to give the buckets a little dimension.
I die cut the largest slimline stitched panel and inked it up with ripe persimmon and dusty concord distress oxides. I spritzed it with water and pulled out my layered lakeside mountain stencil to add some clouds. I did this with texture paste. It gives such a fun dimension and look to the sky. Next I used the same stitched panel to create my ground. After inking it with gathered twigs and tea dye distress oxides I spritzed it with water and used the slimline scenic borders dies to cut the ground.
At this point I die cut bunches of candy pieces that come with the harvest bucket dies from white cardstock. Then I used my copics to add color to each of them. I arranged them how I wanted in the bucket, next to it and in the critter hands and used liquid glue to adhere them all in place.
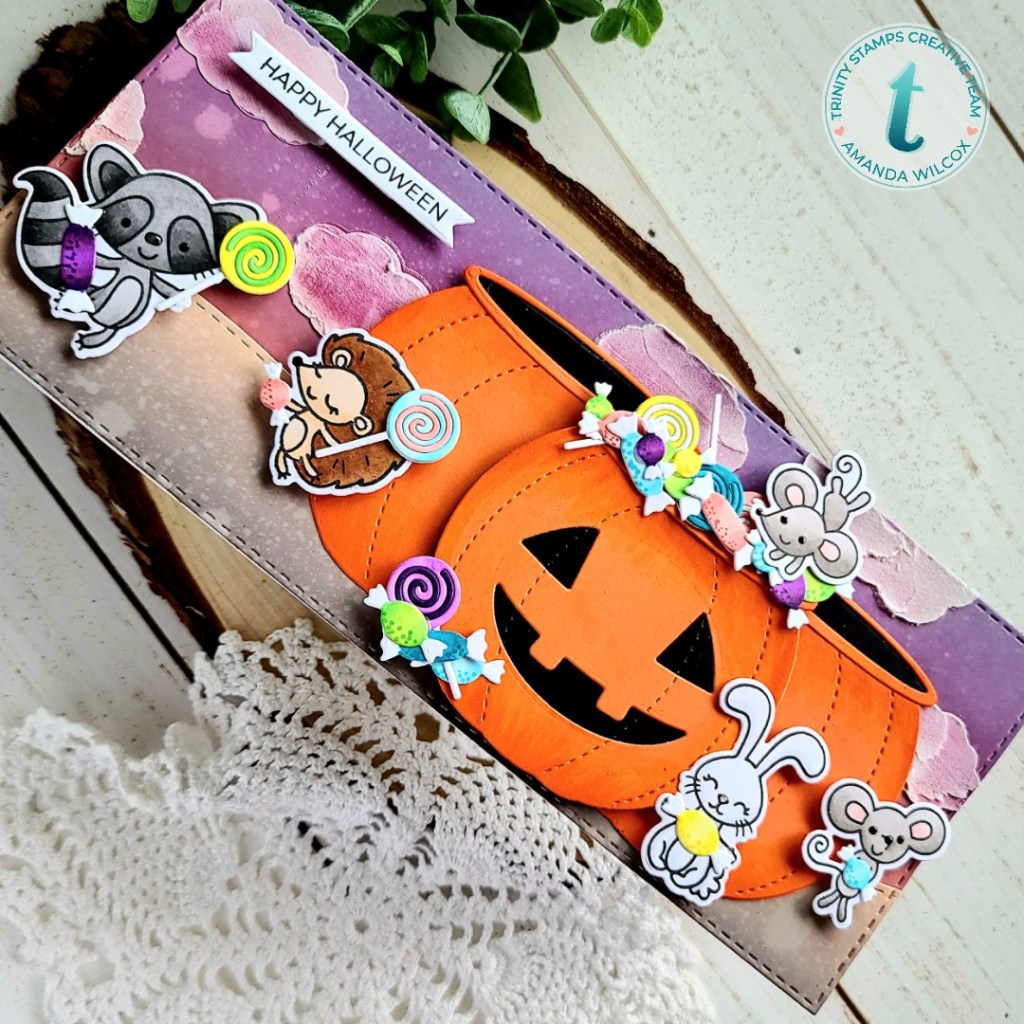
Finally I moved on to assembling my card. I adhered the sky to a card base and the ground to that. Then I added the background pumpkin buckets with liquid glue and the one with the face with foam squares. The critters are all popped up with foam squares as well.
To finish things off I pulled out the sentiment for almost everything set and stamped the “Happy Halloween” sentiment on a banner from the 4-bar die set. I popped this up with foam squares too. The last finishing touches were black glaze pen to the critter eyes and noses and glossy accents to the noses that were colored in.
I really just can’t get enough of this cuteness! These critters are adorable and thinking about a little story of them raiding kids’ candy buckets on Halloween cracks me up!
I appreciate you sharing your time with me. Have a fabulous day!
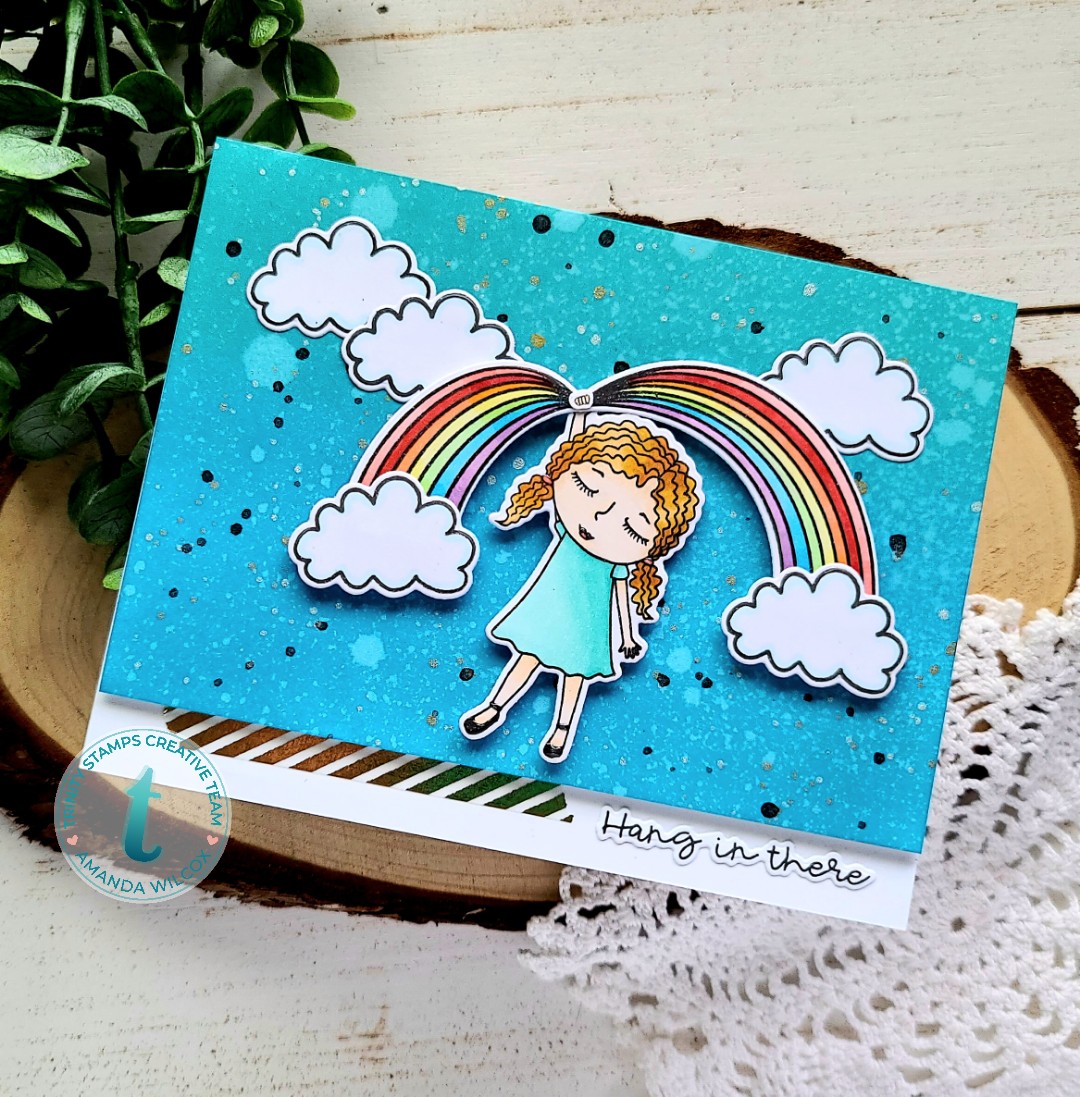
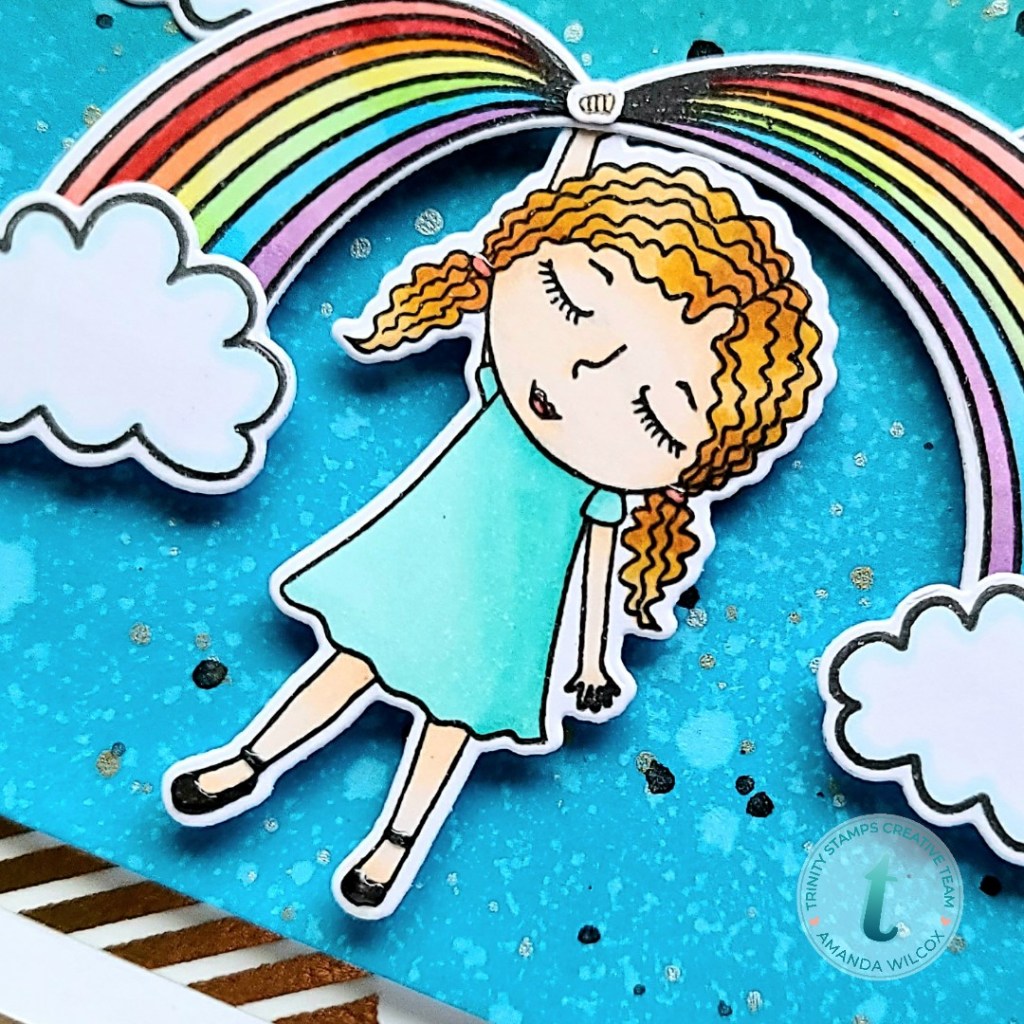
Hello everyone. Let’s hang in there together for just a bit longer, hoping life will go back to some sort of normalcy soon. In light of thinking about things like this over the weekend, I pulled out the Trinity Stamps Hang On stamps and created today’s card.
I stamped the images from Hang On and colored them with my copic markers. Then I used the coordinating dies to cut it all out. I used liquid glue to adhere the hand over top of the rainbow and the clouds to the bottom of the rainbow sides.
I took an A2 panel and inked it up with distress oxides in peacock feathers and mermaid lagoon. I spritzed it with water, silver and gold watercolor and a little black acrylic paint. I left it to dry and then trimmed it down to 5.5×3.75 inches. I popped it up on a white card base with foam tape and adhered my images on that with foam squares.
I stamped my sentiment and also used the coordinating dies to cut it out and glued it below the popped up panel. I added a little gold striped washi tape for extra interest and just a bit of glossy accents to the girls lips, hair ties and shoes to finish things off.
I hope you’re doing well during the craziness of the world, staying safe and healthy.
I appreciate you sharing your time with me. Have a fabulous day!
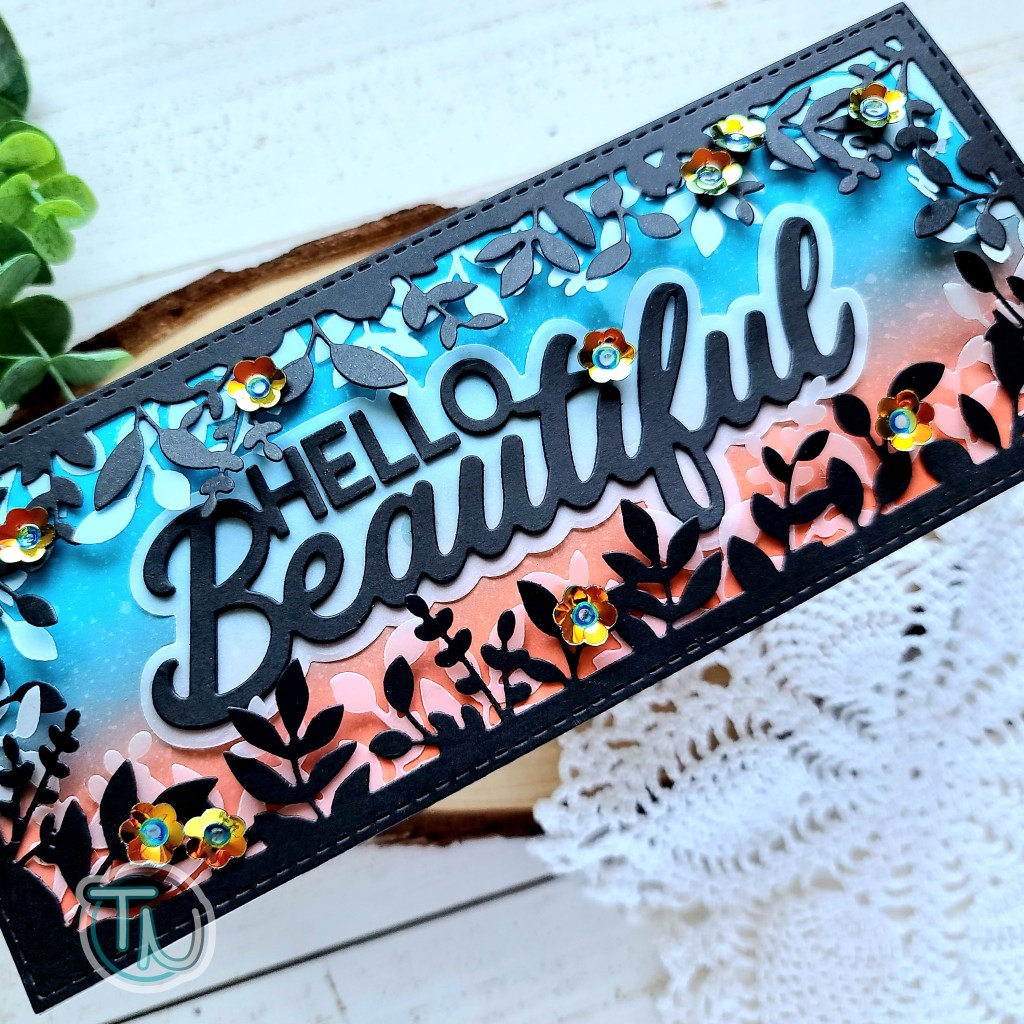
Hi everyone! Today I’ve got an extra special card to share with you. I had so much fun mixing the colors and companies to create this beauty! The whole idea came about from the beautiful Metallic Poppies embellishments that are going live in the shop tomorrow! Everything just fell into place perfectly and I love it.
To create my card, I blended distress oxides on a 3.5×8.5 inch panel in ripened perssimon and mermaid lagoon. It took a little work but they blended beautifully! Then I spritzed it with water and set it aside. Next, I die cut the Trinity Stamps foliage frame from black cardstock and vellum. I flipped them opposite so the leaves didn’t match up and glued them together with liquid glue. Then I glued that to the inked panel.
Next, I pulled out the Hello Beautiful sentiment dies from Pink & Main’s recently released Beautiful Slim Line Dies. I cut the words from black cardstock 3 times and the shadow from vellum once. These are all adhered with liquid glue as well. Then I tucked it under the foliage frame and glued it to the inked panel as well.
To finish this gorgeous card off I glued a few of the new Metallic Poppies among the foliage and one on the dot for the “i” to finish things off. I added some Nuvo Crystal Drops in morning dew to the centers of all the flowers and popped my panel on a white card base.
These beautiful embellishments and 25 others will be available in the shop starting tomorrow! I hope you’ll stop by and take a look.
I appreciate you sharing your time with me. Have a fabulous day!
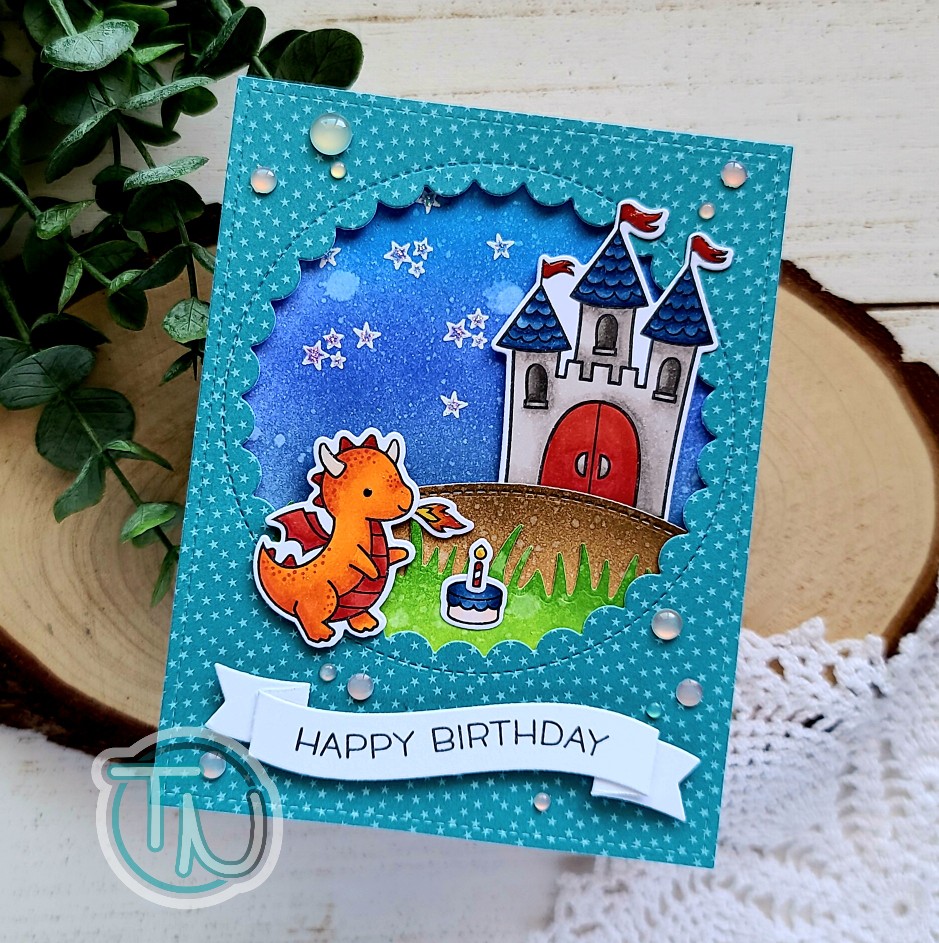
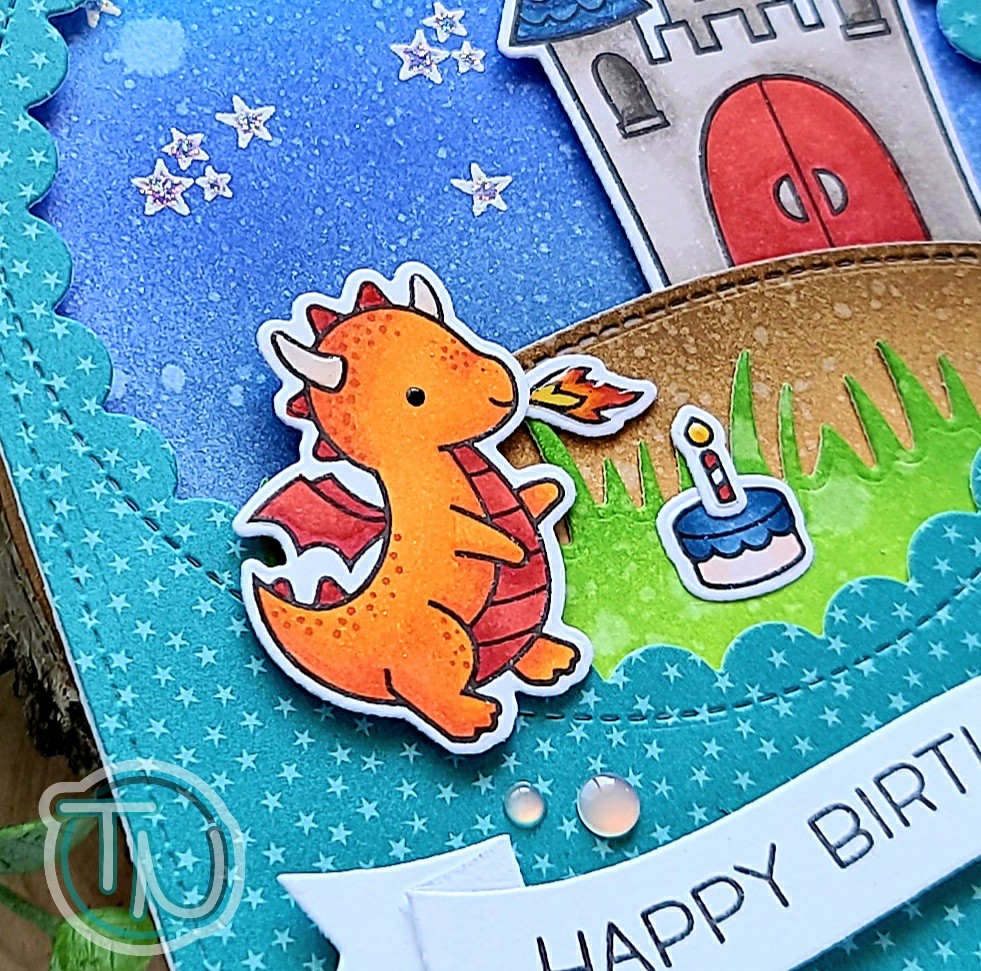
Welcome to a new week. I hope you all had a wonderful weekend. I recently had a moment to play with some new goodies I ordered from Scrapbookpal.com. It was mostly supplies but I had to throw in a few fun things too and one of them was the new Little Dragon mini set.
To create my card, I started by stamping and coloring my images with my copics. I used the Little Dragon and Critters Ever After stamp sets to create this scene. Then I inked up a panel with distress inks for a darker sky and spritzed it with water. Next, I inked up 2 other panels – for grass and a hill – and die cut them with my grassy border die and one of the stitched hillside borders.
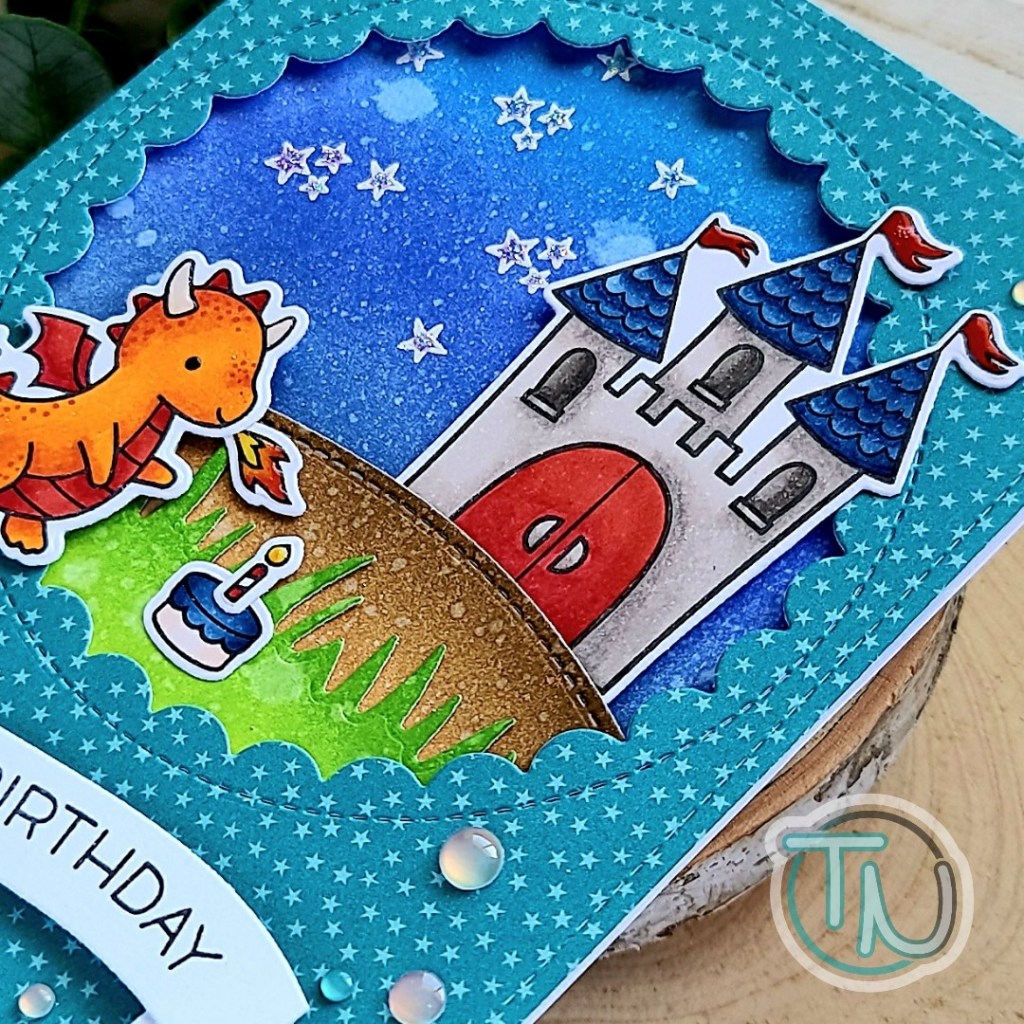
I die cut a stitched rectangle from an old Beachside paper pad I’ve been hoarding. Then I cut the largest outside-in stitched scalloped circle from the center. Using my images as a guide I stamped some stars in the sky with VersaMark ink and heat embossed them in white. Now, it’s time for assembly.
I adhered the hill and grass together and then to the back of the panel with the circle hole. I line the back of that with foam tape and adhered it to my inked panel. This whole panel was then glued to a card base and I started on my images. Those are adhered with a combination of foam squares and liquid glue.
For my sentiment, I die cut one of the wavy banners and stamped “Happy Birthday” from the wavy sayings stamp set. After folding on the crease lines I added a little glue to the folds and popped the banner up with foam squares.
To finish this card off, I added unicorn Stickles to the stars in the sky, glossy accents to the dragon horns, flames and flags on the castle and a black glaze pen on the dragon’s eye. Last, I glued down a scattering of Fortune Teller flat back beads from Trinity Stamps.
I had so much fun creating this card! I hope you enjoyed it and find a little inspiration to make something wonderful.
I appreciate you sharing your time with me. Have a fabulous day!
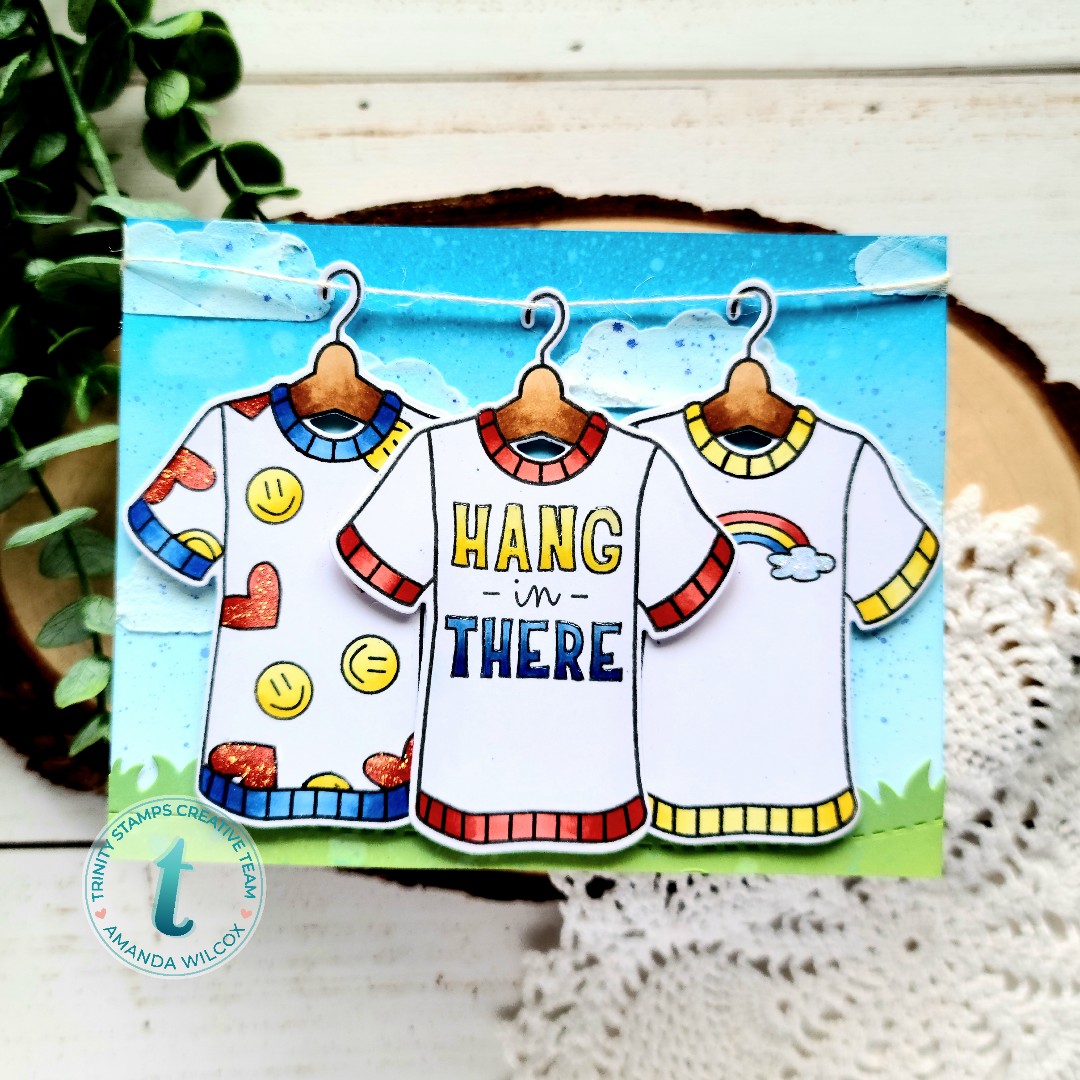
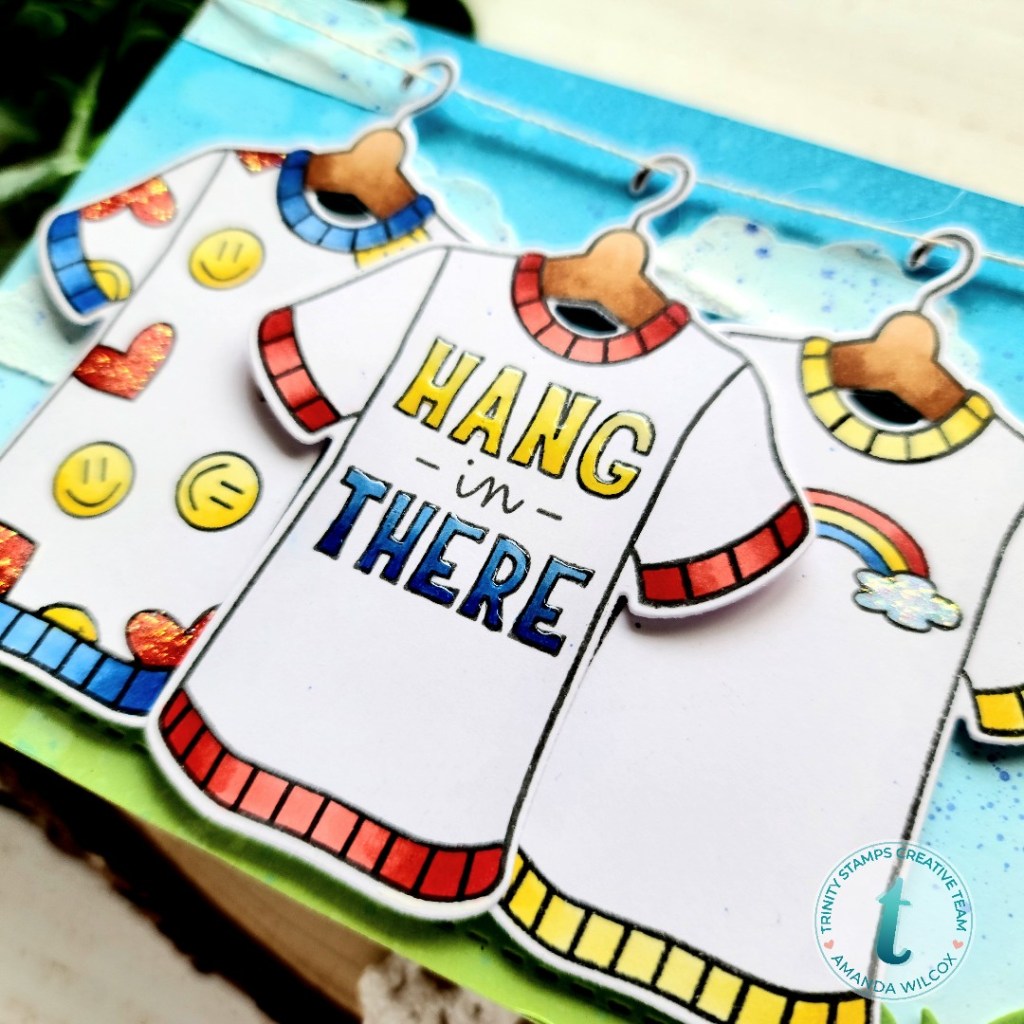
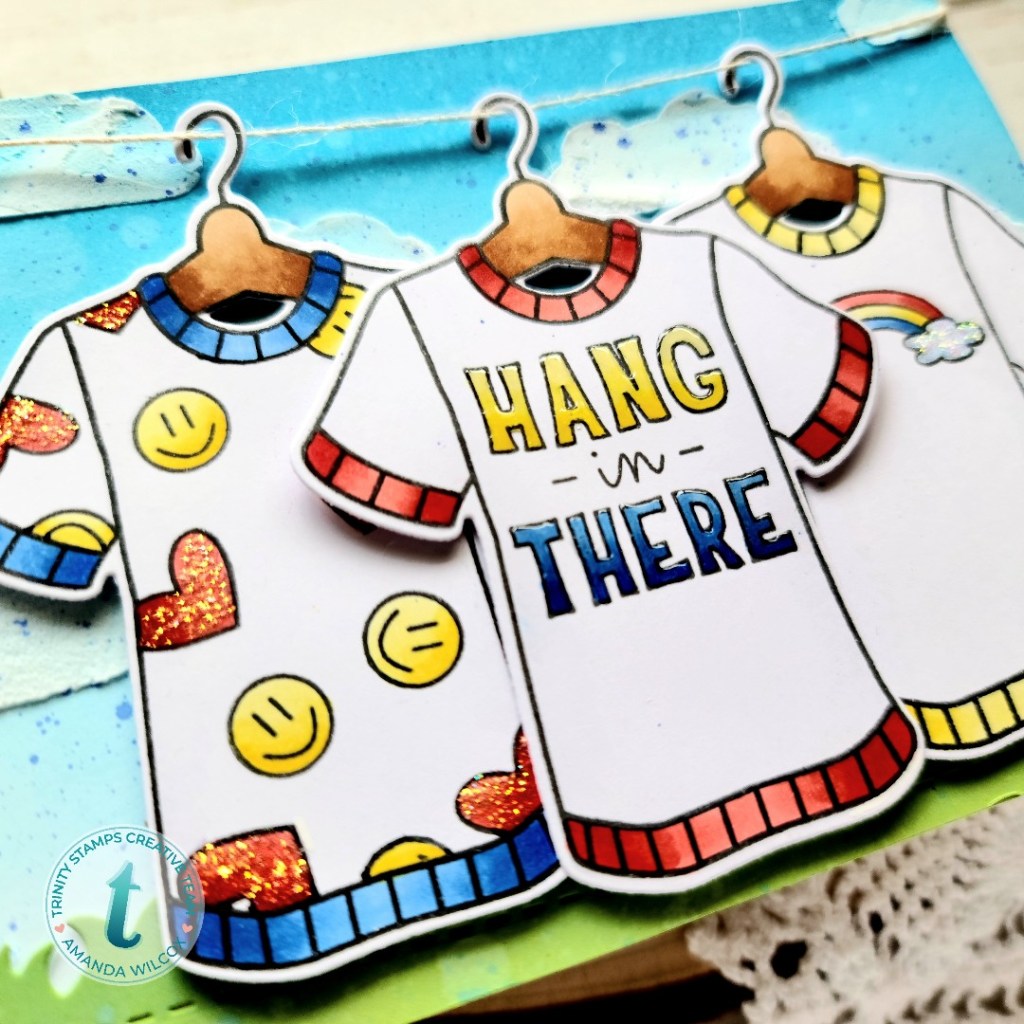
Hello everyone. I’m joining you today for a fun way to customize the new Hang In There stamp set from Trinity Stamps. I had so much fun creating this card and hope you enjoy it.
I started this card by stamping the image from Hang In There as it is. Then I masked off the words on the inside and stamped 2 more shirts. Then I cut another mask for the negative of the shirt, being sure to cover the ribbing too. I chose the smaller images in the set to decorate my other shirts with but really, the possibilities are endless. You could add anything you wanted.
I colored the images with my copic markers and used the coordinating dies to cut them out. Then, moving on to my background I blended distress inks on a panel and splattered it with the darkest of the inks. I took out the Layered Lakeside stencil set out and stenciled some clouds with texture paste over the top.
I inked up a small panel in greens and splattered it as well. Then I used the slimline scenic borders dies to cut some grass from it and adhered it to my panel sky panel.
Next, I adhered some twine to the back of the panel so my shirts could hang on the line and adhered it to a card base. The shirts are popped up with foam squares and then I moved on to finishing touches.
For those, I added glossy accents to the words and Stickles to the hearts and clouds on the other shirts.
I appreciate you sharing your time with me. Have a fabulous day!