Newton’s Nook – Happiness is Coffee and a Good Book

Hey friends! I’m over on the Newton’s Nook blog today with a fall color themed card for your fellow coffee and book lovers! This Sips & Stories set is so me that I have to pull it out to play from time to time just because.

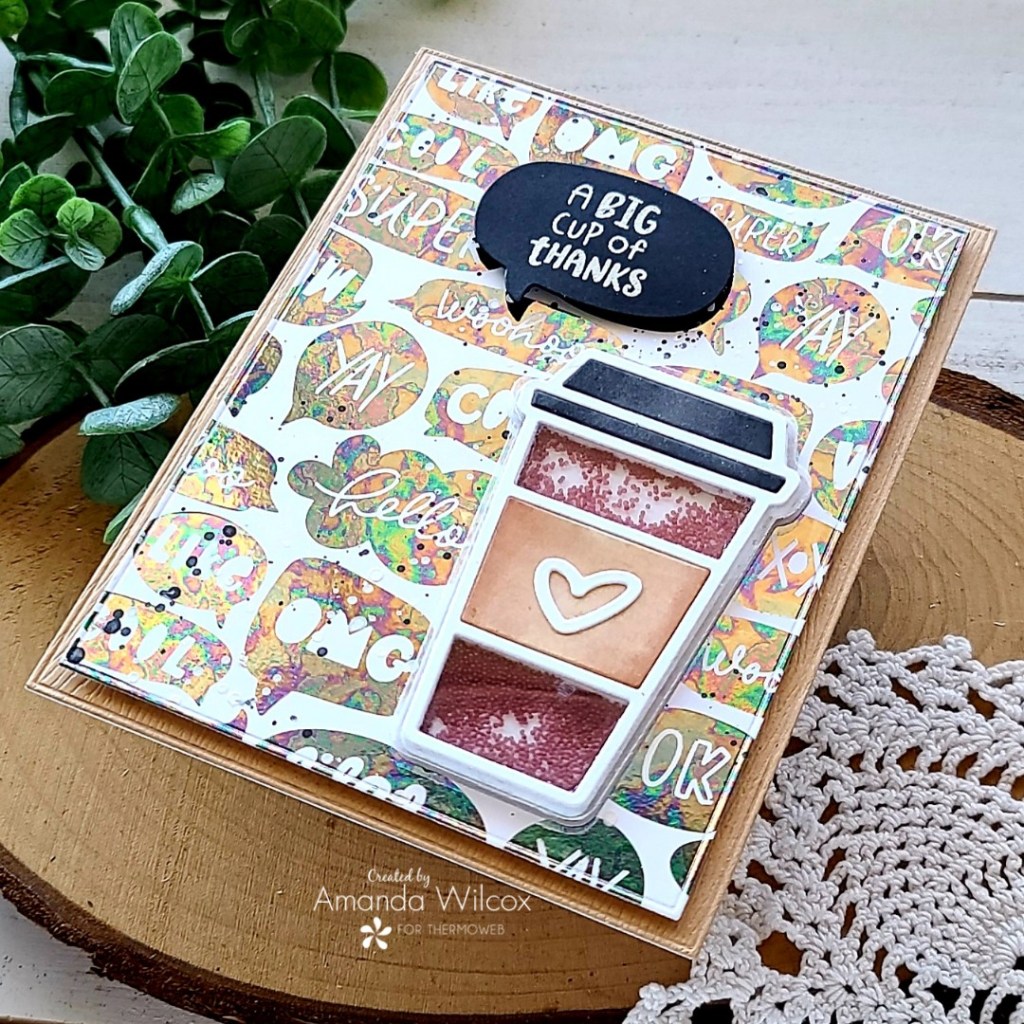
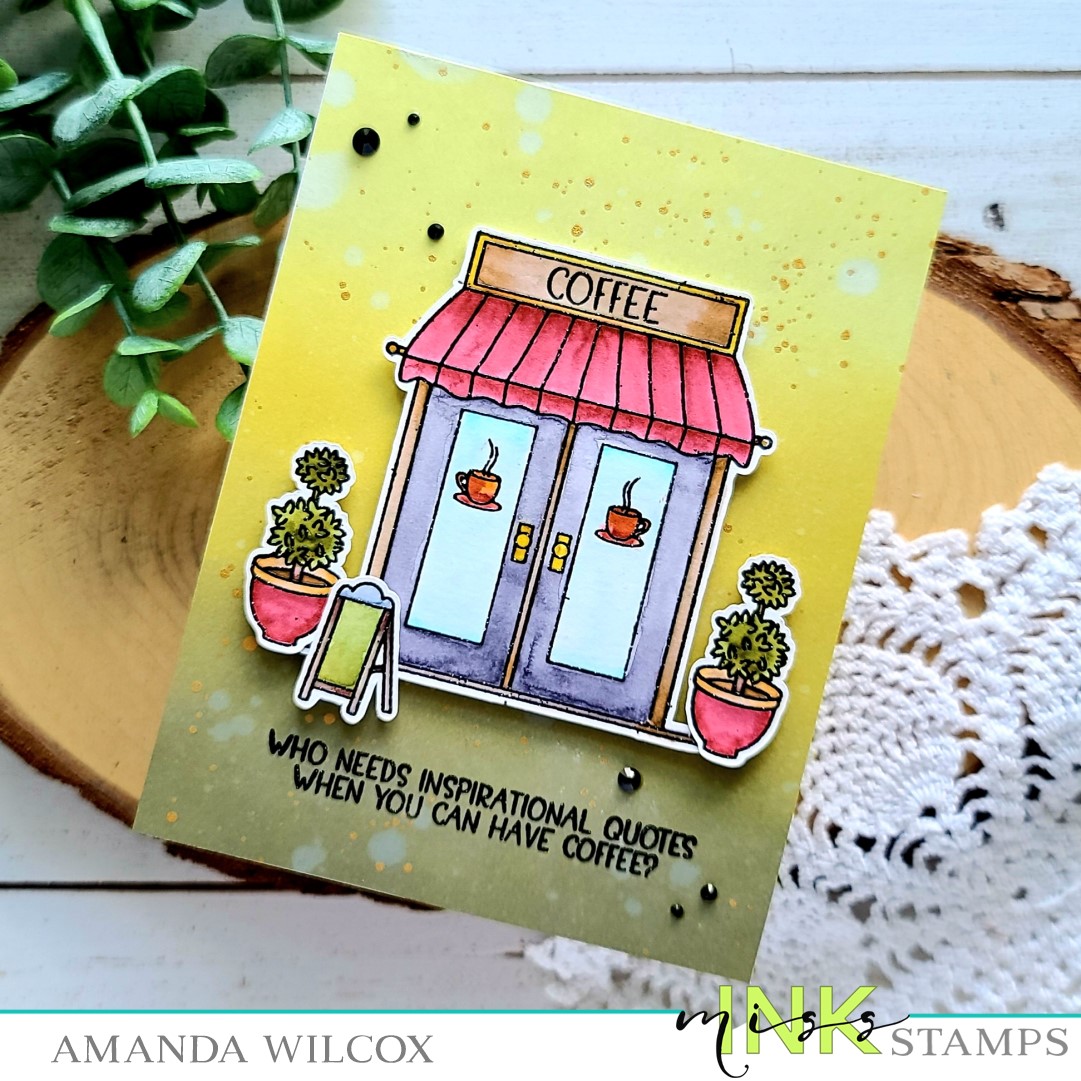
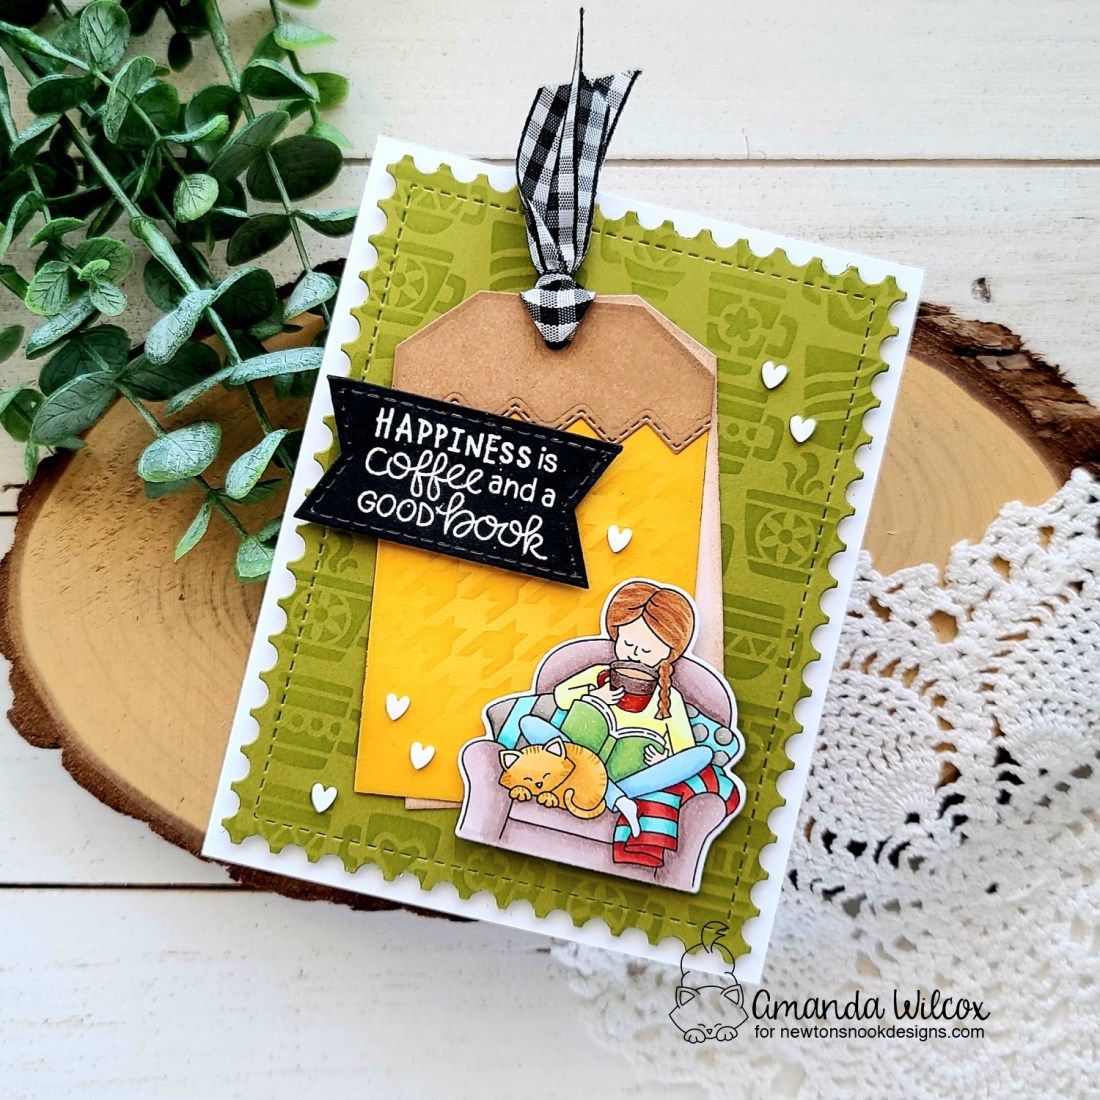
I started by stamping the image from Sips & Stories and colored it with my copic markers. Then I cut it out with the coordinating die and started playing around with my background. I inked up a green piece of cardstock with the Mugs stencil and die cut it with the largest Framework dies. Then I cut a couple of tags and a topper from the Fancy Edges Tag dies and inked them up with the Houndstooth stencil.

I added foam tape to the back of the mugs panel and adhered it to a white card base. Then I adhered my tags and topper together and threaded some ribbon through the top. These are adhered directly to the mugs panel with liquid glue.

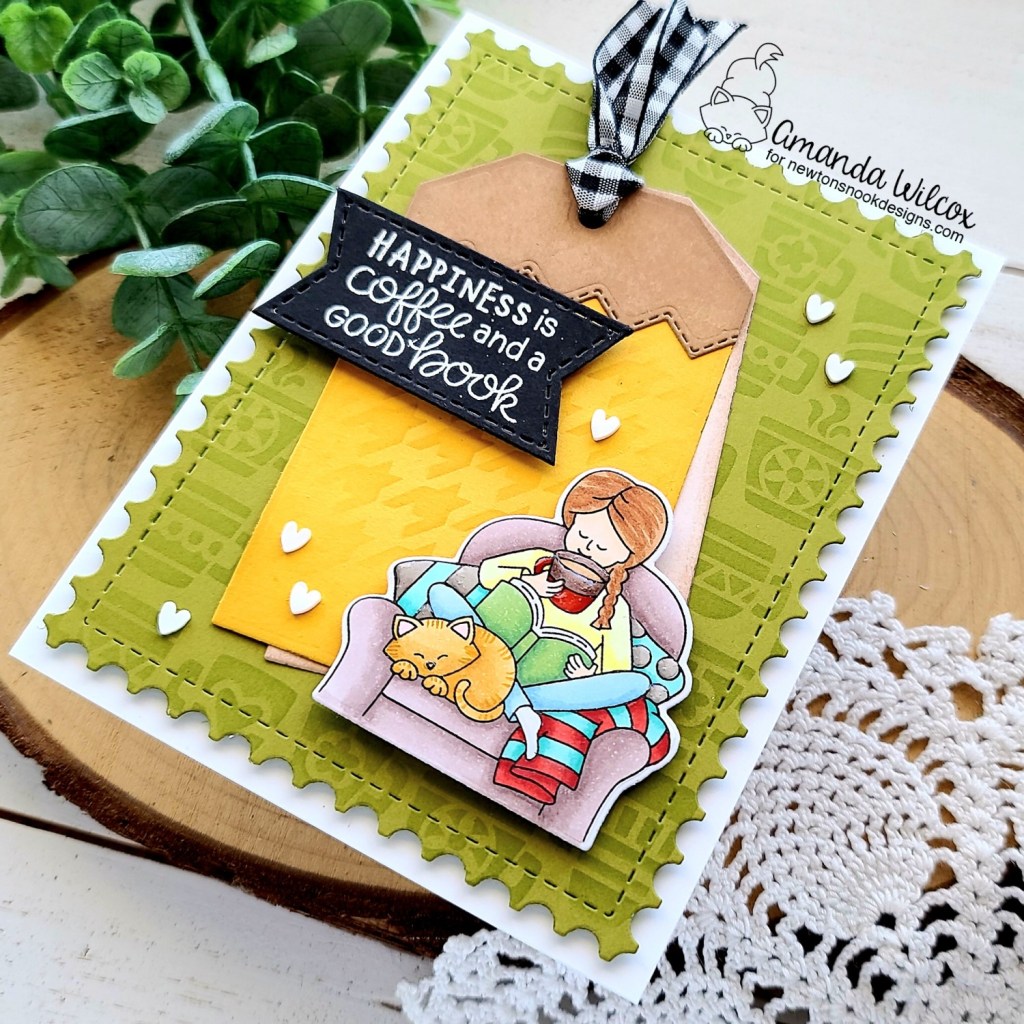
I chose a sentiment from the Sips & Stories set and die cut a banner from the Frames & Flags set to match the size I needed. I achieved this by cutting the whole banner, laying my stamp on the die, realigning the die smaller and just cutting one side off. Then I added foam squares to the sentiment and image and popped them in place.

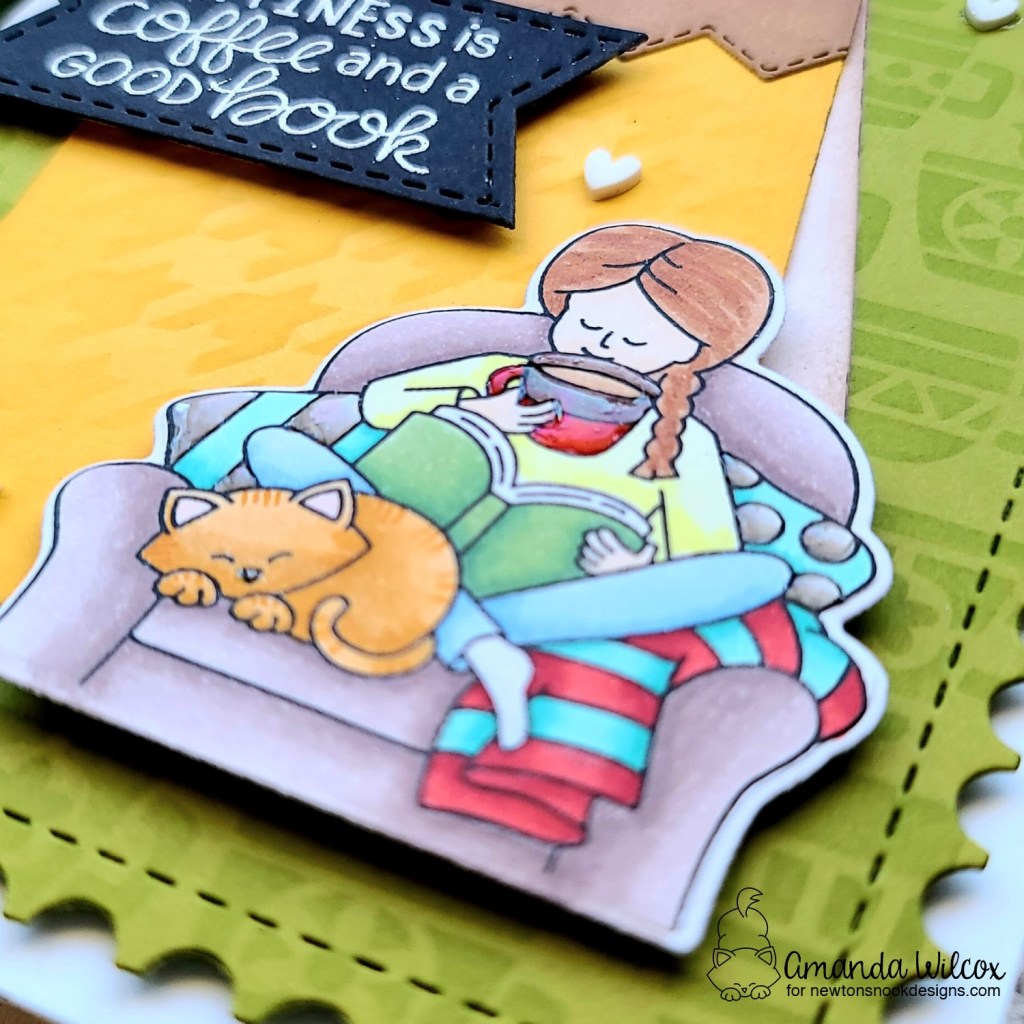
For finishing touches, I added glossy accents to bits on the pillows, the girl’s mug and Newton’s nose. Then I came in with a scattering of white clay hearts from Twiddler’s Nook Sweethearts mix.

I’m super excited to share this card with the recipient and hope they love it as much as I do!

Products used on today’s card:
Sips & Stories stamps and dies
Fancy Edges Tag dies
Framework dies
Frames & Flags dies
Houndstooth stencil
Mugs stencil
Twiddler’s Nook Sweethearts embellishments
iCraft Ultra Bond liquid adhesive
Thermoweb tape roll
Scrapbook Adhesives foam squares
Blending Buddy brushes
Glossy accents

I appreciate you sharing your time with me. Have a fabulous day!

Thermoweb – Coffee Shaker with Toner Foiling

Welcome back everyone! Today I’m over on the Thermoweb blog with a tutorial how I created this fun coffee themed shaker card using Brutus Monroe toner card fronts and decofoil!

This tide pool decofoil is so awesome in the light and using the microbeads from the Twiddler’s Nook shop as shaker bits is just added fun!

Be sure to head to the Thermoweb blog for all the details and products used to create this fun interactive card!

I appreciate you popping in today. Have a fabulous day!

Miss Ink Stamps – Who Needs Inspirational Quotes…

Hi there! I’ve got a fun Miss Ink Stamps card to share with you today featuring a mini scene from the Java Joe stamp set. I’m always drawn to using the main images in a set but sometimes I remember to look at it differently and use other bits and pieces too. That’s how today’s card came about.

I stamped and heat embossed images from Java Joe’s on Bristol Smooth cardstock and watercolored them with my copic markers. Then I used the scan-n-cut to cut them all out.

Next, I blended distress oxide inks on a panel and spritzed it with water. I flicked some gold watercolor across it and left it to dry.

Once it was dry, I trimmed it to A2 size and used my images as a guide where to stamp my sentiment. I used the MISTI to stamp it with VersaFine ink so it gave a really good impression over the distress oxides. Then I added foam squares to my images and plopped them in place.

For finishing touches I just glued down a scattering of black rhinestones from the Twiddler’s Nook shop.

I just love all the texture this card has between the watercolor and ink blending. It’s so great!

Products used today:
Miss Ink Stamps Java Joe’s stamps
Distress Oxide Ink –
Twiddler’s Nook Flat Back Rhinestone Mix – black
iCraft Ultra Bond liquid adhesive
Foam squares

I appreciate you sharing your time with me. Have a fabulous day!

Twiddler’s Nook Shop – Labor Day SALE

Hey there friends!!! Just popping in to let you know that we’re having a sale this weekend in the Twiddler’s Nook Shop! We’re offering 20% off your entire purchase from today through Monday, Sept. 6. Also, if you spend over $35 you get free shipping too!

For a bit of added fun this weekend, if you type the word “dinglehopper” in the notes to the seller portion at checkout I will add an extra surprise in your package! Click HERE to head to the shop and look around.

Have a happy and safe holiday weekend! Enjoy that last bit of summer before the kiddos head back to school if they haven’t already or maybe get a little extra crafting in.

Crafty hugs my friends!

I appreciate your support more than you all know!!! Have a fabulous day!

Miss Ink Stamps – Trick or Treat Photo Booth Strip

Hello everyone! I’m popping in with a fun card featuring some adorable Halloween critters from Miss Ink Stamps. I got this set last year and love it so much! I was super happy to be able to pull it out again and ink it up.

Today I’ve paired it with some great ink blending and an MFT Stamps photo booth strip die for a fun design element.

I started by stamping and coloring the critters from Boo Crew with my copic markers. Then I used the scan-n-cut to cut them out. Next, I cut the photo booth strip die from orange cardstock and inked the edges up with black soot distress ink. Then I cut a black panel slightly smaller than that and flicked some pearl and gold watercolor on it. Once it was dry I glued the two together and added my critters to it.

Next, I ink blended a panel with distress oxides in wilted violet, seedless preserves and twisted citron. Then I spritzed the panel with water and flicked some watered down black paint on it too. Once the panel was dry I die cut it with a Trinity Stamps Modern Embossed Edge Rectangle die. I adhered the panel to a card base and then popped the photo booth strip up with foam tape.

Last, I stamped a few sentiments from the set on a strip of cardstock and trimmed them apart. I used a combination of liquid glue and foam strips to adhere them in place. For finishing touches I adhered a scattering of glow-in-the-dark stars from Twiddler’s Nook and added a little glossy accents to the critters eyes.

Products used on today’s card:
Miss Ink Stamps Boo Crew
MFT Stamps Photo Booth Strip die
Trinity Stamps Modern Embossed Edge Rectangle dies
Distress Oxide Ink – twisted citron, wilted violet, seedless preserves
Distress Ink – black soot

Glossy accents
Twiddler’s Nook Glow in the Dark Stars and Moons clay embellishment mix

I appreciate you sharing your time with me. Have a fabulous day!

Pretty Pink Posh – Happy Halloween Shaker Card

Happy weekend my friends! I’m still on the Halloween roll so I have another fun one to share with you today. It’s a shaker card featuring lots of goodies from Pretty Pink Posh – some from the new release and some older.

I started my card by die cutting the boo shaker die twice from black cardstock. Then I cut 2 pieces of vellum to fit and used liquid glue to adhere it to the back of one and front of another. Then I lined the edge with foam tape, sprinkled my shaker bits and sealed it up. This way my shaker mechanism is it’s own thing and I can move it around to decide final placement.

Next, I stamped and colored images from Halloween Pals with my copic markers and used the coordinating dies to cut them out. Then I arranged them around my Shaker mechanism and used liquid glue to adhere them where possible.

Next, I decided to ink blend my background…big shocker, I know. Haha. I used seedless preserves, ripe persimmon and carved pumpkin. I spritzed it with my distress sprayer and flicked black acrylic paint on it too. After trimming the ink blended panel down, I adhered it to an A2 card base and adhered my shaker and images with a combination of foam squares and liquid glue.

Full transparency…didn’t like how plain it was and wanted another sentiment so I carefully used my MISTI and stamped Happy Halloween below the shaker. Then I stamped and heat embossed the stars in the set with glow in the dark embossing powder, die cut and adhered them with liquid glue as well. This made me super happy!

I went and hid in my closet with my card and boy did those stars glow! It was super cool and made me happy. After this was a success I went back to the craft room for finishing touches on my card.

I used black glaze pen on the critter eyes and glossy accents on their noses, hats and the pup’s hook. Then I used Stickles on the pumpkin openings for glitzy light coming through their jack-o-lanterns.

I had so much fun creating this card and hope you liked it too!

Products used today:
Pretty Pink Posh Halloween Pals stamps and dies
Pretty Pink Posh Boo shaker die
Distress Oxide ink – seedless preserves, ripe persimmon, carved pumpkin
Twiddler’s Nook embellishments – pixie dust microbeads and luscious lime confetti stars
Glossy accents
Stickles

I appreciate you sharing your time with me. Have a fabulous day!

BYSHC Christmas in July Hop

Hey friends! Popping in to let you know we are sponsoring the super fun Build Your Stash Holiday Cardmakers Christimas in July Hop! There are fun prizes up for grabs, including 2 $20 gift codes to the Twiddler’s Nook shop!

However, while the hop is going on we’re also having a sale on the entire shop! 15% off – no code necessary, not vaild on prior purchases.

Click HERE to head to the shop and take a look around.

For fun I have a Christmas shaker card to share with you that features a whopping 4 embellishments from the shop! I also have to say that I did all my stamping using the new Pressure Pal tool and I absolutely love it!

To create this card, I stamped a couple of images from MFT Stamps Polar Opposites set and colored them with my copics. Then I used the coordinating dies to cut them out and set them aside. I took a white panel measuring 4×5.25 inches and die cut the Rectangle Peek-a-Boo Window from it. This is the start of my shaker window. I lined the back with scrappy tape and adhered a piece of acetate. Next, I placed the panel in my MISTI and stamped a sentiment from MFT Reindeer Games below the window.

Then I took a white panel larger than the window and blended Distress Oxide inks in blueprint sketch and chipped sapphire. I spritzed it with water and flicked some gold watercolor on it. While that was drying, I added a double layer of foam tape to the back of my window panel and sprinkled in my shaker bits. Today I chose Twiddler’s Nook Snowy Day, Princess Rings and Pixie Dust micro beads!

I removed the release paper, added my inked panel to seal the shaker mechanism and popped the whole thing on a white card base. Next, I added foam squares to the back of my images and placed them at the bottom of the window.

Moving on to finishing touches, i added a scattering of Twiddler’s Nook gold baubles to the design. Then glossy accents to the noses and feet and unicorn Stickles to the sweater and hat. Last, I added black glaze pen to the critter eyes to help them shine.

Super cute and ready for my Christmas card stash!

Products used on today’s card:
Twiddler’s Nook Snowy Day
Twiddler’s Nook Princess Rings – Cinderella
Twiddler’s Nook Pixie Dust Micro Beads – Silvermist
Twiddler’s Nook Baubles – Gold
Twiddler’s Nook Pressure Pal
MFT Stamps Reindeer Games stamps
MFT Stamps Polar Opposites stamps and dies
MFT Stamps Rectangle Peek-a-boo Window die
Distress Oxide Ink – blueprint sketch and chipped sapphire
Glossy accents
Stickles – unicorn
Foam tape

I hope you’re enjoying the hop and will play along! Don’t forget to head to the SHOP and check out our sale too!

I appreciate you sharing your time with me. Have a fabulous day!

Heffy Doodle – Hey Gull Friend!

Thanks so much for stopping in today! I’m sharing a super bright and fun slimline card featuring some of the goodies from my most recent Heffy Doodle order! Right after I orderd these fun seagulls I kept seeing inspiration all over and it was killing me to wait for them to arrive. Needless to say, I had these cuties inked up and colored within minutes of finding the package in my mailbox!

I had a general layout in my head so I did stamp and color the images straight away. I used the coordinating dies to cut them all out and set them aside. Then I took a white panel and used different dies from the Slimline Scenery die set to cut sections. The one thing I love about these dies is how they give the stitched detail on both sides of the cut line so you could use either! It’s great!

After I cut the sections apart, I pulled out distress oxide inks and inked up each panel, except the clouds. From top to bottom I used squeezed lemonade and mustard seed, peacock feathers, mermaid lagoon, blueprint sketch, antique linen and gathered twigs. Then I spritzed it all with water and let it dry.

Next, I cut a slimline card base measuring 3.5×8.5 inches and adhered the layers one at a time working from top to bottom to make sure everything fit together properly. Then I used liquid glue to adhered my images and popped the card in my MISTI to add the fun sentiment at the bottom.

For finishing touches, I added glossy accents to the bird beaks and feet and black glaze pen to their eyes. Then I pulled a couple of seashells from the Twiddler’s Nook Glass Beach embellishment mix and glued them on either side of the sentiment at the bottom.

I just love how fun and bright this card turned out! Originally I was going to use all blue for the background but I’m just loving that yellow panel for the bright sunshine coming from behind the clouds.

Each month the Heffy Doodlers Facebook group has challenge you can enter. This month’s theme is adventure so I’m going to link this fun card up there!

Products used on today’s card:
Heffy Doodle You Go, Gull stamps and dies
Heffy Doodle Slimline Scenery dies
Twiddler’s Nook Glass Beach embellishments
Glossy accents
Distress Oxide inks
Tombow Mono Multi liquid adhesive
Copic markers

I appreciate you sharing your time with me. Have a fabulous day!

Paperie Ink – Just Wanted to Bug You

Welcome, welcome everyone! Just popping in to bug you on this fine Sunday morning. Haha! These sweet Paperie Ink ladybugs were just too cute to resist and the sentiments in the set are equally as adorable! Today I’m sharing a fun, just because card and it cracks me up every time I read the sentiment.

I stamped and heat embossed images from Bug For a Hug stamp set on Bristol Smooth cardstock. I watercolored them all with Zig Clean Color Real Brush markers and a water brush pen. Then I used the scan-n-cut to cut them all out.

Next, I took a light blue panel and used white pigment ink with a blending brush and the Newton’s Nook clouds stencil. Then I used a Newton’s Nook land borders die to cut some grass from a green panel and inked up the edges with a blending brush for some dimension. Next, I used liquid glue to adhere the grass to the sky and the leaves to the top of the panel too. I did put acrylic blocks on the leaves until the glue was dry to make sure they stayed flat.

To keep things looking the same, I stamped and heat embossed my sentiment before adding the ladybug images. Then I popped those cuties up with foam squares. For finishing touches, I added some red hearts from Twiddler’s Nook Sweethearts embellishment mix and some Fresh as a Daisy embellishments in the grass too.

Last, I popped the panel up with foam tape a melon card base and this card is all finished. Cute as can be!

Products used on today’s card:
Paperie Ink Bug For A Hug stamps
Newton’s Nook Clouds stencil
Newton’s Nook Land Borders dies
Twiddler’s Nook Fresh as a Daisy embellishments
Twiddler’s Nook Sweethearts embellishments
Foam squares
Foam tape
Blending Buddy brush

I appreciate you sharing your time with me. Have a fabulous day!

Miss Ink Stamps – Oh, Nuts!

Hey friends! I hope your week is chugging along smoothly. Today I’m popping in with a silly card from Miss Ink Stamps featuring some of my favorite squirrels from Oh, Nuts! I paired them with a little stenciling and decofoil for some texture and shine.

To start my card, I pulled out the Ins & Outs Quatrefoil and Latte Love stencils. The Ins & Outs stencils are 2-piece sets that work together to give you a center shape and a frame. Today I inked up the center piece with Lawn Fawn walnut ink and a blending brush, then taped the Latte Love stencil over the opening and added another layer of the same walnut ink. I removed the stencils and placed the quatrefoil frame stencil in place and spread Thermoweb transfer gel through the opening. I removed the stencil and set my panel aside to dry. Next, I turned on the laminator to heat up while the transfer gel dried and I cleaned up my workspace.

While I was waiting to foil my panel, I stamped images from Oh, Nuts! and colored them with my copic markers. I used the scan-n-cut to cut them out and set them aside. Next, I placed my stenciled panel in a folded sheet of parchment paper and added a piece of gold decofoil over the top. I ran this through my laminator and voila! Shiny, beautiful frame around my stenciling! This never gets old.

I trimmed my panel down to 4×5.25 inches and stamped a sentiment below the foiled frame. I added foam squares to the back of my images and popped them in place. Then I added foam tape to the back of the panel and popped it up on a white card base.

To finish things off I glued a scattering of gold baubles from the Twiddler’s Nook shop and added black glaze pen to the squirrel eyes and noses. After the eyes were dry I added a dot of white gel pen for a highlight.

Aren’t these furry little guys super cute?!? I love them and this sentiment leaves room for so many different types of cards too!

Products used on today’s card:
Miss Ink Stamps Oh, Nuts!
Miss Ink Stamps Ins & Outs Quatrefoil stencil
Miss Ink Stamps Latte Love stencil
Thermoweb Transfer Gel
Thermoweb Decfoil gold
Thermoweb stencil pal
Twiddler’s Nook gold baubles

I appreciate you sharing your time with me. Have a fabulous day!

(This blog uses affiliate links whenever possible, at no additional cost to you.)