Miss Ink Stamps – Firetruck!

Hi friends! I’m over on the Miss Ink Stamps blog today with my first post as a design team member and I’m sharing a super funny card! The whole thing uses just one small stamp set called Firetruck Duck. I love it!

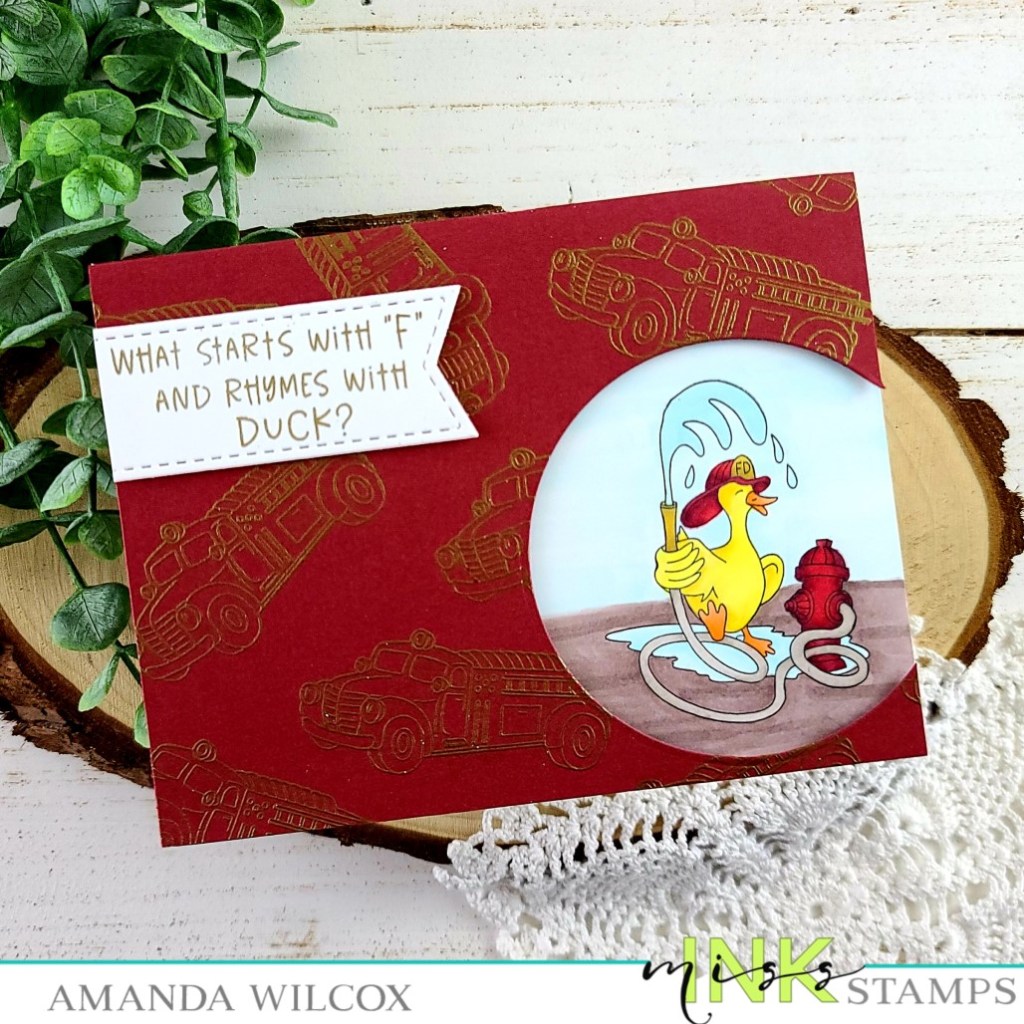
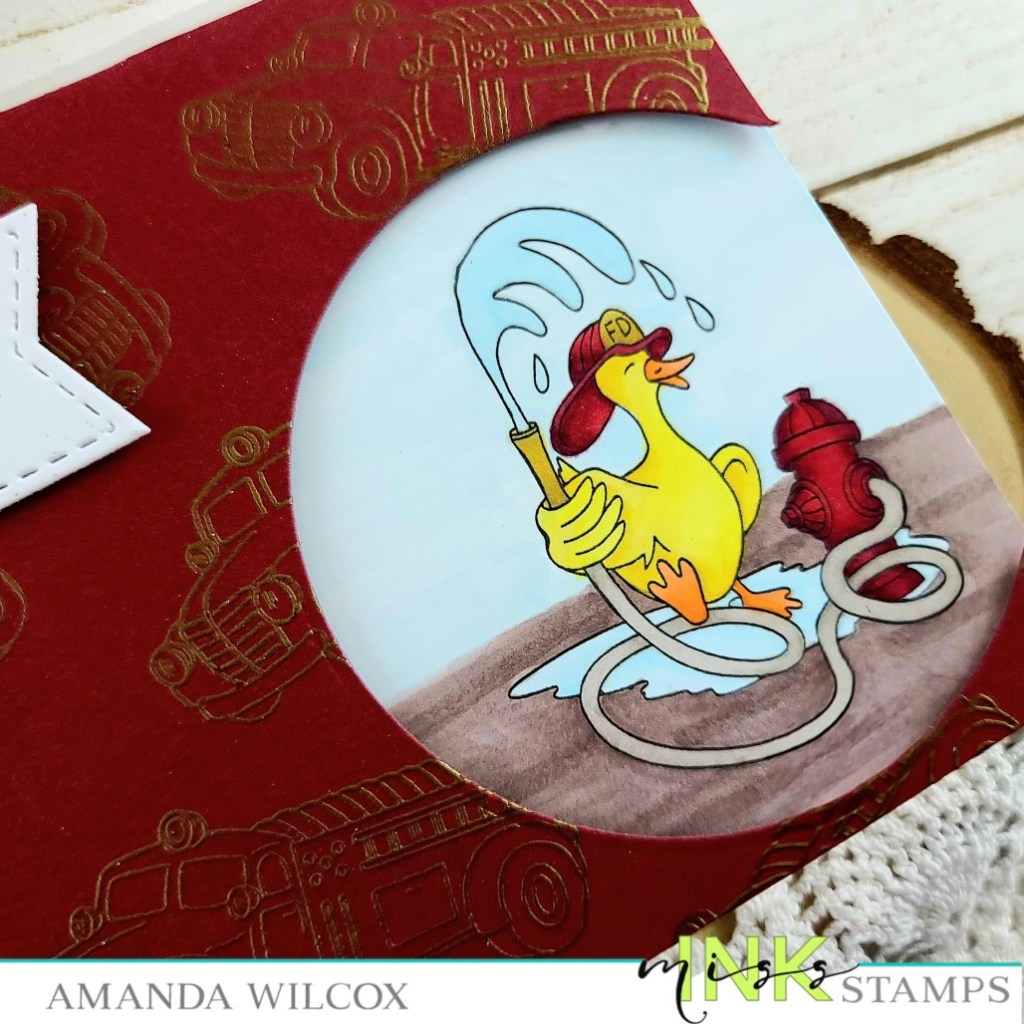
It was pretty quick to come together. I stamped and heat embossed the firetruck in gold on a red panel, then die cut a circle from the lower right corner. I stamped my duck on an A2 white panel and colored it with my copics. Next, I popped the red panel up with foam tape and moved on to my sentiment.

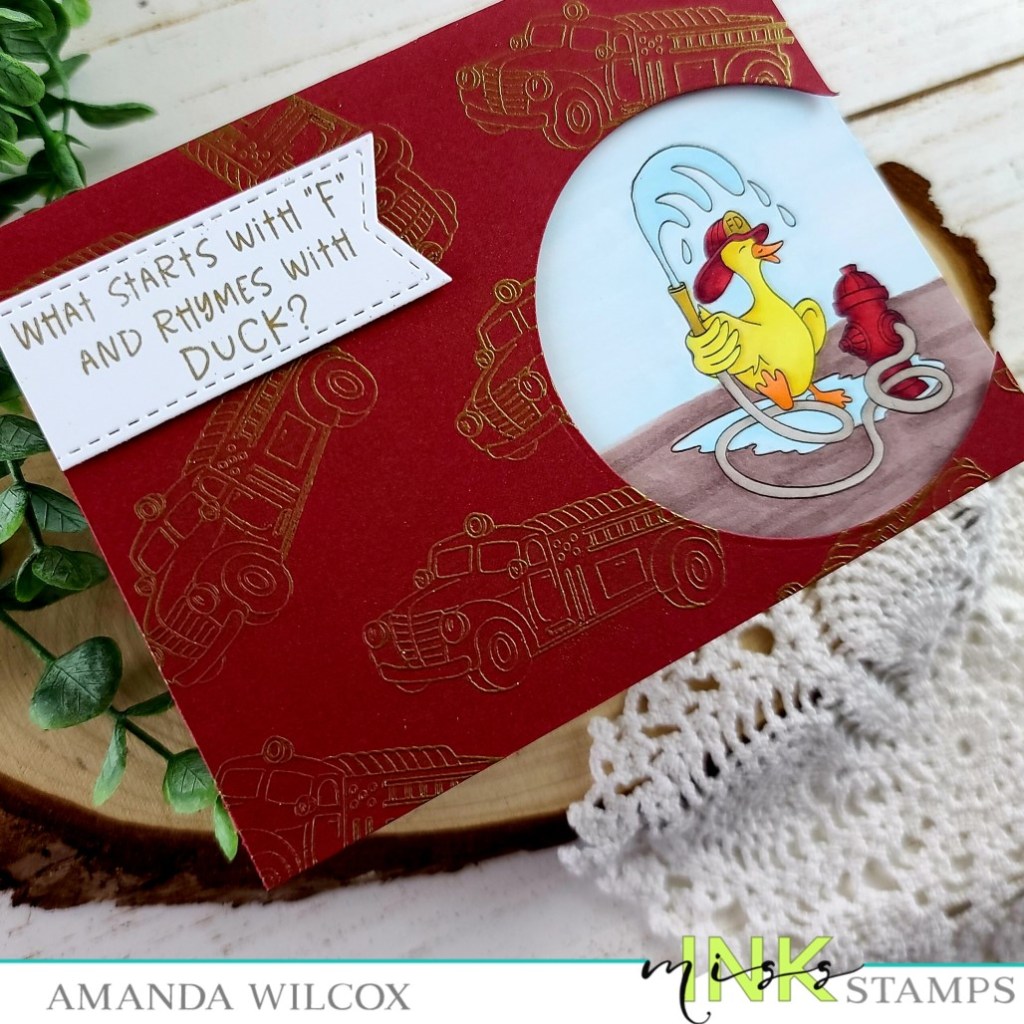
I die cut a flag from the Newton’s Nook Frames & Flags die set and heat embossed it in gold to tie things together. Then popped it up with foam squares too. Instead of giving it all away on the front, I brought the sentiment finisher to the inside of the card for fun.

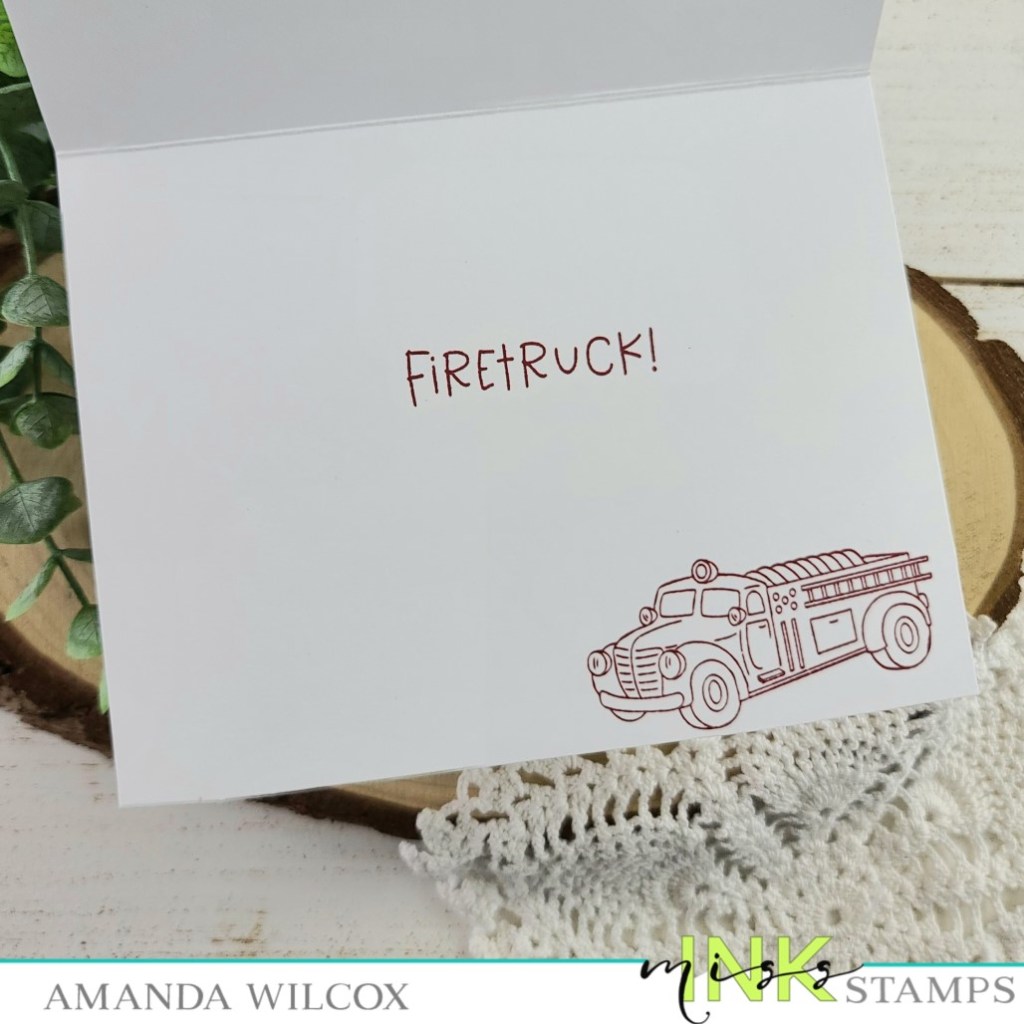
I couldn’t resist also stamping that cute firetruck to go along with it. I decided on red ink to tie it in with the card design. Hehehe! I love this set and can’t wait to share this card with someone who will really appreciate it.

I appreciate you sharing your time with me. Have a fabulous day!

Pink & Main – Autumn Blessings

Hello there! I’m over on the Pink & Main blog sharing a really simple but beautiful die cut card today. I’m in love with this new leafy slim line die. It’s just beautiful and can look so different depending how you use it.

Today, I started with an oversized panel and ink blended distress oxides in aged mahogany, rusty hinge and wild honey. I spritzed it with water and blotted it dry. Then I took some gold watercolor and watered down black acrylic paint and flicked it all over the panel. Once this was dry I die cut it with the largest of the layered slim line dies. I adhered this to a white card base and moved on to die cutting my leafy slim line die 3 times from black cardstock. I used liquid glue to adhered these all together and then adhered it to my inked card front.

Then I die cut the “autumn blessings” sentiment and shadow from the blessings slime line die set. The words are cut 3 times from black cardstock and the shadow from iridescent vellum. They are all adhered with liquid glue as well.

I finished the card off with a scattering of iridescent jewels for a little added sparkle and interest.

I love the slight shimmer from the gold watercolor and jewels with the bold black die cuts and those distress oxide colors! I could see doing this card in a set with different background colors for each card. So fun!

I appreciate you sharing your time with me. Have a fabulous day!

Trinity Stamps + Pink & Main – Hello Beautiful

Hi everyone! Today I’ve got an extra special card to share with you. I had so much fun mixing the colors and companies to create this beauty! The whole idea came about from the beautiful Metallic Poppies embellishments that are going live in the shop tomorrow! Everything just fell into place perfectly and I love it.

To create my card, I blended distress oxides on a 3.5×8.5 inch panel in ripened perssimon and mermaid lagoon. It took a little work but they blended beautifully! Then I spritzed it with water and set it aside. Next, I die cut the Trinity Stamps foliage frame from black cardstock and vellum. I flipped them opposite so the leaves didn’t match up and glued them together with liquid glue. Then I glued that to the inked panel.

Next, I pulled out the Hello Beautiful sentiment dies from Pink & Main’s recently released Beautiful Slim Line Dies. I cut the words from black cardstock 3 times and the shadow from vellum once. These are all adhered with liquid glue as well. Then I tucked it under the foliage frame and glued it to the inked panel as well.

To finish this gorgeous card off I glued a few of the new Metallic Poppies among the foliage and one on the dot for the “i” to finish things off. I added some Nuvo Crystal Drops in morning dew to the centers of all the flowers and popped my panel on a white card base.

These beautiful embellishments and 25 others will be available in the shop starting tomorrow! I hope you’ll stop by and take a look.

I appreciate you sharing your time with me. Have a fabulous day!

Newton’s Nook – Happy Halloween Shaker

Hello everyone. I’m over on the Newton’s Nook blog today with this really fun shaker card featuring some newly release goodies along with goodies from previous releases too. I hope you enjoy it.

To create this card, I started with a kraft panel and used blending brushes on dye inks over the Falling Leaves stencil. I used red, yellow and brown randomly for a little color variation. Then I took out the Frames & Flags and Framework die sets and cut a frame. I backed it with scrappy tape and adhered acetate to it to create my window. Then I scattered seed beads (preview of coming attractions to Twiddler’s Nook) on the kraft panel and adhered my frame with foam strips. I took the die used to create the window to cut a brown panel and then used the land borders to create a hill and adhered it to the acetate window.

I stamped my Pug-kin and supporting images from Autumn Mice and Paw-tumn and colored them with my copics. Then I used the coordinating dies to cut it all out. With a combination of liquid glue and foam squares, I adhered all the images filling in my scene.

I took a sentiment from the new Spooky Roundabout and heat embossed it on one of the banners from Banner Trio. I attached it to the window and added a few falling leaves to round things out. Then, moving on to finishing touches, I added white gel pen accents and glossy accents to various spots.

I appreciate you sharing your time with me. Have a fabulous day!

Coffee Loving Cardmakers – Bottomless Thanks

Hey there! It’s time for another Tuesday Tea with Twiddler’s Nook over on the Coffee Loving Cardmakers blog. Today I’m sharing bottomless thanks and some new-to-me products. It was messy fun!

I had lots of fun creating today’s card. I started by stamping and coloring my images from Miss Ink Stamps Brewtiful set with my copics. Then I used the scan-n-cut to cut them all out and I started deciding how to create the background I had in my head. After lots of trial and error, I landed on using the Backgammon 2 stencil on brown cardstock with some Nuvo expanding mousse I recently purchased. I decided to try heating it up for that puffy look. It’s sooo cool! I’ll definitely have to get some more colors. Then I die cut the panel with my Frames & Flags dies from Newton’s Nook.

Next, I cut a piece of blue cardstock matching my mug and stamped the smaller flower images from the set repeatedly creating my own patterned paper. I glued this to a brown card base and popped my stenciled panel up with foam tape. Then with a combination of liquid glue and foam squares I adhered my images. I stamped my sentiment on the same blue cardstock and trimmed it into a strip, popping it up with foam squares too.

For finishing touches on my card today, I added glossy accents to the dots on the mug, flower stamen and the coffee beans. I also added a little Wink of Stella glitter brush pen to the sentiment strip and the “X” in my XO.

I love cards with dimension and texture and this one is packed full. I had fun creating it and hope you enjoyed it too.

I appreciate you sharing your time with me. Have a fabulous day!

Lawn Fawn – Magical Happy Birthday

Welcome to a new week. I hope you all had a wonderful weekend. I recently had a moment to play with some new goodies I ordered from Scrapbookpal.com. It was mostly supplies but I had to throw in a few fun things too and one of them was the new Little Dragon mini set.

To create my card, I started by stamping and coloring my images with my copics. I used the Little Dragon and Critters Ever After stamp sets to create this scene. Then I inked up a panel with distress inks for a darker sky and spritzed it with water. Next, I inked up 2 other panels – for grass and a hill – and die cut them with my grassy border die and one of the stitched hillside borders.

I die cut a stitched rectangle from an old Beachside paper pad I’ve been hoarding. Then I cut the largest outside-in stitched scalloped circle from the center. Using my images as a guide I stamped some stars in the sky with VersaMark ink and heat embossed them in white. Now, it’s time for assembly.

I adhered the hill and grass together and then to the back of the panel with the circle hole. I line the back of that with foam tape and adhered it to my inked panel. This whole panel was then glued to a card base and I started on my images. Those are adhered with a combination of foam squares and liquid glue.

For my sentiment, I die cut one of the wavy banners and stamped “Happy Birthday” from the wavy sayings stamp set. After folding on the crease lines I added a little glue to the folds and popped the banner up with foam squares.

To finish this card off, I added unicorn Stickles to the stars in the sky, glossy accents to the dragon horns, flames and flags on the castle and a black glaze pen on the dragon’s eye. Last, I glued down a scattering of Fortune Teller flat back beads from Trinity Stamps.

I had so much fun creating this card! I hope you enjoyed it and find a little inspiration to make something wonderful.

I appreciate you sharing your time with me. Have a fabulous day!

Pink & Main – Celabra La Vida!

Oh my goodess friends! I am SOOOOOOOOOOO excited to share with you that I have joined the Pink & Main Design Team! This is thrilling and going to be such a fun adventure! Today is my first card share over on their blog and I’m really excited about it! They just had a new release and I’ve been playing with the new goodies. I hope you love it!

To create my card, I started by inking a panel with distress oxides in blueprint sketch, picked raspberry and mustard seed. Then I used distress ink in black soot over the whole thing, using the mandala stencil. I spritzed it all with water and then ran it through my die cut machine with the larger of the new Beautiful slimline dies.

Next, I stamped and colored my images from Day of the Dead with my copics and then used the coordinating dies to cut them all out. I arranged them on my panel how I wanted and then adhered them with a combination of liquid glue and foam squares.

I didn’t want my sentiment to distract from the cool stenciled background or that cutie boy and his guitar so I kept it simple. I stamped and heat embossed it in white on black cardstock and trimmed it into a strip. I popped it up with foam squares. I adhered the whole panel to a black card base measuring 3.5×8.5 inches with foam tape for a little dimension. Then I moved on to finishing touches.

For those, I added some white gel pen accents to some of the images and then glossy accents to the candle flames and some details on the boy and his guitar. Last, I used liquid glue and adhered a scattering of confetti bits from my stash throughout the design. I really love how this finishes it off and makes the card feel complete.

I hope you enjoyed today’s share and found some inspiration to create something wonderful. Remember all the new goodies are for sale in the shop, so head over and check it all out!

I appreciate you sharing your time with me. Have a fabulous day!

Newton’s Nook – Cupcake Inspirations 500th Challenge

Happy Friday everyone!!! I’m super excited to be sharing inspiration for Cupcake Inspirations’ 500th Challenge! This is amazing and Newton’s Nook is a sponsor so we’re playing along.

I decided to go a little bold and wild for their awesome birthday theme this challenge.

To create my card, I started by die cutting my scalloped square and then I stamped and heat embossed the zoo party image. I used my Zig Clean Color Real Brush Markers and a water brush pen to watercolor the scene. I love coloring these critters up! It’s so relaxing and fun!

Next, I blended picked raspberry and blueprint sketch distress inks on a panel and spritzed it with water. The panel was adhered to a card base and the zoo party image was popped up with foam tape. I die cut one of the speech bubbles from the Newton’s Nook set and I heat embossed a sentiment on it. This is popped up as well.

Then I die cut a banner from the Frames & Flags set and another sentiment was heat embossed on it. It’s popped up with foam tape but tucked under the edge of the square panel.

I finished the card off with Nuvo Crystal Drops in morning dew scattered throughout the card design. I love the subtle interest this gives without distracting from those awesome critters!

I hope you’ve found some fun inspiration to create a fantastic birthday themed card to play along with the Cupcake Inspirations 500th Challenge!

I appreciate you sharing your time with me. Have a fabulous day!

Trinity Stamps – Hanging In There

Hello everyone. I’m joining you today for a fun way to customize the new Hang In There stamp set from Trinity Stamps. I had so much fun creating this card and hope you enjoy it.

I started this card by stamping the image from Hang In There as it is. Then I masked off the words on the inside and stamped 2 more shirts. Then I cut another mask for the negative of the shirt, being sure to cover the ribbing too. I chose the smaller images in the set to decorate my other shirts with but really, the possibilities are endless. You could add anything you wanted.

I colored the images with my copic markers and used the coordinating dies to cut them out. Then, moving on to my background I blended distress inks on a panel and splattered it with the darkest of the inks. I took out the Layered Lakeside stencil set out and stenciled some clouds with texture paste over the top. 

I inked up a small panel in greens and splattered it as well. Then I used the slimline scenic borders dies to cut some grass from it and adhered it to my panel sky panel.

Next, I adhered some twine to the back of the panel so my shirts could hang on the line and adhered it to a card base. The shirts are popped up with foam squares and then I moved on to finishing touches.

For those, I added glossy accents to the words and Stickles to the hearts and clouds on the other shirts. 

I appreciate you sharing your time with me. Have a fabulous day!

Newton’s Nook August Release – Day 4

Holy moly! It’s been an amazing week of Newton’s Nook awesomeness and today is the icing on the cake! These new images are sooo much fun! I love them both!

Pug-kin and Knight Owl Stamps and Dies

Seriously??? They are the cutest things ever and I have super fun cards using each one to share with you today.

I knew straight off that I wanted to create a fun forest scene for my Knight Owl to be in. He’s on a quest, you know. This is just fitting. 😉 I inked up a panel with distress inks and used the Falling Stars stencil and some Metallix gel for a night time background. Then I die cut a vellum panel from one of the Frames & Flags dies. I inked up another panel with green and die cut it from the same die and again with the grassy border die. Then I cut some trees from the Forest Scene Builder set and inked them up. I die cut my starry panel with the Framework die and popped it up on a dark blue card base with foam tape. I glued my grass and trees to the vellum panel and carefully put glue on the vellum behind those places and stuck it down to the stenciled panel. This hides your glue spots.

I had colored my Knight Owl with copics and die cut him, now it was time to pop him up with foam squares. I decided to pull that dark blue in a little more and heat embossed my sentiment (which is a combo of Heartfelt Essentials and Knight Owl) on a flag from Frames & Flags. To make things cohesive I ran the flag through my die cutter with the same die as my vellum panel so the stitching matches up. The flag is popped up with foam tape. To finish the design off I added white gel pen highlights and glossy accents in a couple of spots like the shield and owl’s beak and feet.

I have to be totally honest here…I could color a hundred of these pug-kins and it wouldn’t get old. I really love watching them come to life. They’re too cute! I paired this little sweetie with some extra pumpkins from the new Paw-tumn set from earlier in the week. For the background, I inked up a panel with distress oxides and then used the new Houndstooth stencil over the top in brown. I found a brown textured cardstock in my stash and cut a couple of circles out using the Circle Frames dies. The brown panel is popped up with foam tape. I die cut 2 banners from the Banner Trio dies and stamped my sentiments (one from Heartfelt Essentials and the other from Pug-kin) on them. Those are popped up with foam tape and then the cute Pug-kin and his pumpkins are adhered with a combo of liquid glue and foam squares.

I finished this card off with some white gel pen highlights, a little glossy accents on his nose and some clear gems from my stash. I just love this!!!

Would you like to win the “Knight Owl” and the “Pug-kin” Stamp Set?We will choose TWO lucky winners to each win this duo of stamp sets!

Here’s how to win: Comment on the NND blog and Design Team blogs (see list below)! Thewinner will be chosen at random from the collective reveal posts. Make sure to check out each of their blogs and comment for your chance to win. You will not know which blog has been chosen so the more you comment on the better your chances are of winning! You have until Thursday August 20th at 9pm EST to comment  — winners will be announced on the blog post on Friday, August 21st. 

Check out all the awesome Design Team Blogs below to enter:

Newton’s Nook Designs
Ellen Haxelmans
Larissa Heskett
Samantha Mann
Zsofia Molnar
Maria Russell
Andrea Shell
Tatiana Trafimovich
Amy Tsuruta
Amanda Wilcox