Newton’s Nook August Release – Day 3

Welcome to day 3 of Newton’s Nook’s August release reveals! Today is packed full of Halloween goodness! I have 3 awesome cards to share with you so I’ll keep them all brief.

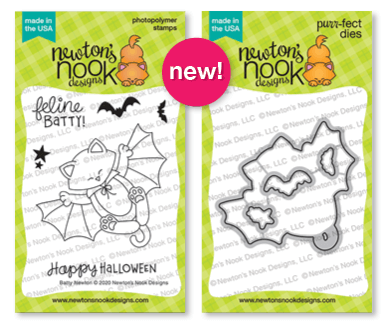
Batty Newton Stamps and Dies

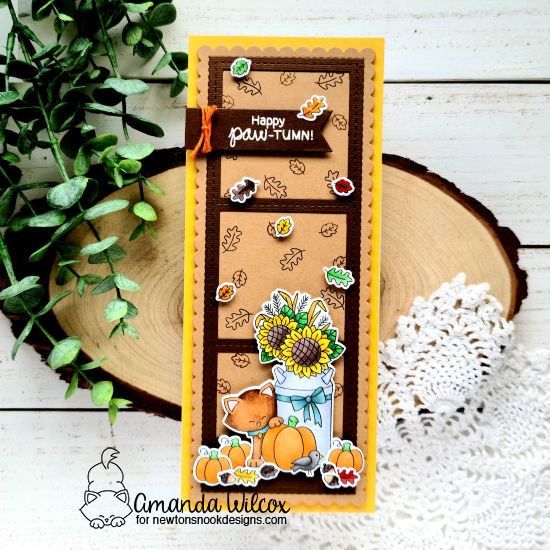
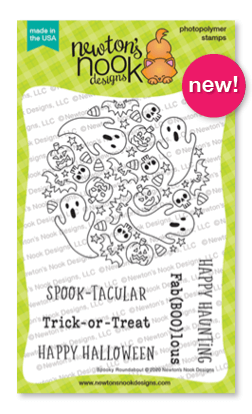
Spooky Roundabout Stamps
(Coordinates with Circle Frames and Banner Trio dies)
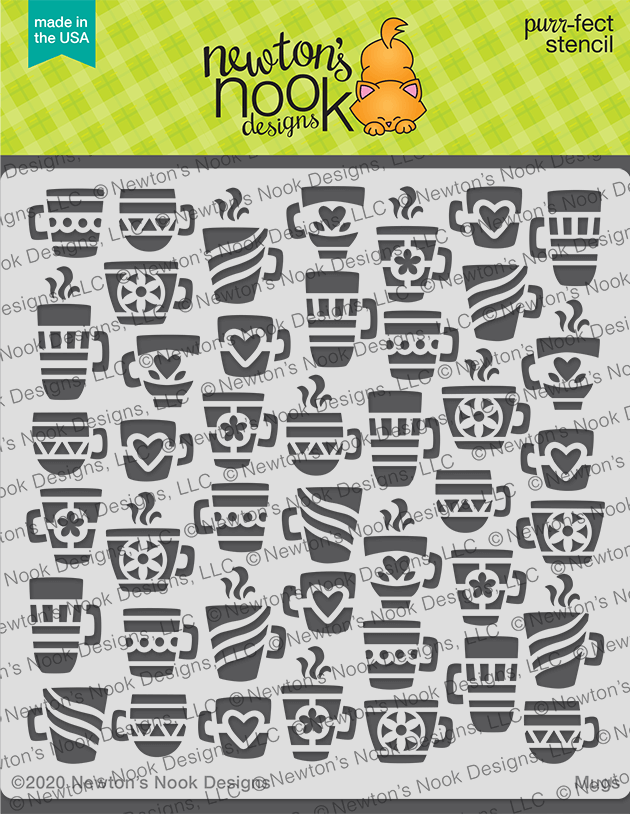
Spiderweb Stencil

Isn’t all of this incredible?!?!? I love Halloween and creating Halloween themed projects, so today is making me sooo happy! I hope you like it all too!

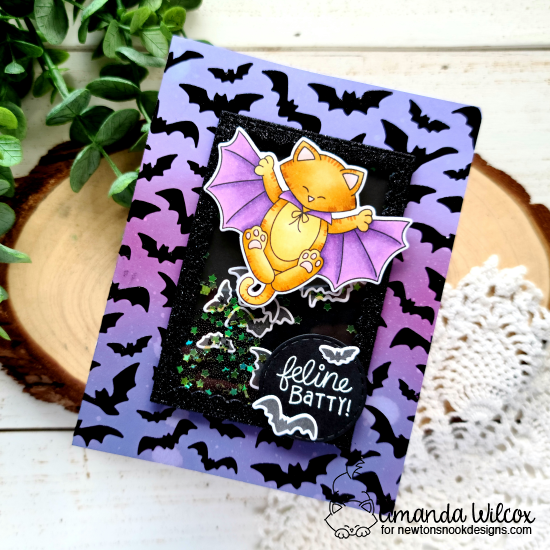
To create this fun Batty Newton shaker, I started with blending distress inks on a panel and used Thermoweb transfer gel and black decofoil with the bats stencil. Then to create the shaker mechanism I used Thermoweb glitz gel on a panel, let it dry and die cut a frame from the Framework die set to make it super glittery. I stamped, colored and die cut my Batty Newton; making sure to cut lots of extra bats for my shaker. I die cut the smallest Circle Frame and heat embossed my sentiment. Batty Newton and the sentiment are popped up with foam tape on the shaker and the shaker is adhered to the foiled panel with liquid glue. Then the whole thing was popped on a card base and I used some simple glossy accents on Newton’s nose and toe beans.

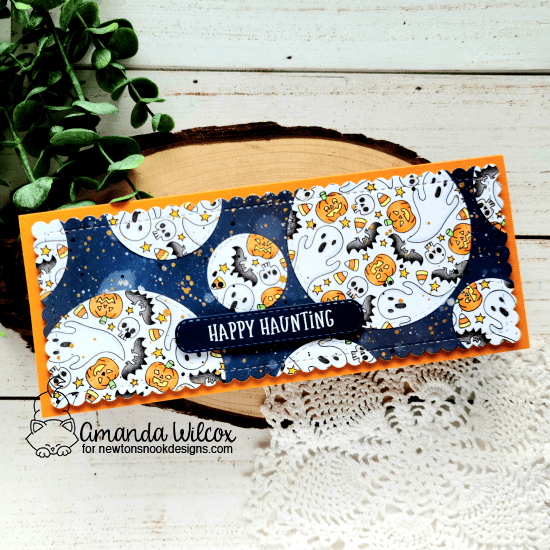
For a different spin on the roundabout series, I stamped and colored 2 Spooky Roundabout images. Then I took various dies from the Circle Frames set and cut them out. I inked up a panel from the Slimline Frames and Portholes with distress inks and spritzed it with water. I adhered my circles all over and then flicked pearl and gold watercolor and black paint all over it. This panel is popped up with foam tape on an orange card base. I used the Banner Trio dies and heat embossed my sentiment. Then this is also popped up with foam squares. Isn’t it so much fun?

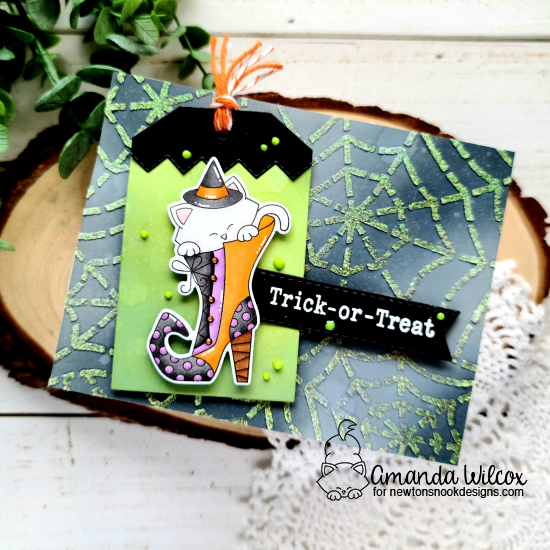
Finally, I wanted to create a card where the new Spider Web stencil was the star of the show. So I inked up a panel with distress oxide inks and used Thermoweb glitz gel over the stencil and set it aside to dry. I pulled out the fabulous Witchy Newton image from last year and color him with my copics, die cutting him with the coordinating dies and setting it aside. I pulled out the Fancy Edges Tag set and cut out a tag base from a green distress inked panel. I cut a black top and adhered it together, popping Newton up with foam squares. I strung some baker’s twine through the hole and popped the tag up over the stenciled panel. For a sentiment I used the Spooky Roundabout set and another Banner Trio die and popped it up. For finishing touches I added glossy accents to the image and Nuvo Crystal Drops in apple green.

Would you like to win the  “Spooky Roundabout” or the “Batty Newton” Stamp Set?We will choose ONE lucky winner for each stamp set!

Here’s how to win: Comment on the NND blog and Design Team blogs (see list below)! Thewinner will be chosen at random from the collective reveal posts. Make sure to check out each of their blogs and comment for your chance to win. You will not know which blog has been chosen so the more you comment on the better your chances are of winning! You have until Thursday August 20th at 9pm EST to comment  — winners will be announced on the blog post on Friday, August 21st. 

Check out all the awesome Design Team Blogs below to enter:

Newton’s Nook Designs
Ellen Haxelmans
Larissa Heskett
Samantha Mann
Zsofia Molnar
Maria Russell
Andrea Shell
Tatiana Trafimovich
Amy Tsuruta
Amanda Wilcox

Newton’s Nook August Release – Day 2

Thanks for stopping by again. Today we’ve got even more fall fun to share with you! A few stamp sets and one coordinating die set. Let’s jump right in.

Paw-tumn Stamps and Dies

Fall Roundabout Stamps
(coordinates with Circle Frames and Banner Trio die sets)

Heartfelt Essentials Stamps
(coordinates with Banner Trio dies)

With all of this goodness, I’ve got 2 cards to share with you today. I had so much fun creating both of them; I hope you enjoy them!

For my fall roundabout card, I started by stamping my image on Bristol smooth cardstock and watercolored with my zig clean color real brush markers. Then I took out the circle frame dies and cut it out, along with creating a frame from the same cardstock. I create a circle shaker feature and set it aside to work on the rest of my card.

I used various Nuvo embellishment mousses on cardstock, let them dry and die cut autumn leaves from the panels. I cut an A2 panel from kraft cardstock and used the houndstooth stencil with brown ink. I arranged my leaves under the shaker mechanism and adhered them with liquid glue. Then I adhered my shaker and moved on to a sentiment. I love that the sentiments in the roundabout sets work perfectly with the banner trio dies so I die cut a banner and stamped my sentiment on it. Then I went around the letters with a light blue zig marker for a little extra interest. The banner was then folded on the crease lines and adhered with liquid glue.

For this amazingly adorable paw-tumn set, I’ve got some great slimline fun to share with you. I started by coloring my images with copics and then used the coordinating dies to cut them all out. I stamped extra leaves, pumpkins and acorns because I wasn’t sure how many I would want in my scene. Pulling from the fall colors I used on the images, I die cut a panel from kraft cardstock using the slimline frames and portholes dies. Then I cut a frame from dark brown using the slimline frames and windows dies. I stamped the leaves all over the kraft panel and adhered the dark brown frame with liquid glue. Then I popped that panel up with foam tape on a golden yellow card base. I arranged my images and adhered them with a combination of foam squares and liquid glue.

For the sentiment, I die cut a flag from Frames & Flags die set and heat embossed it in white. I wrapped some baker’s twine around the end and glued one last leaf to the end. Then I popped it up with foam squares. For finishing touches on this card, I added glossy accents to various parts of the images like sunflower centers, acorn tops, leaves and pumpkin stems.

Would you like to win the “Fall Roundabout”  or the “Paw-tumn Newton” Stamp Set?We will choose ONE lucky winner for each stamp set!

Here’s how to win: Comment on the NND blog and Design Team blogs (see list below)! Thewinner will be chosen at random from the collective reveal posts. Make sure to check out each of their blogs and comment for your chance to win. You will not know which blog has been chosen so the more you comment on the better your chances are of winning! You have until Thursday August 20th at 9pm EST to comment  — winners will be announced on the blog post on Friday, August 21st. 

Check out all the awesome Design Team Blogs below to enter:

Newton’s Nook Designs
Ellen Haxelmans
Larissa Heskett
Samantha Mann
Zsofia Molnar
Maria Russell
Andrea Shell
Tatiana Trafimovich
Amy Tsuruta
Amanda Wilcox

Newton’s Nook August Release – Day 1

Yippee!!! Welcome to another amazing release from Newton’s Nook! Today for day 1 we’ve got a couple of fabulous stencils and an amazing stamp and die set to share with you! Be sure to check back each day to see all of the fun that’s in store.

Mugs Stencil

Houndstooth Stencil

Sips & Stories Stamps and Dies

Aren’t these all so fun! I had a blast creating with everything. Today I have a card to share with you using the new mugs stencil and Sips & Stories. I hope you like it.

To create my card I started by using Thermoweb transfer gel over my mugs stencil. I let it dry and ran it through my laminator with light blue flocking. So the mugs in the background are all fuzzy. It’s super fun! I stamped, colored and die cut my images and started arranging them. Then I thought it would be fun to make a couple of scenes on my card so I used the Framework dies and cut dark brown frames and glued vellum to the back. After getting and idea for image placement I stamped and heat embossed my sentiment. Then went back to adhere all of my images and finally adhered the panels to my flocked piece.

The panel was attached to a card base and I moved on to finishing touches which were just a few spots of glossy accents on the book spines and various mugs in the scenes.

Would you like to win the “Sips & Stories” Stamp Set?This stamp set will be given away to ONE lucky winner!

Here’s how to win: Comment on the NND blog and Design Team blogs (see list below)! Thewinner will be chosen at random from the collective reveal posts. Make sure to check out each of their blogs and comment for your chance to win. You will not know which blog has been chosen so the more you comment on the better your chances are of winning! You have until Thursday August 20th at 9pm EST to comment  — winners will be announced on the blog post on Friday, August 21st. 

Check out all the awesome Design Team Blogs below to enter:

Newton’s Nook Designs
Ellen Haxelmans
Larissa Heskett
Samantha Mann
Zsofia Molnar
Maria Russell
Andrea Shell
Tatiana Trafimovich
Amy Tsuruta
Amanda Wilcox

Miss Ink Stamps – Painting the Roses

Hellooooooo everyone!!! I am soooooooo beyond excited to share that I have joined the Miss Ink Stamps Design Team! This is so surreal and I am so grateful to be designing along this incredible team of talent! To celebrate, I’m sharing my first card today!

This super fun card was created with just one of the stamp sets from the amazing Alice in Wonderland release from earlier this year. I stamped and colored the images from Painting the Roses with my copics. Then I ran them through my scan-n-cut to cut them out. Then I took the bush image and repeat stamped it across a slimline size panel (8.5×3.5 inches). Then I used distress inks in mowed lawn and salty ocean to create my grass and sky. Next I colored the bushes with my copics and set to adhering the images where I wanted them.

I popped them up with foam squares to give the card a little extra dimension and interest. Then I stamped my sentiment and cut it into a flag shape, popping it up too.

At this point I thought my sky was a little boring so I pulled out a Newton’s Nooks stencil called cloudy sky and inked Hero Arts unicorn white pigment ink through it with a blending brush. It was easy to manipulate the stencil around the images and I love the little bit that it adds. Finally I finished the design off with glossy accents on various things like some roses, garden tools and the soldier’s staff and then a scattering of red clay hearts across the sky and one on the sentiment to tie it all together.

This is just the beginning of sharing some amazing creations with Miss Ink Stamps products. I hope you enjoy the journey with me.

I appreciate you sharing your time with me. Have a fabulous day!

Reverse Confetti – Cool Birthday

Happy weekend everyone! We’re having a heat wave here so this card is helping me cool off mentally. 😉 I was very excited to finally make my first order from Reverse Confetti. I love their unique critters and had a really hard time choosing just a couple.

As soon as they came in I couldn’t resist inking them up. Here’s the first card I made.

I knew that I wanted to try keeping my color palette limited and softer than typical so I pulled out some pink and mint and immediately thought brown would go great with it all. I mean, who doesn’t love chocolate ice cream???

I colored up my images from Ice Cream Social with my copic markers and used the coordinating dies to cut them all out. Then I set to ink blending my background with spun sugar and cracked pistachio distress inks. Then I flicked watered down color on the panel.

I used my Newton’s Nook cloudy sky stencil with some texture paste for fun dimensional clouds in the sky. Once this was dry I adhered my panel to a card base. Then I used Newton’s Nook Frames & Flags dies to make a frame and popped it up with foam strips. I used a combination of foam squares and liquid glue to adhere all of my images down next. I stamped my sentiment on a soft pink cardstock and cut it into a flag, then popped it up too.

For finishing touches on this sweet card, I used glossy accents on the critter noses, eyes and toe beans, the ice cream truck window, horn, light and decal on the side of the truck. Then I thought it would be fun to add some sparkly so I used unicorn Stickles on all the sprinkles of the ice creams.

I’m in love with this guys! Totally hooked and can’t wait to create more. I hope you find some inspiration to create something wonderful today!

I appreciate you sharing your time with me. Have a fabulous day!

Trinity Stamps – Hey Chum

Happy Friday everyone!!! I wanted to pop in with just one more fun Shark Week themed card that I made. Today I’m featuring Trinity Stamps Shark Bait and Ocean Reef Builder stamp sets along with some fun ink blending.

To make my card, I pulled out Shark Bait and stamped a bundle of images, multiple times to fill my scene. I wanted more variation at the bottom of my ocean floor so I also stamped a few from the Ocean Reef Builder set. I colored them all with my copics and used the coordinating dies to cut them all out.

Then I moved on to my background. I inked up the bottom with antique linen and tea dye distress inks and the top with blueprint sketch and salty ocean. Then I flicked droplets of each color onto the panel for some distressing with a little color to it.

I adhered all of my scenery with liquid glue to the bottom of my ocean floor. Then I popped up my sharks with foam squares and die cut my sentiment from the coordinating dies to Shark Bait. I used a quickie glue pen to adhere these because they are so tiny.

For finishing touches, I added some white gel pen accents to various images and then added Nuvo Crystal Drops in morning dew as bubbles above the sharks and to add a little shine to my starfish and sea urchin.

I had a bunch of fun putting this sharky scene together. I hope you enjoyed it.

I appreciate you sharing your time with me. Have a fabulous day!

Trinity Stamps – Congratulations Wedding Card

Hi there! Just popping in today to share a wedding card I made last week featuring the Trinity Stamps foliage frame and some fun embellishments from my shop.

My parents were going to a wedding and needed a card. I don’t really have wedding stamps, or a talent for fancy looking cards but the foliage frame popped in my head. I took a little inspiration from a crafty friend and created this beautiful shaker card.

I started this card by die cutting the foliage frame from white cardstock and iridescent vellum and layered them together. Then I lined the back with scrappy tape and adhered a sheet of acetate to it. Next, I added a layer of foam tape and created a 3.5×8.5 card base to stick it to.

I added a pile of holographic hearts and snow queen embellishments from my Etsy shop along with a few clear microbeads and then adhered the frame to my card base, sealing all the shaker bits inside.

I didn’t have a large congratulations sentiment so I got my Cricut out and made a custom one just the size I wanted and glued it to the acetate window with liquid glue.

I think this card turned out really pretty and was very simple to come together. It would also be simple to customize with wedding colors or holiday colors and a new sentiment across the front as well.

I appreciate you sharing your time with me. Have a fabulous day!

Birch Press Design – Stenciling Quick and Easy Cards

Hello everyone! I hope you’re having a great week so far. Today I’m over on the Birch Press Design blog featuring this set of 4 stenciled cards. They are quick and easy to pull together if you need something in a jif or if you’d like to mass produce cards to have in your stash. They would make a great gift to give as well.

I used the same mandala stencil on each of these cards. I just changed up the ink colors and where I placed the stencil on my panel. I used blending brushes and dye inks for all the stenciling. Let’s take a closer look at each card.

For this first card, I used some blue and purple inks and started my inking from the center of the mandala out. I finished it off with some gem stones accenting the different points of the mandala to make it a focal point and added a die cut sentiment to the bottom.

For this next one, I wanted to use bright, fun colors for my inking and then made the sentiment flashy with a rose gold mirror cardstock for the shadow portion. I finished it off with some opal half-round embellishments scattered across the design this time.

For this design, I brought the stencil down much further and stuck with some natural green and muted yellow inks. I absolutely love how this turned out! I also brought a little shine to this sentiment with gold mirror cardstock and pearl confetti bits scattered all about. This one may be my favorite.

Something struck me when I moved on to this final card and I decided to try stenciling at an angle instead of centered. I think it turned out really cool and would definitely try this design again. I finished it off with a simple hello and some great clear blue and green bubbles from my stash.

I hope you enjoyed today’s cards. If you’d like to see the step-by-step, head over to the Birch Press Design blog where I lay it all out with a photo tutorial.

I appreciate you sharing your time with me. Have a fabulous day!

Coffee Loving Cardmakers – Shark Week

Hellooooooooo everyone!!! I’m so excited that shark week has begun! I always love this week on TV. So today, for our installment of Tuesday Tea with Twiddler’s Nook over on the Coffee Loving Cardmakers blog, I decided it would be fun to celebrate with a silly themed card.

I love this Shark Hugs stamp set by Avery Elle! It comes with a variety of things you can fit in the shark’s fins but I decided to think outside the box a bit and found a coffee mug the perfect size! This die set can be tricky so I started by using the die made to cut the slits for his fins, then I stamped my image over that, lining up the fins with the cut marks. Then I colored him with my copics and cut him out. I snagged a mug from the Lawn Fawn Love You a Latte set, colored it up and die cut it too. I used liquid glue to adhere the mug in the shark’s fin.

Next I blended distress oxides on a panel – salty ocean, blueprint sketch, chipped sapphire and black soot. Then I spritzed it with water and flicked pearl watercolor on it for a little extra texture. I adhered that to a card base and die cut my Avery Elle plus frame. I popped the frame and shark up with foam tape and moved on to my sentiment.

I stamped the speech bubble from the Avery Elle speech bubbles set and stamped part of my sentiment from Shark Hugs, masking off what I didn’t want. Then I pulled out Thanks a Latte from Lawn Fawn and added the word “coffee” to finish off the statement. The speech bubble is popped up wtih foam squares as well.

To finish off this fun card, I scattered a few confetti sequins about and adhered them with liquid glue as well. I added black glaze pen to the shark’s eye and white gel pen accents throughout.

Happy Shark Week everyone! I hope you enjoy it, even if you aren’t binging Animal Planet all week long.

I appreciate you sharing your time with me. Have a fabulous day!

Trinity Stamps – Paper Pep Talk

Hello everyone! Welcome to a fresh new week! I hope you had a fabulous weekend and are ready to tackle this Monday. I’m sharing a little paper pep talk with you all today, from Trinity Stamps latest release.

To create this card, I started by stamping and heat embossing my image with clear embossing powder on Bristol smooth cardstock. Then I pulled out my Zig Clean Color Real Brush markers and started watercoloring in rainbow. This was so relaxing and fun to do. Once the letters were done, I took a really light blue and went around the edge of the speech bubbles and used a water brush pen to blend it out, pulling some color from the letters here and there. I love how this turned out!

I used my coordinating dies to cut it out and moved on to the background. I used distress oxides in picked raspberry, squeezed lemonade and mermaid lagoon to achieve the rainbow look. Then I took my halftone dots stencil and used versamark ink on it with a blending buddy brush. Then I sprinkled iridescent glitter embossing powder on it and heated it up.

I trimmed the background down to 4×5.25 and popped it up with foam tape on a white card base. Then I popped my image up with foam squares as well. I thought it could use a little more bling so I finished the whole design off with a scattering of unicorn tears embellishments.

This turned out to be such a bright and happy card. Perfect to share on a Monday to start the week and perfect for any recipient needing a little positive pep talk.

I appreciate you sharing your time with me. Have a fabulous day!