Hey friends! I’m over on the Newton’s Nook blog today with my last post of the year for them. This year has flown by and been an absolute blast being a part of that team too! I hope you’ve enjoyed all the creations and found a little inspiration along the way.
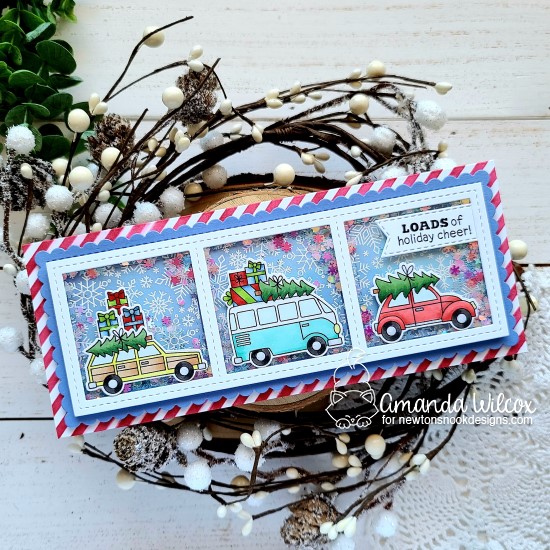
For today’s card I pulled out the recently released Destination Christmas set and colored up a few of the cars with my copics. I used the coordinating dies to cut them out and set them aside. I die cut the slimline frames and windows frame from white cardstock, then I used the snowfall roundabout and heat embossed it on the squares that came from the window panel. I inked them up with distress oxides in tumbled glass and blueprint sketch. Using my frame as a guide I adhered the squares down to a panel I die cut with the slimline frames and portholes scalloped rectangle.
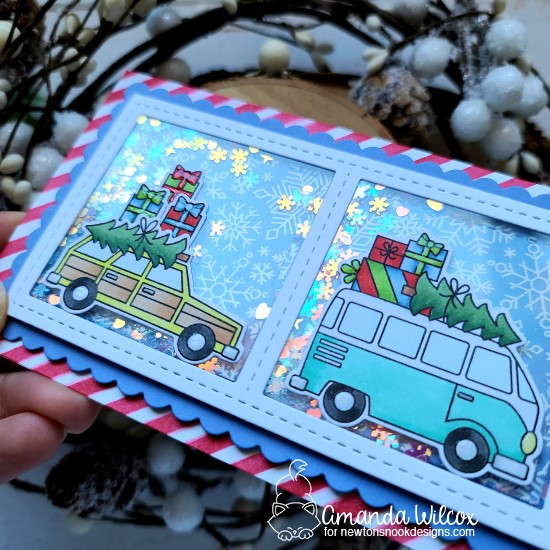
I decided to make this a shaker card so I trimmed down a piece of acetate and adhered it to the back of the window frame and lined it with foam tape. I sprinkled some snow queen shaker bits from the Twiddler’s Nook shop and sealed it all up. Using liquid glue I adhered the cars down next and decided on a sentiment.

I cut out a banner from the banner trio set and stamped my sentiment on that. Then I trimmed the edge off and used liquid glue to adhere it down. Finally, I didn’t like the plain card base so I used the Trinity Stamps stripes stencil on a white card base and then popped my scalloped panel up with foam tape.
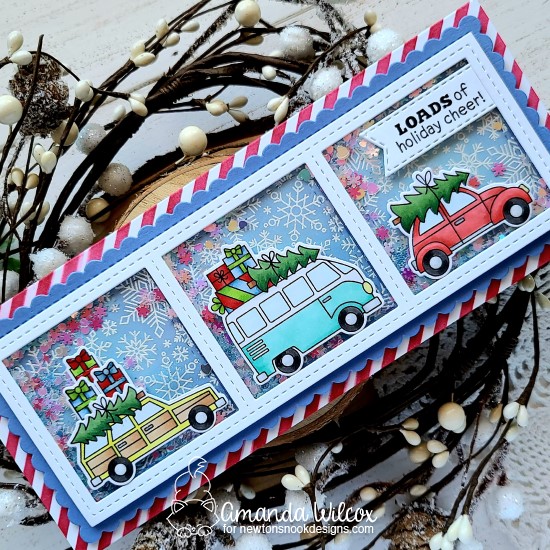
There’s a lot going on here so I kept finishing touches to just glossy accents to the package bows and accents on the cars like lights, wheels and door handles.
This card is so much fun and I had a blast putting it all together!
I appreciate you sharing your time with me. Have a fabulous day!
