
Hi everyone! I shared this card on social media earlier in the week but hadn’t had a chance to write up a post about it. Someone had asked so I wanted to pop in with a quick explanation how I created this fun mini slimline card. It features stamps and stencils from Miss Ink Stamps and dies from Trinity Stamps.

I started by die cutting the largest panel from Trinity Stamps Clean and Simple Mini Slimline Panels die set from a melon cardstock and a second from kraft. Then I used champagne metallix gel from Thermoweb over the Circular Harlequin stencil from Miss Ink Stamps and set it aside to dry. I stamped and colored images from Miss Ink Stamps Brewtiful and colored them with my copic markers. Then I fussy cut them all out.
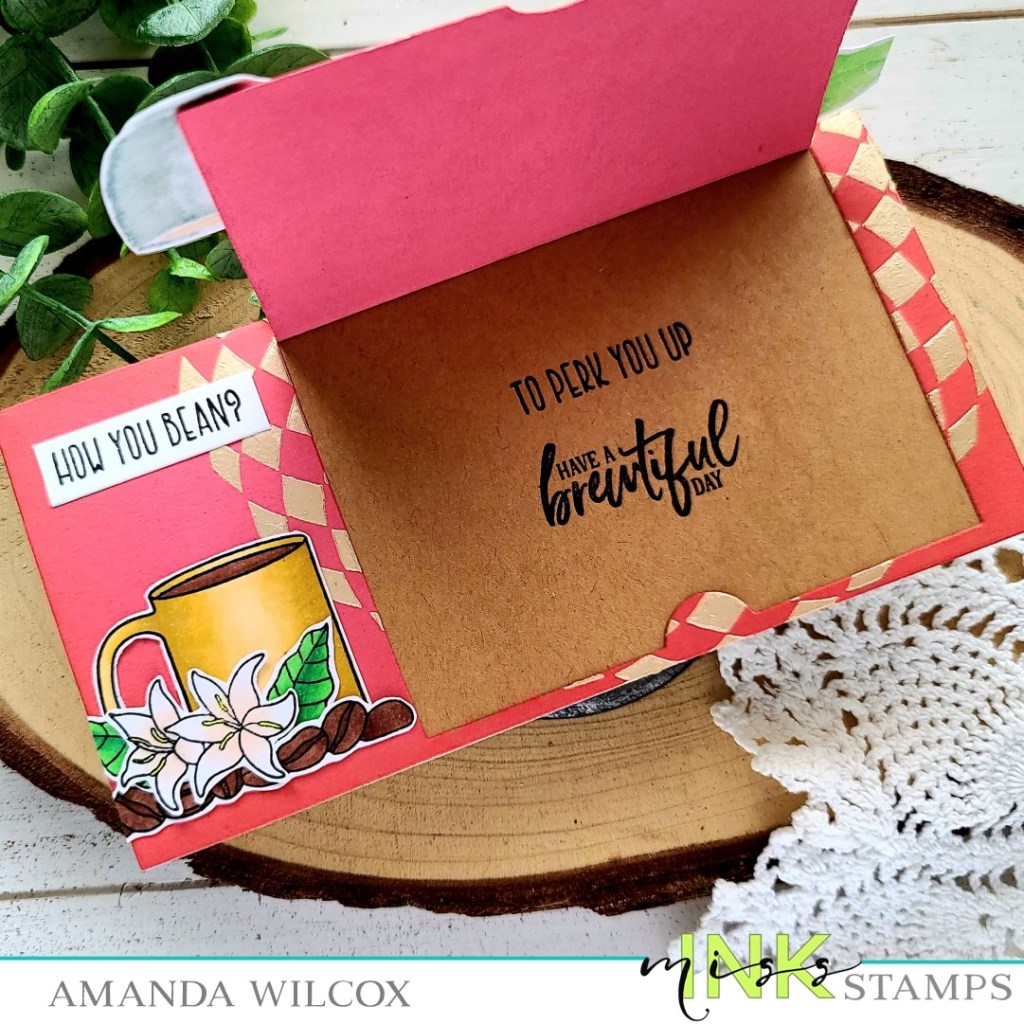
Once the metallix gel was dry I used one of the Trinity Stamps Lift the Flap dies to create a flip up window. Using that panel as a guide, I stamped sentiments on the kraft panel that would show when the flap was opened and moved on to assembly.
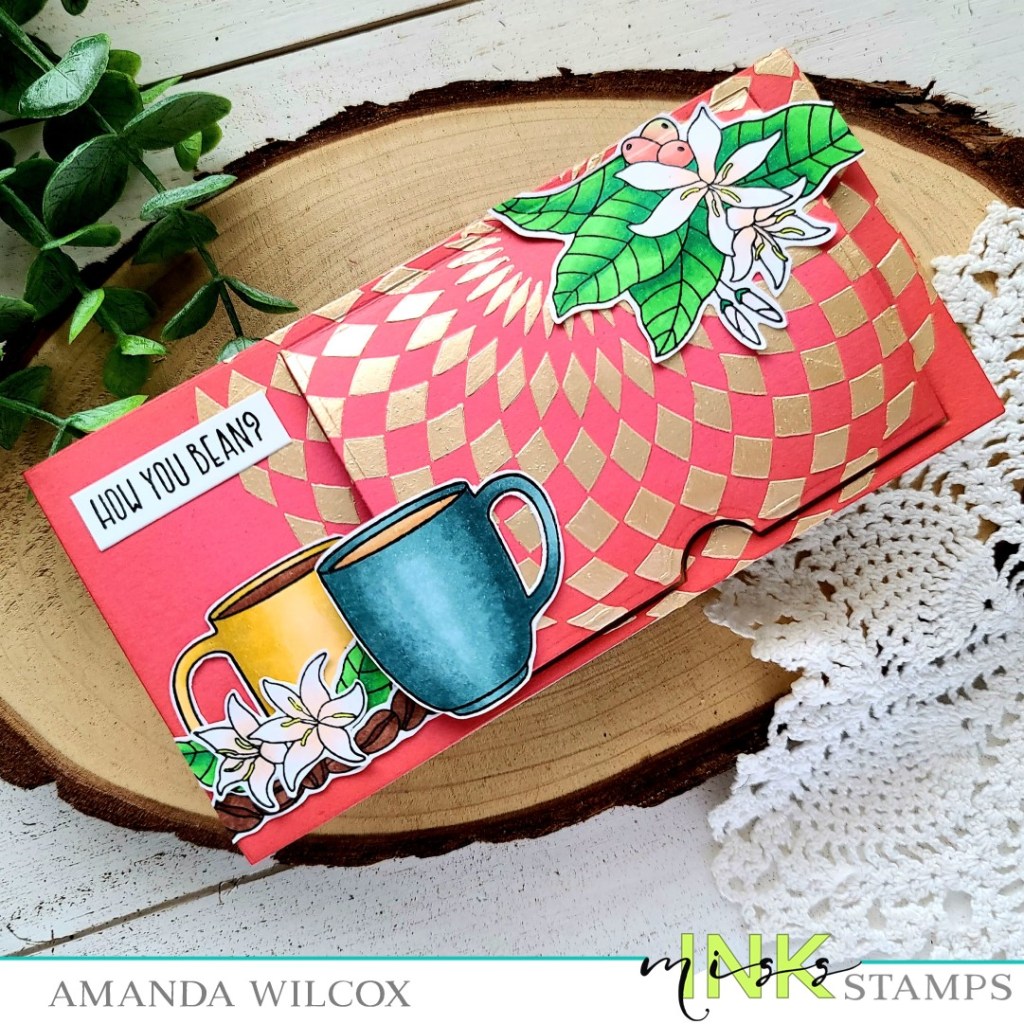
I adhered the melon panel to the kraft one with tear tape and then used liquid glue to attach all of my images. The trick here is to not attach something to the flap and the card front. You have to choose one. Haha. I stamped one more sentiment and trimmed it into a small strip and attached it as well. Last, I used liquid glue to adhere the panels to a white card base that measures 3×6 inches and trimmed off images that hung over the edge.
I hope this helps and inspires you to create something wonderful.
I appreciate you sharing your time with me. Have a fabulous day!

Lovely
LikeLiked by 2 people