
Welcome everyone! Thanks for stopping by. Today I have a SUPER snazzy slimline skelly to share with you. He’s so fun and I found a simpler way to use these awesome dies!

I started this card by playing around with the slimline skelly dies. I cut the base from black cardstock, thinking I would glue the white bones onto it. Then I had the idea to cut the bones from the black cardstock and cut another base layer from white and glue them together! Then all I had to do was inlay the pieces in the pelvis, ribcage and skull. So awesome!
Then I cut the hat from silver glitter cardstock, the band and bowtie from orange. Then I took YR09 and YR07 and gave the orange pieces a little shadow and depth.

Switching gears to the background, I inked up a panel with seedless preserves, twisted citron and carved pumpkin distress oxide inks. I spritzed the panel with water and flicked black paint on it. After it was dry, I die cut it with the slimline striped frame panel and adhered it to a white card base. I used liquid glue to adhere the band to the hat and then the hat and bowtie to the skelly.
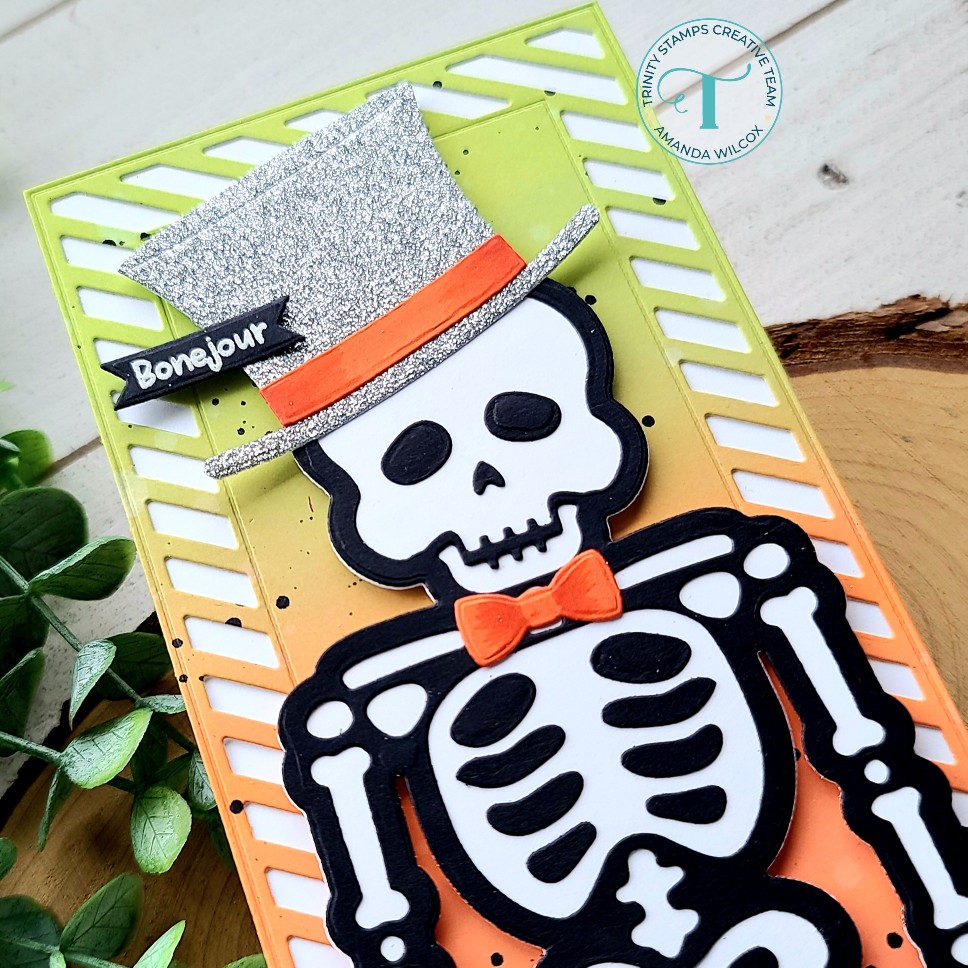
I added foam tape to my skeleton and popped him in place. For the sentiment, I chose 2 from the Shake Your Bones stamp set and heat embossed them in white on black cardstock. Then I die cut them with a banner die from the 4-bar card die set. and added them with foam strips and liquid glue.
This card is so much fun and I really can’t wait to share it with a special little guy who I know will just love it!
Products used today:
Slimline Skelly dies
Slimline Striped Frame Panel die
Shake Your Bones stamps
4-Bar Card dies
I appreciate you sharing your time with me. Have a fabulous day!
