Spellbinders – 3D Eggs and Flowers Inspiration

Welcome everyone! Today I have a couple of fun 3D Easter ideas to share with you featuring the new Spellbinders 3D Eggs and Flowers die set. This die set creates 3D Easter eggs with a variety of florals to decorate the sides. There are two sizes included in the set so I made one of each size to start out with.

I was also sure to play with multiple variations of the florals available in the set too. I started by choosing color palettes of felt and then die cut enough pieces of everything to create two eggs and decorate all four sides of each one.

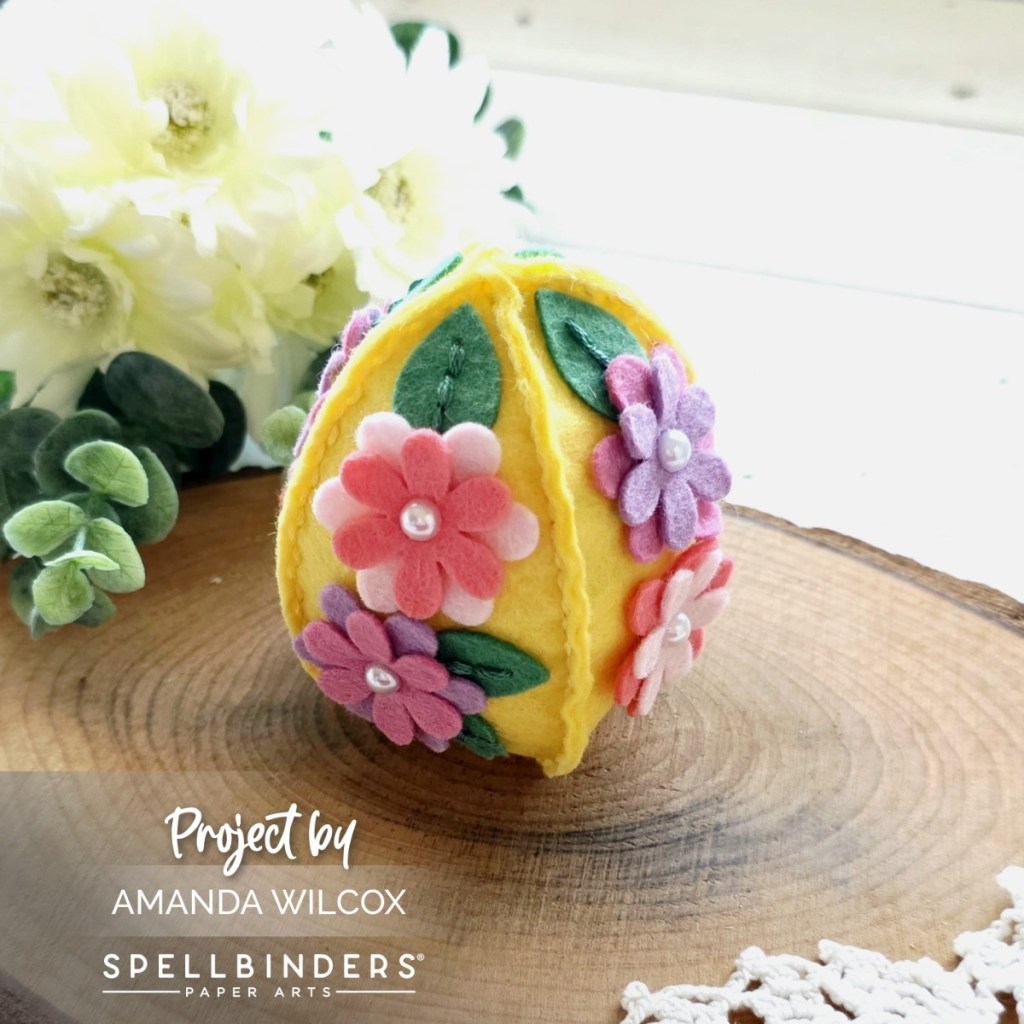
The yellow egg is the larger size so I was able to fit two florals and three leaves per side. I used fabric glue to adhere my layers together, stitched all my leaves and then used the fabric glue to adhere decorations to each side before stitching the whole thing together.

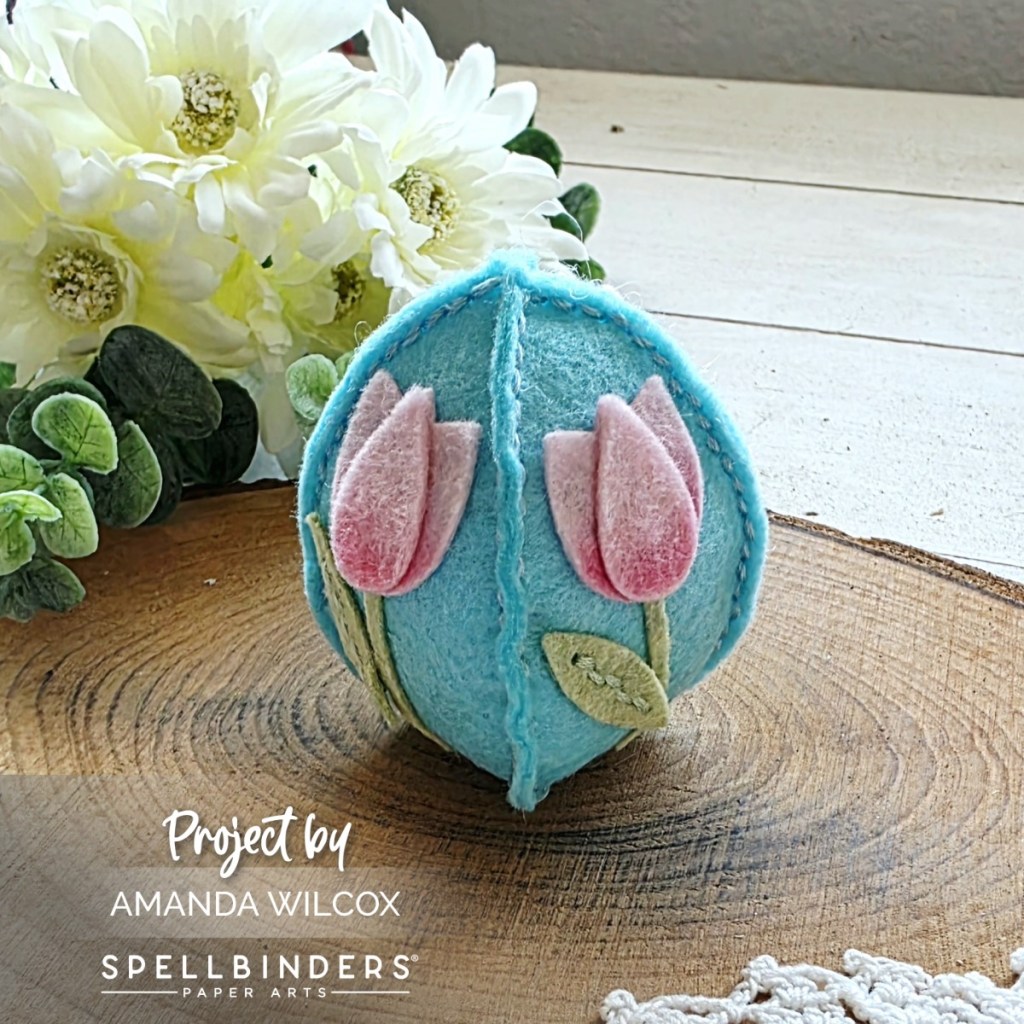
I followed the same order of operations for this smaller teal egg but with the tulips, I used some chalk and a foam pad to add some shading to the bottom of the petals. I love the extra depth it gives them!

I’m excited to make more of these in different colorways and possibly hang them on a garland or maybe decorate the mantel with a cluster or two.

Products used:
3D Eggs and Flowers dies
Benzie felt
DMC embroidery floss

Thermoweb Fabric Fuse

I appreciate you sharing your time with me. Have a fabulous day!

Spellbinders – Zodiac Blocks with Better Press

Hi friends! Another collection that released yesterday with Spellbinders are these awesome Better Press plates available in all of the zodiac signs. They come with the star layout, the name of the zodiac with dates and a sentiment that goes with that sign. They all go together perfectly, and come with a guide to press them on your panel perfectly spaced out.

I was able to play with the Sagittarius and Cancer signs early and decided to create cards with similar layouts but different colorways feeding off of the zodiac signs themselves.

I chose the Simon Hurley Starry Night 3D emboss and cut with stencils set to create my backgrounds. This is such a cool combo. You emboss and cut your panel at the same time, then use the stencils to color your stars with blending brushes or pastes!

I created 2 starry night backgrounds and glued them to card fronts. Then I glued contrasting strips along the straight edge and popped my zodiac panels up with foam tape on that.

Products used:
Zodiac Block better press plates – Sagittarius and Cancer
Better Press Ink pads
Starry Night 3D emboss, cut and stencil combo
Foam tape
Blending brushes
Stellar ink pads

I appreciate you sharing your time with me. Have a fabulous day!

Spellbinders – Aged to Perfection

It’s release day for Spellbinders and one of the fun collections releasing is called Aged to Perfection. It’s punny and fun to create with. I had the opportunity to create with the OMG dies and had so much fun thinking of ways to use them. I love the block letters with shadows to create depth.

The first card I created, I couldn’t resist pairing with the recently released Simon Hurley Birthday Bear dies. It can create a regular brown, black or polar bear but also has the extra pieces to create a panda! My favorite!

After cutting and assembling all the pieces to my sentiment and panda, I embossed a background panel using the Floating Balloons 3D embossing folder. I spritzed the panel with distress oxide sprays and then flicked white paint for more texture.

Once that was dry, I glued the panel to a white card base and used foam tape to pop up the panda and OMG sentiment. I can think of a dozen ways to use this card given the expression of the panda and the fun, but open-ended OMG sentiment.

Products used:
OMG dies
Birthday Bear dies
Floating Balloons 3D embossing folder
Distress Oxide Sprays – peacock feathers and cracked pistachio
Foam tape
Liquid glue

I appreciate you sharing your time with me. Have a fabulous day!

Doodlebugs – One of a Kind

Happy Mix it up Monday everyone! I’m working my way out of all things valentine and into some fun spring ideas; I hope you don’t mind. Today we’re playing with ladybugs and big beautiful sentiments! I love that combo!

The start of this was purely to play with the Pretty Pink Posh Ladybugs layered stencil set. I inked up the body layer with a combo of red and orange inks because you see such a variety of ladybug colors anymore and I thought they should all be here. Then to finish the stenciling off, I spread black widow Stellar Paste through the dots for some shine.

While that panel was drying, I stamped images from Pretty Pink Posh Lovely Ladybugs and colored them with copic markers. I used the coordinating dies to cut them out and then moved on to heat embossing a sentiment from Waffle Flower’s Old Friend Sentiments stamp and die combo. I went ahead and also stamped and die cut the sub sentiment using Lawn Fawn lobster ink.

Digging through my cardstock I found this great melon color and decided it was the perfect base for my card front. After trimming it down, I glued it to a card base and used a corner rounder on opposing corners. Then I trimmed the stenciled panel down to 4×5.25 inches and rounded the same corners. This panel is popped up on the card front with foam tape. Then the sentiments and ladybugs are all added with foam squares as well.

For finishing touches on today’s card, I just added glossy accents to the dots and antennae of the colored ladybug images.

Products used:
Pretty Pink Posh Lovely Ladybugs stamps and dies
Pretty Pink Posh Ladybugs layered stencil set
Lawn Fawn inks – lobster and carrot
Waffle Flower Old Friend Sentiments stamp and die combo

Foam squares and tape
Embossing & watermark ink
Anti-static bag
Embossing powder
Glossy accents
Blending brushes
Stellar Paste – black widow
Paste tools

I appreciate you sharing your time with me. Have a fabulous day!