Lawn Fawn – Hello & Thanks Embroidery Cards

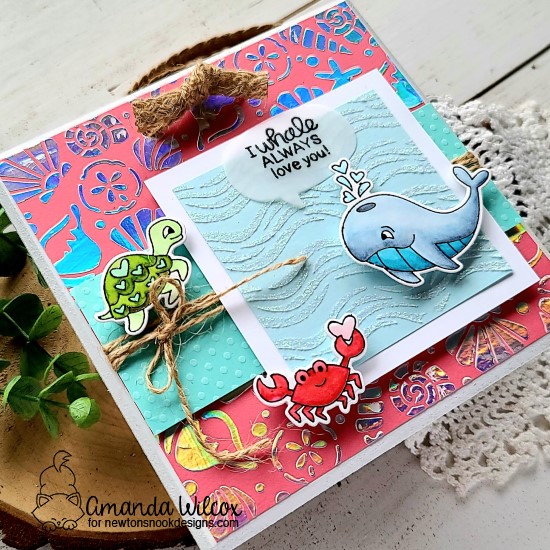
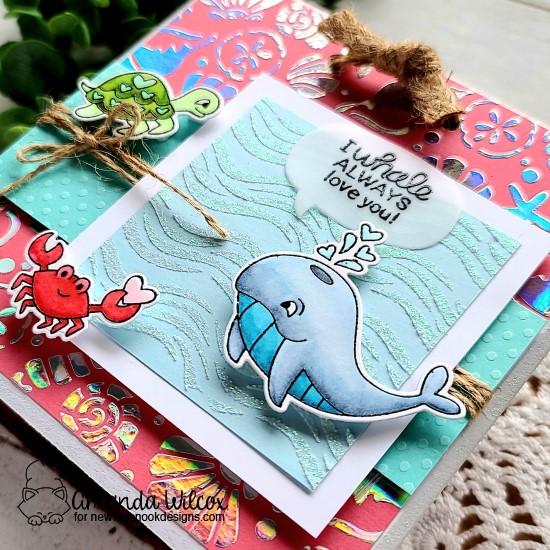
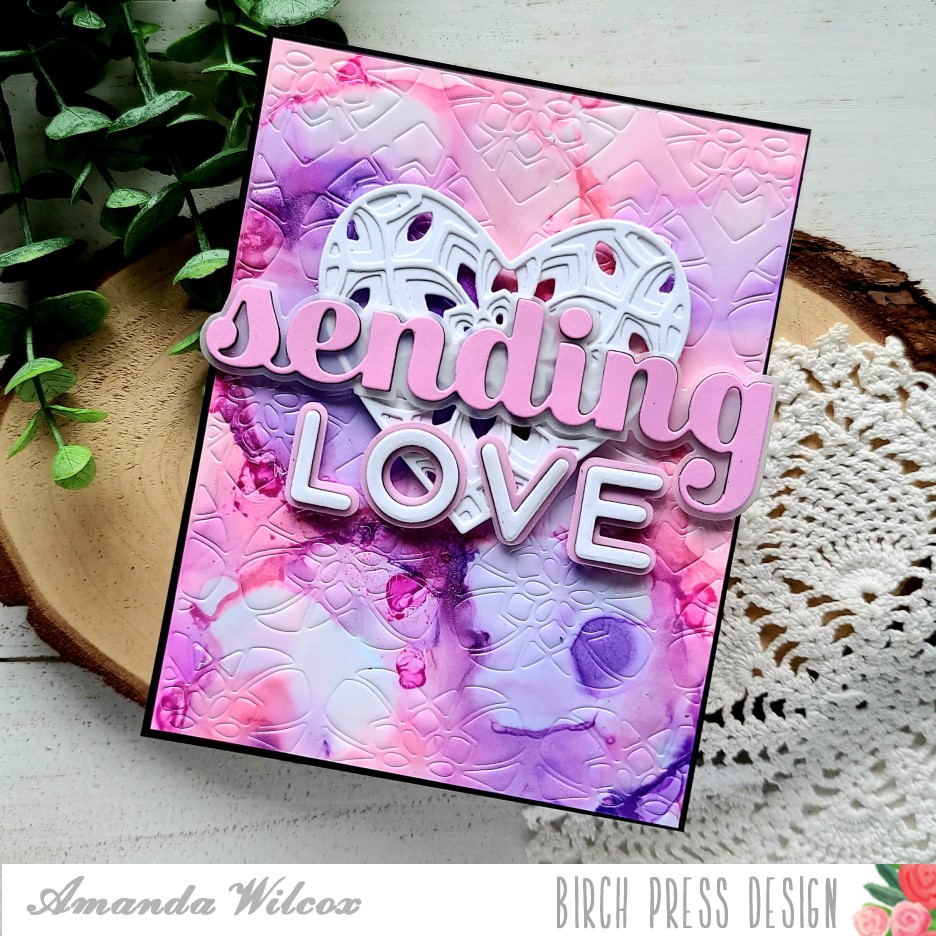
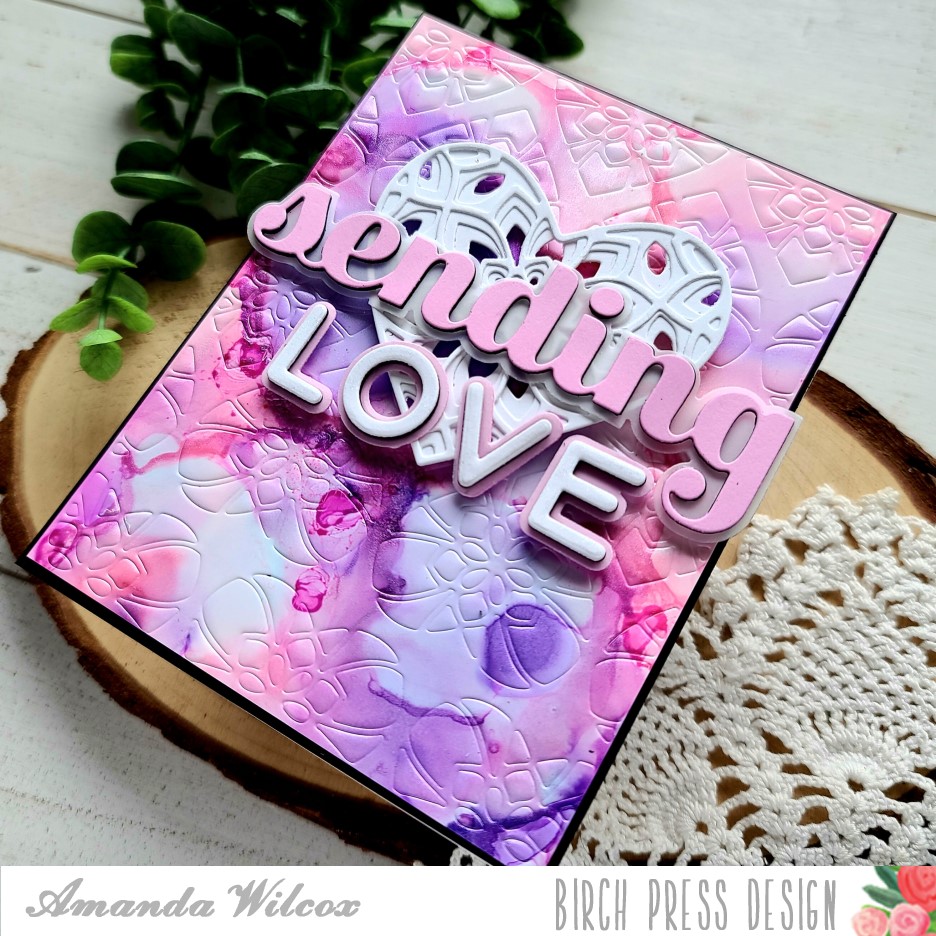
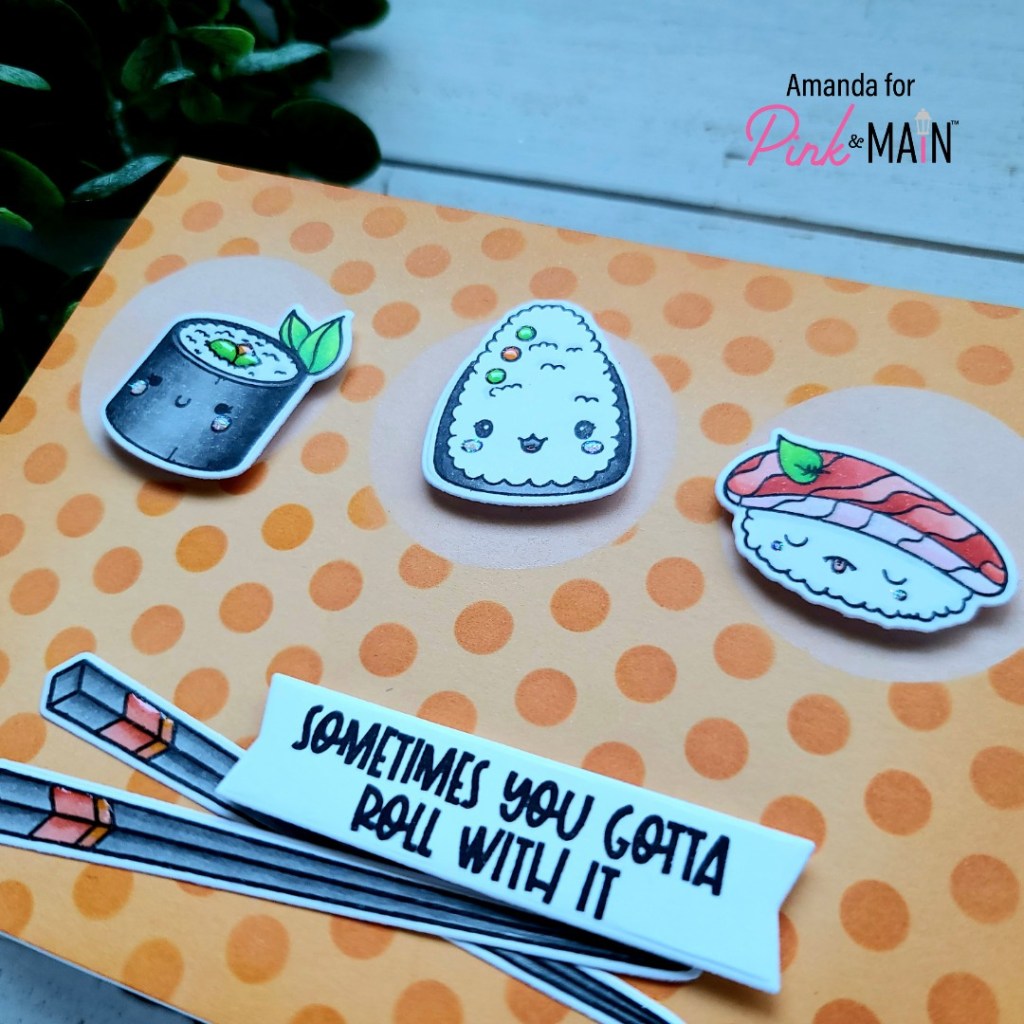
Hello everyone!!! I’m starting off your week with a big batch of really fun cards featuring Lawn Fawn and Avery Elle goodies. These embroidery dies came out from Lawn Fawn a few years ago and, while I thought they were cool, it didn’t totally interest me at the time. Fast forward to now and I like stitching on paper quite a lot so I picked them both up recently and decided to give them a shot. Obviously I had a problem stopping because I whipped these up in a weekend and was eager to make more.

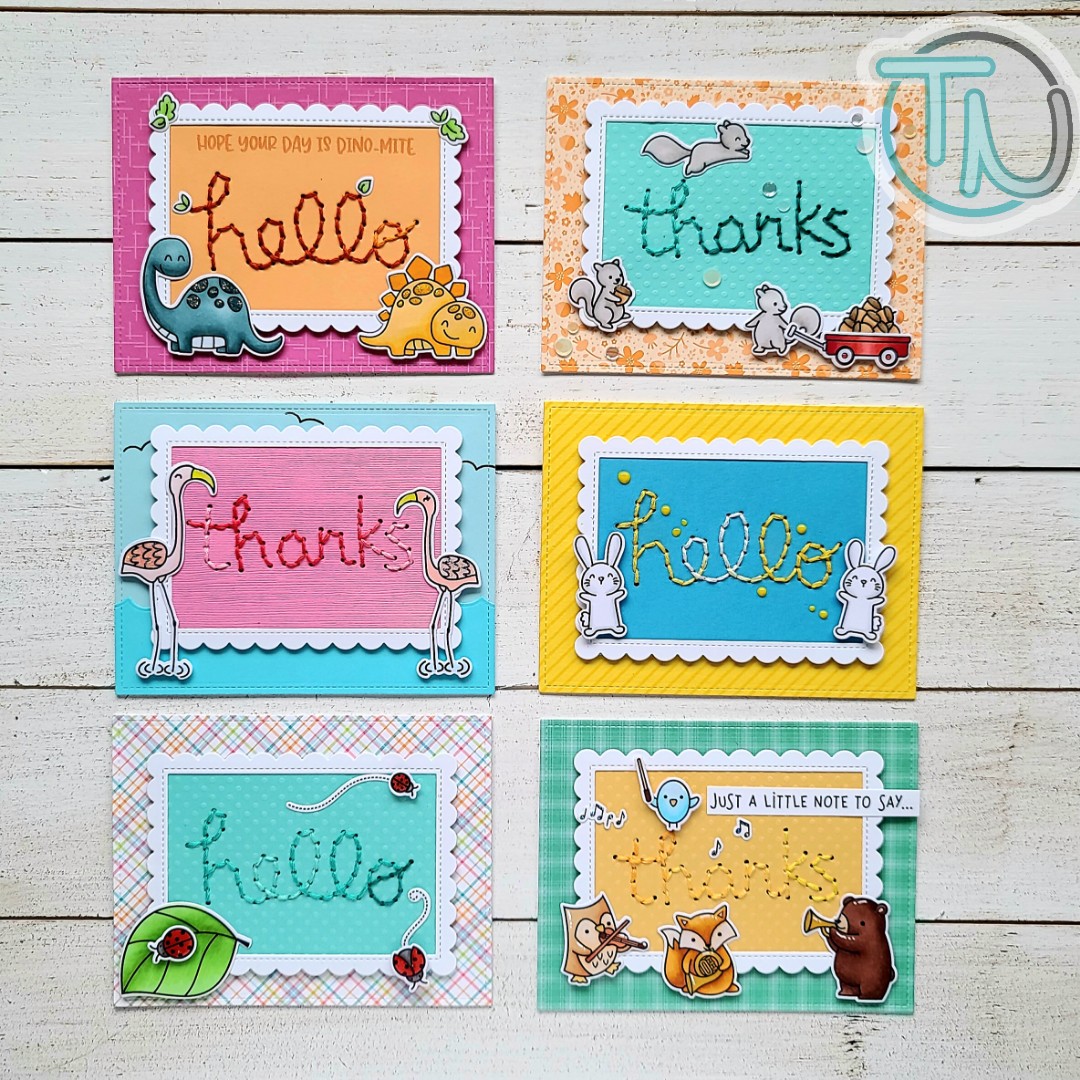
I did 3 hello and 3 thanks style cards and used different paper and stamps to decorate each one but generally kept to the same layout. Here is a picture of just the hello set.

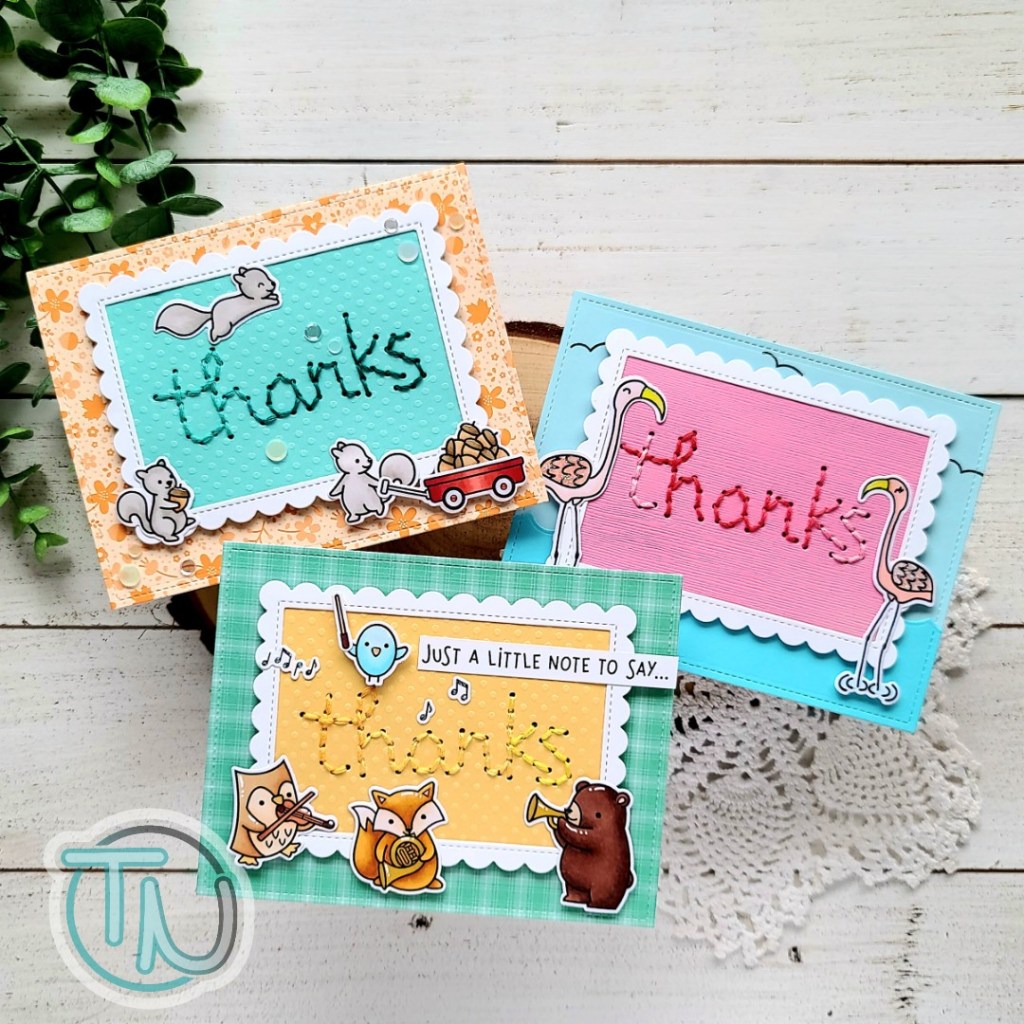
I had so much fun pulling out stamps that I haven’t used before or very often and was able to decorate these cute stitched panels. Let’s take a look at the thanks set closer too.

For this whole set of cards, I just chose some colors of cardstock I liked and cut them into 3×4 inch panels. I ran them through the die cut machine with the Lawn Fawn hello and thanks embroidery dies and sat in front of the TV stitching one evening. Then I die cut a Lawn Fawn scalloped rectangle frame from white cardstock 6 times and adhered the panels to them. With this part done, I dug through my stamps and paired different sets with the different stitched panels. Some I chose because of the cardstock and stitching colors and some because of the sentiment.

I stamped out the images I chose and colored them all with copics. Then I used the coordinating dies to cut them all out and put the cards together one at a time.

I know this will get long but I’m going to run through each card individually in case anyone is wondering what I used to create them.

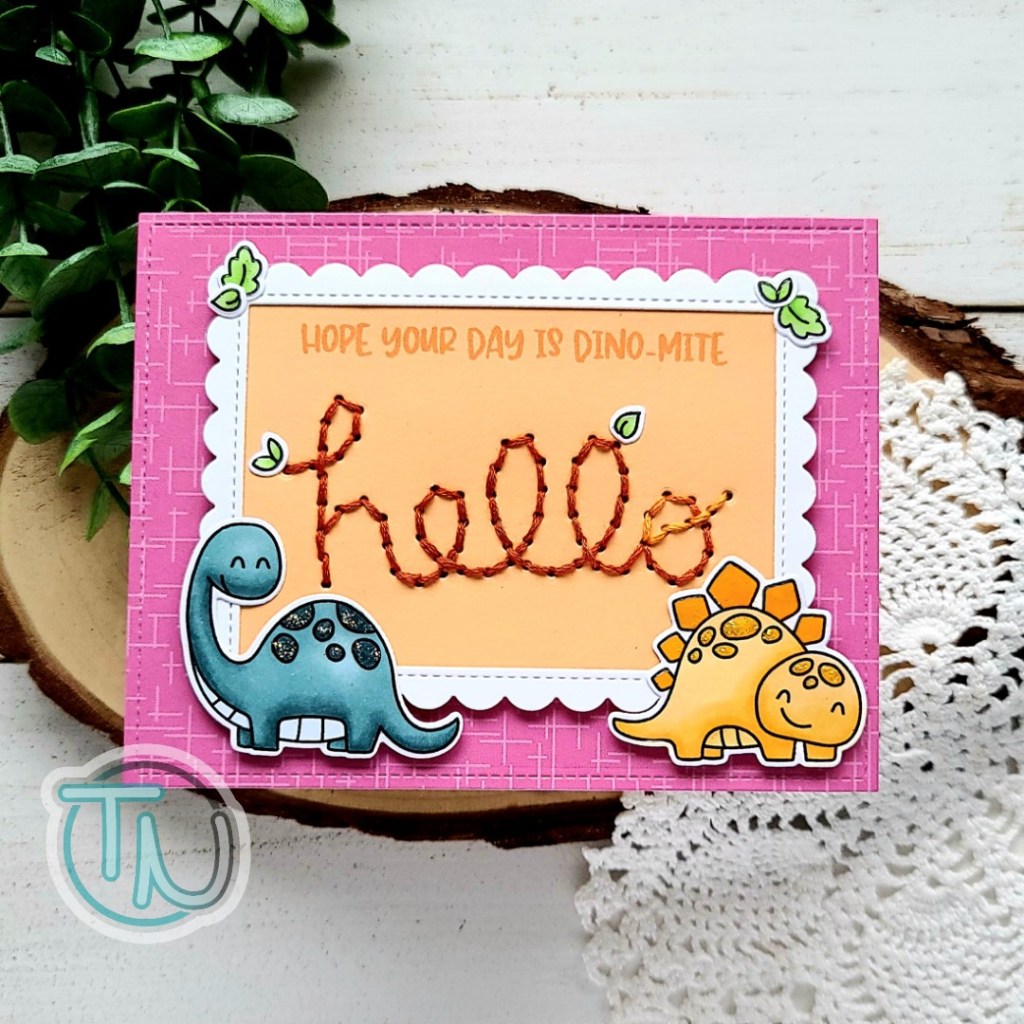
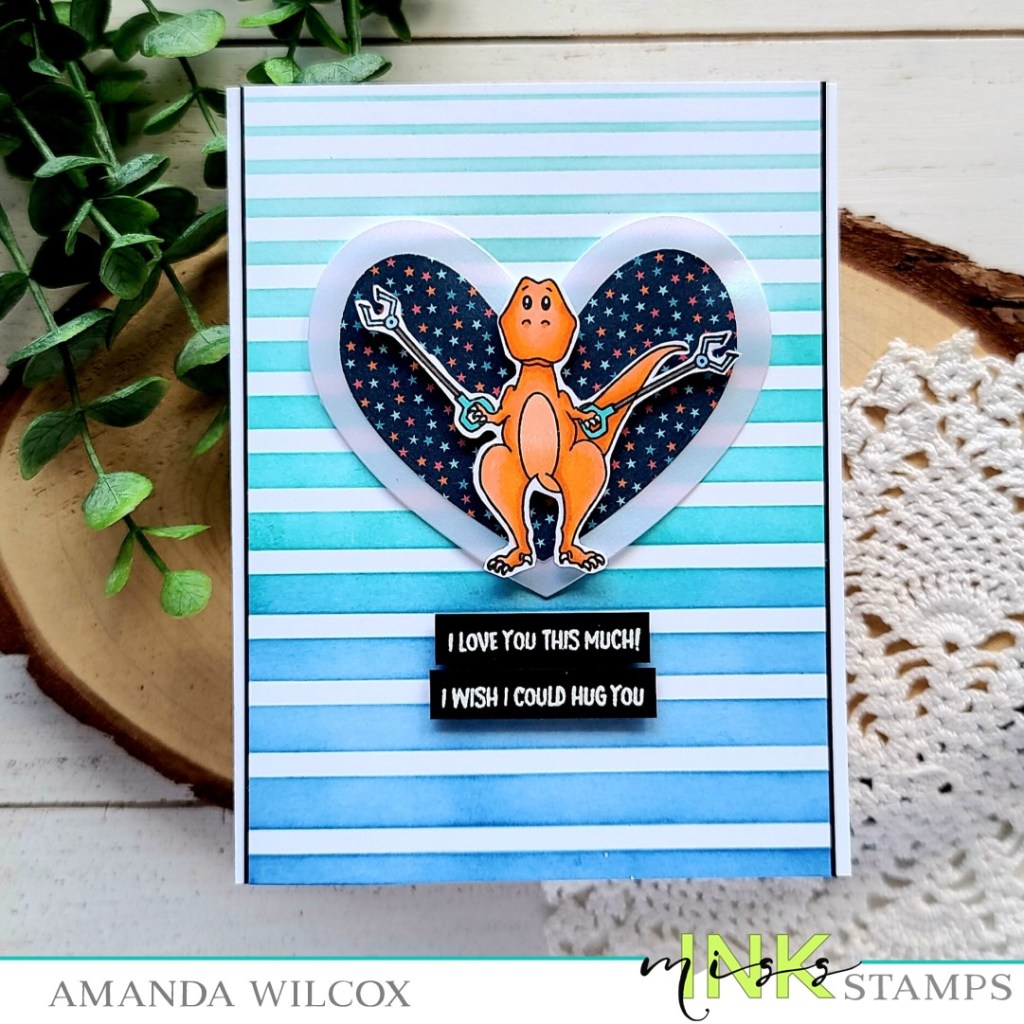
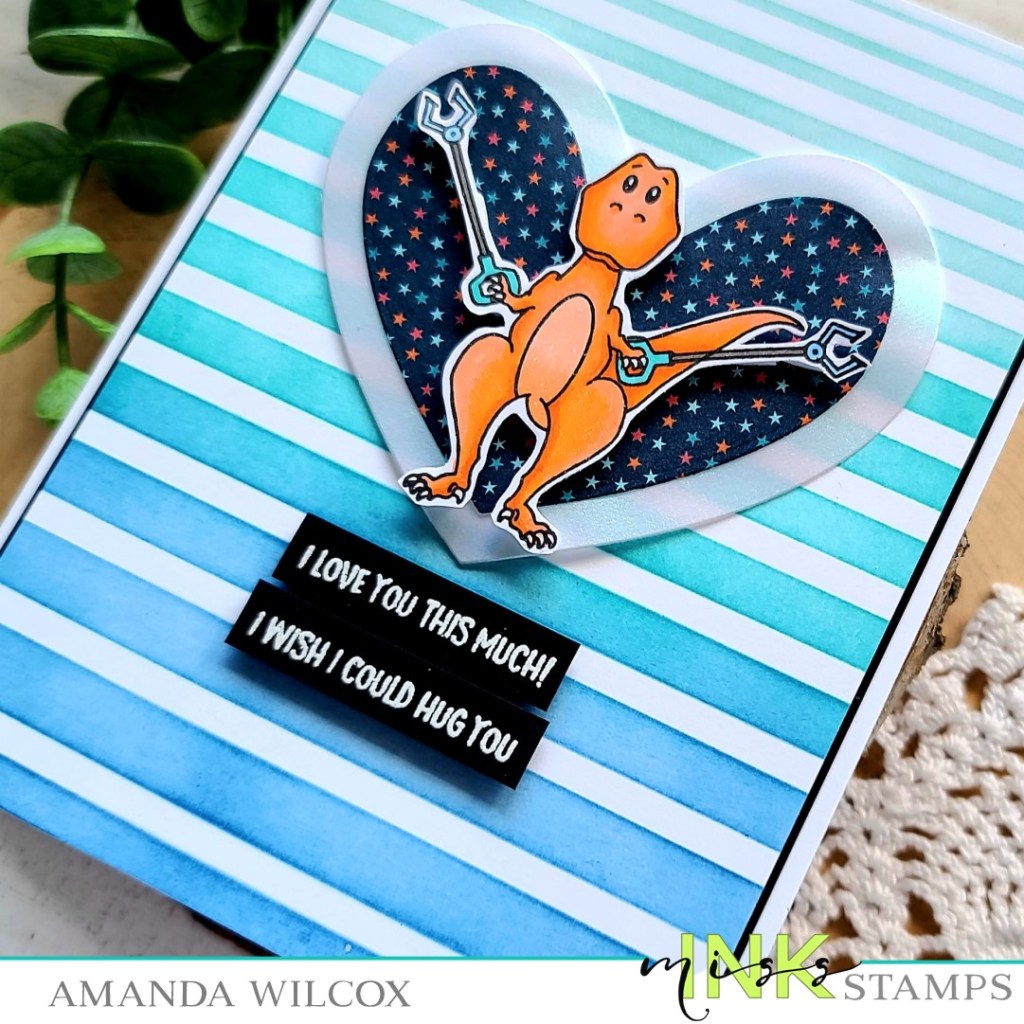
This dino one is my absolute favorite. I have a serious affliction for dinosaurs and these guys are adorable. The paper is an old Avery Elle pad I had in my stash and the stamps are also Avery Elle – Rawr.

This flamingo set also happens to be Avery Elle also and is called Flamingos. It’s retired now but I love how well it framed up the sentiment here. I used the Lawn Fawn ocean waves border for the water panel on the background.

This cuteness uses a Lawn Fawn set from last spring called Hey Lady that I was gifted from a wonderful friend. Aren’t they so cute crawling around on that panel? The paper in the background is Lawn Fawn Perfectly Plaid. This was one of my favorite pads they created and I’m sad it’s retired now.

Next, we’re tooting our horns with Lawn Fawn Critter Concert stamps and the Perfectly Plaid Chill paper pad. My daughter and I actually scored this at a super discount this summer and she just had to have it. These critters are adorable and I love how the sentiments work together here.

Staying on track with Lawn Fawn, we’ve got those adorable squirrels from Let’s Go Nuts playing around our whole scene. That beautiful floral paper is from the Lawn Fawn Fall Fling paper pad. This card has a fall feel to it but it’s really just pretty and I would totally give it year round. I embellishments on this one are from Trinity Stamps called Glass Slipper.

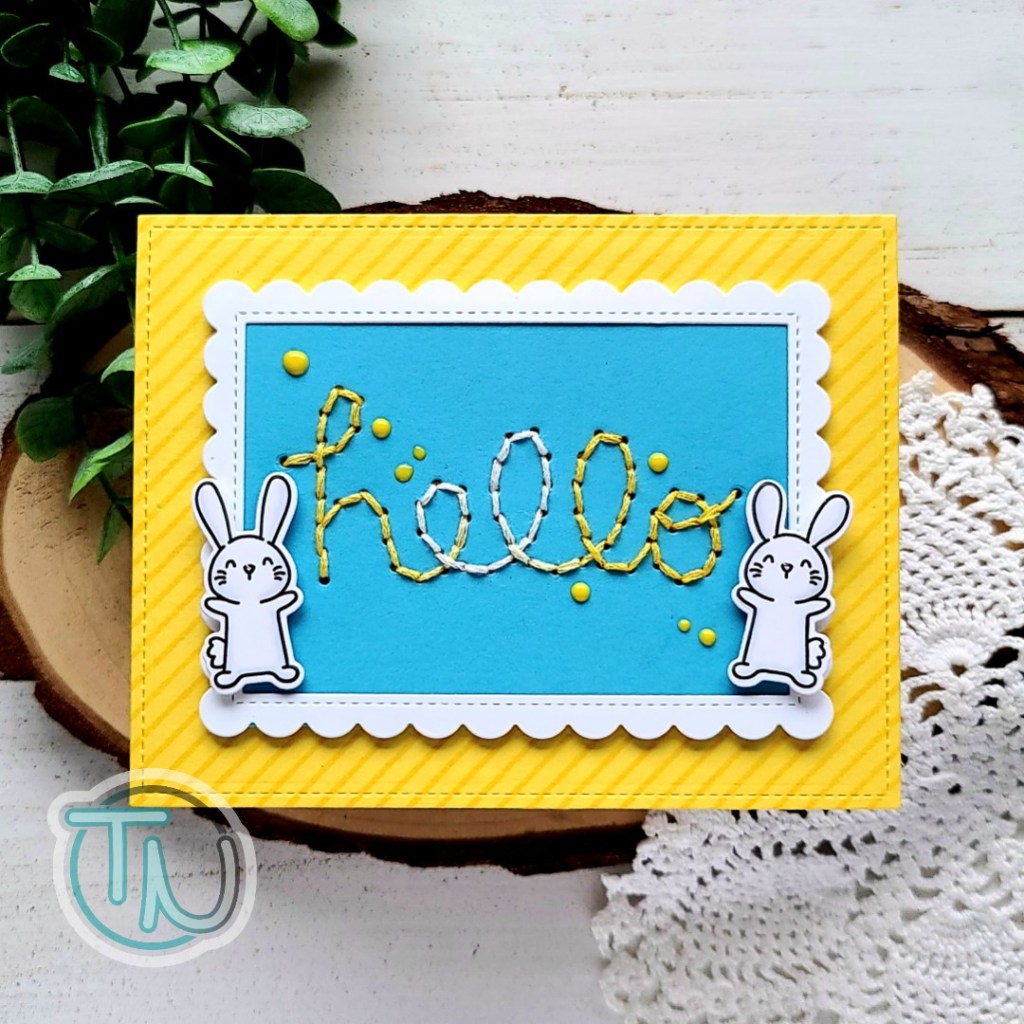
And for the final card in this set, I chose these cute bunnies from Avery Elle Party Pals. The striped background is a stamp from MFT Stamps called diagonal stripes. The embellishments across this one are Nuvo Crystal Drops in dandelion yellow.

I always like to add those finishing touches to cards so most of these have glossy accents or unicorn stickles in various places too. Black glaze pen on critter eyes is always a must as well. Some also have white gel pen accents added for a little extra interest.

I truly hope that you enjoyed today’s post and found a little inspiration to create something wonderful.

I really appreciate you sharing your time with me, especially for such a long post. Have a fabulous day!

Pink & Main – Sending Love

Hey friends! I’m over on the Pink & Main blog on this fine Friday sending some sweet cherub love! These little cherubs are so absolutely adorable and fun to color up really quickly. I feel like they are so versatile for many types of cards – Valentine, baby, sympathy, thinking of you – lots of options! Today I’m sharing a more generic thinking of you card but it could be used for Valentine’s Day too.

For this card, I chose my stamps and paper, and created a general layout before actually cutting or stamping anything. Because of that I let the paper guide the colors I chose for my images. All of the images are from the Little Cherubs set which I colored with my copics. Then I used the coordinating dies to cut the images out and moved on to my stenciled background.

For that I used the clouds stencil with my blending brush and some light purple ink. Then I die cut 2 ovals from patterned paper in the All Occasion Florals paper pad and moved on to assembling everything. I adhered the oval layers with liquid glue and backed the panel with foam tape. I attached the cloud panel and added foam squares to my images and put them all in place next.

Then I popped my card front in my MISTI and stamped the sentiment in the same purple ink as the clouds and moved on to finishing touches. For those, I added glossy accents to the flying hearts so they were shiny but you could easily see their cute faces. Then I added Stickles to the other hearts and Wink of Stella glitter brush pen to the cherub wings and hair.

Don’t you just love these sweet little images! They are too adorable for words!

I appreciate you sharing your time with me. Have a fabulous day!

Newton’s Nook – Sweet Treats Blog Hop

Newton’s Nook Designs 7th Annual Sweet Treats Blog Hop!

The Newton’s Nook Design Team is hopping along today to share some great Sweet Treats – just in time for Valentine’s Day! Make sure you scroll down to the bottom of this post to see the whole list and hop along and comment for a chance to win!

I couldn’t resist heading to the store and finding Hot Wheels to match the new Love Emergency stamps for my projects today. Then I thought it would be fun to find different ways to package them. Let’s start with that awesome police car!

I started these by stamping all of the images from Love Emergency and colored them to go with the cars that I had bought. It was a fun way to decide my color palette and not necessarily color everything realistic like I tend to lean toward.

For the police card, I die cut a red rectangle from Framework and folded it in half. I masked off one half and inked up the other half with the gingham stencil and white ink. Then I cut another rectangle from black and used the land borders die to create a ground. I glued them together and then added my police car with foam squares. I stamped and heat embossed a sentiment on a flag from Frames & Flags and trimmed off the top. I adhered that and attached my topper to a cellophane bag filled with some chocolates and that awesome Hot Wheels police car!

The super cool fire truck topper has the same idea but uses dies from Frames & Flags for the topper and a heat embossed sentiment on one of the hearts from the new Heart Frames set. The fire truck is popped up with foam squares for a little dimension.

Last, but not least, I moved on to the ambulance and decided to create a tag for this treat bag. I used the Fancy Edge Tag and cut 2 – one from white and one from blue. Then I inked the middle of the white one with red and popped me ambulance on it with foam squares. I stamped my sentiment on the smallest ticket shape in the Framework set and added the heart image to the side of it. I attached it with foam tape and threaded some ribbon through the holes of both tag pieces. I tied it to my back with some yellow baker’s twine and this bag is done too!

Sweet Treats Blog Hop Giveaway!

Would you like to win a $25 store credit to Newton’s Nook Designs online shop?

We are giving them out to TWO lucky winners!

Here’s how to win:

Comment on the NND blog and Design Team blogs (see list below)! The winner will be chosen at random from the collective reveal posts. Make sure to check out each of their blogs and comment for your chance to win. You will not know which blog has been chosen so the more you comment on the better your chances are of winning! You have until Monday, February 8th at 9pm EST to comment — winners will be announced on the NND blog on Tuesday, February 9th.

Check out all the awesome Design Team Blogs below to enter:

Newton’s Nook Designs
Ellen Haxelmans
Tina Herbeck
Larissa Heskett
Samantha Mann
Zsofia Molnar
Maria Russell
Farhana Sarker
Tatiana Trafimovich
Samantha VanArnhem
Amanda Wilcox

Miss Ink Stamps – Love You This Much

Hi there! I have a super adorable dinosaur card to share with you today featuring the Miss Ink Stamps Unstoppable set. I love these dinos so much! They crack me up!

I started by stamping my dinosaur and then cut a mask for him. Then I stamped down the claw arms and removed the mask. I colored him with my copics and fussy cut him out. Then I moved on to my card front by inking up the Stripes stencil with blue and teal inks. on a white panel. I trimmed it down to 5.5×4. Then I glued a couple of thin black strips behind the edge for a little interest. I die cut 2 hearts from Trinity Stamps nested hearts dies and adhered them together. They are popped up with foam tape on the stenciled background and my dino is also popped up.

I stamped and heat embossed 2 sentiments from the set on black cardstock and cut them into thin strips. Then I added foam strips and adhered them down. The whole panel is adhered to a white card base with liquid glue.

This card is so stinkin’ cute! I just love the idea of a giant T-Rex holding onto those claw extenders because his arms are so short. Makes me giggle.

I appreciate you sharing your time with me. Have a fabulous day!

Trinity Stamps – Beary Special Duo

Hey friends! I’m over on the Trinity Stamps blog today with a couple of fun slimline cards featuring the newly released Beary Special slimline stamp set. I thought it would be fun to make 2 different cards using a lot of the same techniques and products.

I started by inking up my Beary Special stamp with VersaMark ink and heat embossing 2 panels – one in white and one in black. Then I ink blended distress oxides over each one. I cut the green-toned one with the largest of the Modern Embossed Slimline dies. For the pink-toned panel, I cut three pieces with those same dies – coral cardstock, rose gold foiled cardstock, and then the inked panel.

Finishing off the pink-toned card, I adhered the largest panel to a white cardbase, then popped up the other 2 panels with foam tape. I stamped a sentiment from Beary Special with Seedless Preserves and die cut it with a banner from Slimline Series Scalloped Panels and Banners. I popped the banner up with foam tape and glued a scattering of confetti embellishments across the design.

Switching gears back to the green-toned card, we’ve got our panel and now it’s time to build it into a shaker. I die cut the scalloped frame that comes with the Slimline Envelope Builder die set from back cardstock. I cut a piece of acetate and adhered them together with double-sided tape. Then I lined the frame with double-height foam strips.

I sprinkled confetti bits and resin hearts on my panel, removed the release paper from the foam strips and adhered them together. I used liquid glue to add the shaker to a card front and moved in to the sentiment.

For that, I die cut the heart from the Marshmallow Alphabet dies from a similar green and black cardstock and adhered them to the acetate window with liquid glue. I stamped and heat embossed a sentiment from Beary Special on vellum and cut it into a rectangle. I smeared a layer of liquid glue on the back of the vellum and attached it to the heart.

I hope you’ve enjoyed today’s projects and found a little inspiration to create something wonderful.

I appreciate you sharing your time with me. Have a fabulous day!

Coffee Loving Cardmakers – Joy to My Heart

Hey friends! It’s Tuesday Tea over on the Coffee Loving Cardmakers blog today and I’m playing with some old and some brand new Trinity Stamps goodies today. They’ve got such a fun line of gnomes I decided to pair one of the new ones with the coffee mug die.

I started my card by die cutting half of the coffee mug and then inking up the layered coffee bean stencil. Half is red dye ink and the second half is glitter glitz gel. So sparkly and fun! I had die cut the hole for the coffee initially, so I colored some white cardstock and layered it behind the opening too. Then I die cut the new intertwined heart 3 times from red, white and teal. I glued the frame to the mug and popped the inside pieces up with foam squares.

Next, I stamped and colored the gnome from Joyful Heart with my copic markers. Then I used the coordinating dies to cut him out. I added foam squares to the back of him and added him to the mug. For my background, I die cut the “floor” from the slimline room builder dies and trimmed it to fit my card front. Then I cut a piece of red paper from the Autumn Rainbow pad for the top and adhered both to my card front. I thought it needed a border so I cut a strip of white paper 1/4 inch and glued it over the seam. Then I popped my mug and gnome up with foam tape and adhered them down.

Last, I stamped a sentiment from the Joyful Heart set and used the coordinating dies to cut it out and added it to the bottom of the card with foam squares. I thought the white heart on the mug looked a little empty so I also stamped a sentiment on it with red ink.

For finishing touches, I just added some white gel pen accents to my image and hearts to the gnome’s hat.

This combo is just too cute! A giant coffee cup with a sweet gnome professing his love…to you or the coffee??? I suppose that’s up for interpretation.

I appreciate you sharing your time with me. Have a fabulous day!

Newton’s Nook – I Whale Always Love You Plaque

Hello everyone! I’ve been on a major Valentine decor creating kick lately to go with my cards. Today I’m sharing a fun wood plaque I created featuring a few Newton’s Nook goodies that I absolutely adore!

I started by painting my plaque white. These have been available at my local craft store for years and they are only $1. So, needless to say, I have a stash and we’ve done a bunch of different projects with them. Then I set to deciding on a theme and some general pieces I wanted to go together. I stamped and heat embossed critters from Tides of Love and watercolored them with my Zig markers. Then I used the coordinating dies and cut them out.

Next, I made a mess which is always so fun to me. I used the seashell stencil with Thermoweb transfer gel blanco on some coral colored cardstock and white glitter glitz gel on light blue cardstock with the waves stencil. I cleaned up after myself and left them over night to dry. In the morning I ran the seashells through my laminator with iridescent decofoil and totally swooned! These are gorgeous in the light!

Time for trimming and assembly. I trimmed everything down and decided on final layout before adhering anything down.

Here are the specs:
seashells – 5 1/4 x 5 1/4 inches
glitter waves – 3×3 inches
white frame – 3 1/2 x 3 1/2 inches
polka dot teal stripe – 2 x 5 1/4 inches

I hope that helps if you want to recreate the same layout.

Now for assembly. I used liquid glue to attach the seashells to the plaque. Then I wrapped twine around the polka dot teal stripe and tied it in a bow. Then I added foam tape to the back so it would lay flat. I adhered the waves to the white frame and added foam tape to the back of that to help it lie flat around the twine too. Last, I added foam squares to the back of my images and put them in place. I learned a trick with vellum a while ago and have never gone back…if you have an even layer of glue behind the whole image you don’t see any glue spots showing through. Using the Xyron sticker maker is the easiest for this but mine is empty right now so I used liquid glue and my trusty finger. 😉

I seriously wish you all could see this in person. The shimmer and shiny of all the pieces is so pretty!!! I just adore this sign and am excited to make more for other occasions.

I appreciate you sharing your time with me. Have a fabulous day!

Birch Press Design – Sending Love

Hey friends! I’m over on the Birch Press Design blog today with a different technique for you to try. It’s embossing with your dies, especially panel dies! I paired it with some alcohol ink blending and love how it turned out.

I started by blending and mixing Ranger Alcohol Pearl Inks in enchanted and villainous on a piece of Yupo paper. When I got it how I wanted, I left it to dry for a while really make sure it wasn’t sticky. Then I took the Kinsley Heart Plate A and the sandwich for my die cutter that embosses and ran it through. It gives this great embossing of the areas that would have cut if I used the regular sandwich. This usually requires a silicon mat for your die cutter but they are very inexpensive and can totally open up a new world for your dies!

Then I die cut the layers for the Kinsley Heart in white and glued them together. For my sentiments, I used a combo of white, black and light purple cardstocks with vellum shadows. Each one has 4 layers for extra dimension and are attached with liquid glue and foam squares to keep things laying nicely.

Because I used alcohol pearl inks, the background is full of shimmer and I didn’t want to detract from that so the only extra thing I did for finishing touches on today’s card was add a little Wink of Stella glitter brush pen to the word LOVE.

I appreciate you sharing your time with me. Have a fabulous day!

Pink & Main – Roll With It

Happy Friday friends! We’ve done it again and made it to the end of the week. ❤ I’m over on the Pink & Main blog just rolling with it…sushi style!

I thought these cute sushi images from Roll With It fit perfectly in the windows the Mask It In-Line stencil creates so I paired them together. First I put the stencil down on an orange cardstock panel and inked up the circles with some white pigment ink. Then I replaced the circle masks, put the dotty stencil over them and used an orange ink on those. Then I took the orange ink and went around the edges for a little texture to draw your eye in to the center of the card.

I stamped the images from Roll With It and colored them with my copic markers. Then I used the coordinating dies to cut them out. I absolutely love this banner die that comes in the set and perfectly fits all of the sentiments! I popped up the images in the windows with foam squares. Then I used liquid glue to adhere my chopsticks to the bottom and popped the sentiment banner up with foam squares.

For a little extra texture I added glossy accents to the stripes on the chopsticks and parts of the sushi. Then I added Stickles in stardust to all of the sushi cheeks too.

I love this set so much and I don’t even eat sushi! They’re so cute and the sentiments range so much that you can literally use it for almost anything!

I appreciate you sharing your time with me. Have a fabulous day!

Coffee Loving Cardmakers | Sweet ‘n Sassy Collab

Happy Friday everyone! I’m super excited to be apart of the Coffee Loving Cardmakers – Sweet ‘n Sassy Stamps Collaboration today! I’ve made 2 cards to share with you featuring I Like Big Cups and Coffee Talk 2. These sets pair perfectly together so I couldn’t resist.

Let’s talk slimline first, shall we? I inked up a panel with ground espresso, vintage photo and tea dye distress oxide inks. Then I flicked some watered down ground espresso ink and regular water all over the panel. Once that was dry, I pulled out the Trinity Stamps slimline modern embossed panels dies and cut the 3 largest sizes from: dark brown, rose gold and the inked panel. The brown was adhered to a slimline card base with liquid glue, then the rose gold with foam tape. I wrapped some twine around the inked panel, tied it in a knot and put foam tape on the back avoiding the twine and put it in place too. Then I stamped and colored the travel cup and sleeve from I Like Big Cups and cut them out. I stamped a sentiment from Coffee Talk 2 on the sleeve and adhered them together with liquid glued. I added foam tape to the back of the cup, skipping the part where it overlaps the twine so it lays flat and popped it in place. For finishing touches I added some hearts and coffee beans from Twiddler’s Nook Caffeinated Crafting embellishment mix.

For my second card, I wanted to brighten things up a bit. So I chose a selection of blue and teal cardstocks and cut some different width strips. I added adhesive to a white panel and stuck the strips down at an angle and trimmed off the excess. I trimmed the panel down to 4×5.25 inches and stamped a sentiment from Coffee Talk 2 in the bottom right corner. I stamped another mug from I Like Big Cups, colored it with my copics and cut it out. I popped it up with foam squares and added foam tape to the back of the striped panel. I decided for a little contrast so I attached it to a black A2 size panel and used liquid glue to adhere it on a white card base. Then for finishing touches I added some white gel pen accents to the mug and a scattering of Twiddler’s Nook Princess Rings – Tiana across the design.

Remember, we’re hopping along today for the chance to win a $25 gift code to the Sweet ‘n Sassy Stamps store! You should have come from the fabulous Lori Turner and now will head over to the amazing Christine Burillo-Kirch.

If you get lost along the way, head back to the Coffee Loving Cardmakers or Sweet ‘n Sassy pages to get your bearings.

You have until Friday, Feb. 5, at 11:59 PDT to comment. Winner will be announced on the Coffee Loving Cardmakers blog Sunday, Feb. 7.

I appreciate you sharing your time with me. Happy hopping! Have a fabulous day!