Newton’s Nook January Release – Day 2

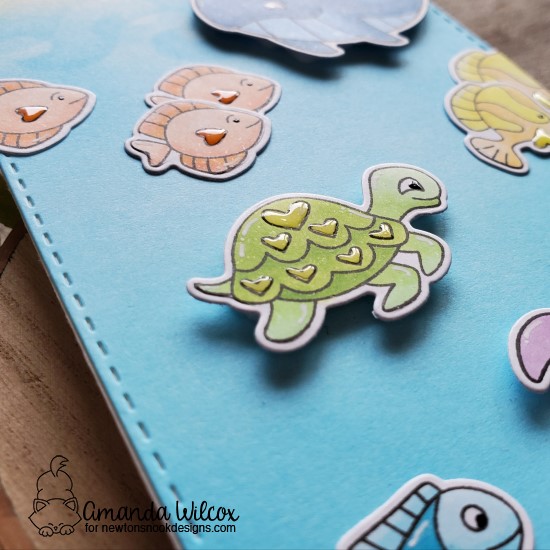
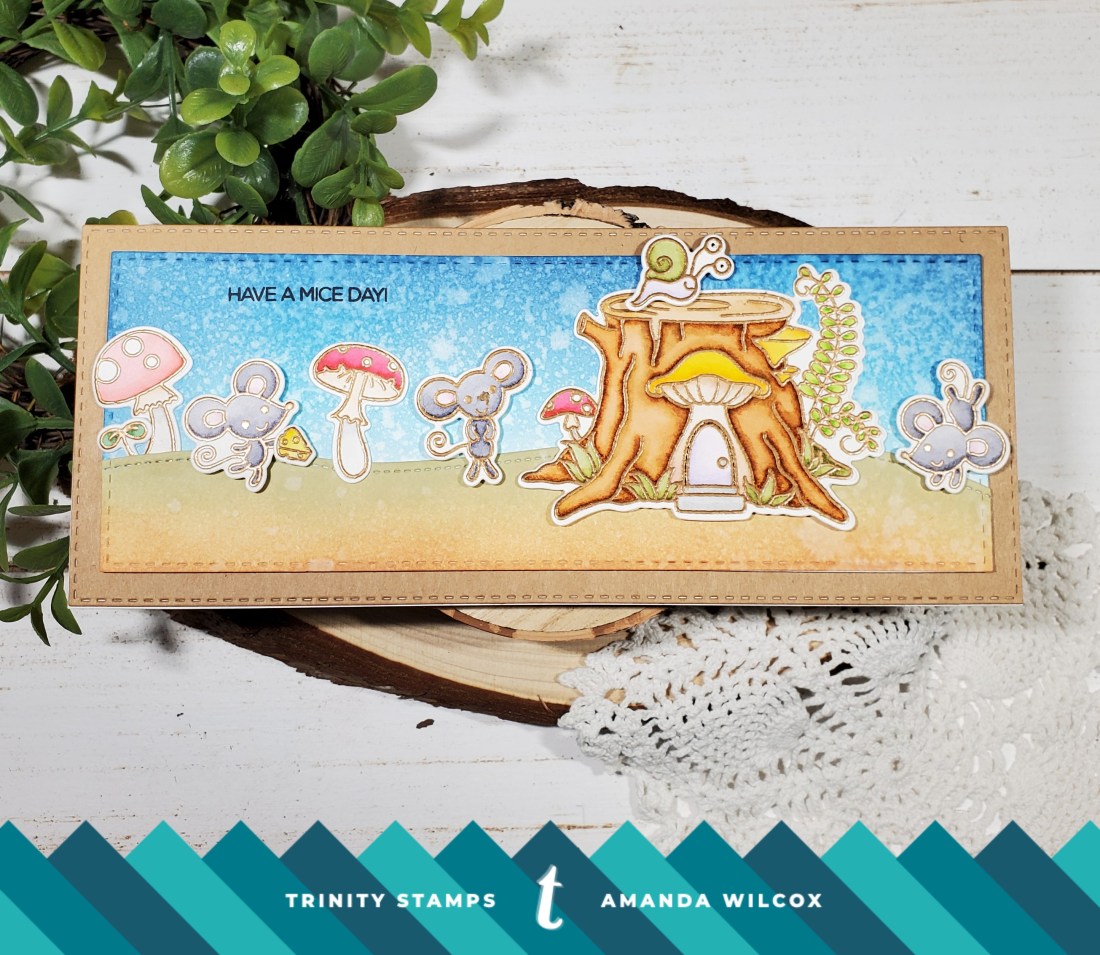
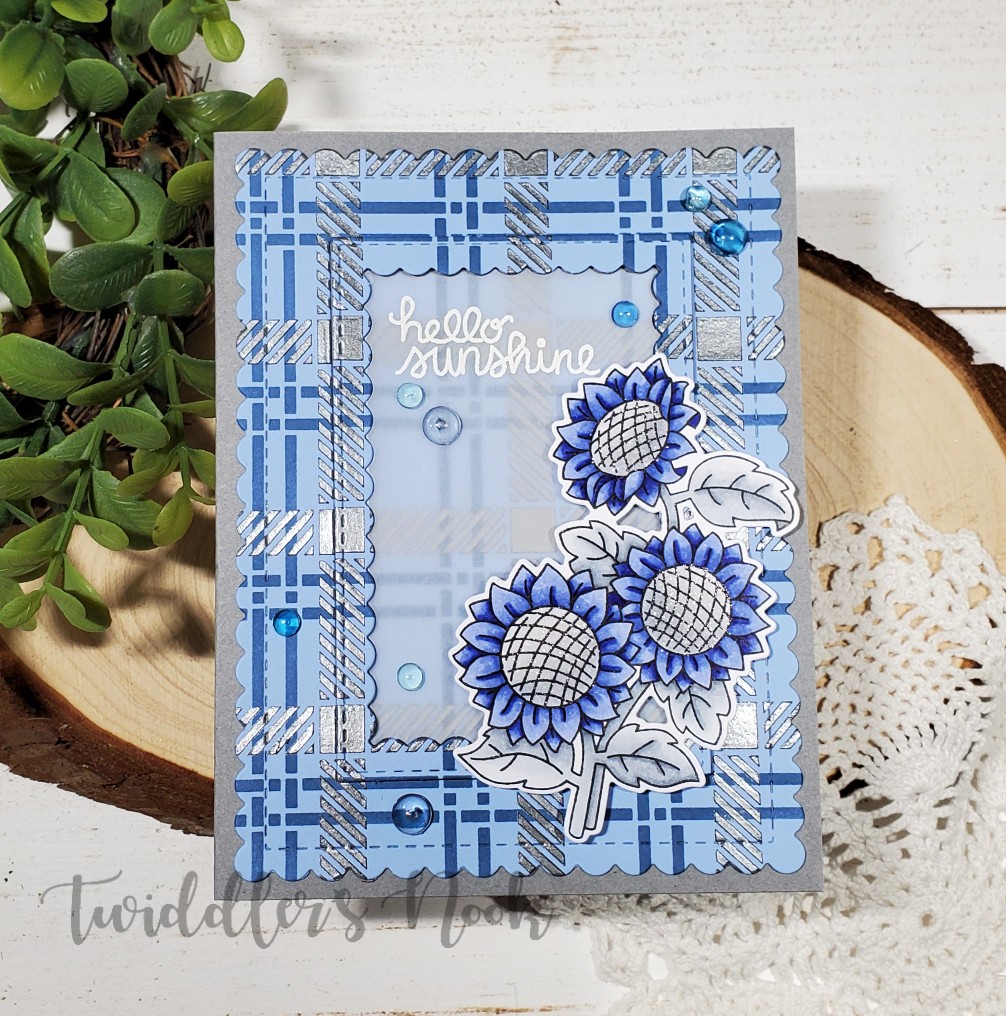
Welcome back to day 2 of the Newton’s Nook January release! Today’s set – Love Quarry – is my all-time favorite of this release! I had SOOOO much fun playing with it and have endless amounts of other ideas too!

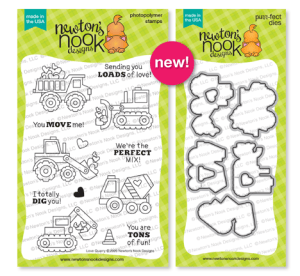
Love Quarry Stamps and Dies

Seriously, those adorable construction trucks and the punny sayings are just the best!

To make this fun card, I used the land border dies to cut hills and then inked them with distress inks and spritzed them with water. Next, I used acrylic paint to dye my texture paste and then smeared it on my cardstock for an awesome muddy look! While that was drying, I inked my card front to make a blue sky and spritzed it too. Then I set to stamping, coloring and die cutting my images.

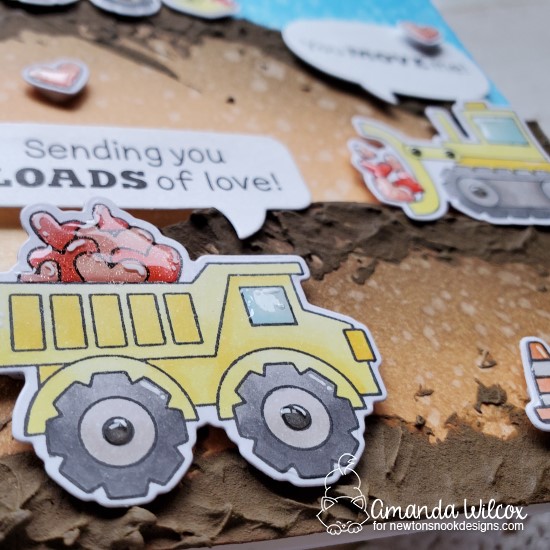
Once the mud was dry I popped the panels up with foam tape and started adhering all my pieces. Most of these are popped up with foam tape as well because it masked the mud’s texture.

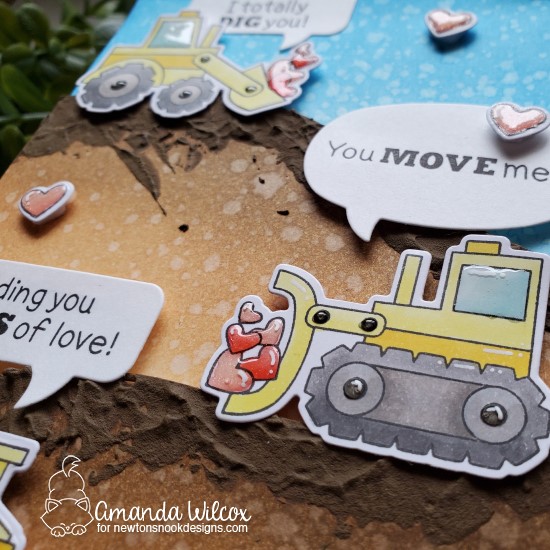
I decided that these awesome trucks needing to be talking so I used the speech bubbles die set for my sentiments. I love the added whimsy it gave this card.

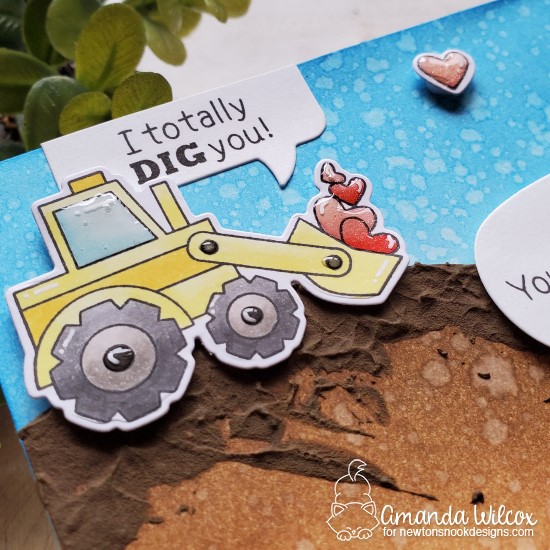
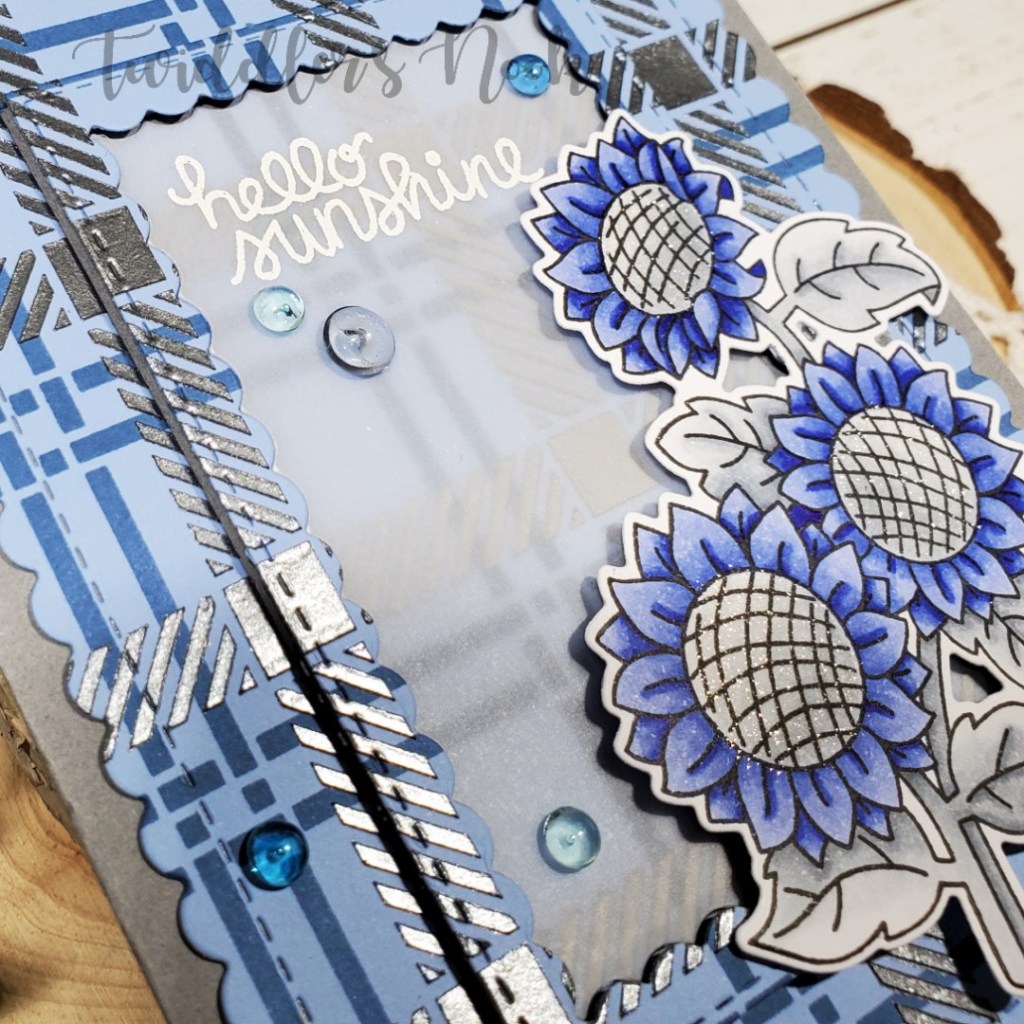
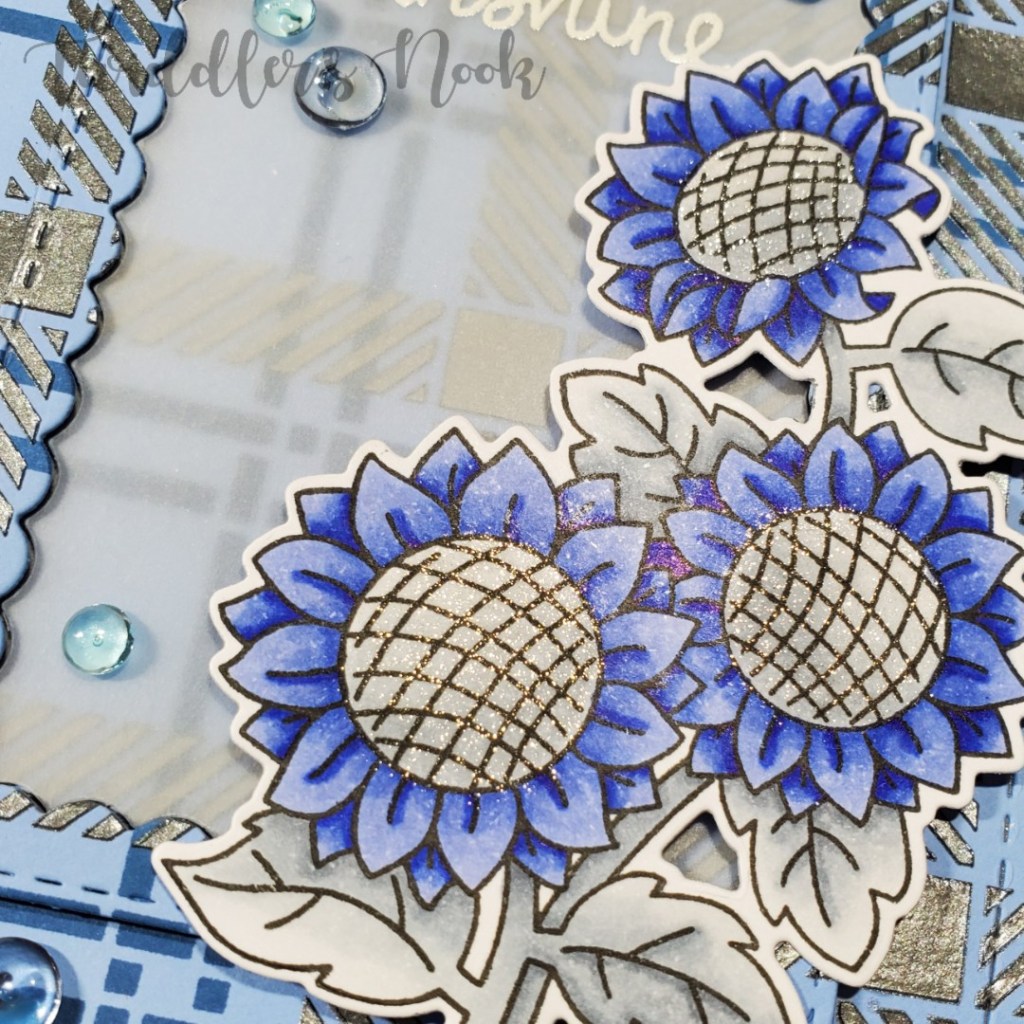
For finishing touches I added white gel pen accents throughout the images, Wink of Stella glitter brush pen to all the hearts and glossy accents throughout the card design. There is so much awesome texture going on in this card. I’m so in love with it!

Would you like to win the “Love Quarry” Stamp Set?This stamp set will be given away to ONE lucky winner!

Here’s how to win: Comment on the NND blog and Design Team blogs (see list below)! Thewinner will be chosen at random from the collective reveal posts. Make sure to check out each of their blogs and comment for your chance to win. You will not know which blog has been chosen so the more you comment on the better your chances are of winning! You have until Thursday January 23rd at 9pm EST to comment  — winners will be announced on the blog post on Friday, January 24th. 

Check out all the awesome Design Team Blogs below to enter:

Newton’s Nook Designs
Ellen Haxelmans
Larissa Heskett
Samantha Mann
Zsofia Molnar
Naki Rager
Maria Russell
Andrea Shell
Tina Smith
Tatiana Trafimovich
Amanda Wilcox

Newton’s Nook January Release – Day 1

Oh my goodness! I’m so excited to finally start sharing the Newton’s Nook January release with you! It is over-the-top amazing! Today we’re sharing the:

Tides of Love Stamps and Dies

Bokeh Hearts Stencil Set

I’ve got a super fun card to share with you using the Tides of Love stamps and dies. Stay tuned for inspiration from me using the awesome new stencil!

I couldn’t decide which critters to use so I decided to make a slimline card and use everyone! The critters are stamped, colored and die cut. Then popped up with foam squares on an ink blended panel.

I used the land borders to cut my sand and then added dot detail for texture. I added white gel pen to all the critters and black glaze pen to the eyes.

If you follow me at all, you know I love my finishing touches and little details. On this card, I added glossy accents to the hearts on the fish, turtles and also on the octopus tentacles and whale water spurt. Then I added unicorn Stickles to the crab and octopi’s heart and the hearts in the whales water spurt. The difference in texture and also the look from gloss to super-sparkle is so eye catching. I love how this card turned out! Don’t you?

Would you like to win the “Tides of Love” Stamp Set? This stamp set will be given away to ONE lucky winner!

Here’s how to win: Comment on the NND blog and Design Team blogs (see list below)! The winner will be chosen at random from the collective reveal posts. Make sure to check out each of their blogs and comment for your chance to win. You will not know which blog has been chosen so the more you comment on the better your chances are of winning! You have until Thursday, January 23rd at 9pm EST to comment  — winners will be announced on the blog post on Friday, January 24th. 

Check out all the awesome Design Team Blogs below to enter:

Newton’s Nook Designs
Ellen Haxelmans
Larissa Heskett
Samantha Mann
Zsofia Molnar
Naki Rager
Maria Russell
Andrea Shell
Tina Smith
Tatiana Trafimovich
Amanda Wilcox

Trinity Stamps – Candy Jar

Hello everyone! I’m popping in with a second post today to share this fun Trinity Stamps candy jar card. Over on the Trinity Stamps blog today, we’re starting to reveal the 2020 Creative Team. Guess what!?! I’m on it! (Insert happy dance!!!)

Today’s reveal is the admin team and we decided to do a little collab together using the Candy Jar stamp set. Head to the Trinity Stamps blog to check out everyone’s contributions and then stop by tomorrow and the next day for the reveal of the blog and video teams.

There is so much awesomeness lined up for Trinity Stamps this year. It’s going to be amazing!

For today’s card, I decided to mask and stamp all of the candy pieces inside my jar for a one-layer look. It took a while but it’s pretty cool looking and worth the work. After coloring and die cutting, I added glossy accents to the glass portion of my jar and left it to dry.

I used the shine brighter stencil with two pink dye inks and the amazing blending buddy brushes directly on my card front. Then I popped my jar up with foam tape and worked on my sentiments.

I die cut the sweeter sentiment and it’s shadow from the sweet senti-mini die set. The shadow is cut from vellum and the word from silver cardstock. Then I took sentiments from the sweet senti-mini stamp set and heat embossed them in white on black cardstock. The sentiments are also popped up with foam squares.

For simple finishing touches on this card, I added white gel pen accents to the jar and called it good. It’s a really fun card with such a “sweet” 😉 sentiment that I didn’t think it needed anything else.

I hope you enjoyed today’s card and will head over to the Trinity Stamps blog to see everyone’s creations.

I appreciate you sharing your time with me. Have a fabulous day!

Peek-a-boo Thanks!

Happy Tuesday everyone! I’m up on the Coffee Loving Cardmakers blog today with my first post as a design team member. I pulled out those fabulous Avery Elle peek-a-boo pals again and paired them with the awesome cool beans set for this adorable thank you card.

To make it I stamped, colored and die cut my my panda from the original Avery Elle Peek-a-boo Pals set and the coffee cup, sleeve and beans from Avery Elle Cool Beans. Then I die cut the Avery Elle Quilted Frame from gray cardstock and, using that for a guide, inked spun sugar distress ink in the center of my card front. I popped the frame up with foam tape and adhered my cup and panda to that. Using my MISTI I stamped the steam in light gray ink and then my sentiment in black over that.

For finishing touches I added black glaze pen to the panda’s eyes and nose, glossy accents to the coffee beans and white gel pen accents throughout the images.

Last but not least, I added some adorable sweethearts clay hearts from Honey Bee Stamps on the coffee cup and throughout the background. Super cute and easily customizable by changing the critter and sentiment to match whoever your recipient is.

I don’t know if pandas like coffee, but in another life I must have been a panda, and I love coffee so we’ll go with that. Thanks so much for stopping by today. I hope you enjoyed today’s card. Have a fabulous day!

Designer’s Nook Sneak Peek

Hello everyone. Last month I learned that there is a special newsletter that Newton’s Nook sends out to subscribers only every Tuesday. It’s got special projects from the design team and the only way to see them is to subscribe! This is so cool and I wanted to share it with you because tomorrow is my first time joining in on the Designer’s Nook fun for Newton’s Nook!

Click HERE to subscribe today so that you don’t miss out on my awesome project tomorrow! Be sure to check the box for Designer’s Nook when you subscribe.

Here’s a sneak peek of tomorrow’s project for you…

I hope you’ll head over and subscribe. I wouldn’t want you to miss out on the fun!

As always, thanks for stopping by. Have a fabulous day!

Have a Mice Day!

Happy Thursday everyone! I’m over on the Trinity Stamps blog today with this fabulous mousy slimline card! I fell in love with these mice the second I saw them last fall and love how versatile they are all year round!

For this card I decided to work outside of my comfort zone a bit and try some heat embossing and watercolor with my Zig Clean Color Real Brush Markers. Instead of the traditional black heat embossing, I went with copper for a different look and I love it!

To make this fun card, I heat embossed the images from Mouse House, colored and then die cut them with the coordinating dies. Then I took out my Slimline Stitched Card Panels and Windows die set and cut the largest from kraft cardstock and the smallest twice from white cardstock. Then I took the stitched border from the Castle Scene Builder die set and cut a “ground” for my scene from one of the white panels. I inked the white panels up with distress inks and spritzed them with water.

On to assembly now. I put the kraft panel on a card base 3.5×8.5 inch card base and then adhered the ground to the sky panel and popped it up with foam tape. For the images, the house and mushrooms are adhered directly to the card-front but the mice and snail are popped up with foam squares. 

With all of the shine from the heat embossing and texture of the distress ink background I actually didn’t add any further embellishments to this card. I stamped my sentiment in the top left sky area and this beautiful card is ready to be shared!

I love the variety of sentiments in this set. You can make almost any occasion card you need to. It’s great!

I hope you enjoyed today’s project. I appreciate you sharing your time with me. Have a fabulous day!

Trinity Stamps – Succulent Banner

Hello everyone! I hope your weekend is going well. I’m stopping in today to share a different style card than I typically play around with. The stamp set I chose was a Christmas gift that I was so excited to play with. It’s called Succulent Banner from Trinity Stamps. It’s in the Last Chance section now so you’ll want to stop by and grab one before they’re gone. There are quite a few fabulous sets at great prices so…treat yourself! 🙂

For today’s card, I started by heat embossing the image with copper embossing powder on watercolor paper. Then I watercolored with my Zig Clean Color Real Brush Markers and a waterbrush pen. I stamped my sentiment after the coloring was dry and then die cut it out.

Then I started to work on the background. I dug in my stash for stencils that I felt went with the succulent image and found some older Stampin’ Up stencils I don’t think I’ve ever used. (Crafter problems. Oy!) I took the first one and used a light gray pigment ink with my blending buddy brush on black cardstock. Then I took the second one and used champagne Metallix Gel on that. Last I took pearl and gold watercolors and splattered them over the whole thing.

Once all of those layers were dry, I popped my image up with foam squares and this card is ready to go!

There are so many sentiments in this set that you could swap them out for a whole set of cards for any occasion! And I am in LOVE with that image. I hope you enjoyed today’s card.

I appreciate you sharing your time with me. Have a fabulous day!

Newton’s Nook – Winston Takes Flight

Hello everyone! I’m beyond excited to be sharing my very first post as a Newton’s Nook Design Team member today. My family knows me very well and added to my stash of Newton’s Nook stamps for Christmas and I couldn’t wait to ink this cute Winston up! Today he’s sharing a birthday message to a very special someone – my dad! I made this for his birthday earlier this week.

I started by inking up Winston Takes Flight and coloring the images with my copics. Then I used the coordinating dies and set them aside to start on my background.

I cut a panel and used the clouds stencil with distress ink to make my sky. Then die cut that panel from the largest of the Frames & Flags die set. I popped the panel up on a card base and then figured out my final placement.

I popped Winston and the banner up with foam squares and glued the clouds directly to the background. I double-stamped my sentiment in blue and black ink for a fun look in the top left corner. I thought the card needed a little something at this point so I shopped my stash and found a cute bird in the Festive Fawns set, so I stamped, colored and die cut him out. He’s popped up with a foam square too.

For finishing touches on this card I added Stickles to the clouds for texture, black glaze pen to the eyes and white gel pen accents throughout. Then I added Wink of Stella glitter brush pen to the medallion on the plane and the banner. Last I put glossy accents on Winston’s goggles and nose, the medallion on the place and the bird’s beak.

This card was so fun to put together. I hope you enjoyed it as well.

I appreciate you sharing your time with me. Have a fabulous day!

Sweet Birthday

Hello everyone! I’m up on the Trinity Stamps blog today.

I don’t know about you but I try to stock up on birthday and all occasion cards whenever I get the chance. It seems that we’re always needing one when I don’t have time to make it. So today, I’ve got a super sweet birthday card to share.

I pulled out my Sweeter Than stamp set, stamped them all, colored and then die cut them. Then I started on my background. I blended picked raspberry and dusty concord distress inks and spritzed them with water. Then I used my blending buddy brushes and added more dusty concord over the top half of the thinner layer of my Catching Some Rays stencil. Next, I used white pigment ink over the wider layer of the stencil set. Then I added some washi tape from my stash and die cut the panel.

Now, I added foam squares to the back of all my candy pieces and arranged them across the card front. Then, I stamped the outer parts of my sentiment in black and heat embossed the larger “sweet” in white so it stood out. 

I popped this panel up on a card front with foam tape and started on finishing touches. For those, I added glossy accents to half of the suckers and Wink of Stella glitter brush pen to the other half. Then I scattered some jellyfish jewels throughout the card front. I love extra shimmer and sparkle. It never gets old! 

I just love how bright and fun this card is! The recipient is sure to enjoy the sweet thought that went into making it. I appreciate you sharing your time with me. Have a fabulous day!

Newton’s Nook Design Team

Happy New Year everyone!!!! I’m over the moon to share with you that I’m joining the Newton’s Nook Design Team! This is amazing and I feel so fortunate to be joining this group of incredibly talented ladies!

So, let’s celebrate with a card, shall we?!? I love celebrating this way! I pulled out the beautiful Sunflower Days stamp and die set to play with for this occasion. I got it for my birthday a couple months ago and hadn’t made a point to play with it yet.

For some reason I’ve been dreaming about these beautiful sunflowers in shades of blue and silver, so that’s what I did. What do you think of it?

I also used the plaid stencil set with blue dye ink and glazed pewter metallix gel on a lighter blue cardstock. After the gel was dry I die cut the panel from the largest of the Flags & Frames Die Set. Then I die cut the same panel again from the middle sized die in the Frameworks Die Set.

At this point I started assembling my card by adhering the largest “frame” I created diretly to the gray cardbase. Then I used foam strips to pop up the inner frame and finally glued the center panel directly to the cardbase as well. This is when I started playing with placement of my sunflowers and didn’t like anything at all. I even considered scrapping the sunflowers and reaching for a different image. Until I had an idea to use vellum to diffuse the tone-on-tone look everywhere and I loved it!

So I die cut the center panel from vellum, stamped and heat embossed my sentiment and glued that piece to the center. The sunflower image is popped up with foam squares so it lays nicely on the popped up frame.

I kept the finishing touches on this card simple because there is a lot going on. I used my Wink of Stella glitter brush pen on the centers of all 3 flowers and then glued some blue dew drops from Honey Bee Stamps across the card front.

I am just in love with how this card turned out. And with the sentiment, it can be a card for just about any occasion too! Bonus!

I’m super excited to be joining this team and hope you’ll continue with me through this amazing journey! Thanks for stopping by.

I appreciate you sharing your time with me. Have a fabulous day! And…HAPPY NEW YEAR!!!