Blog

Miss Ink Stamps – Perfect Match

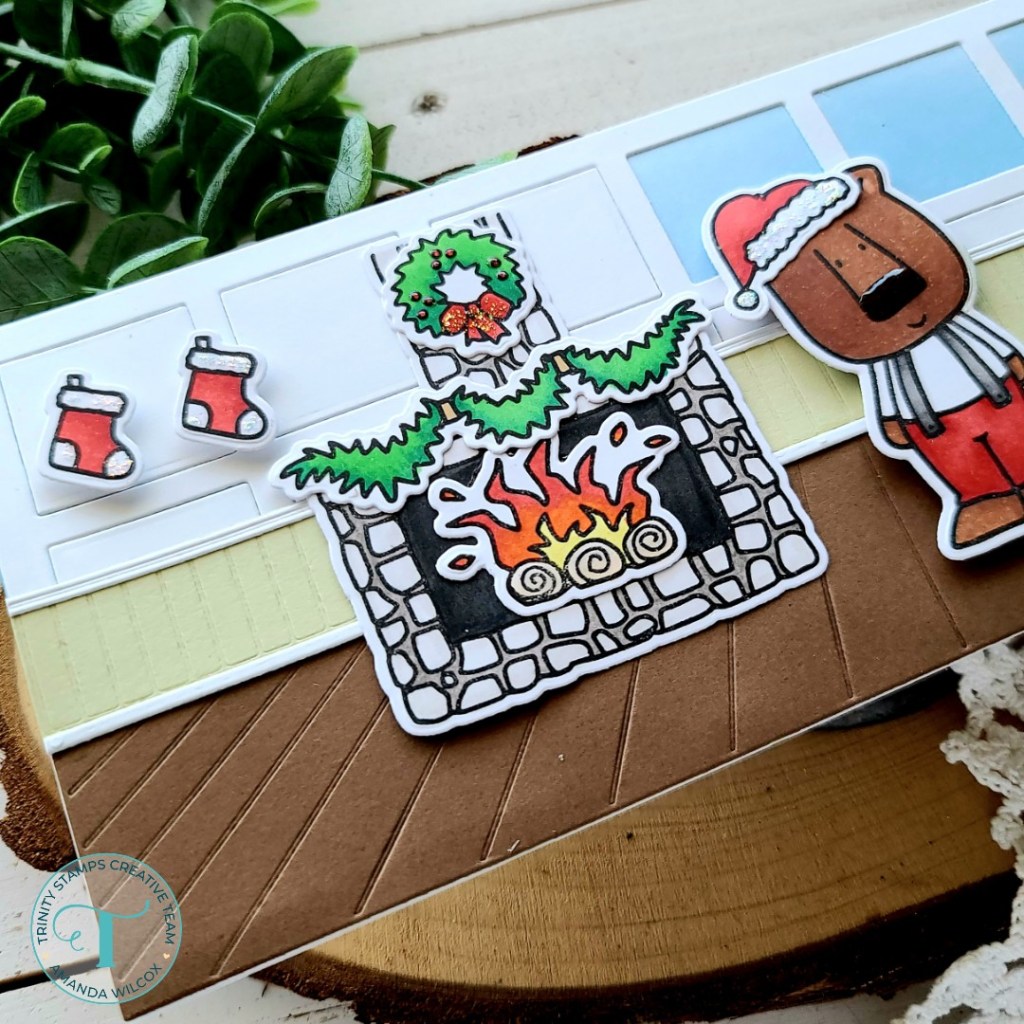
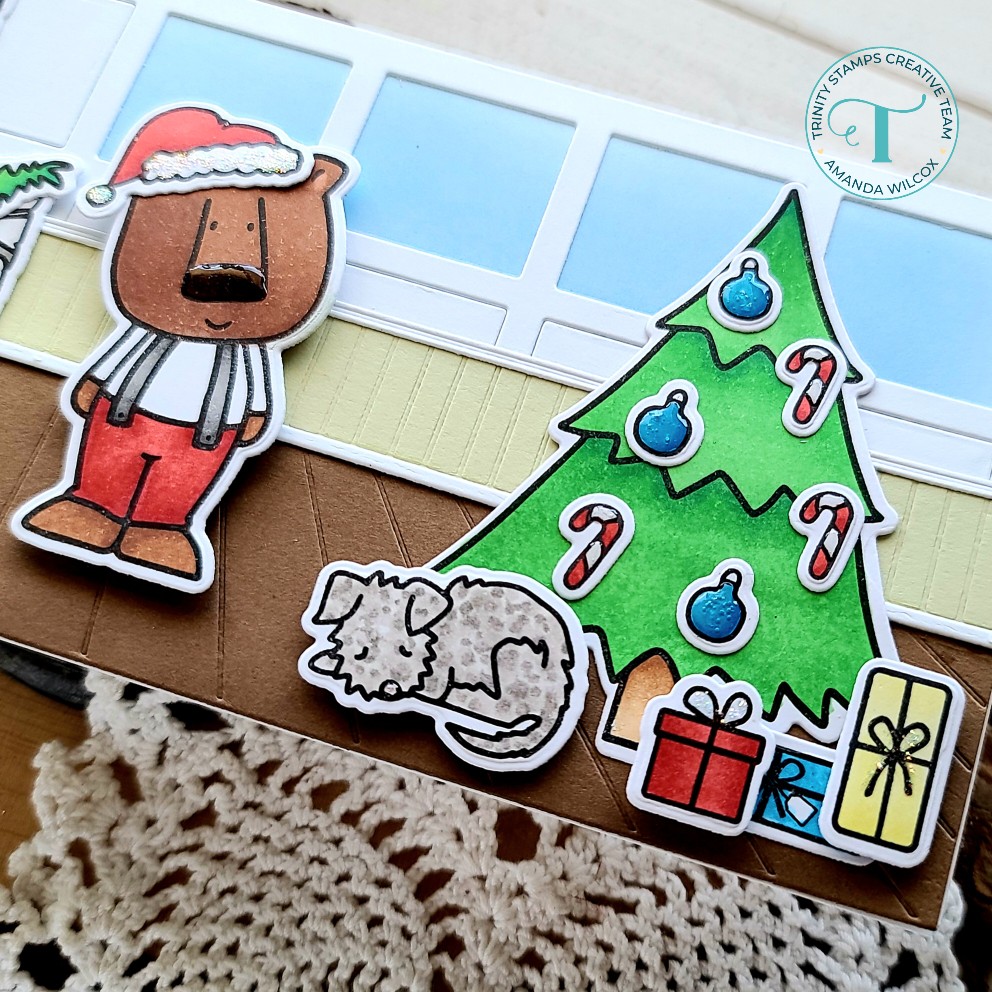
Hey friends! Popping in with a fun and punny card featuring one of the new Miss Ink Stamps gnome sets – Perfect Match! The sentiments in the set lend it to a variety of card themes from birthday to anniversary and lots more!

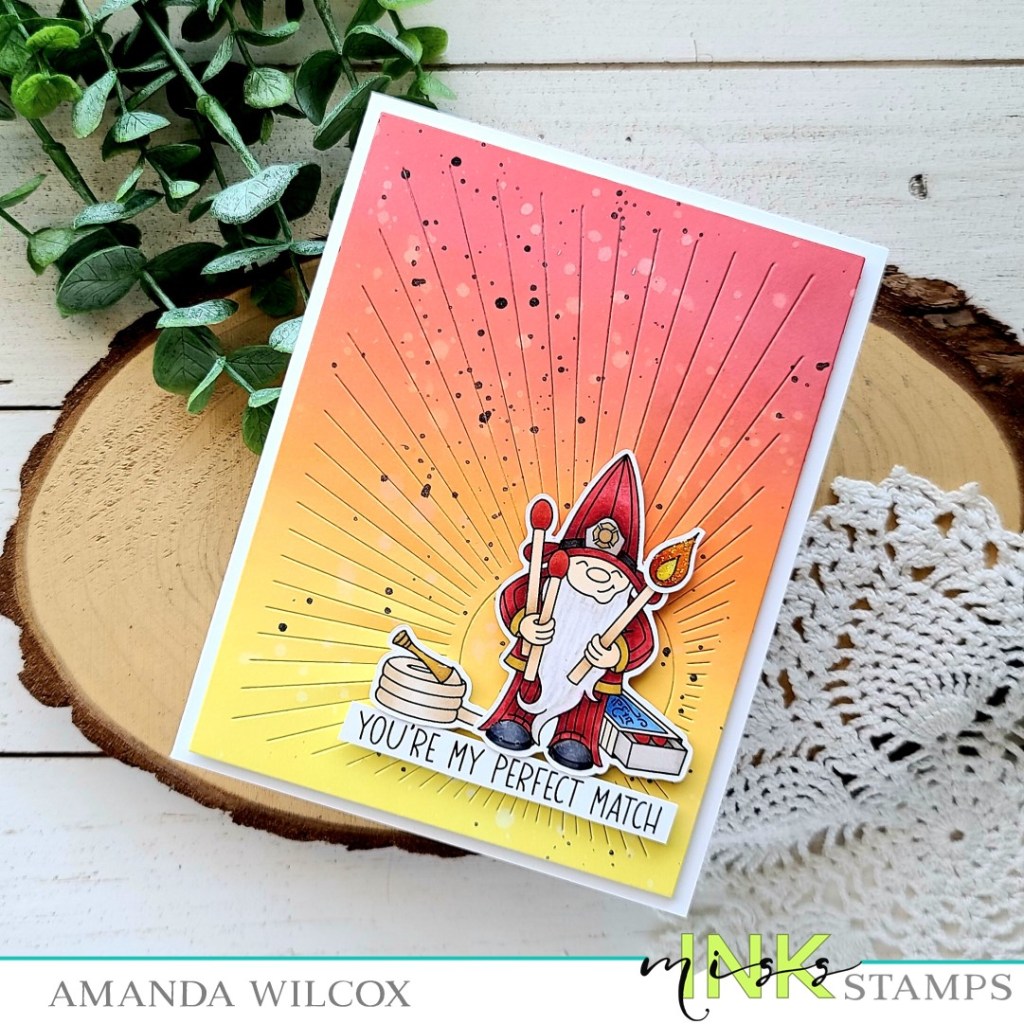
I colored up my cute fireman gnome, a flame and the firehose in the set with my copic markers. Then I used the scan-n-cut to cut them all out. I stamped a sentiment and trimmed it into a strip and switched gears to ink blending my background.

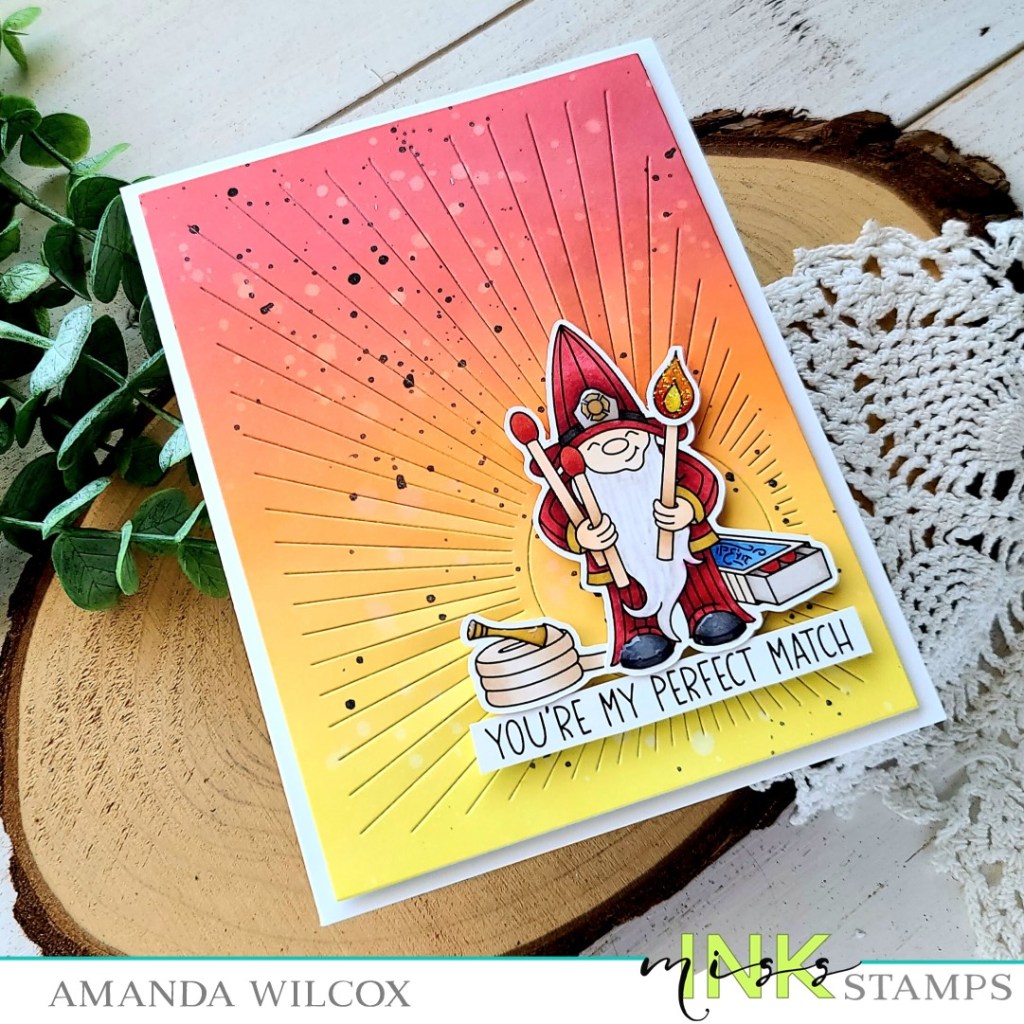
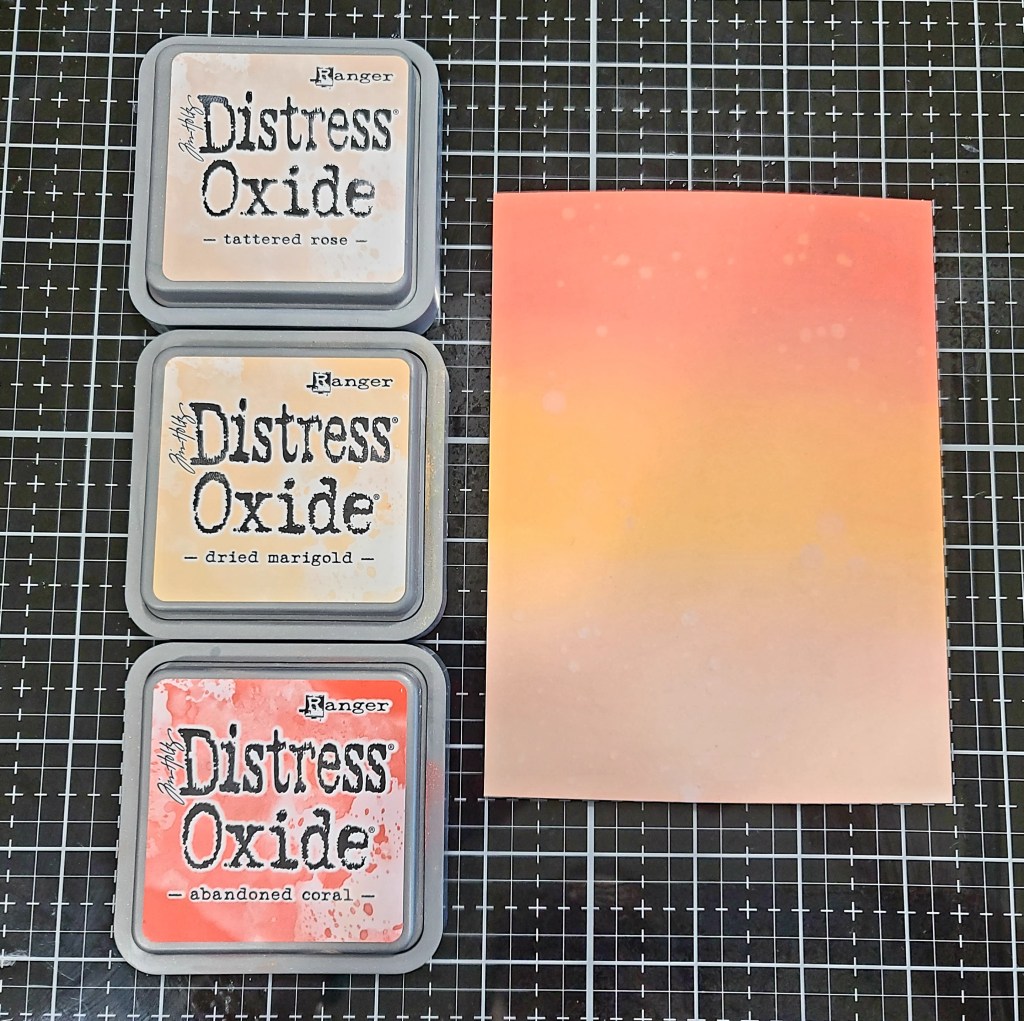
For that I used distress oxide inks in squeezed lemonade, carved pumpkin and barn door on a white panel. I spritzed it with water and flicked some black paint across the panel. Once it was dry I ran it through my die cut machine with an Avery Elle Ray cover plate die. I added foam tape to the back of the panel and popped it up on a white card base. Then I used liquid glue to adhere my images together and popped them up with foam squares. Last, I used a foam strip to add my sentiment just under the images.

For finishing touches I added unicorn Stickles to the flame and glossy accents to the hat emblem, boots and hose nozzle.

Products used on today’s card:
Miss Ink Stamps Perfect Match stamps
Avery Elle Ray die
Distress Oxide Ink – squeezed lemonade, carved pumpkin, barn door
Glossy accents
Stickles – unicorn

I appreciate you sharing your time with me. Have a fabulous day!

Trinity Stamps – Happy Mail

Welcome, welcome friends! I have some unbearably adorable happy mail to share with you all today! I tried a new distress oxide ink combo and played with one of the new Trinity Stamps sets – Special Delivery. It’s got another round of those super cute bears that I just love and this one has a pup too!

I started by stamping and coloring those cute images with my copic markers. Then I used the coordinating dies to cut them all out. Next, I die cut the largest Slimline Scalloped Panel die from white cardstock. I pulled out distress oxide inks and blended them together at an angle. Left to right I used chipped sapphire, peacock feathers and twisted citron. I splattered it with water and the flicked pearl watercolor on it too. Next, I watered down a bit of black acrylic paint and, without rinsing my watercolor brush, I picked up the paint and flicked it too. This turned out so cool! It’s like a pearl charcoal paint splatter. It’s beautiful in the light.

Next, I die cut the word happy from the Marshmallow alphabet dies 3 times and glued them together. I partial stamped a sentiment from Special Delivery and heat embossed it. Then I trimmed it into a little block. I used liquid glue to adhere the inked panel to a white slimline card base.

I used liquid glue to adhere the word happy, then added foam squares to the back of my images and the word mail and started adhering them to the card base. For finishing touches I added glossy accents to parts like the mailbox flag, smiley faces and critter noses. Then I came in with unicorn Stickles for the flowers at the base of the mailbox.

This little stamp set is absolutely adorable but keep in mind too that it works fabulously with a bundle of other products from Trinity Stamps like the Cozy Cottage, Cottage Kitchen, Cozy Christmas Cottage, Cozy Bear and You Lift Me Up!

Products used on today’s card:
Special Delivery stamps and dies
Marshmallow Alphabet dies
Slimline Scalloped Panels and Banners
Distress Oxide inks – twisted citron, peacock feathers, chipped sapphire
Glossy accents
Stickles – unicorn

I appreciate you sharing your time with me. Have a fabulous day!

(This blog uses affiliate links whenever possible, at no additional cost to you.)

Trinity Stamps – Christmas in July Fun

Hey friends! Popping in a second time today with another Christmas in July card for your inspiration vault. I had a little fun this weekend playing with some Trinity Stamps goodies from last year that I hadn’t gotten to yet and came up with this fun Christmas slimline card.

I knew I wanted to create a fun scene with this adorable Cozy Christmas Cottage stamp set so I stamped a bundle of images that I thought would make a cute room and colored them with my copics. Then I used the coordinating dies to cut them out and started playing to decide if I wanted a portrait or landscape card. Originally I was thinking portrait and then I pulled out the Slimline Room Builder dies and that went out the window because it was too perfect!

I cut the room builder floor from brown cardstock and the wainscoting portion of the wall from light green. Then I cut the chair rail and baseboard from white. I also die cut the Slimline Hip to be Square die from white for my “windows. I inked up a slimline panel with some light blue ink for the sky outside my windows and adhered the Hip to be Square panel to that. Then I glued the squares that came out back in where I didn’t want windows showing open. Next, I adhered the layers of my room builder – the floor and walls, etc.

With the room built I used a combination of liquid glue and foam squares to place all of my images filling in the scene and decorating the tree. For finishing touches I added bits of glossy accents and unicorn Stickles throughout the design.

At this point I didn’t want to muddle the cute room scene with a sentiment so I will choose one later on for the inside of my card that fits the recipient. I don’t do this often but it makes for a nice versatile card.

Products used on this card:
Cozy Christmas Cottage stamps and dies
Slimline Hip to be Square die
Slimline Room Builder dies
Blending Buddy brush
Copic markers
Glossy accents
Stickles – unicorn

I’m going to link this fun card up to the BYSHC Christmas in July Hop today too! So excited to have a few cards in my stash already for the holiday season.

I appreciate you sharing your time with me. Have a fabulous day!

MFT Stamps – Sending You HUGS

Hi friends! I hope you’re having a fabulous day so far! I’m popping in with a simple and sweet thinking of you card featuring some goodies from MFT Stamps. I recently picked up these adorable Mini Meows kitties and couldn’t wait to play with them!

This whole card started with the need to stamp and color these cute kitties! So I chose 3 and colored them with my copics. Then I used the coordinating dies to cut them out. Seeing how perfectly they fit in the photo booth strip die I just had to use it. So I took a piece of white cardstock slightly smaller and ink blended peacock feathers and tumbled glass distress oxide inks. I spritzed it with water and glued it to the back of the photo booth strip frame. I added the kitties next.

For the background panel, I blended tattered rose, worn lipstick and candied apple distress oxide inks and spritzed it with water. Once it was dry I die cut the panel with the largest Stitched Rectangle die from Lawn Fawn. It took me a minute but I die cut the Sending You Hugs sentiment and tried different arrangements. Once I decided how I liked it, I adhered the first layer down. Then I die cut the letters 3 more times and glued them on top for some dimension. I added foam tape to the back of the photo strip and popped it on the panel next.

I used liquid glue to adhere the panel to a white card base and moved on to finishing touches. Those are pretty small here but I still like the effect they make. I used black glaze pen on the kitties’ eyes and a little dab of glossy accents to their noses.

At the last minute I thought it would be adorable to take one of the heart speech bubbles and add it to that middle kitty. So I cut it from white, colored the heart with copics and glued it in place. I couldn’t leave it alone though so I added glossy accents to the heart too! So cute!!!

Products used on today’s card:
MFT Stamps Mini Meows stamps and dies
MFT Stamps Sending You Hugs die
MFT Stamps Photo Booth Strip die
MFT Stamps Love Speech Bubbles
Lawn Fawn Large Stitched Rectangle Stackable dies
Distress Oxide Ink – candied apple, worn lipstick, tattered rose, peacock feathers, tumbled glass
Glossy accents
Foam tape

I appreciate you sharing your time with me. Have a fabulous day!

Newton’s Nook – Designer’s Nook Sneak Peek

Hey crafty friends! I’m popping in with a little sneak peek of tomorrows Designer’s Nook newsletter from Newton’s Nook!

If you’re not familiar, this is a subscriber only newsletter from the design team at Newton’s Nook to you with exclusive crafty inspiration every Tuesday! As long as you subscribe today you’ll start getting awesome inspiration directly to your inbox tomorrow morning and each Tuesday after that!

Click HERE to head to the subscriber section of the Newton’s Nook website. Be sure to click Designer’s Nook newsletter!

I appreciate you sharing your time with me. Have a fabulous day!

Thermoweb – Collaboration with Benzie Design

Oh my goodness! I am so excited to share that Thermoweb and Benzie Design have partnered up for a really awesome Christmas in July collaboration! They’ve got designers from the paper team and fabric team creating awesome projects all week long! Today I have some ornaments, tags and a card to share!

Here’s a quick look at all the fun things I created for the collaboration! The sweet bears and foiled tags are great together or on their own. Tied to a package or maybe affixed to an envelope even. And the Christmas card is fun and the sweater is removable to hang on the tree!

Here’s a closer look at the Christmas card. The fun foiled background mixed with the fuzzy texture from the felt are so awesome! And I can’t get enough of the Ugly Christmas Sweater dies from Benzie! They are so fun!

Here’s another look at those sweet bears and gift tags. I have been obsessed with these bears for a while and love making them hold lots of different things. For this project I gave them each a Christmas gift with a bow on top! The tags are two layers with foiled acetate on top and white cardstock for writing a message or the recipient’s name on the bottom.

If you’d like to see a step-by-step for these projects and more head over to the Thermoweb blog and check it all out!

I appreciate you sharing your time with me. Have a fabulous day!

Miss Ink Stamps – Release Day

I am so excited to share that today is release day for Miss Ink Stamps and it’s so full of original and amazing stamps!!! I shared a peek earlier in the week of one of the new gnome stamps and today I have a card to share featuring the new Slim’s Whims. This pup is larger than life and soooo much fun t color and arrange with his different accessories! The sentiments are fantastic too!

I mean, look at that face! How could you not love him!!! There are so many color combination possibilities too which makes playing with this stamp set endless fun!

I started my card with a general layout in mind so I don’t into coloring him with my copics and cutting him out with my scan-n-cut. For the background I used a combination of a few stencils. First, the Ins and Outs Hollywood stencil to ink up the center portion of a light blue cardstock panel in distress oxide inks – chipped sapphire and weathered wood. Then I placed the mask over that area and used the Basket Case stencil on the outside of the panel. Finally, I used the frame layer of the Ins and Outs stencil and spread transfer gel through it. Once it was dry and my laminator was heated up I used tuscan gold Deco Foil Transfer Flock. I love the little bit of texture and color difference this gives the design.

I chose a fabulous sentiment from the set and die cut it with a Trinity Stamps Embossed Edge Circle. I added foam tape to the back of Slim and adhered him in the center. Then I used a combo of liquid adhesive and foam squares to place my sentiment circle. I used scissors to trim off the bottom and voila, my card is fabulous and finished!

Quite literally the most distinguished pup you’ll ever meet! Hahaha! We’re having a hop over on Instagram so head HERE and hop along with us for more inspiration and then go HERE to check out the new release!

Products used on today’s card:
Slim’s Whims stamps
Ins and Outs Hollywood stencil
Basket Case stencil
Thermoweb Transfer Gel Blanco
Thermoweb foam tape roll
Thermoweb foam squares
Thermoweb Deco Foil Flock Transfer – tuscan gold
Thermoweb stencil pal

I appreciate you sharing your time with me. Have a fabulous day!

Pink & Main – Ducky Duo

Happy Friday everyone! Today I have a super cute pair of cards over on the Pink & Main blog! The new release is live and available for purchase so don’t hesitate to head over and treat yourself! There are so absolutely amazing products added to the mix this month!

I couldn’t help myself so I took the same design idea and created two cards to share with you today. It actually started because I pulled out the woodgrain embossing folder and embossed the grain the wrong direction for my original design. I couldn’t let it go to waste so I decided it was a perfect opportunity to make two fun cards to share with you!

Like I said before, I used the new woodgrain embossing folder for my backgrounds. Because these are 6×6 you can take your A2 size cardstock and turn it portrait or landscape for different looks. I ended up with one of each. Then I took a white panel and ink blended distress oxide inks in blueprint sketch and mermaid lagoon. I spritzed the panel with water and die cut the letters from the new Just a Note dies and Big Hugs dies. Then I cut them from white 2 more times each and used EZ Squeeze glue to adhere them together. I die cut the shadow for each from pearlescent vellum and adhered those with tape runner.

Next, I stamped images from the July Stamp and Die of the Month – Just Ducky and colored them with my copics. I used the coordinating dies to cut them out and decided on sentiments to go with each card. This die set comes with these awesome rounded banner dies that fit the sentiments in the set so I was able to die cut them perfectly too!

I adhered the woodgrain backgrounds to white card bases with EZ Squeeze glue. Then I added the ink blended sentiments to those. Next, I added foam squares to the back of the images and sentiment banners and popped those in place.

For finishing touches, I added yellow pearls from the new Rainbow Pearls embellishment wheel to both card designs. Then I came in with glossy accents on the ducky eyes, beaks and feet.

Aren’t these ducks just too cute for words?!? I love them and the different positions they are all in. So many options! The new word dies are an absolute must for any crafty stash! They are versatile and so fun to use! I’m swooning over the font too!!! It’s just perfect!

Products used on today’s cards:
Stamp and Die of the Month: Just Ducky
Just a Note dies
Big Hugs dies
Woodgrain embossing folder
Rainbow Pearls embellishment wheel
EZ Squeeze glue
Glossy accents
Distress Oxide inks – mermaid lagoon and blueprint sketch

I appreciate you sharing your time with me. Have a fabulous day!

(This blog uses affiliate links whenever possible, at no additional cost to you.)

BYSHC Christmas in July Hop

Hey friends! Popping in to let you know we are sponsoring the super fun Build Your Stash Holiday Cardmakers Christimas in July Hop! There are fun prizes up for grabs, including 2 $20 gift codes to the Twiddler’s Nook shop!

However, while the hop is going on we’re also having a sale on the entire shop! 15% off – no code necessary, not vaild on prior purchases.

Click HERE to head to the shop and take a look around.

For fun I have a Christmas shaker card to share with you that features a whopping 4 embellishments from the shop! I also have to say that I did all my stamping using the new Pressure Pal tool and I absolutely love it!

To create this card, I stamped a couple of images from MFT Stamps Polar Opposites set and colored them with my copics. Then I used the coordinating dies to cut them out and set them aside. I took a white panel measuring 4×5.25 inches and die cut the Rectangle Peek-a-Boo Window from it. This is the start of my shaker window. I lined the back with scrappy tape and adhered a piece of acetate. Next, I placed the panel in my MISTI and stamped a sentiment from MFT Reindeer Games below the window.

Then I took a white panel larger than the window and blended Distress Oxide inks in blueprint sketch and chipped sapphire. I spritzed it with water and flicked some gold watercolor on it. While that was drying, I added a double layer of foam tape to the back of my window panel and sprinkled in my shaker bits. Today I chose Twiddler’s Nook Snowy Day, Princess Rings and Pixie Dust micro beads!

I removed the release paper, added my inked panel to seal the shaker mechanism and popped the whole thing on a white card base. Next, I added foam squares to the back of my images and placed them at the bottom of the window.

Moving on to finishing touches, i added a scattering of Twiddler’s Nook gold baubles to the design. Then glossy accents to the noses and feet and unicorn Stickles to the sweater and hat. Last, I added black glaze pen to the critter eyes to help them shine.

Super cute and ready for my Christmas card stash!

Products used on today’s card:
Twiddler’s Nook Snowy Day
Twiddler’s Nook Princess Rings – Cinderella
Twiddler’s Nook Pixie Dust Micro Beads – Silvermist
Twiddler’s Nook Baubles – Gold
Twiddler’s Nook Pressure Pal
MFT Stamps Reindeer Games stamps
MFT Stamps Polar Opposites stamps and dies
MFT Stamps Rectangle Peek-a-boo Window die
Distress Oxide Ink – blueprint sketch and chipped sapphire
Glossy accents
Stickles – unicorn
Foam tape

I hope you’re enjoying the hop and will play along! Don’t forget to head to the SHOP and check out our sale too!

I appreciate you sharing your time with me. Have a fabulous day!

Trinity Stamps – One Layer Wonder

Hey friends! I’m over on the Trinity Stamps blog today with a really fun birthday card that is all one layer! I used the new Pretty Party Decor stamp set. And I didn’t pull out the foam squares for even a second this time! Trust me…it was difficult. Lol! But this card is so fun. Let’s check it out!

Today I started by laying out my stamps on a card base to see if the design in my head would even work. This can be very helpful when doing cards with lots of to same stamp over and over again or making sure spacing looks how you think it will.

Then I chose one of my favorite distress oxide ink blends and started blending on an oversized white panel. The magic combo is abandoned coral, tattered rose and dried marigold. These colors just make me happy every time I put them together!

I splattered the panel with water and once it was dry I die cut it with the largest Modern Embossed Rectangle die and started my stamping!

The first round of stamping was all the black – sentiment and strings – which I stamped with VersaFine ink. I sprinkled clear embossing powder on the sentiment and heat set it. This is a big reason I like using VersaFine…and it covers beautifully on the first impression. Then I moved on to stamping the lanterns at the bottom of the strings with aged mahogany distress oxide ink. I heat set that and then stamped the detail over the top of them with VersaMark and heat embossed them with gold.

I came back and added a few more strings and then moved on to the confetti stamps in this set. I started with a scattering and heat embossed them with clear embossing powder and then went back and added more filling things in and embossed those in gold.

It’s hard for me to make masculine cards but when this was finished I immediately thought that you could change the colors and make this card fit great for a guy’s birthday too!

Products used on today’s card:
Pretty Party Decor stamps
Modern Embossed Edge Rectangle dies
Distress Oxide Inks – aged mahogany, abandoned coral, tattered rose, dried marigold

I appreciate you sharing your time with me. Have a fabulous day!