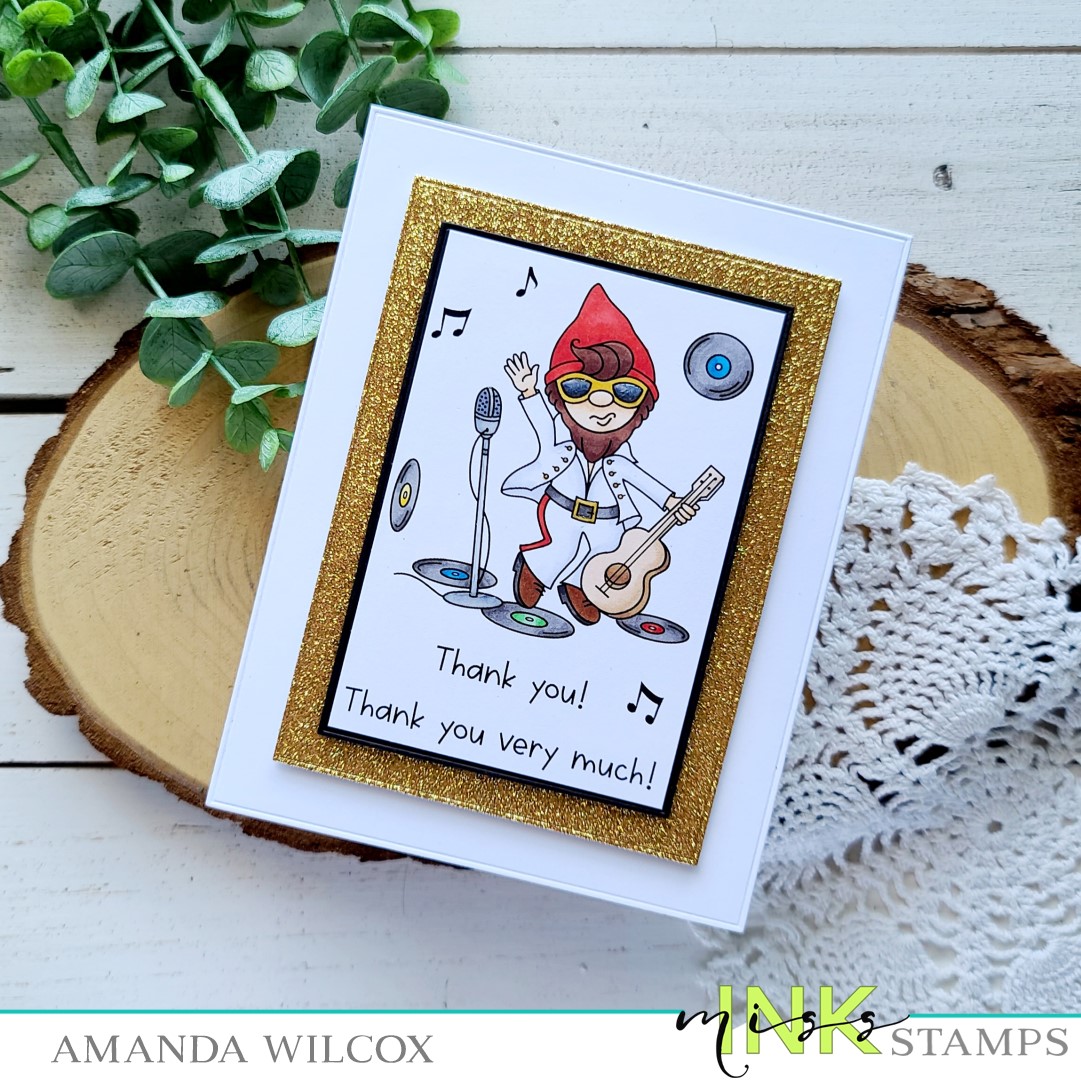
Hey friends! Miss Ink Stamps has a new release coming and we’re sneaking peaks over on Instagram for the next few days before the release goes live on Saturday! Today I have a super cute and silly gnome card to share with you.
My dad is a huge Elvis fan. I grew up watching those movies and dancing to that music so this set just made my heart happy to create with!
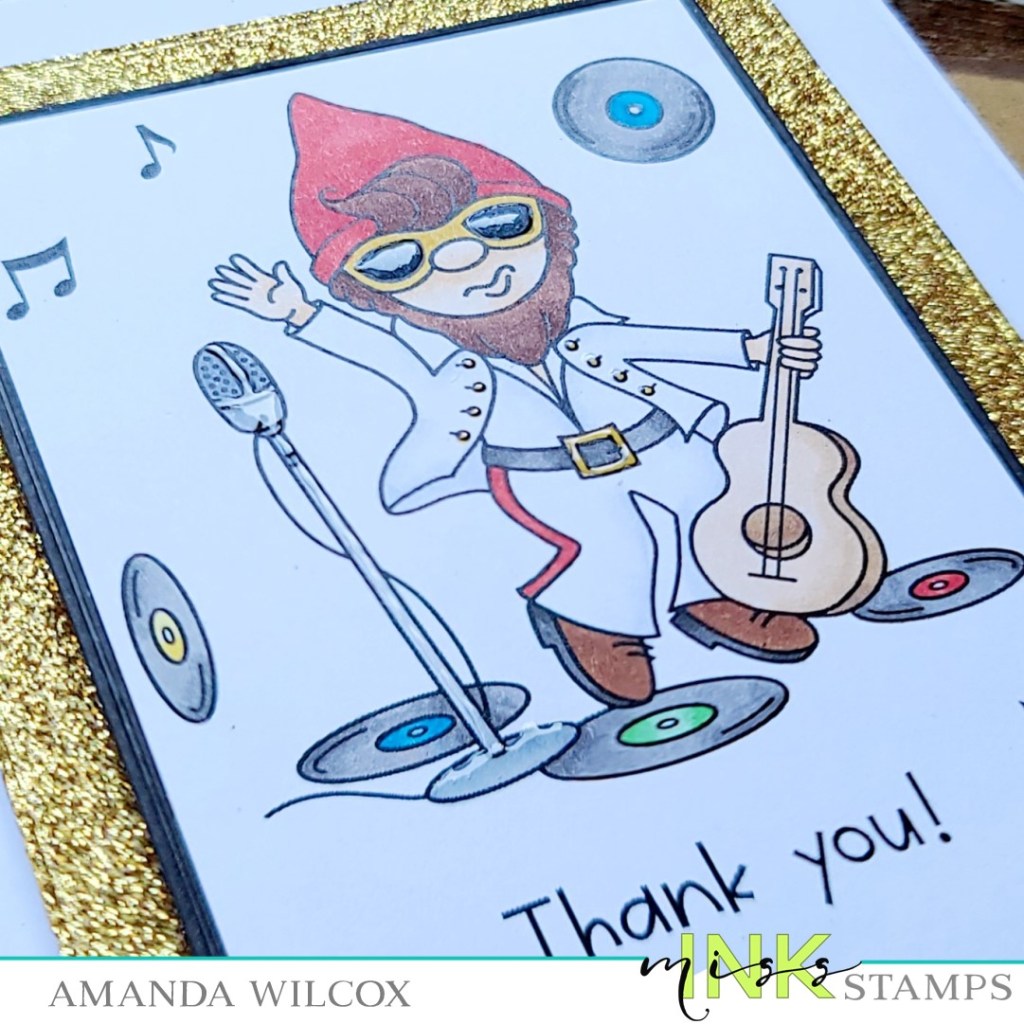
I colored up the images with my copic colors and trimmed it down. Then I used the Trinity Stamps Embossed Edge Rectangle Stack to create some layers. Starting with the base which is white adhered to a white card base. I really wanted that matching embossed edge so I didn’t mind the extra layer. Then a cool gold glitter layer adhere with foam strips. Last there is a black layer also popped up with foam tape and the little scene adhered to that with liquid glue.
For finishing touches I added glossy accents to the gnomes glasses, buttons and belt, along with the microphone and stand. I thought there needed to be a little shine but I didn’t want it to compete with the cool glitter cardstock layer.
This is just too much fun! I love the whole little scene. Remember there are giveaways on Instagram from today until the release so be sure to head over and comment on the Miss Ink posts.
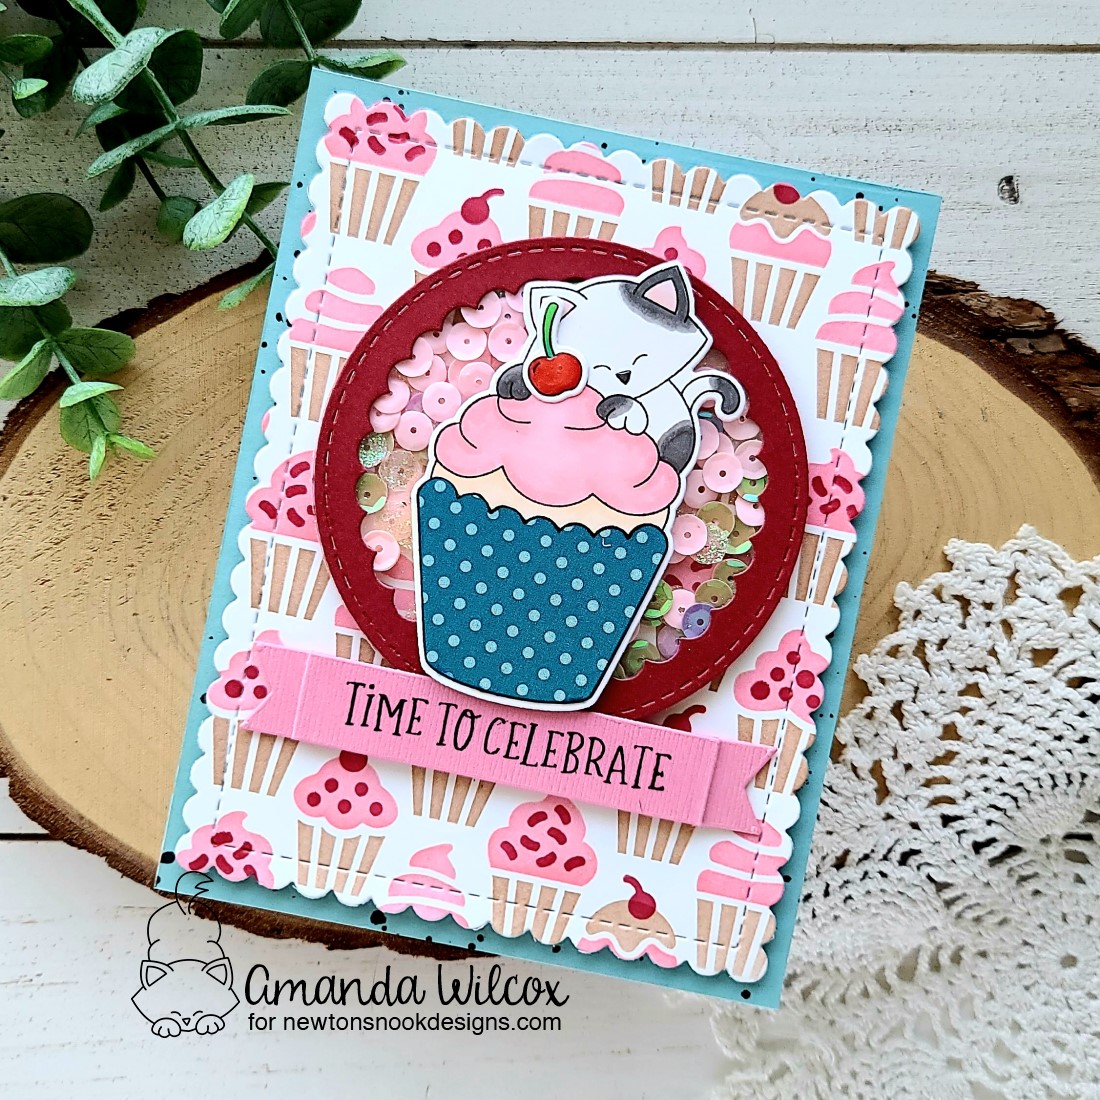
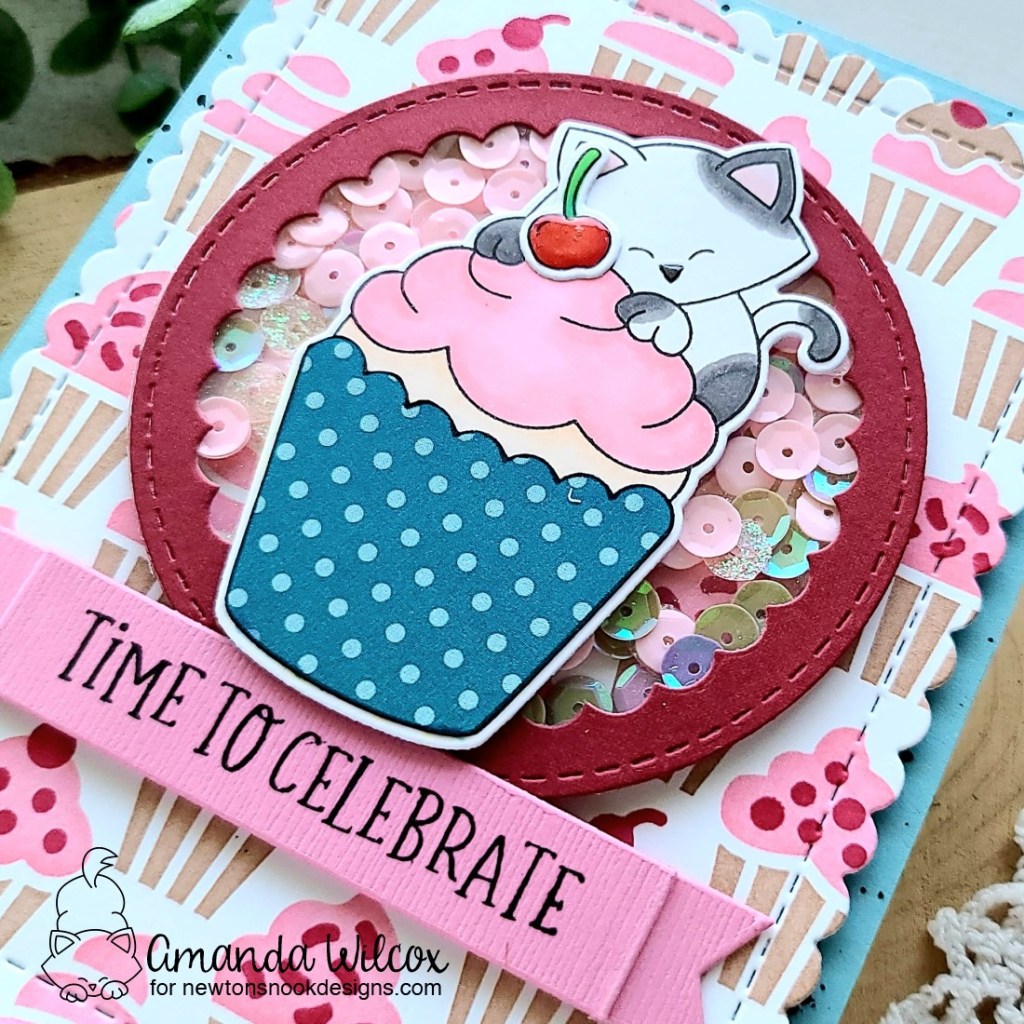
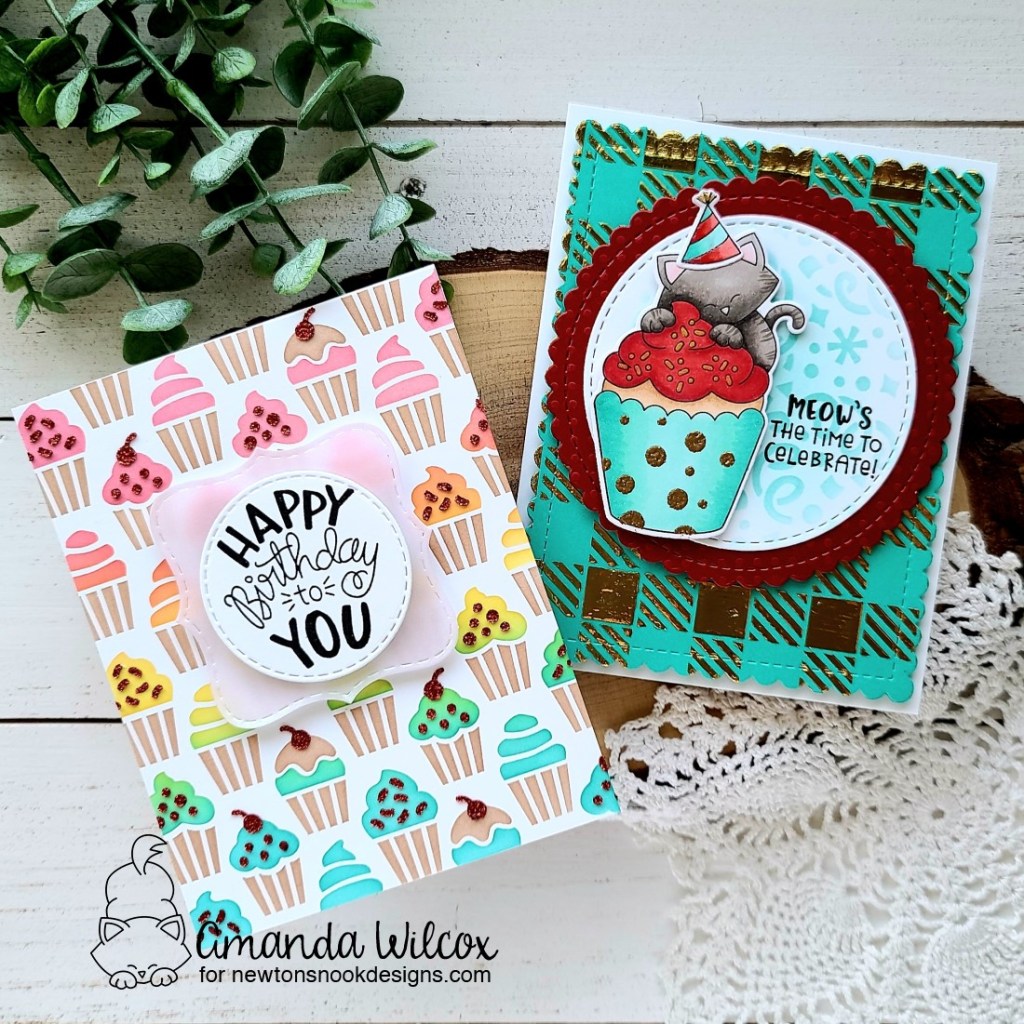
I’m sure it’s time to celebrate something, right?!? We love to celebrate everything in our house. It’s fun and creates great excuses for important things like cupcakes! Haha! Today I’m over on the Newton’s Nook blog with a fun shaker card featuring the newly release Newton’s Cupcake stamps and dies along with the cupcakes layering stencil too!
My whole card started by inking up the stencil layers with fun pink and red colors and die cut the panel with the scalloped rectangle in Frames & Flags. Then I let my card design come together from that. I stamped and colored Newton’s Cupcake with copic markers but couldn’t decide on a color or design for the cupcake. That’s when I had an idea to paper piece it like those fun cupcake wrappers my mom always used when I was growing up!
Next, I moved on to the shaker pouch. I die cut two circles from the Circle Frames dies – one red and one acetate. Then I took the scalloped circle that is the next size down and cut it from the red circle, creating my frame and window. I used liquid glue to adhere the acetate to the frame and lined the back with foam tape. I sprinkled sequins on the stenciled panel and sealed up my shaker.
Next, I added foam squares to the back of Newton and popped him in the center of the window. I used liquid glue to adhere the cute cherry to the top of the cupcake and moved on to my sentiment. I chose one from the Birthday Roundabout set and stamped it on a die cut banner from the Banner Trio dies. I love how this one has emboss lines to fold it for a more 3D look. I added a combo of foam squares and liquid glue to adhere it to the bottom of the shaker frame.
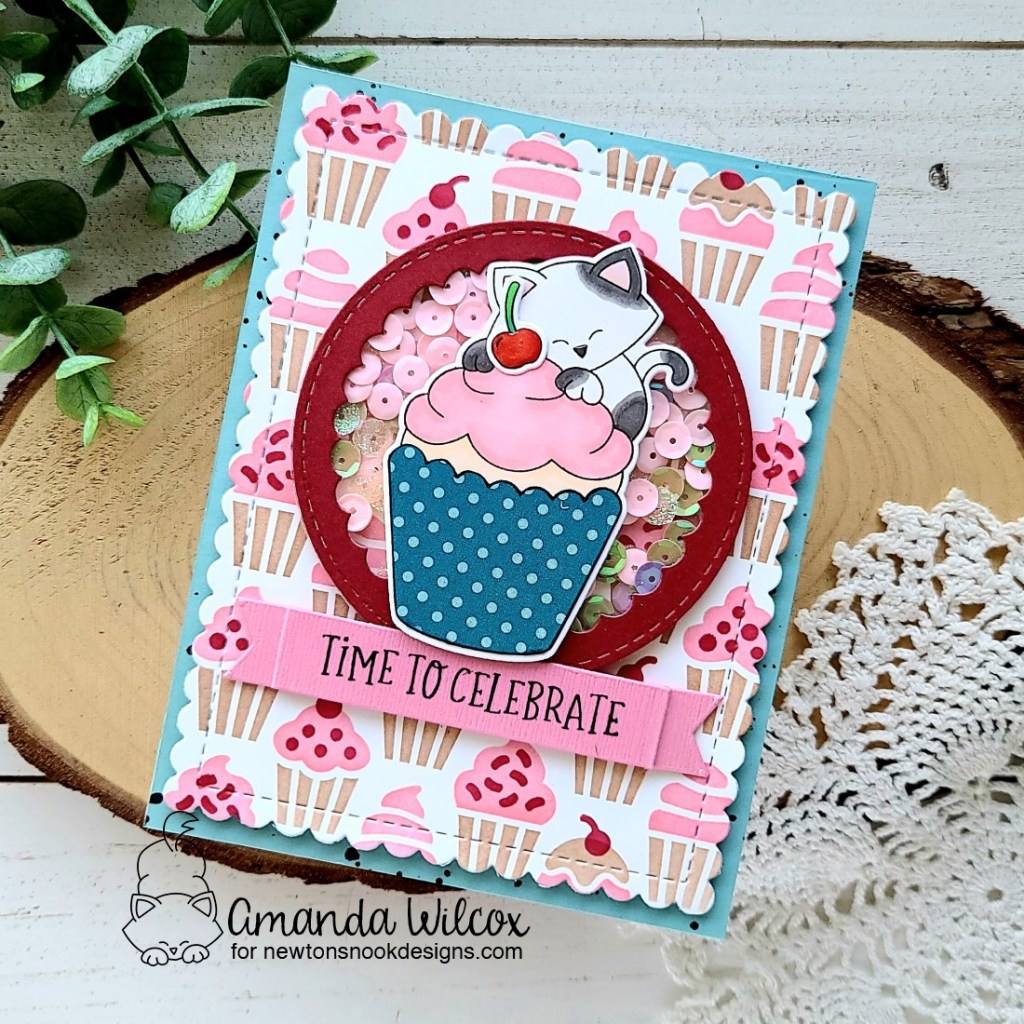
Next, I found a piece of cardstock that was close to the blue in the cupcake wrapper and trimmed it to A2 size. I flicked black acrylic paint all over it for a little texture. Once that was dry I glued it to a white card base and popped my panel on it with some foam tape.
For finishing touches, I added glossy accents to the cherry and Newton’s nose.
One thing I found out later – a real duh moment – is that the sentiments in Newton’s Cupcake are all sized to stamp inside the cupcake if you would like to! How cool is that?!? I’m looking forward to trying it out for a different and fun look!
Products used on today’s card: Newton’s Cupcake stamps and dies Cupcakes stencil Frames & Flags dies Circle Frames dies Banner Trio dies
I appreciate you sharing your time with me. Have a fabulous day!
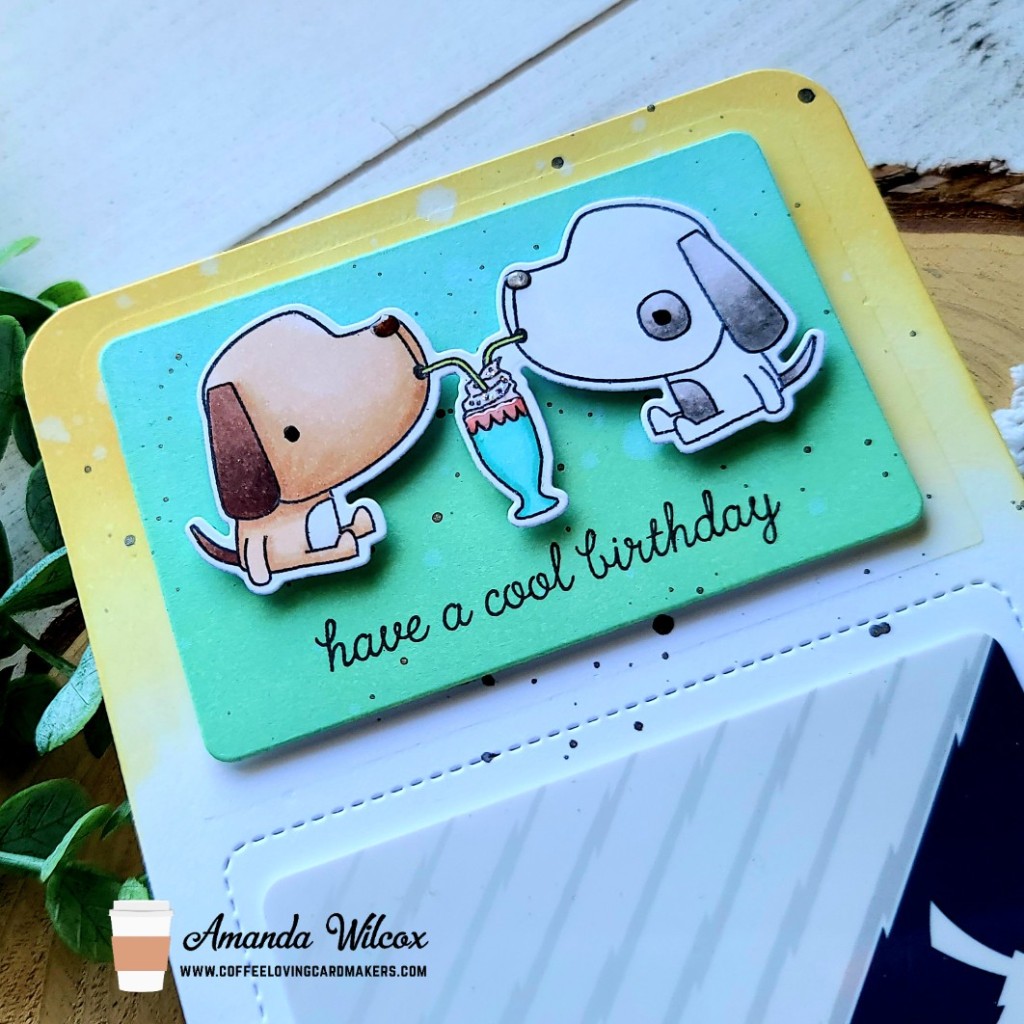
Hi there, it’s Tuesday Tea on the Coffee Loving Cardmakers blog today. I’m sharing a bit of a different card today that can be personalized and changed for so many themes and occasions. It features goodies from Reverse Confetti which I just adore!
For this card, I die cut the Reverse Confetti gift card holder from white cardstock. Then I inked up the top portion with scattered straw distress oxide ink. I also die cut the rectangle that comes in the die set from white cardstock and inked it with cracked pistachio and tumbled glass distress oxide inks. This additional die could be used as a scene setter like I have here or you could create a window with it as well! This card would be awesome as a shaker, don’t you think?
Anyway, back to this card…I spritzed the panels with water and flicked black paint on them for some added interest and texture. Once that was dry, I stamped a sentiment from Ice Cream Social on the smaller panel.
Next, I stamped and colored those cute pooches sharing a puppucino with my copic markers. I used the coordinating dies to cut them out and started assembling everything.
To start, I glued the gift card holder panel to a piece of white cardstock and used my scissors to trim off the corners. This way I can write my message on the back and it gives the whole thing more stability to hold the gift card. Then I added foam tape to the small panel and centered it in the top portion. I added foam squares to my image and placed them above the sentiment.
Finally, I moved on to finishing touches like black glaze pen on the eyes, glossy accents on the noses and cup and a little star dust Stickles on the whipped cream. I slid my Dutch Bros. gift card in the slots and this gift is ready to give!
What’s the go-to coffee place in your area? The kiddos seem to like Dutch here where I prefer a local place called Java Crew.
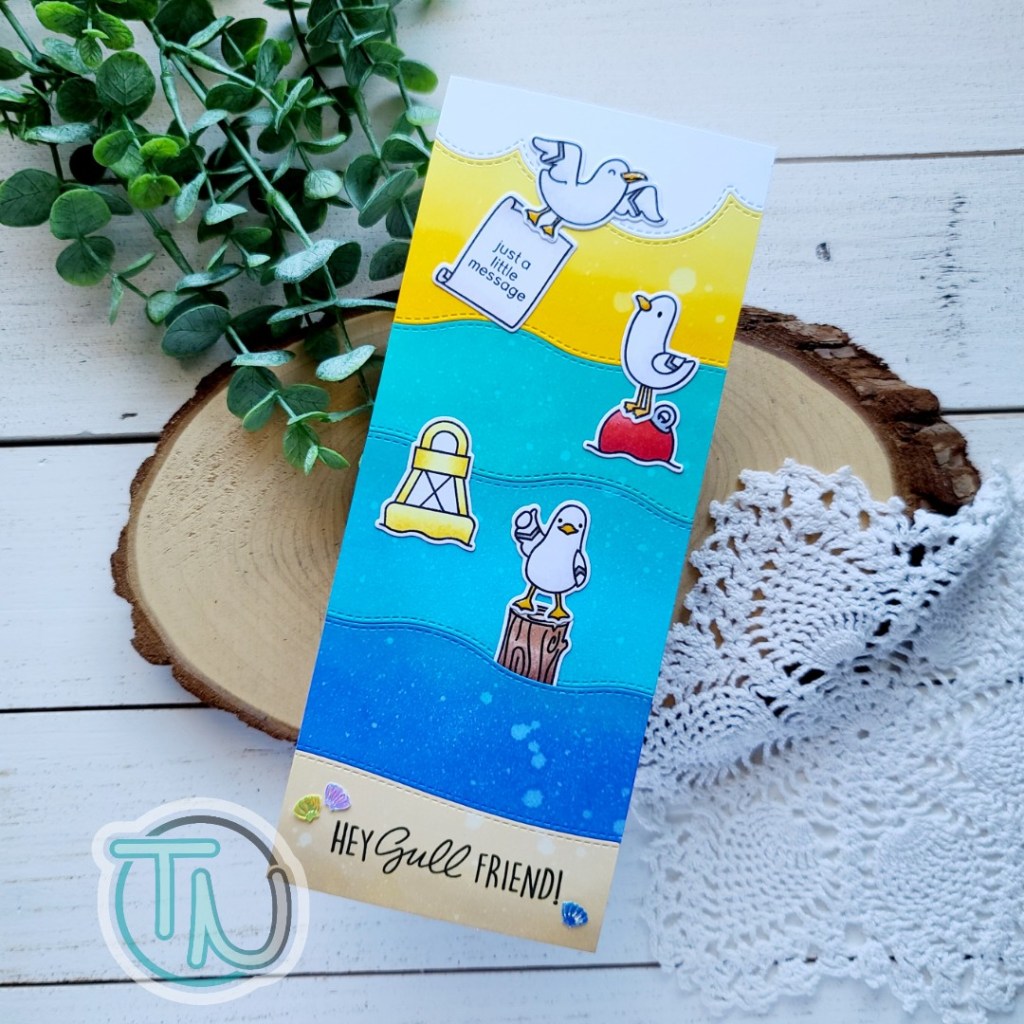
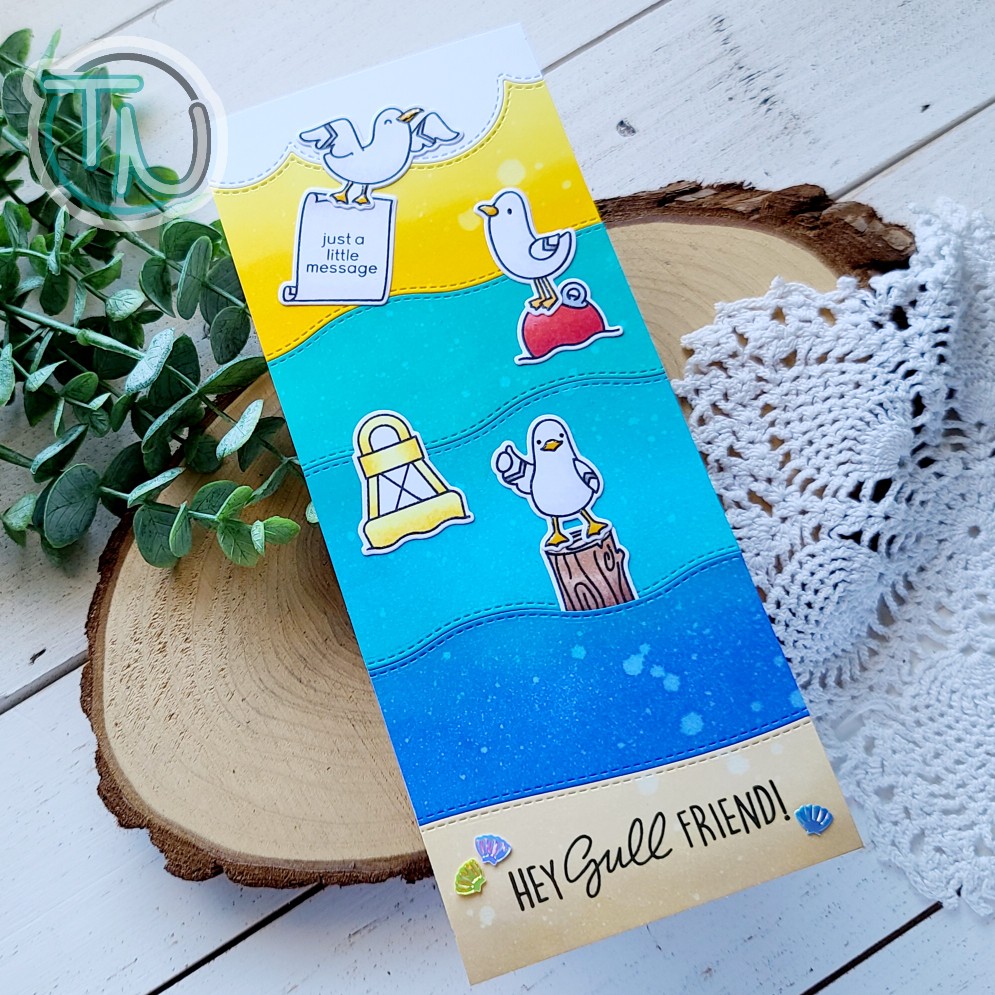
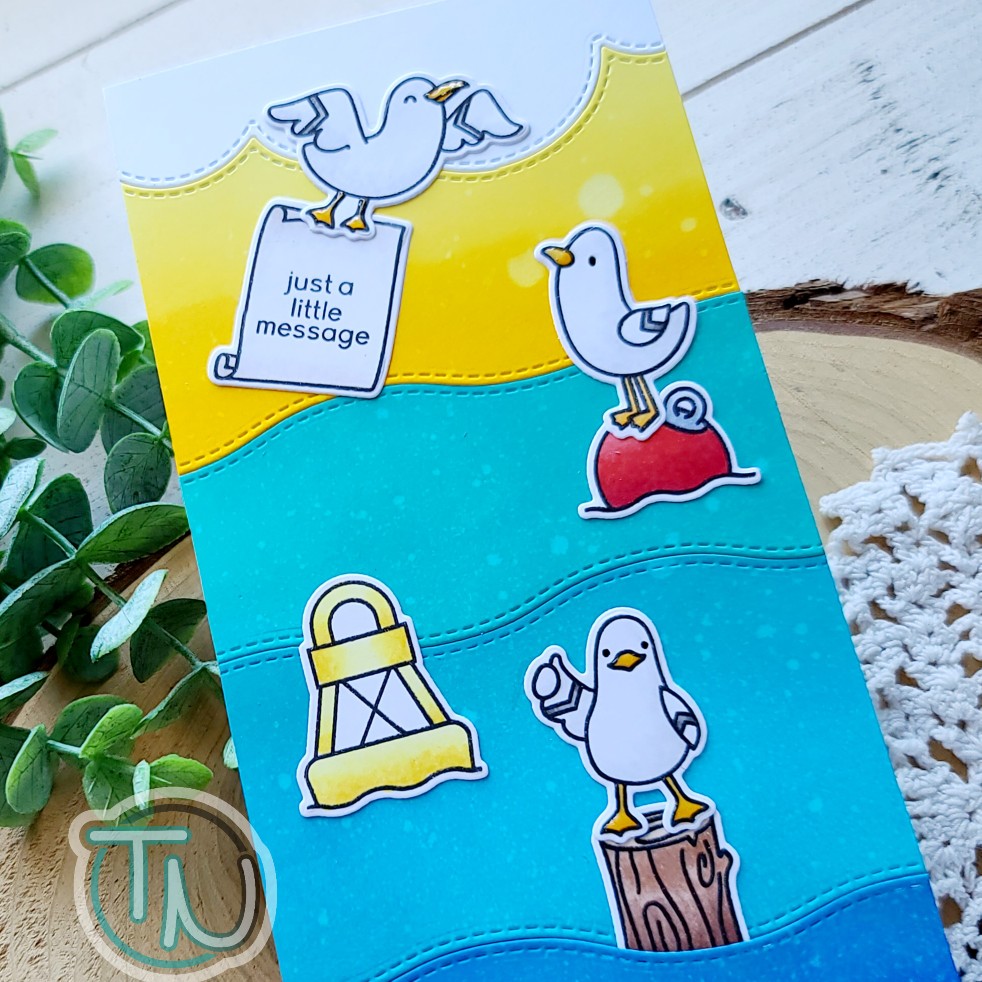
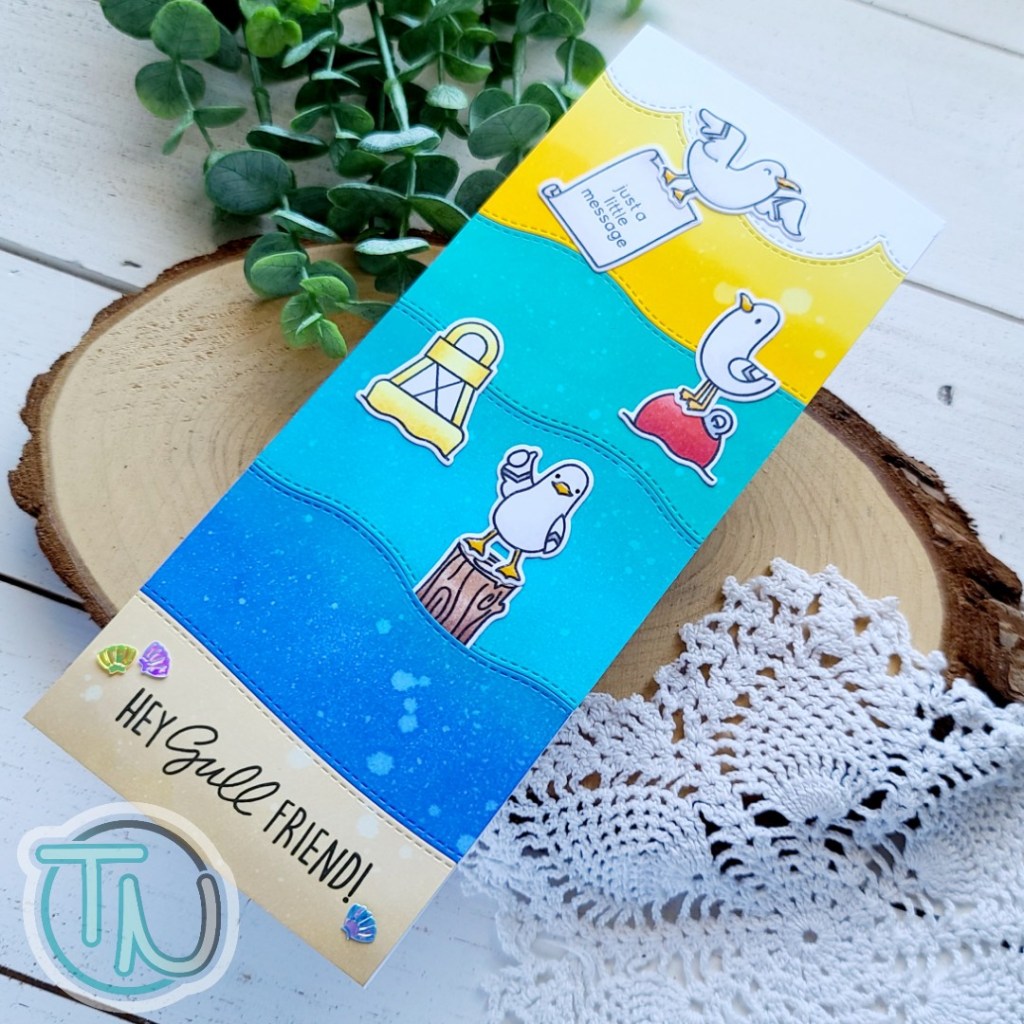
Thanks so much for stopping in today! I’m sharing a super bright and fun slimline card featuring some of the goodies from my most recent Heffy Doodle order! Right after I orderd these fun seagulls I kept seeing inspiration all over and it was killing me to wait for them to arrive. Needless to say, I had these cuties inked up and colored within minutes of finding the package in my mailbox!
I had a general layout in my head so I did stamp and color the images straight away. I used the coordinating dies to cut them all out and set them aside. Then I took a white panel and used different dies from the Slimline Scenery die set to cut sections. The one thing I love about these dies is how they give the stitched detail on both sides of the cut line so you could use either! It’s great!
After I cut the sections apart, I pulled out distress oxide inks and inked up each panel, except the clouds. From top to bottom I used squeezed lemonade and mustard seed, peacock feathers, mermaid lagoon, blueprint sketch, antique linen and gathered twigs. Then I spritzed it all with water and let it dry.
Next, I cut a slimline card base measuring 3.5×8.5 inches and adhered the layers one at a time working from top to bottom to make sure everything fit together properly. Then I used liquid glue to adhered my images and popped the card in my MISTI to add the fun sentiment at the bottom.
For finishing touches, I added glossy accents to the bird beaks and feet and black glaze pen to their eyes. Then I pulled a couple of seashells from the Twiddler’s Nook Glass Beach embellishment mix and glued them on either side of the sentiment at the bottom.
I just love how fun and bright this card turned out! Originally I was going to use all blue for the background but I’m just loving that yellow panel for the bright sunshine coming from behind the clouds.
Each month the Heffy Doodlers Facebook group has challenge you can enter. This month’s theme is adventure so I’m going to link this fun card up there!
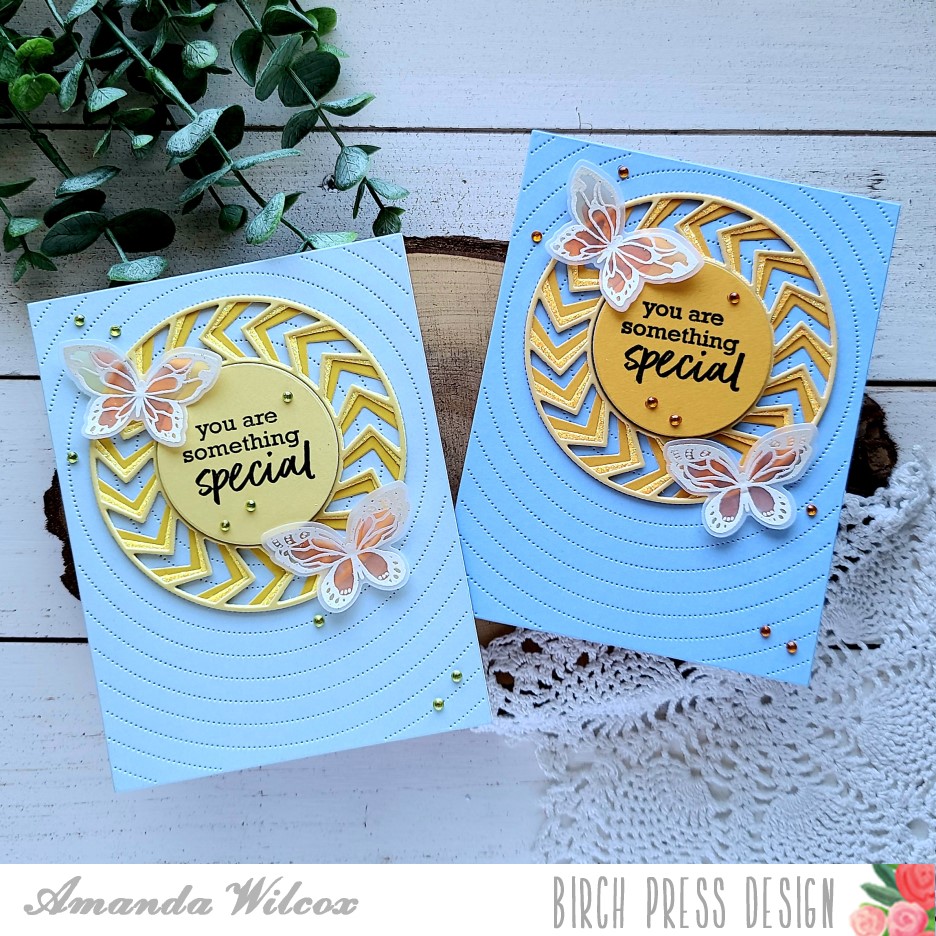
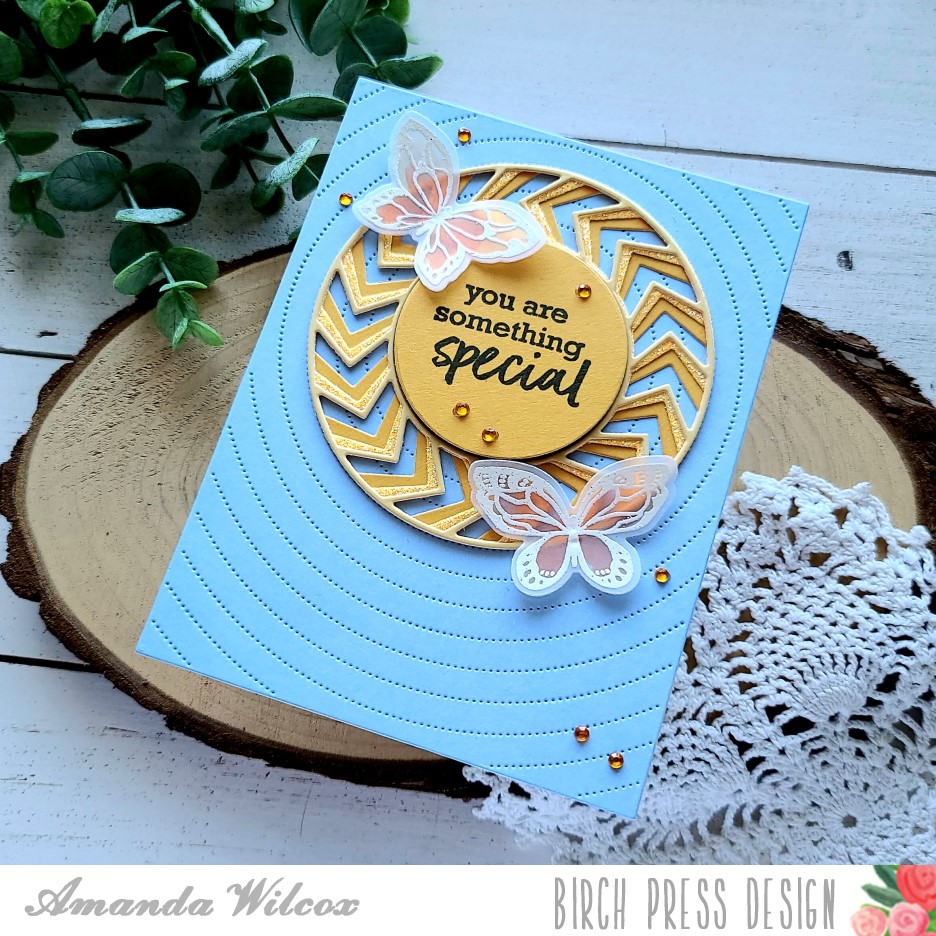
Hi there! Today I’m over on the Birch Press Design blog with a pair of just because cards that feature layering dies and some heat embossed stamps with coloring on vellum. Have you ever done that? It’s really simple and kind of looks like stained glass when you’re finished.
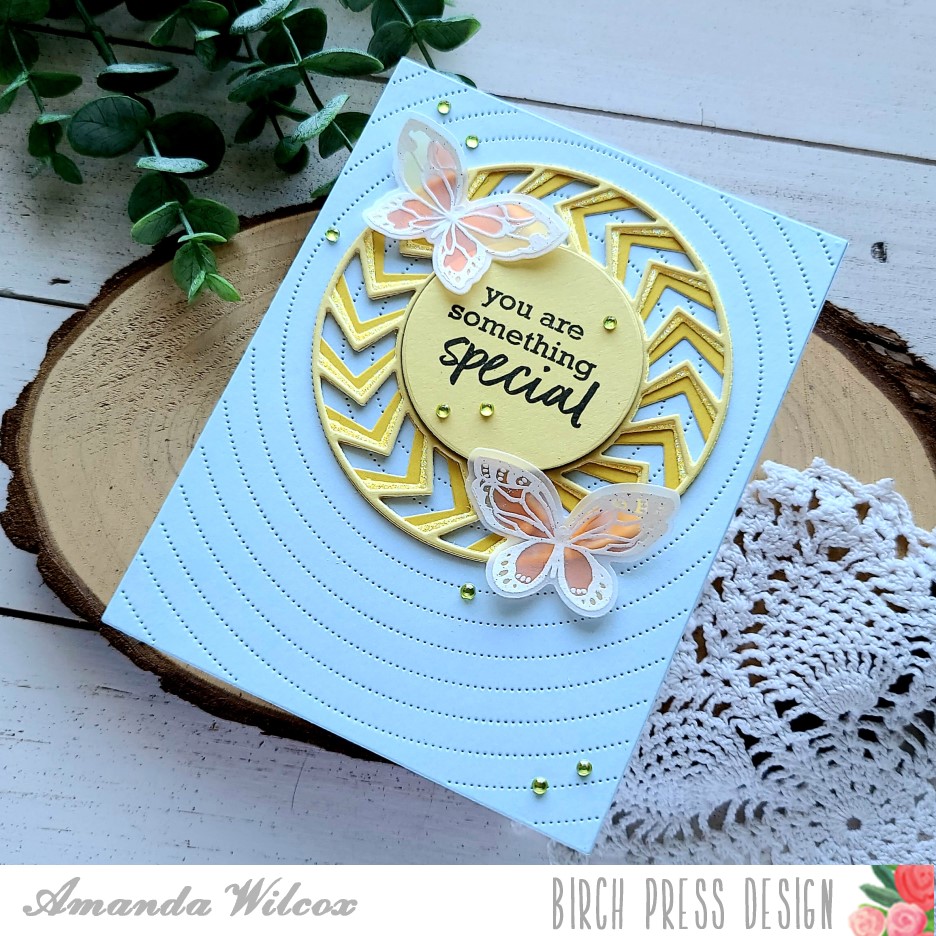
I chose similar color palettes – a lemony yellow with light teal and a peachy orange with light blue. I like how these colors work together and play off of each other. Almost like suns in the sky with this circular design.
I used the pinpoint radial plate for the background panel on both of these cards and the roundabout layering dies for that cool spiral in the middle.
The sentiment stamp is from brush sentiments while the butterflies set is called lovely butterflies. After I stamped and heat embossed the butterflies on vellum, I used copic markers to color the backside in. It just gives them a little something extra and I really love it.
I finished things off with a scattering of fairy jewels on both cards.
For the detailed step-by-step, head over to the Birch Press Design blog HERE and get all the details.
I appreciate you sharing your time with me. Have a fabulous day!
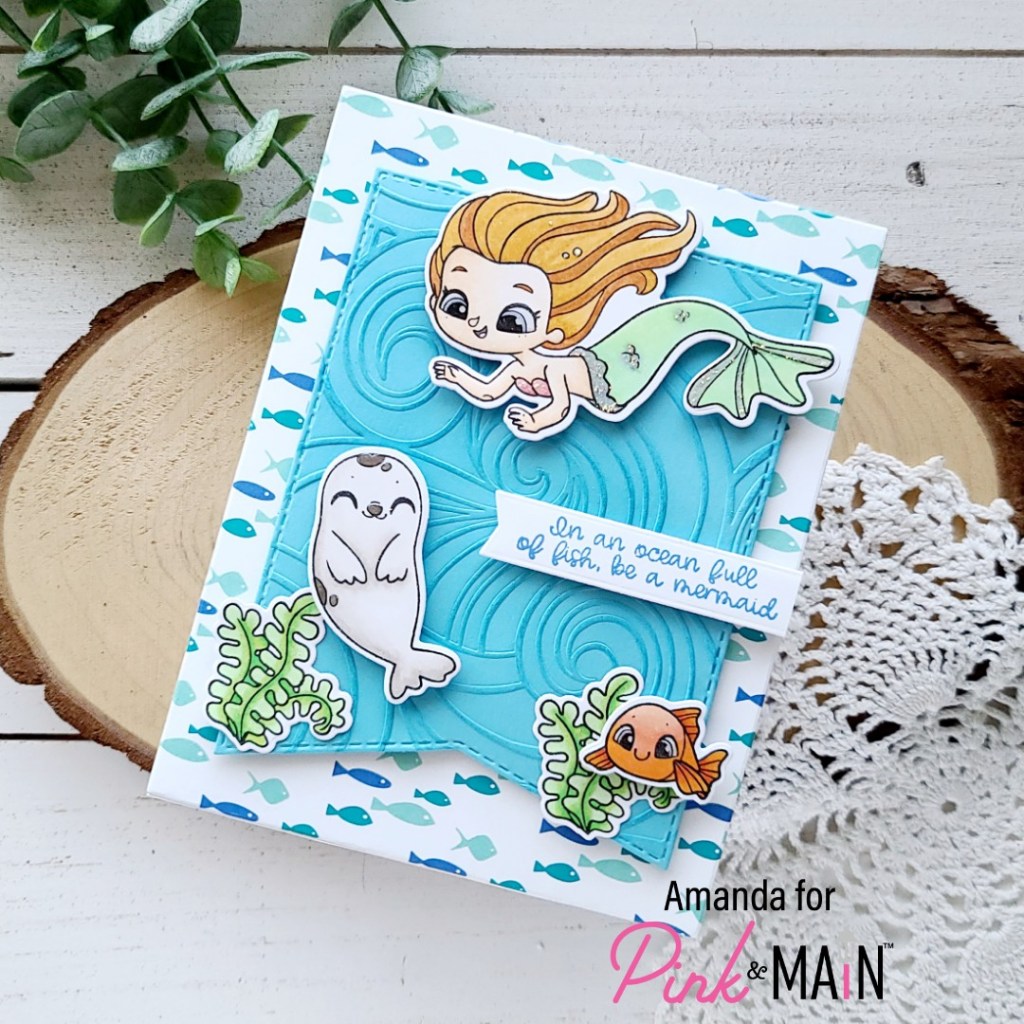
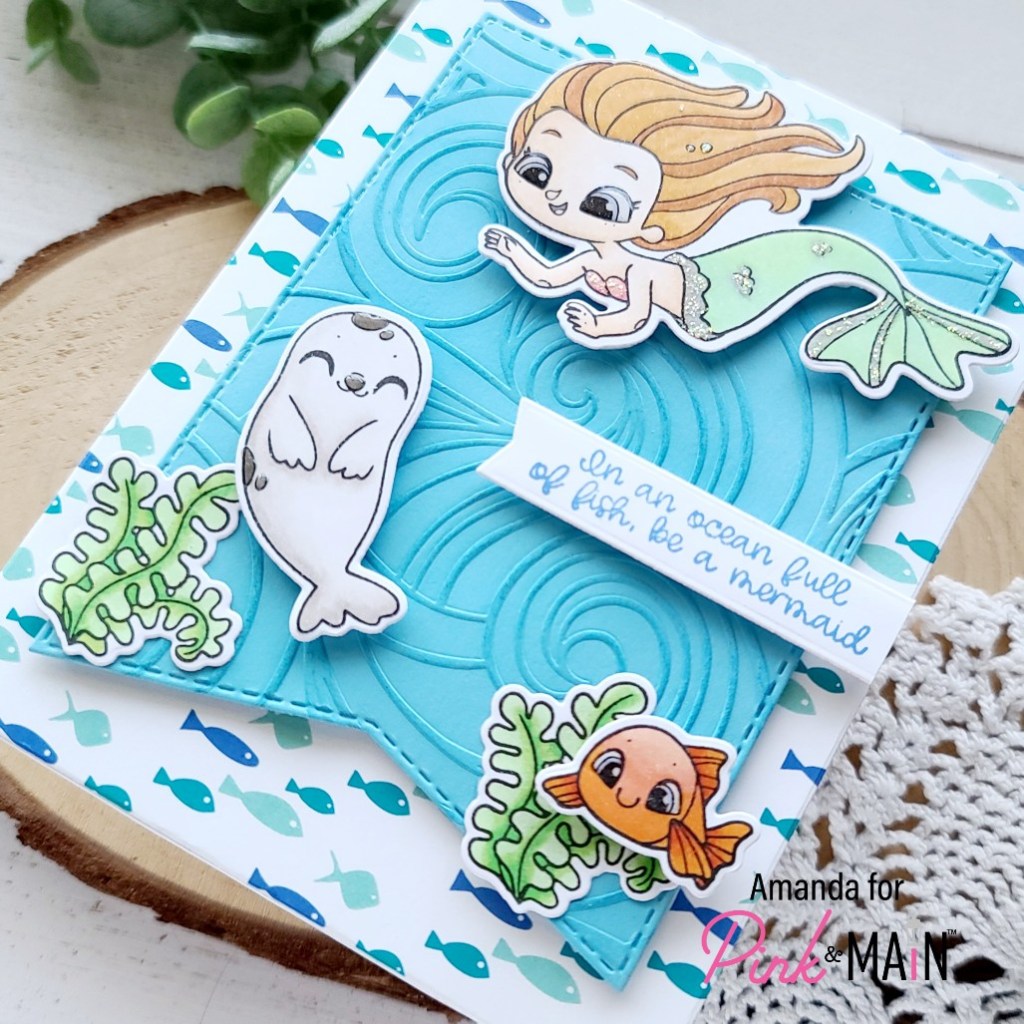
Hello again! Today I’m over on the Pink & Main blog hanging with my mermaid friends! I sure do love them! The cuties in this new stamp set are so much fun and I love the different images where the mermaid is peeking out of the water or her fin is all that’s left from diving down. You can build some awesome scenes with these!
For today, I chose one of the sweet mermaids and a couple of friends for her to have too. You know me, I have to add critters whenever possible! I just love them all! I colored these guys with my copic markers and used the coordinating dies to cut them all out.
Next, I took a blue panel and used the waves embossing folder on it. To enhance the embossing, I used a blending brush and blue dye ink and lightly blended the whole panel. This really helps the embossing design pop visually.
Originally this was going to be my card front but I loved how it looked behind the images so I switched gears by die cutting it with one of the stitched banner dies. Now I needed a different background panel so I immediately pulled out the new awesome paper pad and started comparing, picking and choosing. I think these fish were too perfect not to use! So I used the largest Layered Rectangle to cut it out and adhered it to a white card base.
Next, I added foam tape to the banner and popped it in place, followed by foam squares and liquid glue to adhere all the images. Last, I stamped a sentiment in blue ink and die cut it with a Large Sentiment banner die. I popped it in place with foam squares and trimmed off the edge.
For finishing touches on this card, I added glossy accents to the open eyes, noses and spots. Then I used unicorn Stickles on the mermaid’s fin and seashells. Last, I used a Wink of Stella glitter brush pen on the seaweed for a little shimmer on the bottom half of the card too.
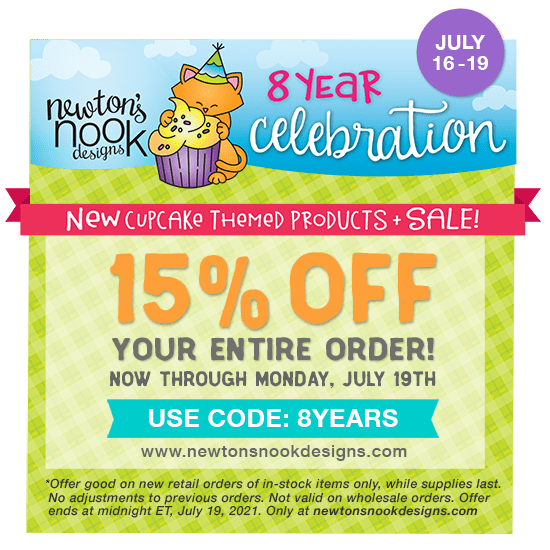
Today I am excited to be part of the 8 year anniversary celebration with Newton’s Nook Designs! To celebrate this awesome milestone, Newton’s Nook Designs has released adorable new cupcake themed products, which I will be sharing on my projects today. There are prizes too! Read all the way to the end of this post to find out how you can win!
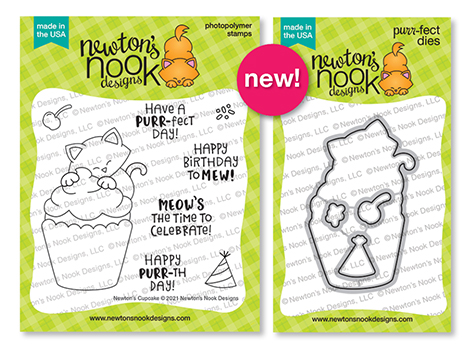
First, here’s a peek at the products releasing today!
Isn’t it all just so wonderful??? I obsessed with this new stencil. And Newton’s Cupcake just has so many possibilities throughout the year for fun! But I digress…now on to the projects I made to share with you today.
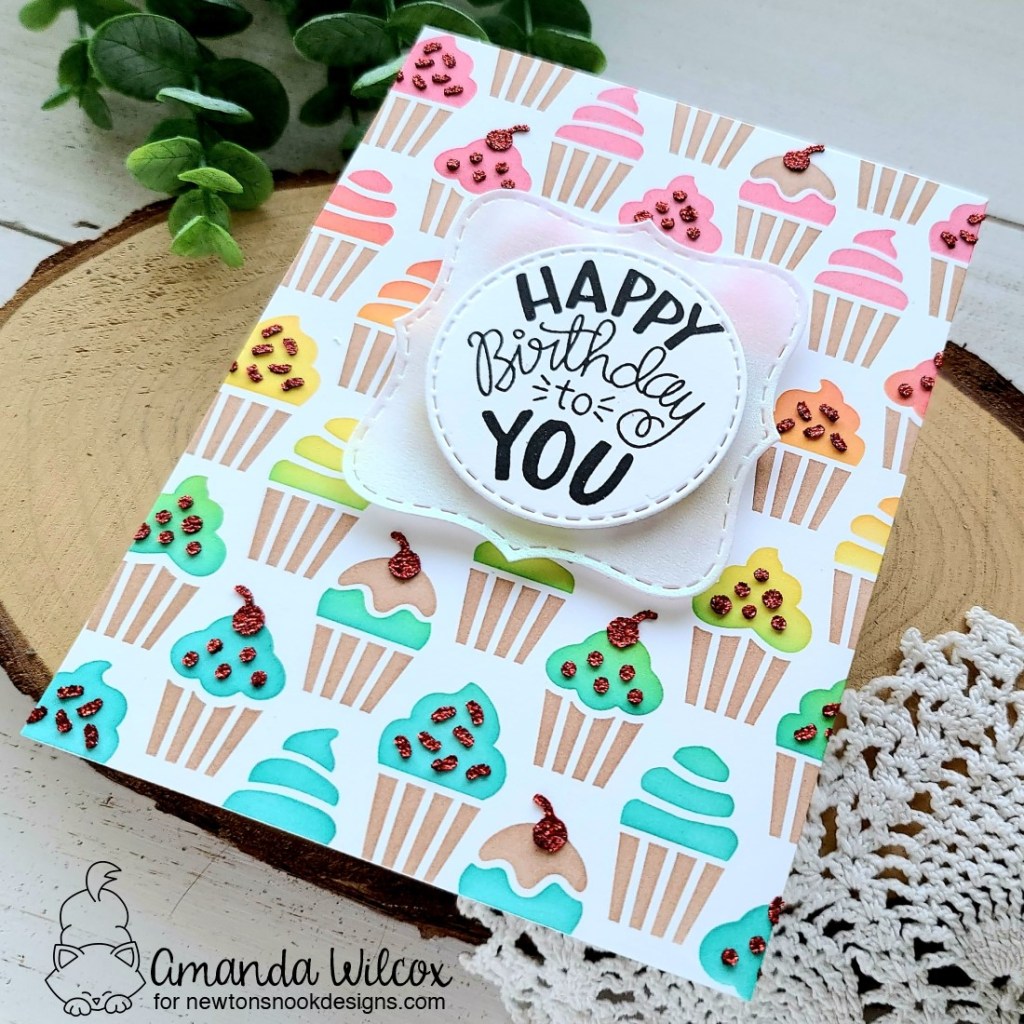
I have two cards to share with you today. The first of which is this adorable rainbow frosted cupcake card! This new stencil is a 3-piece layering stencil and it is AMAZING!!! A definite must for all crafty stashes.
I inked up the first layer with a brown ink and a blending brush. Then I placed the second layer and chose light melon, yellow and teal inks. I started with the yellow first so that my brush didn’t pick up the darker colors on either side. Making sure to overlap my colors, I got a beautiful rainbow in the end! Then I taped the third layer in place and spread red glitz gel through it for some fabulous cherries and sprinkles to top my rainbow cupcakes!
Then I stamped a sentiment from Uplifting Wishes on a circle that I die cut with the Circle Frames die set. Then I die cut a label shape from the Frames Squared set and layered them together with foam squares. Last, I glued the stenciled panel to a white card base and popped the sentiment layers up with foam squares as well.
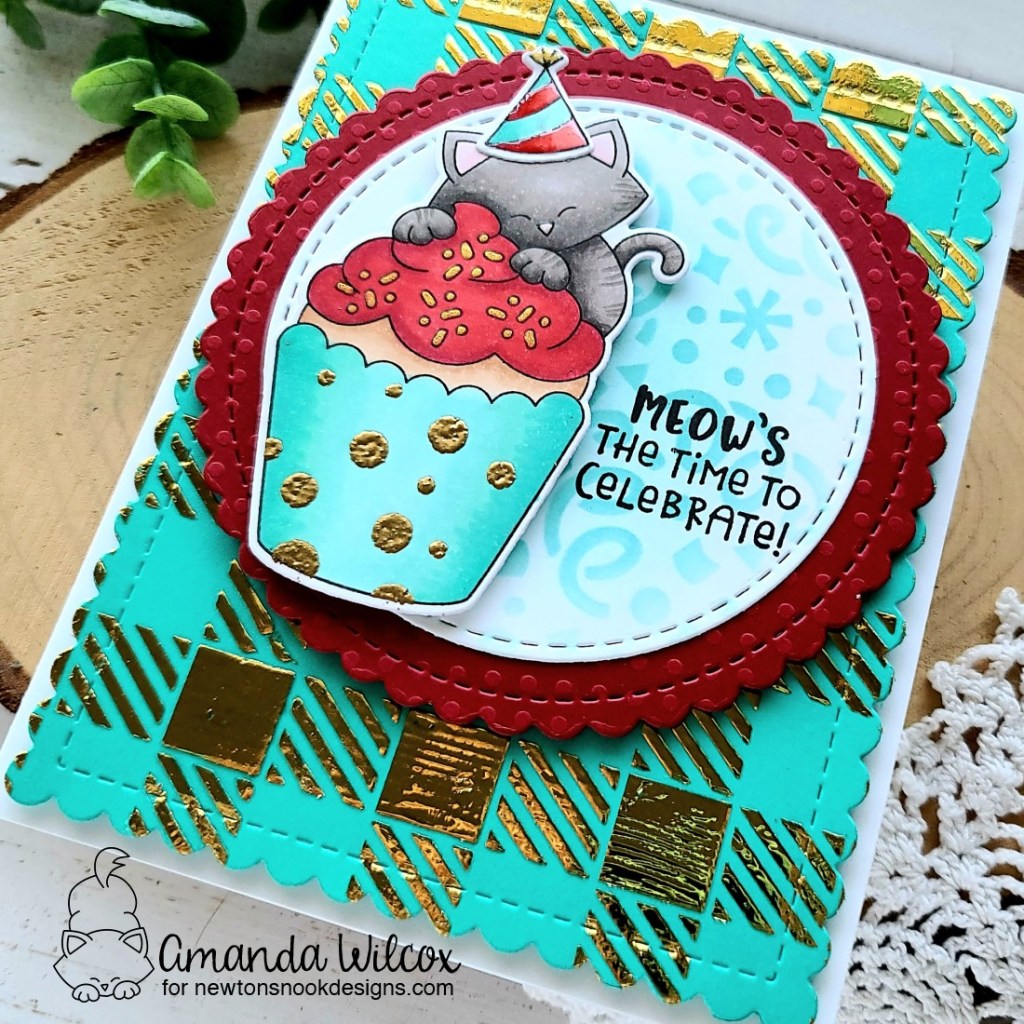
For my next card, I stamped and colored the new Newton’s Cupcake image with my copic markers. I used the coordinating dies to cut them out and used a little liquid glue to adhere a cute party had on Newton’s head. I thought the cupcake wrapper was plain so I pulled out the Bubbles stencil, inked it with VersaMark ink and heat embossed some gold bubbles on it. Next, I pulled colors from my coloring to choose background cardstocks. I die cut a red circle to go with the cupcake frosting and a white circle to fit inside it. I stamped the sentiment off to the right so I had space for Newton and decided this was plain too. I inked it up with a little teal shadow and then added the Confetti stencil and more ink for some texture.
For the background panel, I took a teal piece of cardstock and spread Thermoweb transfer gel through the Gingham stencil. I removed the stencil and set the panel aside to dry while I cleaned things up and turned the laminator on. When the panel was dry I placed it in a folded piece of parchment paper with gold decofoil and ran it through the hot laminator. Isn’t that shiny foiling so much fun?!? I die cut the panel with the largest Frames & Flags die and set to assembling my card.
For this I added foam tape the the foiled panel and popped it on a white card base. Then I added foam tape to the red circle and centered it. I used liquid adhesive for the white panel and another layer of foam squares for Newton.
To finish things off I added Wink of Stella gold glitter to the sprinkles on the cupcake and the top of Newton’s hat. Then glossy accents to Newton’s nose and the stripes on his hat.
Would you like to win a $50 store credit to the Newton’s Nook Designs Online Shop? We will choose TWO lucky winners! Here’s how to win:
Comment on the NND blog and Design Team blogs! (see list below) The winner will be chosen at random from the collective posts. Make sure to check out each of their blogs and comment for your chance to win. You will not know which blog has been chosen so the more you comment on the better your chances are of winning! You have until Monday, July 19th at 9pm ET to comment — winners will be announced on the blog post on Tuesday, July 20th.
Check out all the awesome Design Team Blogs below to enter:
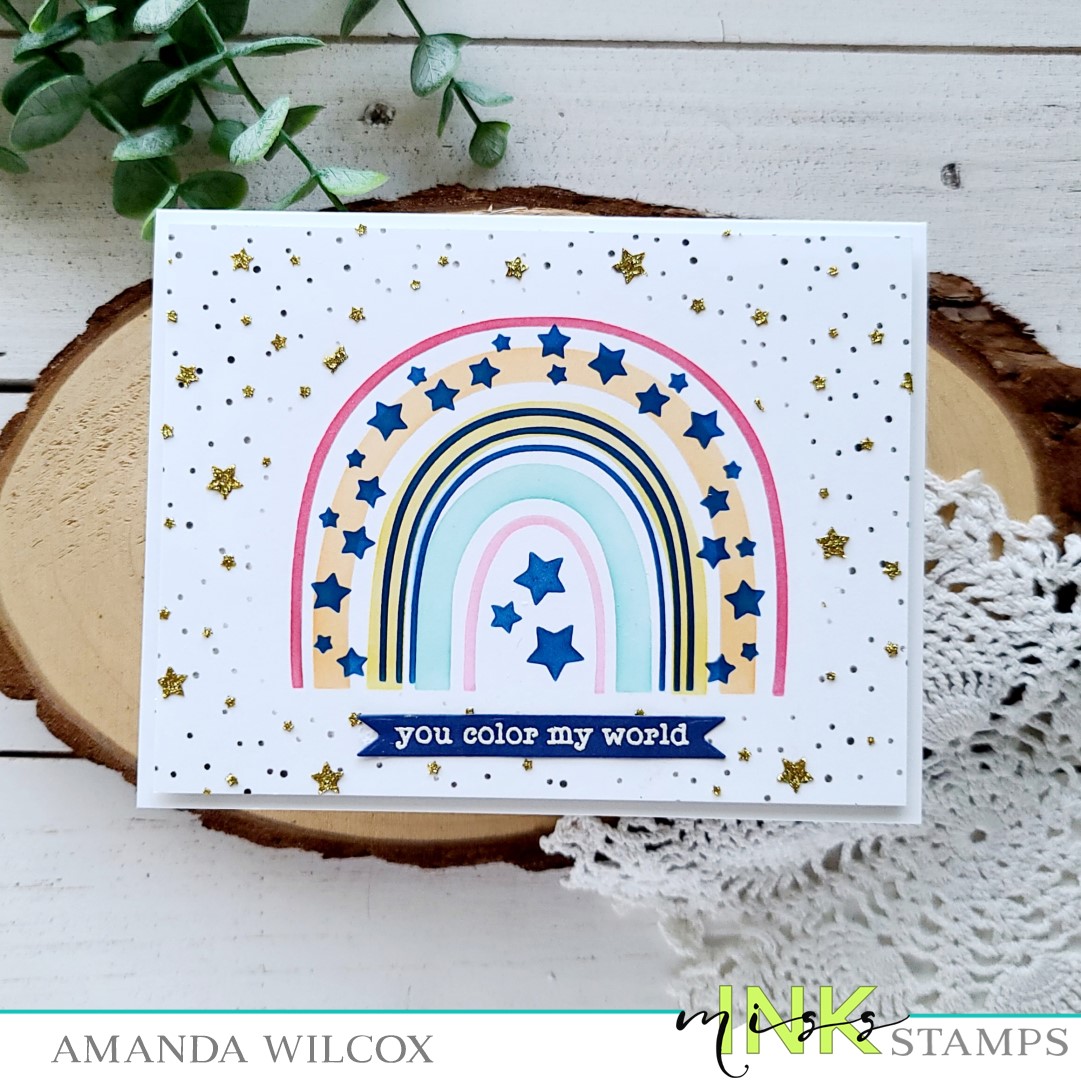
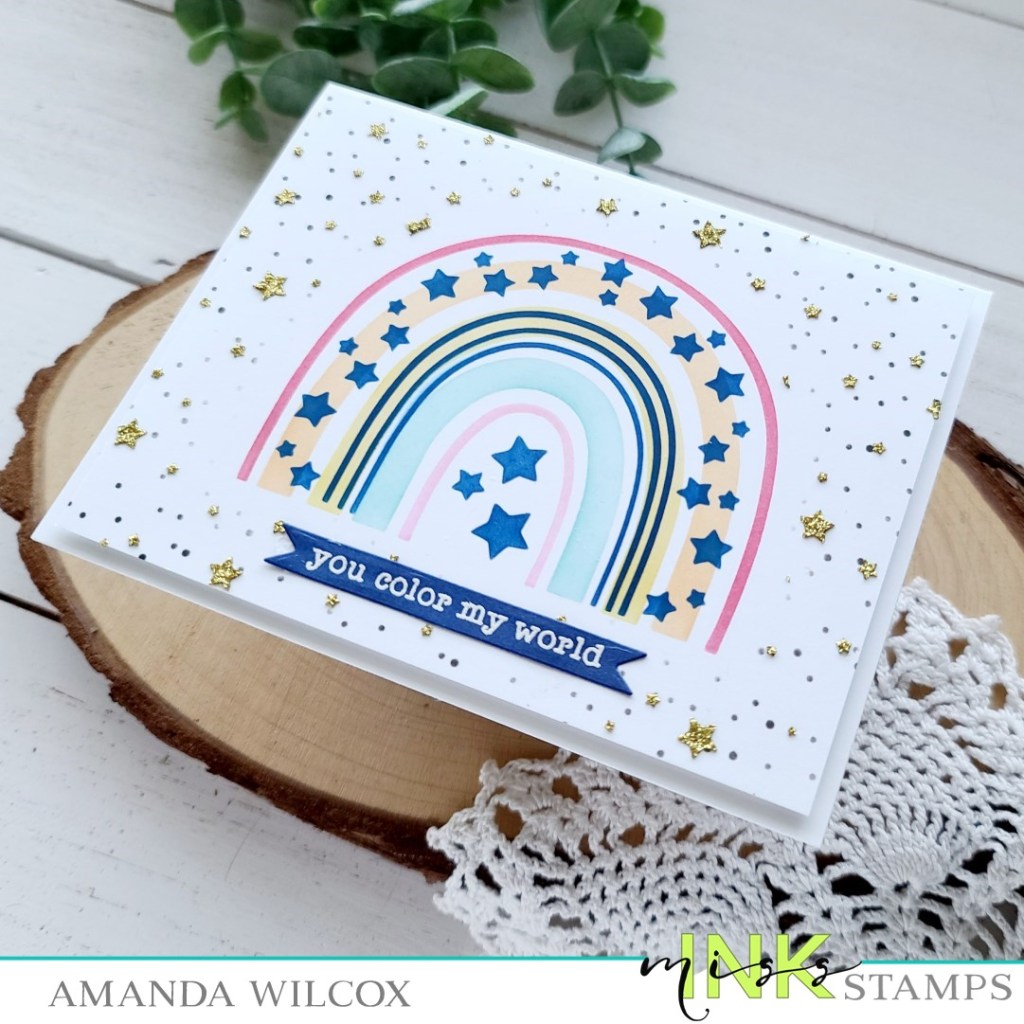
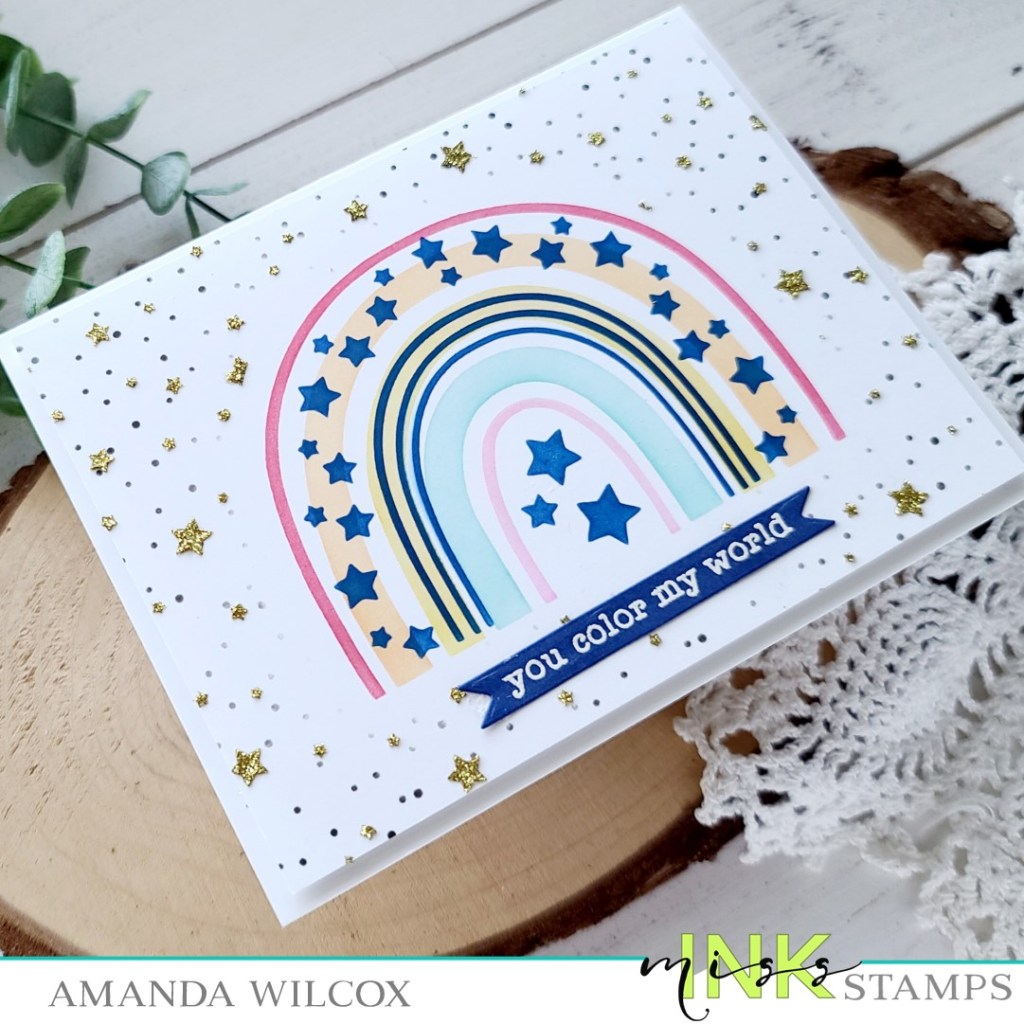
Hey friends! I’m back today with another Miss Ink Stamps card. I just had to bring that awesome Rainbow Builder stencil set and play again. I just love these so much!
I started by cutting a white panel to 4×5.25 inches. Then I centered the largest layer of the rainbow stencil I wanted to use and inked it up. Then I switched to the second layer and ended with those fun accents details in dark blue this time.
I trimmed a piece of cardstock in the general shape of the rainbow to use as a mask from the outer stenciling I wanted to do. I taped down the Tiny Snowfall stencil next and inked it up in dark blue. Then I came back with the Starry Night stencil and gold glitter glitz gel. While the glitz gel was drying I stamped and heat embossed a sentiment from Sunshine and Rainbows on a dark blue cardstock with white embossing powder. I used the Trinity Stamps 4-bar Card die set to cut it into a sentiment banner.
I added foam tape to the back of the stenciled panel and popped it on a white card base. Then I used a little liquid adhesive to adhere the banner down and my card is all finished. Isn’t this so fun?!?
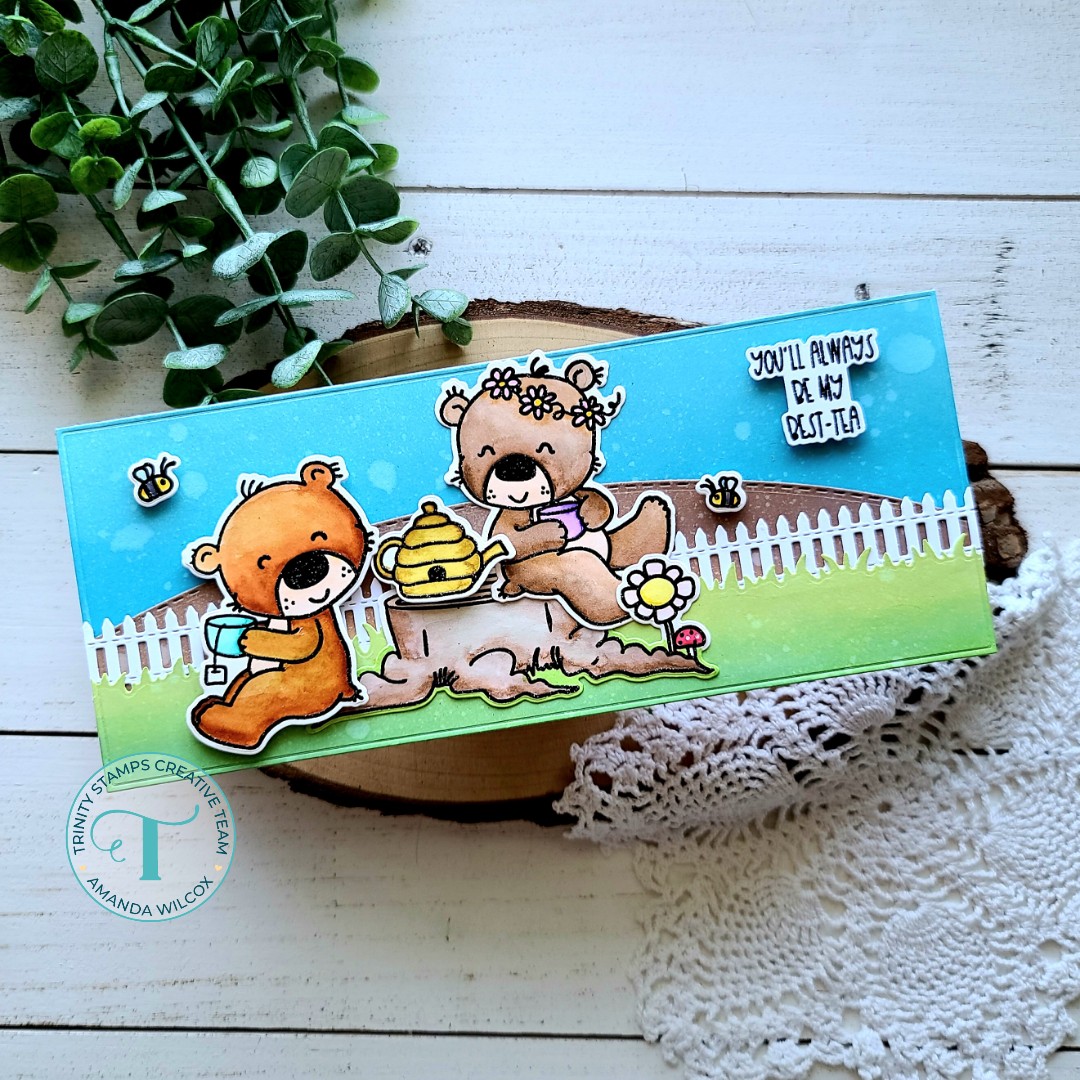
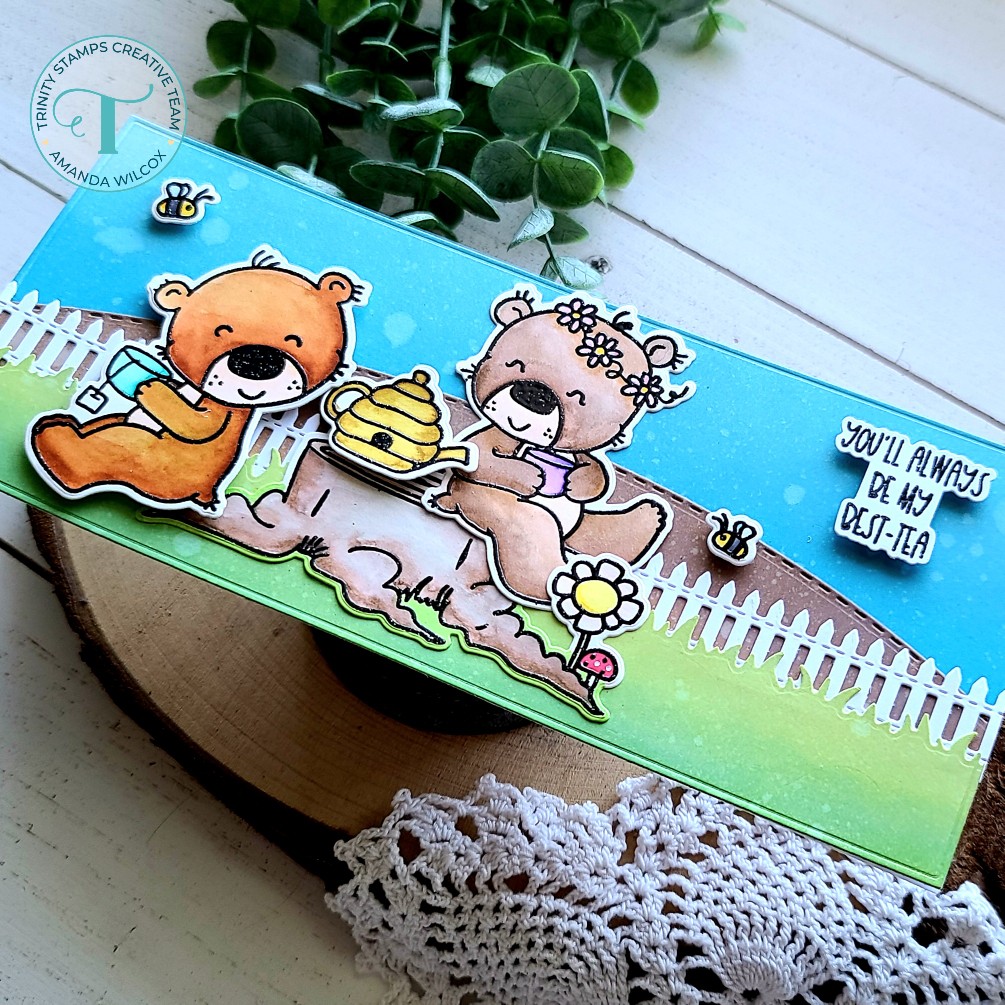
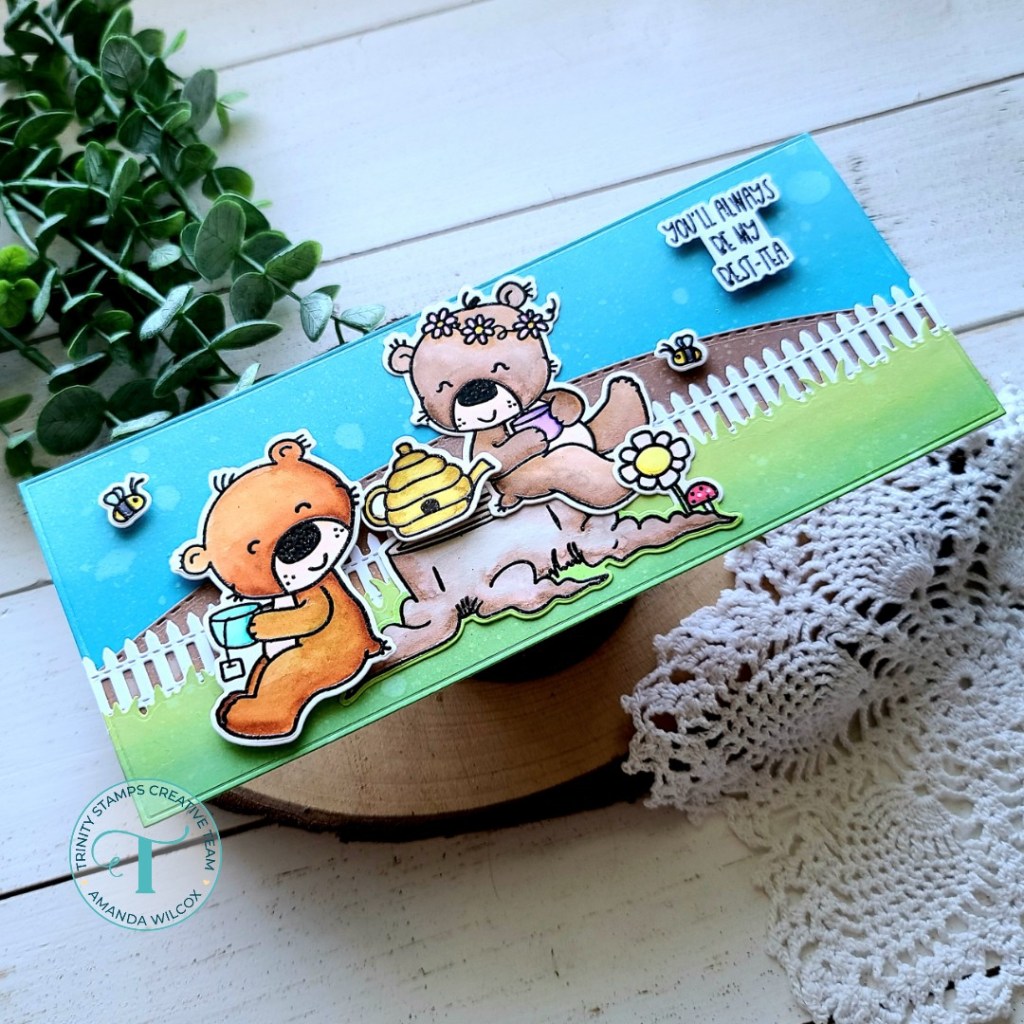
Welcome, welcome!!! Thanks so much for stopping by today. I’m over on the Trinity Stamps blog for another fun Wednesday. Today we’re having a sweet tea party with a couple of adorable bears! I love how large these images are! They fill up a slimline or an A2 size card but they also work wonderfully with the new A7 card size products as well! Today I really wanted to try them on a slimline, so let’s get started.
I stamped and heat embossed the images on Bristol Smooth cardstock and watercolored them all with my Zig Clean Color Real Brush markers and a water brush pen. When they were dry, I used the coordinating dies to cut them all out. Then I started die cutting the elements for my scene so I could get inky messy!
I die cut 3 panels with the largest Slimline Modern Embossed Panels die. Then I used the Slimline Great Outdoor Borders dies to cut a hill and some grass with two of the panels. Then I came in with distress oxide inks and inked each panel up. I spritzed them all with water and blotted them dry. Last, I die cut the sweet picket fence from the Great Outdoors Borders and moved on to assembling my card.
I used liquid adhesive to adhere the background layers together. Then I added foam squares to the back of my images, including the sentiment and decided on final placement. I wanted some depth so I used liquid glue to adhere the tree stump and girl bear. Then I removed the release paper on everything else and popped them in place.
Isn’t this scene just too cute for words?!? I love these sweet bears! My brain is working trying to figure out what else I can have them sit on!
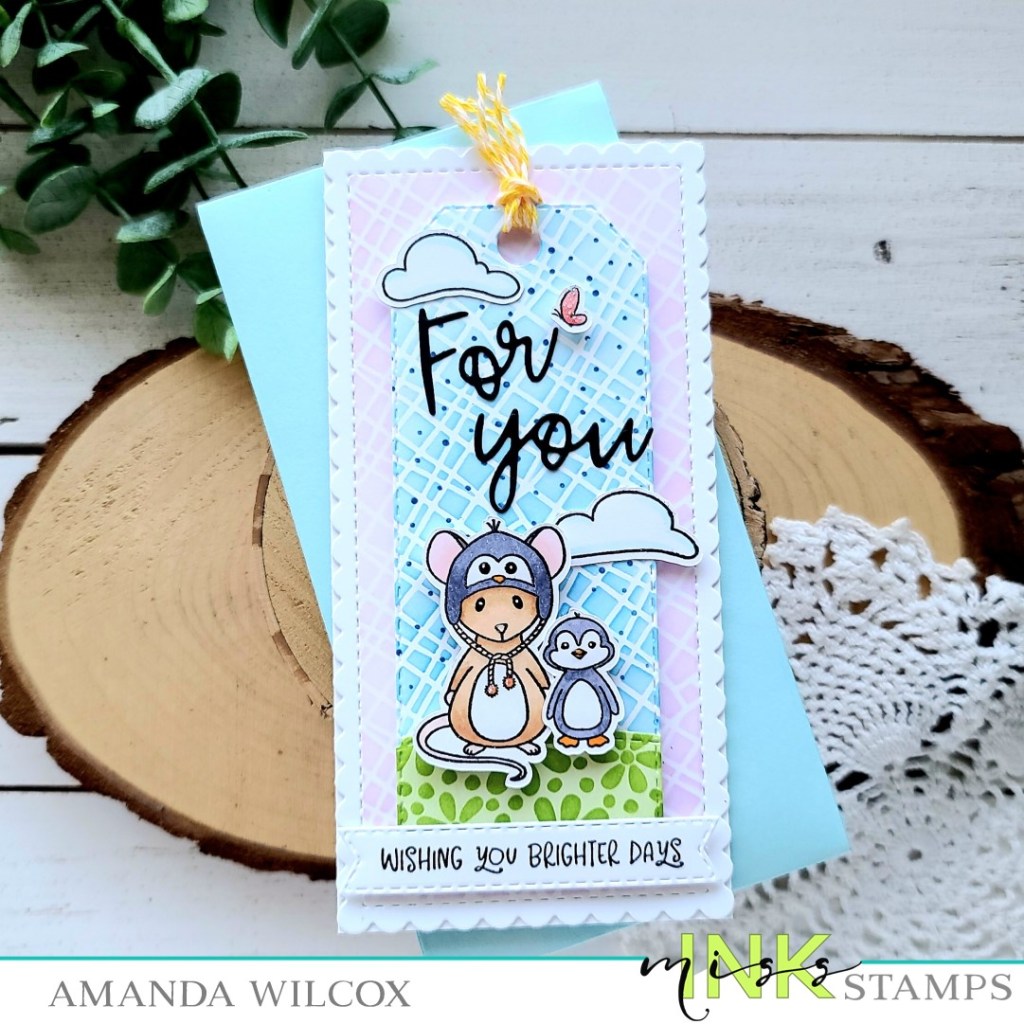
Hello everyone! Today I’m over on the Miss Ink Stamps blog with this sweet little mini slimline card and coordinating envelope. I just love these mice and their sidekicks from Say Cheese! so I pulled out the penguins, which I hadn’t used yet and decided to color them up!
I also colored a couple of clouds and a butterfly to fill in my scene. Once they were colored I used the scan-n-cut to cut them all out and switched gears to stenciling and ink blending.
For that I die cut the scalloped panel from the Trinity Stamps mini slimline card and envelope die set. I taped off from the stitching to the edge and affixed my Miss Ink Stamps Square Dance stencil. I inked it up with a light purple ink. I removed that panel, die cut the bookmark tag from the same die set and replaced it in the same spot so the stenciling lines up perfectly. This time I inked up with a light blue ink. Next, I taped down the Tiny Snowfall stencil and used a dark blue on that. It gives a really fun texture to the sky.
Finally, I die cut another small panel with the bottom of the bookmark tag die and inked it up with the Oopsie Daisy stencil and green ink. I removed the stencil and inked the whole panel up again giving the whole thing a light green color. I cut the top of that little panel off with a Trinity Stamps Great Outdoor Border die to create a little hill. One last thing before assembling the card, I stamped a sentiment from Sunshine and Rainbows on a banner from the mini slimline die set and die cut the words “for you” from the same set.
For assembly, I created a mini slimline card base measuring 3×6 inches and adhered my scalloped panel with liquid adhesive. I added foam tape to the back of the tag and popped it in place, lining up the stenciling. Then I added foam squares to the back of my images and sentiment banner and used them for placement of the words being glued in the sky. For those skinny pieces I used a glue pen to adhere them. Then I removed the release paper from my images and popped everything in place.
Finishing touches on my card were to cut some strips of yellow bakers twine and thread it through the top of the tag. Then I added glossy accents to noses and beaks and black glaze pen to all the eyes. I used unicorn Stickles on the butterfly and the pom poms on the mouse’s hat. Once the black glaze pen was dry I added white gel pen dot highlights to the eyes.