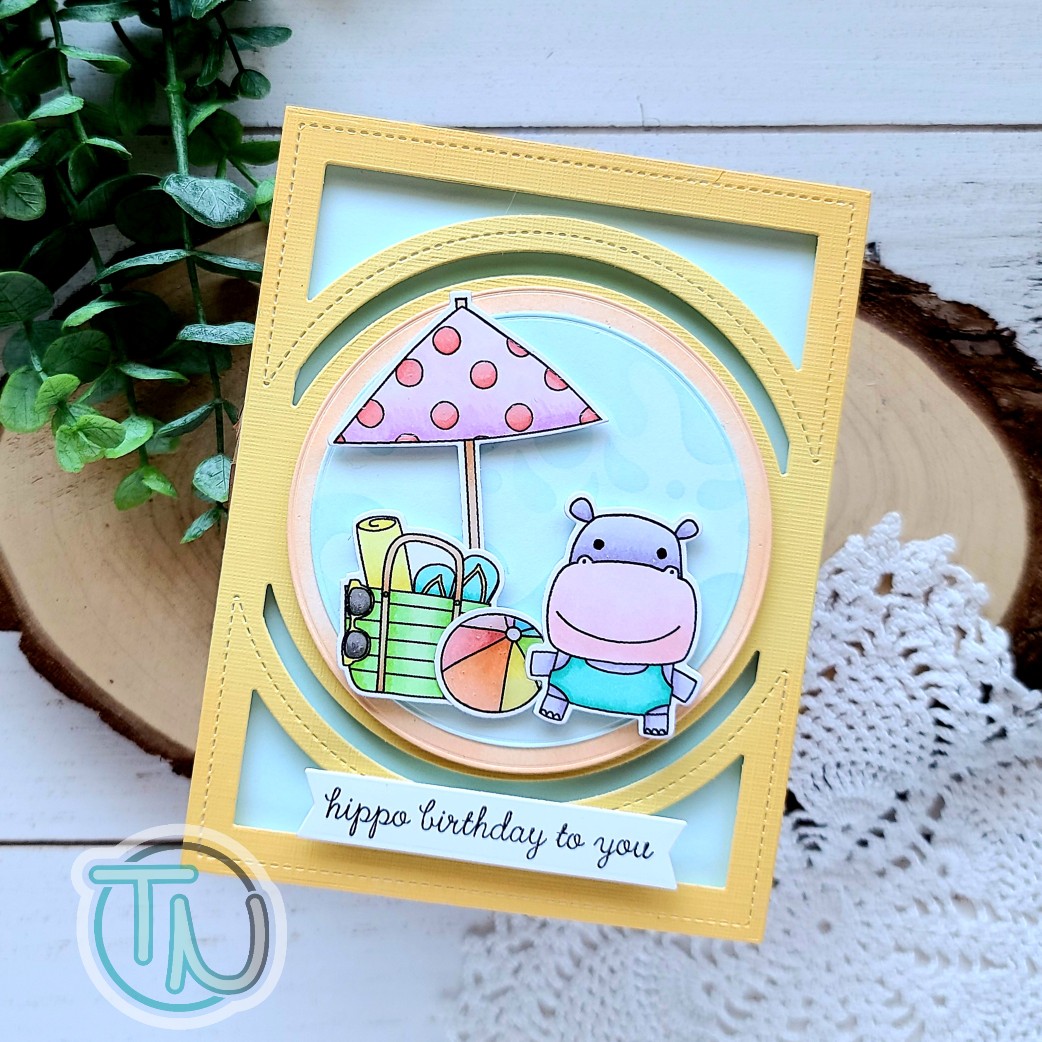
Hi again! I’m back today with a really fun Reverse Confetti birthday card celebrating all this sun we’ve been having where I’m at.
For today’s card, I started by stamping the images I knew I wanted to use from Hippo Pool Party and colored them with my copic markers. Then I used the coordinating dies to cut them out and switched gears to figure out my background.
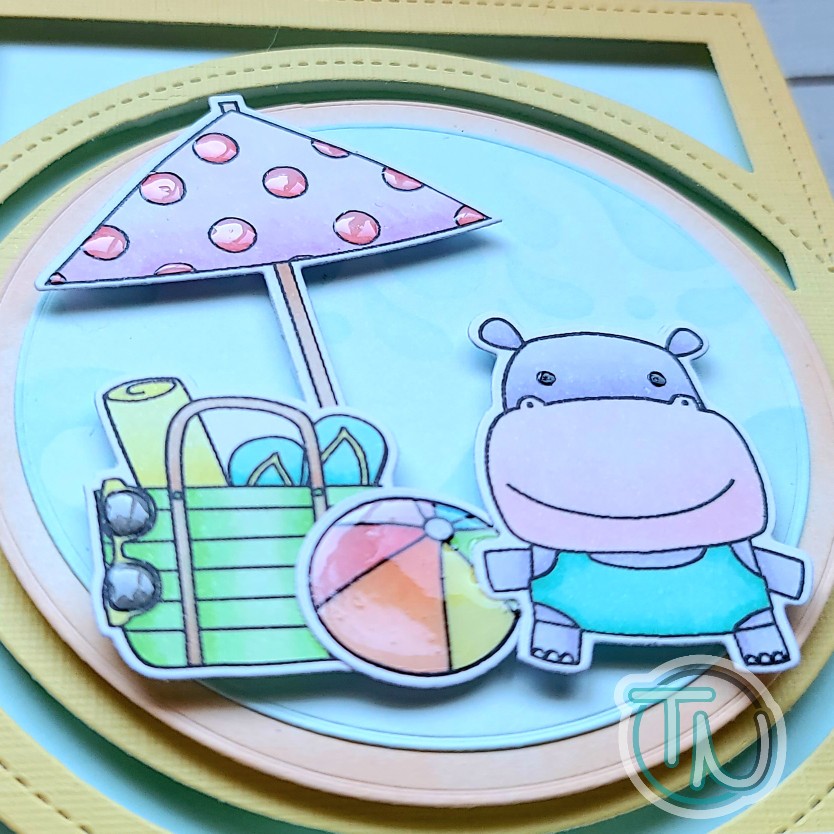
I also knew that I really wanted to create a little scene in the middle of the Center Circle Cover Panel so I pulled that out and ultimately cut it from yellow cardstock. Then I used my Trinity Stamps embossed edge circle stack to cut a couple circles that fit inside. The larger one from white which I inked up orange, and another from light blue which I inked up with the Newton’s Nook waves & splashes stencil for a little texture.
Moving in to assembly, I cut another blue panel to cover my white card base that matches the blue waves circle. I popped the frame up with foam tape. Then I glued the circles together and added them to the frame with foam tape as well. Last, I added my images with a combination of foam squares and liquid glue. I stamped a wonderfully punny sentiment from the Hippo Pool Party set and cut it with a Pink & Main sentiment strip die and added it to the card front with foam squares.
I finished my card off with some glossy accents on all the necessary places, like the beach ball, glasses, umbrella dots and, last but not least, the hippo’s eyes.
This is such a fun card and just perfect for summer birthdays that you might have coming up very soon!
I appreciate you sharing your time with me. Have a fabulous day!
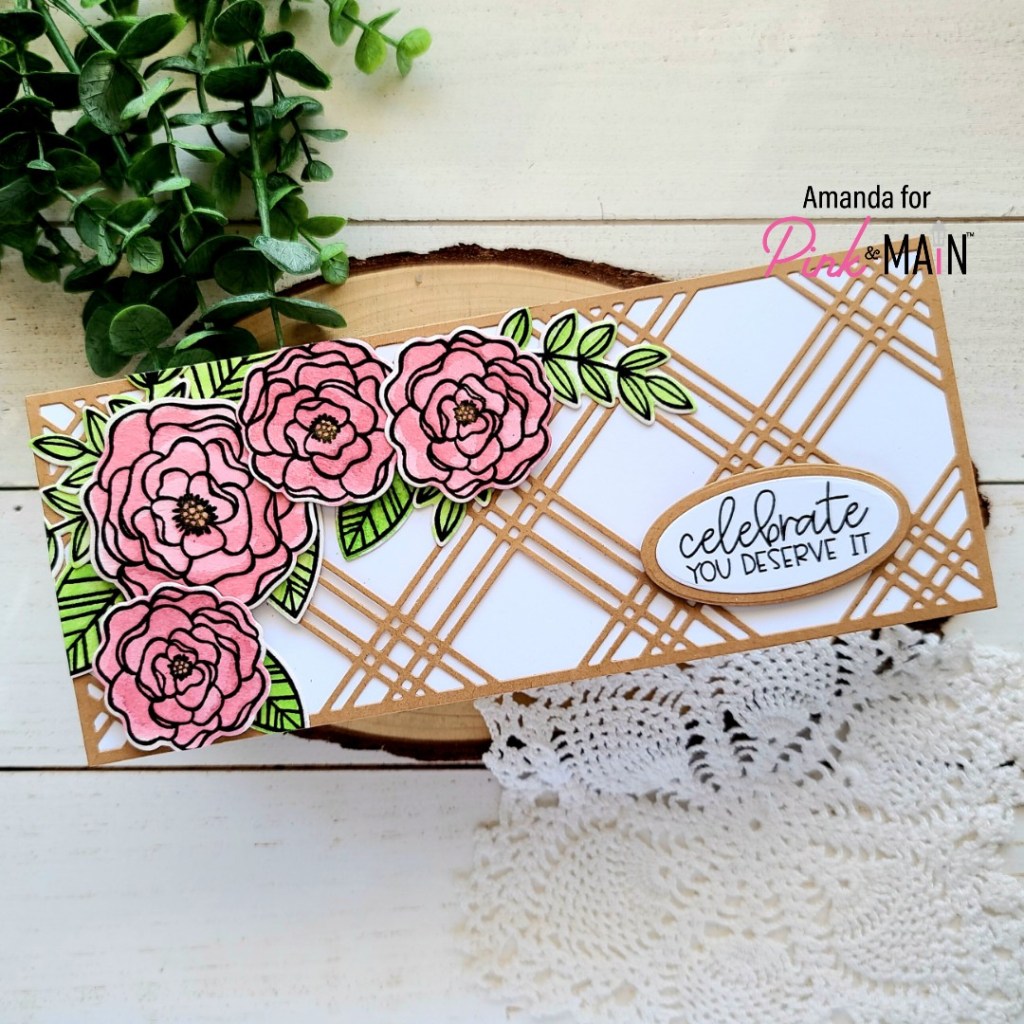
Hey everyone! I’m over on the Pink & Main blog today with a fun sneak peek of one of the upcoming sets in the April release! It’s called Missing You and it’s beautiful! I had some fun watercoloring with reinkers, which I had never done before.
Having no idea what I was doing, I added a few drops of ink on my glass mat and then added some water to it. I kind of loose watercolored blobs all over my paper, drying it in between layers, and then stamped the floral images with VersaFine onyx black ink once they were dry. Next, I used the coordinating dies to cut the shapes out and moved on to die cutting my background.
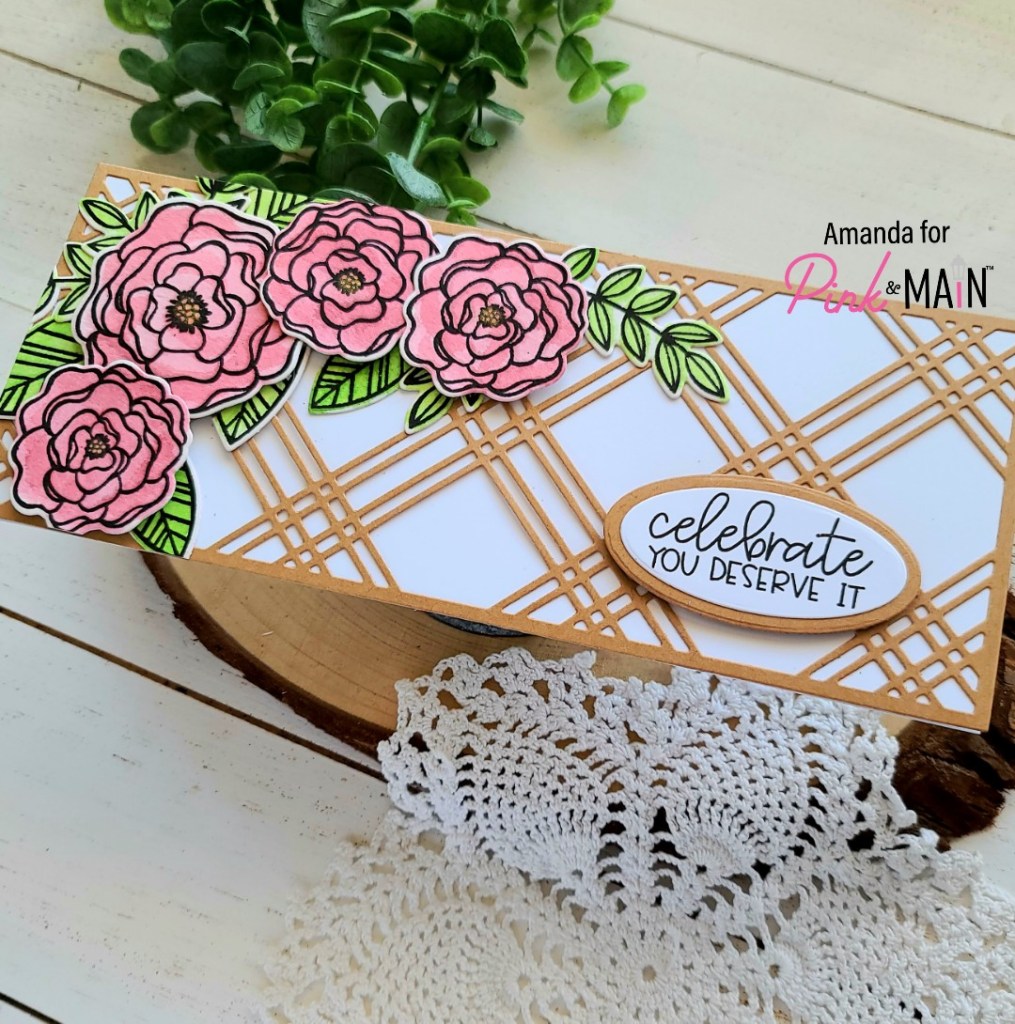
I cut the plaid slim line panel from kraft card stock and used the EZ squeeze glue to adhere it to a white card base. Then I laid my images out how I wanted, gluing the leaves down and popping the flowers up with foam squares. I trimmed the excess off the edges with my scissors and decided on a sentiment.
For that, I stamped it, then found a perfect size oval from the Layered Oval set to cut it out with. To help it pop a little, I cut the next size up from kraft cardstock and glued them together. Then I popped them up with foam squares.
Keeping things simple, I finished this card off with some gold Wink of Stella on the flower centers. I love the shimmer this gives in the light.
I can’t wait for you all to see the entire release this month. It’s another show stopper!!! Be prepared! Check back tomorrow for more sneak peeks all the way up until the release goes live on April 20!
I appreciate you sharing your time with me. Have a fabulous day!
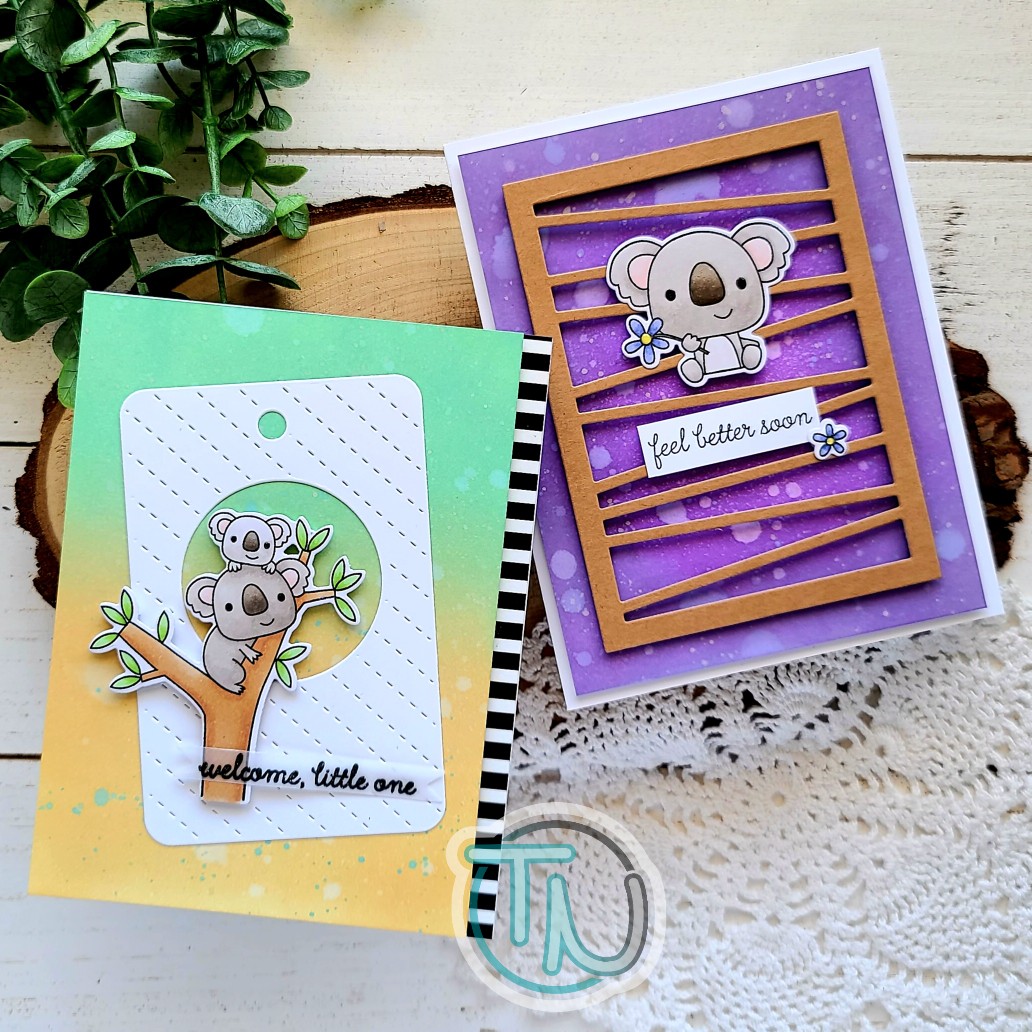
Happy Friday everyone!!! It’s super sunny here and we’re looking at fabulous weather all weekend. I hope most of you can relate and get to enjoy it! Today I’m sharing a couple of adorable cards I made to stock my stash for occasions that I don’t need often but sometimes don’t have time to make a card for either. This adorable Reverse Confetti set called Bear Hugs is super versatile with the sentiments included but the images are also great for just about any other sentiment you might want to pair with it too!
I had so much fun, once again, getting super inky to create these great backgrounds and am absolutely in love with all the cover plate background dies that Reverse Confetti has to offer. Today I used the Wonky Stripes Panel and See Through Tag to help ground my images. I love them both! So many options!
For this first card, I blended cracked pistacchio and scattered straw distress oxide inks on a panel and the spritzed it with water. Then I flicked watered down ink from both colors over the panel too. Setting it aside to dry, I die cut the see through tag from white card stock, stamped and colored my images, and then used the coordinating dies to cut them out.
I stamped and heat embossed my sentiment, then used a Trinity Stamps banner die to cut it out. Moving on to assembly, I added some black striped washi tape to the edge of a white card base. Then I trimmed the inked panel down to 4×5.5 inches and added foam tape to the back, adding it to the card base so the stripes showed on the right side. I used liquid glue to adhere the tag to the inked panel and popped my image up with foam squares. Last, I smeared a little liquid glue on the back of the vellum sentiment banner and adhered it to the tree trunk.
For finishing touches on this sweet card, I added glossy accents to the koala eyes and noses. I love that beautiful gender-neutral color palette for a baby card. Perfect for people not finding out what they are having or maybe a congratulations card for someone who just found out they are expecting.
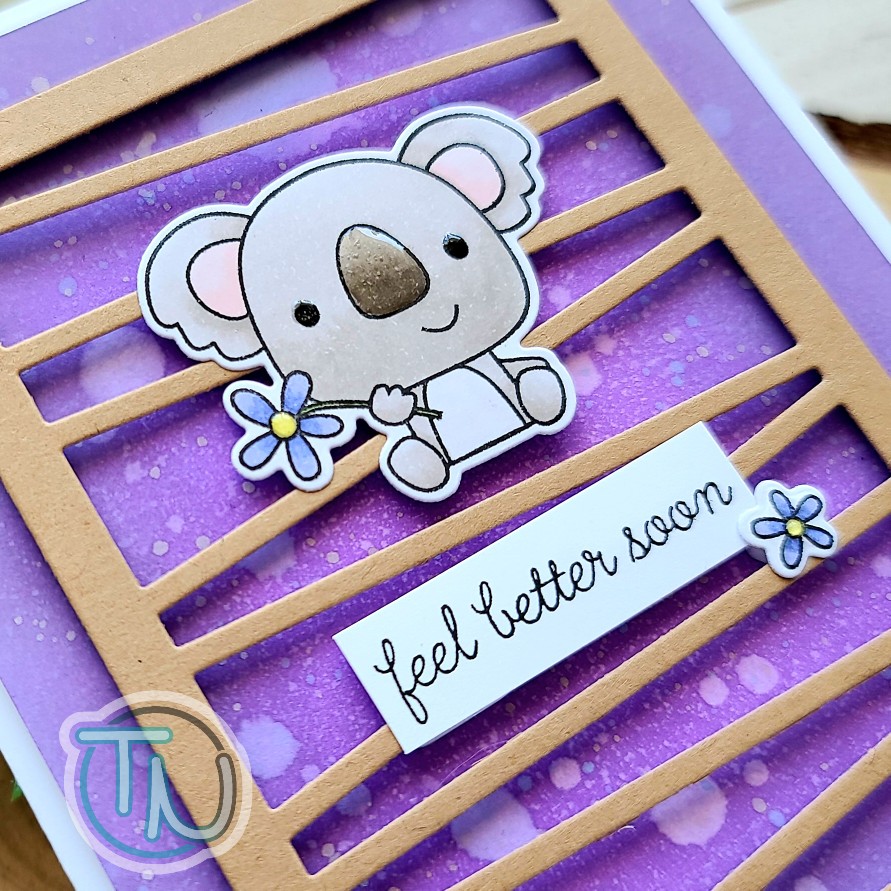
Get well cards are often the ones I don’t have time to make just when I need one so it’s wonderful to have something I love to share ready to go.
For this card, I blending wilted violet and seedless preserves distress oxides on a panel and spritzed it with water. Then I flicked some watered down milled lavender on the panel for a little color contrast in the speckles. I set the panel aside to dry and die cut the Wonky Stripes Panel from kraft cardstock and added foam strips to the back of it.
I stamped and colored my image with copic markers, then used the coordinating dies to cut it out. I stamped a sentiment from the set and trimmed it into a strip. Now, we can assemble everything. I trimmed the inked panel down to 4×5.25 inches, added foam tape to the back and popped it on a white card base. I used liquid glue to added my image and sentiment to the wonky stripes panel and then put more foam squares behind them for added stability. I removed the release paper and put it in place next.
Moving on to finishing touches for this card, I added glossy accents to the koala’s eyes and nose again, plus the flower centers this time.
This set is just too cute and I’m so glad that I finally snagged it after eyeing it for so long.
I appreciate you sharing your time with me. Have a fabulous day!
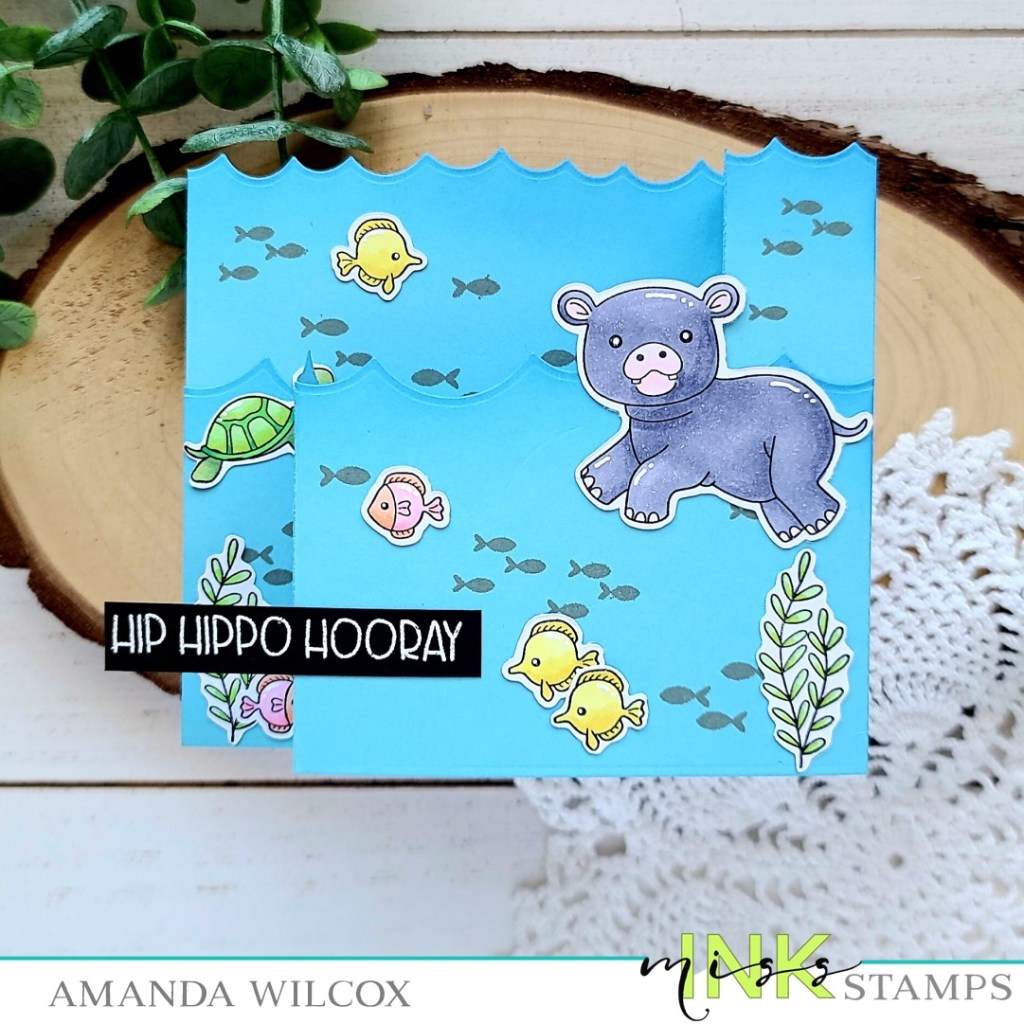
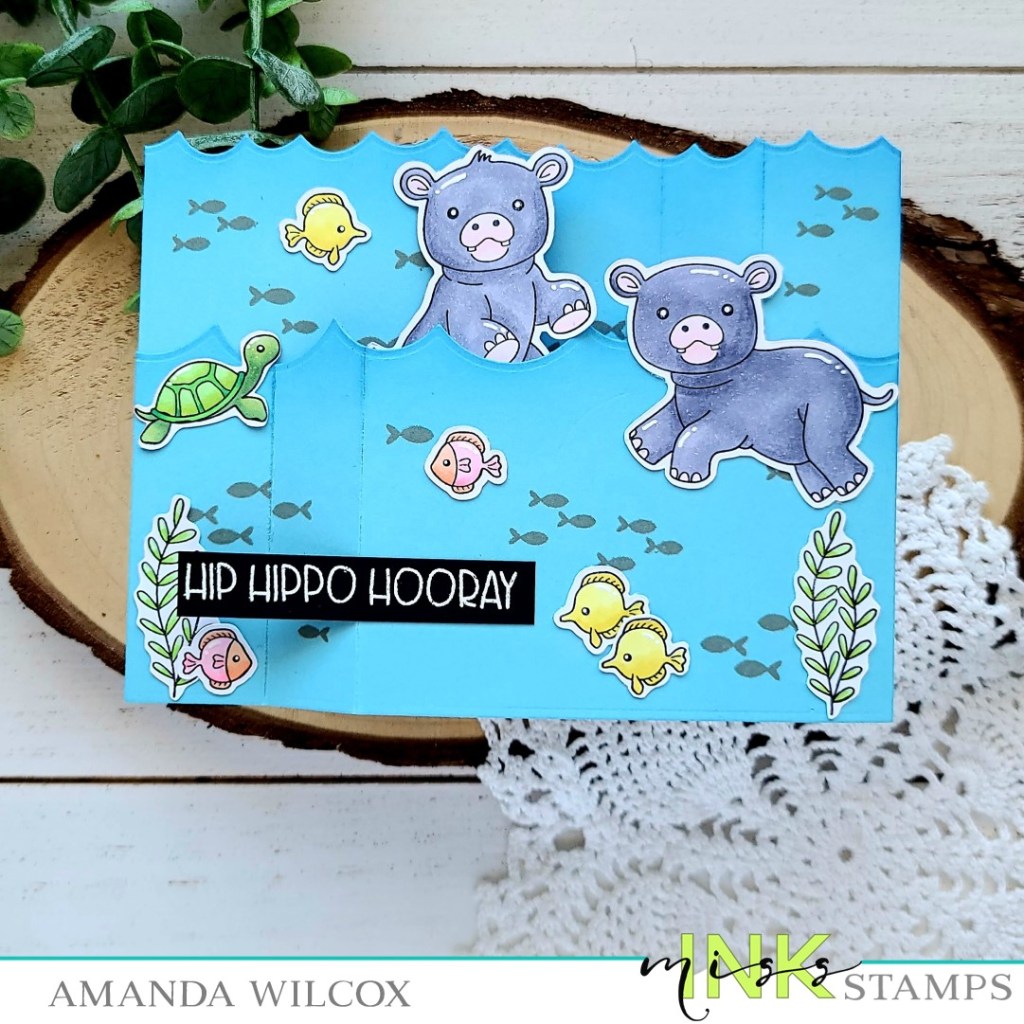
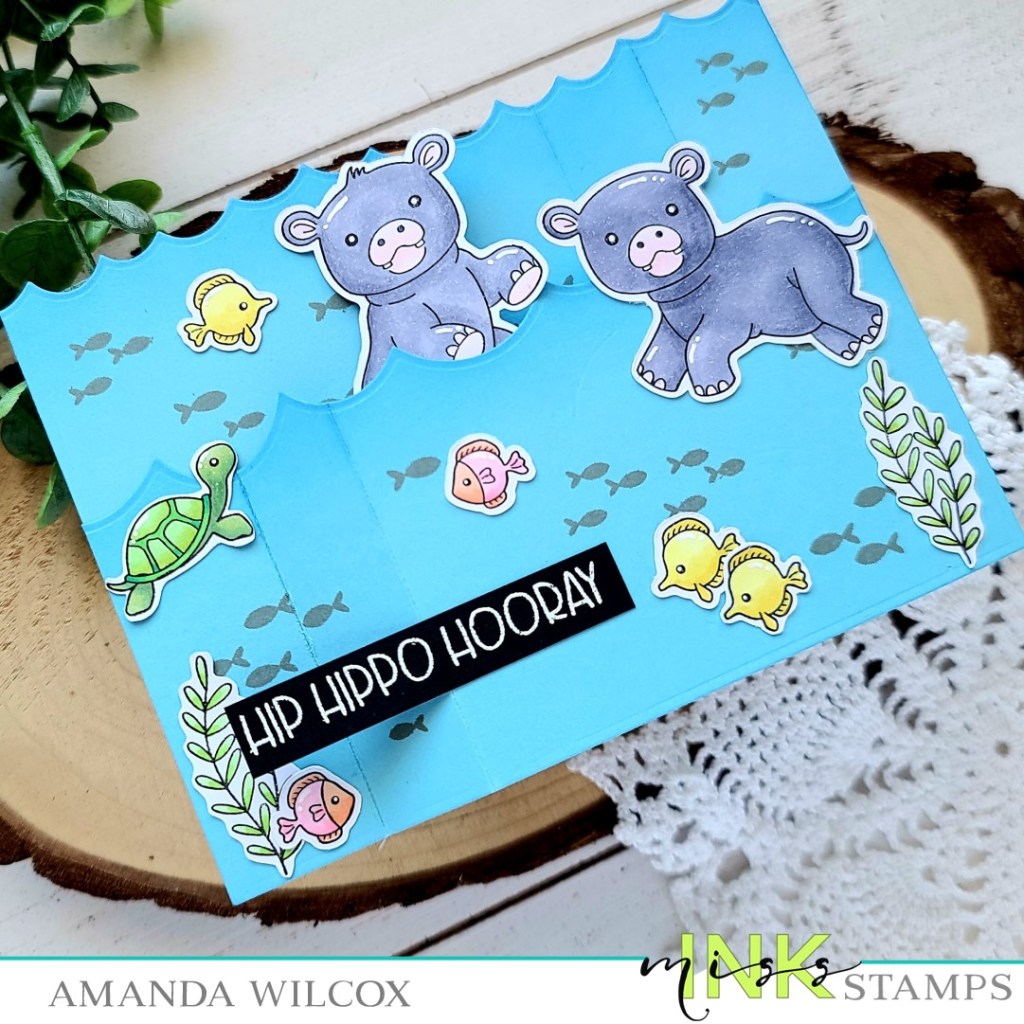
Hello again! Today I’m back with another Miss Ink Stamps card but this one is extra fun and totally adorable too! These hippos are so super cute! Plus today’s card is interactive which makes it even better!
I stamped my images from Hippo Hooray and colored them with copics, then used the scan-n-cut to cut them all out and then it was time to start assembling everything. I adhered my wiper mechanism to the back of the front panel and then the panels together. Next, I added my images and moved on to a sentiment.
For that, I stamped and heat embossed it, then trimmed it into a thin strip. I glued it to just part of the card front so that it didn’t inhibit the moving motion needed to let the wiper flip up and down. Just stay to the right of the embossed lines and you’re good. Look at that cute hippo popping up to say hooray! This is too cute!
I don’t ever want finishing touches like glossy accents or Stickles to get in the way of moving pieces on these type of cards, so I left everything to just a few white gel pen highlights and decided this cute card was finished!
I hope you enjoyed it and find a little inspiration to create something wonderful.
I appreciate you sharing your time with me. Have a fabulous day!
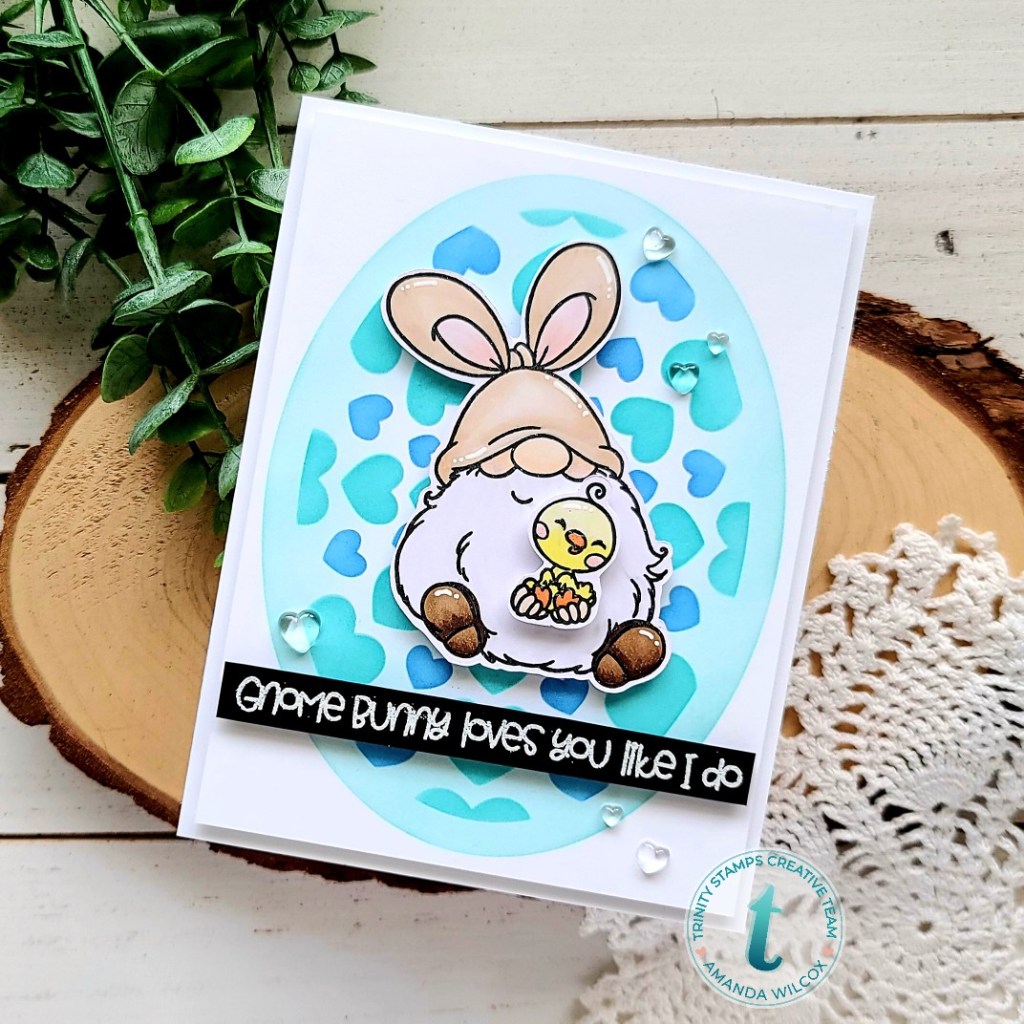
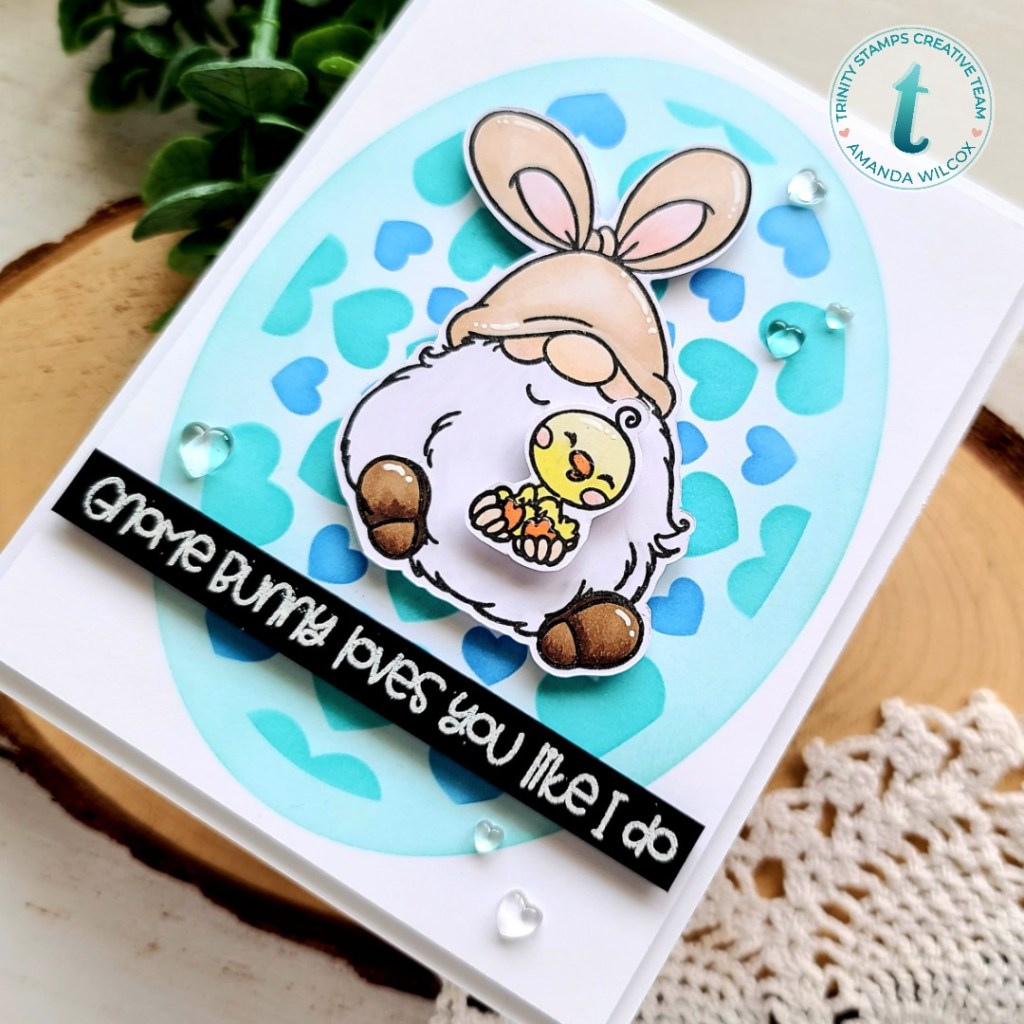
Hi again! I’m over on the Trinity Stamps blog today too and wanted to share the sweet gnome bunny card that I made. I tried to take the Easter sets and give them a different feel for more use throughout the year. So if you have a gnome lover, this just may work for you too!
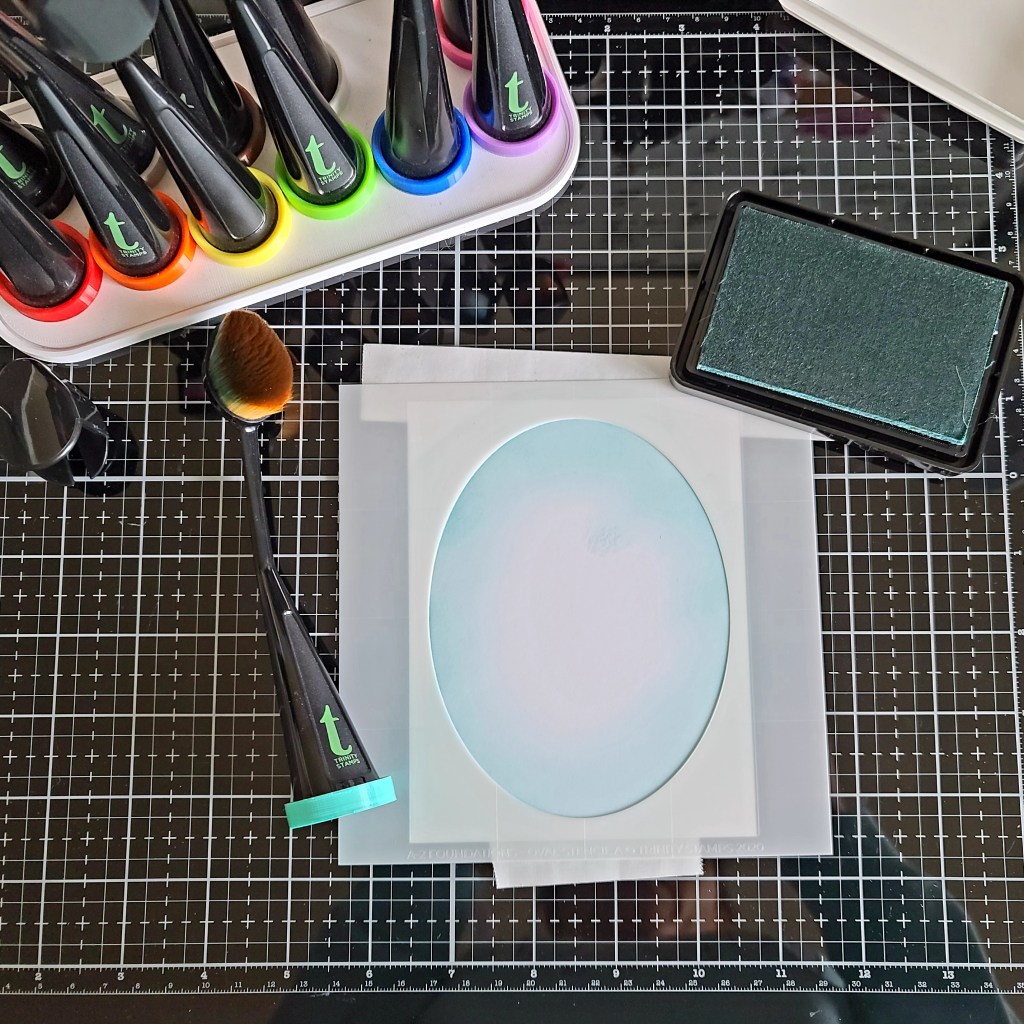
I started my card by cutting a white panel to A2 size and pulled out my oval foundations stencil and a blending brush. I taped on the largest oval and inked up the edges with a light teal ink.
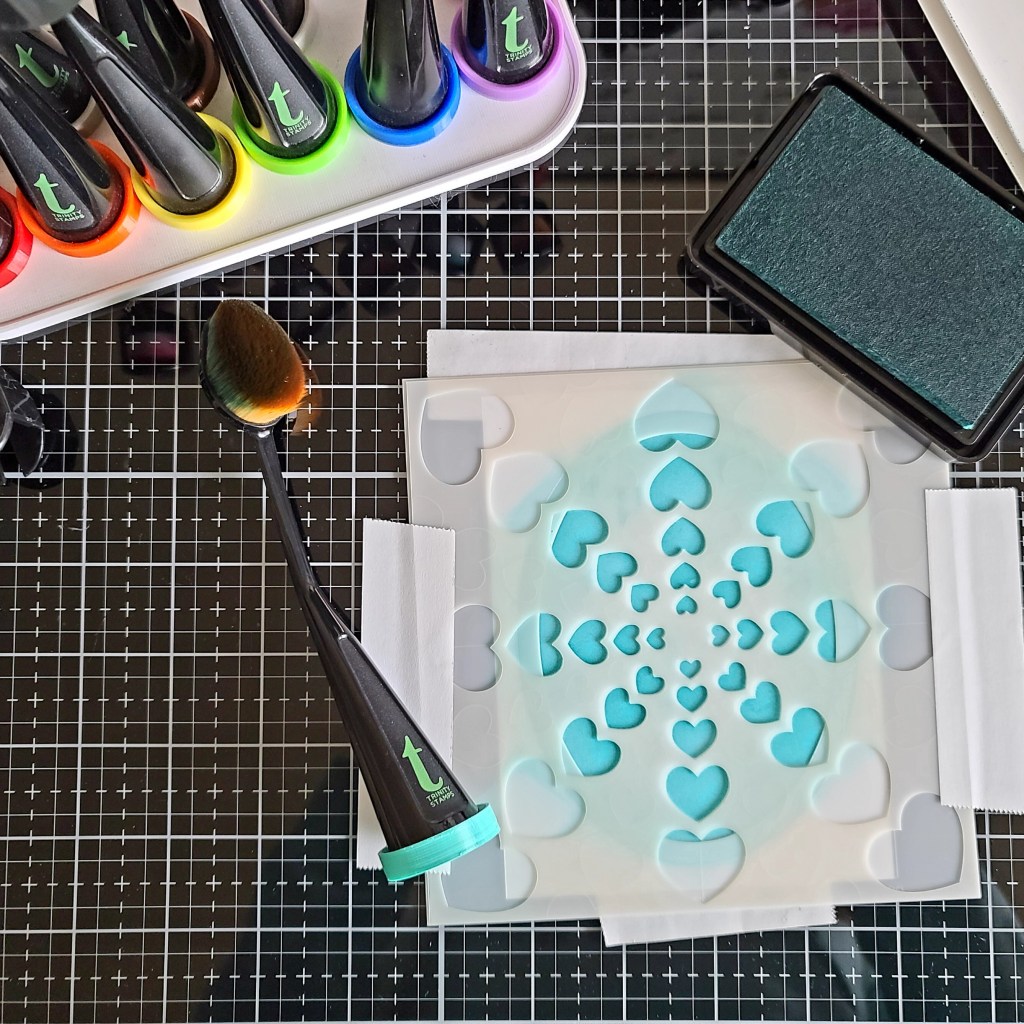
I removed that stencil and lined up the next smallest oval along with the first layer of the heartburst stencils and inked up a darker teal ink.
After that, I left the oval in place, removed the first layer of heartburst and lined up the second layer to add a blue ink to the mix and finish off my stenciling.
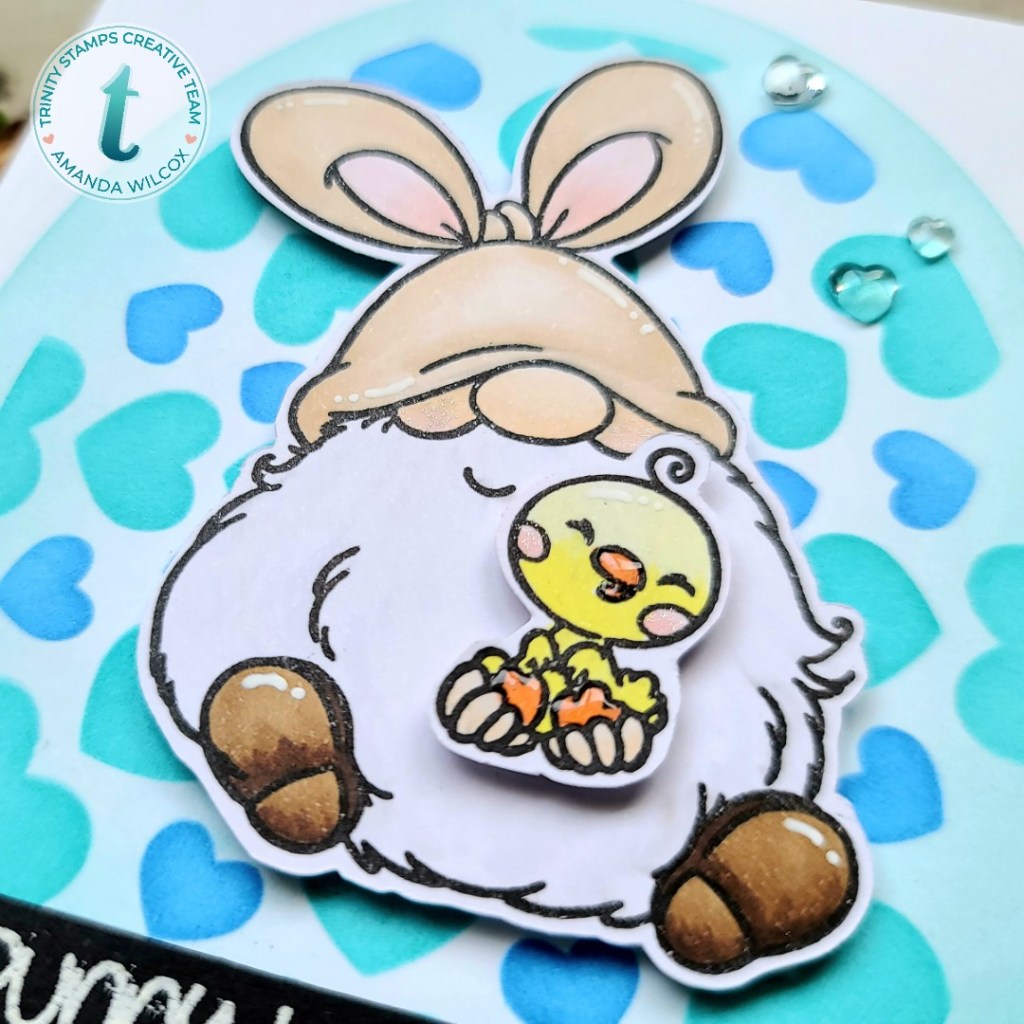
Next, I stamped and colored the images from Gnome Bunny and cut them out. I chose my sentiment, stamped and heat embossed it in white on a strip of black cardstock and started assembling my card.
First, I trimmed 1/8 inch off each side of my stenciled panel and popped it up with foam tape on a white card base. Then I added foam squares to the back of my gnome and popped him in the center of the oval. I also added foam squares to his hands holding the chick and put him in place. Last, I added foam strips to the back of the sentiment and placed it toward the bottom of my panel.
For finishing touches on my card, I added glossy accents to the chick’s beak and feet, white gel pen accents to the gnome and chick and a little Wink of Stella glitter brush pen to both of their cheeks. The last things I did was glue a scattering of boiled sugar jelly drop hearts around the card design for a little extra love.
I appreciate you sharing your time with me. Have a fabulous day!
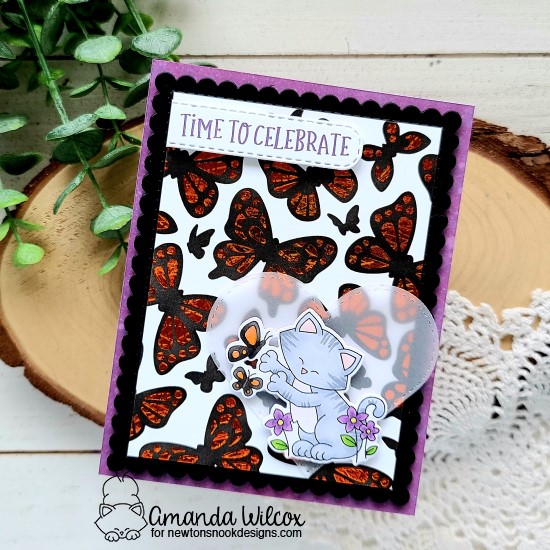
Welcome! Welcome! Today I’m over on the Newton’s Nook blog sharing a REALLY FUN spring card that would be amazing for a bunch of different occasions. I specifically chose the generic sentiment so I had flexibility later on when I am ready to use it. Do you ever do this with your cards?
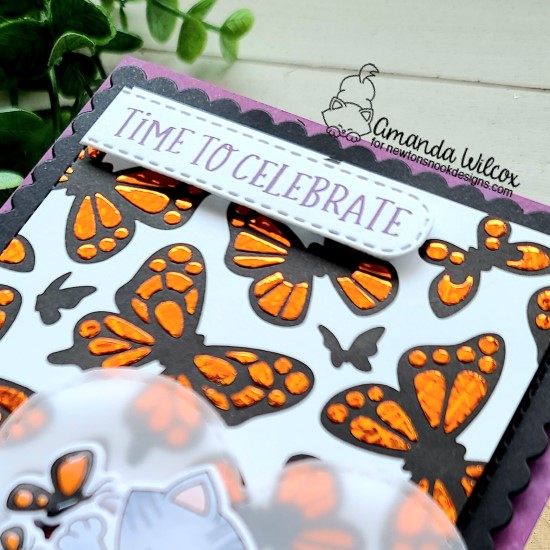
I had been wanting to play with the butterflies stencil for a while so I finally pulled it out and inked it up. I inked the first layer black and when over the spots layer with Thermoweb transfer gel. I let it dry and ran it through my laminator with orange sketch deco foil. I love the texture this foil has! It’s so cool! Then I chose an image from Newton’s Flower Garden and colored it with my copics. I used the coordinating dies to cut it out.
Playing off the colors I chose for the image, I inked up a white panel with distress oxide inks in seedless preserves and dusty concord. I spritzed the panel with water and let it dry. While I was waiting I die cut the scalloped rectangle from Frames & Flags and a vellum heart from the heart frames set.
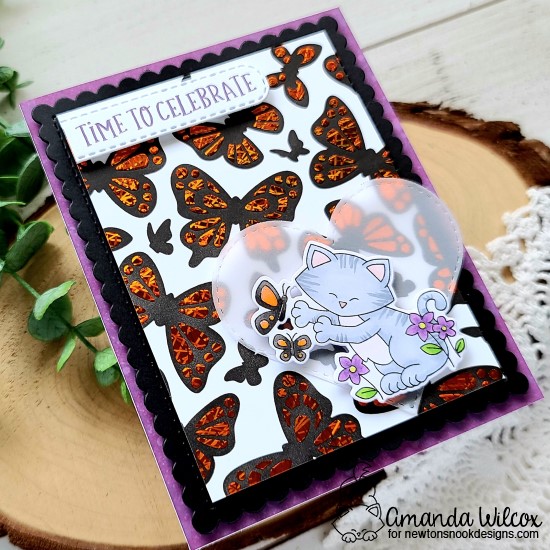
For assembly, I adhered the purple panel to a white card base with liquid glue. Then I added the black scalloped panel with foam tape. I trimmed the foiled butterfly panel down to 3.5×4.75 inches and added it with foam tape as well. I popped my Newton image up on the vellum heart with foam squares, then I hit liquid glue behind that portion to adhere it to the butterflies.
For my sentiment, I die cut the rounded banner from the banner trio set and stamped a sentiment from Birthday Roundabout in the same purple ink as the background panel. I trimmed off one end, added foam squares and popped it in place.
For finishing touches, I added glossy accents to the flower centers, Newton’s nose and parts of the butterflies.
This bold fun card is sure to make the recipient smile. I just love the dark and bright together with the happy Newton image. It’s all so wonderful!
I hope you find some inspiration to create something wonderful. I appreciate you sharing your time with me. Have a fabulous day!
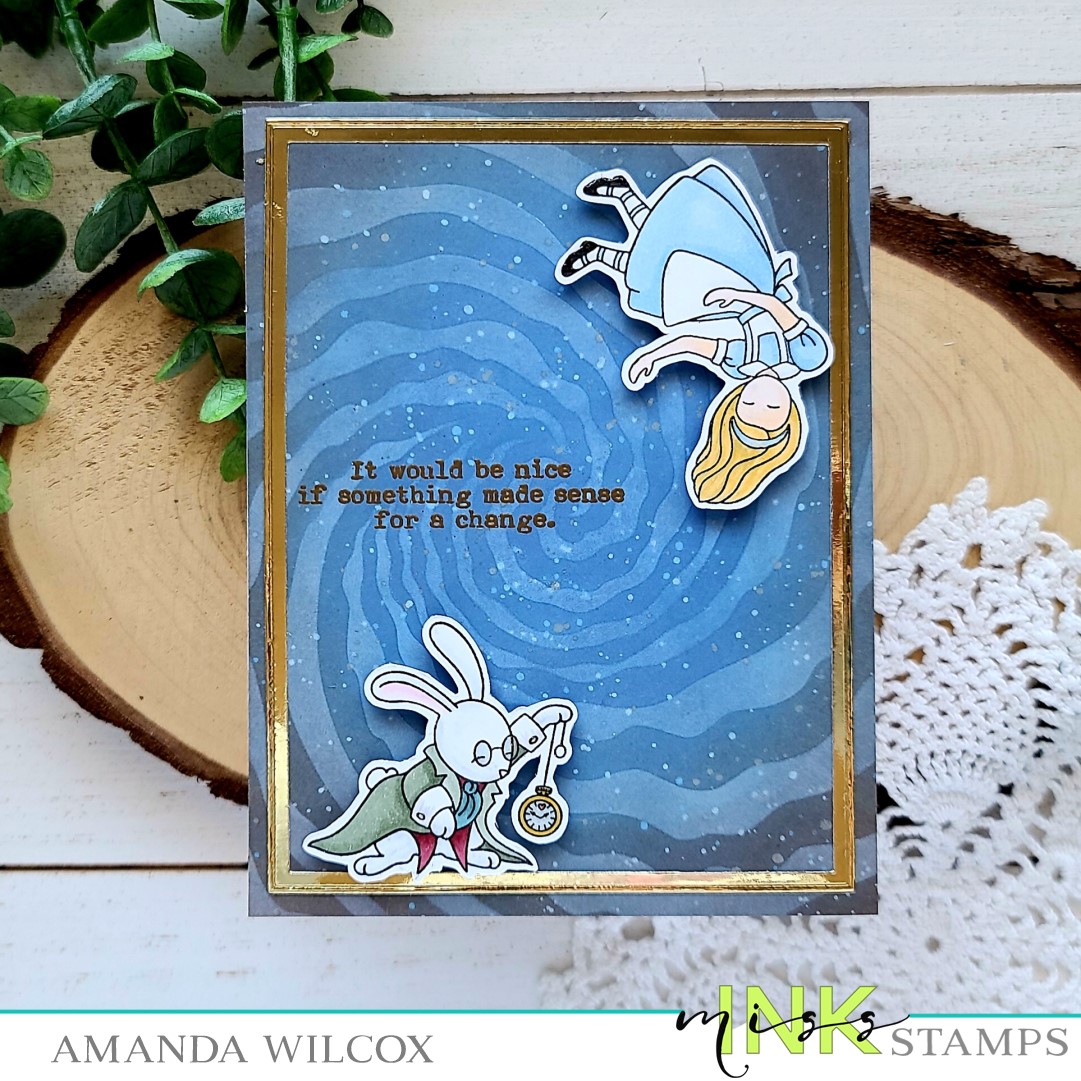
Hey everyone! I’m over on the Miss Ink Stamps blog today with another addition to the Alice card collection. This time we’re falling down the rabbit hole…where nothing makes sense anymore, and we’re late.
I started with the background on this card, blending distress oxides and using the Rabbit Hole stencil. I did a little different color combo for my distress oxide blending today and I like how it worked out.
I always start with an oversized panel so I can trim whichever way I want. It helps if my stencil isn’t centered or the ink blends one edge better than another. Anyway, today I used faded jeans for the center and ground espresso for the edges. Then I splattered the panel with watered down bits of both colors. I sprayed my stencil with pixie spray and laid it over top, then pounced on some tattered rose for the swirls. I flicked some of this watered down ink over the panel as well.
Next, I stamped and colored my images from Alice and used the scan-n-cut to cut them out. I added foam squares to the back and used them as a guide for where to stamp and heat emboss my sentiment. This is one from the Wonderland Wisdom set. These quotes are fantastic. Once that was complete, I added the background panel to a card base and adhered my images in place.
Things looks a little sparse so I went back to the drawing board and came up with the fun idea to add a frame. I used the Trinity Stamps embossed edge rectangles. I cut one from gold mirror cardstock and then cut the center out with the next size down. I added liquid glue to the frame and carefully fit it around the images. I love what this does for the whole design!
For finishing touches, I added glossy accents to the rabbit’s watch, glasses and buttons, and Alice’s shoes and headband.
Given the world we live it right now, I think this card is fairly appropriate and would be fun to send to just about anyone. Don’t you?
I appreciate you sharing your time with me. Have a fabulous day!
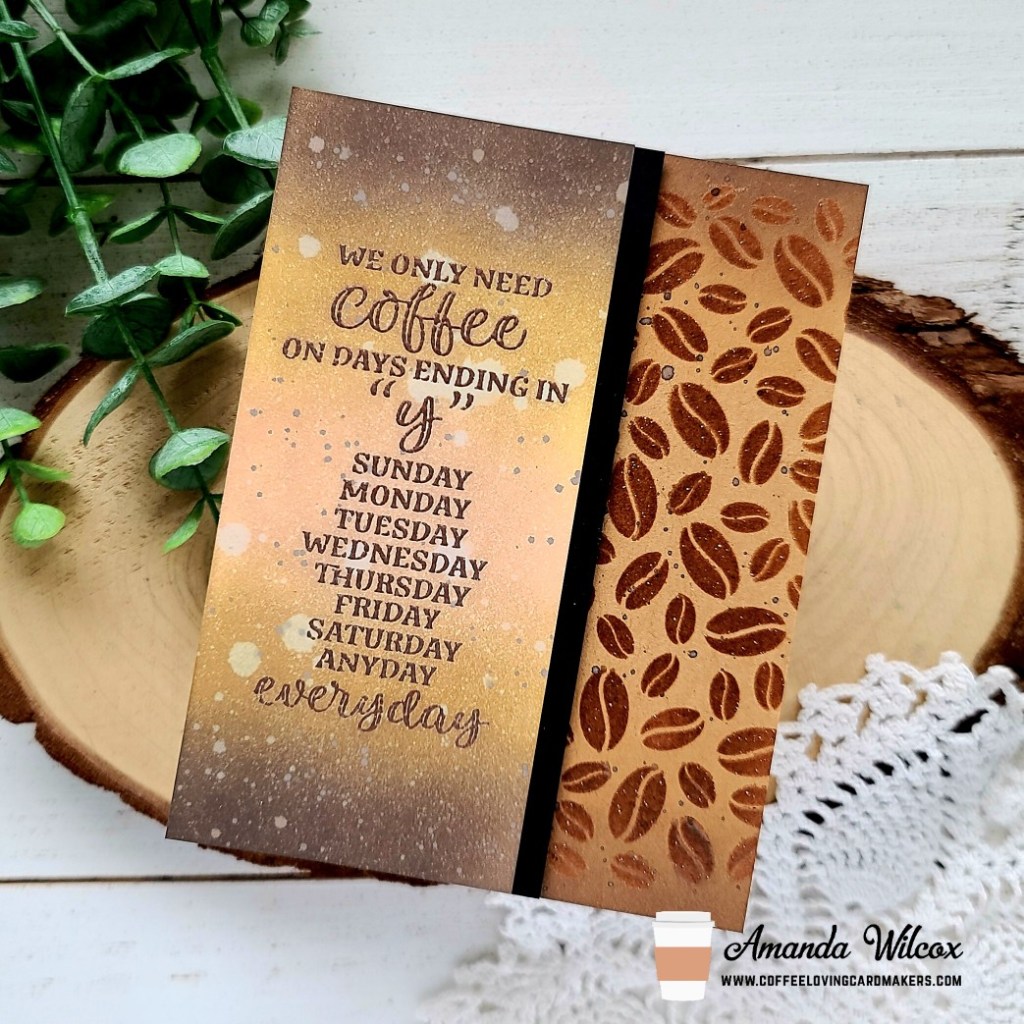
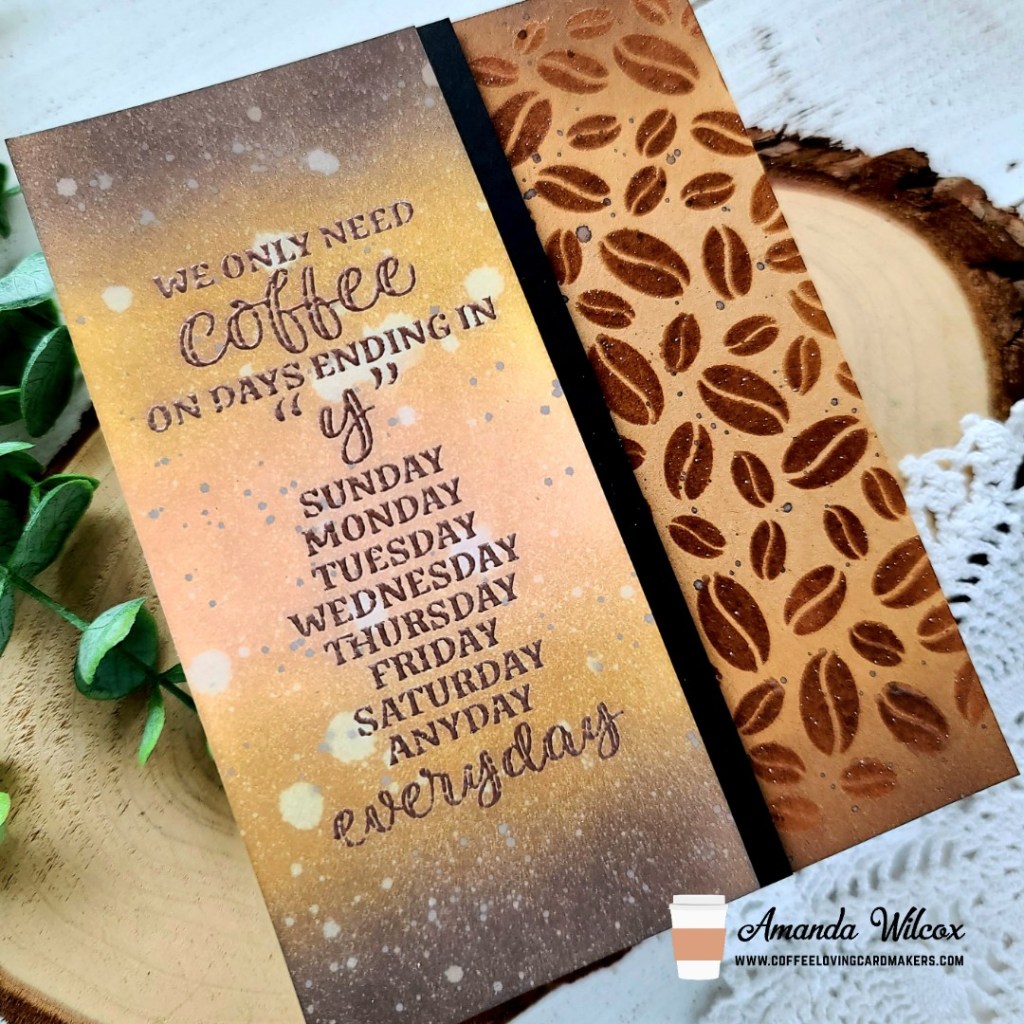
Hey friends! It’s time for another Tuesday Tea over on the Coffee Lovers blog today and I’m super excited to share a card I made with my prize from the Spring|Summer Hop that just finished in March! It was so much fun and I was lucky enough to win a fantastic prize pack from CAS-ual Fridays. They were so generous and I was very excited to jump right in and start creating with everything.
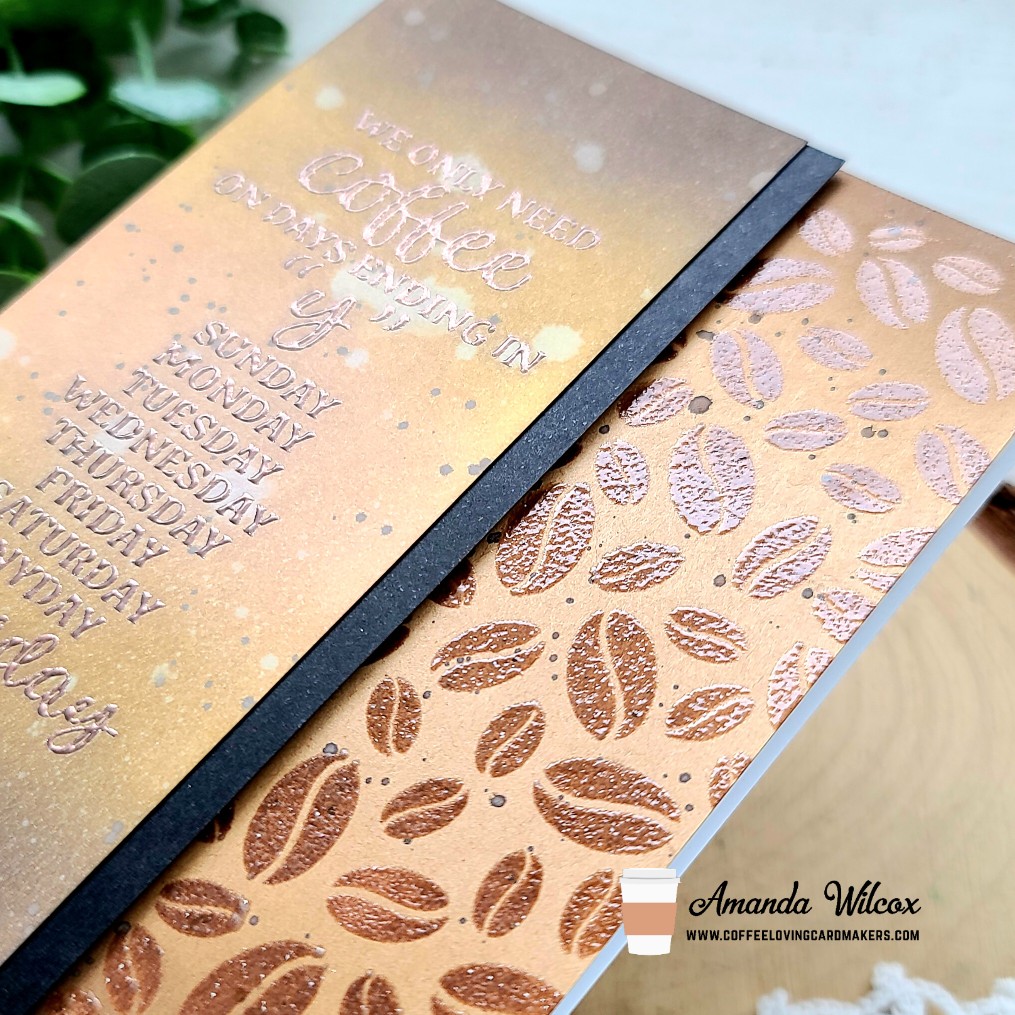
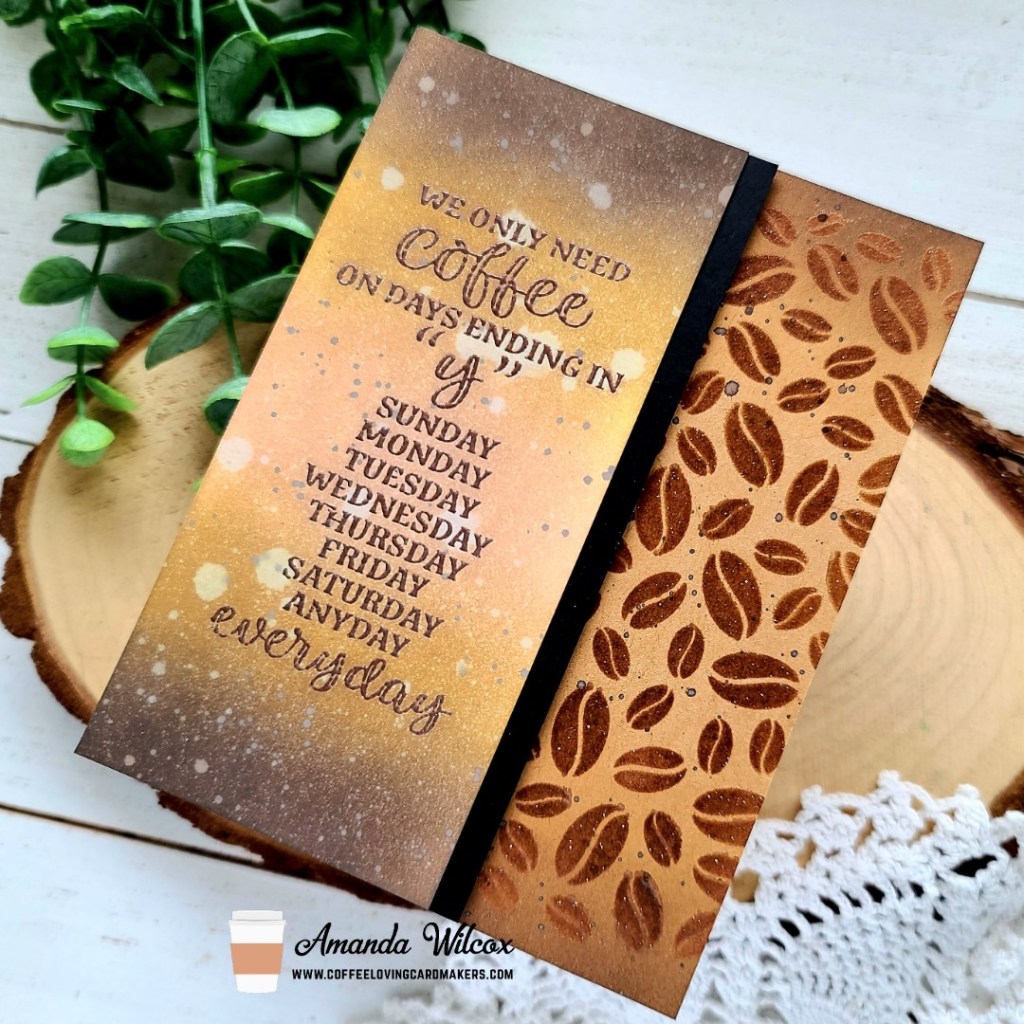
I started by cutting a strip of kraft cardstock and inked up the by the beans stencil with brown ink. Then I left my stencil in place and went over the whole thing with VersaMark ink and added clear embossing powder for cool shiny coffee beans! I took some tea dye distress ink and inked up the top and bottom of my strip for some added interest. Then I watered down ground espresso distress oxide ink and flicked it all over the panel.
Next, I took the sentiment from the Coffee Days stamp set and heat embossed it in copper on a white panel. Then I went over the top with ground espresso, gathered twigs and tea dye distress oxide inks. I wiped off the residue from the heat embossing and spritzed the panel with a distress sprayer. I flicked watered down ground espresso distress oxide on this panel too.
I trimmed a half inch strip of black cardstock and added it to the sentiment panel. Then I lined the back of that whole panel with foam tape. I adhered the coffee bean panel to a white card base with liquid glue and then popped my sentiment panel on as well.
This card was so much fun to make and I absolutely LOVE the sentiment. It’s so fun and cracks me up every time I read it.
I appreciate you sharing your time with me. Have a fabulous day!
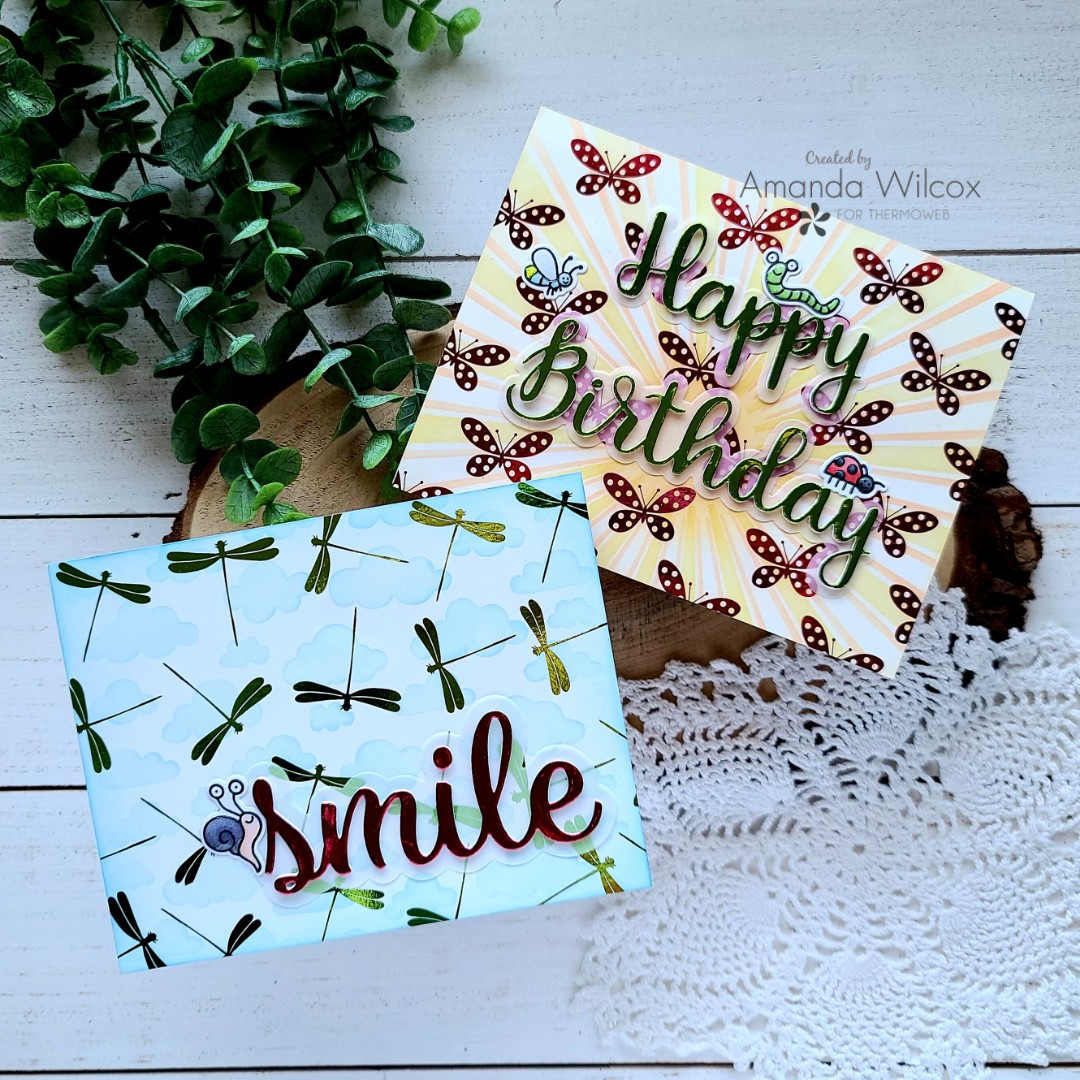
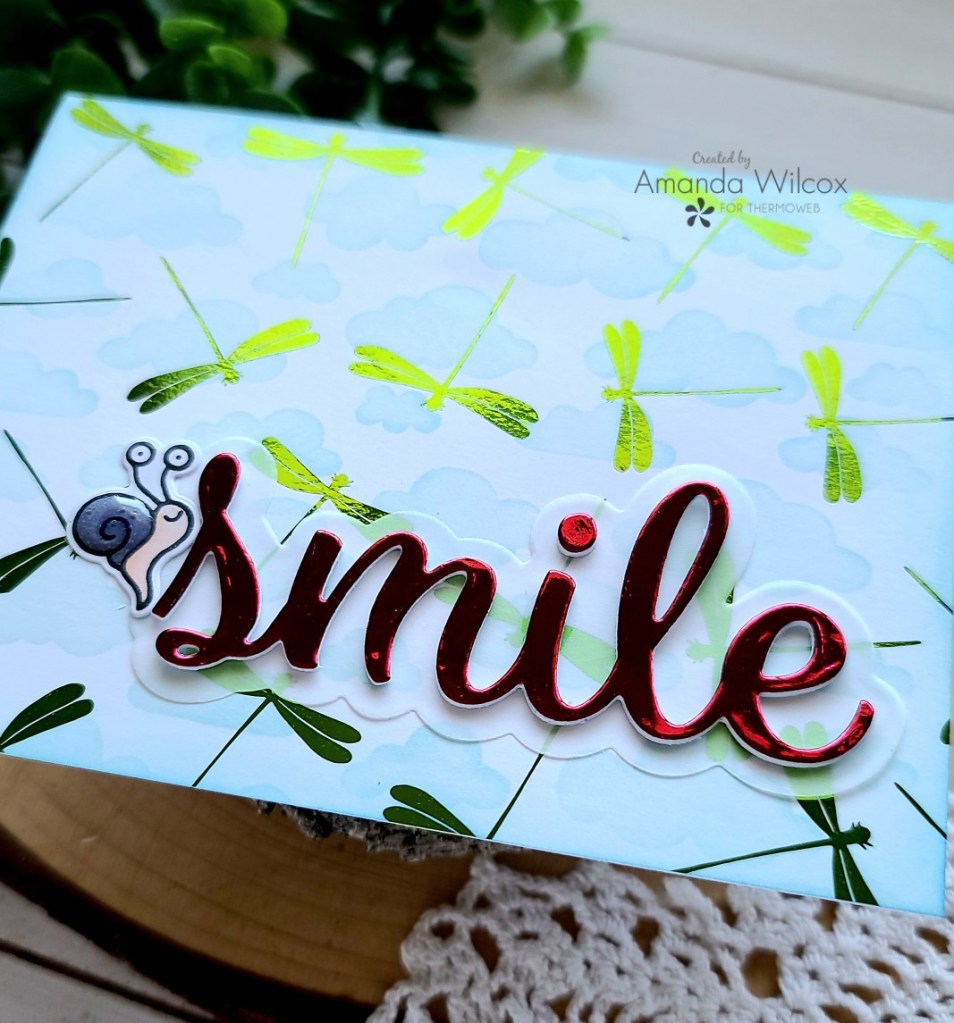
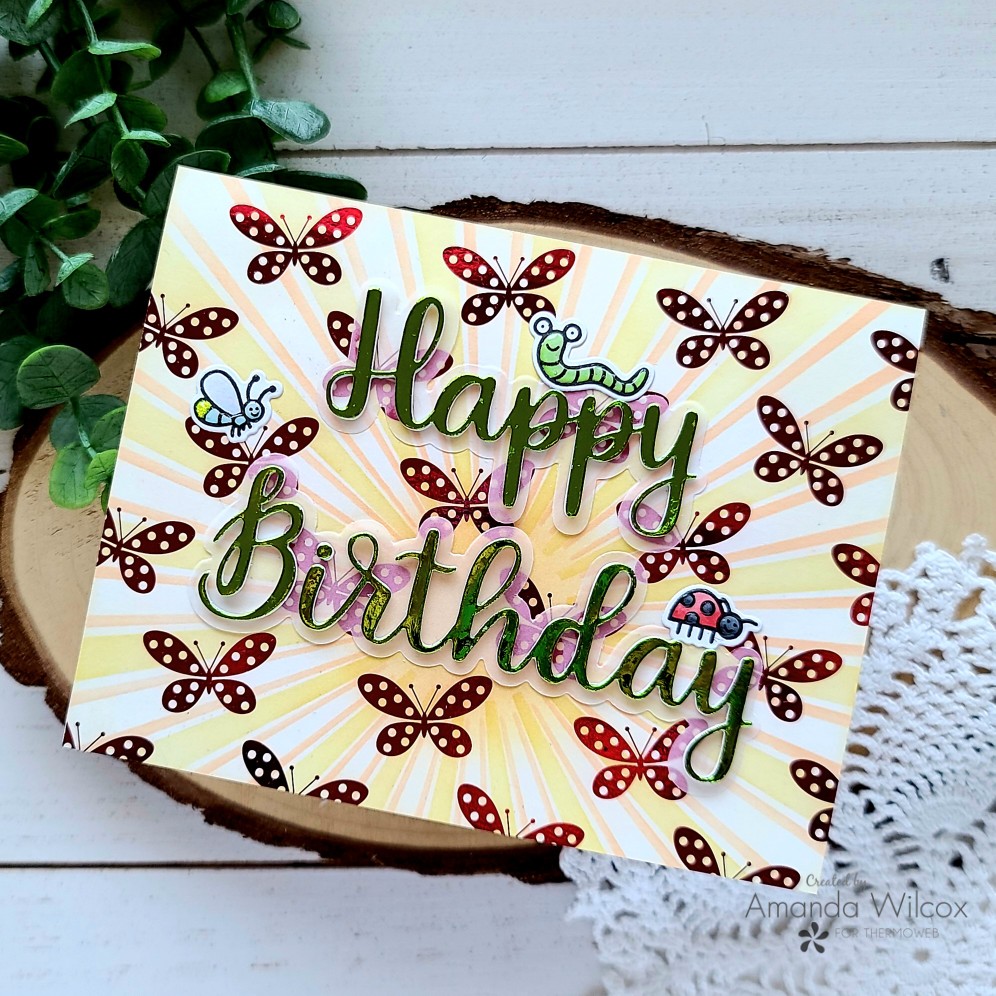
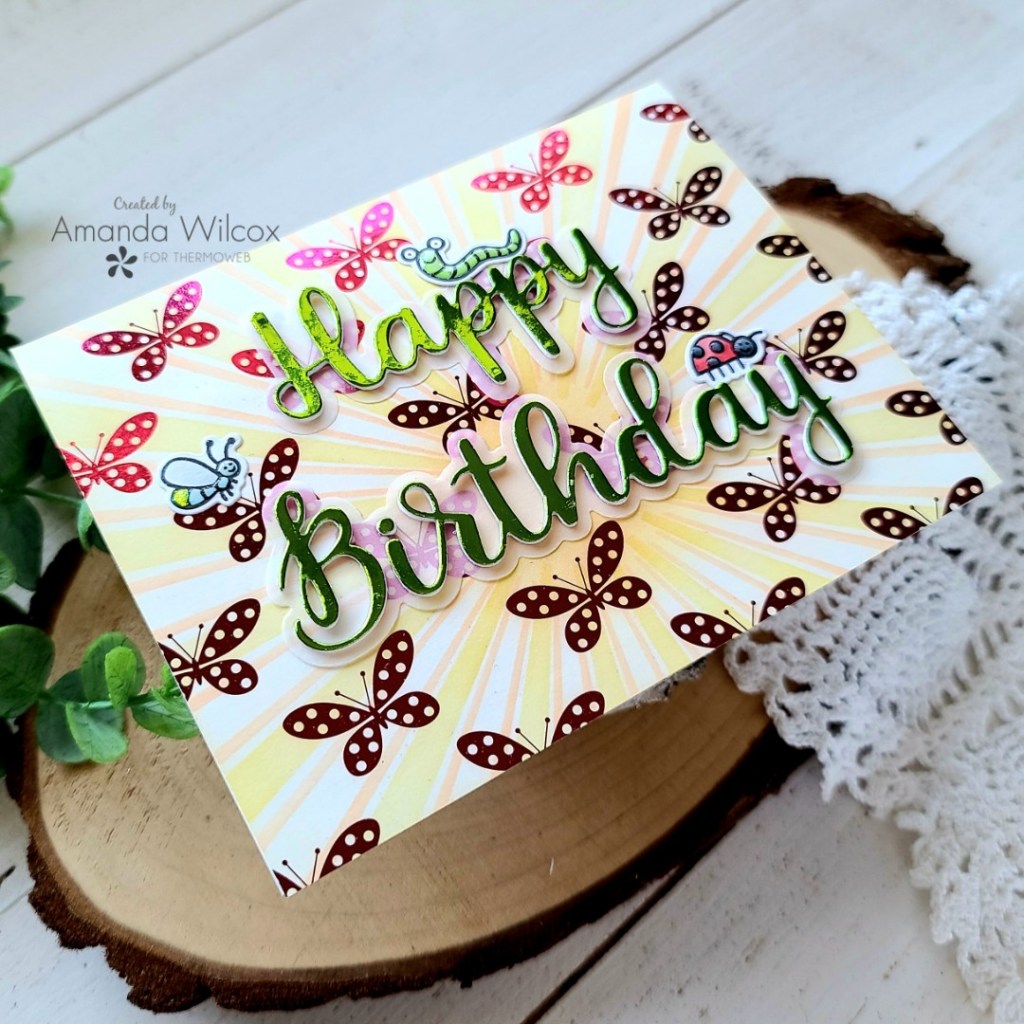
Hello again! Cheers to a new week and a fresh start! Today I’ve got a couple of fun cards to share with you featuring the newest limited edition release of toner sheets from Thermoweb called Time To Fly! They are super adorable butterflies and dragonflies! I couldn’t choose so I made a card with each of them for you!
I used a combination of grass green and passionate pink deco foils on both cards. I paired these awesome products with stamps, dies and stencils from Pink & Main, Trinity Stamps and Newton’s Nook.
Hey friends! I have some new followers since the last time I was up on the Newton’s Nook Designer’s Nook newsletter. I wanted to share what a fun thing it is and how to sign up.
This is a weekly subscribers only newsletter direct to your inbox coming straight from the design team with special projects for your eyes only! They don’t go public at all. It’s so fun! Here’s a peek at what I’m sharing tomorrow.
If you’re not already signed up, click HERE to get there. Be sure to click the Designer’s Nook button…along with all the others too. Hehehe! You know you don’t want to miss anything.
I appreciate you sharing your time with me. Have a fabulous day!