Hi friends! I’m excited to revive my love of creating caffeinated cards for today’s hop! And, as always, proud to be a super sponsor for the Coffee Lovers Blog Hops. Today you have a chance to win $20 to the Twiddler’s Nook shop.

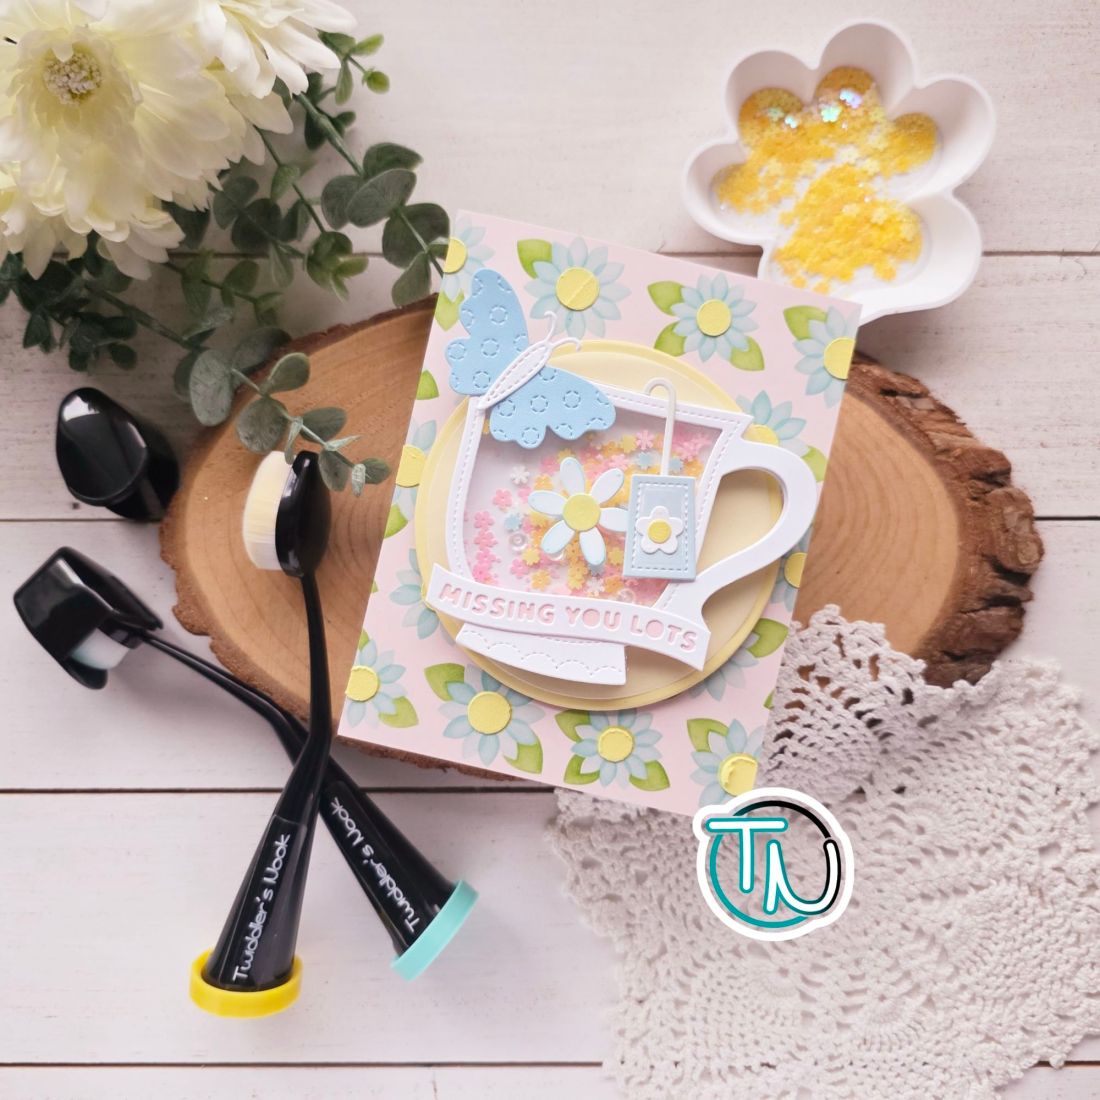
I took a moment earlier this week to create a fun shaker card using a number of our products to do so and I wanted to share it with you today!

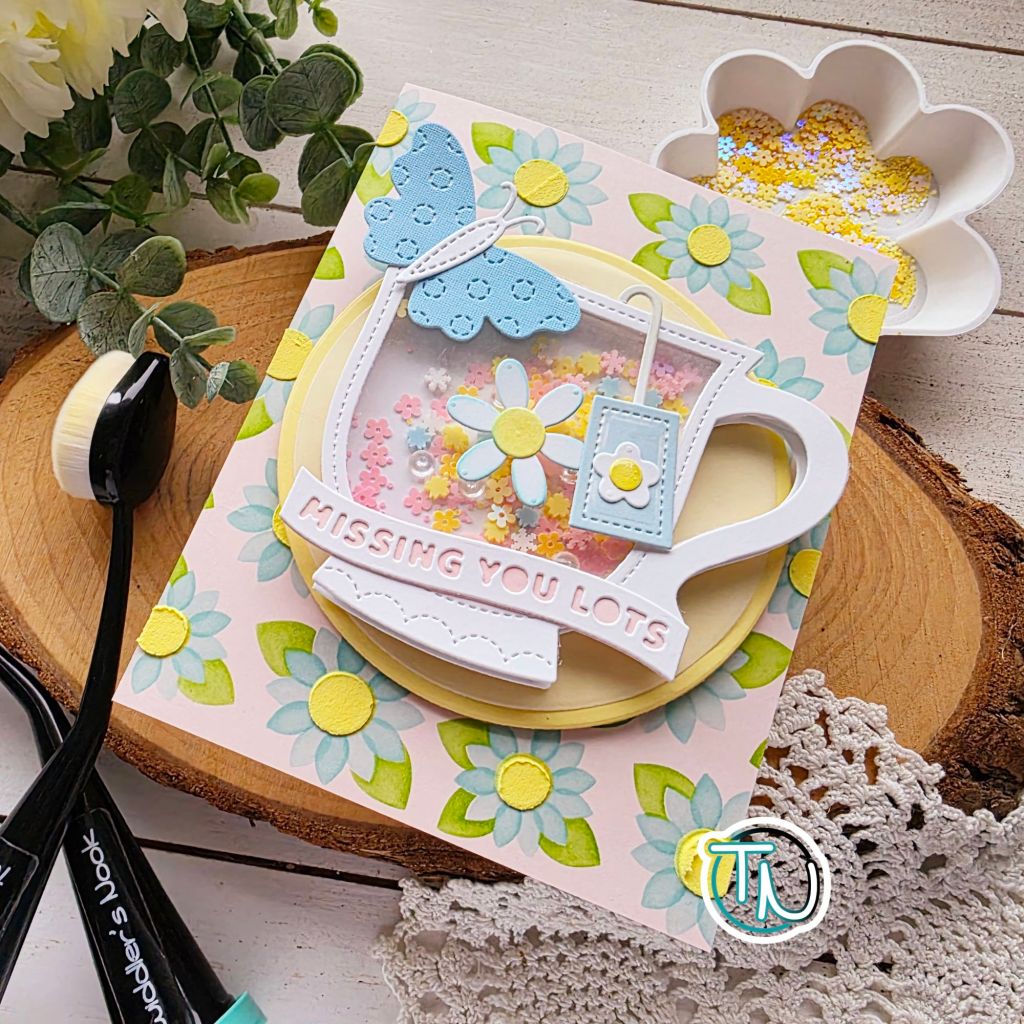
I used a number of fun Pretty Pink Posh products, paired with Twiddler’s Nook embellishments and tools to create my sweet teacup shaker card. Starting with the shaker teacup, I filled it with primrose confetti bits and the spring fling mix too.

Moving on to the background, I used our blending brushes with the Pretty Pink Posh Layered Sunflowers stencil set. After inking all the layers, I thought it would be more fun to add texture to the flower center layer so I mixed paint with texture paste to make the perfect yellow paste to spread through the stencil.
I had so much fun creating this sweet card and hope you enjoyed the bit of inspiration too!
Leave a comment on this post for a chance to win $20 to the Twiddler’s Nook shop. Winner will be chosen from the comments on this post only. Commenting closes Friday, May 30, at 11:59 p.m. Winner will be announced Friday, June 6, on the Coffee Lovers Blog.
If you’ve gotten lost along the way or need to get back to the main post to see where you’ve been, click HERE.
I appreciate you sharing your time with me. Have a fabulous day!