Blog

Trinity Stamps – I <3 You Shaker

Hey there! I’m over on the Trinity Stamps blog today with a super fun shaker card showcasing one of the super cute gnomes from the release on Friday!

This was a total winging it card. LOL! I started by coloring this cute gnome from Make a Wish and die cutting him out. Then I looked at him for a bit and decided it would be fun to use the punny sentiment in the set and suddenly the idea hit me for a shaker card!

I used the lots of dots stencil on a panel and then die cut the I ❤ YOU with the marshmallow alphabet dies and glued it to a piece of acetate. Pulling from colors used on my image I cut a blue panel the same color as the gnome’s accents, added foam tape, added my shaker bits and closed it all up. I used some clear microbeads from my stash and the twitterpated hearts from Trinity for my shaker. The heart in the marshmallow alphabet dies cuts a frame so I cut it from the same blue in the background and glued it to the acetate opening too.

I stamped and die cut my sentiment and then popped it, and my gnome, up with foam squares. Then I finished the card off with glossy accents on the gnome’s hat, shaker and some of the cake decorations. I also added Wink of Stella glitter brush pen to the stamped sentiment.

Such a fun card! I have so many gnome lovers in my life that I know would enjoy this. Also, I can’t stop playing with the shaker. They are so entertaining.

I appreciate you sharing your time with me. Have a fabulous day!

Trinity Stamps – Release Day

Happy Friday everyone!!! Today is release day for Trinity Stamps and I’m soooo excited for all of you to pick up new goodies and start creating. You’re going to love it all!

Today I’ve got a fun card featuring a couple of new products to share with you!

To create this card, I used the new waving hello stencil in 2 different teal and blue inks on a lighter teal cardstock. Then I colored and die cut my images from Shellabration, along with stamping and die cutting my sentiments. The cool thing about most of the sets is there are coordinating dies for your sentiment too! Don’t you love it? I do!

I adhered the octopus and his goodies to my stenciled piece and adhered it to a white card base. Then I took some wood grain patterned paper and die cut a port hole frame from Lawn Fawn. I cut the same frame from black cardstock and adhered those to an acetate panel.

It looks like you’re inside the ship looking out and seeing this awesome octopus ready for an amazing shell-abration! Haha! I seriously love puns. They are the best.

I adhered my sentiments and then for finishing touches I added Nuvo Crystal Drops in silver living to the port hole frame so it looks like bolts holding it in place.

Today marks the final Instagram Hop to celebrate the new release going live. So be sure to head HERE and join in on that fun too!

I appreciate you sharing your time with me. Have a fabulous day!

Trinity Stamps – Rainbows and Sunshine

Hi there! Today I’m over on the Trinity Stamps blog with this awesome rainbow card. It features some sneak peeks of product that will be available tomorrow for the new release! It’s super exciting and there is so much fun! We’re also having an Instagram hop today! (We had one yesterday and there’s another one tomorrow too!) At the end I’ll give you links to get you started for that. But first, let’s see this fun card I made.

What’s this??? A rainbow die big enough for a slimline card??? Squeeee!!! You guys know I love my rainbows! And those fun puffy clouds. This scene is just magical.

And these bears with their balloons? Too cute for words! I had so much fun coloring them all up! You know I couldn’t resist a little glossy accents too.

Once the card was put together I also added some Stickles to the cloud edges and those awesome boiled sugar jelly drop hearts. Oh, and you know I had to add some shimmer to the rainbow with my Wink of Stella glitter brush pen. Here’s a closer look.

This was so fun to create! I know you’re going to love all the new product too! So let’s get on to info about the Instagram hop!

Start at the Trinity Stamps Instagram page and hop along each day for a chance to win prizes! Then head over to the Trinity Stamp Facebook group and play games for chances to win lots of other prizes too!

And after all of that, head to the Trinity Stamps shop on Friday and treat yourself to some new fun goodies!!!

I appreciate you sharing your time with me. Have a fabulous day!

Trinity Stamps – Happy Birthday Release Sneak Peek

I have a couple of really fun cards to share with you sneak peeking a few more products that will be available from Trinity Stamps in just a few days. It’s Trinity Stamps’ birthday so there are some fun birthday themed products and I couldn’t resist making a couple of birthday cards. I chose a color scheme, started playing and ended up with more than one fun card for today.

Aren’t they just so fun?!? I used lots of products to give them each different texture and look. Let’s start with the one on the left.

I inked up those awesome balloons with a new stencil coming and then did some foiling and glitter glitz gel with another confetti stencil coming too! How about those awesome die cut words with the shadow behind them. I love it when word dies come with both! It’s so useful!

Then for this card…there’s that confetti stencil again and those die cut balloons are so cool! I die cut an extra from vellum to tone down the cardstock colors I was using. I love this soft look. Then I finished it off with a simple sentiment and topped it with Wink of Stella glitter brush pen so it’s a little sparkly.

Today is the start of the release celebration for Trinity Stamps. There are 3 separate Instagram hops going on today, tomorrow and Friday! Head over to the Trinity Instagram page and start there. You’ll see peeks of different product each day and there are prizes to win each day too! Then on Friday there will be fun and games going on over at the Facebook group page too.

Thanks for stopping by today. I appreciate you sharing your time. Now go hop along!!!

Birch Press Design – Thanks

Happy Tuesday everyone! I’m over on the Birch Press Design blog today with this bright and happy thank you card. This die set is kind of Christmassy but I wanted to try using it for a non-holiday card and I love how it turned out!

For a step-by-step photo tutorial how I put this card together, head over to the Birch Press Design blog.

I appreciate you sharing your time with me. Have a fabulous day!

Trinity Stamps – Sneak Peek

Hello everyone! This is the week of the newest Trinity Stamps Birthday Release! Trinity Stamps just turned 2 years old and we’re celebrating with a fun release, games and lots of giveaways. Be sure you’re following on Facebook and Instagram and are also part of the Trinity Stamps – Imagination, Inspiration and Conversation group on Facebook too! The Facebook group is where all the fun will take place!

Today I have a little sneak peek for you of a couple products to look forward to on Friday when everything gets released!

I love making shaped cards so I took this new die and paired it with a new stamp that’s coming to create a fun balloon card fit for anything you want to celebrate! It’s so great!

I die cut the balloon and stamped my image. I colored it with copics and then used my blending buddy brush to add some light blue ink to the outer part of the balloon. I added some stars and part of my sentiment is die cut for a little texture too.

To finish things off I added glossy accents to all the little stars and Wink of Stella glitter brush pen to the stamped words. I tied a little baker’s twine to the bottom and glued it to a shaped cardbase I had created with the same die.

This is seriously the tippy tip top of the iceberg for this release. It’s amazing and incredible! I hope you’ll join us for the celebration! OH! We’re also have 3 separate Instagram hops – Wednesday, Thursday and Friday for chances to win and reveals of product each day! Don’t forget to join in!!!

I appreciate you sharing your time with me. Have a fabulous day!

Trinity Stamps – You’re Totally Amazing

I want to start off with a big Happy Father’s Day to all the amazing dads out there. I’m so lucky to have an incredible dad and my daughter is super lucky to have one too! These men have supported me through thick and thin and I appreciate them more than words!

That brings me to my card share today. This is the card I made my husband for Father’s Day.

To make this card I started with stamping and coloring my image from Trinity Stamps’ Totally Amazing. I used the coordinating dies to cut it out and found some coordinating cardstock to the markers I used.

I trimmed the cardstock down into thin strips and adhered them to a base. After I filled it up, I trimmed the edges down to 4×5.25. This panel is popped up on a white card base with foam tape.

Then I die cut a stitched circle from iridescent vellum and glued my image to it. Next, I glued it to the card front. I did it in this order so I could hide the glue behind the stamped image.

I still thought it needed a little something so I pulled out Trinity Stamps’ So Appreciative and used the banner die with a small sentiment. I colored it with copics, glued it together and then to the card front.

Since this is a masculine card I held off on the glitter but I want you all to know it was painful and against my better judgement. Lol.

I appreciate you sharing your time with me. Have a fabulous day!

Newton’s Nook June Release Day

Hello everyone! I hope you enjoyed Newton’s Nook reveal week and have hopped over to buy some new goodies for your stash since everything is on sale today!

I was having so much fun creating, my husband came to check on me one night and had a hilarious idea. I couldn’t resist creating it and wanted to share it with you today.

We both loved the G.O.A.T. sentiment and he thought the goat really needed to go in the tractor’s trailer. I told him the proportions were off and when I showed him to prove my point we both cracked up so much that I just had to do it.

To create my card, I stamped, colored and die cut my images from Bleat and Farming Fun and set them aside. I pulled out the Framework dies and Sunscape stencil again and inked it up. This time after I inked the dirt and yellow part of the sun, I rotated the stencil and used it like a mask to add a little blue sky too.

There are a few layers to this card. I started with a white cardbase and glued a brown panel directly to it measuring 4 1/8×5 3/8. Then the green panel is popped up with foam tape and measures 4×5.25 which is the same size as the framework stenciled panel. That is also popped up with foam tape. Finally the images were glued together with liquid glue and popped up with foam squares.

Finally I die cut a flag from Frames and Flags and heat embossed the first half of my sentiment on it in white. This is popped up with foam squares. The second half of the sentiment is stamped inside the card.

Last I moved on to finishing touches which were pretty simple. I added black glaze pen to the eyes and white gel pen accents throughout. Then I finished it off with glossy accents on all the shiny parts of the tractor and trailer, along with the goat’s bell and horns.

Cheers to being silly with your spouse and ending up with a fabulous card as the outcome. I hope you enjoyed the week and are able to pick up some new goodies to play with.

I appreciate you sharing your time with me. Have a fabulous day!

Newton’s Nook June Release – Day 4

I hope you’ve enjoyed all the previews so far. Today we have two last ones to share with you before everything goes on sale for you to purchase first thing tomorrow! A Newton’s Nook release wouldn’t be complete without a new Newton image, so we’ve got that covered, and then we have another great floral image to add to that collection too.
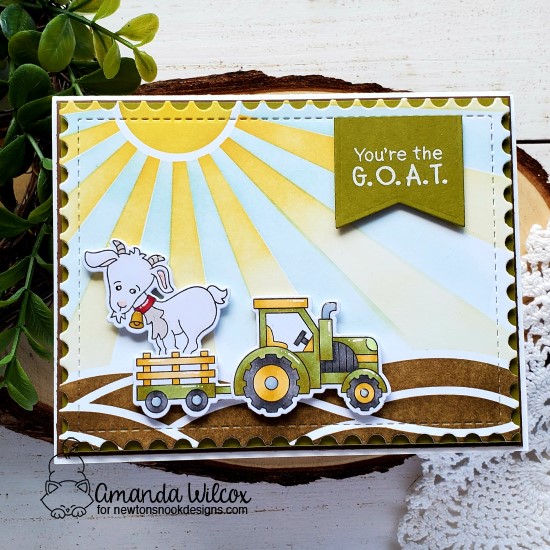
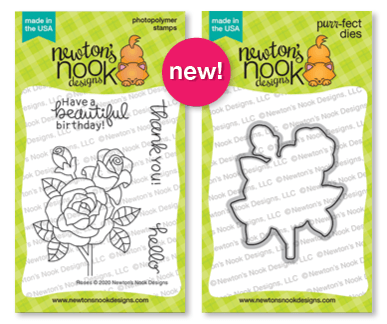
Porch Swing Friends

Roses

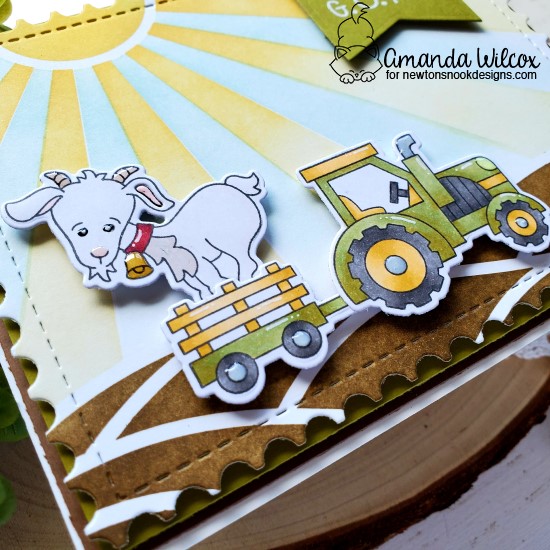
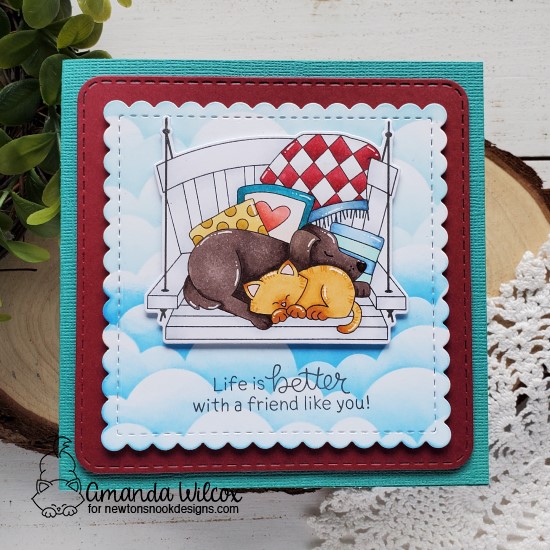
First up I wanted to share the card I made with Porch Swing Friends. I just think it’s so sweet and it makes me wish I had a big porch with a swing like this to relax on.

Given the shape of the image I knew right away I wanted to make a square card so I pulled out my Frames Squared dies and cut some layers out. The scalloped panel is inked with the Clouds stencil and each of the layers are popped up with foam tape. I stamped, colored and die cut my image and then used my MISTI to stamp my sentiment. For finishing touches I added white gel pen accents and glossy accents to their noses. This scene is so sweet and relaxing, I just love it! And that sentiment…remember it from earlier in the week? I used it on one of my Bleat cards on Tuesday. It’s so great and versatile to use all the time.

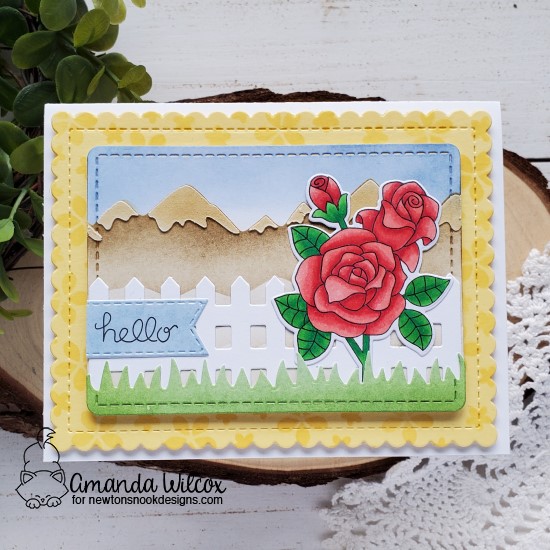
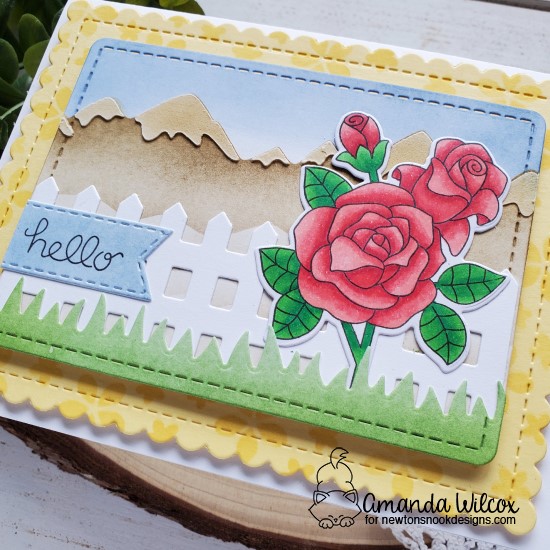
Next up I am excited to share this beautiful card featuring the new Roses stamps and dies.

I started by actually coloring three roses and die cutting them all. I had an idea of filling the fence line with them but it cluttered up too much and I wanted you to see the cool mountains in the background. So now I have two extra roses to make other fun cards with. Bonus!

I used the Frames and Flags dies along with the Fence die, Land Borders dies and Mountains stencil to create my scene. After I inked up my stenciled panel I used texture paste on the mountains and set it aside to dry. I thought the yellow panel was a little plain so I added some Petite Flowers stenciled in yellow ink for a subtle texture. You know my by now, the layers are adhered with foam tape for that great dimension and the scene is all attached with liquid glue. I really find that this helps with the inked panels. It just sticks better.

I wanted to keep the sentiment simple so I just used the Hello stamp on a die cut banner from the Banner Trio dies and inked it with the same blue in the sky for consistency.

I live in the Pacific Northwest and I really feel like this card is home. The mountains and roses with lush green grass everywhere. It’s super comforting and just makes me happy.

Would you like to win the “Roses” or the “Porch Swing Friends”  Stamp Set?We will choose ONE lucky winner for each stamp set!

Here’s how to win: Comment on the NND blog and Design Team blogs (see list below)! The winner will be chosen at random from the collective reveal posts. Make sure to check out each of their blogs and comment for your chance to win. You will not know which blog has been chosen so the more you comment on the better your chances are of winning! You have until Thursday, June 18th, at 9 p.m. EST to comment  — winners will be announced on the blog post on Friday, June 19th. 

Check out all the awesome Design Team Blogs below to enter:

Newton’s Nook Designs
Ellen Haxelmans
Larissa Heskett
Samantha Mann
Zsofia Molnar
Naki Rager
Maria Russell
Andrea Shell
Tina Smith
Tatiana Trafimovich
Amanda Wilcox

Newton’s Nook June Release – Day 3

And the fun just keeps coming!!! Aren’t you just loving everything so far? We really are! Keeping with this fun farm-ish theme, today we get to share this fabulous set called Neigh with you. Bet you can’t guess what’s in it? haha! Bad jokes aside, these horses are adorable! Check them out.

Neigh

Another great set to create with. For today’s card I paired them with both the new Slimline Frames and Portholes (for the scalloped panel) with the Slimline Frames and Windows.

Honestly, I wasn’t totally sure about design for this card so I simply started by stamping and coloring my images with copics. Then I used the coordinating dies to cut them out and started playing around. In the end I used the Plaid stencil on the white window cutouts with dark blue and green inks. I cut the scalloped panel from Slimline Frames and Portholes out of dark green and then cut the frame from Slimline Windows and Frames 2 more times from white and once from dark blue. I adhered all of the frames together for a stacked dimension and glued it to the green scalloped panel. Then I inserted the stenciled windows and popped the whole panel up with foam tape on a white cardbase measuring 3.5×8.5.

I die cut the flag banner from the same green cardstock and heat embossed my sentiment in white. This is popped up with foam squares. The horseshoes underneath are glued directly down. Then each of the horses is popped up with foam squares in the windows below.

For finishing touches I added black glaze pen to the eyes and white gel pen accents throughout. The horseshoes all have glossy accents for a little shine and this card is all finished.

Would you like to win the “Neigh”  Stamp Set?This stamp set will be given away to ONE lucky winner!

Here’s how to win: Comment on the NND blog and Design Team blogs (see list below)! The winner will be chosen at random from the collective reveal posts. Make sure to check out each of their blogs and comment for your chance to win. You will not know which blog has been chosen so the more you comment on the better your chances are of winning! You have until Thursday, June 18th at 9 p.m. EST to comment  — winners will be announced on the blog post on Friday, June 19th. 

Check out all the awesome Design Team Blogs below to enter:

Newton’s Nook Designs
Ellen Haxelmans
Larissa Heskett
Samantha Mann
Zsofia Molnar
Naki Rager
Maria Russell
Andrea Shell
Tina Smith
Tatiana Trafimovich
Amanda Wilcox