Blog

Spellbinders – Oh Happy Day

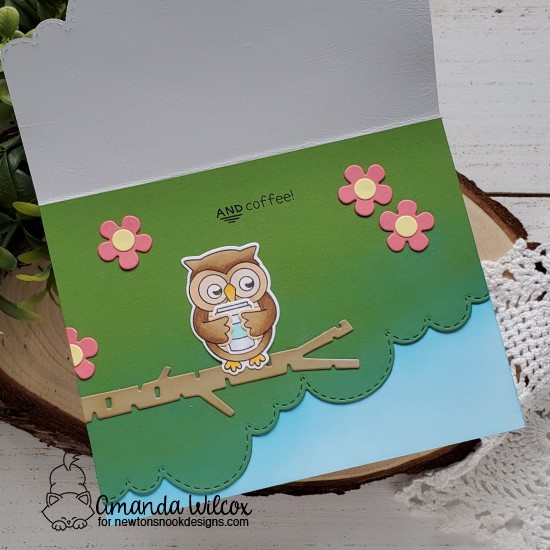
Hello everyone! I recently joined the world of alcohol inks by purchasing a few bottles of the alcohol pearls and couldn’t wait to play! I created a coffee card last week with my first background but who can stop with just one when you’re playing with those inks??? No one, that’s who! So, of course I kept going and then had a fun idea what to do with them…hence today’s card!

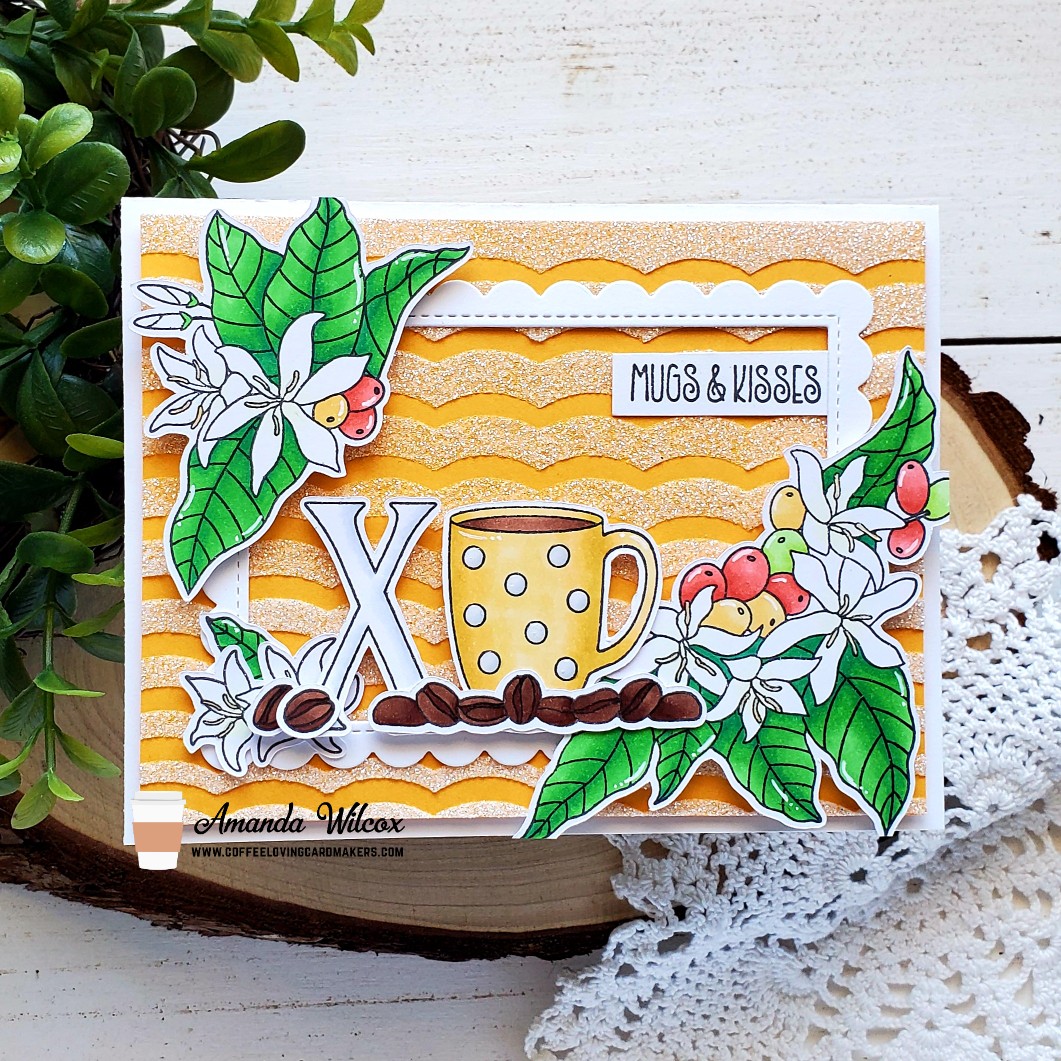
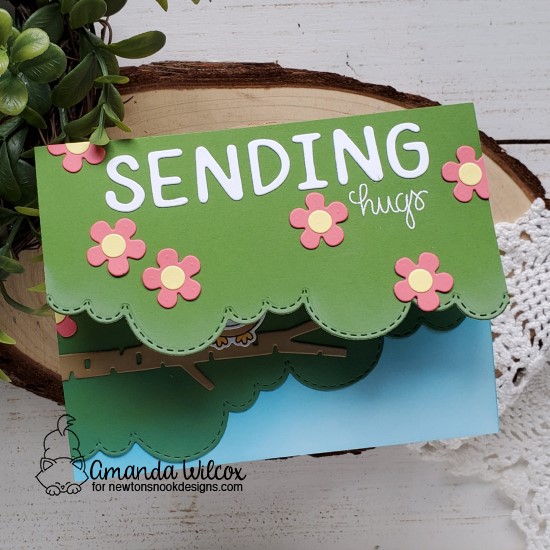
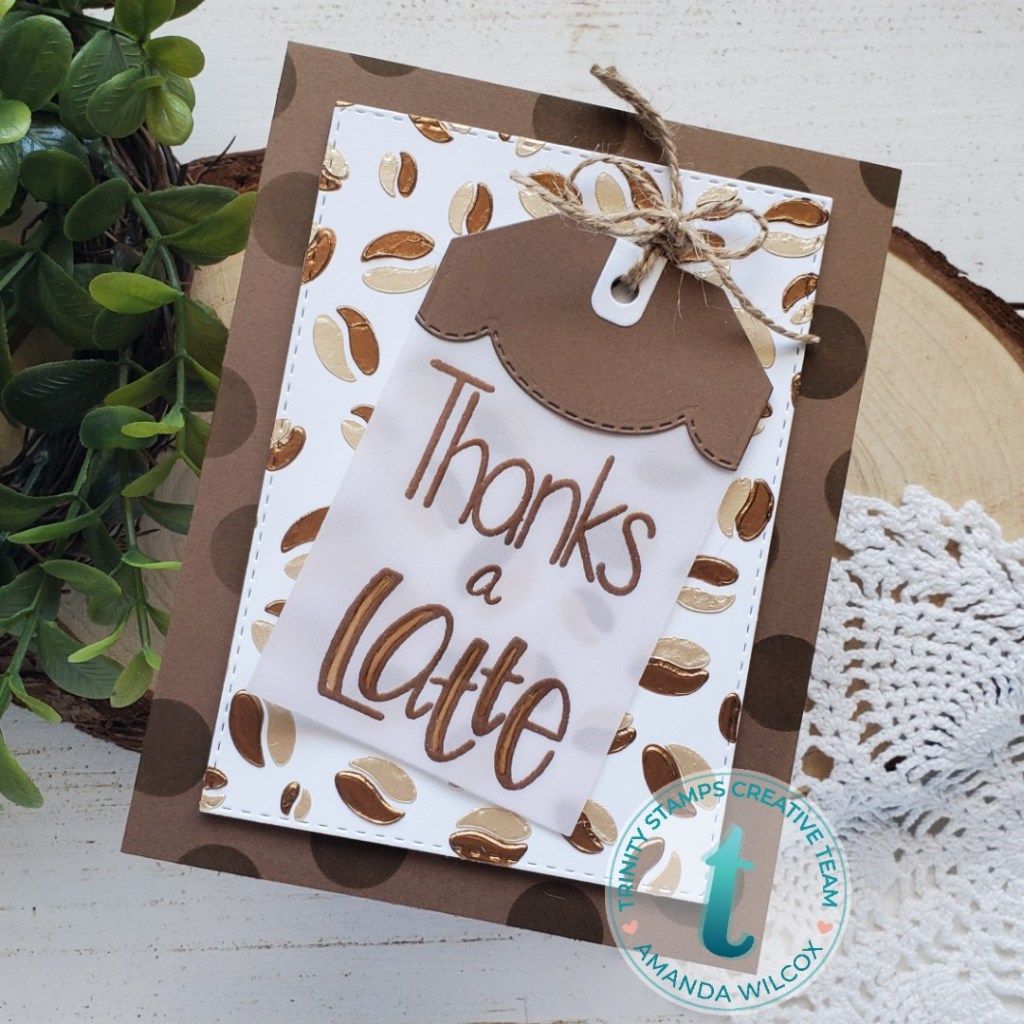
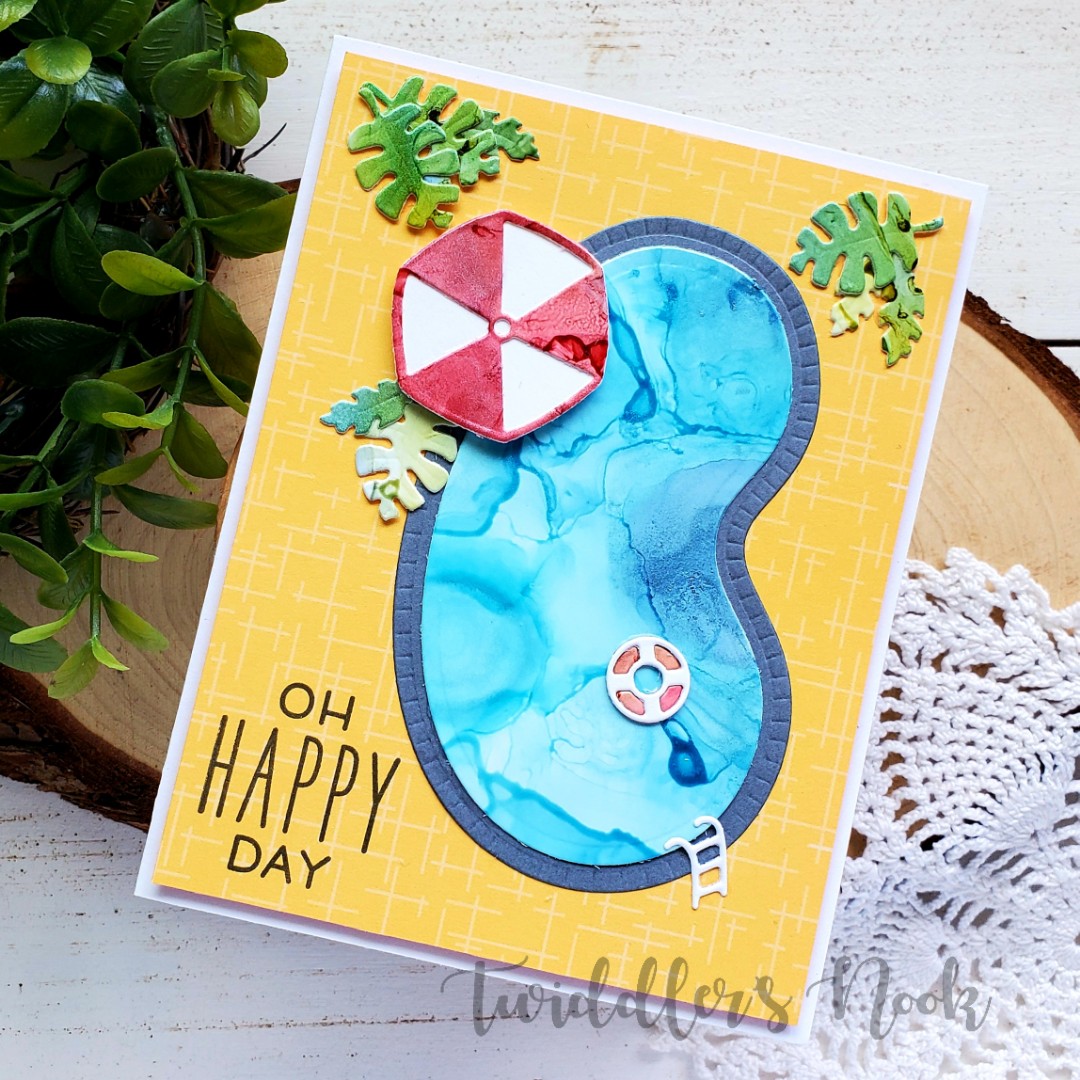
I created a few backgrounds with the various colors that I have and then used my new Spellbinders Pool with a View die set to die cut the various pieces. I found this fun yellow Avery Elle patterned paper in my stash and used it for a background for my scene.

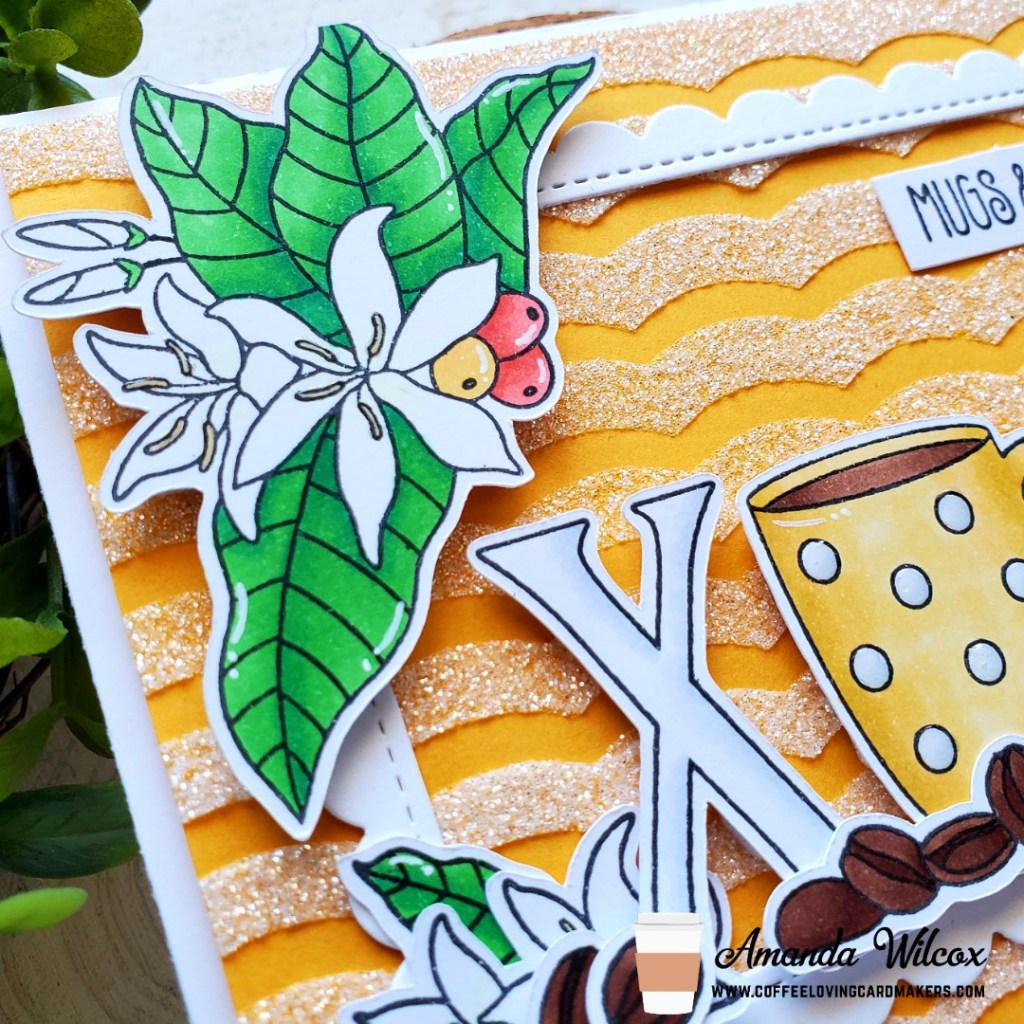
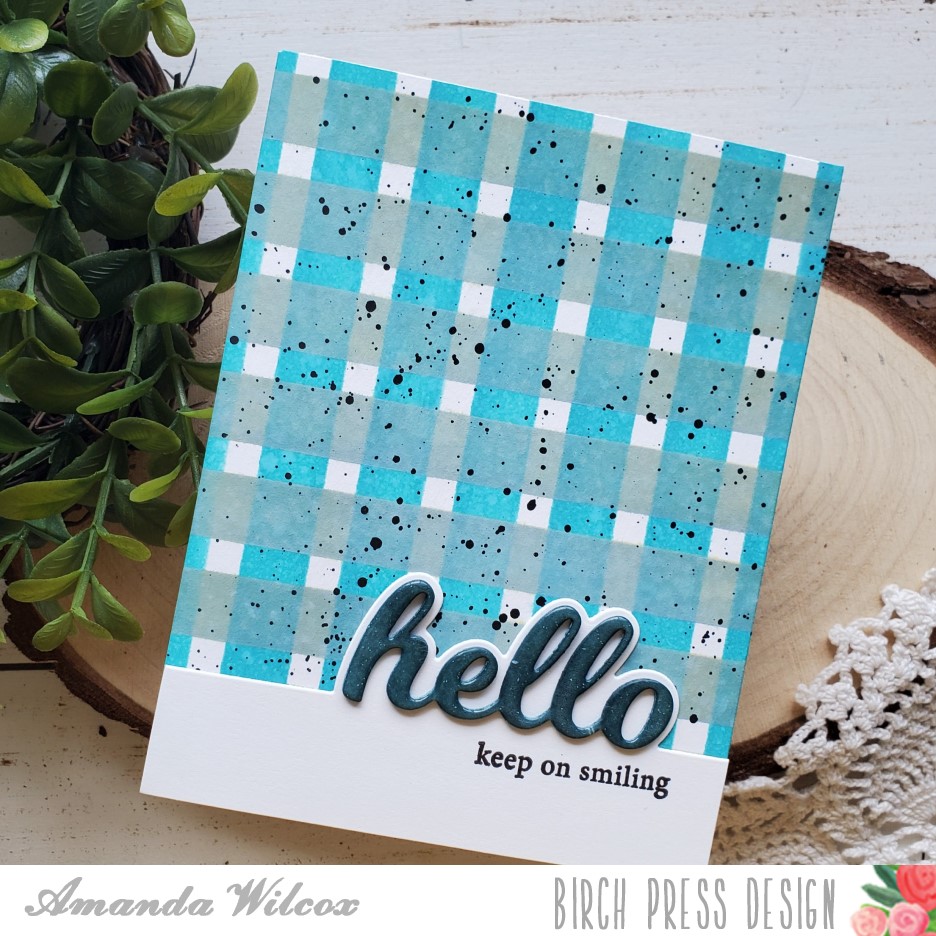
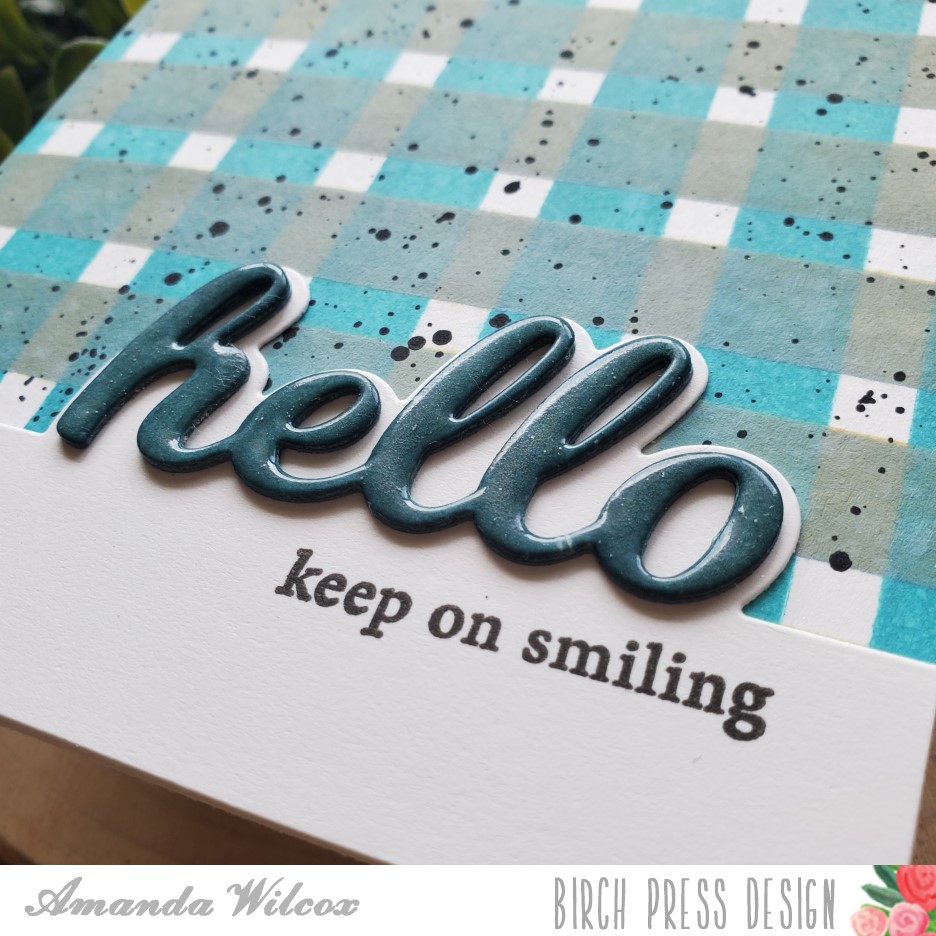
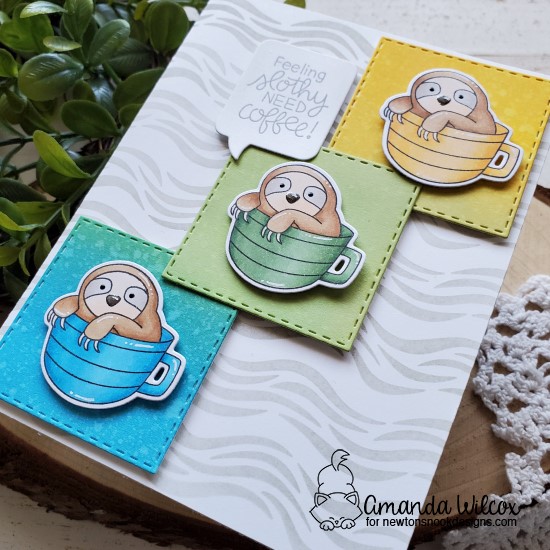
The shimmer that the alcohol pearls give is so pretty in the light. I love it! And the different texture they give is so fun too!

I adhered all the pieces together with liquid glue and popped the umbrella up with foam squares for a little dimension. The yellow panel was then popped up with foam tape and put on a white card base.

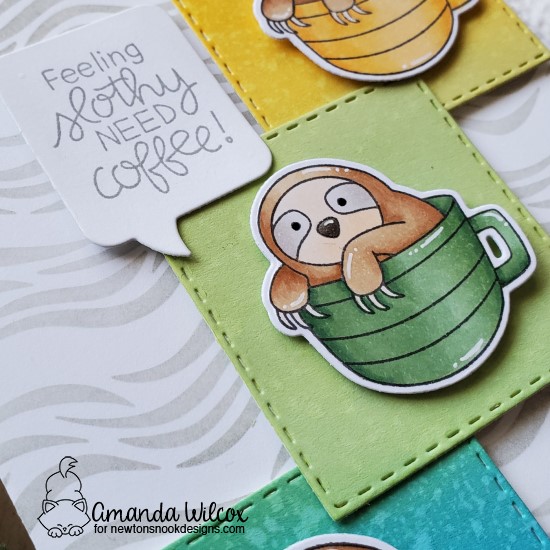
I pulled out my Hello Sunshine Lawn Fawn set and stamped a sentiment from that on the front as well.

Isn’t this card so happy?!? It has been dreary and rainy at home so this was my bit of sunshine during the storm.

I appreciate you sharing your time with me. Have a fabulous day!

Coffee Loving Cardmakers – Mugs and Kisses

Happy Tuesday everyone! It’s Tuesday Tea with Twiddler’s Nook over on the Coffee Loving Cardmakers blog today and I have a gorgeous, sparkly fun card to share with you! I recently got the amazing Brewtiful stamp set from Miss Ink Stamps and couldn’t wait to ink it up! This set has so many fun images that can be paired in so many combos and will be great to combine with other sets as well.

I create this card, I started by laying my stamps out on an A2 card base to decide if the idea in my head would work. After I figured it out, I stamped and colored my images, then cut it all out with my scan-n-cut. Next, I found a yellow cardstock that matched my mug and used the scallop stencil with some white glitz gel. I left this overnight to dry and came back to assemble everything the next day.

Whenever I stencil a large panel, I always use a piece bigger than what I need so I can trim it down. So, that’s what I did with the yellow panel first – trimmed it down to 4×5.25 and popped it up with foam tape on a white card base. Then I die cut a scalloped frame from Lawn Fawn and adhered it with liquid glue. Because of the glitz gel, I put a few acrylic blocks on top and left it for a little bit to dry before moving on.

I attached most of my images with foam squares, with the exception of the small flowers behind the X and the sentiment strip on the upper right. Those were adhered with liquid glue like the frame.

Finally, I moved on to finishing touches. I started with some white gel pen accents to the images and moved on to glossy accents on the mug dots and stamen of the flowers.

I am in love with this card and can’t wait to share it with someone. It’s so bright and cheery and is certain to make someone smile!

I appreciate you sharing your time with me. Have a fabulous day!

Clearly Besotted – Picture Perfect

Hello everyone! I’m so excited to share today’s card with you! It’s bright and happy, which I thought was perfect for the beginning of June. A new month, closer to summer and all things sunshine and happy!

Last week I shared a couple of cards featuring Clearly Besotted stamps and stencil, a new-to-me company. Today I’m back with another stamp set I snagged at the same time as those. It was too cute to resist.

To create this card, I started by stamping images from Picture Perfect, colored them with my copics and used my scan-n-cut to cut them out. Then I pulled out that awesome Stamp On It stencil and inked a white 3.5×3.5 square using it. I started with a melon colored ink in the center and then a yellow on the edges, blending them together in the middle. I love how this turned out!!!!

Using my images as a guide on the inked panel, I stamped a few sentiments from the set in one of the stenciled squares.

Next, I moved on to assembly and decided that the melon cardstock I chose for my background was too plain. I pulled out the smaller, secondary images from the stamp set and created my own tone-on-tone patterned paper for a little extra interest.

After that was fixed, I adhered the melon cardstock to a white cardbase and popped up the inked square with foam tape. Then I popped up my images with foam squares and moved on to finishing touches.

For those, I added glossy accents to the camera and Stickles to the smaller images for a little sparkle.

This set has so much potential and I’ve got so many ideas for it! I can’t wait to keep creating! I think a bunch of photos taped to a wall or hung on a line will be so much fun!

I appreciate you sharing your time with me. Have a fabulous day!

Birch Press Design – Masculine Encouragement Card

Hello everyone! Thanks for stopping by this fine Saturday. I’m up on the Birch Press Design blog today with that masculine feeling encouragement card. It was definitely trial and error but I love how fiddling with the background came out and the whole feel of this card.

Be sure to head over to the Birch Press Design blog for a step-by-step tutorial and process of how I created this awesome card.

Trial and error, perseverance and determination got me to this end result. This card was a great reminder to keep trying if you don’t like how something looks at first and also to walk away and come back later. Your whole mindset and view on things changes.

I appreciate you sharing your time with me. Have a fabulous day!

Newton’s Nook Take 2- Spring-Summer CLC Hop

Hello again. I made another Newton’s Nook card for the Coffee Loving Cardmakers Spring-Summer Hop and just had to share it with you. It’s too cute and fun not to!

Here’s a quick view of the front. I used the sky borders die to create a tree. Then I added some flowers from the flower trio set and used the alphabet dies to add emphasis to my sentiment. So much fun!

Inside I have another layer of tree and a limb created with the forest scene builder dies. And that cute owl from Sending Hugs holding his cup of coffee. Such a silly but fun card.

I hope you enjoyed it. I’m linking it up to the Coffee Loving Cardmakers Hop HERE.

I appreciate you sharing your time with me. Have a fabulous day!

Newton’s Nook – CLC Spring-Summer Hop

Today is the last day to link up your amazing caffeinated projects for the Coffee Loving Cardmakers Spring-Summer Hop. I hope you’ve had fun, been able to create somethings and found inspiration with all of the fun entries.

Today I’m sharing a fun card using on of the little 2×3 sets from Newton’s Nook – Slothy Coffee. I absolutely adore sloths and this set was just too perfect not to pull out this week.

So, full disclosure here…the inked panels you see behind the sloths were from a card I made a few weeks ago. They were the windows I die cut out of a panel but the hoarder in me wouldn’t let me toss them. Then this idea popped in my head and it was so perfect!

I stamped my sloth 3 times and colored them all the same. Then I colored the mugs coordinating with the inked squares I had in front of me. I used the coordinating die to cut them all out and set them aside. Then, I used my waves stencil with gray ink on a white cardbase for just a little subtle texture. Finally I added my squares and images with foam squares for some dimension.

Last, I pulled out my speech bubbles, die cut one and stamped my sentiment on it with the same gray ink from the background. Moving on to finishing touches, I added glossy accents to the sloth noses, black glaze pen to the eyes and white gel pen highlights throughout.

I’m linking this last card up to the Coffee Loving Cardmakers Hop HERE. I hope you’ve had a chance to play along with us and enjoyed all the inspiration shared.

I appreciate you sharing your time with me. Have a fabulous day!

Trinity Stamps – Thanks a Latte

Hello again. Today I’m up on the Trinity Stamps blog with this fun coffee themed thank you card to keep with the Coffee Loving Cardmakers Spring-Summer Hop theme.

To make this card, I started by pulling out the awesome layered coffee bean stencil and using two different colored metallix gels – aged copper and champagne mist. I left it overnight to dry and came back the next day to nail down my final card design. I die cut the panel with the largest rectangle in the 4-bar card die set.

I pulled out the A Latte Love sentiments and heat embossed them on a vellum tag I had die cut. I added some twine and tied it with a bow. I used the largest lots of dots stencil on a brown card base and then popped up my coffee bean stenciled panel with foam tape. Last, I strategically added glue to the tag so it wouldn’t show through the vellum and added it as well.

Lots of texture, dimension and shine. I love how this turned out! I’ll be linking it up to the Coffee Loving Cardmakers Spring-Summer Hop HERE. There’s still time to play along if you haven’t yet.

I appreciate you sharing your time with me. Have a fabulous day!

Neat & Tangled – CLC Spring-Summer Hop

Okay, how many dog lovers do I have out there? I definitely have quite a few in my life; so when I found this cute Neat & Tangled puppy’s favorite things set I had to grab it. I’ve already made a fun birthday card with but I couldn’t resist a little coffee hello card given that the set has this adorable mug in it!

I started this card by stamping, coloring and die cutting my images. Then I took a piece of teal cardstock and used my Newton’s Nook gingham stencil on it with some darker teal ink. I love the tone-on-tone look! I picked up this fun hello there stamp set at the same time I found the puppy set and loved the bold sentiment. I decided to heat emboss that part in black for a little shiny texture and then popped my images up with foam squares. This panel was then popped up with foam tape on a kraft cardbase.

For finishing touches, I added black glaze pen to the eyes and nose, white gel pen highlights and glossy accents on the mug.

Isn’t he the cutest?!? I just love him and all the things you can put in his paws.

I’m linking this card up to the Coffee Loving Cardmakers Spring-Summer Hop HERE. Remember, there’s still time to play along.

I appreciate you sharing your time with me. Have a fabulous day!

Clearly Besotted Take 2 – CLC Spring Summer Hop

Okay, I couldn’t resist. I’m back with another Clearly Besotted card featuring literally the exact same products. I just couldn’t stop. They are sooooo cute!!! I mean, can you really blame me?

For this card, I used a different portion of the stencil and inked it up with a blend of blue and green inks. I stamped and colored my images, using my scan-n-cut again to cut them out. I stamped my sentiment under the inked rectangles on the right side and assembled everything. The images are popped up with foam squares and the panel is popped up on a card base with foam tape.

I did add some white gel pen accents to these cuties but overall I kept this card fairly simple. I love how it turned out and can’t wait to color more of these guys up right away!!!

I’m linking this beauty up to the Coffee Loving Cardmakers Hop HERE too!

I appreciate you stopping by again today. Have a fabulous day!

Clearly Besotted – CLC Spring-Summer Hop

Thanks so much for stopping by today. I’m sharing a really fun card from a new-to-me company, Clearly Besotted. Their artwork is beyond adorable and I’ve been admiring it for a bit. Then with their last release came this adorable set called Spilling Tea and I didn’t even hesitate to order it the second it was available! I love it!

Along with my stamps, I snagged this fun stencil called Stamp On It. It’s got the same postage stamp looking squares and rectangles in 3 different ways on the same stencil. I thought it was absolutely genius!

To make this fun card I started by stamping and coloring my images. Then I used my scan-n-cut to cut them out. I inked a column of squares from my new stencil on the right side of a 3.75×5.25 inch panel. Then, using my images as a guide I stamped my sentiment and then adhered the images with foam squares. I wrapped some twine around the left side and added foam tape to the back of this panel. I used my new diagonal stripe stencil from Trinity Stamps on the right edge of a white card base and then adhered my panel to it.

I really just want to squish these little critters. They’re beyond adorable and extra fun with their cups of tea!

I’m linking this fun card up to the Coffee Loving Cardmakers Hop HERE. Don’t forget to play along too! There are so many fun prizes to be won from over 70 amazing companies!

I appreciate you sharing your time with me. Have a fabulous day!