Blog

Newton’s Nook Designs – February Release Day 3

Hello everyone and thanks for joining me for day 3 of the Newton’s Nook February release hop! I hope you’ve been enjoying everything so far because we have more amazingness to share today!

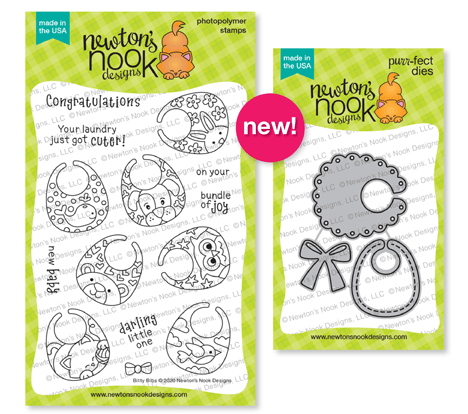
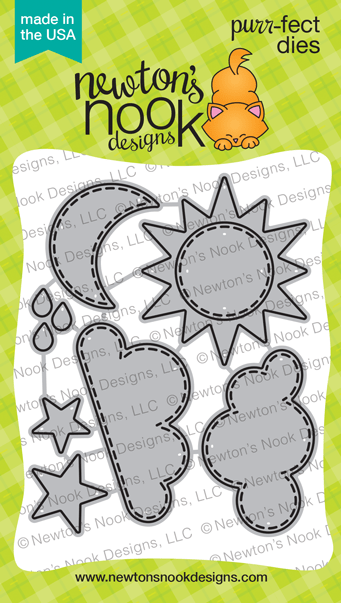
Newton’s Rain Boots Stamps and Dies

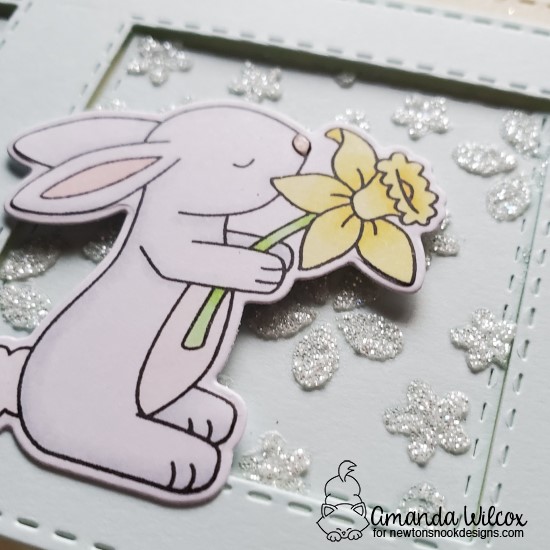
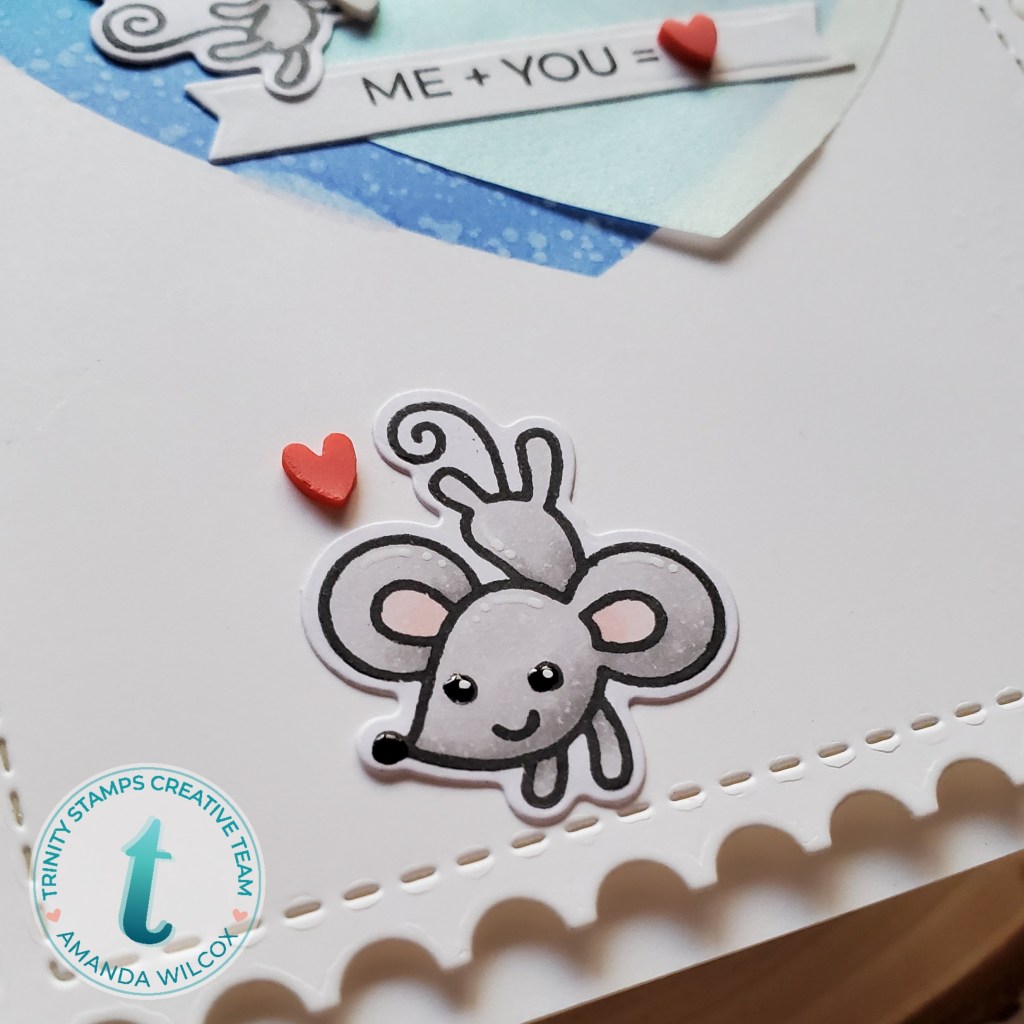
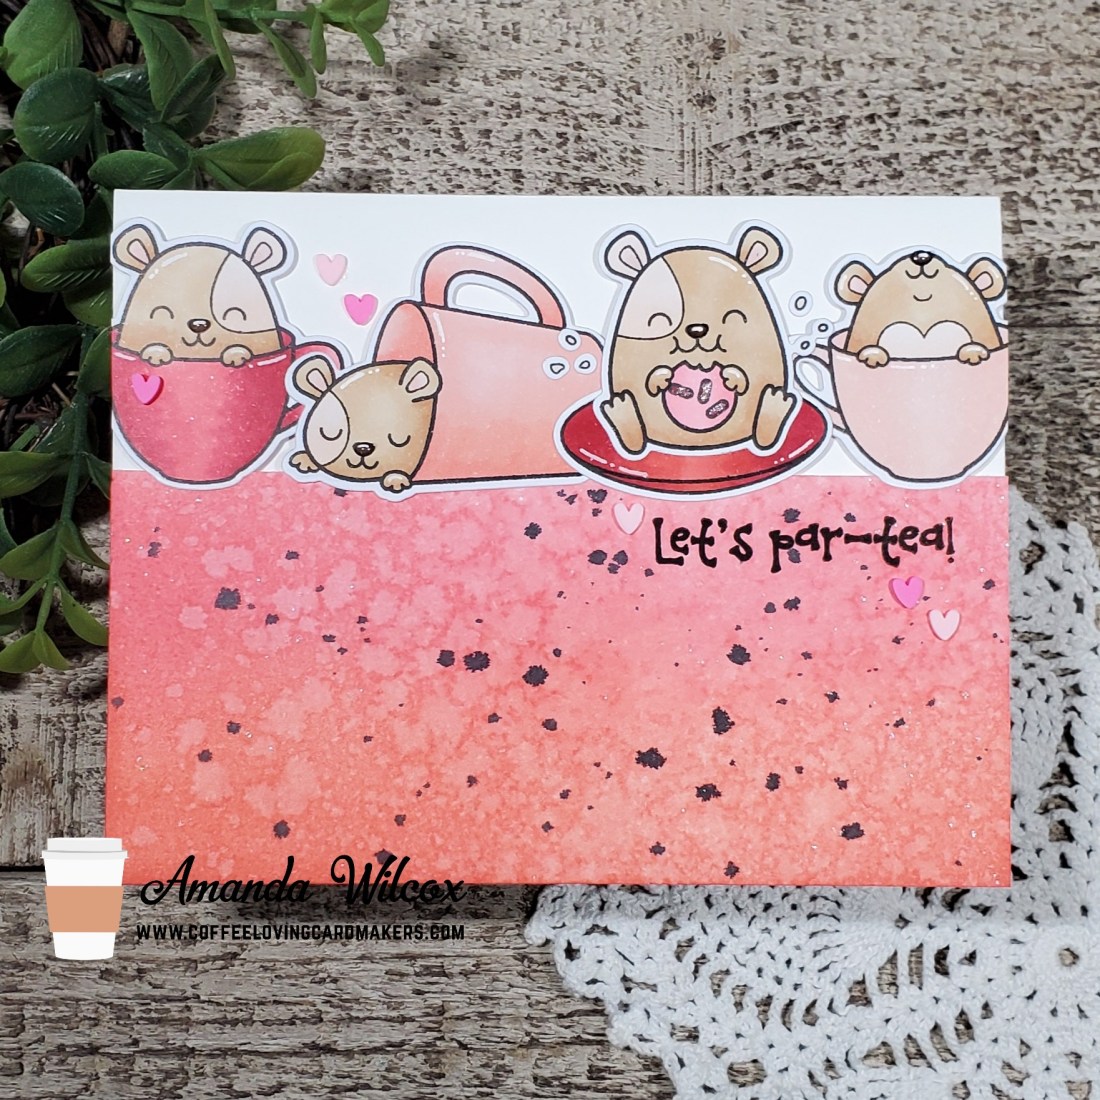
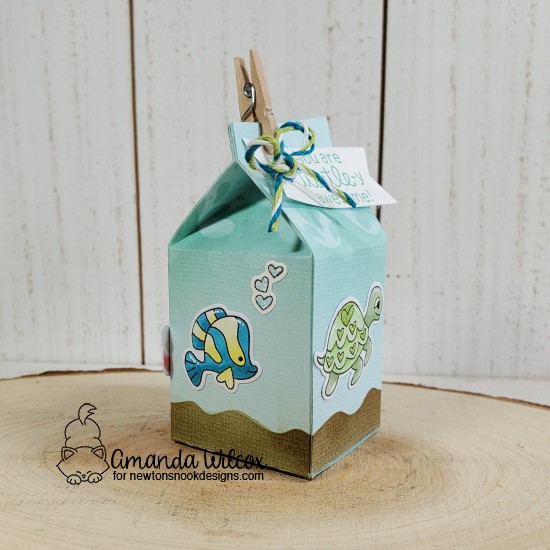
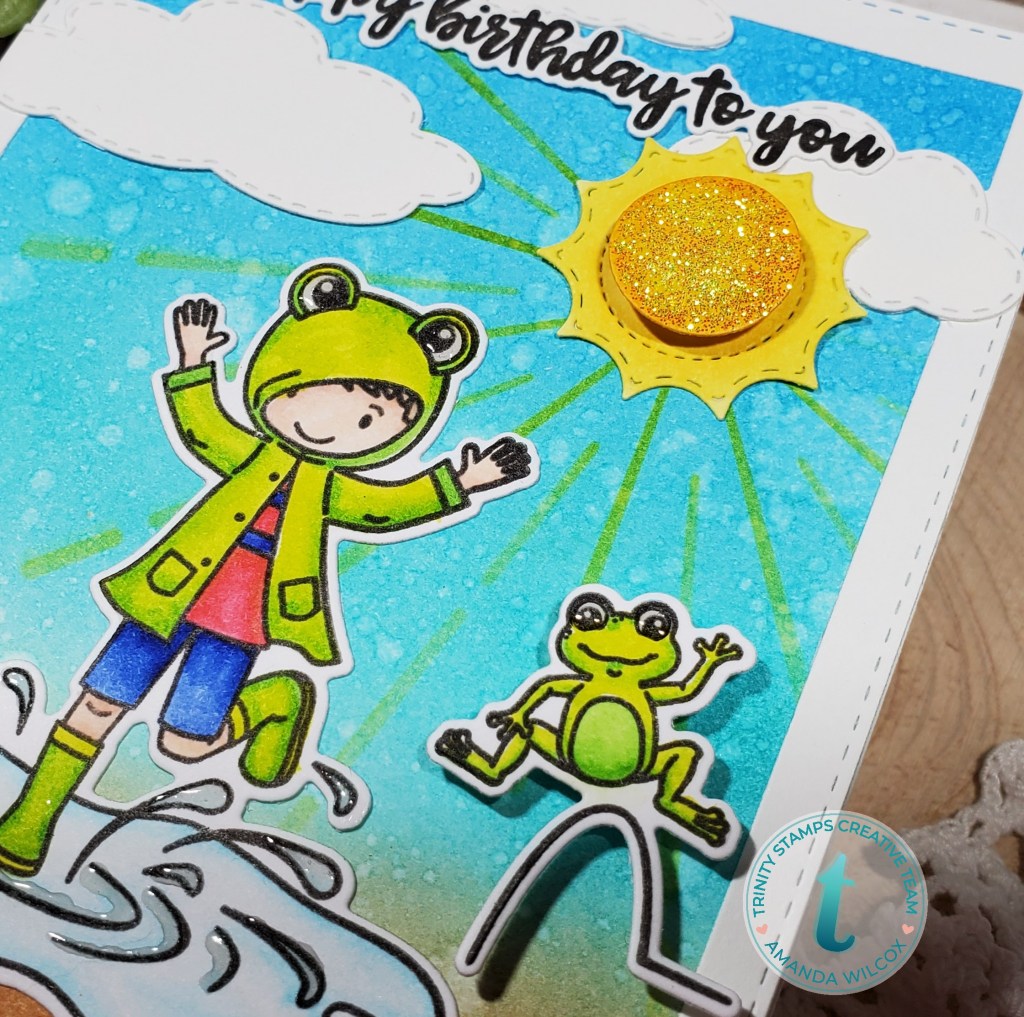
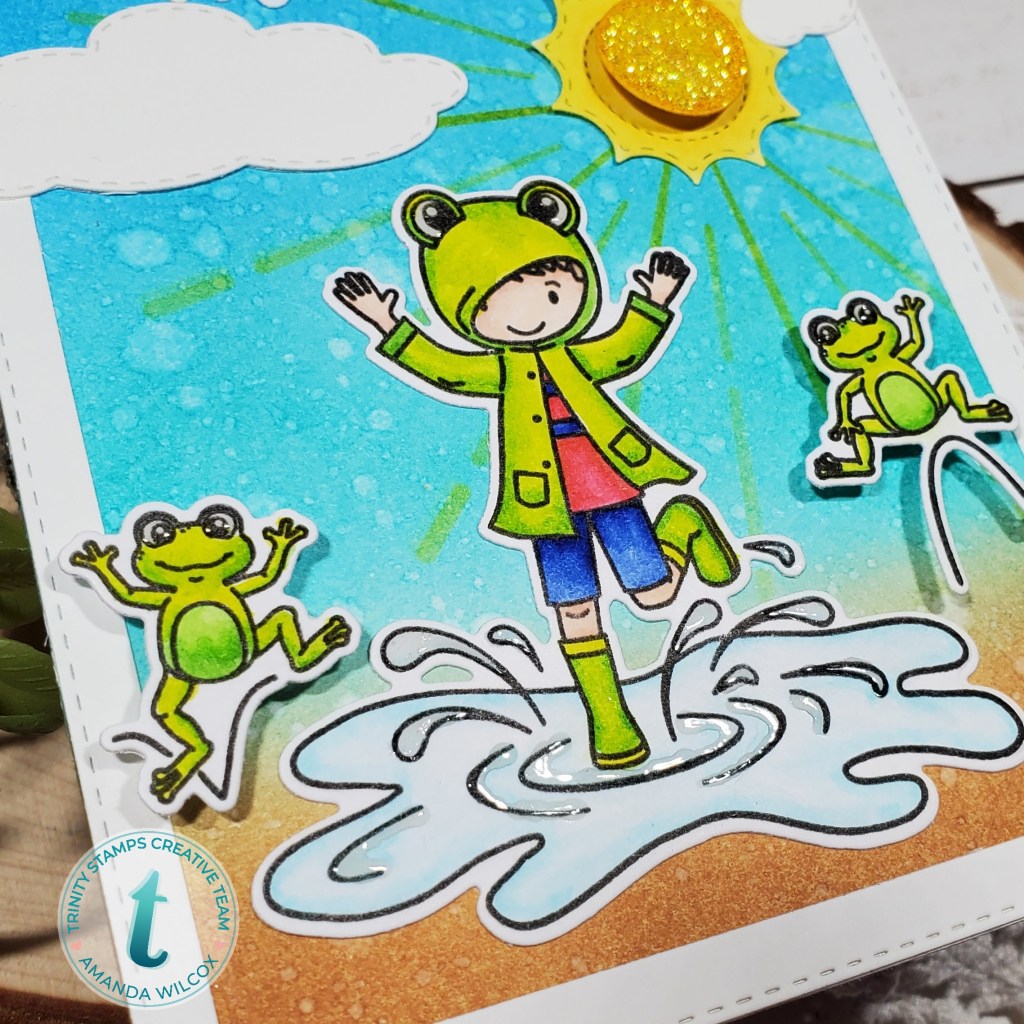
I’m just loving these images and the punny sentiments have completely stolen my heart! They really do quack me up! 😉

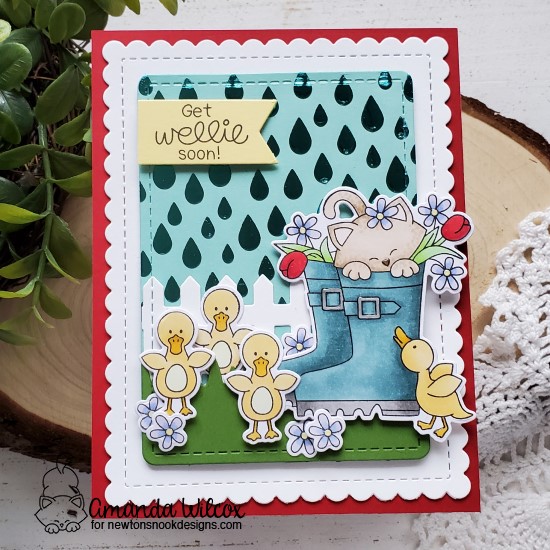
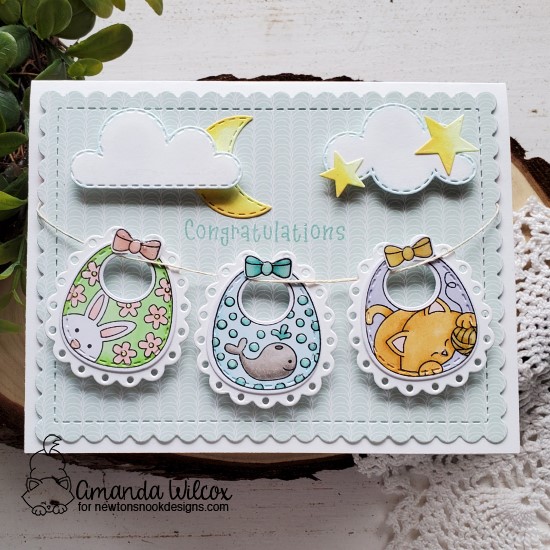
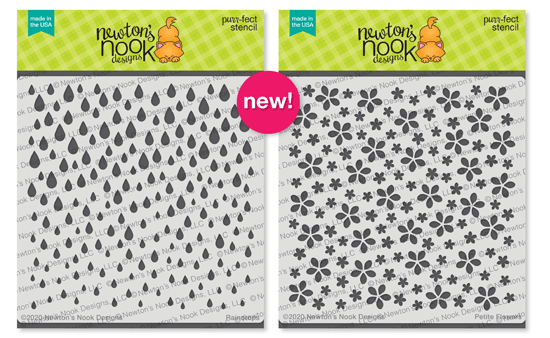
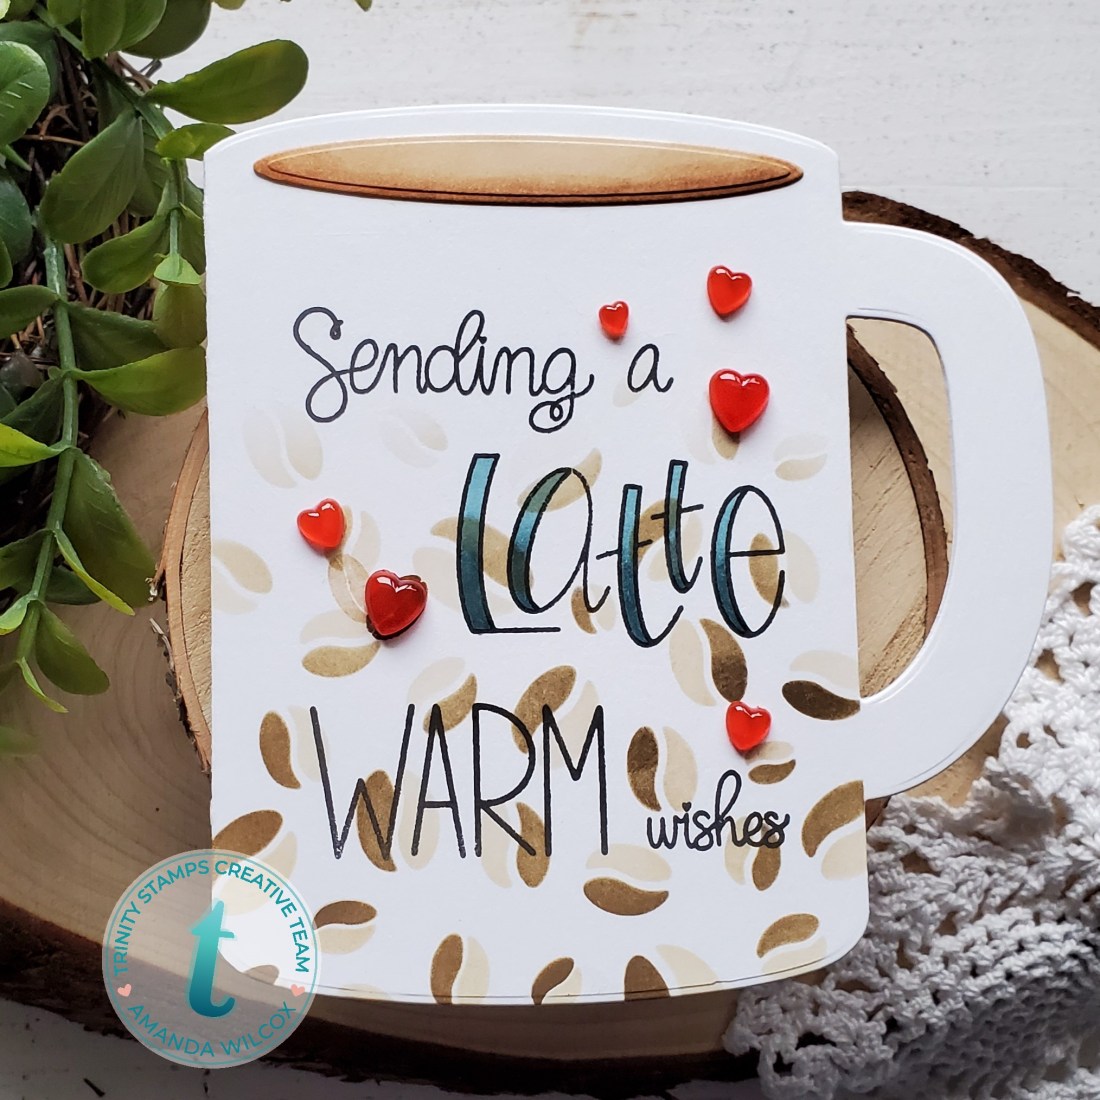
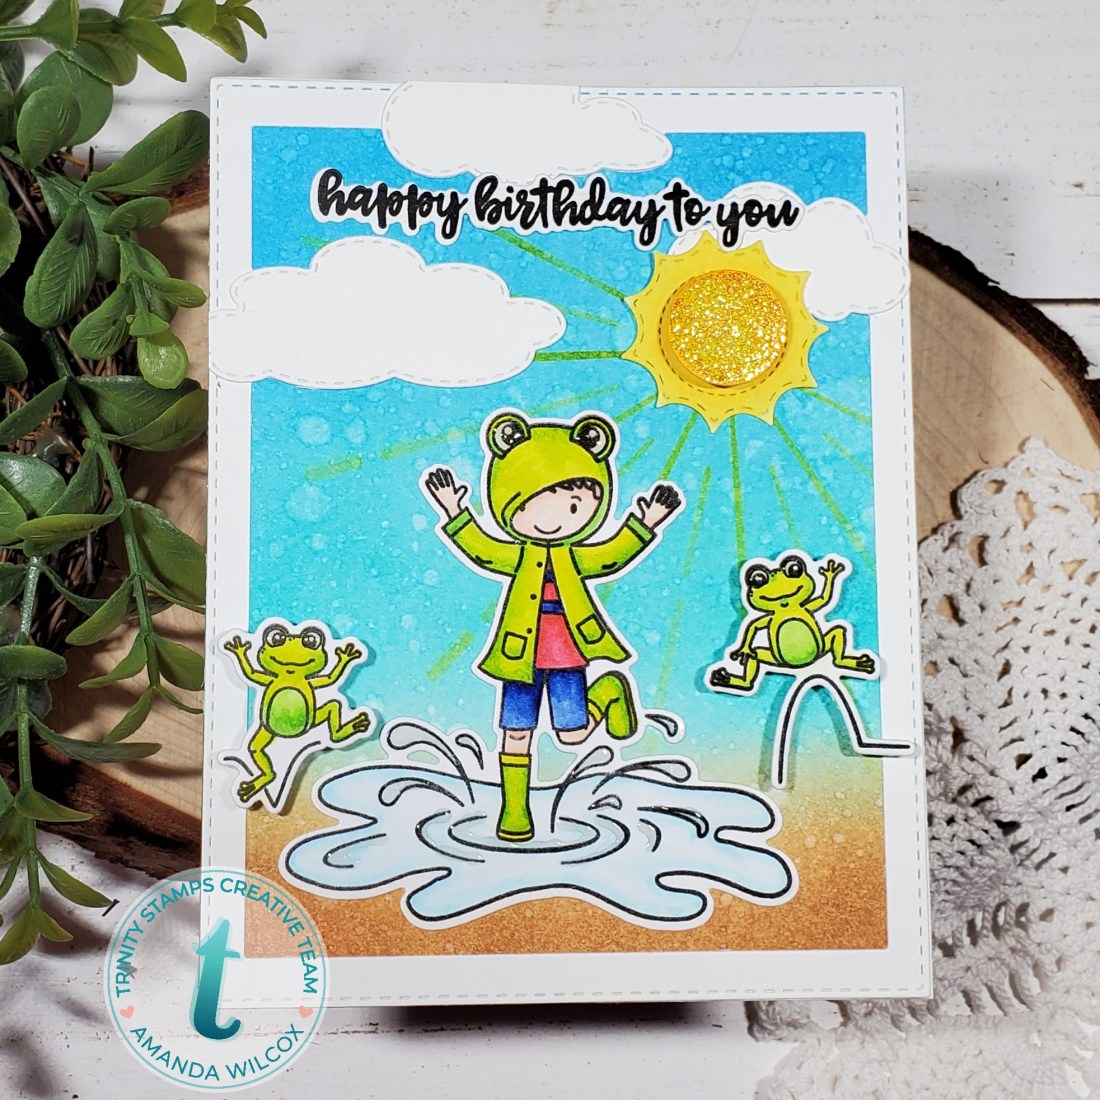
Today’s card came together in my head the moment I saw this release. And I was so pleased when everything fit just how I had intended. It was a little bit of a process though. I started by using Thermoweb transfer gel on teal cardstock using the new Raindrops stencil and then I set it aside to dry while I colored my images from Newton’s Rain Boots.

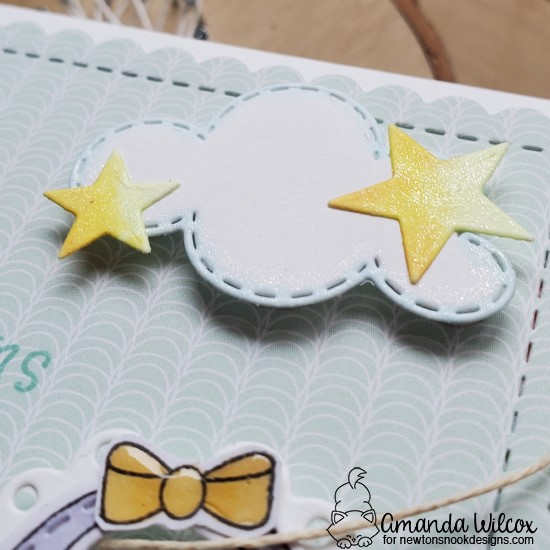
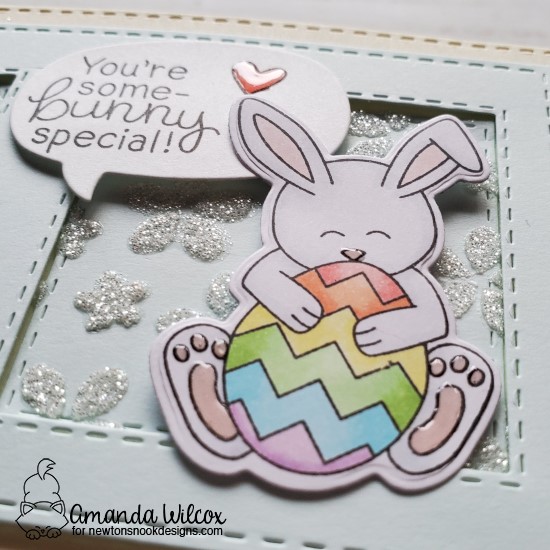
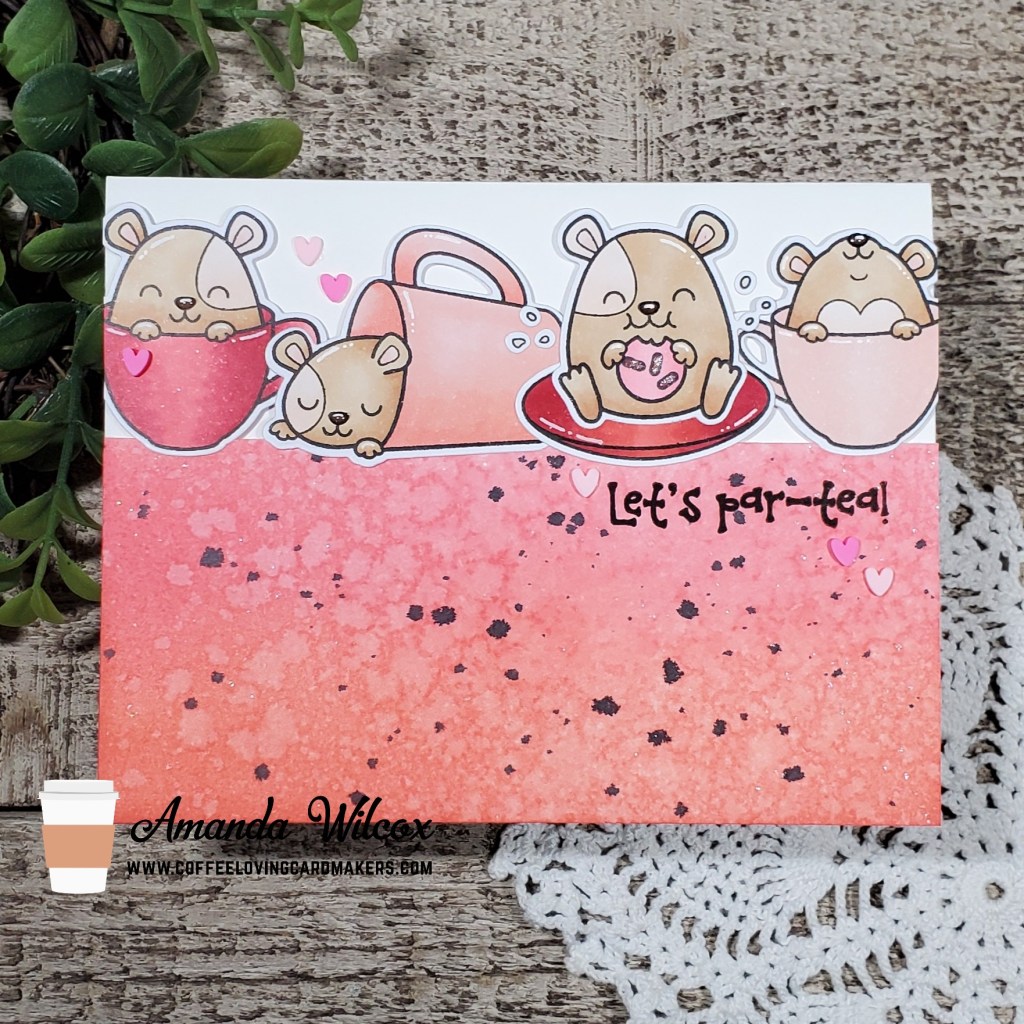
I ran the stenciled panel through my laminator with teal decofoil and was sooooo happy with how it turned out! Then I proceeded to build my scene by die cutting a fence and grass from the land borders set. Then I used the rounded rectangle from the Frames & Flags die set and popped it on a white scalloped rectangle using the same die set.

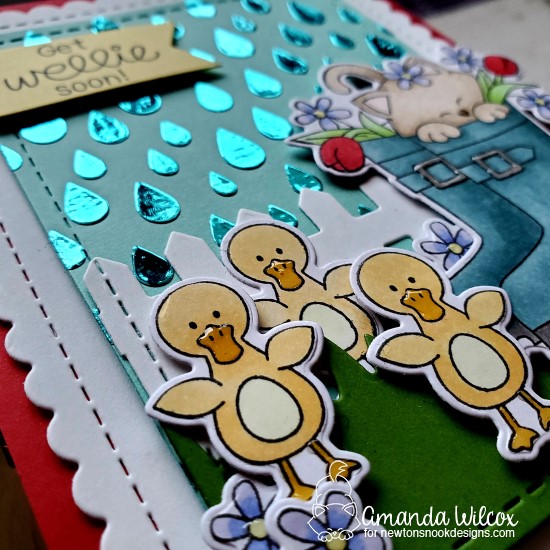
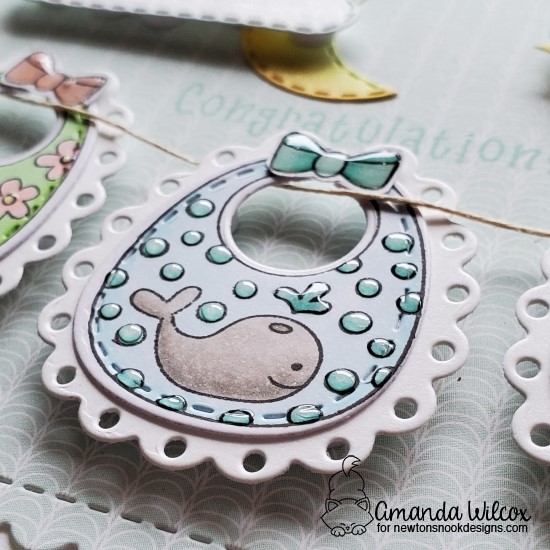
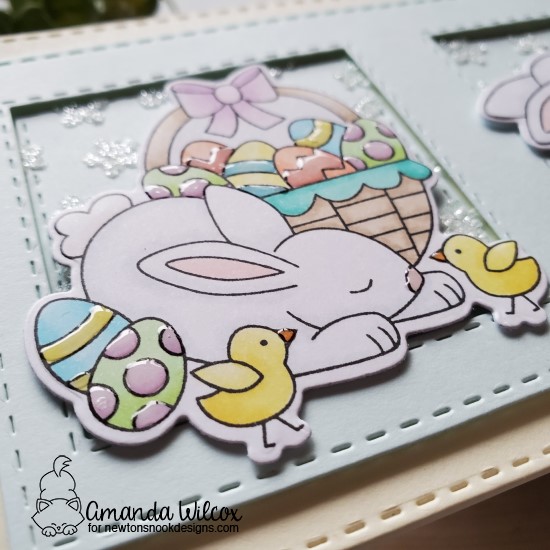
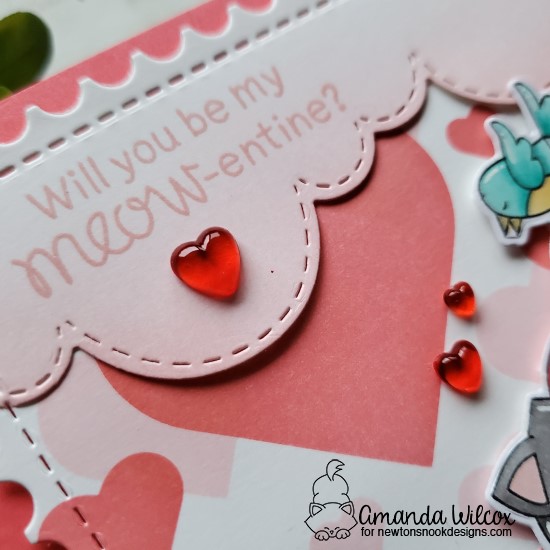
Some of the images are popped up with foam tape and some are adhered to the panel directly for a little extra dimension and interest. Then I stamped my sentiment on a flag from the Frames & Flags set and trimmed it down.

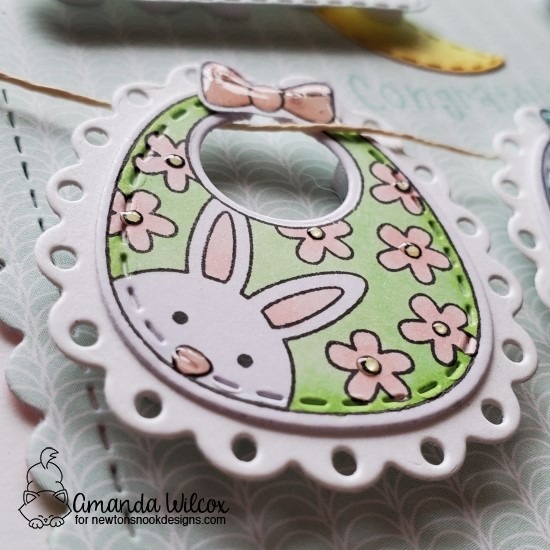
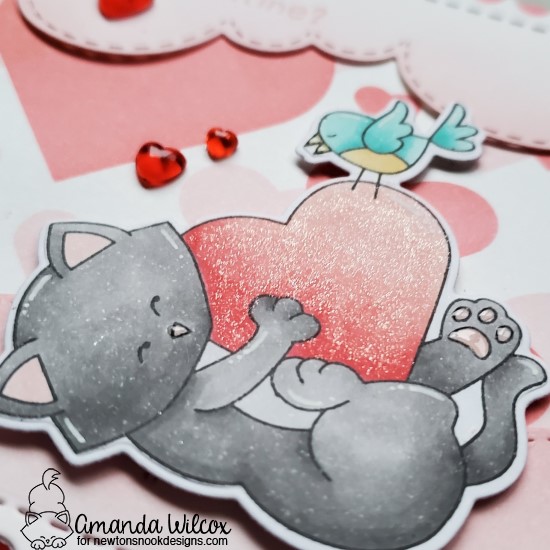
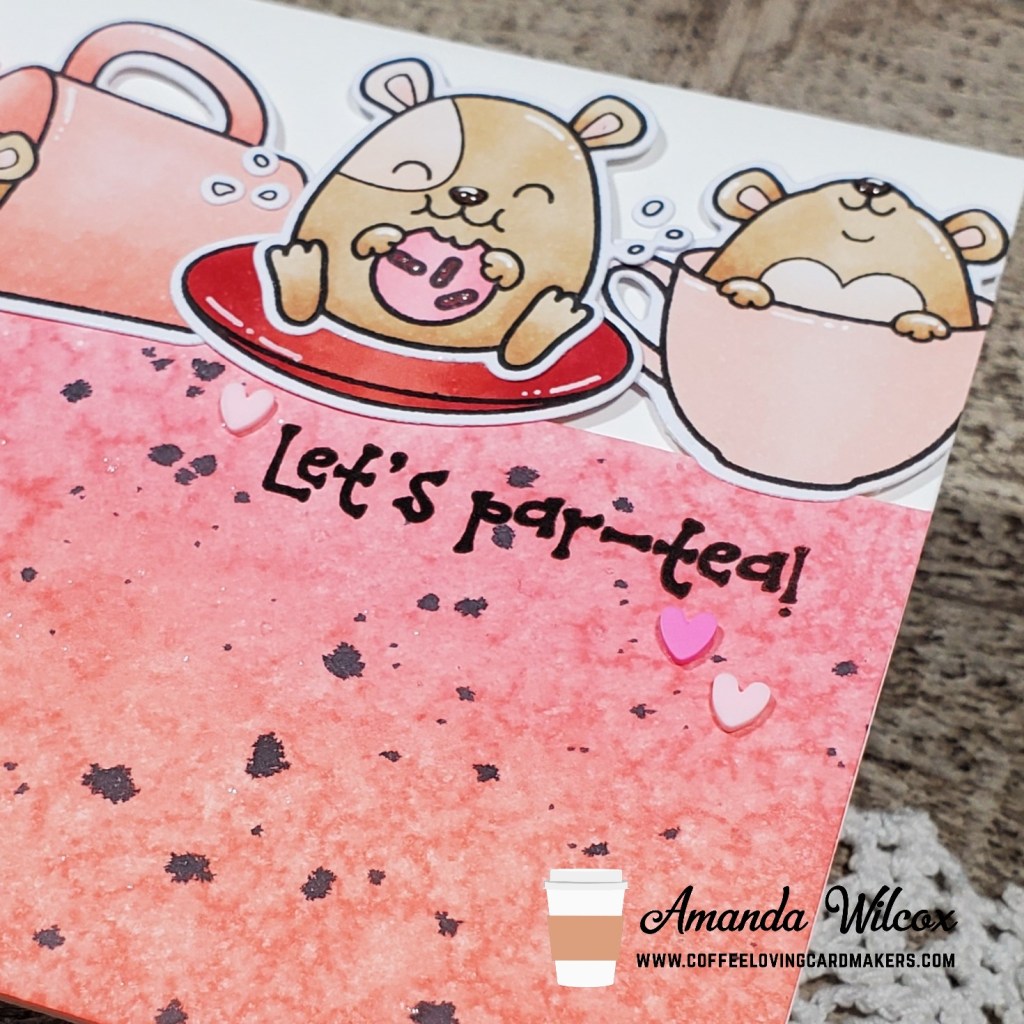
For finishing touches on this fun card, I added glossy accents to all the beaks and feet, flower centers, Newton’s nose and the buckles on the boots.

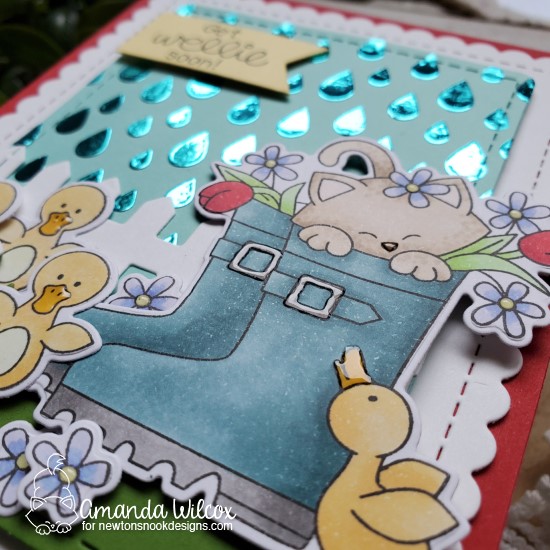
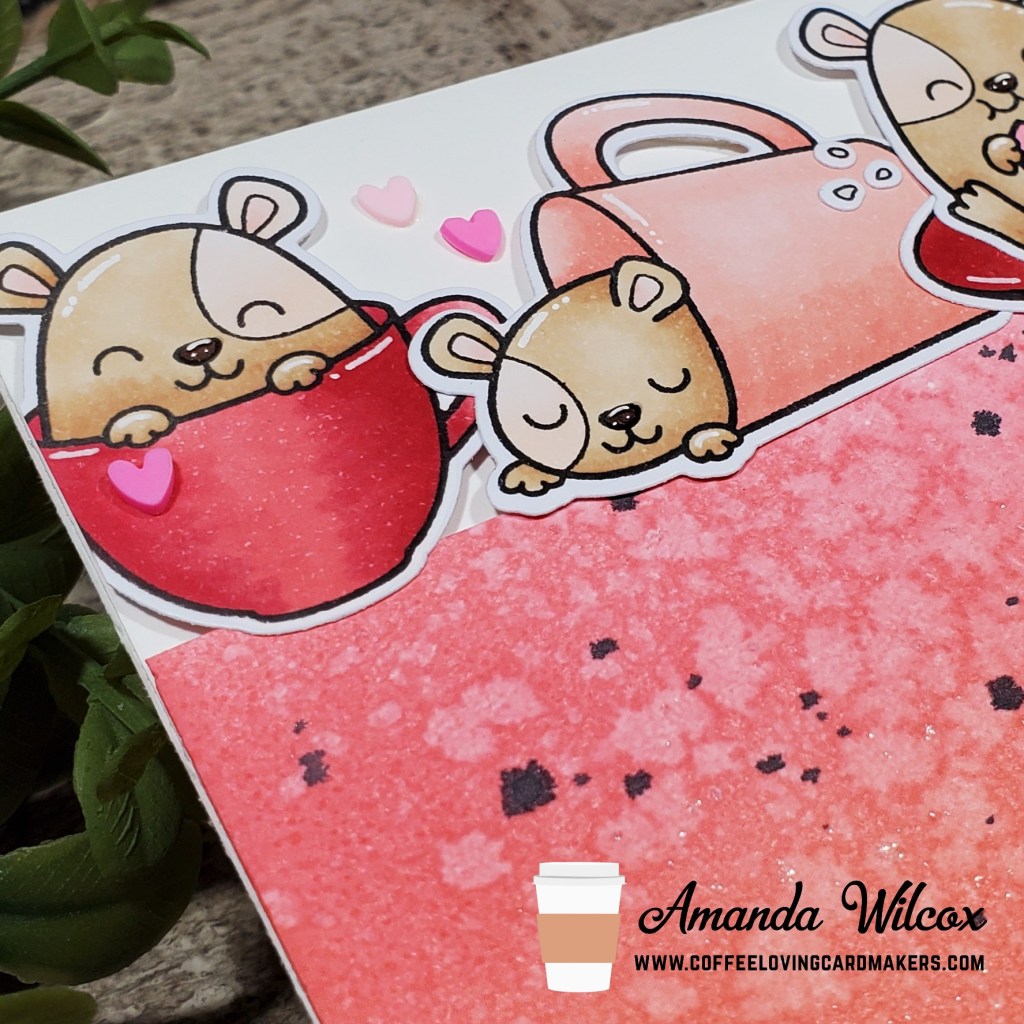
And look at the shine you get from the decofoil on that awesome stenciled background! I am in love!!! Now to wait for someone to get sick so I can share it. LOL!

Would you like to win the “Newton’s Rain Boots”  Stamp Set? This stamp set will be given away to ONE lucky winner!

Here’s how to win: Comment on the NND blog and Design Team blogs (see list below)! The winner will be chosen at random from the collective reveal posts. Make sure to check out each of their blogs and comment for your chance to win. You will not know which blog has been chosen so the more you comment on the better your chances are of winning! You have until Thursday, February 20th at 9pm EST to comment  — Winners will be announced on the blog post on Friday, February 21st. 

Check out all the awesome Design Team Blogs below to enter:

Newton’s Nook Designs
Ellen Haxelmans
Larissa Heskett
Samantha Mann
Zsofia Molnar
Naki Rager
Maria Russell
Andrea Shell
Tina Smith
Tatiana Trafimovich
Amanda Wilcox

Newton’s Nook Designs – February Release Day 2

Welcome back to day 2 of the Newton’s Nook February release! Today we get to share a super fun baby themed stamps set with coordinating dies and a scene builder die set too!

Bitty Bibs Stamps and Dies

Sky Scene Builder Die Set

Today’s card share features both of these new fun sets in one card because I just thought they went together so well!

I started this card by stamping, coloring and die cutting all my bitty bibs and the lacy border they are mounted on. I intentionally made the bibs both girl and boy so that I have a card ready to go whenever the next person I know has a baby…no matter what. I love the images on all the bibs. They are so cute!

After the bibs were put together, I die cut the scalloped rectangle from the Frames & Flags die set and adhered it to my card base. Then I popped the bibs up with foam tape and strung them up, like they’re on a clothes line.

Next, I die cut my sky scene builder pieces and colored them with copics and adhered them as well.

For fun finishing touches on my card, I added glossy accents to various parts on all the bibs. I love the little shine and interest this gives all of them. They are just so adorable!

Seriously, look at the cute polka dots with this whale! It’s just too cute! I also added glossy accents to the bows at the top of each bib too.

Finally, we finish the bibs off with the cutest Newton and his ball of yarn. I just love it! Next we move on to some shimmer in the sky.

I added Wink of Stella glitter brush pen to the clouds and stars and then…believe it or not…I decided that I wanted a sentiment on the front of the card. So, bravely I got out my MISTI and positioned the Congratulations from the Bitty Bibs set and (holding my breath that I didn’t mess it all up) stamped it under the clouds. I think it turned out great and I’m really happy I took the chance.

Would you like to win the “Bitty Bibs” Stamp Set? This stamp set will be given away to ONE lucky winner!

Here’s how to win: Comment on the NND blog and Design Team blogs (see list below)! The winner will be chosen at random from the collective reveal posts. Make sure to check out each of their blogs and comment for your chance to win. You will not know which blog has been chosen so the more you comment on the better your chances are of winning! You have until Thursday, February 20th at 9pm EST to comment  — Winners will be announced on the blog post on Friday, February 21st. 

Check out all the awesome Design Team Blogs below to enter:

Newton’s Nook Designs
Ellen Haxelmans
Larissa Heskett
Samantha Mann
Zsofia Molnar
Naki Rager
Maria Russell
Andrea Shell
Tina Smith
Tatiana Trafimovich
Amanda Wilcox

Newton’s Nook Designs – February Release Day 1

Hello everyone! I’m so excited to finally start sharing all the fun that is the Newton’s Nook Designs February release!!! I hope you enjoy it as much as I have! ❤

Today we’re starting things off with 2 new stencils and a stamp and coordinating dies!

Raindrops Stencil and Petite Flowers Stencil

Hop Into Spring Stamps and Dies

These are both so much fun. Today’s card features the new Hop Into Spring set paired with the Petite Flowers stencil. I hope you enjoy it!

I decided I wanted this to be an Easter card so I chose the 2 images with eggs and then for a break, I chose the daffodil image for the center. I love them all! They really are just the sweetest! After I stamped, colored and die cut my images, I die cut all the elements for my card so I could get messy with that fun petite flowers stencil and some glitter glitz gel!

I popped the frame up on the card base and inlaid the stenciled squares inside once they were dry. Then added foam tape to my images so they would lay nicely over the raised frame.

For finishing touches I added glossy accents to the bunny noses, toe beans, Easter eggs and such for some interest and detail. I think the shine goes well with the glitter of the petite flowers.

Last, I stamped my sentiment on a speech bubble from the Speech Bubbles die set. I love the options this set gives! Then, I snagged a heart from the Puppy Playtime set, stamped, colored it and gave it a little glossy accents too before popping it up with foam tape.

These slimline cards are quickly becoming a favorite of mine…especially when I don’t like to choose which image to use from an adorable set like this.

Would you like to win the “Hop Into Spring” Stamp Set? This stamp set will be given away to ONE lucky winner!

Here’s how to win: Comment on the NND blog and Design Team blogs (see list below)! The winner will be chosen at random from the collective reveal posts. Make sure to check out each of their blogs and comment for your chance to win. You will not know which blog has been chosen so the more you comment on the better your chances are of winning! You have until Thursday, February 20th at 9pm EST to comment  — Winners will be announced on the blog post on Friday, February 21st. 

Check out all the awesome Design Team Blogs below to enter:

Newton’s Nook Designs
Ellen Haxelmans
Larissa Heskett
Samantha Mann
Zsofia Molnar
Naki Rager
Maria Russell
Andrea Shell
Tina Smith
Tatiana Trafimovich
Amanda Wilcox

Trinity Stamps – Me + You Valentine

Happy Valentine’s Day everyone!!! I know some people are so against this holiday but I really love sharing love so it’s fun for me! Today I’m sharing one last Valentine card that I made for someone extra special – my husband.

Those that know me, know I’m in love with those Trinity Stamps mice so I just had to use them today! I also pulled out some other new goodies from the latest release. Keep scrolling to check it all out!

I had the design in my head already so I jumped right in and started inking up my heart. I used the new Layered Heart stencil to ink up a heart in the middle of an A2 panel (salty ocean and blueprint sketch distress inks), then spritzed it with water. Then I die cut a heart the next size down from the Nested Hearts dies with an iridescent vellum. The stencil and die cut hearts are the exact same sizes so they work together seamlessly! It’s fabulous!

Next, I pulled out my Love and Stuff sentiments and stamped it on white cardstock. Then I went digging in my stash and found the PERFECT banner die in my Merry Christmas Senti-mini die set so I used it!

This is when I finally sat down to stamp and color my mice from Mouse House. The I used the coordinating dies to cut them out and I moved on to assembling this fun card!

I die cut my inked panel with the largest rectangle from the Newton’s Nook Framework die set and popped it up with foam tape. Then I attached my mouse and banner to the vellum heart so that I could hide my adhesive behind them to attach the heart to the inked panel. (Tricky, tricky.) 😉 Next I adhered the mouse hiding behind the heart and the one at the bottom of the card.

Finally I started on finishing touches. For this card I kept it simple and added black glaze pen to the eyes and noses of the mice so they shine just a bit and after that was dry I added a little white gel pen highlight to the eyes. Last I took some Sweet & Tart Heart Sprinkle embellishments and glued them around the card.

I just love how simple this card is but how much fun it is too! I hope he likes it tonight when I finally get to give it to him.

I appreciate you sharing your time with me. Have a fabulous day!

Newton’s Nook – Be my Meow-entine?

Hello again! Today I’m sharing a fun card I made for my daughter for Valentine’s Day! She loves Newton as much as I do so it was a no-brainer to grab this cute Newton’s Valentine image and put something fun together for her.

I decided to make Newton laying among puffy pink clouds instead of on the ground this time. I thought it brought a bit of whimsy to the card design. I really like how it turned out.

I stamped my images from Newton’s Valentine, colored them and then cut them out with the coordinating dies. Next I moved on to the scene for my card.

To start that I used the Sky Border dies to cut 2 cloud borders and then inked them pink with my Trinity Stamps blending buddy. Then I cut an A2 panel and used the Bokeh Hearts stencil with a couple of different pink inks.

I glued the clouds to the stenciled panel and the used the largest rectangle in the Framework die set to cut it all at the same time so I knew it would line up. Then I used the same ink I blended on the clouds to stamp my sentiment in the upper left corner.

I adhered my flowers directly to the card and popped my Newton image up with foam tape.

For finishing touches I added white gel pen accents throughout all the images and Wink of Stella glitter brush pen to the heart Newton is holding. Then I took glossy accents to the bird’s beak, Newton’s nose and toe beans, and the centers of all the flowers.

I felt like it still needed a little something so I pulled out my Cinnamon Red Hots jelly drop hearts from Trinity Stamps and added a couple to make my card feel complete.

Then very last, I popped my panel up with foam tape on a melon-colored card base.

I’m really happy with how this fun card turned out and think my daughter will be quite happy with it as well. I’m excited to give it to her.

I appreciate you sharing your time with me. Have a fabulous day!

Trinity Stamps – Latte Love

Happy Wednesday everyone! I hope the week is chugging along for you. I promise I can see the weekend in sight. 🙂

Today I’m stopping in with a fun and simple shaped card with a gift card holder inside. I used all Trinity Stamps products today – Coffee Mug Card dies, A Latte Love stamps, Layered Coffee Bean stnecil and Cinnamon Red Hots Jelly Drop Hearts.

This is a pretty simple card design but I love that it looks like there could really be a mug out there that looks just like this.

I die cut my coffee mug card and coffee for the top from 110 lb. cardstock so it’s good and sturdy. Then I used copics to color the coffee portion and glued it on. Next I grabbed my stamps, laid them out and inked them up. I colored the latte with copics and moved on to stenciling. I love that this stencil is 2 pieces so you can give the beans depth with dual colors if you want. Last, I added some jelly hearts scattered about.

I strategically placed the gift card holder portion on the inside left of the card to cover up the bleed-through that copics always have. It’s die cut from the same teal that I colored on the front.

This card is going to a fun little craft store in Colorado that is celebrating 25 years of business! I think that’s pretty impressive and definitely warrants a celebration!

I appreciate you sharing your time with me! Have a fabulous day!

Your Next Stamp – Let’s Par-tea!

Welcome back everyone! I’m over on the Coffee Loving Cardmakers blog today with this soooo cute Hammie card!

I’ve been a bad girl shopping lately and picked up some new toys to play with. One of my mini sprees was at Your Next Stamp a few weeks ago where I picked up this fun Hammie – Coffee and Tea set. I just want to squish these guys. They’re so cute! 

Since I have issues making decisions, especially with new stamps, I used all the cute images from the set! And since it’s Valentine’s week I decided to go with a pink and red color palette for some extra fun! 

I stamped, colored and die cut my images and then switched over to the ink blended panel. For that I chose worn lipstick and abandoned coral distress inks. Then I splattered it with water and a little watered down black soot distress ink as well. Once it was dry I cut it down to 5.5×2.5 and popped it on my card base with foam tape.

I popped all my Hammies up with foam tape as well and then put my card in my MISTI to stamp the sentiment. I trimmed anything hanging off the edge and set to finish the last embellishing.

I added white gel pen accents to all of the images and gave each Hammie some glossy accents to their nose. Then I took some clay hearts from a special Creativation mix made by Trinity Stamps and scattered them about. I think this gives a perfect little love theme to the pink and red colors. Don’t you?

Are you giving Valentine’s out to anyone special this year?

I appreciate you sharing your time with me. Have a fabulous day! 

Newton’s Nook – Sweet Treats Blog Hop

Newton’s Nook Designs 6th Annual Sweet Treats Blog Hop!

The Newton’s Nook Designs Team is hopping along today to share some great Sweet Treats – just in time for Valentine’s Day! Make sure you scroll down to the bottom of this post to see the whole list and hop along and comment for a chance to win!

I’m so excited to be sharing a really fun Valentine treat box with you for the Newton’s Nook Sweet Treats Blog Hop today! Treat boxes are one of my all-time favorite things to create so this hop is right up my alley! I hope you find fun inspiration and have enjoy hopping along to see everyone’s projects!

I chose to make a mini-milk carton treat box and decorate it with the newly released Tides of Love stamps and dies, along with some other fun Newton’s Nook products.

I started by die cutting my box and then used the waves stencil to give the top some fun water texture. Then I grabbed the mountain border stencil and used that for a sandy bottom. Then I assembled my box and started adhering my ocean creatures.

After those were on I used the banner die from the Frames and Flags die set and made a tag to stamp my sentiment on. I punched a hole, added a twine bow and clipped it to the top with a mini clothespin. This way it’s easy to open and close the box for the giver and the recipient.

For finishing touches I added Stickles to the turtle’s hearts and all of the heart bubbles coming up from the fish.

Sweet Treats Blog Hop Giveaway!

Would you like to win a $25 store credit to Newton’s Nook Designs online shop?

We are giving them out to TWO lucky winners!

Here’s how to win:

Comment on the NND blog and Design Team blogs (see list below)! The winner will be chosen at random from the collective reveal posts. Make sure to check out each of their blogs and comment for your chance to win. You will not know which blog has been chosen so the more you comment on the better your chances are of winning! You have until Monday, February 10th at 9pm EST to comment — winners will be announced on the NND blog on Tuesday, February 11th.

Check out all the awesome Design Team Blogs below to enter:

Newton’s Nook Designs
Ellen Haxelmans
Larissa Heskett
Samantha Mann
Zsofia Molnar
Naki Rager
Maria Russell
Andrea Shell
Tina Smith
Tatiana Trafimovich
Amanda Wilcox <——You are here.

Trinity Stamps Craft with Your Kiddo Challenge – Valentines

Hello everyone! Over at Trinity Stamps we’re having a fun challenge that started Tuesday and goes until Feb. 13: Make Valentines with your kids or fur-kids. Create something with your kiddo and post it for a chance to win a $20 gift certificate to Trinity Stamps online store!

The Trinity Stamps Creative Team paired up with our kiddos and fur-kiddos to bring you some inspiration! Head to the Trinity blog post to check it all out and get the details of the challenge!

Below are some cards and treat boxes my daughter and I made together. I hope you enjoy them and will play along too!

We’ll start with Micaela’s awesome projects – 2 mini-milk carton treat boxes and a mini card. She chose to stamp a dotted pattern for her milk carton background, assembled the boxes and added a monster from the Trinity Stamps Monster Love set. Then she had each monster hold a heart from the Unconversationals Clay Heart Sprinkles Mix.

For her card, she used the new Slimline Frame and Fold dies to create a mini card. She cut a stitched rectangle and then a heart window from the same die set. She popped the panel up on the card base and slid that cute monster in the window. Last she used the MISTI to stamp her sentiment from Love and Stuff Sentiments and glued a few more clay hearts to the bottom of her card.

I absolutely LOVE all of the projects and know that she’s so excited to share them! We decided in the beginning for our projects to coordinate, so I used the same Monster Love, Love and Stuff Sentiments and Slimline Frame and Fold Dies, paired with a few extras.

For my cards I also used the new Slimline Frame and Fold dies to create a mini cards. I started by stamping, coloring and die cutting my Monster Love monsters. Then chose card colors to coordinate. I was trying to stay away from typical Valentine colors for a fun challenge to myself.

The card on the left uses the heart cut out of my daughter’s window card, for a fun pop of a contrasting color. I also used the Heartburst stencil on the yellow background for some added interest. I just love how this turned out!

The card on the right is a shaker card featuring the Dot Your Eyes and I’ve Got My Eye On You embellishment mixes. These are too fun!!! This card is brimming with puns and eye love it! Haha! On the inside I stamped another sentiment from the Love and Stuff Sentiments that says “cheesy cards… that’s how eye roll” and it makes me laugh every time I read it.

For finishing touches on my cards, I added glossy accents to the monsters, black glaze pen to the eyes and white gel pen accents throughout.

I hope you’ve enjoyed all of this fun Valentine inspiration from my daughter and I and will also play along with the Trinity Stamps Junior Designer Challenge too!

I appreciate you sharing your time with me. Have a fabulous day!

Trinity Stamps Puddle Jumpers

Welcome everyone! I’m up on the Trinity Stamps blog today with this adorable Puddle Jumpers card featuring a plethora of Trinity Stamps products! Let’s jump right in, shall we?

For a bit of a change of pace, I got out my Zig Clean Color Real Brush markers to color up these adorable images from Puddle Jumpers. Then I cut them out with the coordinating dies. Next, I set to work on my background. I cut an A2 size panel and blended distress inks for a sky to mud look. Then I took the Cloudy Day Card Scene Builder die and cut the frame, clouds and sun. I used copics to color the sun and then laid everything out to decide on placement.

At this point I thought it would be fun for the sun to have rays shining down on this kiddo playing in the puddles so I grabbed my Shine Brighter stencil and my blending buddy brush to ink it up. I love the look this little extra adds to the whole scene.

Now for assembly – I adhered my inked panel to a card base and then the frame to that. Next, I glued the clouds to the coordinating spots on the frame and trimmed away the excess. I used liquid glue to adhere my sun. (I find this holds better to the inked panels.) And then a foam dot to put the center on the sun. I adhered my kiddo directly to the card front and popped the frogs up like they are jumping right out of the card.

For finishing touches on this sweet card I added glossy accents to the puddle, splashes and to all the frog eyes – including the hood on the coat. Then I took Stickles and glitterfied the sun for some real blingy fun! (These are very technical terms by the way.) 🙂

I hope you enjoyed this card and find some inspiration to create something beautiful.

I appreciate you sharing your time with me. Have a fabulous day!