Blog

Sweet Birthday

Hello everyone! I’m up on the Trinity Stamps blog today.

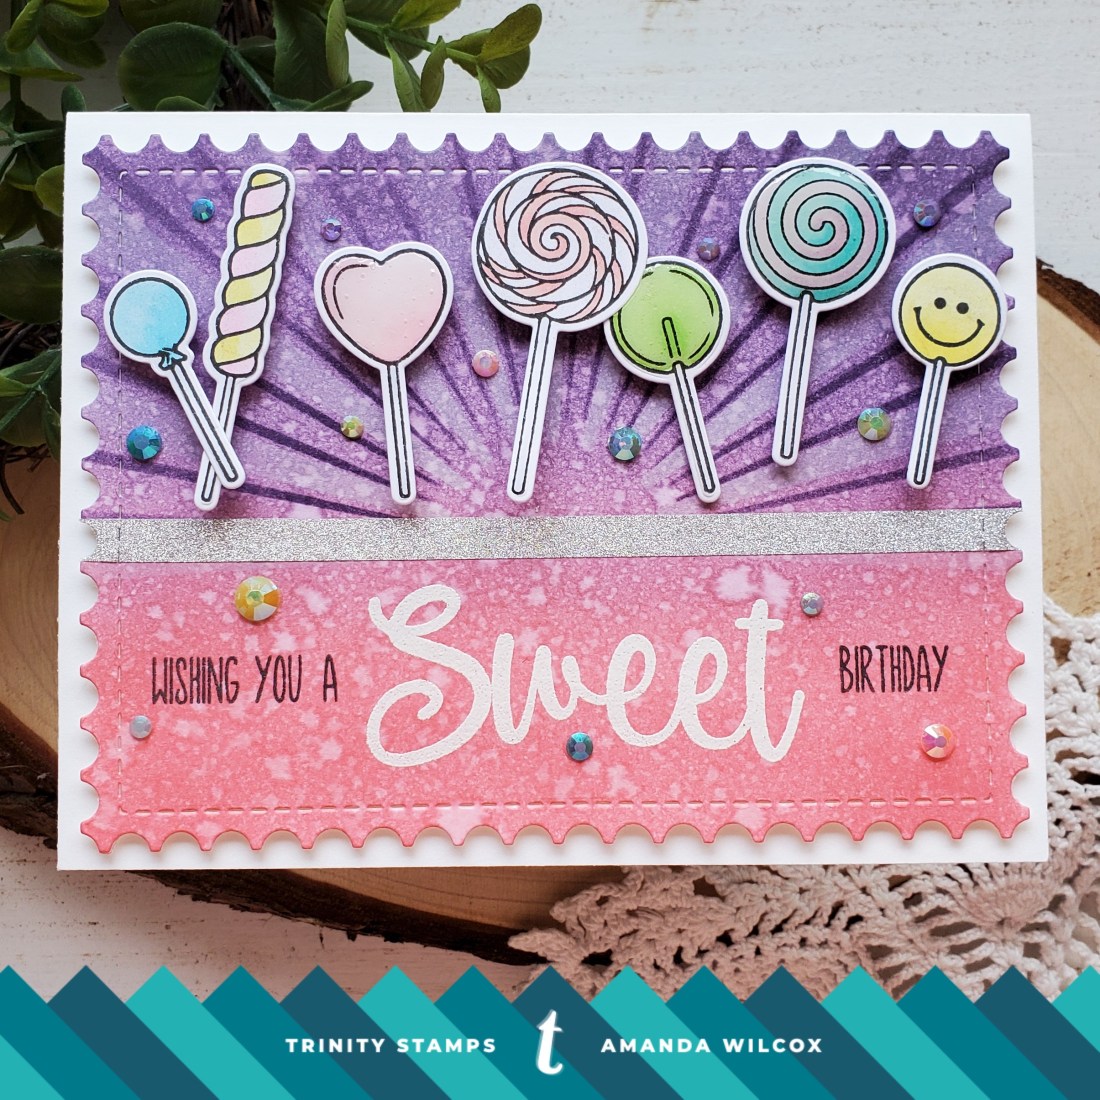
I don’t know about you but I try to stock up on birthday and all occasion cards whenever I get the chance. It seems that we’re always needing one when I don’t have time to make it. So today, I’ve got a super sweet birthday card to share.

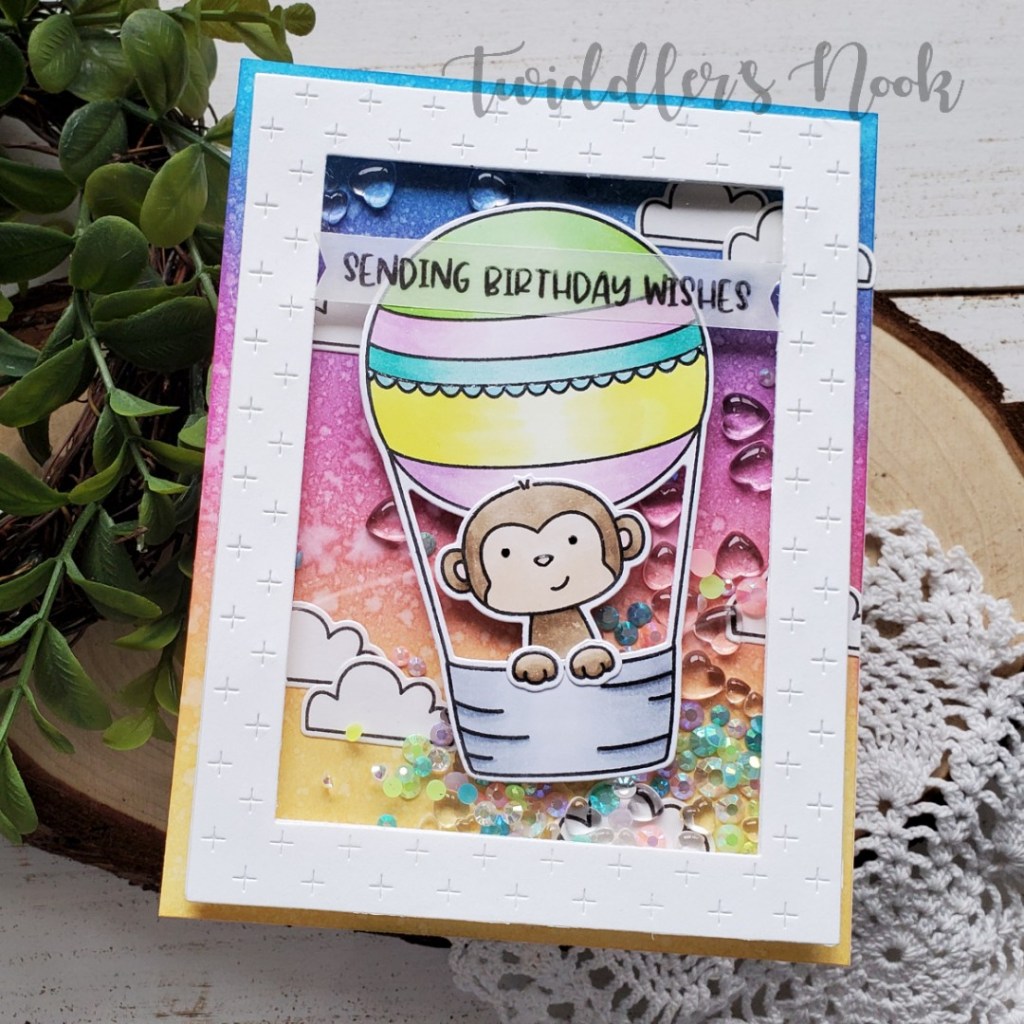
I pulled out my Sweeter Than stamp set, stamped them all, colored and then die cut them. Then I started on my background. I blended picked raspberry and dusty concord distress inks and spritzed them with water. Then I used my blending buddy brushes and added more dusty concord over the top half of the thinner layer of my Catching Some Rays stencil. Next, I used white pigment ink over the wider layer of the stencil set. Then I added some washi tape from my stash and die cut the panel.

Now, I added foam squares to the back of all my candy pieces and arranged them across the card front. Then, I stamped the outer parts of my sentiment in black and heat embossed the larger “sweet” in white so it stood out. 

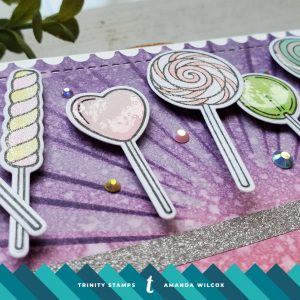
I popped this panel up on a card front with foam tape and started on finishing touches. For those, I added glossy accents to half of the suckers and Wink of Stella glitter brush pen to the other half. Then I scattered some jellyfish jewels throughout the card front. I love extra shimmer and sparkle. It never gets old! 

I just love how bright and fun this card is! The recipient is sure to enjoy the sweet thought that went into making it. I appreciate you sharing your time with me. Have a fabulous day!

Newton’s Nook Design Team

Happy New Year everyone!!!! I’m over the moon to share with you that I’m joining the Newton’s Nook Design Team! This is amazing and I feel so fortunate to be joining this group of incredibly talented ladies!

So, let’s celebrate with a card, shall we?!? I love celebrating this way! I pulled out the beautiful Sunflower Days stamp and die set to play with for this occasion. I got it for my birthday a couple months ago and hadn’t made a point to play with it yet.

For some reason I’ve been dreaming about these beautiful sunflowers in shades of blue and silver, so that’s what I did. What do you think of it?

I also used the plaid stencil set with blue dye ink and glazed pewter metallix gel on a lighter blue cardstock. After the gel was dry I die cut the panel from the largest of the Flags & Frames Die Set. Then I die cut the same panel again from the middle sized die in the Frameworks Die Set.

At this point I started assembling my card by adhering the largest “frame” I created diretly to the gray cardbase. Then I used foam strips to pop up the inner frame and finally glued the center panel directly to the cardbase as well. This is when I started playing with placement of my sunflowers and didn’t like anything at all. I even considered scrapping the sunflowers and reaching for a different image. Until I had an idea to use vellum to diffuse the tone-on-tone look everywhere and I loved it!

So I die cut the center panel from vellum, stamped and heat embossed my sentiment and glued that piece to the center. The sunflower image is popped up with foam squares so it lays nicely on the popped up frame.

I kept the finishing touches on this card simple because there is a lot going on. I used my Wink of Stella glitter brush pen on the centers of all 3 flowers and then glued some blue dew drops from Honey Bee Stamps across the card front.

I am just in love with how this card turned out. And with the sentiment, it can be a card for just about any occasion too! Bonus!

I’m super excited to be joining this team and hope you’ll continue with me through this amazing journey! Thanks for stopping by.

I appreciate you sharing your time with me. Have a fabulous day! And…HAPPY NEW YEAR!!!

Coffee Loving Cardmakers Design Team

Yippee!!!! I’m sooooo excited to finally be able to spill the beans…the coffee beans that is! I’m joining the Coffee Loving Cardmakers Design Team for the 2020 year! This is an amazing opportunity and I’m so honored to be joining the fabulous group of talented cardmakers!

To celebrate this super fun announcement, I made a cute little coffee card with one of my new Newton’s Nook stamps – Slothy Coffee.

To make it I masked off the top portion of my card front and blended distress inks, then spritzed them with water. I stamped, colored and die cut my sloth and popped him up with foam squares.

Using him as a guide, I stamped and heat embossed my sentiment in white. I love how it pops off the dark blue background. Then I added a strip of washi tape from my stash to break up the transition between the card front and inked area.

For finishing touches I added black glaze pen to his eyes, glossy accents to his nose and claws and the stripe on the mug. Then scattered Nuvo Crystal drops across the card-front for added interest.

This is a super simple but really fun card to make and share with any of your coffee loving friends!

I appreciate you sharing your time with me. Have a fabulous day!

Avery Elle – Peek-a-boo Balloon

Hello everyone! Thanks for stopping by today. I hope your holiday was wonderful and you’re recovering from all the excitement! Ours was wonderful and after a few days of cleaning up things are getting back to normal. I was finally able to jump in the craft room and play with some new Avery Elle stamps that I received a few weeks ago. I’m totally crushing on their newest Valentine release!

Today I’ve pulled out my favorite – Peek-a-boo pals – again and paired one with the new Peek-a-boo Balloon for a great birthday shaker card.

I actually started this card by ink blending my background with distress inks – scattered straw, picked raspberry and salty ocean. Then spritzed it with water and set it aside to dry. Next, I stamped, colored and die cut my images from Peek-a-boo Pals and Peek-a-boo balloon. I glued the clouds to the inked panel and started on my shaker.

For that part, I die cut my Plus Frame twice and sandwiched acetate in-between. I scattered some shaker bits to the center of my inked panel, added foam tape to the frame and stuck it down. Then I glued my balloon and monkey to the acetate. For the sentiment I took some vellum and stamped my sentiment in black ink. I cut flags on the ends and sent it through my Xyron sticker maker so no adhesive showed through and stuck it down.

For finishing touches on this super fun card, I added black glaze pen to the eyes, glossy accents to the nose and balloon scallops and finished with Wink of Stella glitter brush pen on one stripe of the balloon.

I love the bright, cheery colors of this card and those peek-a-boo pals will always have my heart. They are so sweet and fun to play with. I love that Avery Elle has started creating things for us to pair them with like this awesome balloon!

I appreciate you sharing your time with me. Have a fabulous day!

Merry Christmas Card From Me to You

Merry Christmas Crafty Friends! I made one last Christmas card just to share with all of you today.

Just a simple card featuring Trinity Stamps narrow card and bookmark die set and Lawn Fawn’s Stamptember set Merry Christmouse.

I die cut all the components and glued them together. Then stamped, colored and die cut my images. After deciding placement I stamped and heat embossed my sentiment and then popped up my images.

These little mice are so stinking cute! They make me smile every time. I hope you all have a wonderful holiday filled with events and people who make you happy!

I appreciate you taking a moment to stop by. Merry Christmas! Have a fabulous day!

Newton’s Nook Penguin Pile Tag

Happy Christmas Eve everyone! I’m so excited for Christmas this year! It’s going to be so much fun! Do you have traditions or plans for Christmas Eve? I’d love to hear them in the comments! We are always struggling to keep busy until bedtime.

Anyway, I have one last tag to share with you today. All of these personalized tags will be under my tree for the special people in my life. It’s the first year I’ve made tags and it was so much fun!

I love this penguin set from Newton’s Nook so much and this was my first time coloring it with actual Christmas colors! The tag is from Trinity Stamps narrow card and bookmark die set.

I die cut my tag from white cardstock and ink blended it. Then cut the bottom again and ink blended it as well. I adhered these together and splattered water. Then I stamped, colored and die cut my images. I popped them up with foam squares and decided to snag the snowflakes from Newton’s Nook Toboggan Together set and the heart from Cup of Cocoa to stamp in the background.

I added white gel pen accents throughout and black glaze pen to the eyes. Then I added glossy accents to the stripes, polka dots, beaks and feet and Wink of Stella glitter brush pen to the hats and earmuffs. Last I added Stickles to the white parts of the hats.

I did die cut another tag in white and glued the recipient’s name to that one. Once everything was dry I adhered them together and added baker’s twine to the top.

This one is all ready and now everyone in my family has one gift with a special handmade tag on it. I hope they all like them!

Thank you for sharing your time with me during this busy time of year! I hope you have a fabulous day! Merry Christmas!

Peek-a-boo Pals Tag

Hello everyone! I hope you had a great weekend and are all ready for Christmas! I’ve been super busy with family holiday stuff but finally managed some time in the craft room to make a couple of last minute projects.

Today I’m sharing another Christmas tag. I loved the star-shaped tag I did before so I decided to try a heart. I love how it turned out!

I used the Lawn Fawn scalloped hearts and inside out stitched hearts paired with Avery Elle polar peek-a-boo pals stamps.

I die cut the scalloped heart from blue cardstock and then the inside out stitched heart 3 times from white. One went on the back with the recipient’s name and the other 2 got ink blended and glued to the front. Then I stamped, colored and die cut my pals and adhered them as well.

For finishing touches I used black glaze pen to the eyes and small noses and white gel pen accents throughout. Then I added glossy accents to the deer hooves and nose and penguin’s beak. I added Wink of Stella glitter brush pen to the antlers, hats and scarves and Stickles to the pompoms on the hats.

The last thing I did was punch a hole and thread some baker’s twine through it.

Super cute and I loved using non-traditional colors for a Christmas tag.

I appreciate you sharing your time with me. Have a fabulous day!

Elf Popcorn

Welcome back and happy Friday everyone! Today I wanted to share a project I designed about 5 years ago and have made them every year since.

It’s essentially a wrapper for a package of microwave popcorn. The front looks like elf clothes and then I add a little piece of cardstock to the back so you can write a message.

To make these I cut 8.5×5.5 green cardstock. Then I cut a red patterned paper (pants) to 8.5×2.5 and a black strip (belt) 8.5x.75. I designed a belt buckle on my Cricut and cut those from gold cardstock and threaded the belt through.

Next I glue the belt and pants to the green panel and score that whole piece 2 1/8 from each side. To make the collar I use a 2″ circle scallop punch, cut it in half and glue the two pieces to the top. Finally I add scor-tape to the back, wrap it around the popcorn and seal it shut.

I have this adorable pair of stamps from Stampendous that I like to put on the back. This white panel is 3×4 inches and I just use tape runner to adhere it. I’ll write a quick note and it’s ready to give. I make these in mass, 44 to be exact, because that’s how many packs come in a Costco box of popcorn. Lol!

These make great teacher and classroom gifts, or put one on all your coworker’s desks like I’m doing today!

I appreciate you sharing your time with me. Have a fabulous day!

Trinity Stamps – Do Re Me Ow

Hello everyone! I’m so happy to be back crafting and sharing fun things with you. My whole family got really sick, including me, which doesn’t often happen. So we’ve been laying low and I haven’t had much energy to craft.

Last night I finally got back in there and made this super fun, punny Christmas card for my daughter’s choir teacher. It features a Trinity Stamps set called DO RE ME OW that is definitely one of my favorites of the year! I hope you enjoy it.

I started by ink blending a background and spritzing it with water. Then I die cut some white glitter cardstock for a snowy hill and set to stamping my images. I colored them with copics and die cut them with the coordinating dies. I love that this set also cuts out the words! So cool!

Then I started assembling everything. The words, music notes and fence are glued directly to the card and everything else is popped up with foam squares. Finally, I moved on to finishing touches, which is my favorite part!!!

I had colored the Christmas lights on the pole but decided to use Nuvo Crystal Drops on them instead. I love how it turned out! I also added glossy accents to the glass on the light, all the kitty noses and tongues, and the sticker on the box.

I put Stickles on the kitty boots and hats and used my Wink of Stella glitter brush pen on the music notes, words and snow on the light pole.

The inside of the card finishes the punny question from the front with, “DO RE ME OW” and under that I added the sentiment from the set, “We wish you a meowy Christmas.” My daughter is so excited to deliver this with his gift tomorrow. I’m sure it will give him a chuckle.

Thank you so much for stopping by today! I’m so happy to be back at it! Have a fabulous day!

Trinity Stamps – Season Greetings Silhouettes

Good morning everyone! I was really restrained over Thanksgiving weekend with all the amazing sales going on but I did splurge on 2 orders. One was the amazing $25 grab bags from Trinity Stamps! I just had to have one! It came in this week and I had a moment to play with this new-to-me set called Season Greetings Silhouettes. It’s beautiful and totally the opposite of what I usually reach for so I really enjoyed creating with it.

I started by arranging my stamps to get an idea of the layout. Then I cut a 5.25×4 inch panel and grabbed my distress inks. I inked up that panel with weathered wood, faded jeans and black soot distress inks and splattered it with water. Then I stamped a few trees directly to the background and die cut two stitched hills. Next, I stamped more trees and the deer images and used my Scan-n-cut to cut them out.

I stamped and heat embossed my sentiment at the top and started adhering everything together. This is such a sweet and serene card. I love how calming it is.

Are you finished with your Christmas cards yet? I need to get mine in the mail ASAP!

I appreciate you sharing your time with me. Have a fabulous day!