It’s time for the Coffee Loving Cardmakers Hop so I’m popping in with some caffeinated inspiration to share with you. I always have fun with these because I can mix and match all the companies and create whatever suits me. I love it!
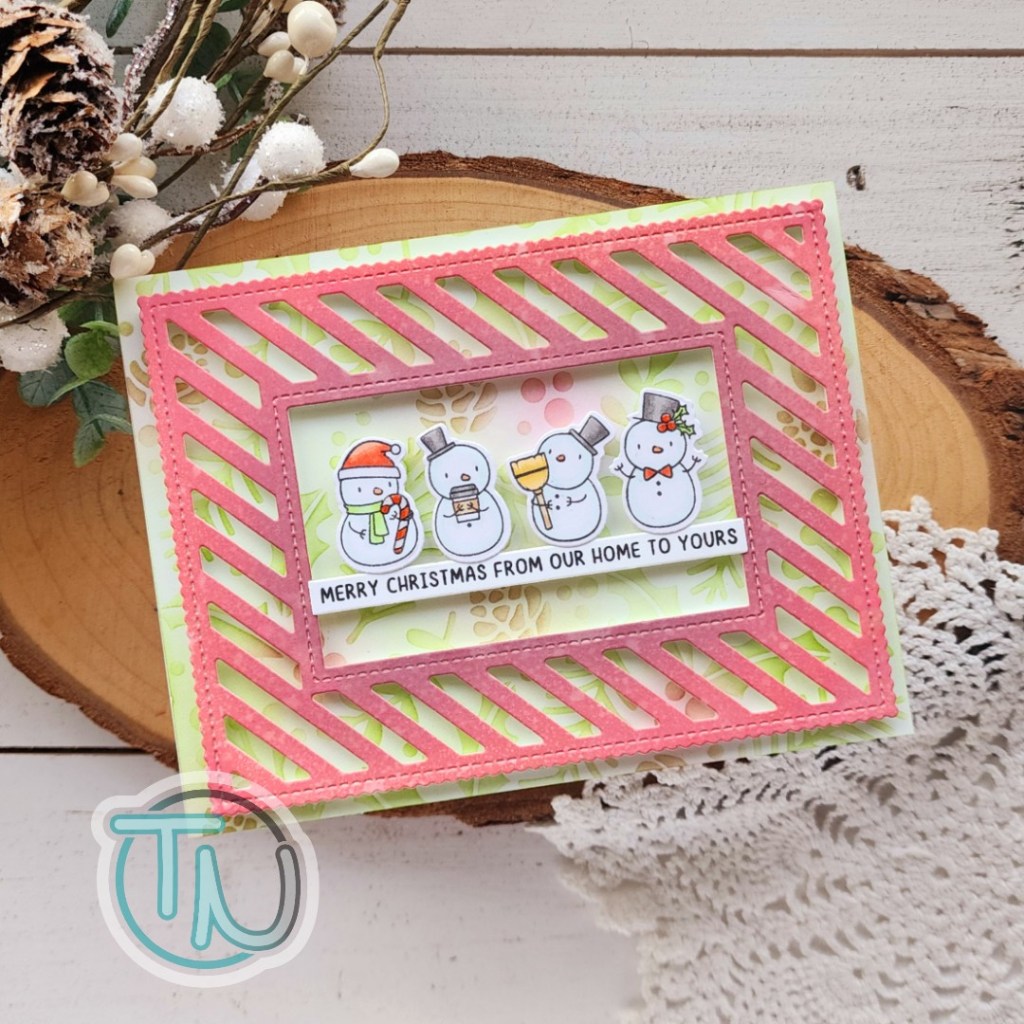
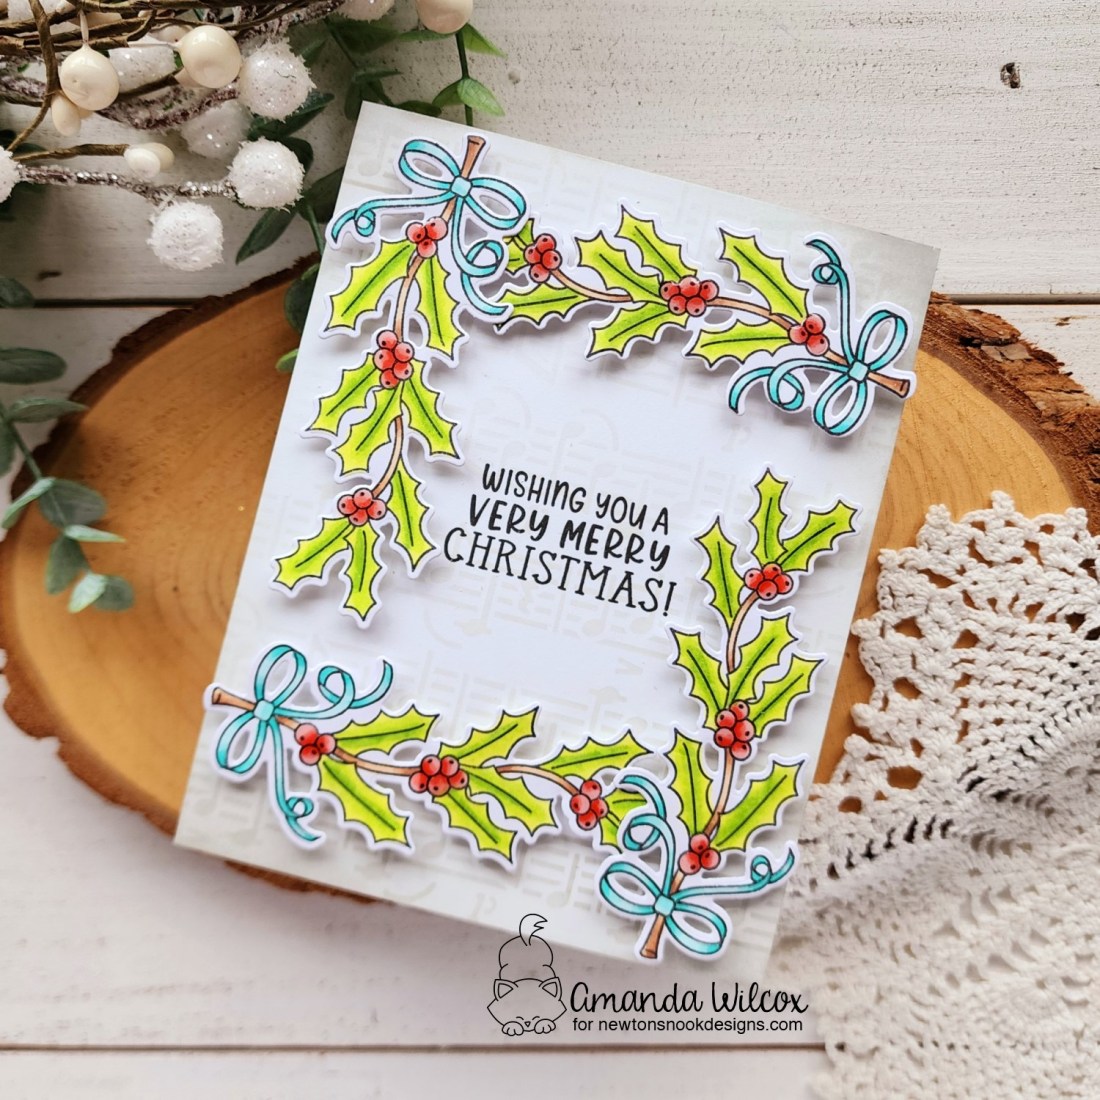
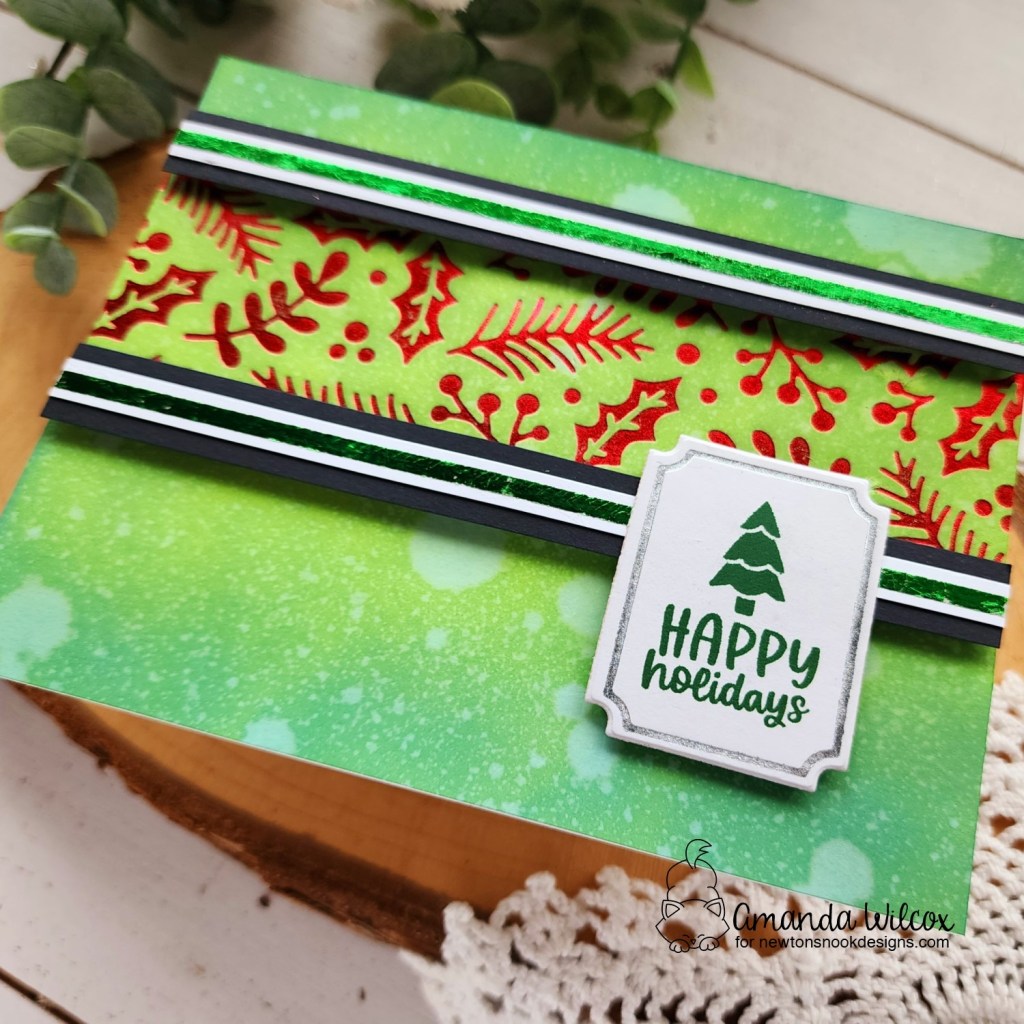
A few weeks ago I shared a card for Doodlebugs that used the inlay pieces from this Mama Elephant frame, but there was no way I was wasting the frame. It turned out to be perfect for my card today!
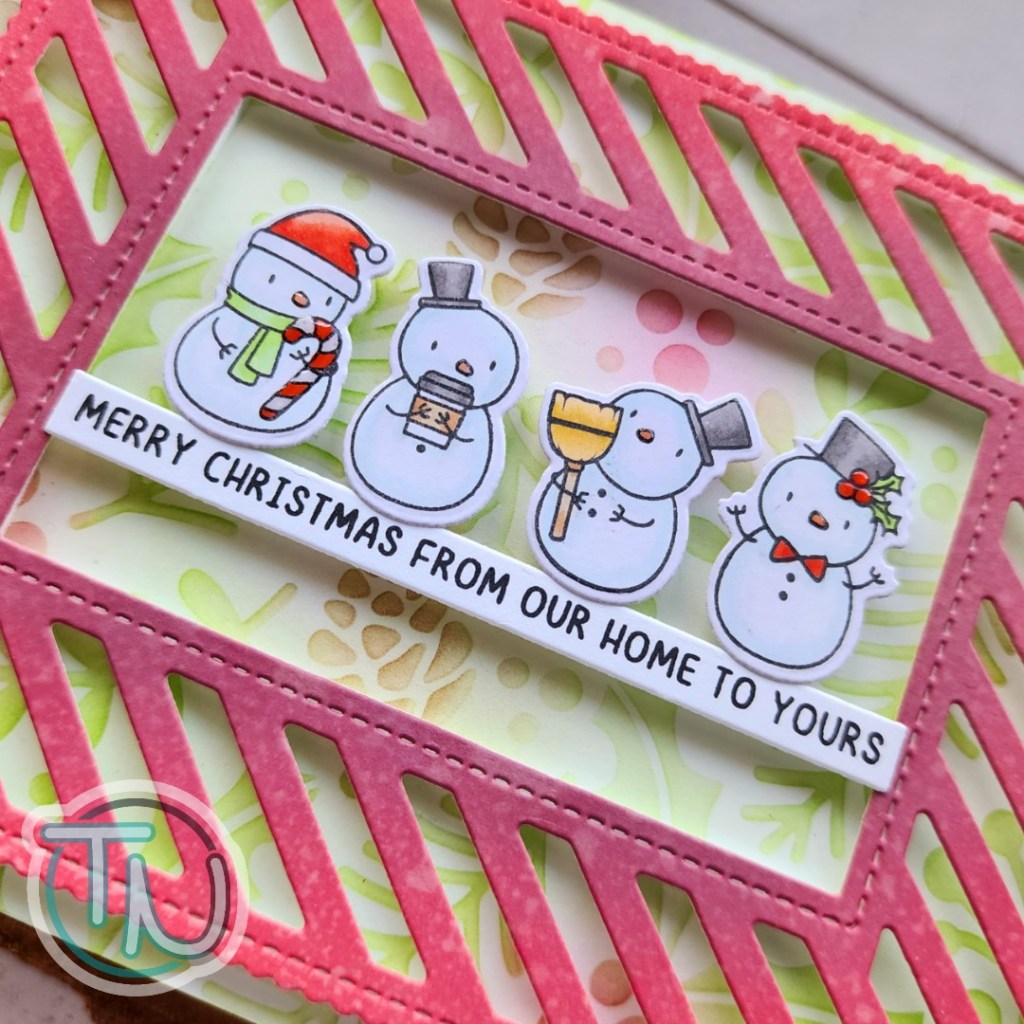
I colored some Mama Elephant Little Agenda Snowmen and die cut them. Then snagged an extra sentiment I saved from the Mama Elephant Easy Xmas Greetings. These sets are fun because they stamp and die cut three sentiments at a time.

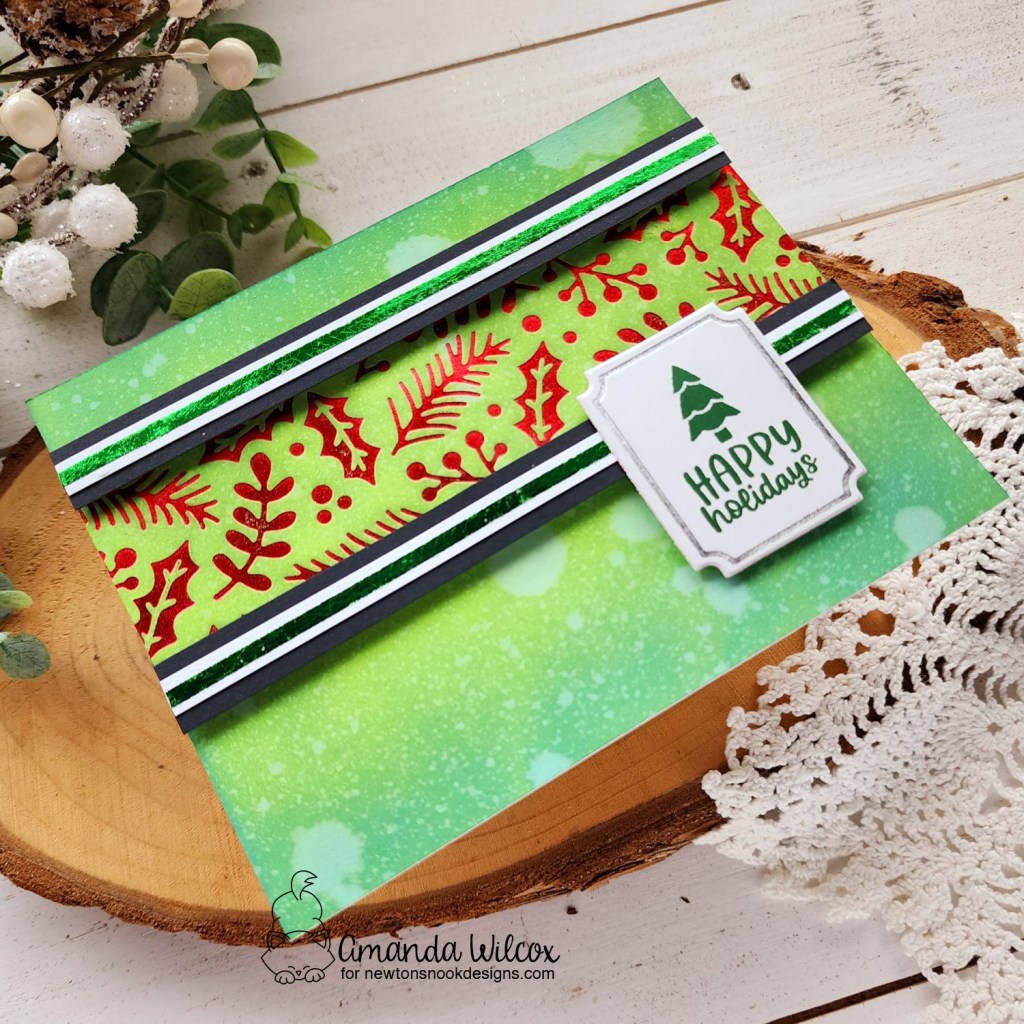
I inked up a background panel with the Newton’s Nook Holiday Foliage stencil, then went over the whole panel with a light layer of the same inks I used on the stencil. This gives a great glow around the images. I love it.
Then I added all of my pieces with foam strips and squares. Finished touches were just some glossy accents on the snowman noses, candy cane and holly berries.
Are you linking up with the Coffee Loving Cardmakers Hop? So many fun prizes up for grabs! Come play with us!
Products used:
Mama Elephant Little Agenda Snowman stamps and dies
Mama Elephant Easy Xmas Greetings stamps and die
Mama Elephant Sweet Shoppe Frame dies
Newton’s Nook Holiday Foliage stencil
Blending brushes
Foam strips and squares
Glossy accents
I appreciate you sharing your time with me. Have a fabulous day!