Hey there everyone! We’re gearing up for gift giving with this week’s Mix it up Monday. As our family has gotten older we give more gift cards for the holidays than we used to. It’s fun to make them a little extra by putting them in something fun and cute instead of those sleeves they all come with.
Today I’ve got a pair of adorable gift card holders using the awesome Pretty Pink Posh Gift Card Bag dies and some Mama Elephant images and sentiment banners. I can’t wait to see these hanging on our Christmas tree!
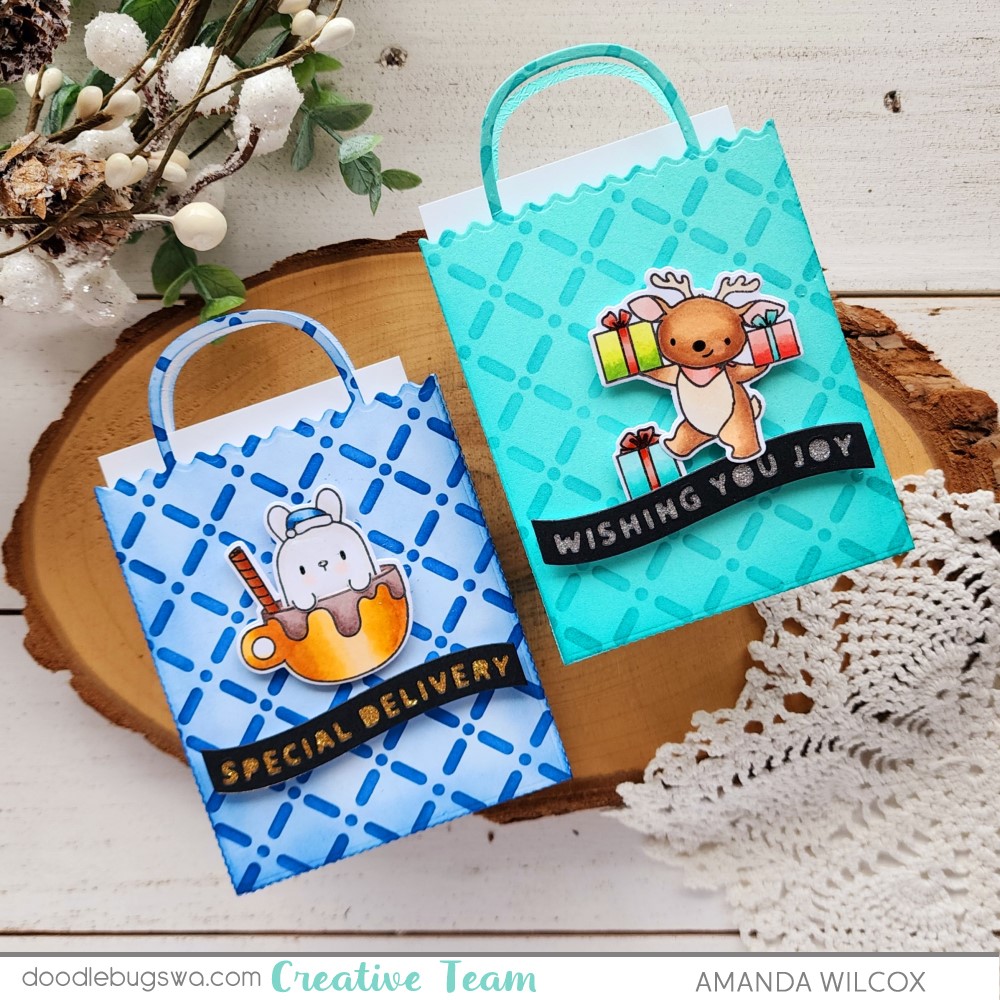
I cut two sets of gift card bags – one from white cardstock and the other from teal. Then I ink blended both using the Pretty Pink Posh Trellis stencil and Lawn Fawn dye inks – deep sea and peacock. I used a tear tape to adhere the front and back of the bags together. Now let’s decorate them!

I started with this wintery version using the sweet bunny and mug from Mama Elephant Holiday Huggers. I chose to color the peppermint stick like a cinnamon stick and his hat blue to keep with the winter/hot cocoa vibe instead of Christmas.
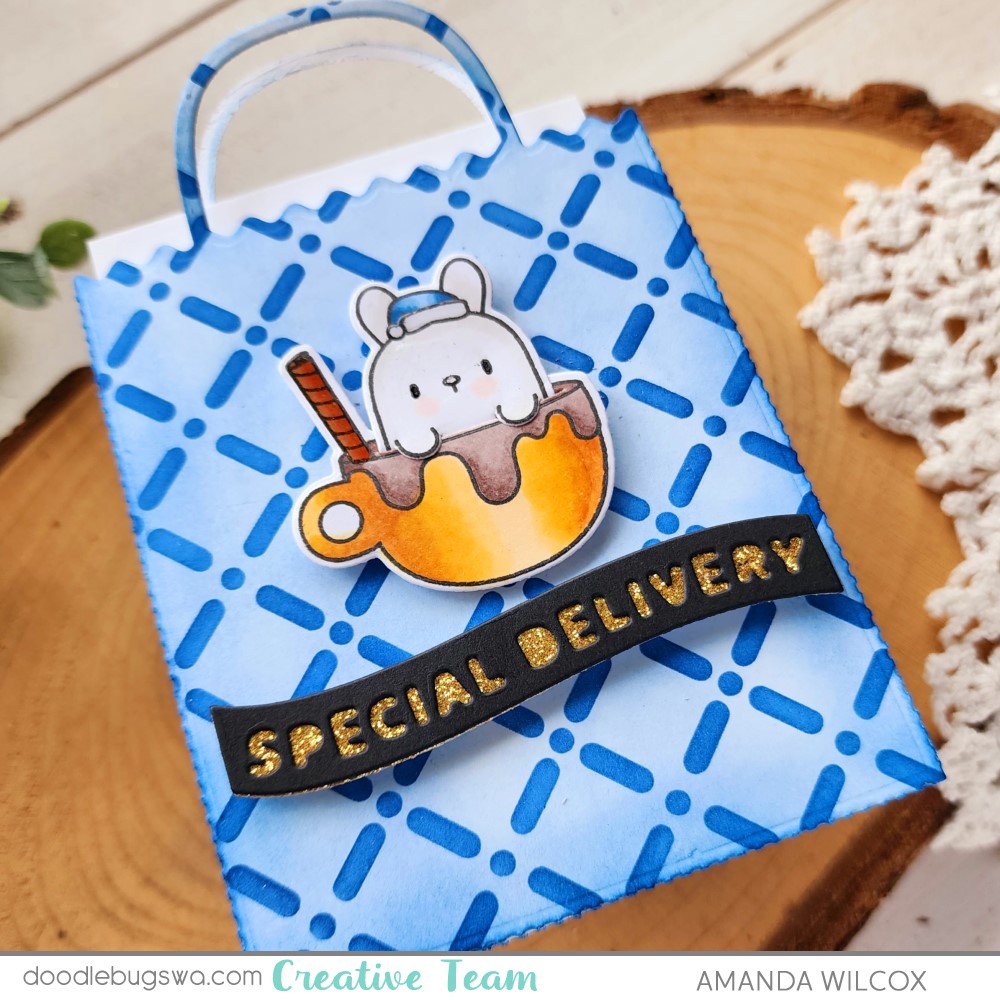
I popped him up with a Mama Elephant Banner Greeting using foam squares and strips. Then I used black glaze pen on the bunny’s eyes and glossy accents on his nose and hat.

But I couldn’t make only generic ones. These reindeer from Mama Elephant Holly’s Reindeer are irresistible and I was so excited to color this cutie and his gifts. I followed the same design and popped him up with another banner sentiment but this time I went with silver instead of gold.

On this one I used the black glaze pen on the reindeer’s eyes and nose, then glossy accents on the package bows. I also created little inserts that are perfect to tape gift cards to and write a message on as well.
I know some people have strong feelings about gift cards versus gifts for the holidays, what side are you on?
I appreciate you sharing your time with me. Have a fabulous day!