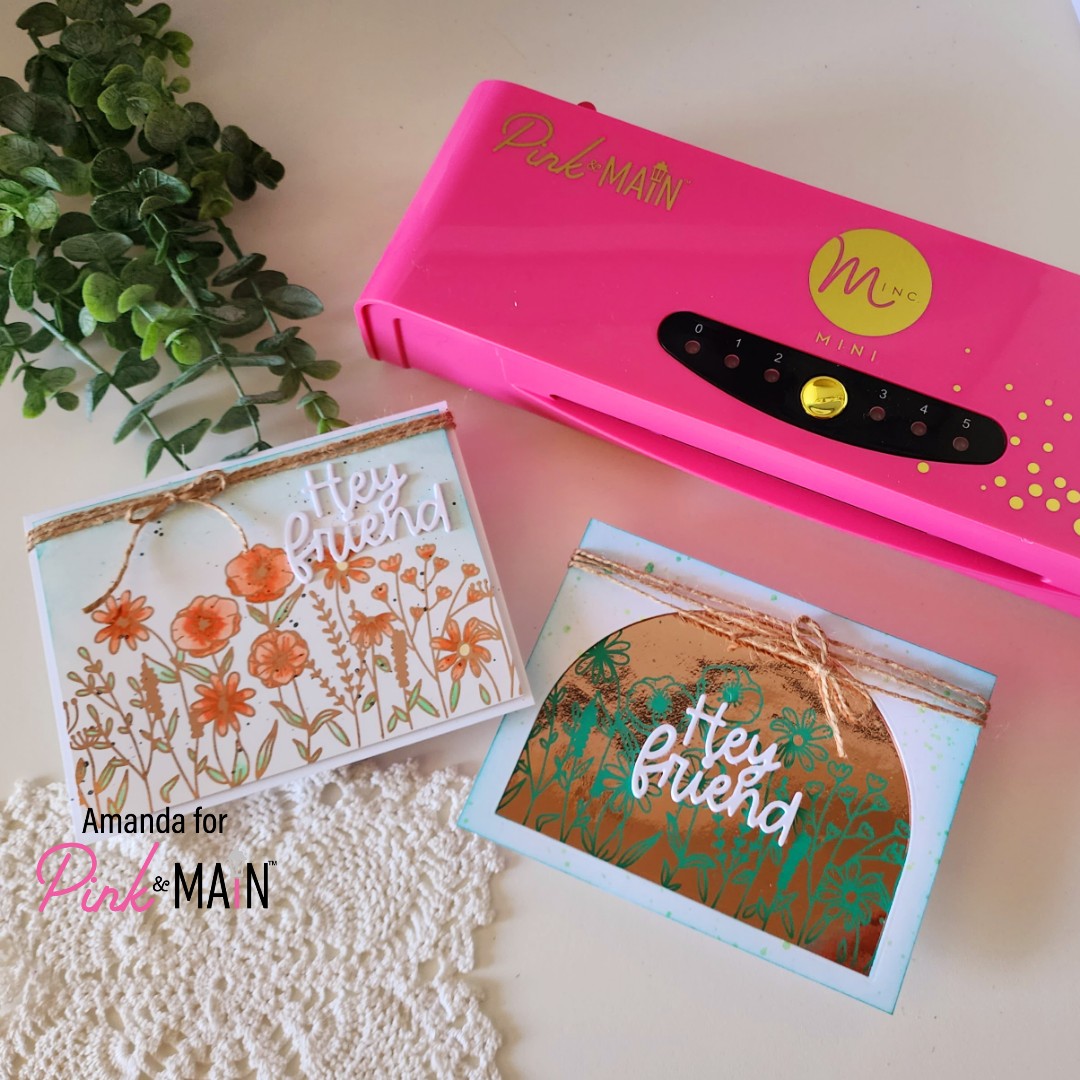
Hey friends! I’m popping in with some extra fun today! We’re highlighting the recently released Pink & Main Minc Machine and CheerFoils! I created a couple of cards to share but also want to share my opinion given that I have extra experience and knowledge of other brands as well.
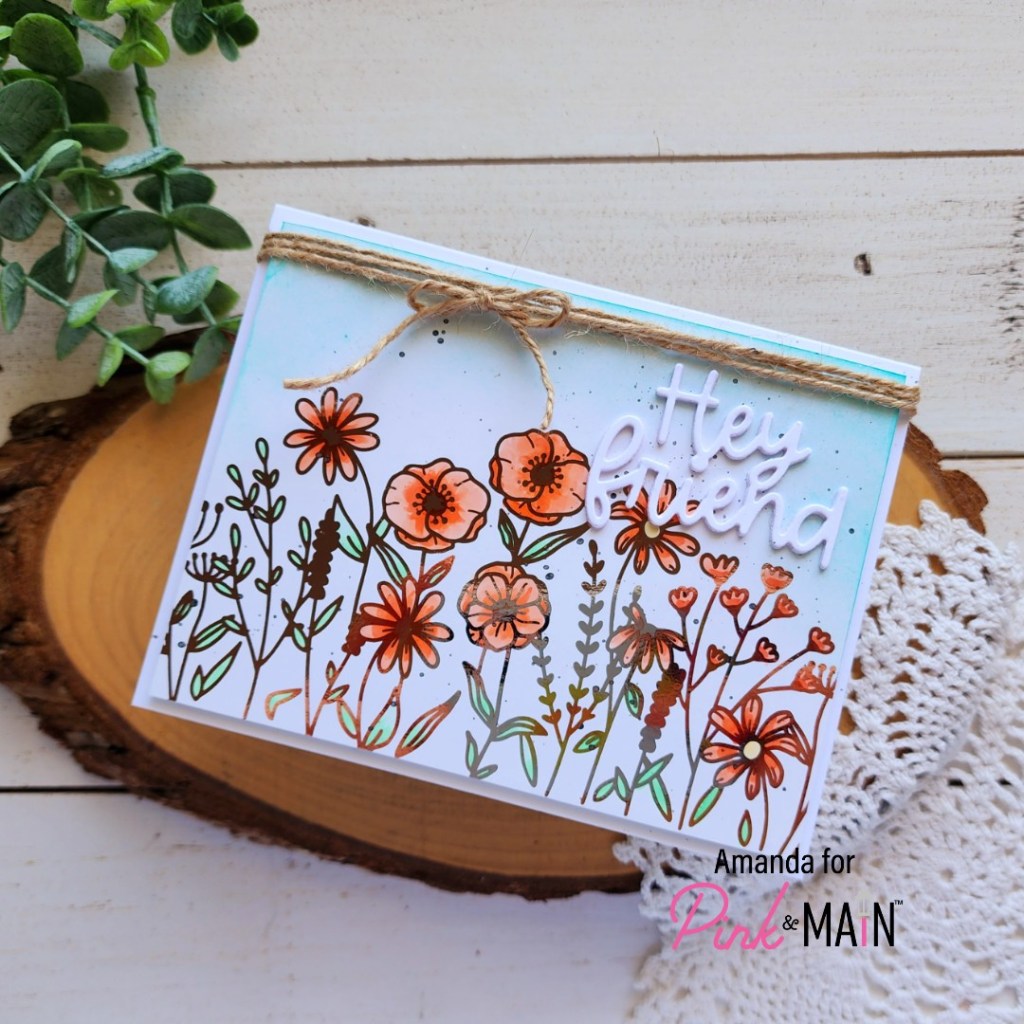
I foiled one of the Wildflowers foilables panels with rose gold CheerFoil and colored the images in with my copic markers. I love that you can color over foiling! Then I took my negative and foiled it over a teal Garden Color Toner Sheet to get a two-for-one out of my foil!
After coloring the first foiled panel, I trimmed it to 4×5.25 inches and inked a light teal sky before splattering the panel with a bit of black acrylic paint. Then I used the sentiment die from Wide Stitched Arches dies four times on white cardstock. I glued them together with EZ Squeeze liquid glue and glued them to the panel.
I added the panel to a white card base with foam tape and then wrapped some twine around it and tied it in a bow. Check out that gorgeous shine in the light!!!
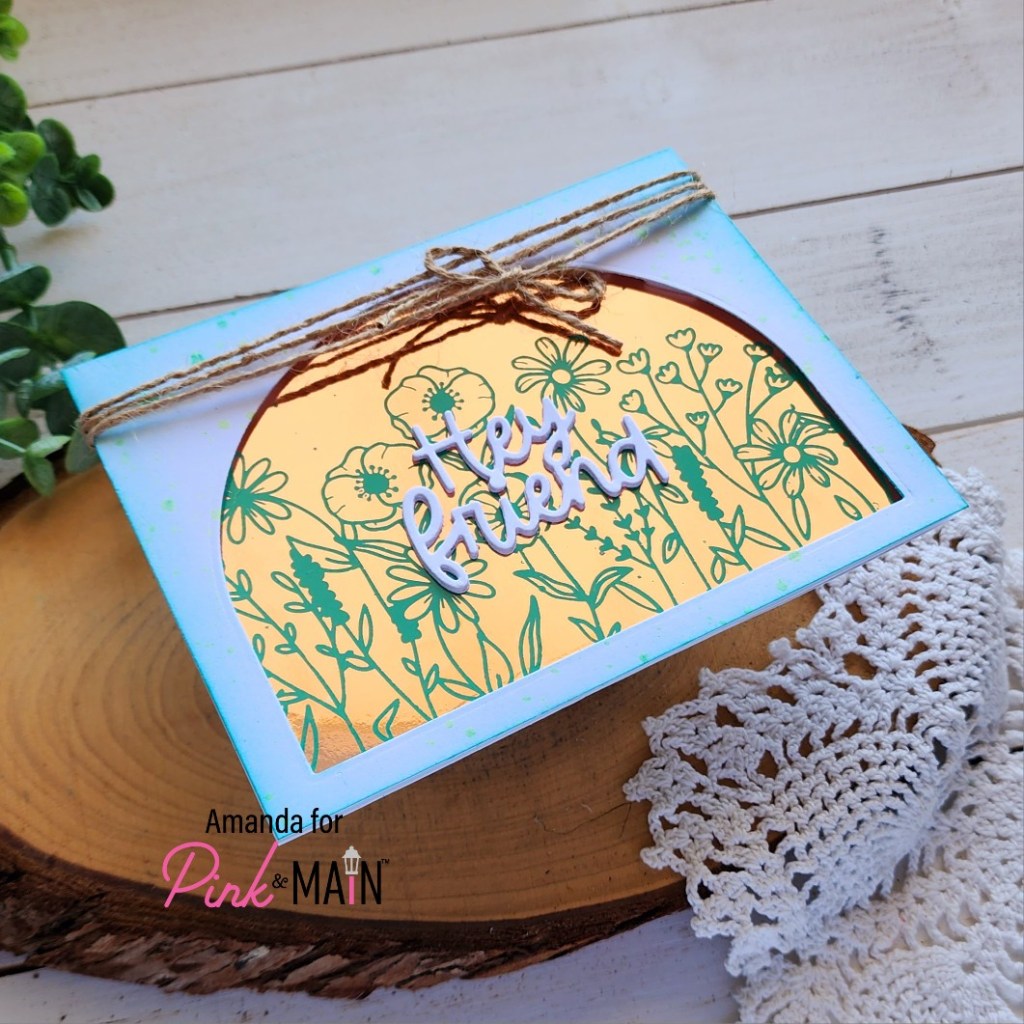
Next, I had the reverse foiling panel which is SO COOL!!! Pink & Main is the first to have colored toner sheets so your negative doesn’t have to always be black. These colors are beautiful!
For this card, I kept to the same products but using the Wide Stitched Arches to cut a window from a panel and popped it up over the top of the foiled panel. I added the same hey friend sentiment to the center and wrapped the same twine around the top too.
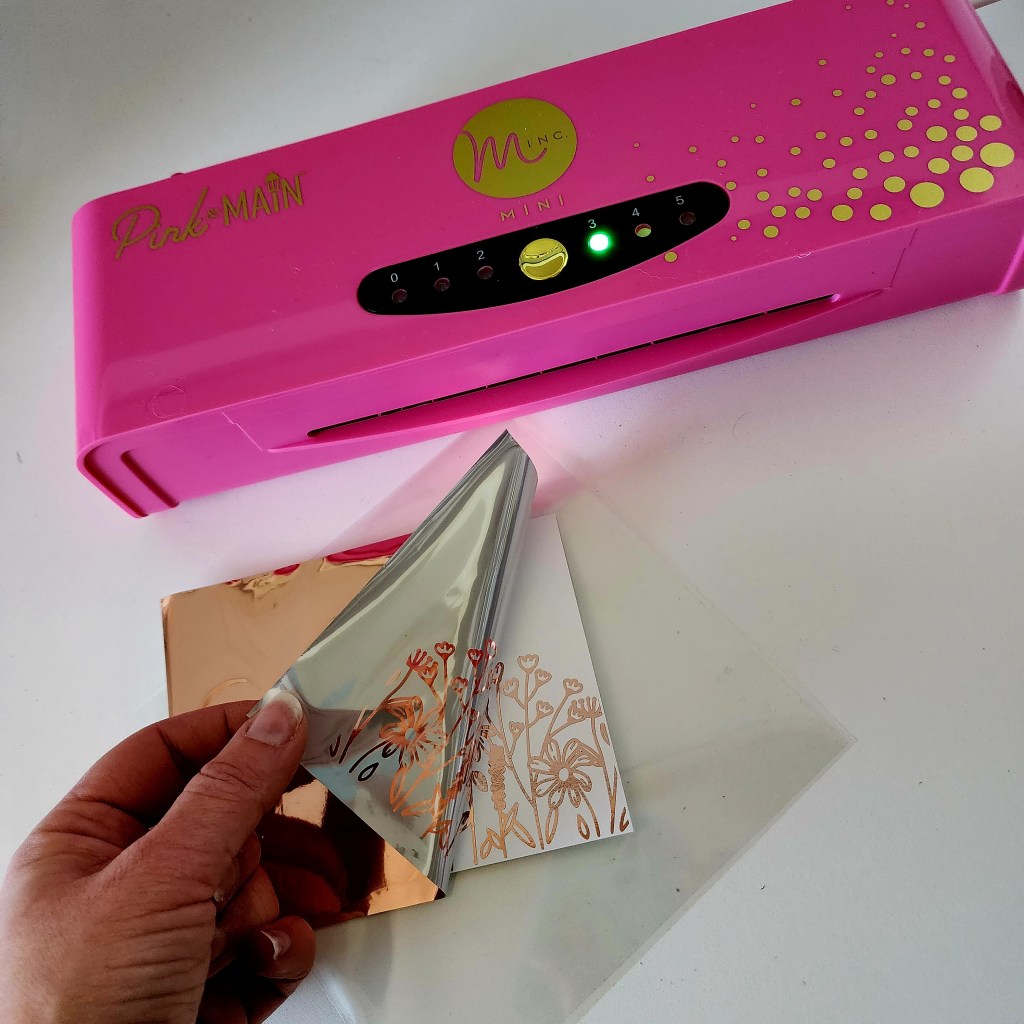
Now, check it out…I’m going to be so real right now. I have done a TON of foiling over the last few years. I could not believe how quick the Minc heated up, how easy it was to use and MOST OF ALL how beautiful it foiled!
I had a blast creating these two cards, and, honestly, kept foiling after these were done because I didn’t believe it was going so well. I highly recommend snagging one of these sweet Pink & Main Minc machines if you like or want to try foiling at all.
REMEMBER
There’s an Instagram Hop going on where you could win a new Minc plus all the goodies to start foiling too. So, head there, hop and check out the inspiration, leaving comments along the way to increase your chances of winning.
Welcome back friends. Yesterday was a very busy day so although this released yesterday, I’m sharing it today to spread things out a bit.
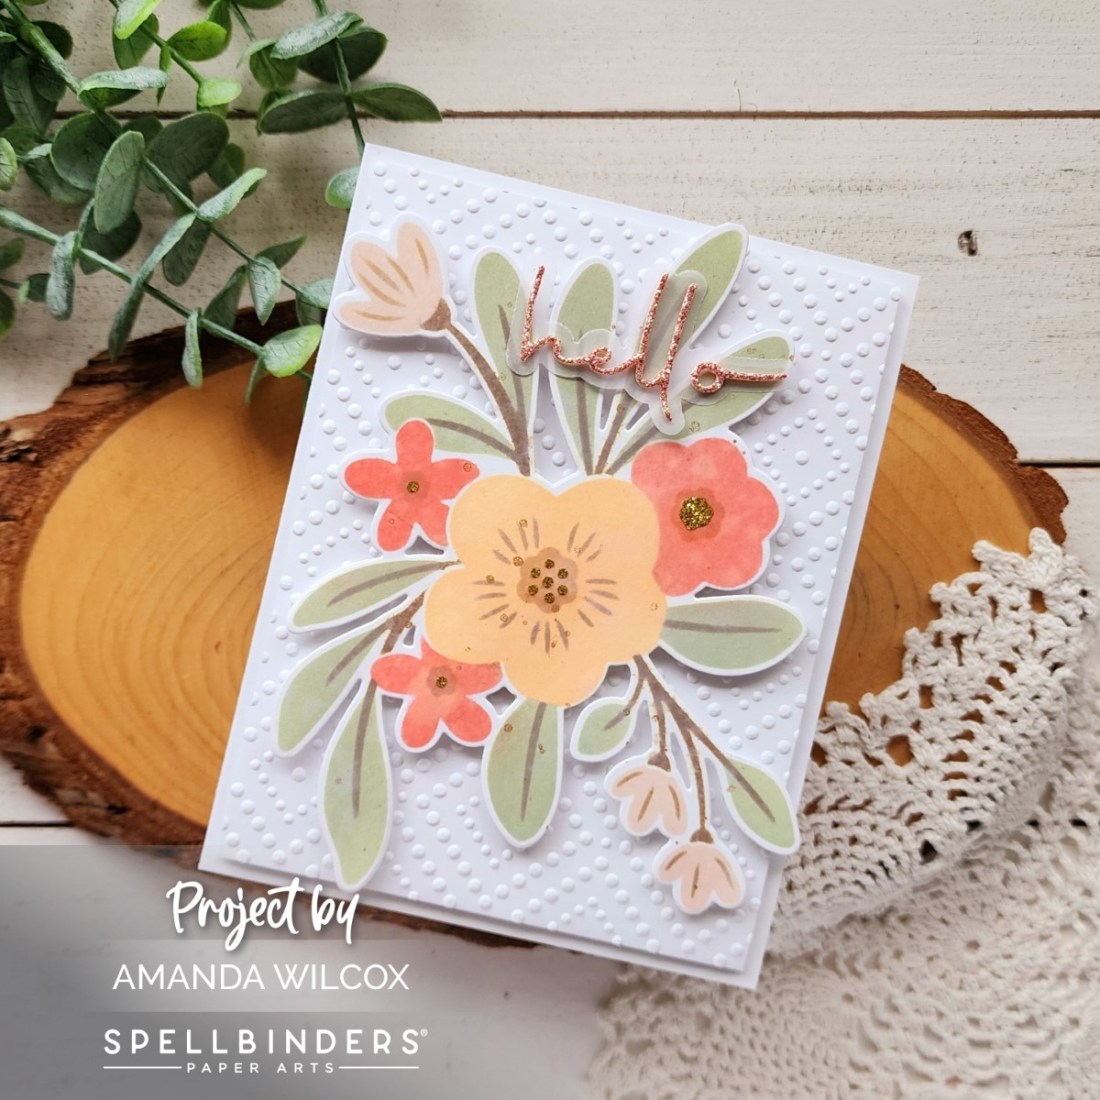
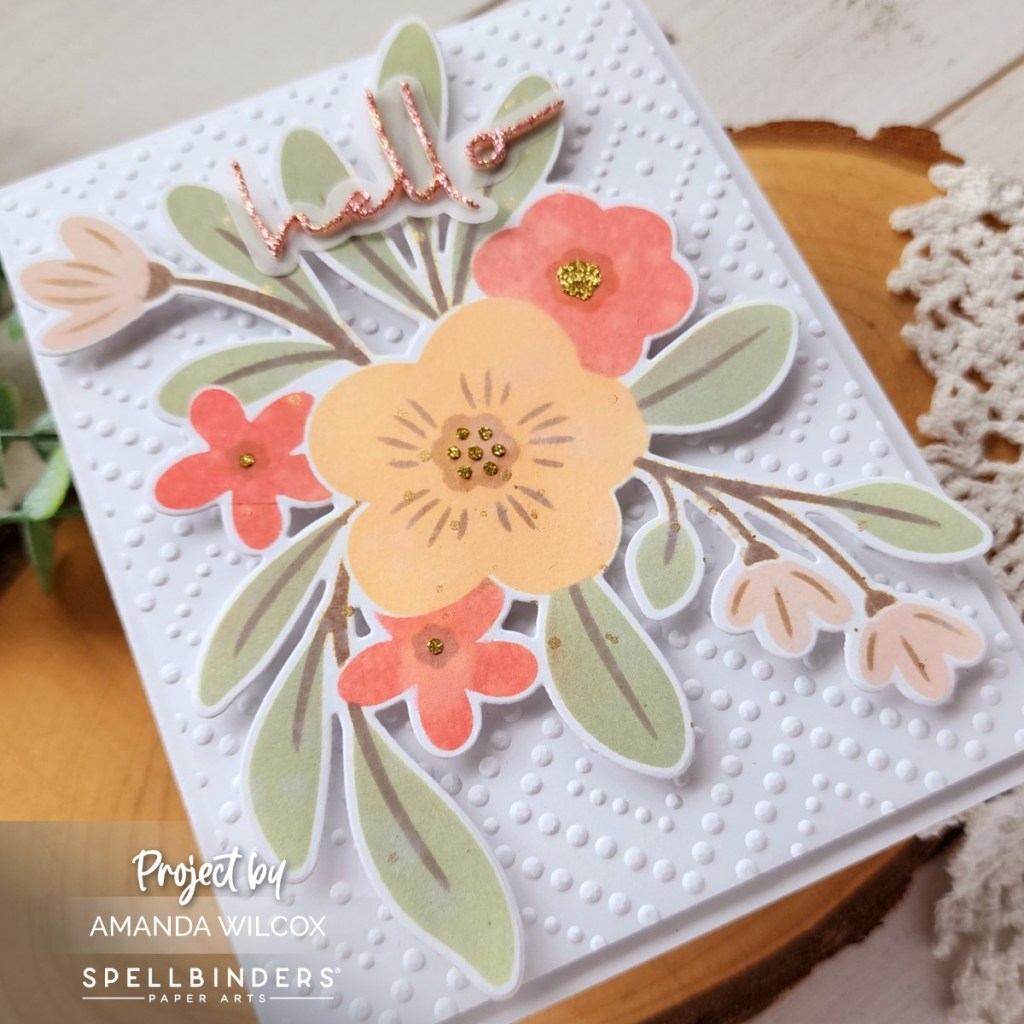
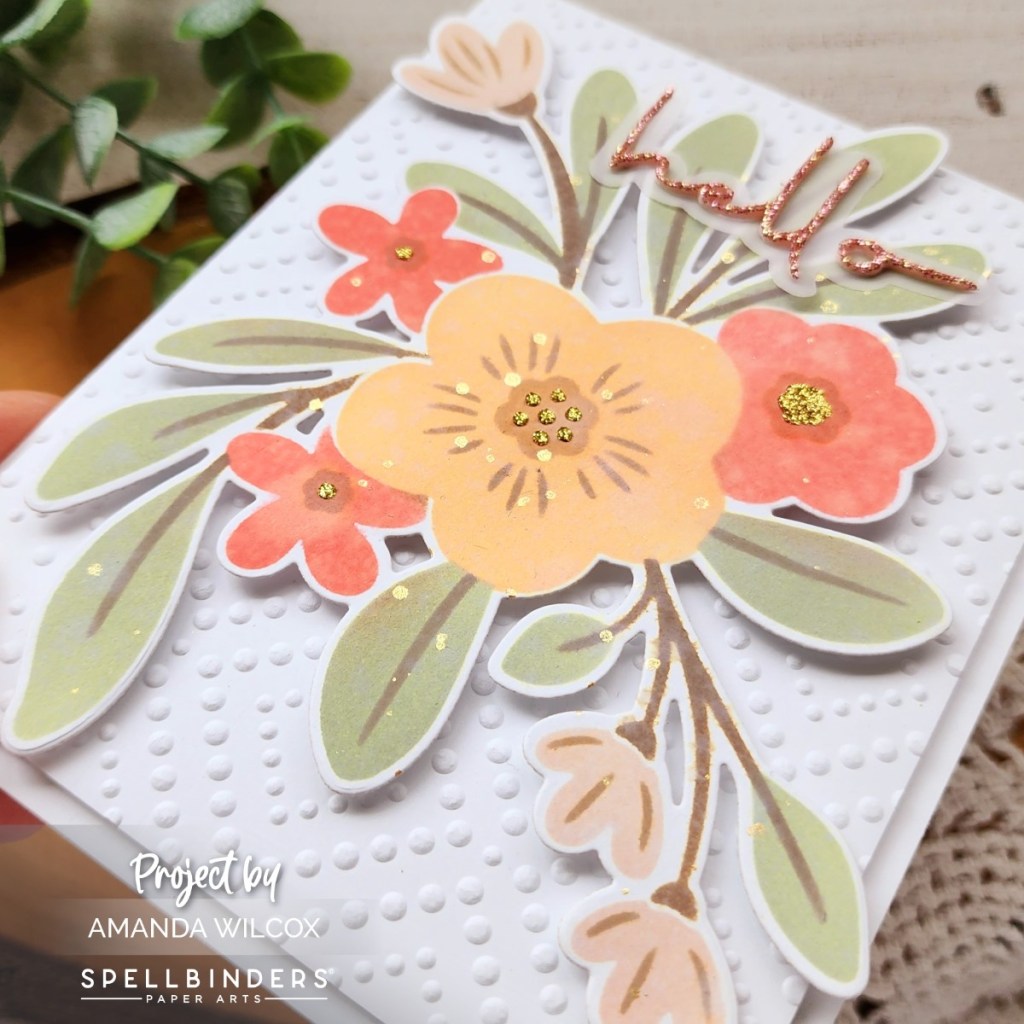
Spellbinders has a few releases this month that I was lucky enough to get to play with early. The Glimmer Cardfront Sentiments release also has this gorgeous stencil and die combo. I loved creating this card and think making sets of these in color themes would be a wonderful gift to share with someone.
To start, I used an A2 piece of white cardstock and inked up the stencil, step-by-step. It was super easy to follow and has registration marks for each step so you know it’s lined up perfectly. I chose distress oxides today because I wanted to splattered/splotchy look. For my detail layer on the flowers, I also used glitz glitter gel to add sparkle to the flower centers. Once it was dry, I used the coordinating die to cut the florals out.
I spritzed them with water and blotted them dry, then flicked gold watercolor on them as well. While that step was drying, I took a 4×5.25 inch white panel and used the Dazzling Dots embossing folder on it. I popped this panel up on a white card base with foam tape before doing the same with the flowers.
There is a wonderful hello die and shadow that comes in the set as well. I cut the word from glitter foam using the peach in the painted desert pack. I used liquid glue to adhere it to the vellum shadow and then to the flowers.
Isn’t this stencil just beautiful?!? It was so simple to use too!
Welcome friends! I was on the Doodlebugs blog yesterday with another guest post but my blog was so crazy I didn’t want this to get lost so I figured I would share it here a day later.
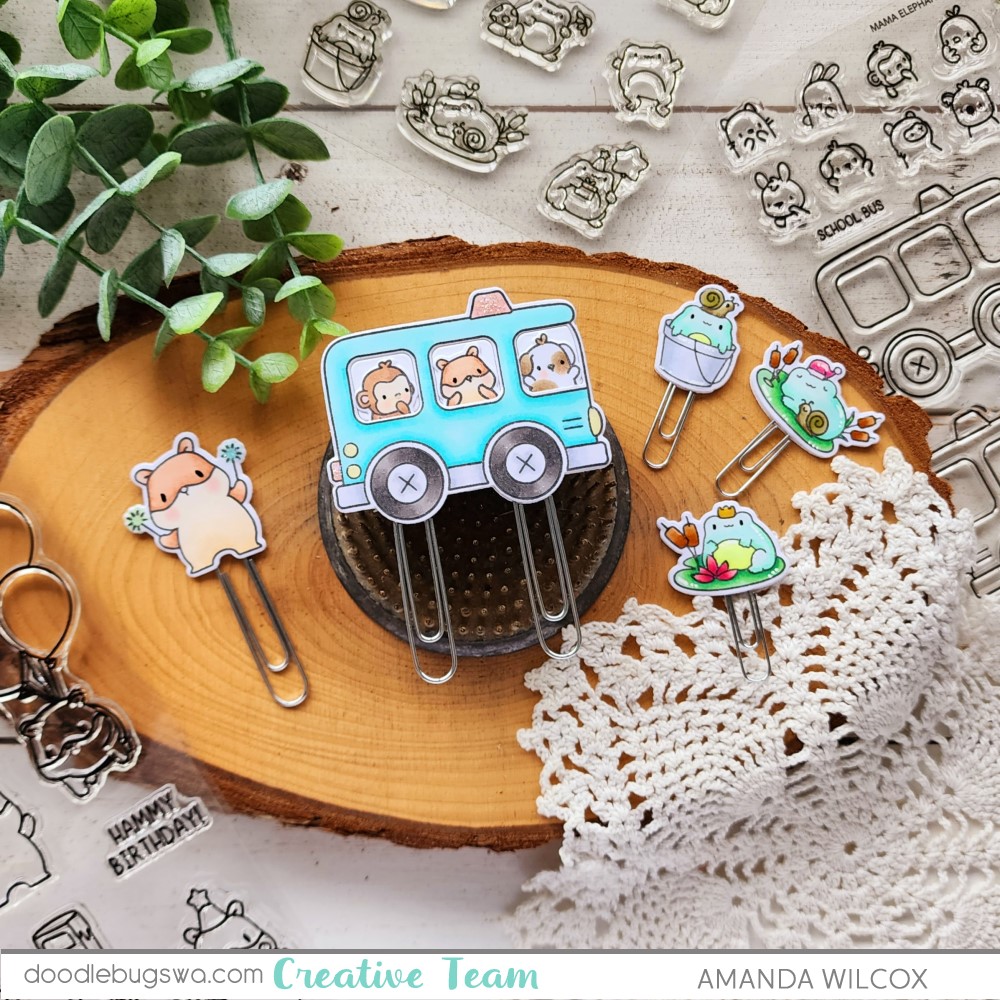
This time I’m not sharing a card but a fun way to decorate your desk or planner with super cute paperclips! They are really easy to create, totally addicting and would make a fun gift along with something to use yourself.
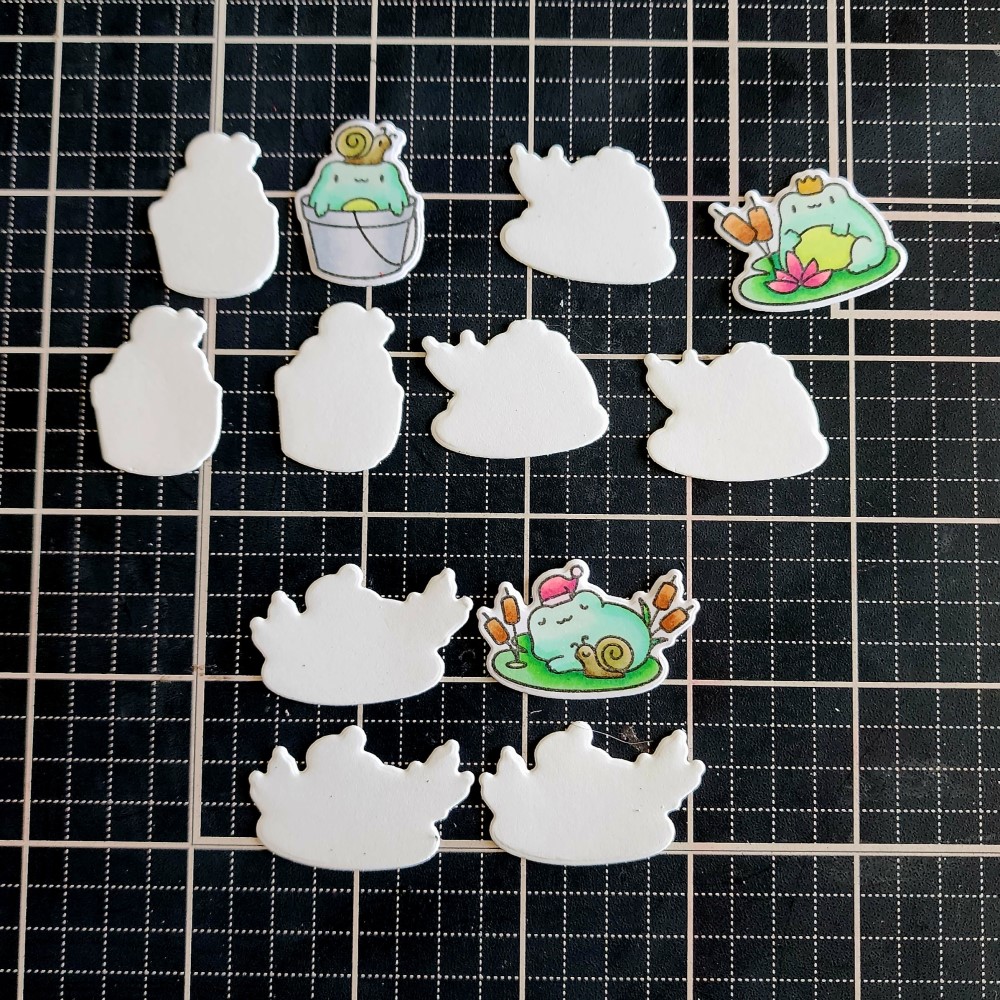
Here’s a look at the set I created this time. So many sizes for different uses. The large one could hold your planner more flat while writing in it while the others are great for keeping your place in your planner, book or use it as a regular paperclip on your desk.
To create these I started by stamping the images I wanted to use and colored them with copic markers. Using the coordinating dies I cut the images out, plus 3 additional blank ones too. I glued the colored image to one blank, then glued the other 2 blanks together. You should have 2 sets of each image now.
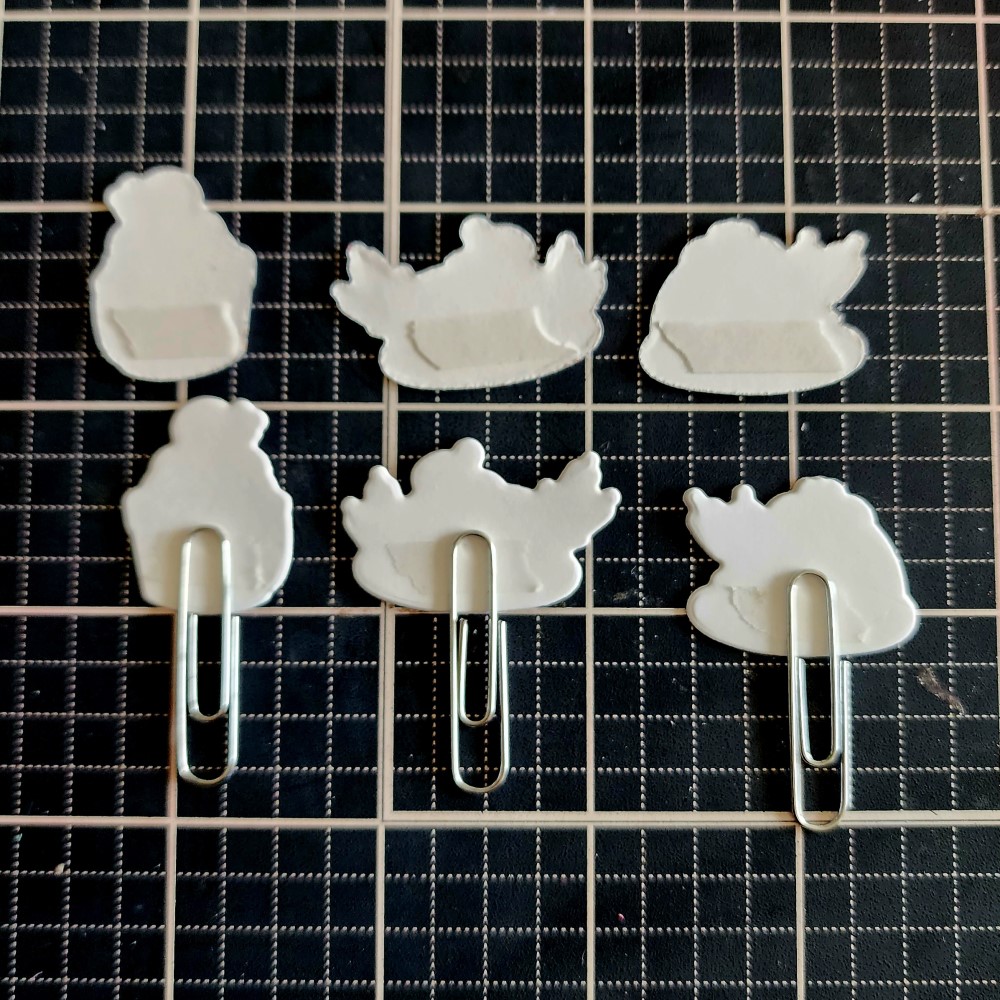
Next, I add double-sided tear tape to the back of the colored ones and the front of the blank stack. remove the release paper from the blank ones and position your paperclip where you want it. I put it as high as I can, where the points of the metal ends rest along the bottom of the image. Next, I add strong liquid glue all the way to the edges of this, remove the release paper on the back of the colored stack and adhere them together.
*Tip: I don’t find that acrylic blocks put pressure in the right areas on these so I do take a moment to hold the layers together for a good hold.
This was my first large, double clip and I am loving using it to hold the page I’m writing on in my traveler’s journal. It’s the cutest, totally makes me smile and holds everything more flat than the others.
When I created this guy, I actually intended him for my desk at work for a little extra happy but he happens to hold my folder of mini photos closed in my traveler’s journal closed perfectly, so that’s where he lives for now. This size is also great to use as a bookmark.
Also, my boss was eyeing this guy, reminding me of when her birthday was so I think I better make a set of them.
Finally, I just had to make a few with the new Little Froggy Agenda cuties! They are my favorite! The happy colors and cute images are perfect!
Remember, you can add finishing touches to these for that little extra as well. I used black glaze pen on any eyes I could, white gel pen highlights on the frogs and glossy accents on things like snail shells, cattails and noses. Then I also added sparkle with stardust Stickles to the sparkles in Hammy’s hands and the lights on the bus.
I have to know…will you give these a try? For yourself or a friend?
Products used today: Mama Elephant Little Agenda Froggy stamps and dies Mama Elephant Little Agenda Bus stamps and dies Mama Elephant Celebration Hamsters stamps and dies Bearly Art liquid glue 1/4″ double-side tape Stickles – stardust Sakura black glaze pen and white gel pen Glossy accents Copic marker
I appreciate you sharing your time with me. Have a fabulous day!
Oh my goodness friends! I’m SUPER EXCITED to announce that Miss Ink Stamps has a new release coming and it’s so fun! There is magic and critters and flowers and EVERYTHING!!!! You’re going to love it!
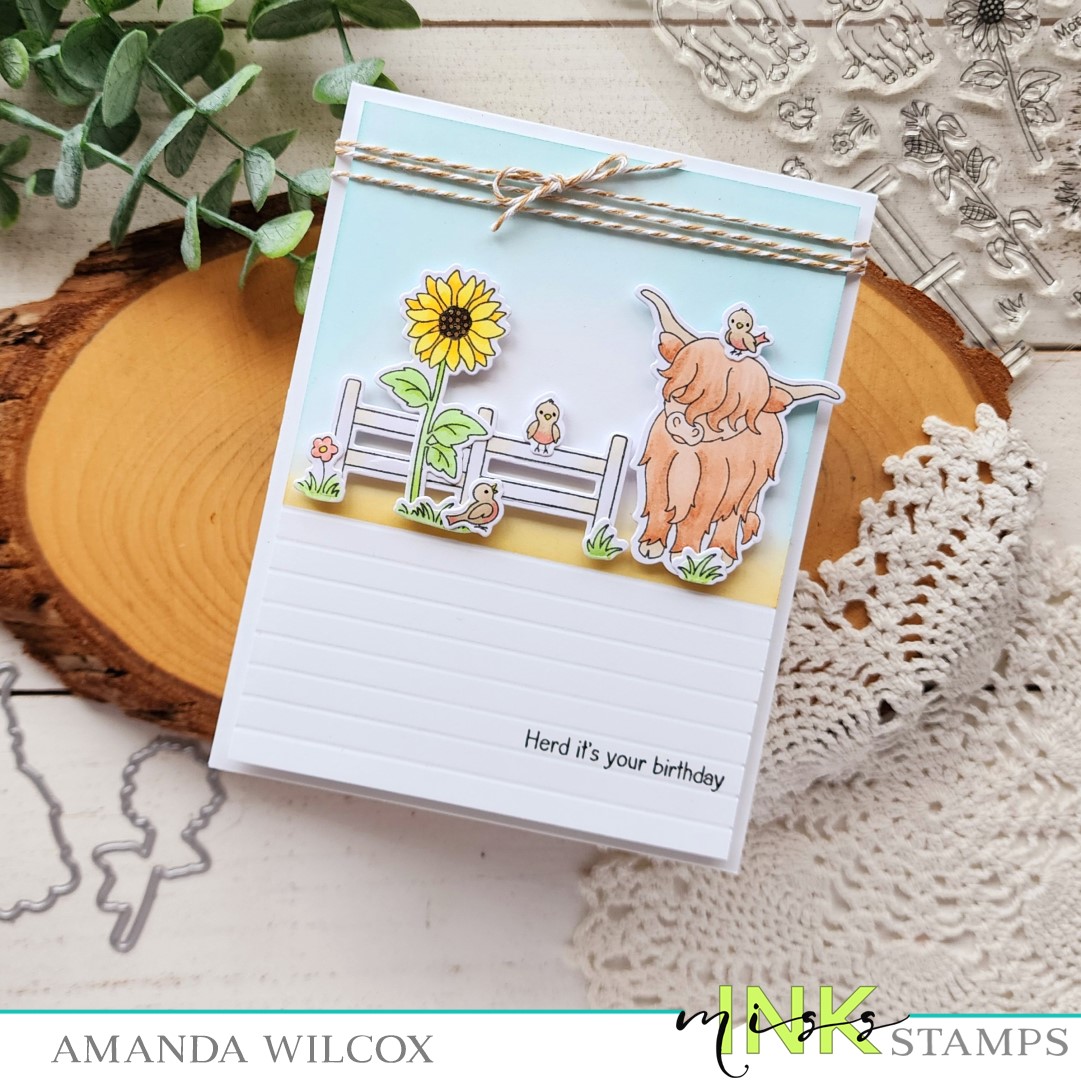
My personal favorite…highland cows. IYKYK. Trust me. I love cows!
I colored this cutie and his friends with my copic markers, added some fun scene setting images too and used the coordinating dies to cut them out. Then I used liquid glue to adhere all the little elements to the big ones.
Then I took a 4×5.25 inch white panel and scored it every 1/4″ for 2″. The sentiments in this set fit perfectly! So I chose one and stamped it. Then masked off the lines with post-it tape and inked up a little dirt and sky on my panel. I added the images with foam squares and popped the panel up on a white card base with foam tape.
Before adding finishing touches to the front, I stamped a second sentiment and the sweet baby cow on the inside of my card. Doesn’t that just crack you up? It’s so good!
Moving back to the front, I tied some twine around the top and tied it in a bow. Then I added black glaze pen to the birds’ eyes and Touch of Gloss to their beaks and the flower center.
Be sure to check the rest of the design team today through Friday for more sneak peeks of upcoming fun and then head to the Miss Ink Stamps shop on Saturday, May 13, for release day!
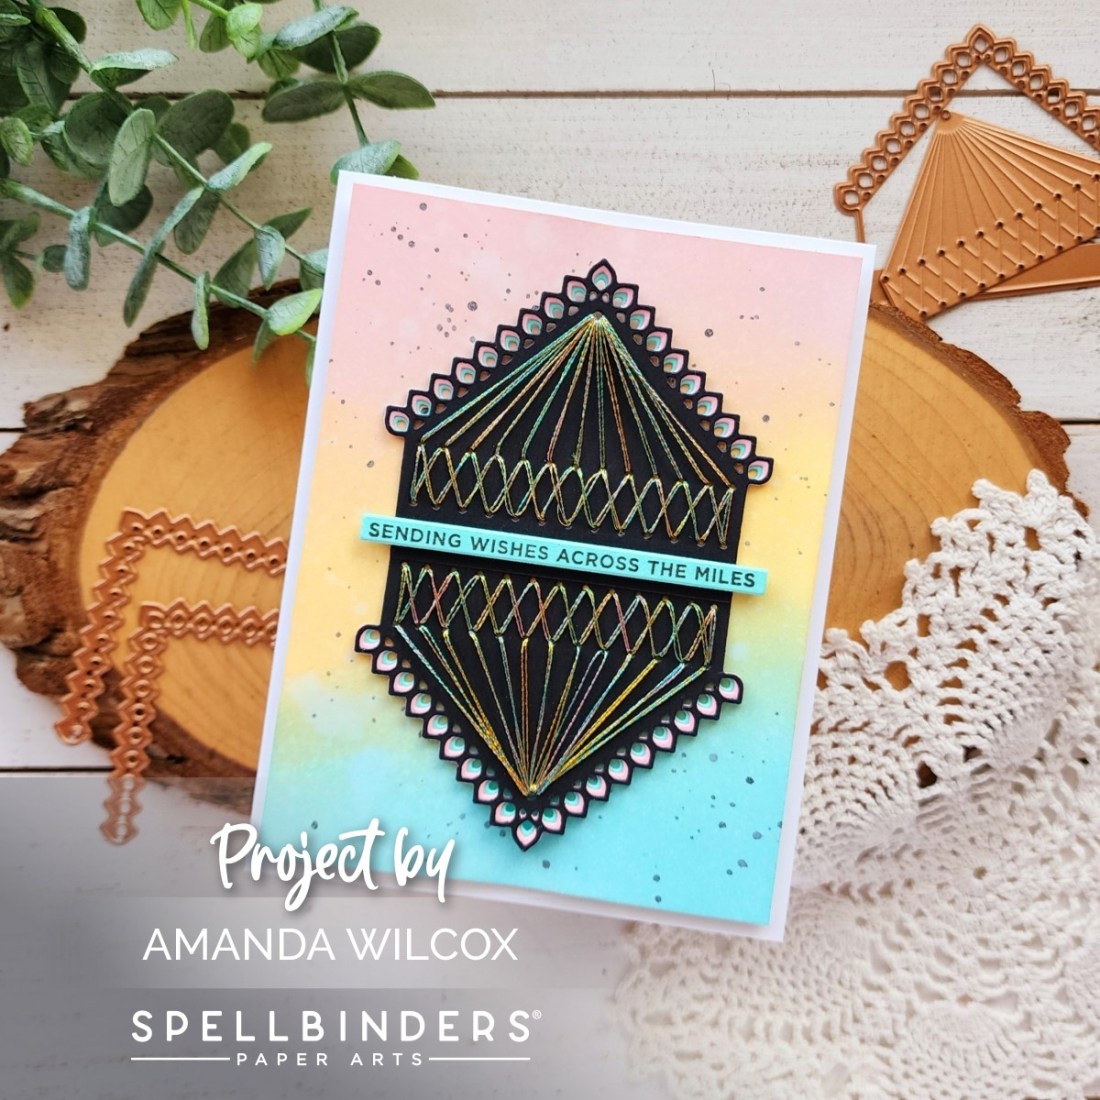
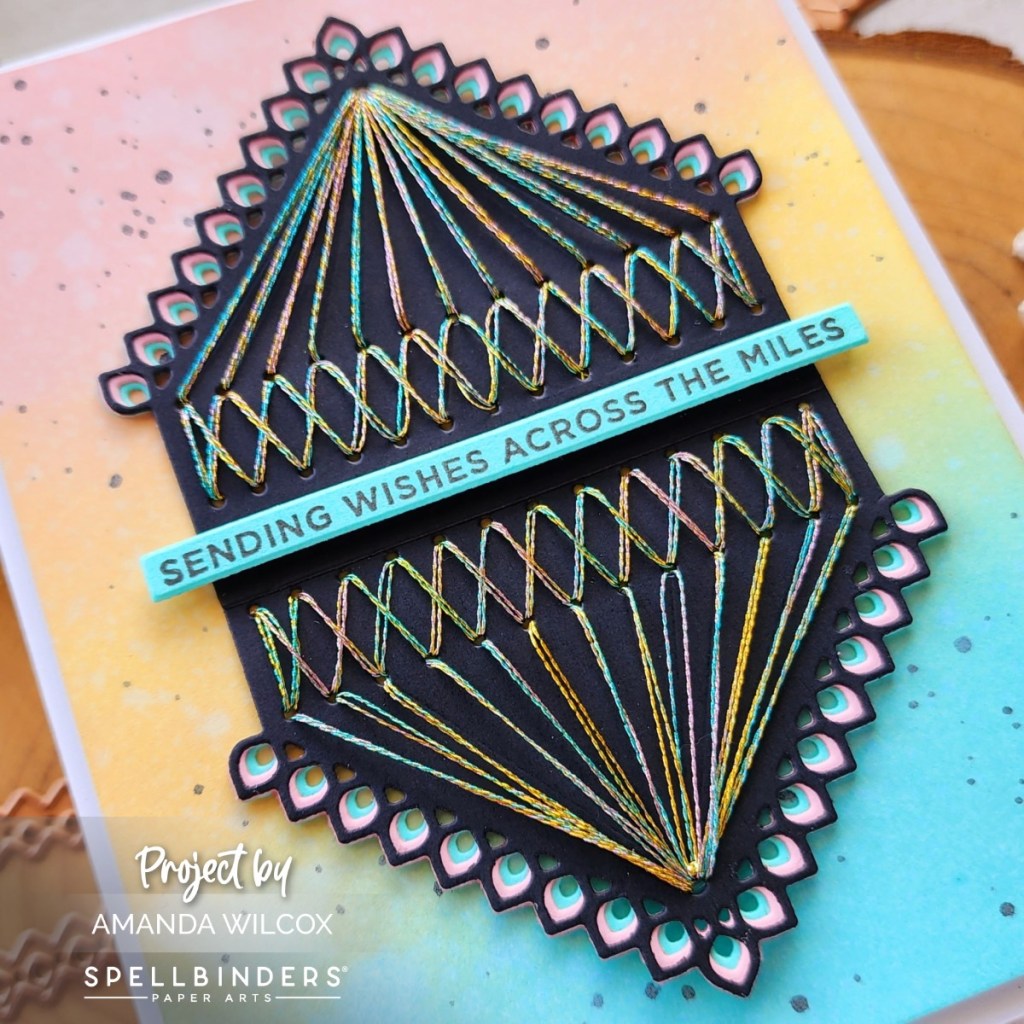
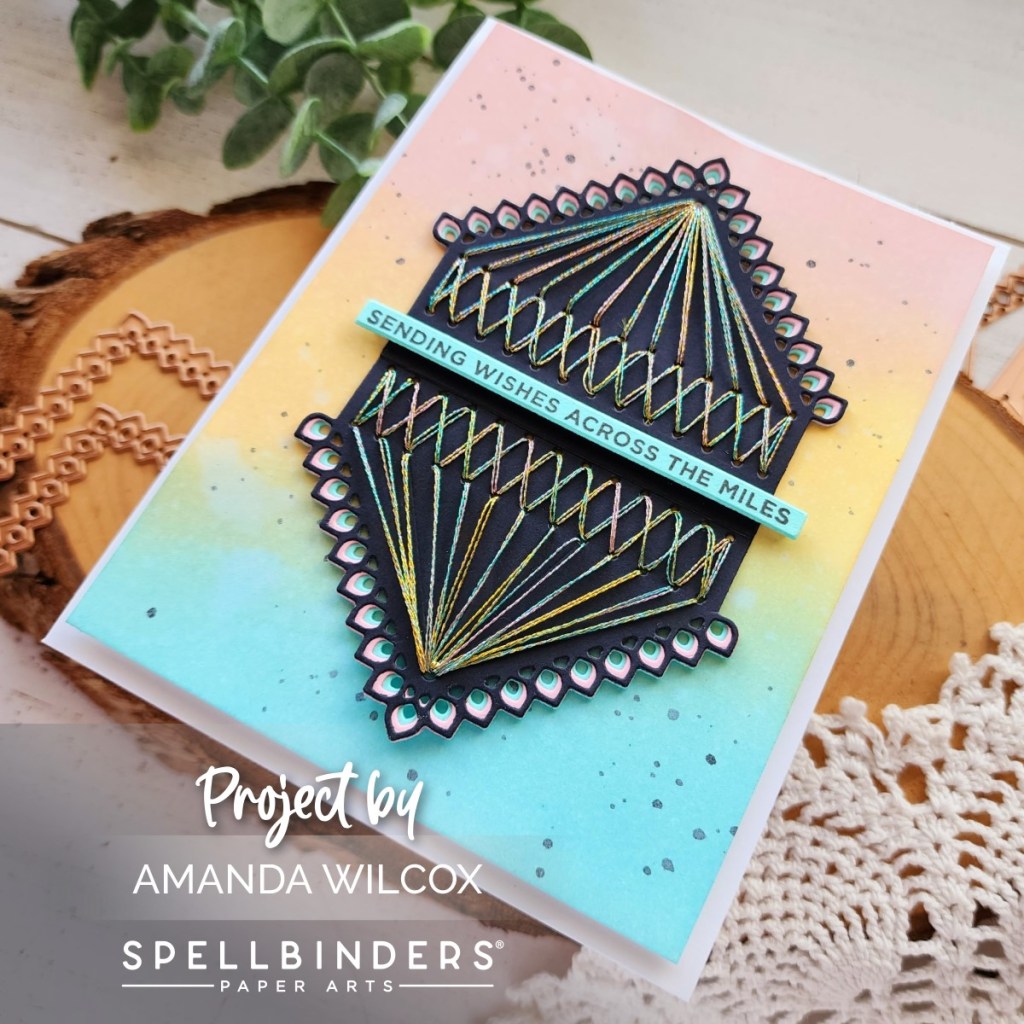
Welcome everyone! I’m so glad you stopped by. Today I have a card using the newly released Stitched Kaleidoscope Hexi-Gem die set. I this is simple die set is gorgeous and a little addicting to stitch up. I could see making a lot of these in the future. Great to cut ahead, stitch on the go and create cards with later.
I cut the main piece from black cardstock and stitched it with a metallic variegated thread. Then I chose cardstock colors inspired by my thread to fill in the extra border pieces that come in the die set. After the stitching was finished, I adhered the two pieces together with liquid glue and added foam tape to the back.
I stamped a sentiment from an older Spellbinders sentiment set and used the strip die included to cut it out. This is the same teal cardstock I used in the edge of the stitched piece. I like how they tie in together. This is added with a foam strip.
Last, I inked blended salvaged patina, scattered straw and spun sugar distress oxide inks on a white panel and spritzed it with water. After blotting it dry I flicked some black paint on the panel too. I popped this panel up with foam tape before adding my stitched pieces on top.
Have you tried stitching dies before? Do you enjoy them? They are definitely different then typical cross stitch or embroidery but I think they’re fun too.
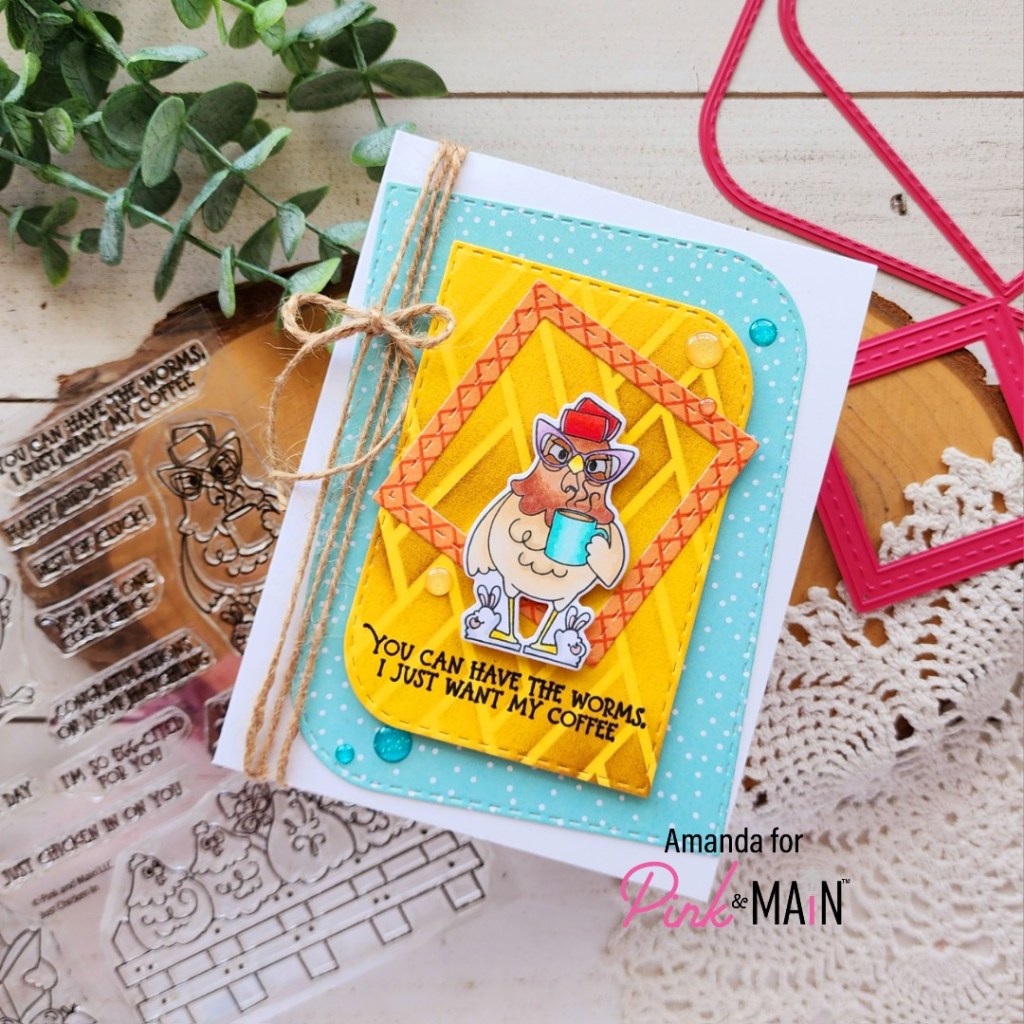
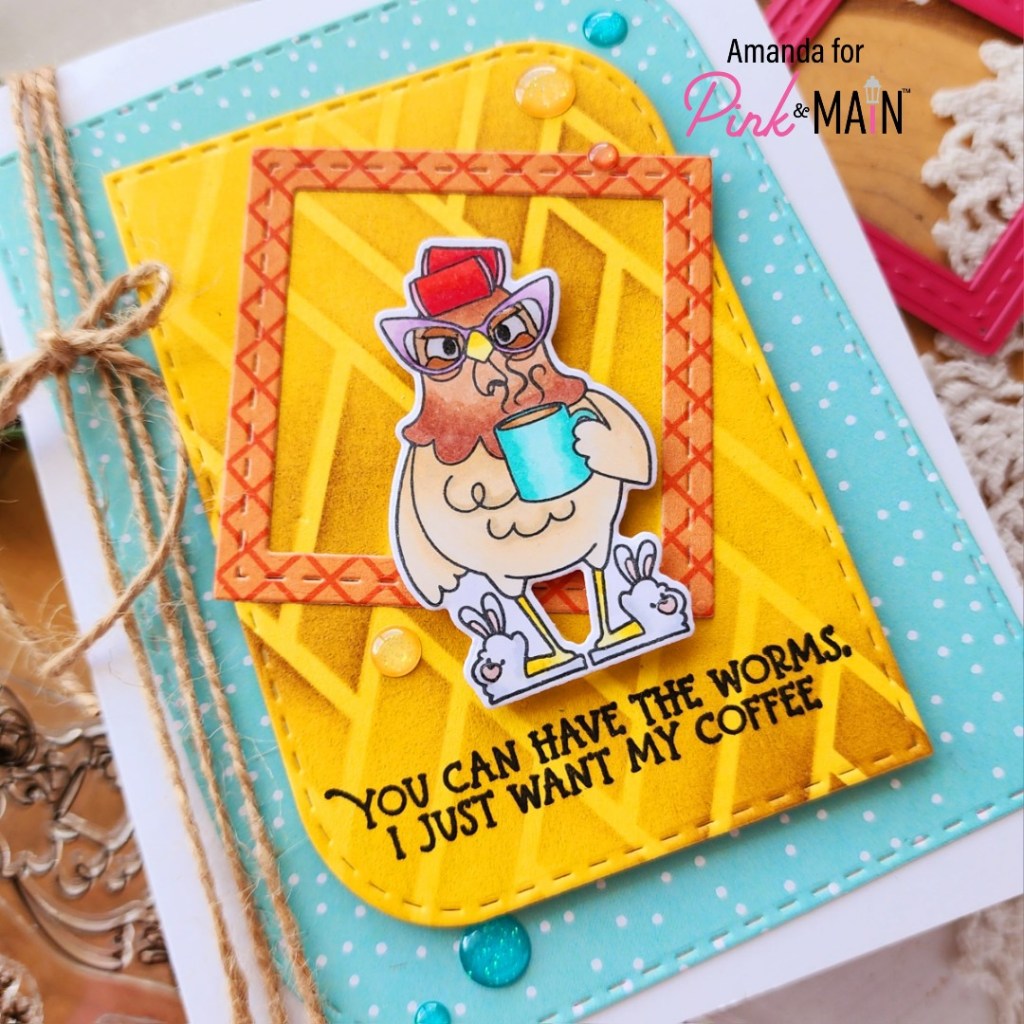
Hello everyone! I’m over on the Pink & Main blog today playing with different layers and a funny chicken that I can very much relate to. Lol!
When I started this card, I had two things in mind – that chicken and sentiment plus the stenciling for my background. So I started by stamping and coloring the image, using the coordinating die to cut it out and then inked up a scrap of streetlight cardstock with yellow and brown inks. This combo gave me a hay bail vibe so I went with it. After trimming the yellow panel down a few different sizes, I pulled out the Mod Stitched Rectangle dies and cut it out with that for a fun, different shape.
For added layers, I cut another mod rectangle two sizes bigger using a piece of patterned paper from the Pumpkin Season paper pad. Using a different pattern from the same paper pad to cut one of the Square Frames too. Now we can assemble all our pieces.
I adhered the largest mod rectangle with EZ Squeeze liquid glue to a white card base, then popped the stenciled panel up with foam tape. The square frame is glued directly to that and my chicken is popped up with foam as well.
For finishing touches I added a scattering of glitter enamel dots that coordinate with the color paper they are stuck to. Then I added Touch of Gloss to the bunny slippers and chicken’s glasses.
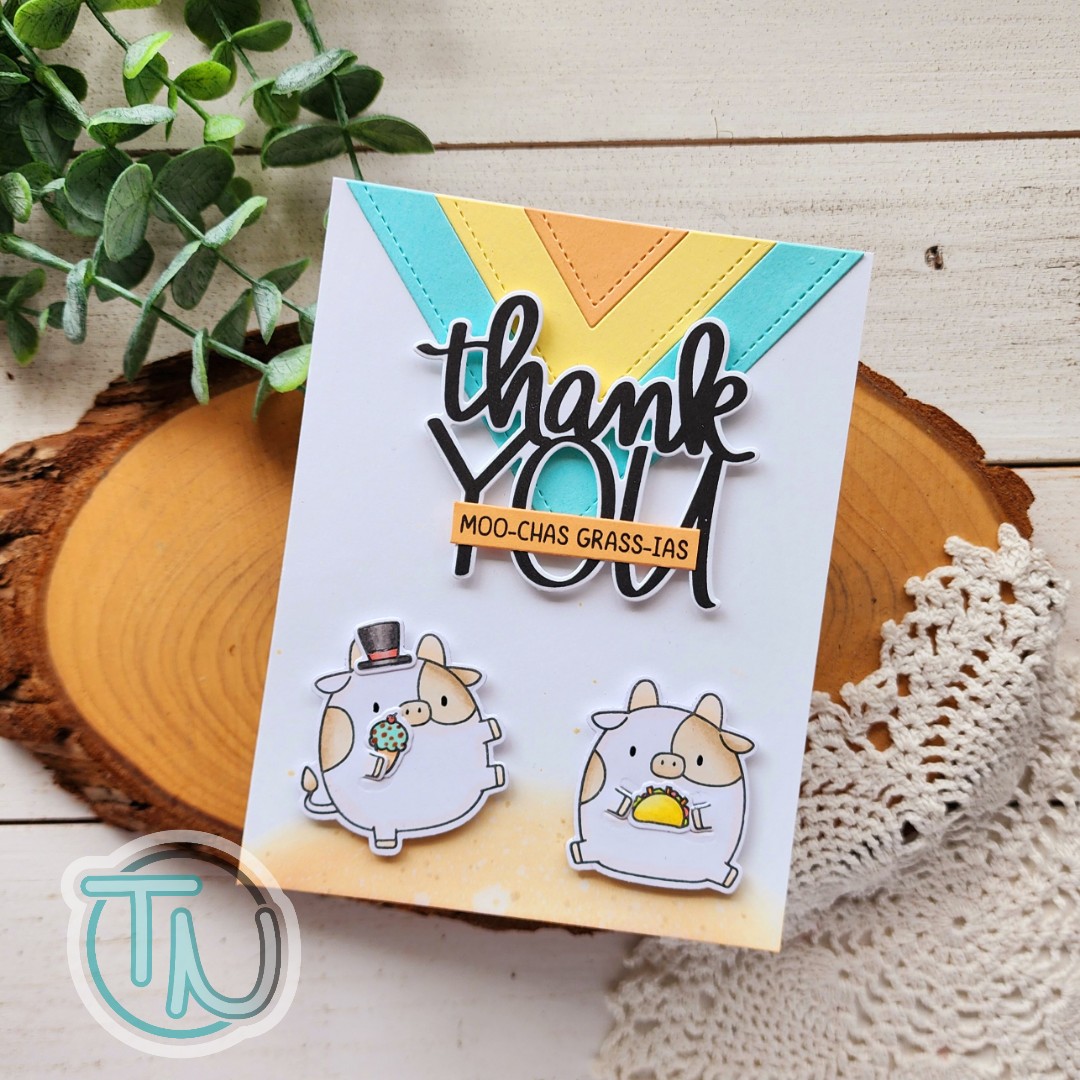
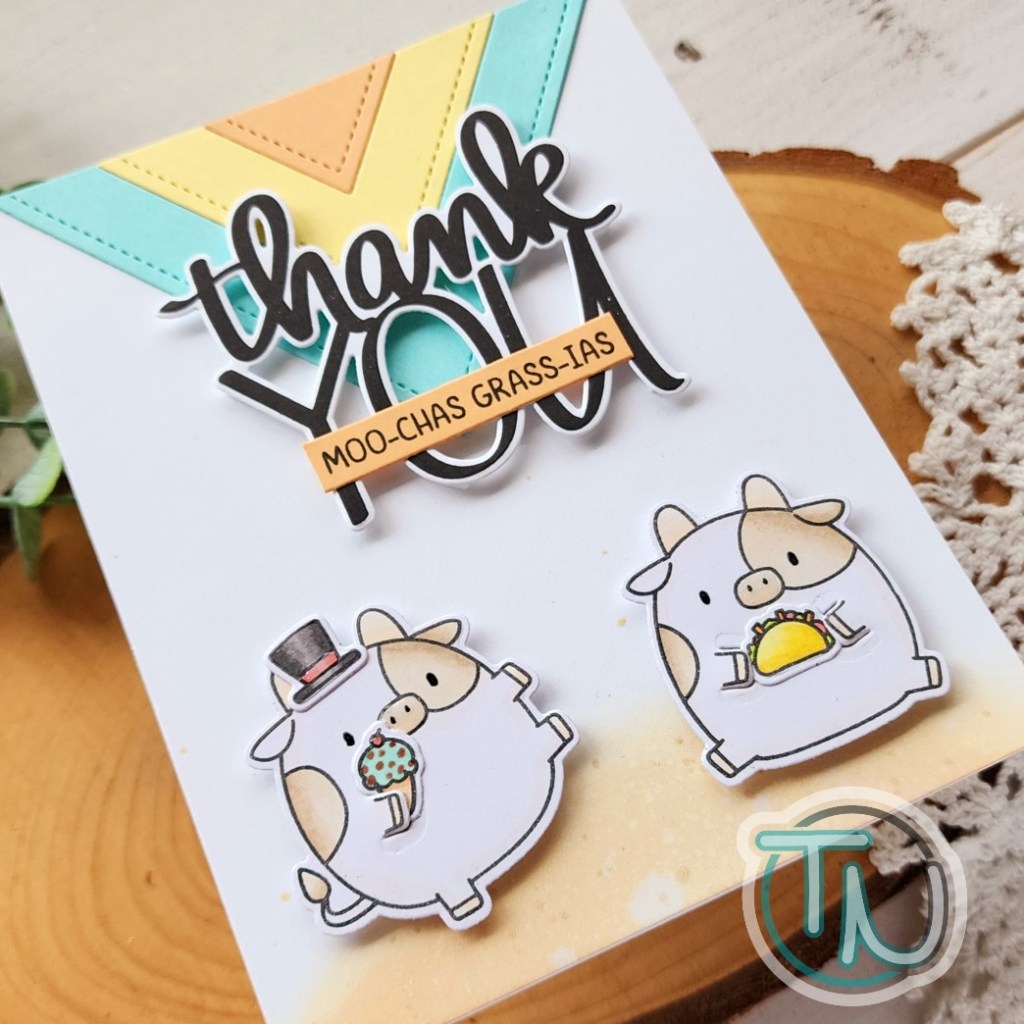
Hi friends! The rest of the week on my blog is slam packed but I wanted to pop in this morning with a fun Mama Elephant thank you card. It’s punny and cute and all the things I love…plus cows! I love cows a ridiculous amount. They’re just so cute!
I missed the Zodiac critter band wagon when they were releasing with Mama Elephant years ago so I’ve been slowly collecting them all the last few months. Today I have the Zodiac Ox set with some accessories from Zodiac Tiger too. I stamped and colored them with my copic markers and used the coordinating dies to cut them out. Then I used liquid glue to adhere the accessories in place.
Just before Doodlebugs took a little vacation I snuck in another order to pick up the Mama Elephant Thank You (Love You) stamps and dies along with the Diamond Stripes dies too. For my background, I cut the stitched version in the Diamond Stripes from three colors and glued them to the top of my panel. I saved the rest in a clear pocket so I have them for another card later on.
Next, I stamped and die cut the big thank you from Thank You (Love You0 and used the coordinating die to cut it out. Instead of using one of the mini sentiments in that set, I used the one in Zodiac Ox because PUNS! Seriously. It’s hilarious and I love it…especially with the taco in his hands.
*Tip – to cut the sentiment into a strip, I used the non-stitched Diamond Stripes plate to cut a scrap of cardstock and stamped in that. Then I just trimmed the edges off. Voila! Perfect sentiment strip with no extra dies needed.
I added some ground to the bottom of the panel with gathered twigs distress oxide and spritzed it with water. I also splattered a little ink on the area for a little texture. Then I added thank you and my cows with foam squares.
For finishing touches, I added black glaze pen to their eyes and Touch of Gloss to their snouts, hat and the cherry.
Doodlebugs is having a sale while Cathy is on vacation. Use code VACAY for 15% off your purchase. If you see this post after the sale is over, you can use my referral link for the same discount off your first purchase. Click HERE for that.
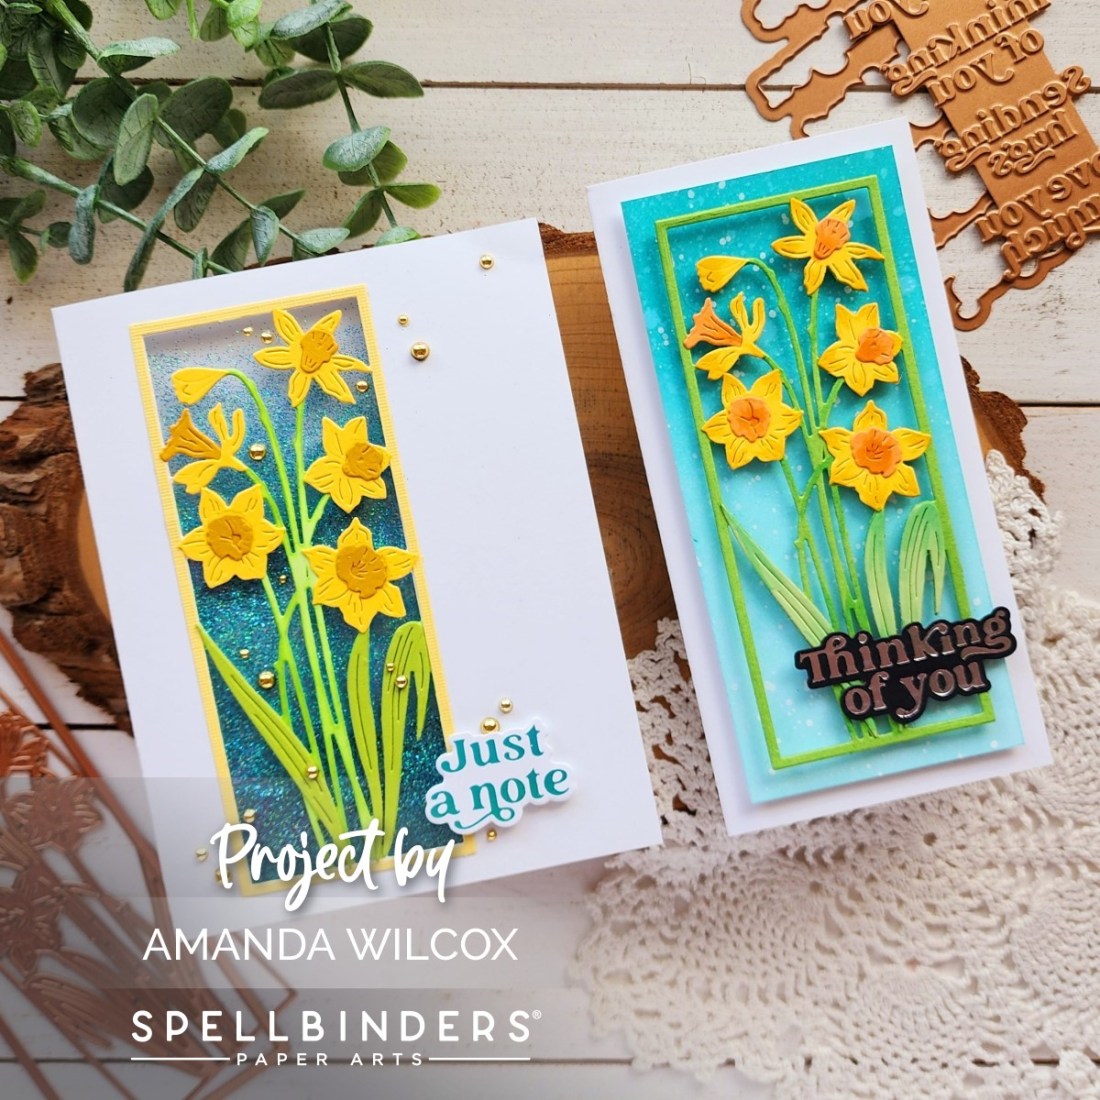
Happy Friday my friends! Today is release day for the Simon Hurley Photosynthesis collection with Spellbinders! I got to play with a few of the products in this release and they are so easy to create with but fun and beautiful too! Today I have two cards featuring the new Daffodil Frame dies and Must-Have Sentiments glimmer plate.
First of all, the new Must-Have Sentiments glimmer plate is one plate that has six sentiments and a coordinating die that cuts them all out at once. It’s fantastic and pure genius! I tried some simple silver foil on black cardstock and beautiful teal on white cardstock and now I have a bunch of sentiments ready to go!
This first card is a shaker but has no bulk. No foam strips or anything. I cut the daffodils from a white A2 cardfront and ink blended it green. Then I used the flower and stem dies to cut coordinating pieces from yellow and green cardstock, adhering them with liquid glue. Then I cut the daffodils and frame from yellow cardstock, trimmed the flowers out so I just had the frame and glued it around the edge.
I created a little glitter pocket using an acetate sleeve I usually put my finished cards in and adhered it on the side of my card. I trimmed the right size window out of a piece of white cardstock and adhered it over the glitter pocket to hide the ugly parts.
Last of all, I added my glimmered sentiment with foam squares and also adhered a few gold baubles around the design.
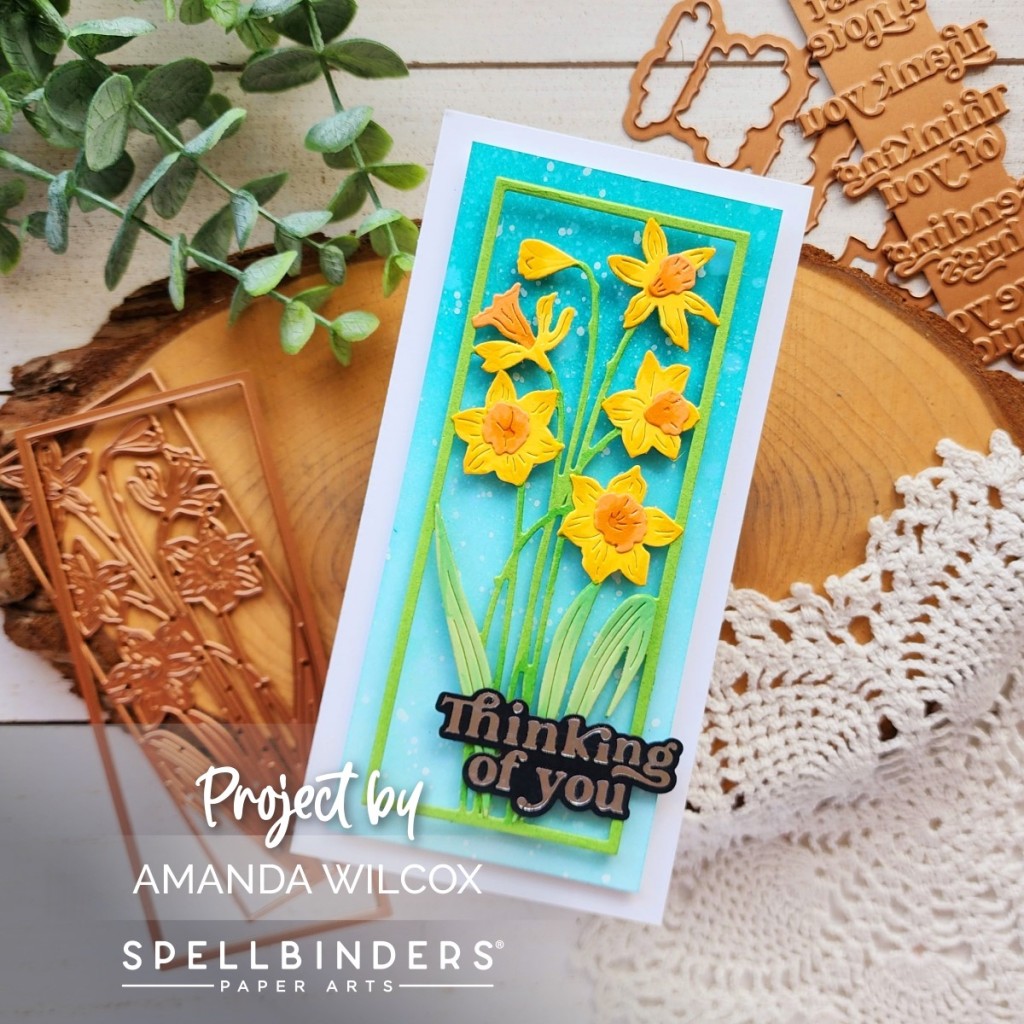
This daffodil frame is absolutely perfect for a mini slimline card, so I just had to create one my first go-round with it. This time I cut the daffodils and frame from green cardstock and then cut the leaves from a lighter green and flowers from yellow and orange. This time I added a little dimension to the die cut pieces with copic markers.
Next, I trimmed a piece of white cardstock to 2.5×5.5 inches and inked it up with peacock feathers and salvaged patina distress oxide ink. I spritzed the panel with water, blotted it dry and flicked white paint on the panel as well.
Once the panel was dry, I popped it up on a 3×6 mini slimline card base with foam tape. Then I added the daffodils with foam squares too. Last, with a combo of liquid glue and foam squares I added a glimmered sentiment to the bottom right side.
Be sure to check out the whole Photosynthesis collection. It’s beautiful! I will have a few more cards for you using more products in the release very soon!
Eeekkk! So excited to be back in the groove of sponsoring these fun hops again! It feels like it’s been a while and I’m here for it! This is the start of the Coffee Loving Cardmakers 2023 Spring | Summer Hop and I’m very proud to be a sponsor of it.
I love carrying a variety of coffee products in the shop to keep you all in perfect theme while crafting – whether it be your tools or embellishments for your creations, we’ve got it.
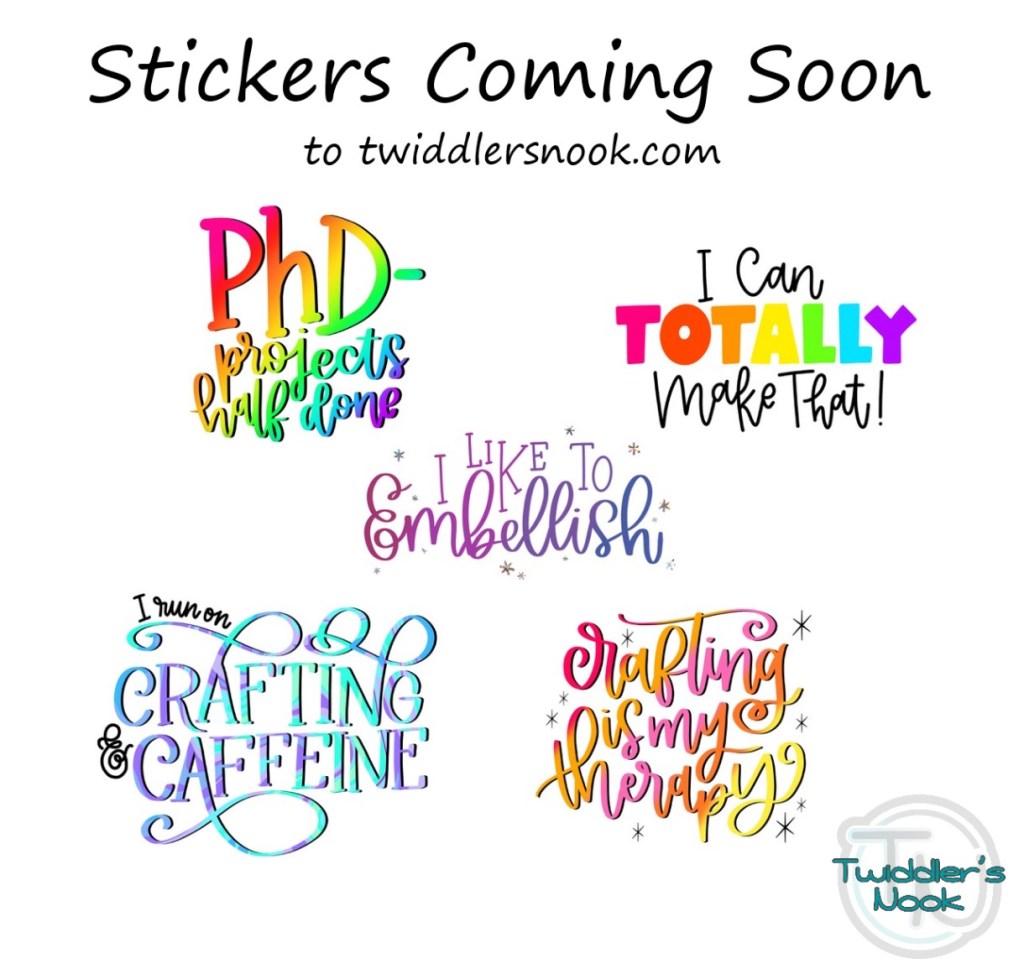
I’m super excited to announce that I have a new product coming to the shop…
Drum roll please…
The plan is to have them available on Sunday, as long as UPS cooperates and delivers them on Saturday. So be sure to check the shop for new items HERE.
These stickers are going to be so fun! Decorate your water bottles, laptops, project bags…all the things!
GIVEAWAY
I’m going to be giving away a full set of the new stickers plus one of our new project bags to one commenter on today’s post. Then I’m going to give a second set of stickers plus a $20 gift code to the shop to another commenter.
Commenting closes Thursday, May 11 at midnight PDT.
Good luck everyone!
BLOG HOP
This is your last stop on the hop but if you didn’t start at the beginning, head back to the CLC post HERE and catch up whatever you missed.