Hello everyone. I’m back with another card featuring products from the Spellbinders Photosynthesis Collection from Simon Hurley. The products are so different but work amazing together. Today I used a background die, floral dies and a hot foil sentiment. I even made it a flat shaker with super fine glitter that moves around behind the chevrons.
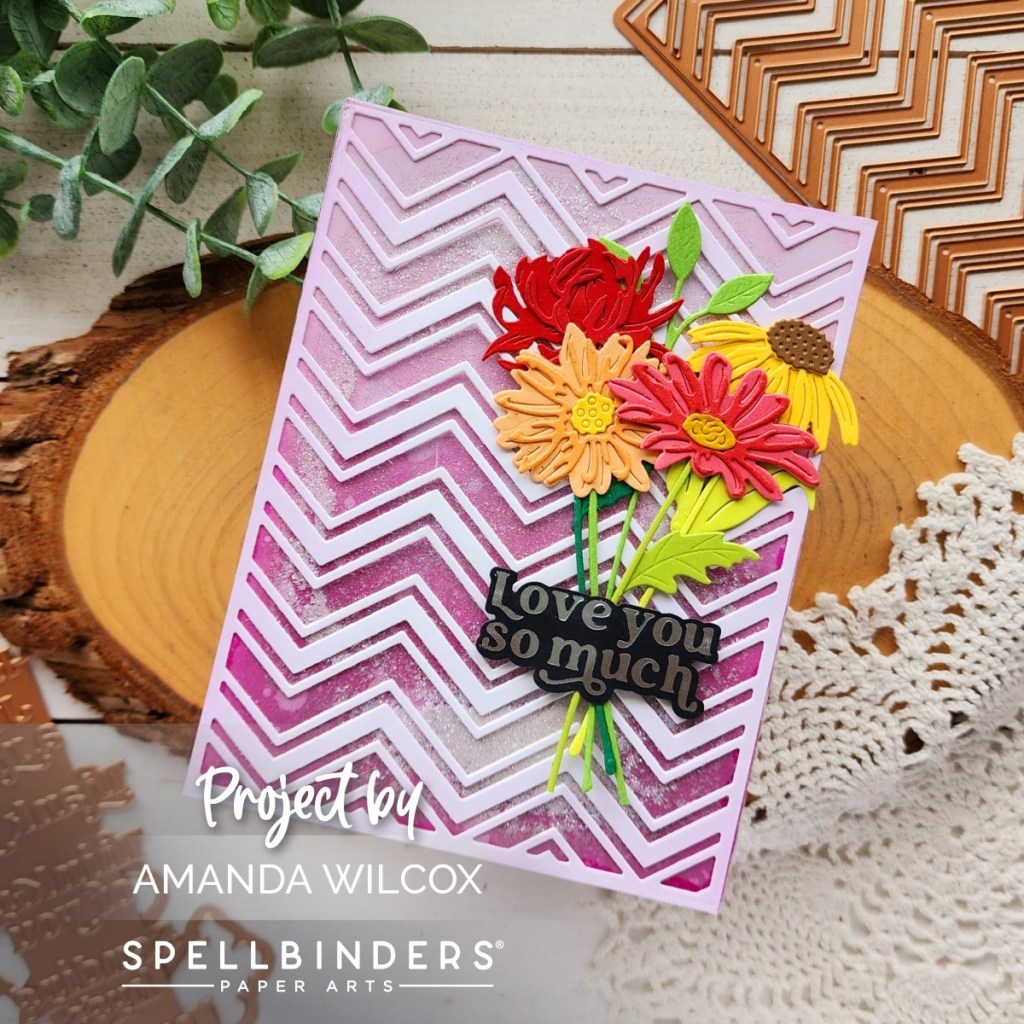
I started by inking up an A2 piece of white cardstock with light purple ink around the edges. Then I cut it with the Zig Zag Chevron cover plate. I added a piece of acetate to the back with liquid glue. Then I inked another piece of cardstock with seedless preserves and milled lavender distress oxide ink. I spritzed the panel with water and blotted it dry. Next, I sprinkled some super fine glitter on the panel and sealed it up with liquid glue adhering the chevron panel on top.

I chose some colors and started die cutting florals from the Floral Stems die set and used liquid glue to adhere the layers together, and then added them to stems with leaves. I gathered them together in an arrangement so you could see them all and glued them to the card front.
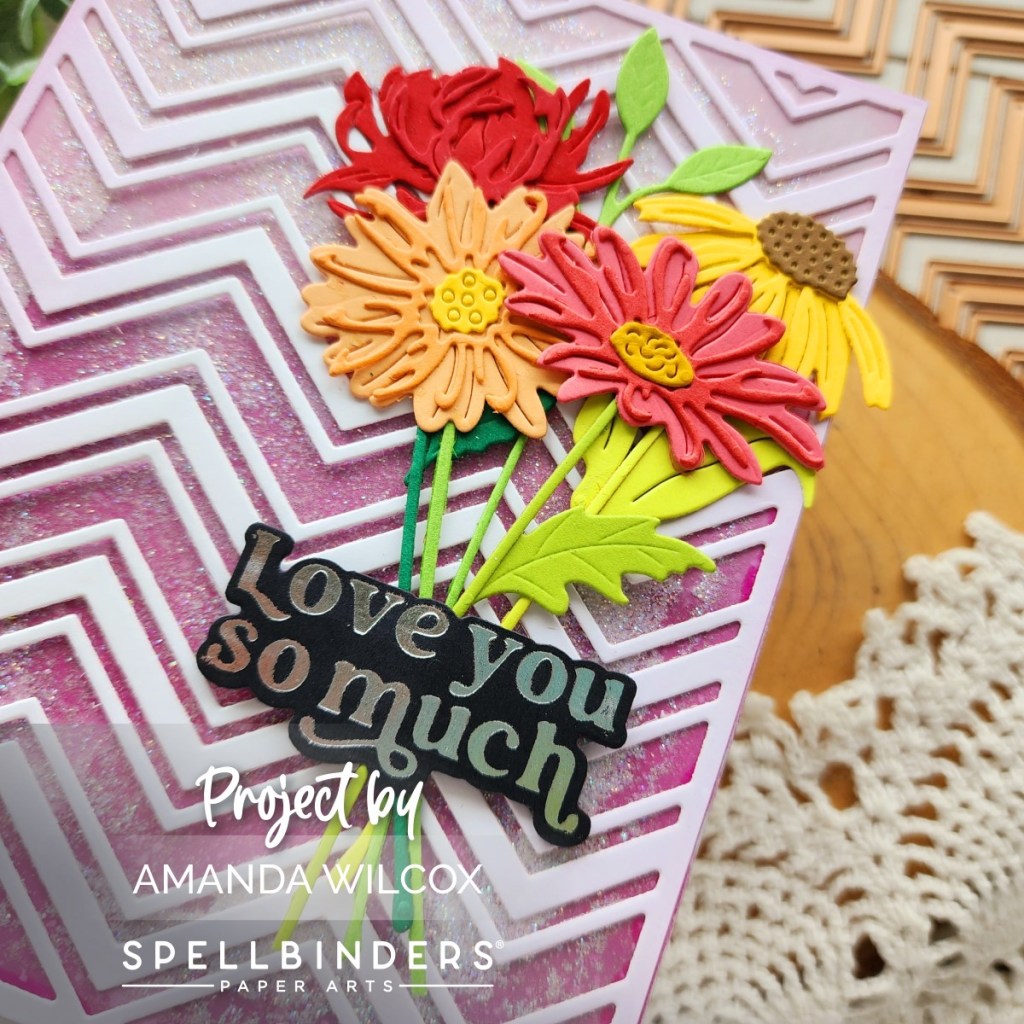
Finally, I added a hot foiled sentiment from the Must-Have Sentiments glimmer hot foil plate and die set. This set is top on my favorites because it hot foils and die cuts multiple fantastic sentiments all at once. I love having a stash to choose from when I’m running out of time and need something extra to add to my card.
Products used today:
Zig Zag Chevron dies
Floral Stems dies
Must-Have Sentiments glimmer plate
Liquid glue
Foam squares
Silver hot foil
Pink & Main Super Fine Glitter – icicle
Distress Oxide Ink – seedless preserves and milled lavender
Blending brush
I appreciate you sharing your time with me. Have a fabulous day!