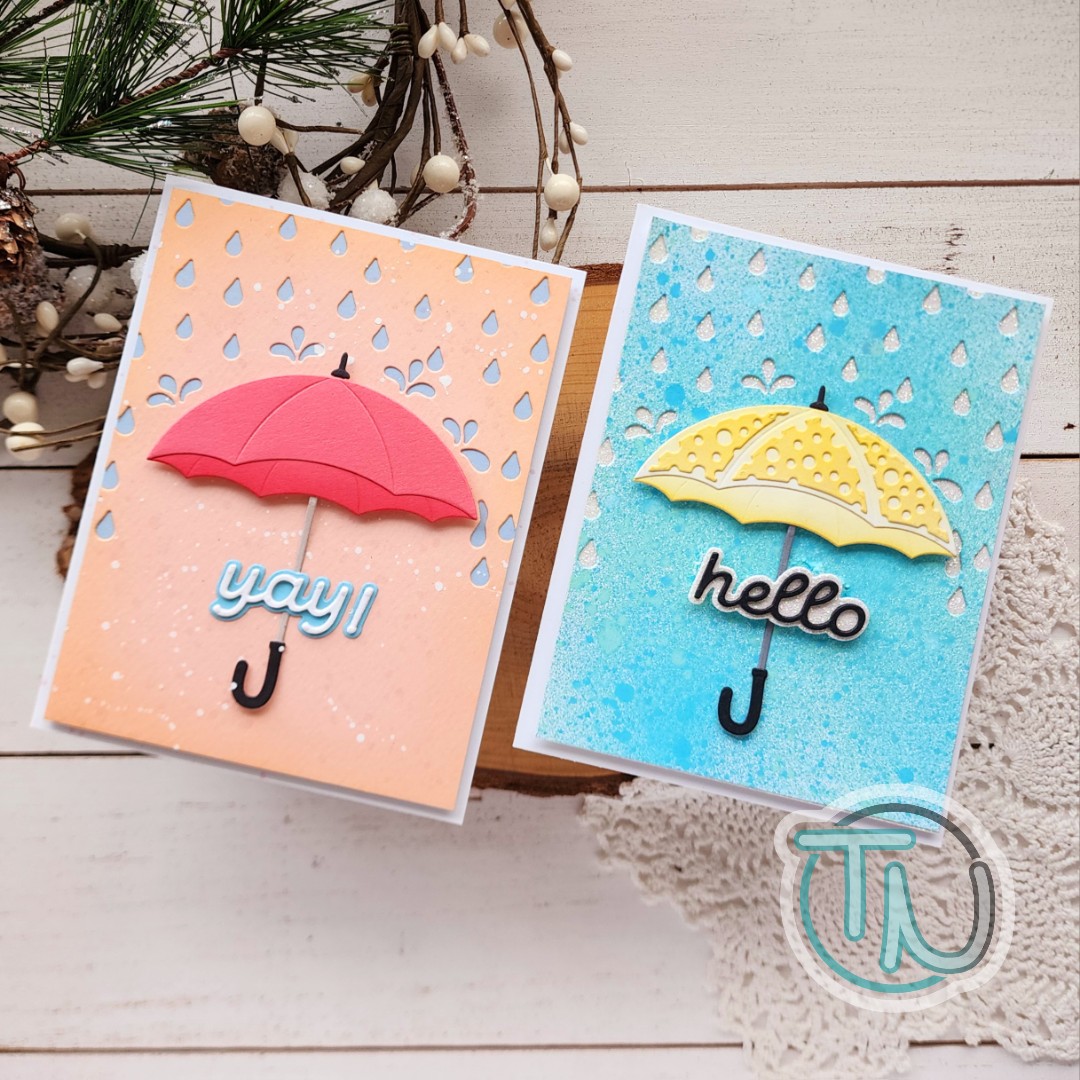
Hi friends! I’m super excited to share a couple of projects with you featuring today’s Showered With Love release from Spellbinders! This collection is over the top adorable and was so much fun to create with! I have a pair of cards today and will be back with another one later this week.
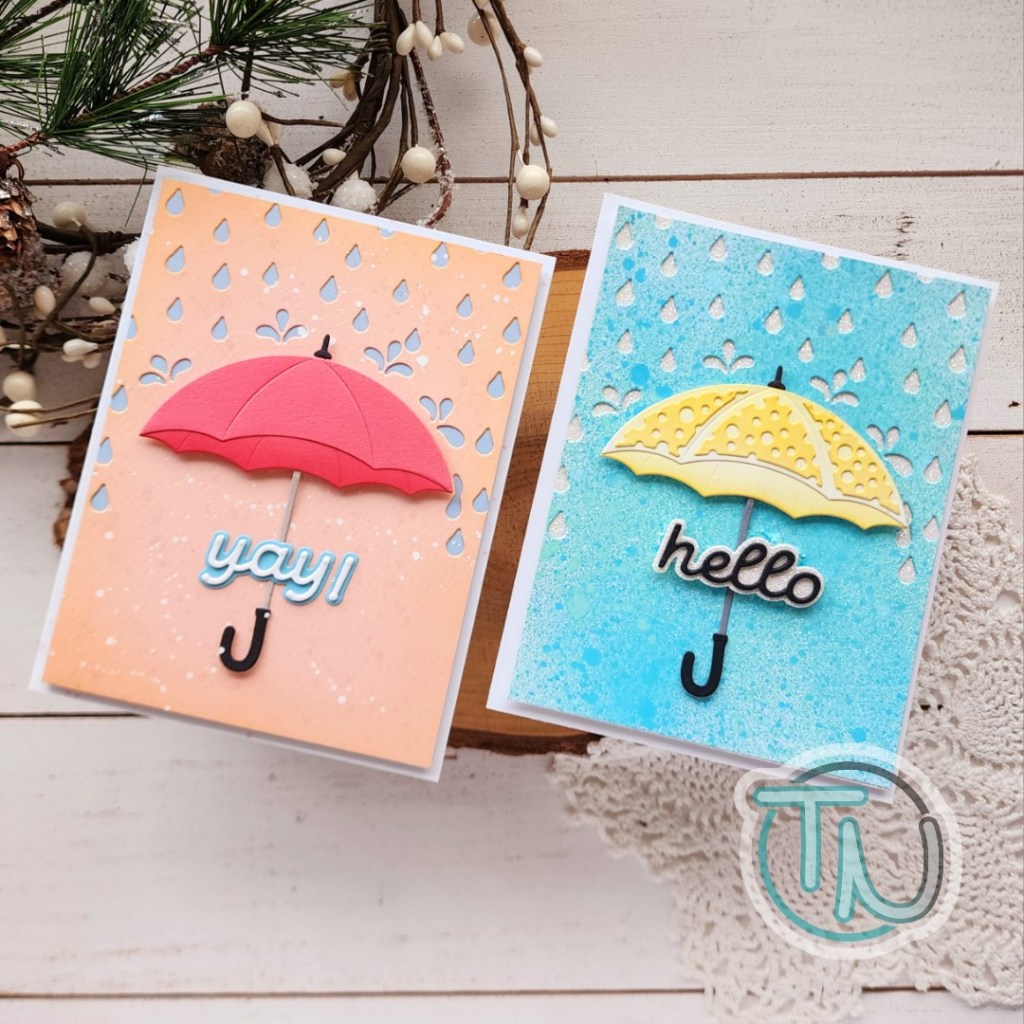
These Raining Hearts dies pair perfectly with the Umbrella Bloom set and give you so many options to create! Today I used the actual raindrops for my background on both cards but there is also a version with heart shaped rain drops that is too cute!

First up, I used some distress oxide sprays to create a textured background. While that was drying I die cut the pieces for an umbrella and inked them all yellow. After inking I used liquid glue to assemble to pieces together.

I chose white glitter paper for the raindrops and tied it back in as the shadow for my sentiment. The background panel is popped up with foam tape and the umbrella is popped up as well. I glued the handle directly to the card front and popped the sentiment up too. This held the handle in place since I didn’t have foam small enough for the skinny handle.
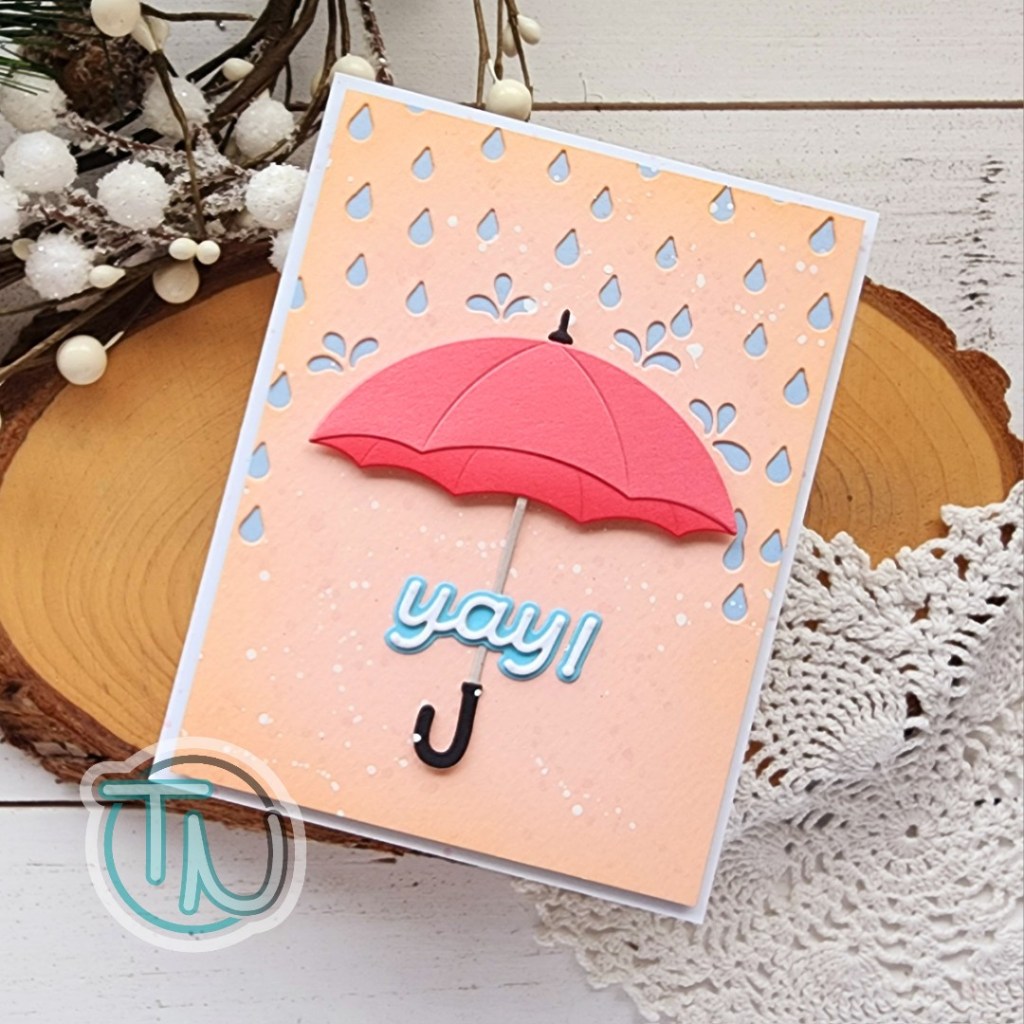
For my second card, I used a peach cardstock, inked the edges with light orange and splattered it with the orange ink and white paint. I chose a melon cardstock for my umbrella and just inked the back layer with a similar color to give it some dimension and shadow.
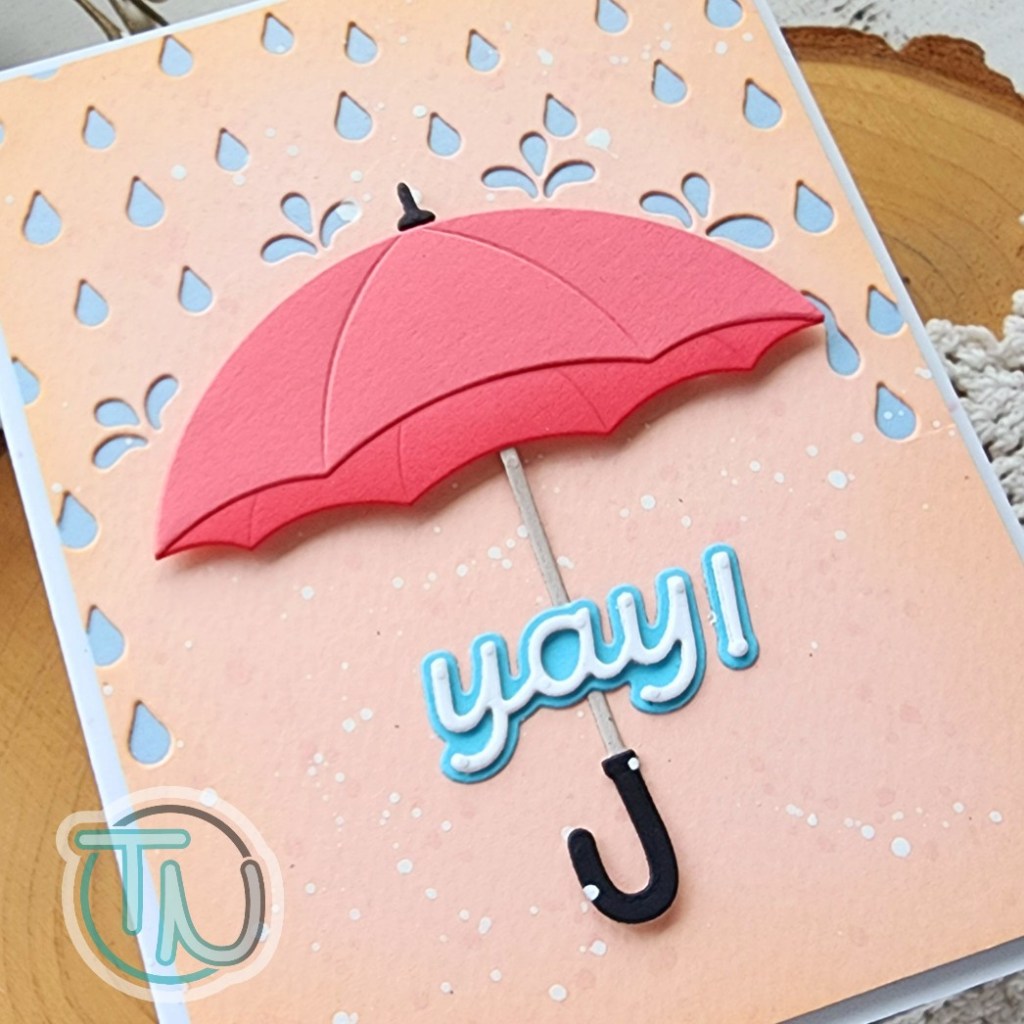
This time I used blue cardstock for my raindrops and sentiment shadow. Everything is assembled the same except I glued the sentiment directly to the panel this time. I think both ways look nice.
Be sure to head to Spellbinders and check out the release! There is a sweet little ducky and the florals that go with the Umbrella Bloom I used today are stunning! So much versatility and fun to create with!
Products used today:
Umbrella Bloom dies
Raining Hearts dies
Distress Oxide Sprays – mermaid lagoon and cracked pistachio
Foam tape
Liquid glue
I appreciate you sharing your time with me. Have a fabulous day!