Welcome everyone! Today I have a really simple and fun shaker card to share with you using MFT Stamps products. Then at the end I have a bonus card to share using leftover die cuts I had from the first card. They’re both so much fun and so festive!
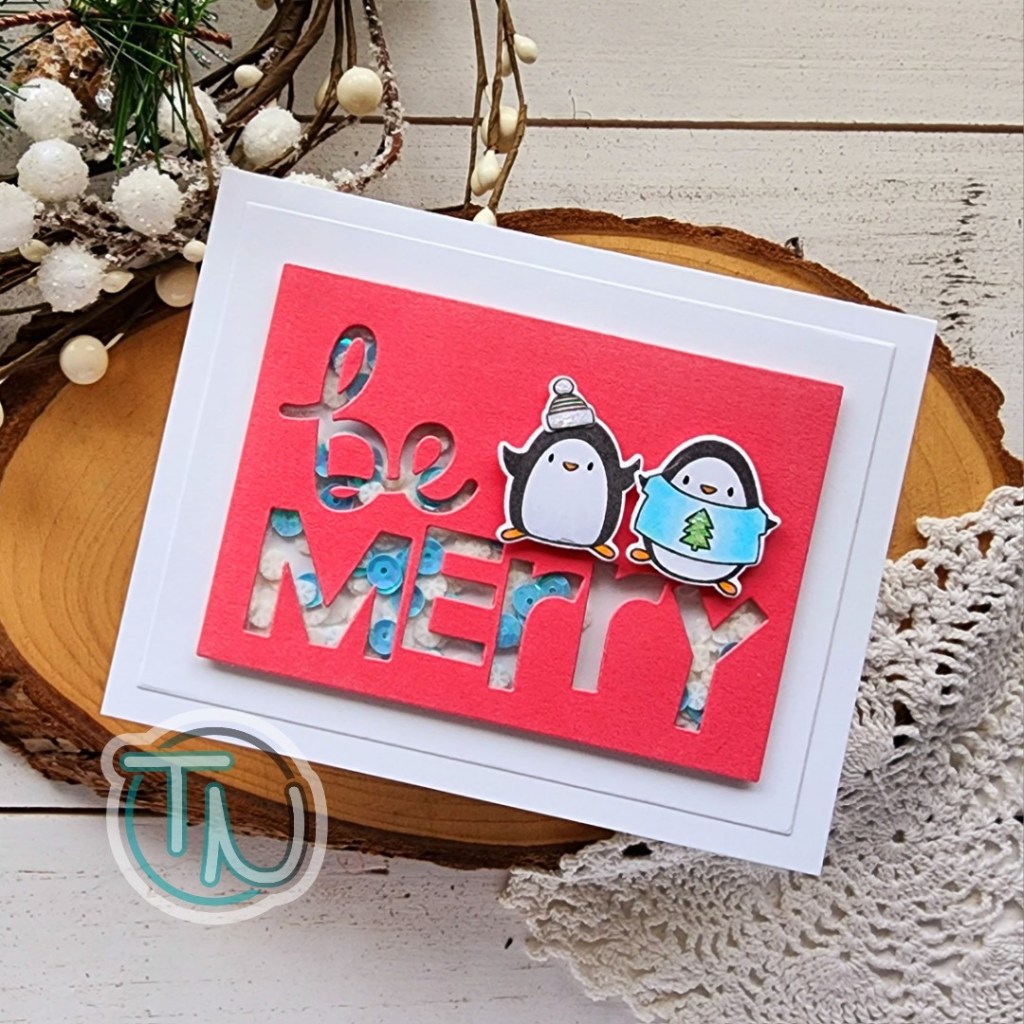
I knew I wanted to make a shaker card with the Be Merry dies so I chose my cardstock, die cut a smaller rectangle and then cut the Be Merry from that. Be sure to se those letters aside, especially the little center pieces too! We’ll need it all in the end.
Line the back of your rectangle with tear tape and adhere acetate over the letter openings. Then add foam strips to create a well for your shaker bits. Sprinkle whatever you like – my daughter chose Snowy Day from my shop and blue sequins from our stash – then seal it up with white cardstock that’s about a half inch larger than the panel.
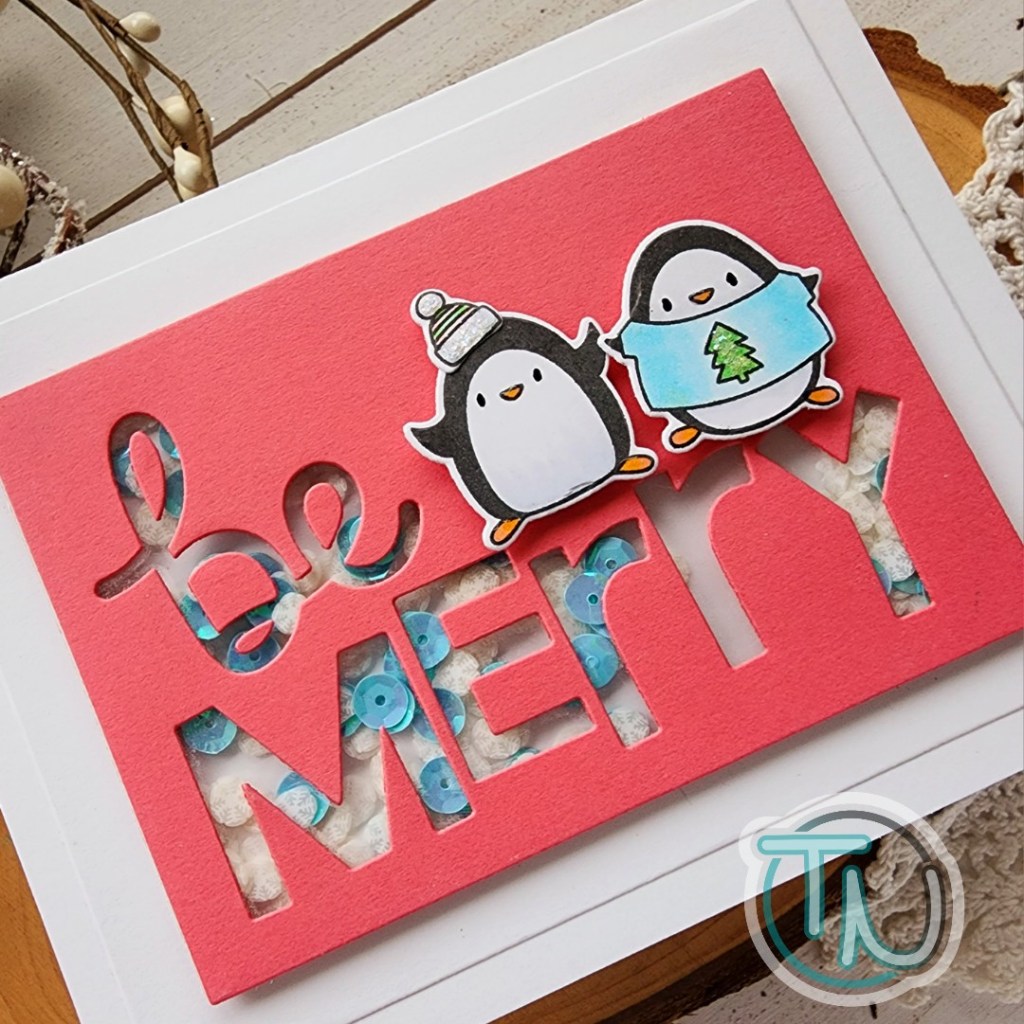
Stamp some adorable penguins from Polar Opposites (this set is retired but use whatever cute critters you have) and color them with copic markers. I used the coordinating dies to cut them out and popped them up over the words with foam squares. I used liquid glue to adhere the inside bits to my letters and then added the shaker mechanism to a white card base.
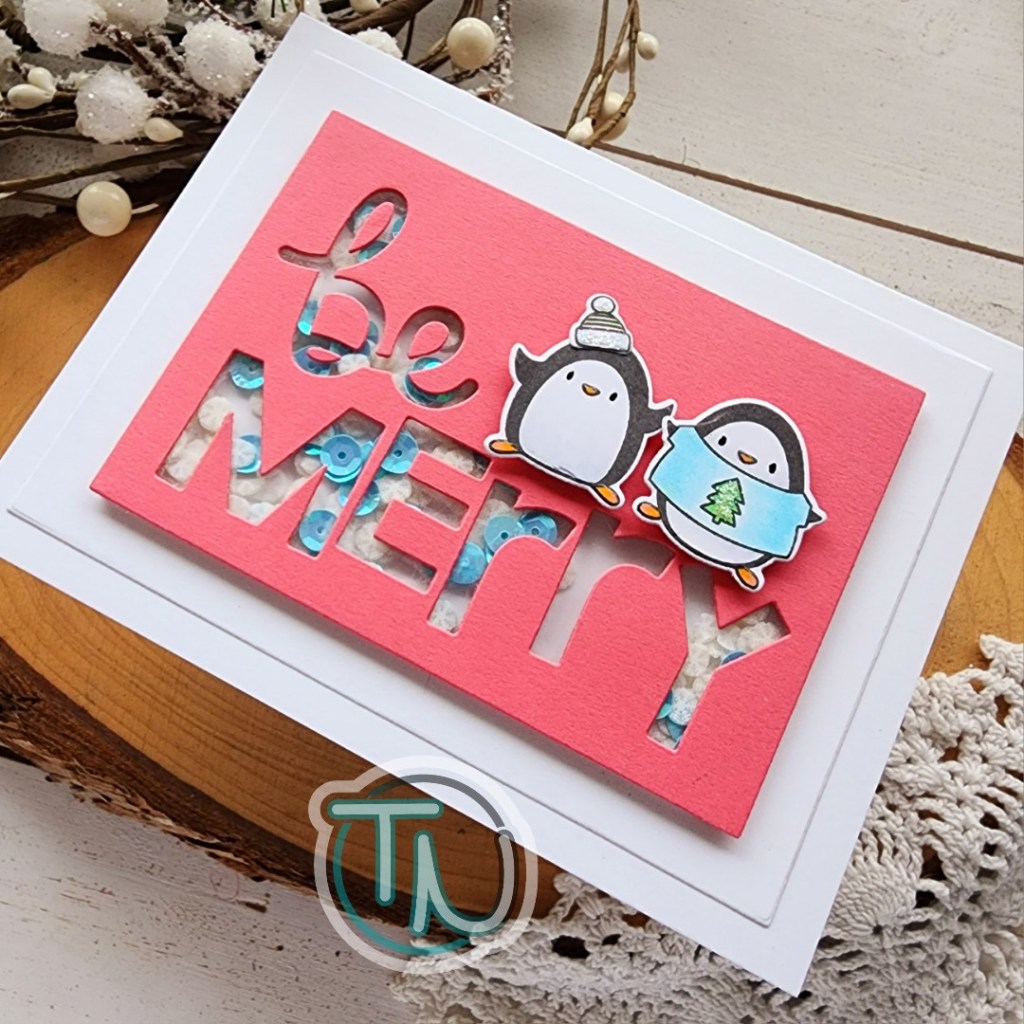
For finishing touches I added a bit of star dust Stickles to penguin’s hat and shirt, black glaze pen to their eyes and glossy accents to their beaks and feet.
Now, remember those letters we kept from the very beginning die cutting? Let’s not let those go to waste either!
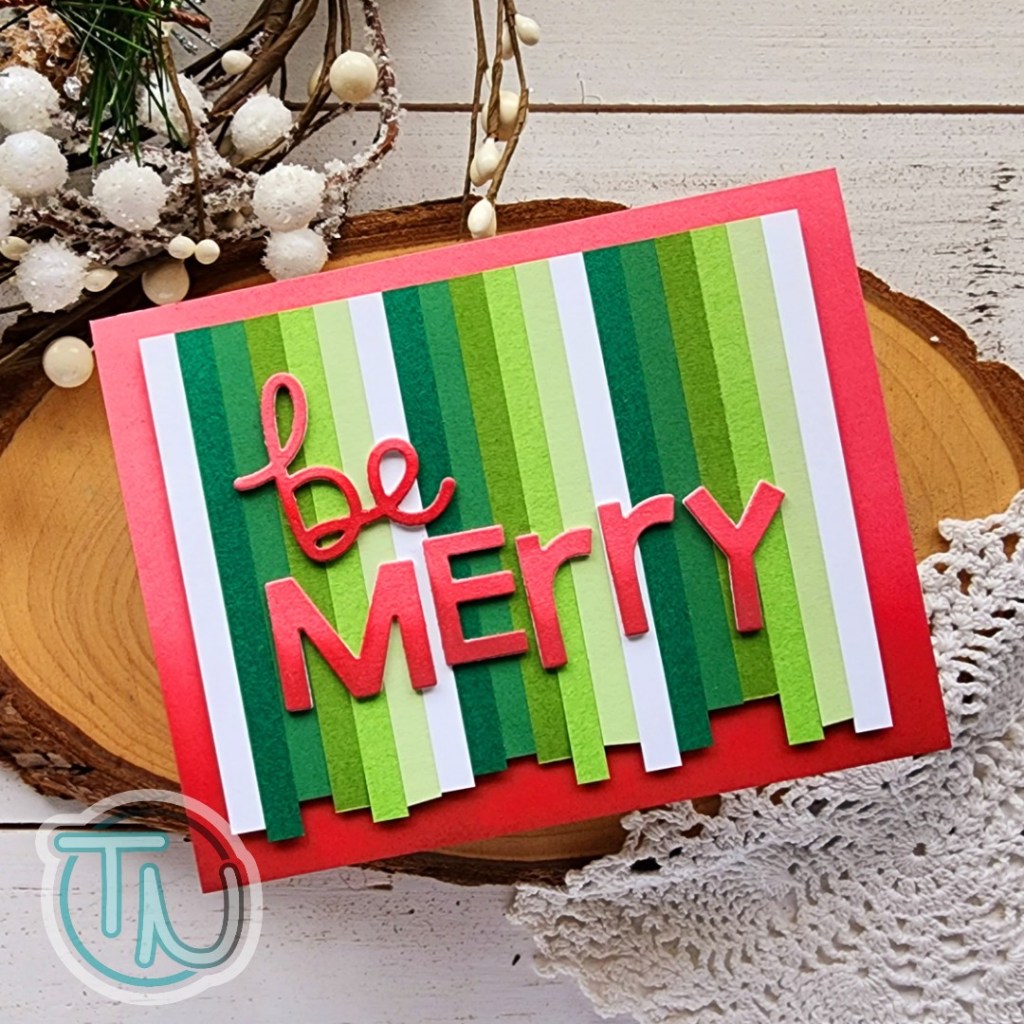
I started by cutting the letters from white cardstock using some scraps 3 more times and glued them together for height and stability. Then I chose an ombre of green to white cardstock from my stash and cut 1/4 inch strips of each one. I adhered them all to a piece of copy paper and trimmed it down to fit on my card base.
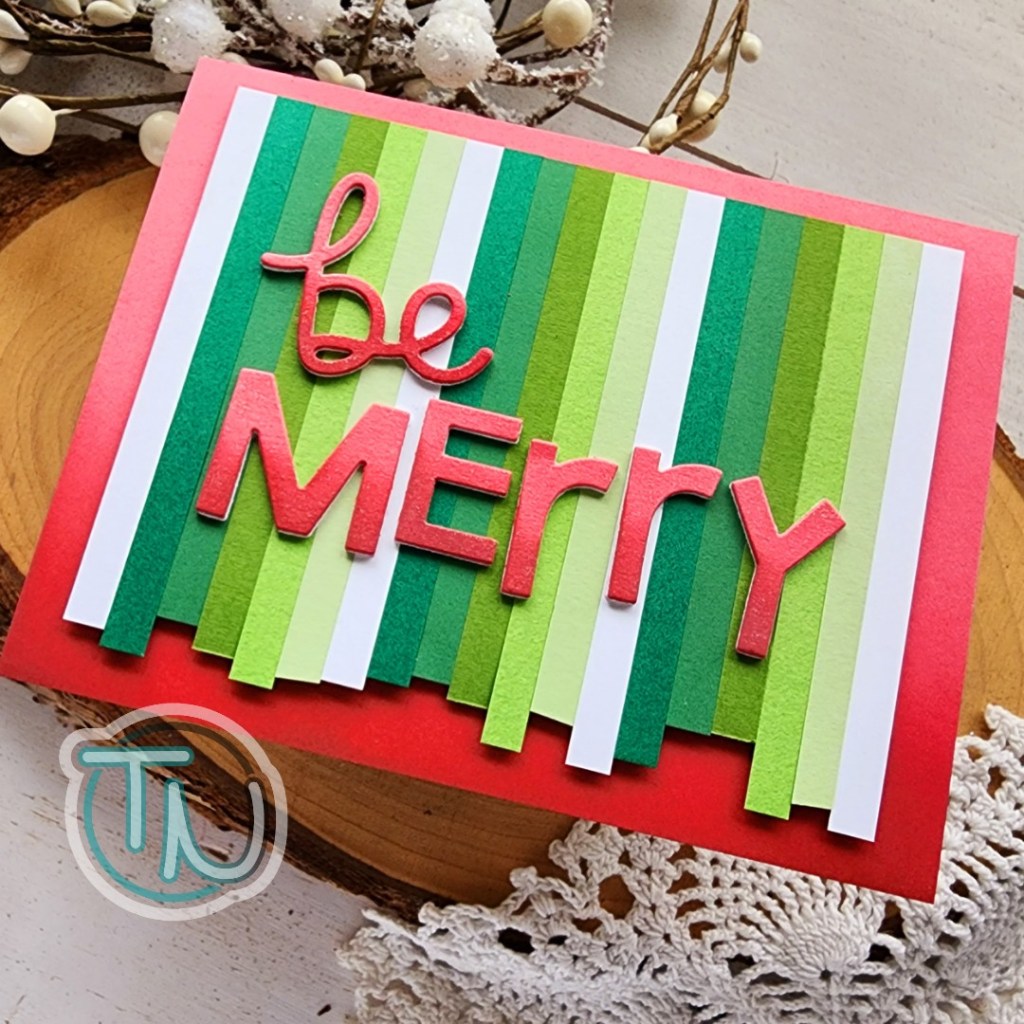
Next, I did a little ink blending on my die cut letters to give them some shading at the bottom and mirrored the effect on an A2 piece of the same color cardstock that will go on my card front. I adhered the letters with liquid glue and added foam tape to the strips to pop it up on the red cardstock.
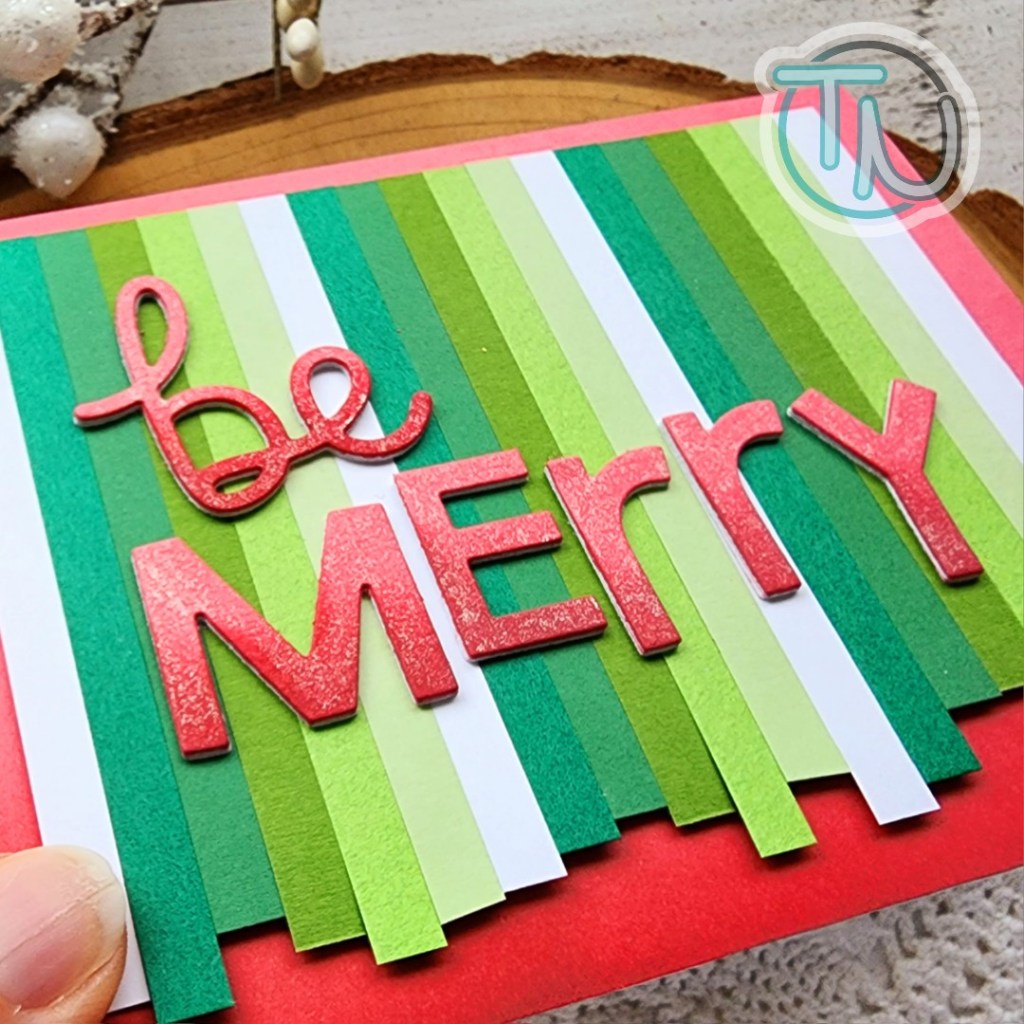
Then I glued the whole panel to a white card base and came in with my Wink of Stella glitter brush pen on the top layer of my letters. This subtle shimmer is super pretty but doesn’t detract from the fun design with all those holiday stripes!
I hope you enjoyed this cards today and find some holiday inspiration!
Products used:
MFT Stamps Polar Opposites stamps and dies
MFT Stamps Be Merry dies
Pink & Main Layered Rectangles dies
Twiddler’s Nook Snowy Day embellishments
Foam strips and squares
Liquid glue
Wink of Stella glitter brush pen
Stickles – star dust
Glossy accents
I appreciate you sharing your time with me. Have a fabulous day!