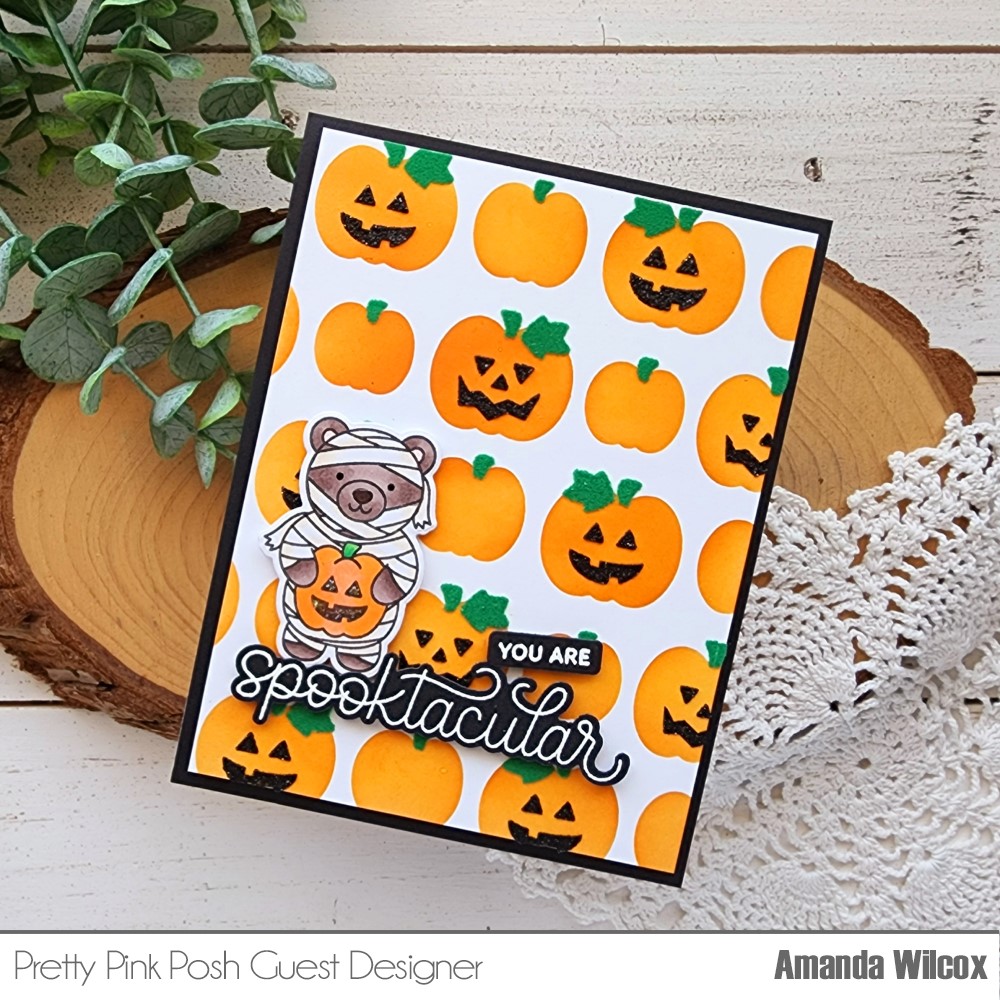
Happy Friday friends! Today I’m back with another adorable and super fun to create card using the August release from Pretty Pink Posh! Another great layering stencil set and too-cute-to-spook critters make for fun in the craft room for sure!
For this card, I stepped up the stenciling a bit by using Thermoweb transfer gel blanco on the leaf layer and adding deco foil flock for some fuzzy leaves. Followed by black glitz glitter gel for the fun faces too!
I chose that adorable mummy bear from Halloween Critters to stamp and color with my copics, then cut out with the coordinating dies. I stamped and heat embossed my sentiment from the same set and used the coordinating die to cut it out too.
A trick I found was that the ruler die from Crafty Critters cuts out the “you are” sentiment in this set perfectly! After all that was done, I added foam squares and strips to the back of everything and started to assembly my card.
I trimmed the stenciled panel to 4×5.25 inches and popped it up on a black A2 panel with foam tape. Then I added the sentiment and mummy bear next. For finishing touches I added black glaze pen to the bear’s eyes and glossy accents to his nose. I also decided to add stardust Stickles to the face of the jack o’ lantern the bear is holding so it looks like the background stenciling too.
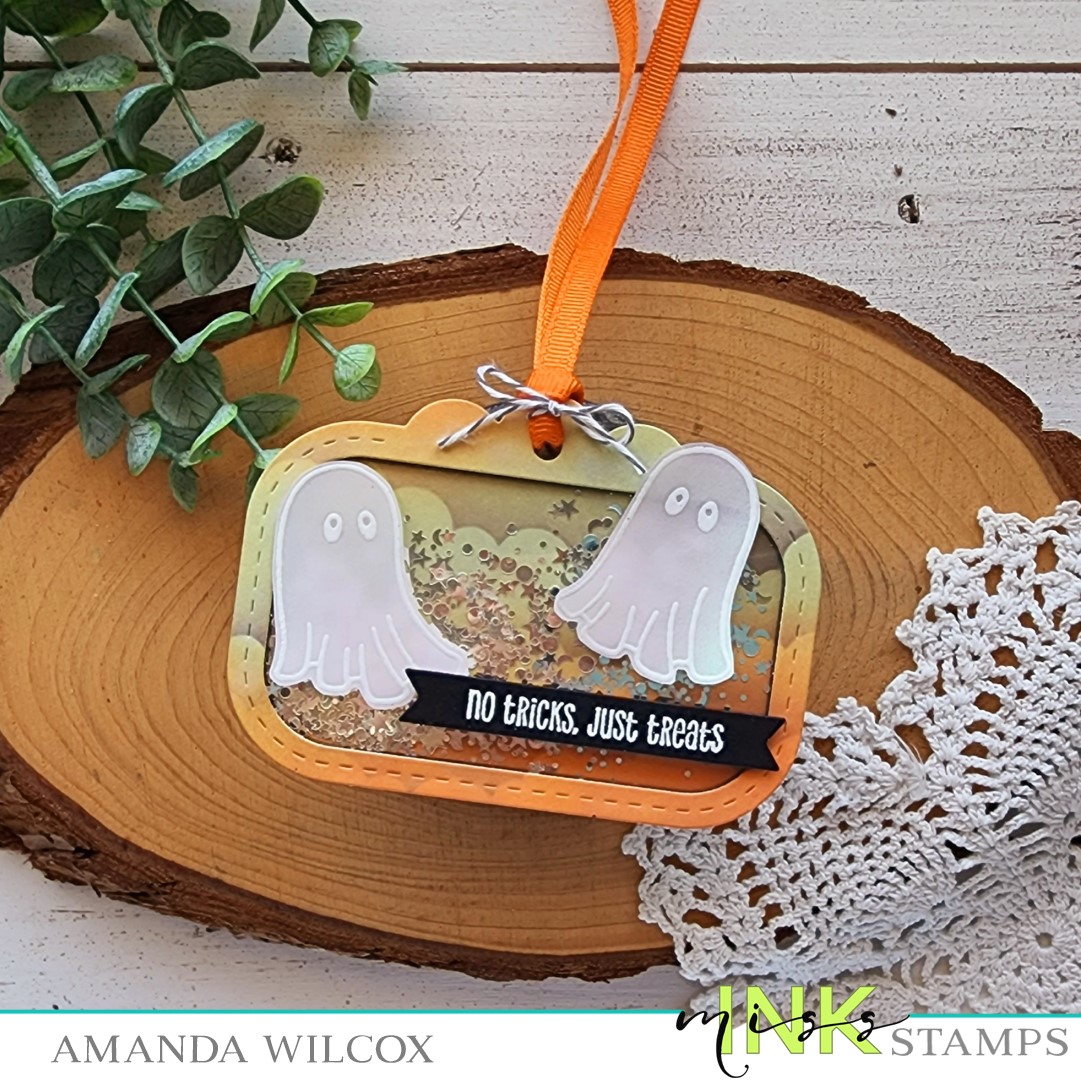
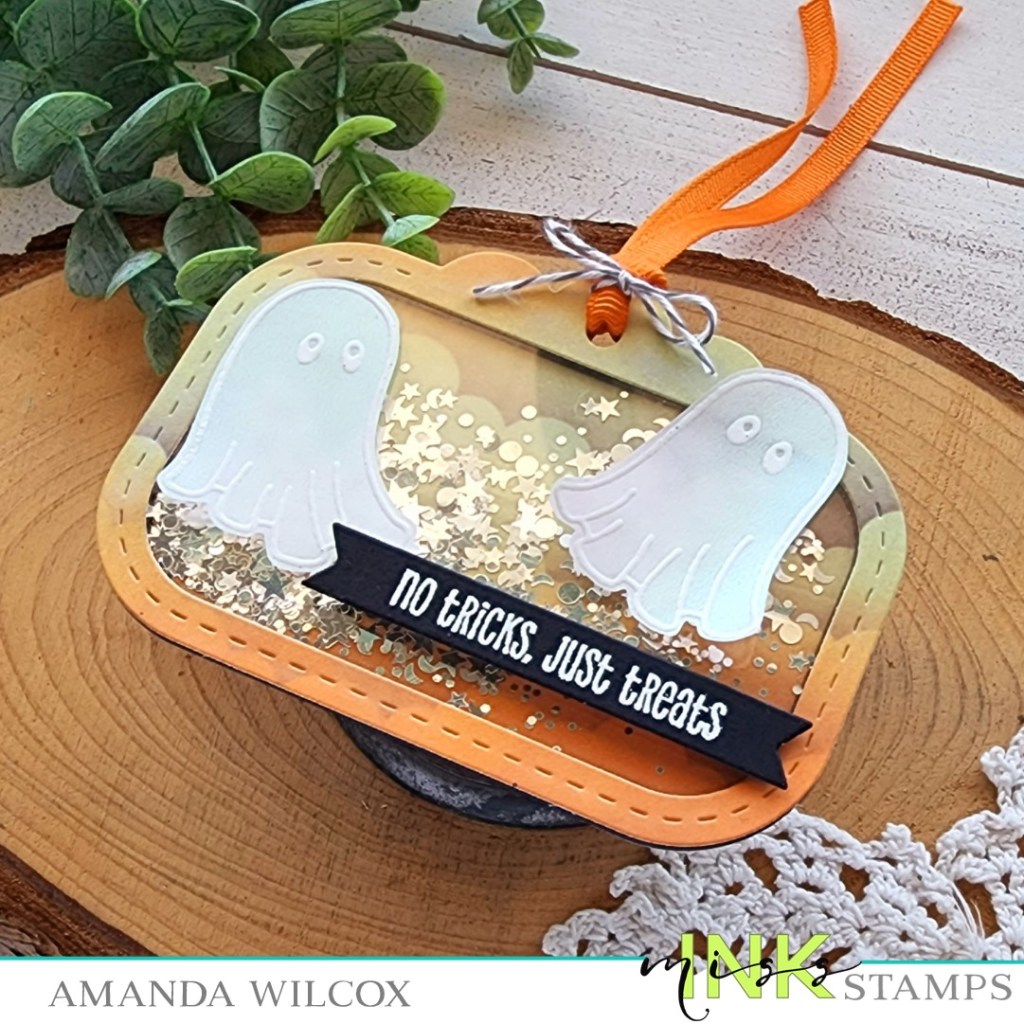
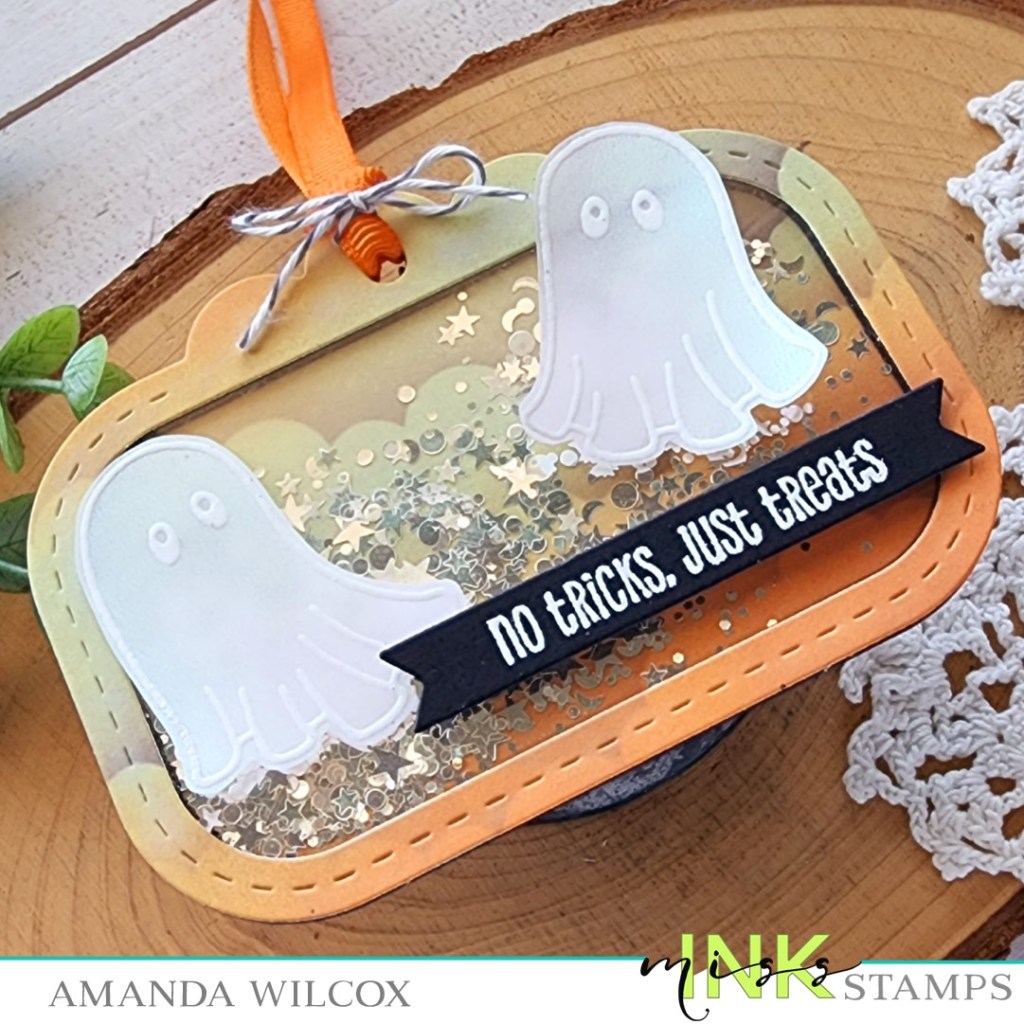
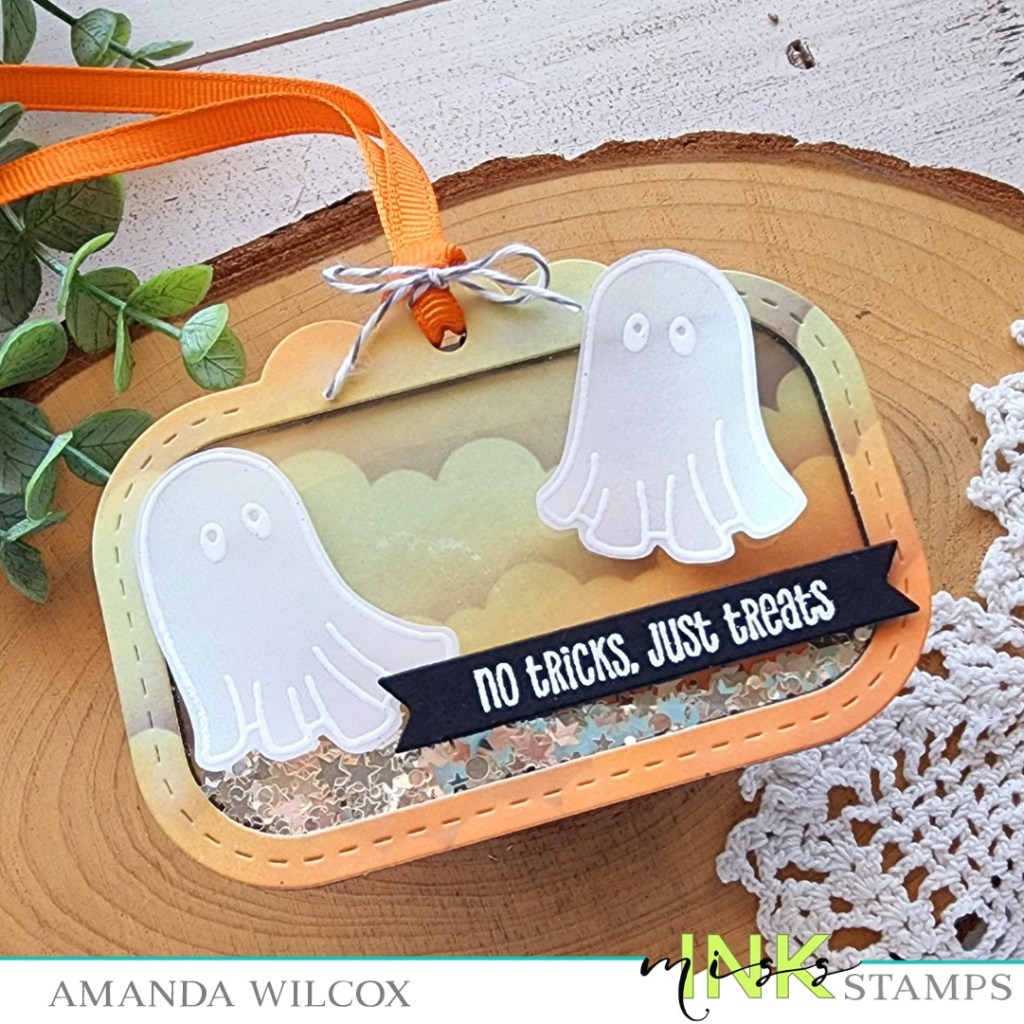
Happy Thursday everyone! I’m popping in this afternoon with a fun shaker tag featuring more amazing Halloween goodness from Miss Ink Stamps. Today, no coloring though! So fun and super quick to create in case you want to make more than one.
For this tag, I took a scrap of white cardstock and ink blended randomly with distress oxide in spiced marmalade and speckled egg. Then I took the Slimline Scene Builder Clouds stencil and ground espresso distress oxide ink to add the cloud texture. Isn’t this color combo so fun!?! I love how different it is. Then I used the Heffy Doodle frame tag die to cut the panel, keeping both inside and frame pieces. Next, I die cut the frame 6 more times from black cardstock, along with 2 solid tags – one from white cardstock for a backer and another from acetate for my window.
I glued one black frame to the white solid tag and then glued the inked center inside that. Next, I kept adding all of the other black frames with liquid glue. I sprinkled in some champagne stardust glitter, adhered the acetate window over top and finally added the stenciled frame on that. I placed acrylic blocks on top and switched to my ghosts and sentiment.
I stamped and heat embossed both ghosts on iridescent vellum and fussy cut them out. These are super easy to cut and didn’t take any time at all. Next, I stamped and heat embossed a sentiment from the Halloween Sentiments stamps that I thought was perfect for a Halloween treat bag! I used the banner die in the tag die set to cut it out.
For assembly today, I used a foam strip to add the sentiment but I hid mini glue dots behind the ghost eyes to adhere them to my tag. It lets the bottom curl up a little and give that spooky feel. It’s so fun and makes “hiding” the adhesive super easy!
I’m excited to add this to a bag of treats for a special someone at Halloween! It’s going to be great!
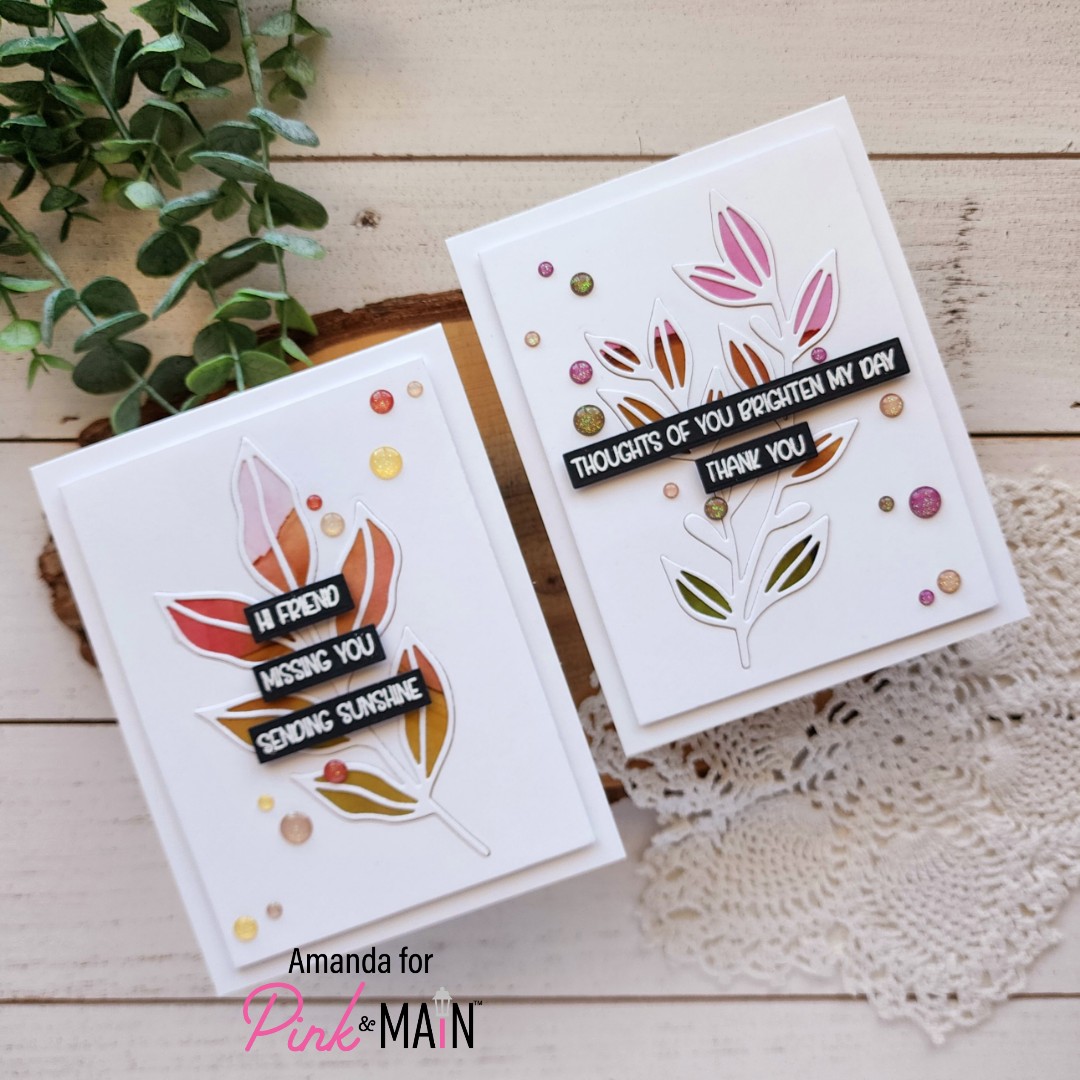
Happy Wednesday friends! I’m over on the Pink & Main blog today with a pair of cards featuring the Leafy 1 and Leafy 2 dies. These are separate foliage sets that come with a solid and an outline die for each design. I love a good two-for-one so I did my die cutting at the same time and created these cards simultaneously.
First, I chose a piece of paper from the Inked Oasis paper pad and cut the shadow die from both leafy die sets from it. Then I used the outline die to cut the center out of a 4×5.25 inch piece of white cardstock. Since I was using the whole thing, I was careful to place it exactly where I wanted it on my card front.
I lined the back of the main panel with foam tape and inserted the patterned paper shadow in the opening. Then I used liquid glue to adhere the outline over the top. I placed an acrylic block on top while I stamped and heat embossed sentiments from Sunny Greetings on black cardstock.
Once the sentiments were finished and die cut, I added them to the foliage panels with foam strips and then added the whole thing to white card bases.
For finishing touches on these cards, I chose enamel dots that went with the colors in the patterned paper. I love the look of embellishments like this scattered at an angle across a design.
Because the leaves were die cut from different parts of the same piece of paper, it was fun to pull different colors from each to give a different look to each card.
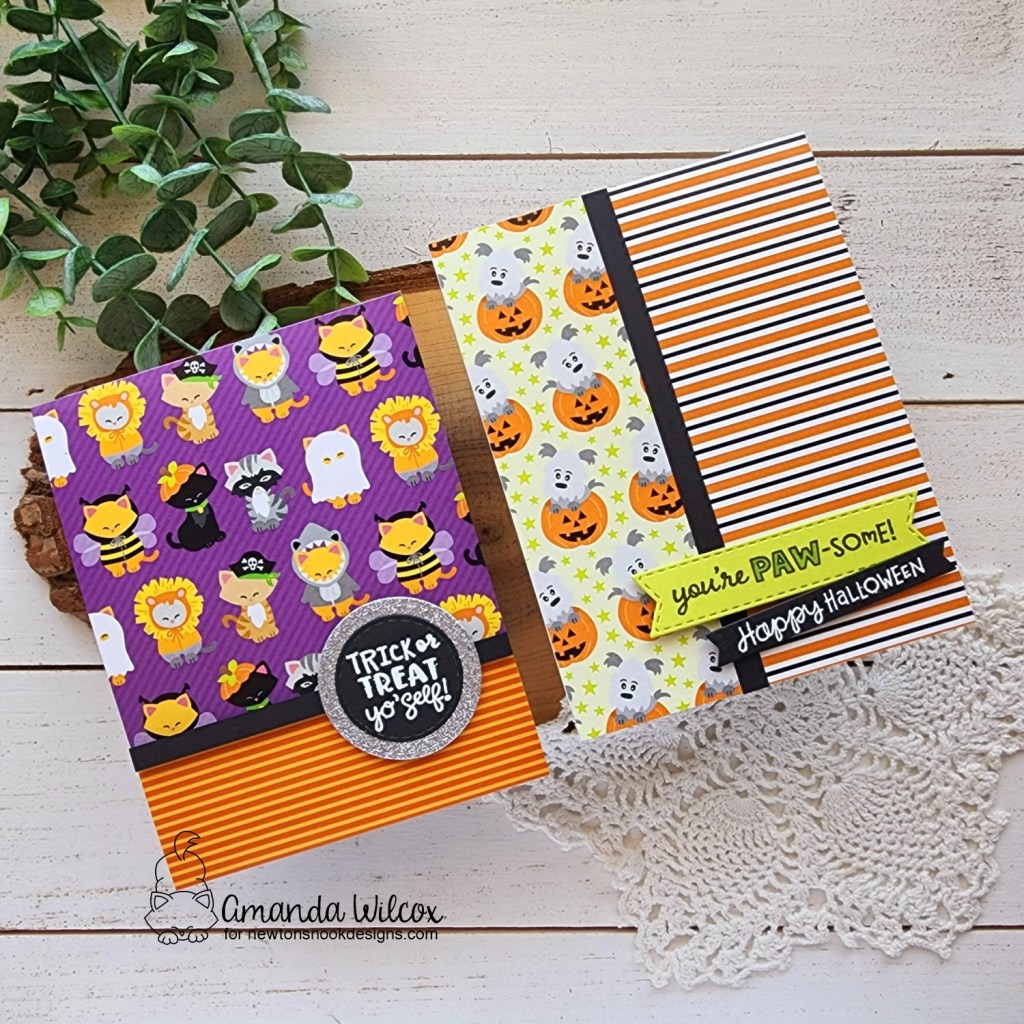
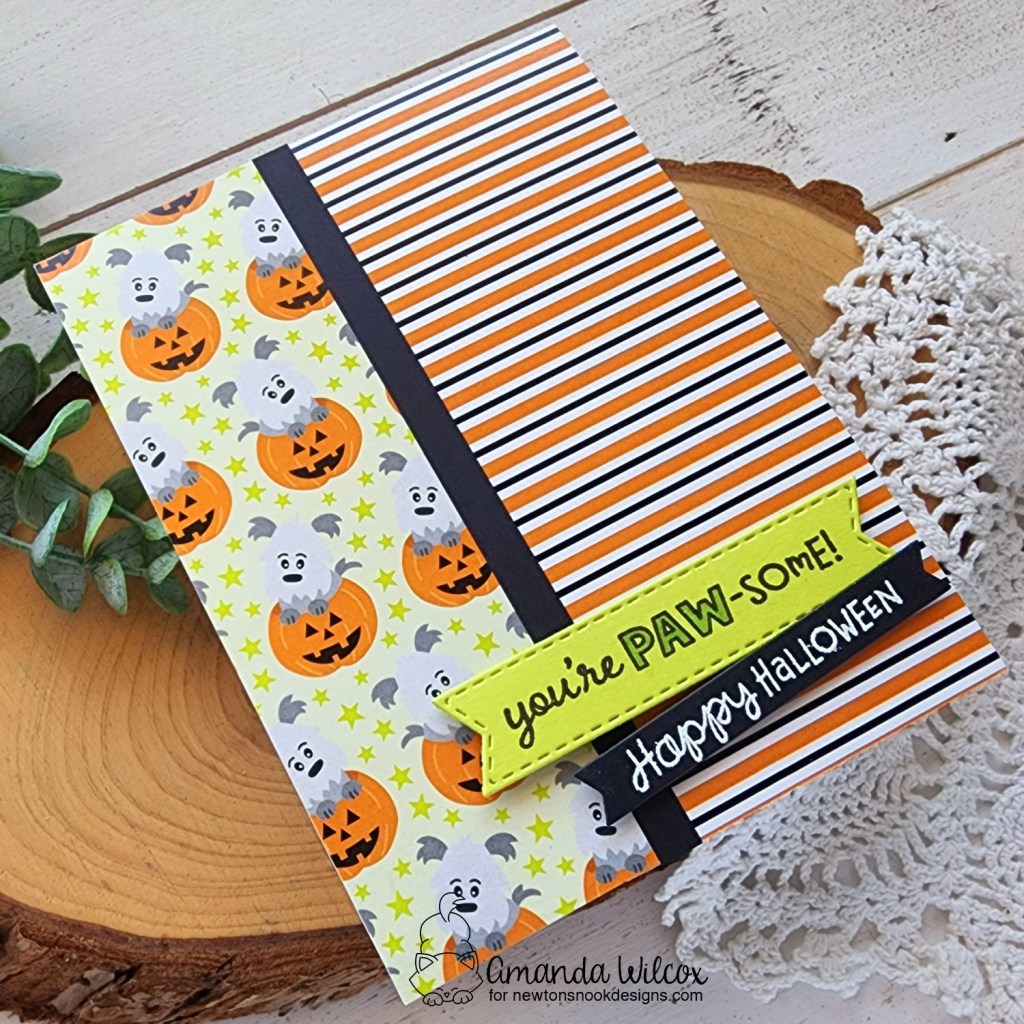
Hello everyone! I’m so glad you’re here! Today I have a couple of fun and super quick to create cards featuring the new Halloween Meows and Halloween Woofs paper pads from the Newton’s Nook release last week.
I fell in love with some of these patterns but couldn’t figure out a way to use the larger patterns without covering up more than I liked. These simple designs were the perfect way to showcase those papers!
Aren’t these papers just so perfect! I love the colors and the critters are perfect compliments for the patterns in the pads too!
This first card features the Halloween Meows paper pad. I cut a piece of the kitty paper measuring 4.25×4 inches and adhered it to a white card base. Then I added the orange strip measuring 4.25×1.5 inches. I cut a 1/4 inch strip of black cardstock and popped it up with foam strips on the seam.
Finally, I used circles from the Circle Frames and Frames Squared die sets to create my sentiment medallion. The sentiment from Halloween Pile is stamps and heat embossed and the circles are added to the card front with foam squares on either side of the black strip so it lays nicely.
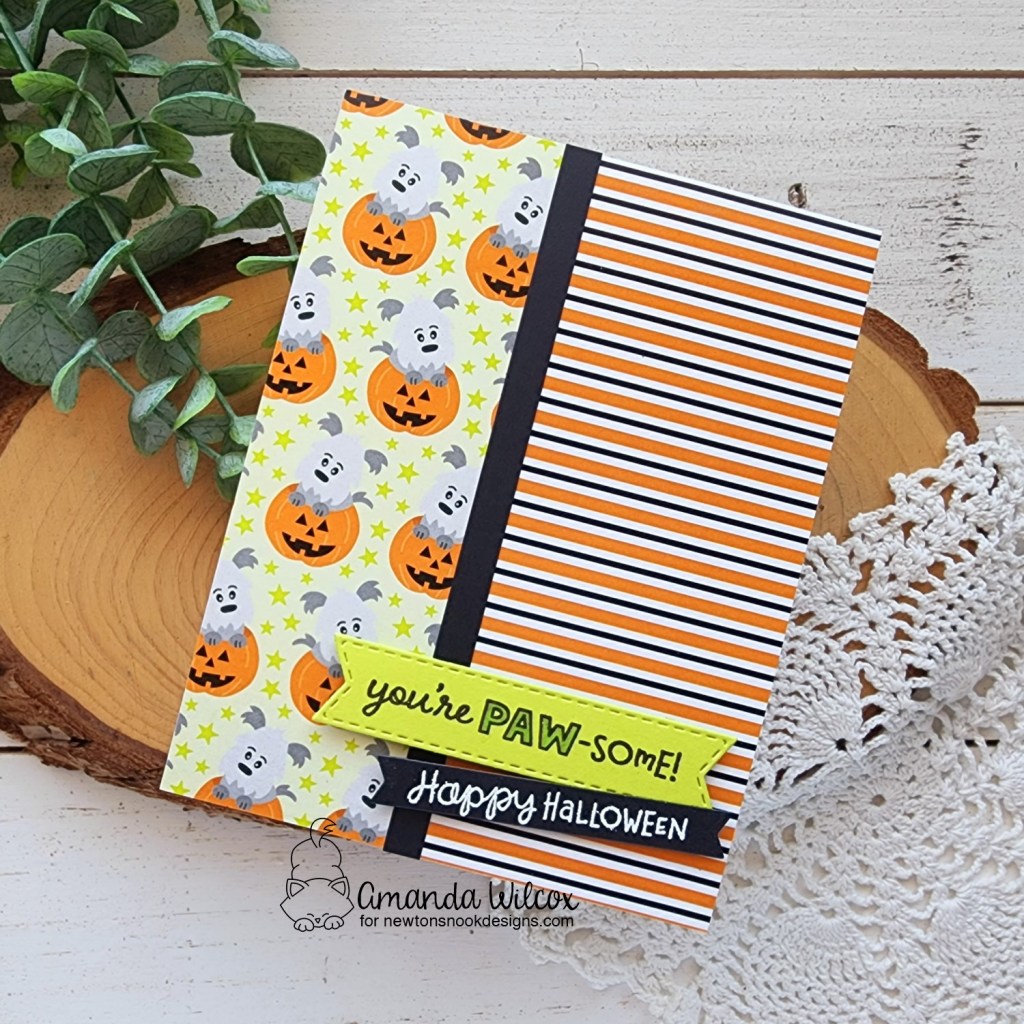
Switching gears to the adorable Halloween Woofs paper pad. I cut two pieces of paper from the pad – the puppies are 5.5×2 inches and the stripes are 5.5×2.25 inches. I added a 1/4 inch strip of black cardstock to hide the seam again, this time with liquid glue.
This time, I went digging for sentiments to make my card a little more individual. The green sentiment is cut with a banner trio die and comes from Heartfelt Woofs. I used a copic marker to color the open letters a darker green to help them stand out a bit. Then I stamped and heat embossed a sentiment from Batty Newton and die cut it with a banner from the A7 Frames & Banners die set. Both banners are added with foam squares.
Aren’t these cards so much fun!?! No coloring required but look at all that visual interest from the patterned paper and fun design elements.
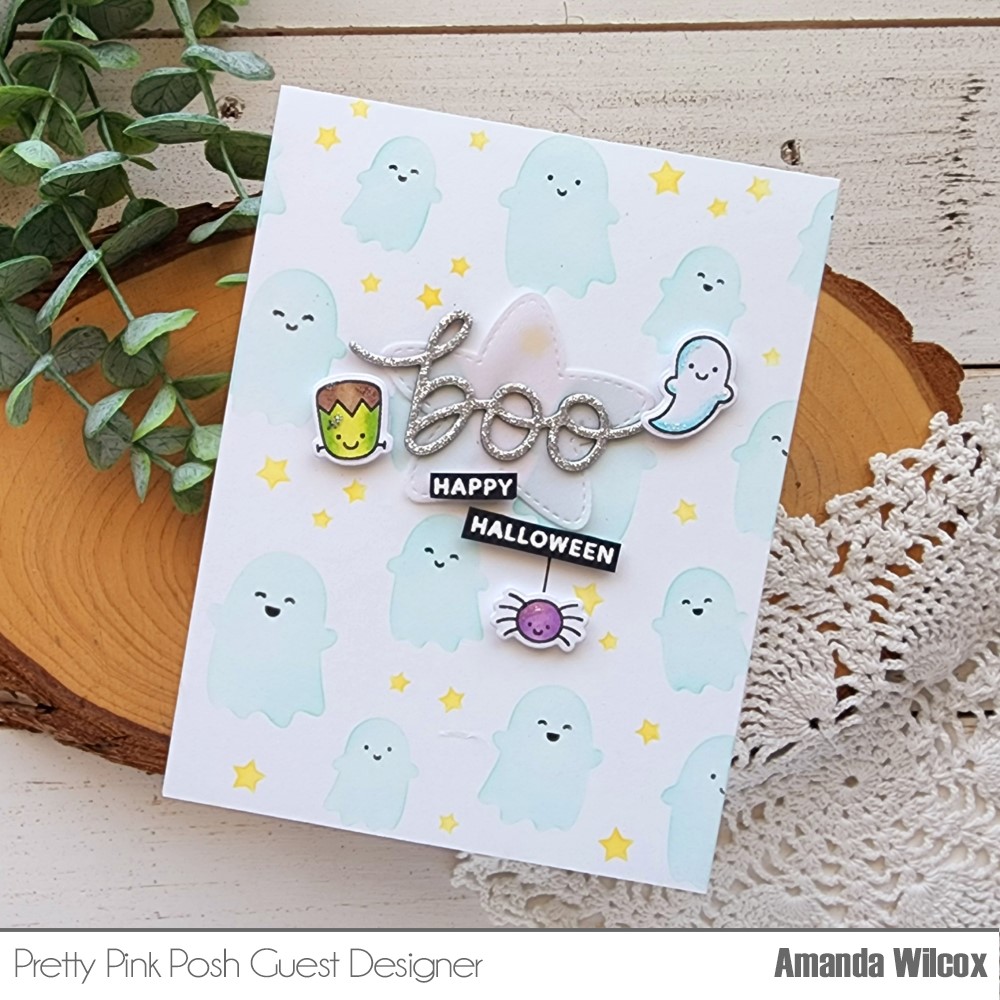
Hello everyone. Thanks for stopping by today. I’m sharing another card featuring some of the August release from Pretty Pink Posh plus some goodies from last year’s Halloween release too!
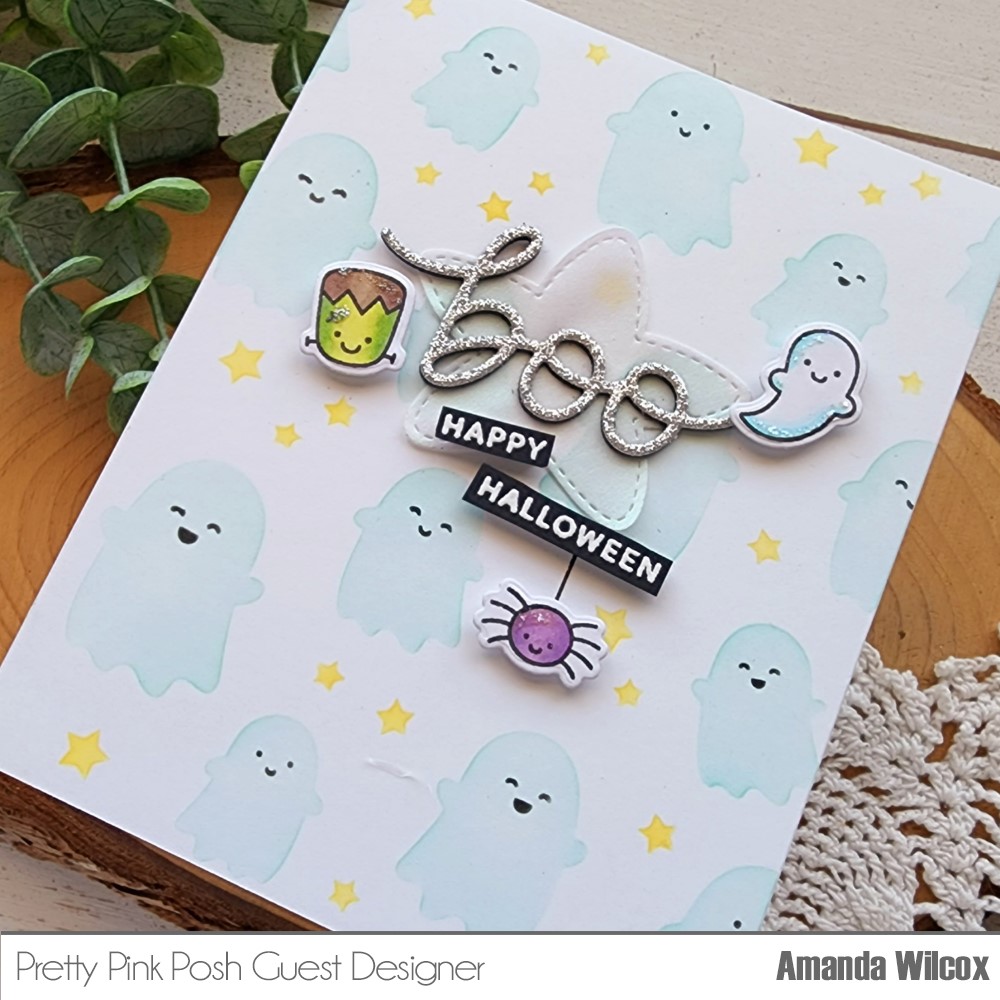
I was having so much fun with the new layering stencils that I just kept making backgrounds and came back later to turn them into cards. This time I used a white A2 piece of cardstock and light teal and yellow inks for my ghosts plus simple black faces so they weren’t totally lost.
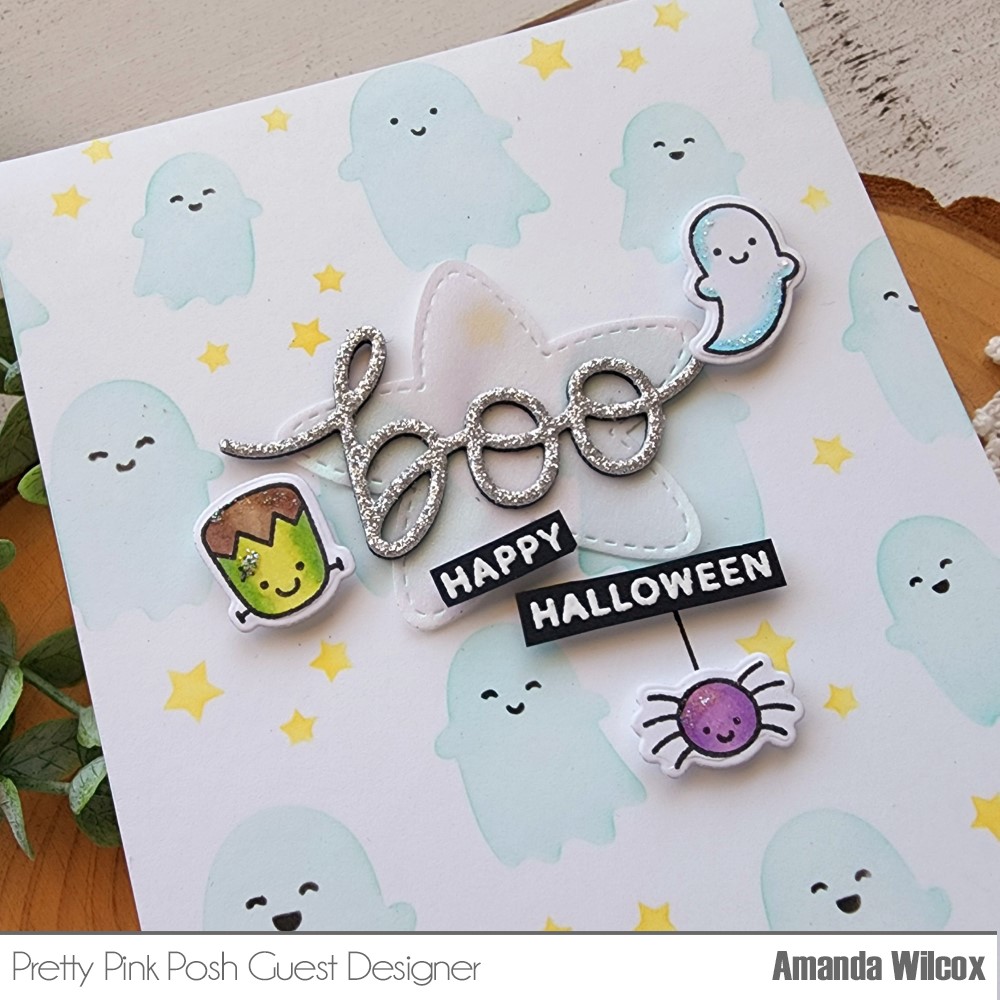
Next, I die cut the new Boo Script die from black and silver glitter cardstocks. I glued 3 layers of black to the silver for dimension. Then I cut the middle Stitched Star from pearlescent vellum and adhered them together, to the stenciled panel.
I thought it looked a little sparse so that’s when I went digging and found these fun smaller images in the Halloween Wreath stamp set. I stamped and colored them with copics and used the coordinating dies to cut everything out.
I also stamped and heat embossed the sentiment in Halloween Wreath on black cardstock and trimmed it into strips. I added foam strips and squares to everything and started adhering them. Before adding the spider, I used a ruler to draw a line coming from under the sentiment strip so it looks like it’s hanging down from its web.
Then for finishing touches, I added stardust Stickles to each of the images for a little sparkle and interest. Last, I glued the whole panel to a white card base and my card is all finished!
Hello everyone! Today is release day for Newton’s Nook. It’s amazing and I hope you’ll take a chance to look at it all if you haven’t yet. It’s got fall and Halloween goodies that are sure to include something wonderful for everyone!
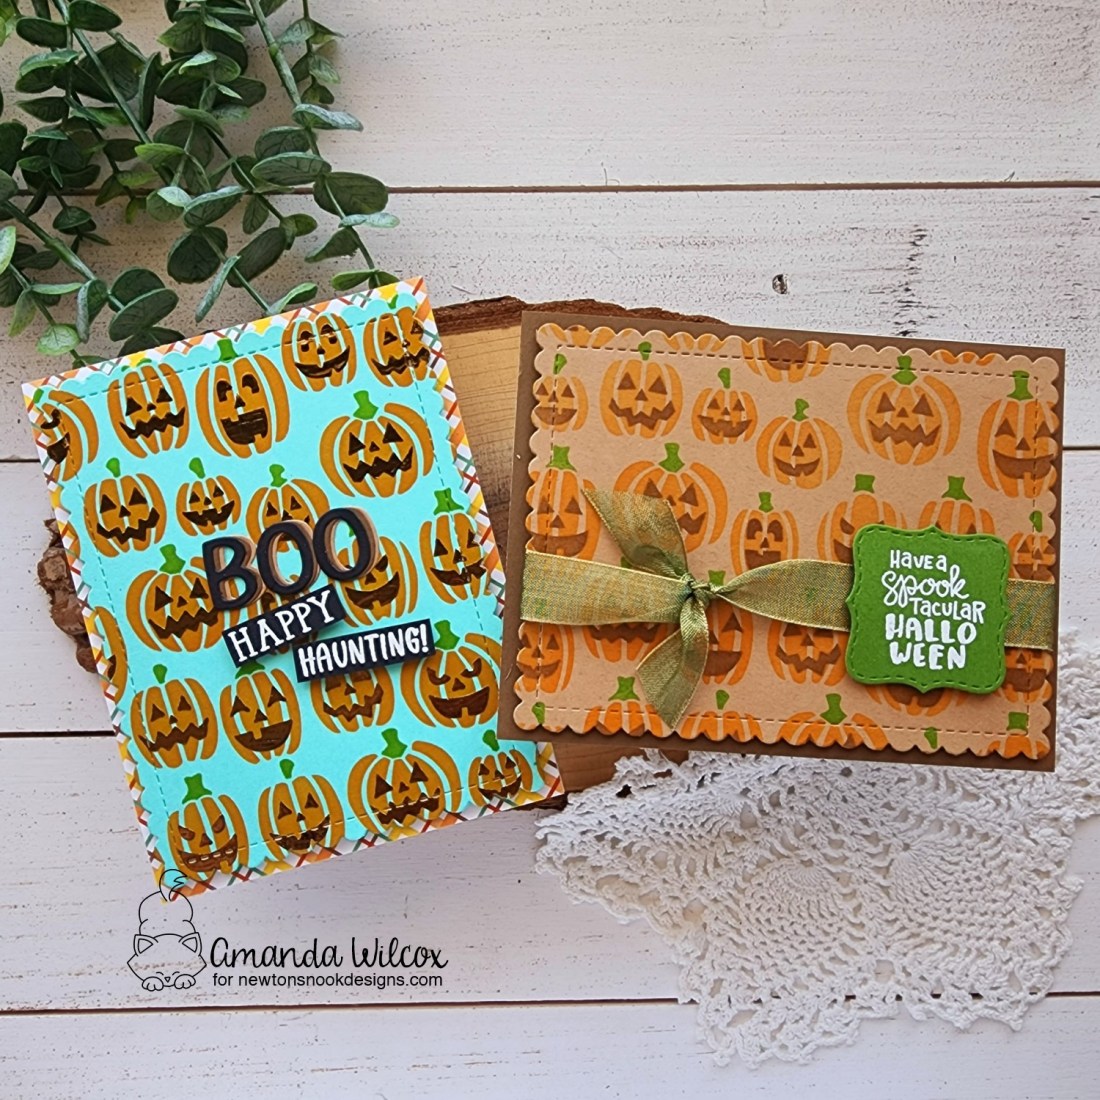
Through release week reveals, I didn’t want my posts to be longer than they already were so I missed out sharing these fun cards featuring the new Jack-o’-Lantern layering stencil set. But we can’t have that so release day seems like the perfect festive day to share them.
I’m totally smitten with layering stencils these days so it’s not surprise that I couldn’t stop at one card with this new set. They are perfectly designed and so fun to create with!
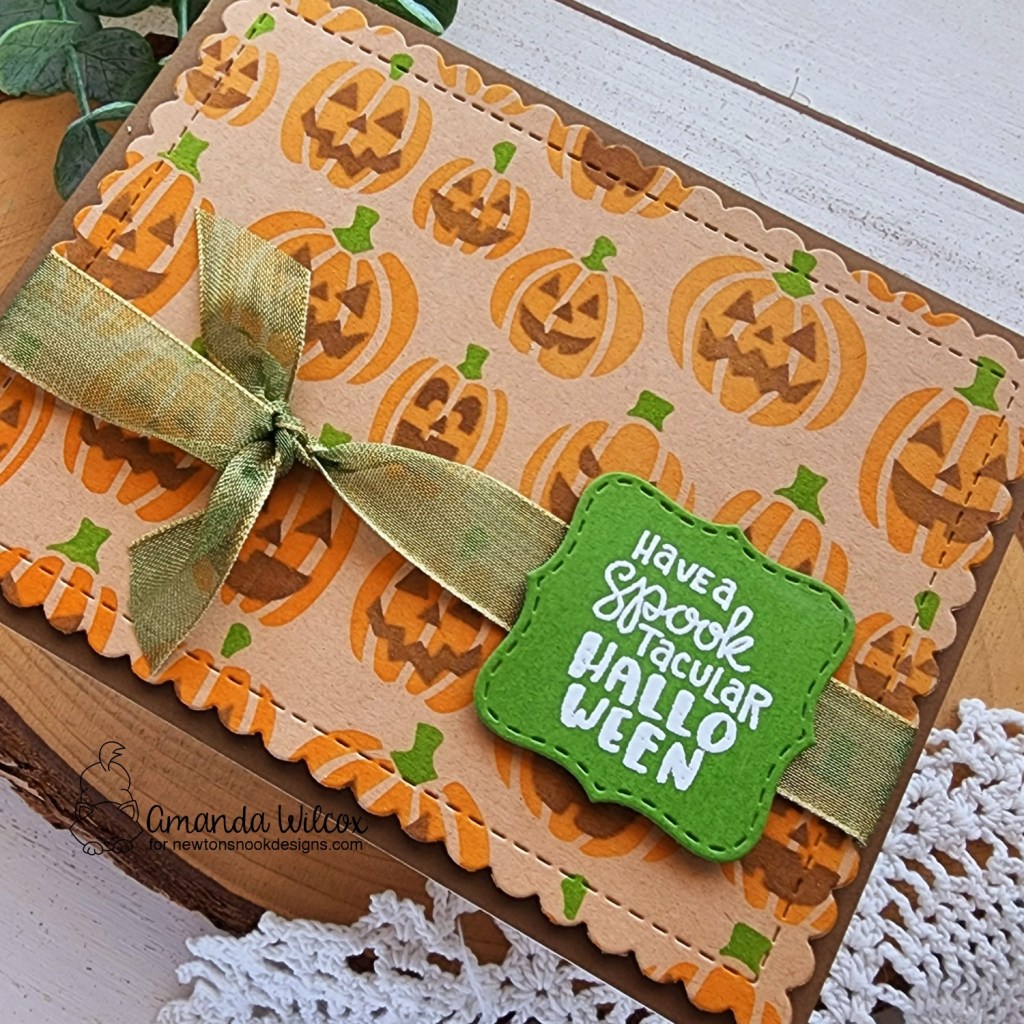
For this first card, I inked up the stencils using dye inks for the orange and green layers, then used distress oxide for the faces so the brown would really cover the pumpkins and show up well. Then I die cut the panel with the largest Frames & Flags die set and tied green organza ribbon around it. Next, I popped it up with foam tape on a brown card base.
Then, I die cut the label shape from the Slimline Frames & Windows die set and heat embossed a sentiment from the new Halloween Pile stamp set before adhering it with foam squares.
This was a quick and easy card to create but it’s so festive and fun. I love it! Next, I stepped up the stenciling just a bit.
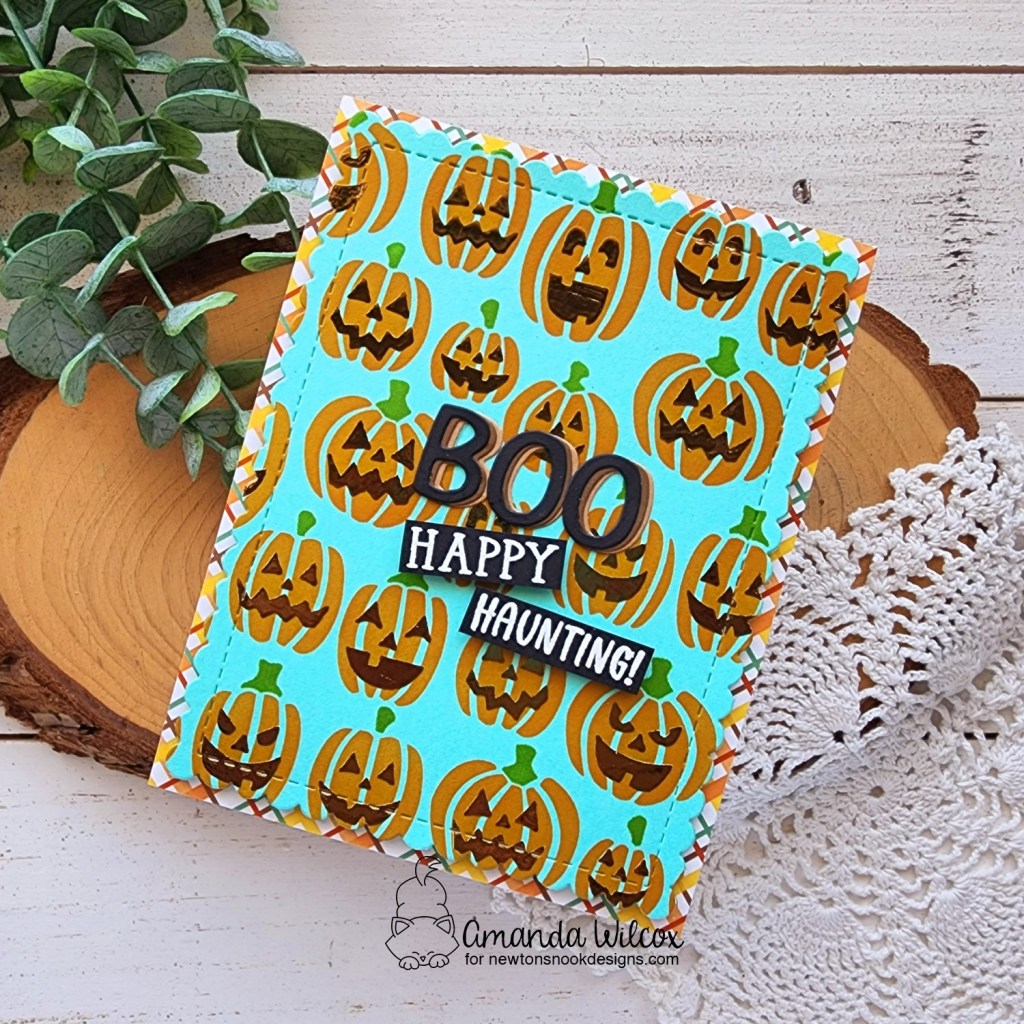
For this card, I used a teal A2 panel for my jack-o-lantern inking with dye inks except for the faces. For that, I spread Thermoweb Transfer Gel Blanco through the stencil and then set it aside to try.
After it was dry, I ran the panel through my laminator with bronze Deco Foil transfer sheet and look at those spooky faces shine! This is so cool in person to play with! I love it!
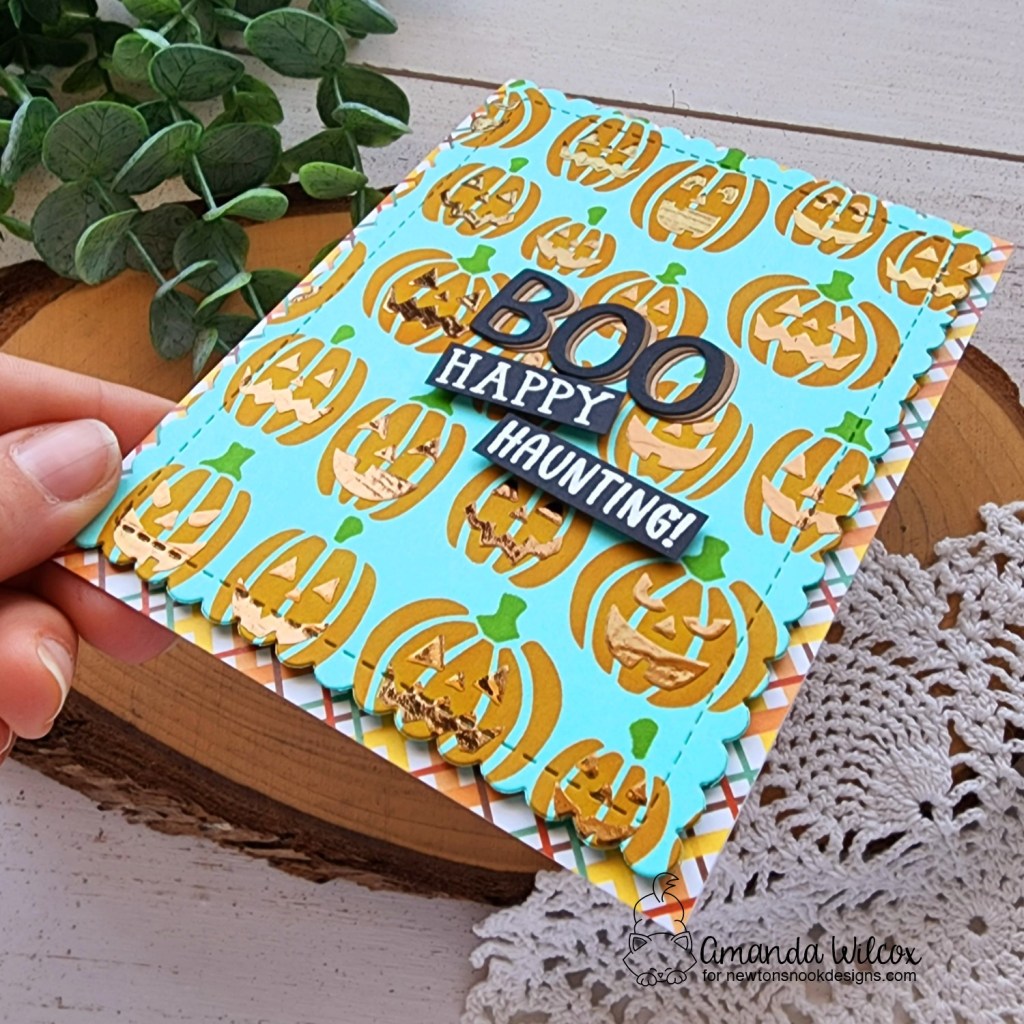
After foiling, I die cut the panel with the largest Frames & Flags die and added foam tape to the back and adhered it to plaid paper from the new Autumn paper pad.
For my sentiments, I used the Essential Alphabet die set to cut BOO from kraft, brown and black cardstock. I used liquid glue to adhere the letters shifting them just a smidge to the right each time. Then I glued them to the pumpkin panel.
Next, I stamped and heat embossed Happy Haunting from the new Spiderweb Oval stamp set and cut the words apart into fun strips. I popped those up with foam strips and adhered the whole panel to a white card base.
I hope you enjoyed these extra projects today and are able to snag some fun fall goodies for yourself from the new release.
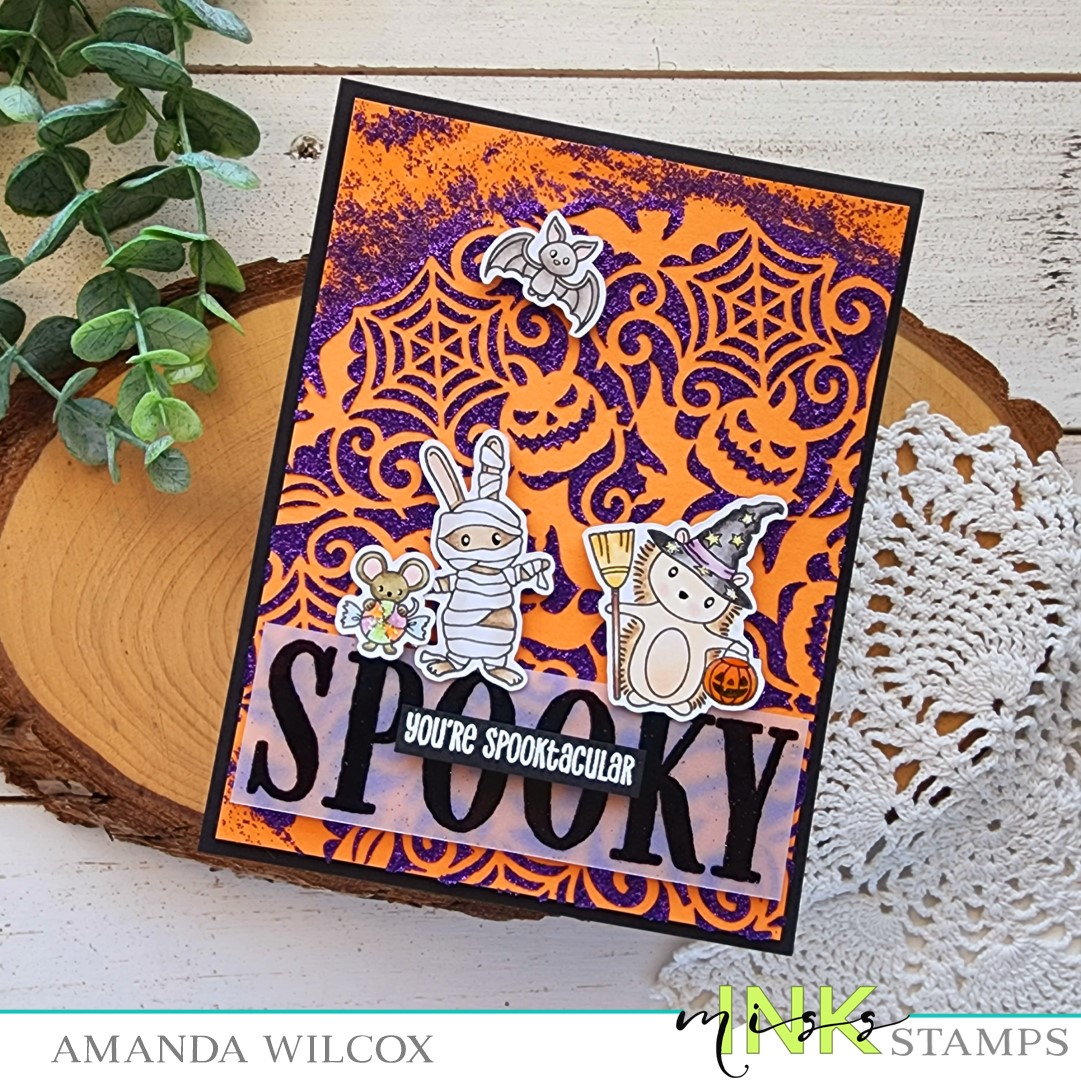
Hi there! I’m back today with some spooky fun inspiration using some more amazing Halloween goodies from Miss Ink Stamps. I didn’t get a chance to use this awesome Halloween Mandala stencil last year and forgot about it until this week, so I immediately pulled it out to play.
I started with an orange panel of cardstock and used pixie spray on my stencil to adhere the two together temporarily. Then I spread wild lilac glitz glitter gel through the stencil. After removing the stencil, I set the panel aside to dry and cleaned up immediately.
While digging through my Halloween stamp sets, I thought it would be so fun to pair the critters in Welcome Home with sentiments in Halloween Sentiments over this awesome stenciling. So I started stamping and coloring everything with my copics. I used the scan-n-cut to cut everything out and added foam squares to the back.
I didn’t want the sentiment to be a big obtrusive block on the bottom of the card so I stamped SPOOKY and heat embossed it on vellum, then trimmed it into a strip. These letters are so chunky, I was able to hide foam strips behind them to pop the sentiment up a bit. Next, I chose a second sentiment to trim into as trip and place on top of that.
When the glitz gel was dry, I added foam tape to the back and popped it up on an A2 black cardstock panel. Then removed the foam back papers and added the critters and sentiments to that. Finally, I used liquid glue to adhere the whole thing to a white card base.
For finishing touches, I added glossy accents to the hedgehog’s hat band and pumpkin. Then stardust Stickles to the stars on the hat and the mouse’s candy costume. Last of all, I added black glaze pen to all of their eyes, let it dry and came in with a white gel pen highlight.
Isn’t this so much fun!?! I am still loving all things Halloween and fall right now. It feels like I’ll be in this mood well through Christmas at this point. Lol!
Continuing on with our final day of release reveals for the Newton’s Nook August Release, we have even more gorgeous fall goodies to share.
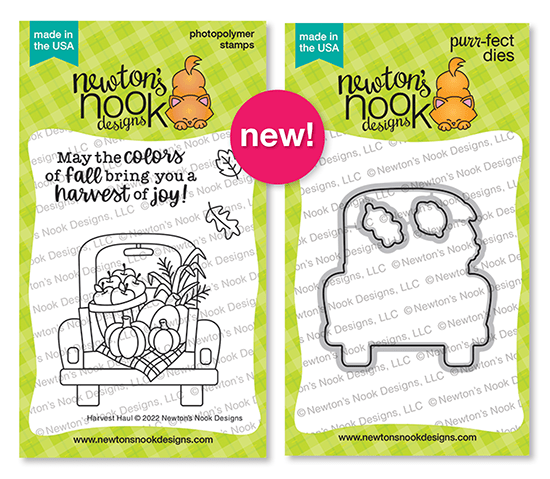
Harvest Haul stamps and dies
Newton’s Crate stamps and dies
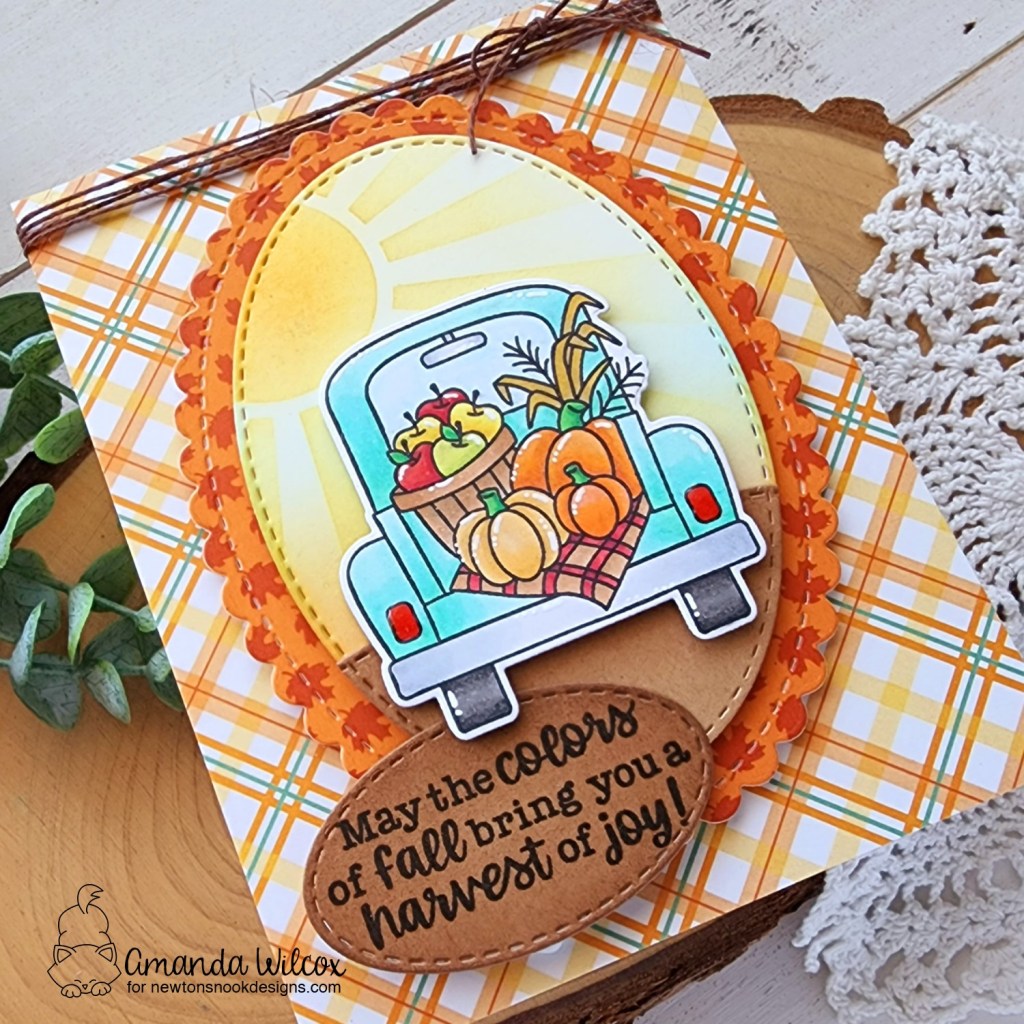
Aren’t these images just amazing! I love them so much! Let’s start with a card I made with Harvest Haul.
I started, like usual, by stamping and coloring the image with copic markers. Then I used the coordinating die to cut it out. For my mini scene, I decided to use the oval frames dies for a different look. I cut one white oval and inked it up with the Sunscape stencil using orange and yellow ink. After removing the stencil I went over the whole panel lightly with the yellow ink still in my brush to take away the stark white areas. Then I cut another partial oval from kraft cardstock and used a Land Borders die to cut a hill from that.
I cut a scalloped oval using the Autumn paper pad and a smaller one from kraft for my sentiment. Next, I trimmed a piece of plaid down to fit an A2 card front and started adhering everything.
I added the plaid to a white card base with liquid glue, then the scalloped oval with foam squares and the scene oval with liquid glue. Finally, the truck and sentiment oval are adhered with foam squares too.
For finishing touches, I added white gel pen highlights to the image and glossy accents to the taillights. Last, I tied some brown twine around the top of the card and tied it in a bow.
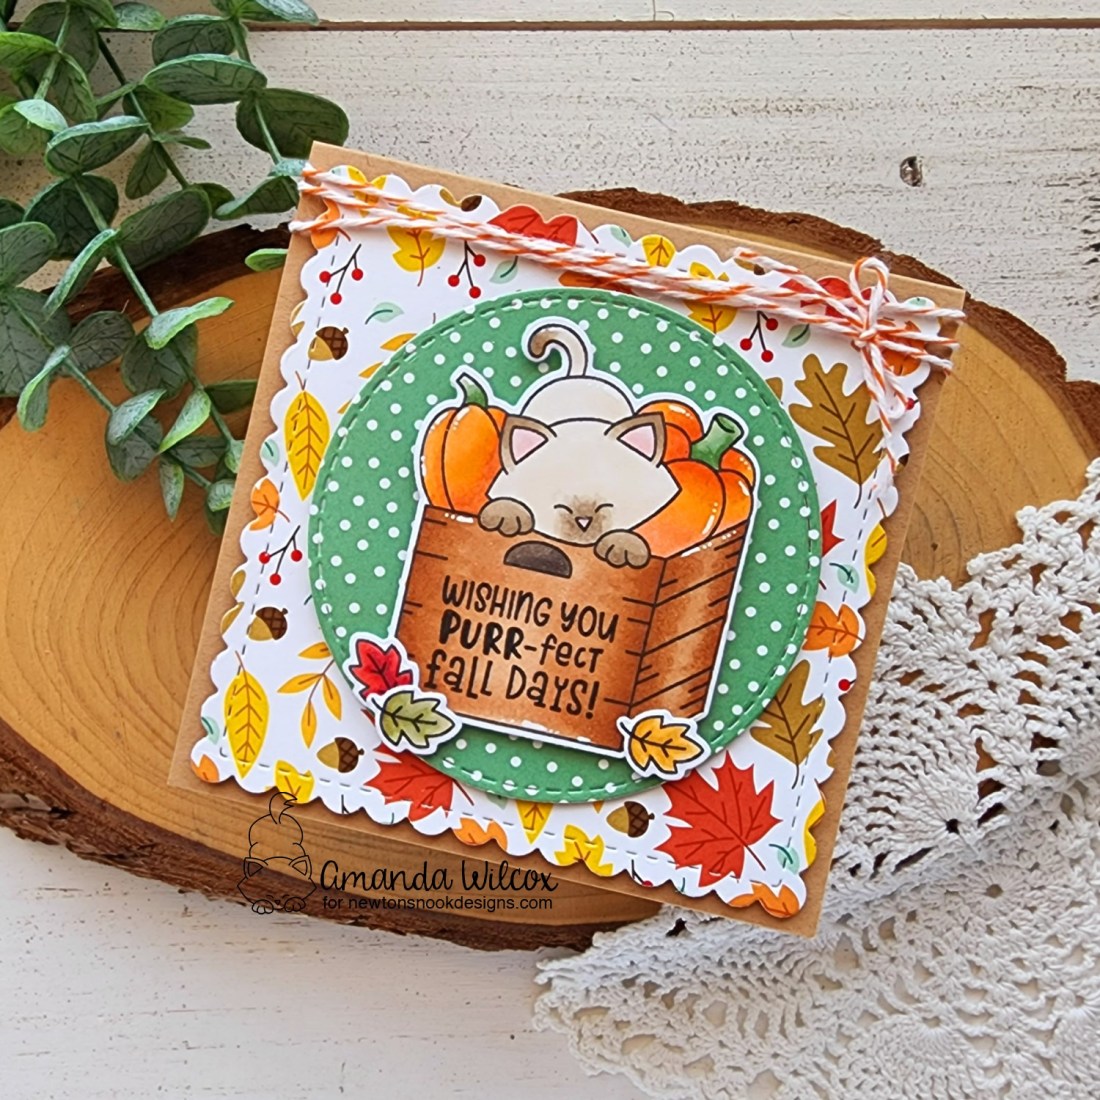
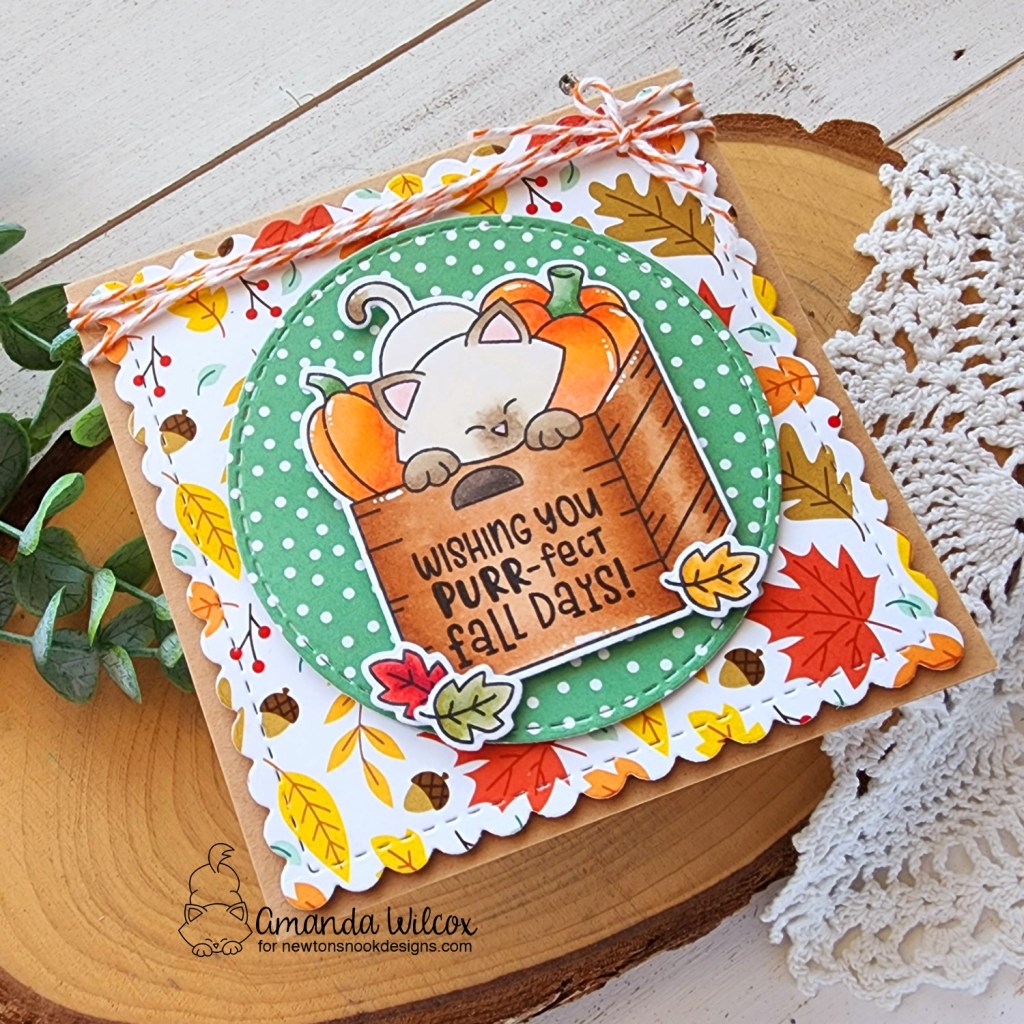
I love how that last card turned out but let’s take a look at the adorable new Newton’s Crate stamp set too! This is extra fun because all of the sentiments can be stamped on the side of the crate if you want to! Isn’t that fun!?!
I stamped Newton and some extra leaves first, then colored them with my copics and cut them out with the coordinating dies. Next, I stamped my sentiment on the side of the crate. I try to do this after coloring to help with potential smearing and bleeding.
I thought this image was perfect for a square card so I pulled out the Frames Squared dies and cut a scalloped square from the Autumn paper pad and then a focal circle using the Circle Frames dies. Then adhered everything to a kraft card base measuring 4 1/4 inches square. This way it still mails in an invitation envelope with regular postage.
The scalloped square, circle and Newton are all added with foam tape, along with the accent leaves too. Then I finished the design off with orange twine I saved from older Newton’s Nook packages.
For finishing touches I added white gel pen highlights to the images and glossy accents to Newton’s nose.
Would you like to win the “Harvest Haul” or the “Newton’s Crate” Stamp Set? We will choose ONE lucky winner for each stamp set!
Here’s how to win: Comment on the NND blog and Design Team blogs (see list below)! Thewinner will be chosen at random from the collective reveal posts. Make sure to check out each of their blogs and comment for your chance to win. You will not know which blog has been chosen so the more you comment on the better your chances are of winning! You have until Thursday August 18th at 9pm ET to comment — winners will be announced on the blog post on Friday August 19th.
Check out all the awesome Design Team Blogs below to enter:
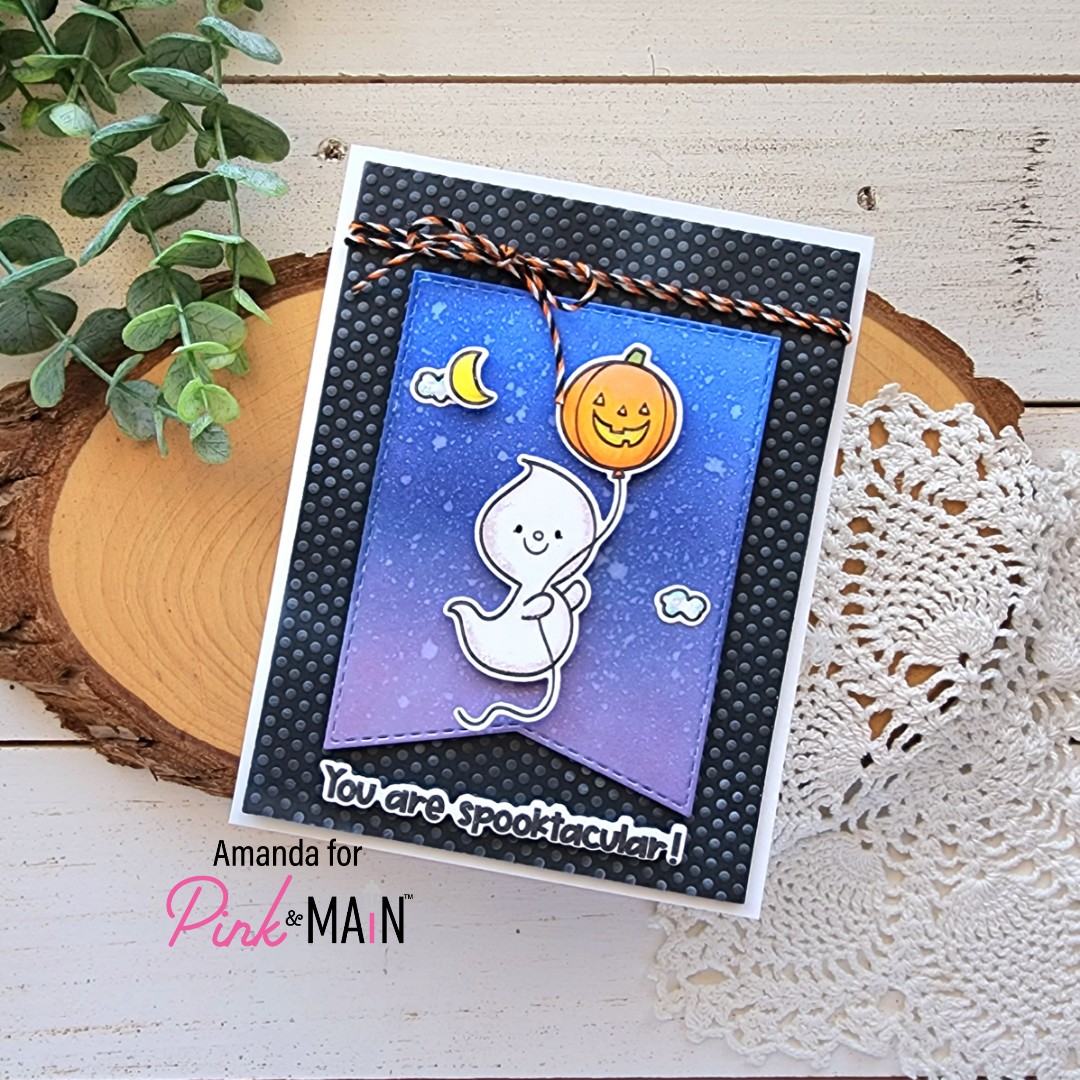
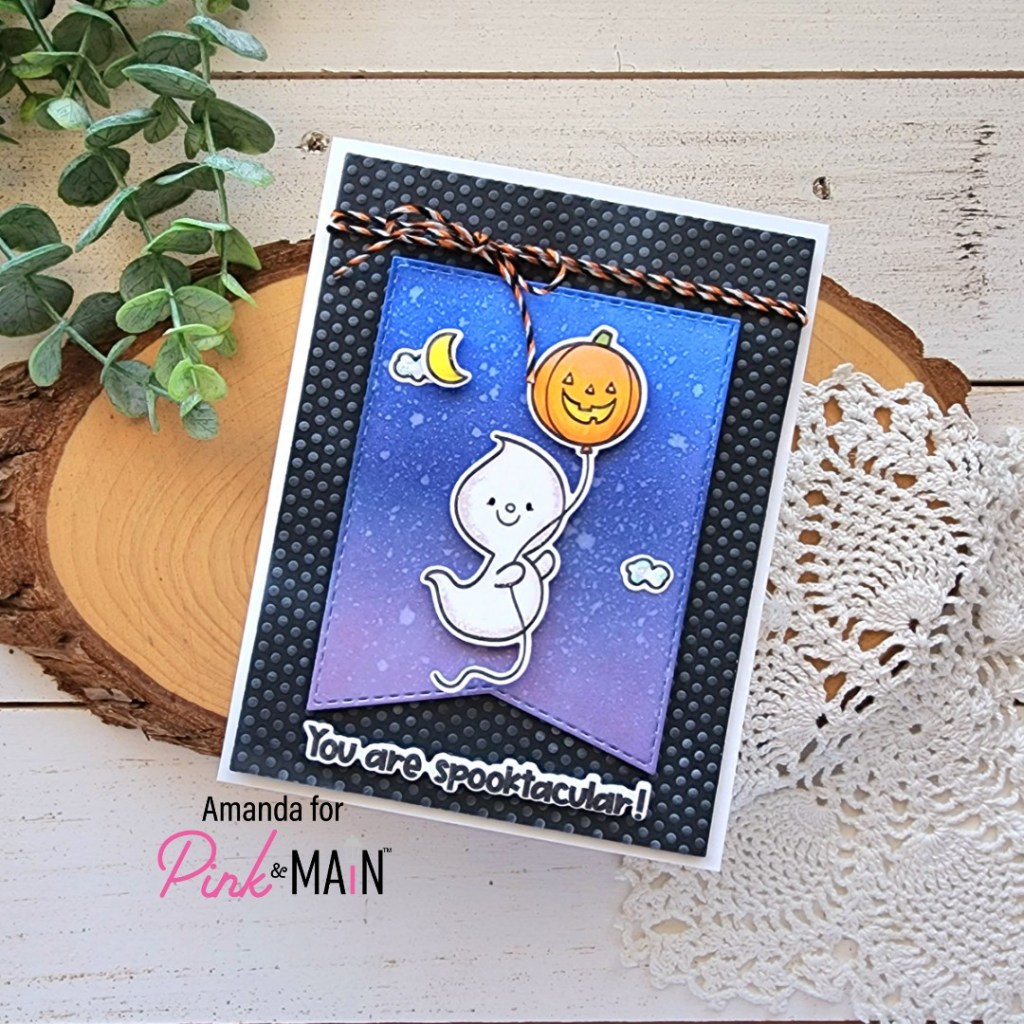
Hey friends! I’m over on the Pink & Main blog today with a sneak peek of the upcoming August release. It is packed with incredible fall and Halloween themed goodies and you’re going to love it all!
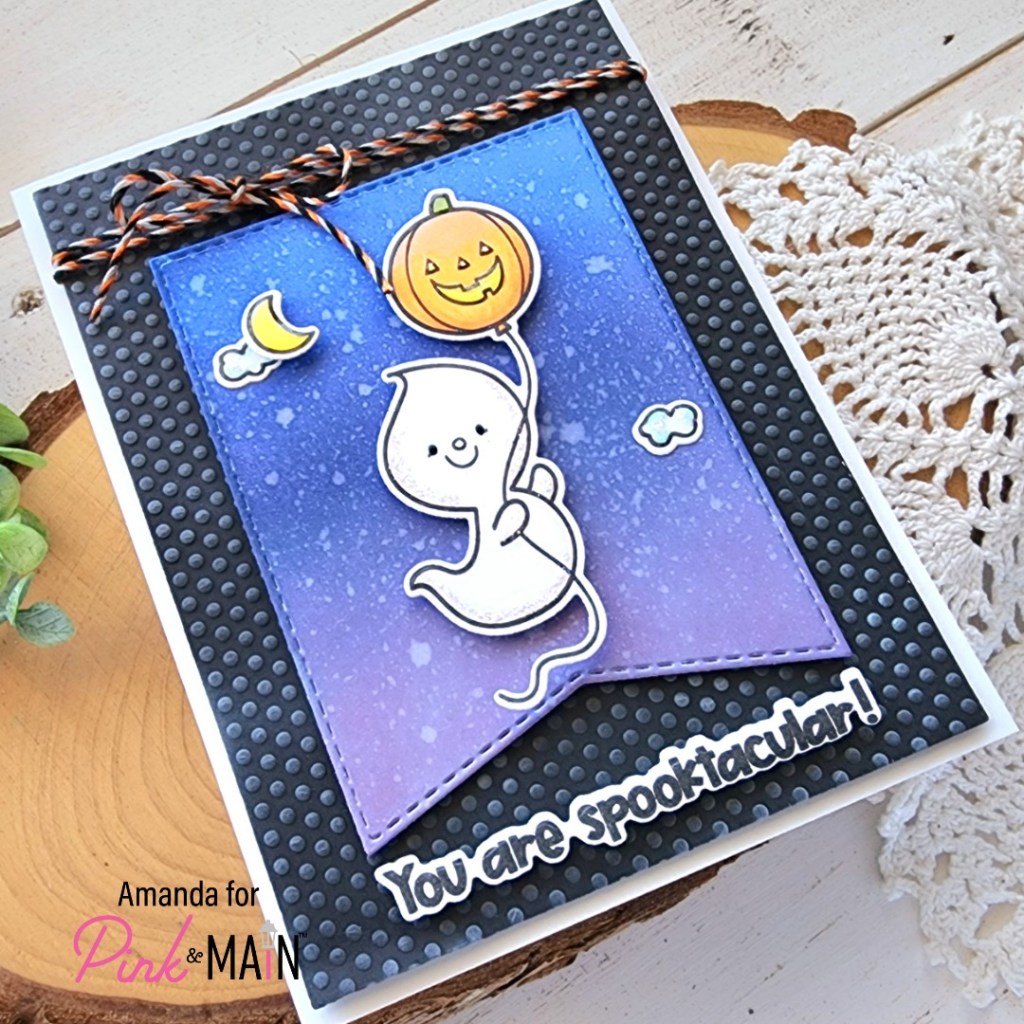
Today I chose images from the upcoming Cute Ghosts and Halloween Brew to create a little scene. I ink blended a white cardstock panel with distress oxide inks in wilted violet, blueprint sketch and chipped sapphire. After spritzing the panel with water and blotting it dry, I die cut it with a Large Fish Tail Banner. I glued the clouds directly to the panel and popped the moon and ghost up with foam squares.
Next, I used the Micro Dots embossing folder on a 4×5.25 inch black panel and lightly used an blending brush to add white pigment ink to the dots for a little texture. Then I added foam tape to the back of the panel, leaving space to wrap twine around it and the panel will still lay nicely. Then I adhered it to a white card base and popped the banner up with foam tape as well.
I stamped and die cut a sentiment from Cute Ghosts and popped it up with foam strips and added glossy accents and stardust Stickles for finishing touches on the ghost, balloon, moon and clouds.
Have you started Halloween and fall crafting yet? I started really early this year and it has made my heart so happy! You have no idea!
For day 3 of the Newton’s Nook August Release reveals, we switch gears to gorgeous fall things!
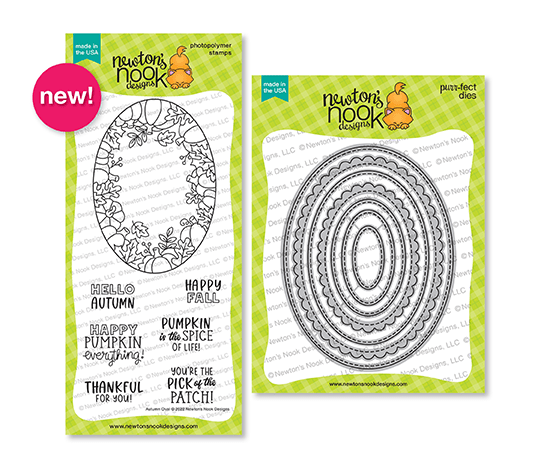
Autumn Oval stamps (coordinates with Oval Frames dies)
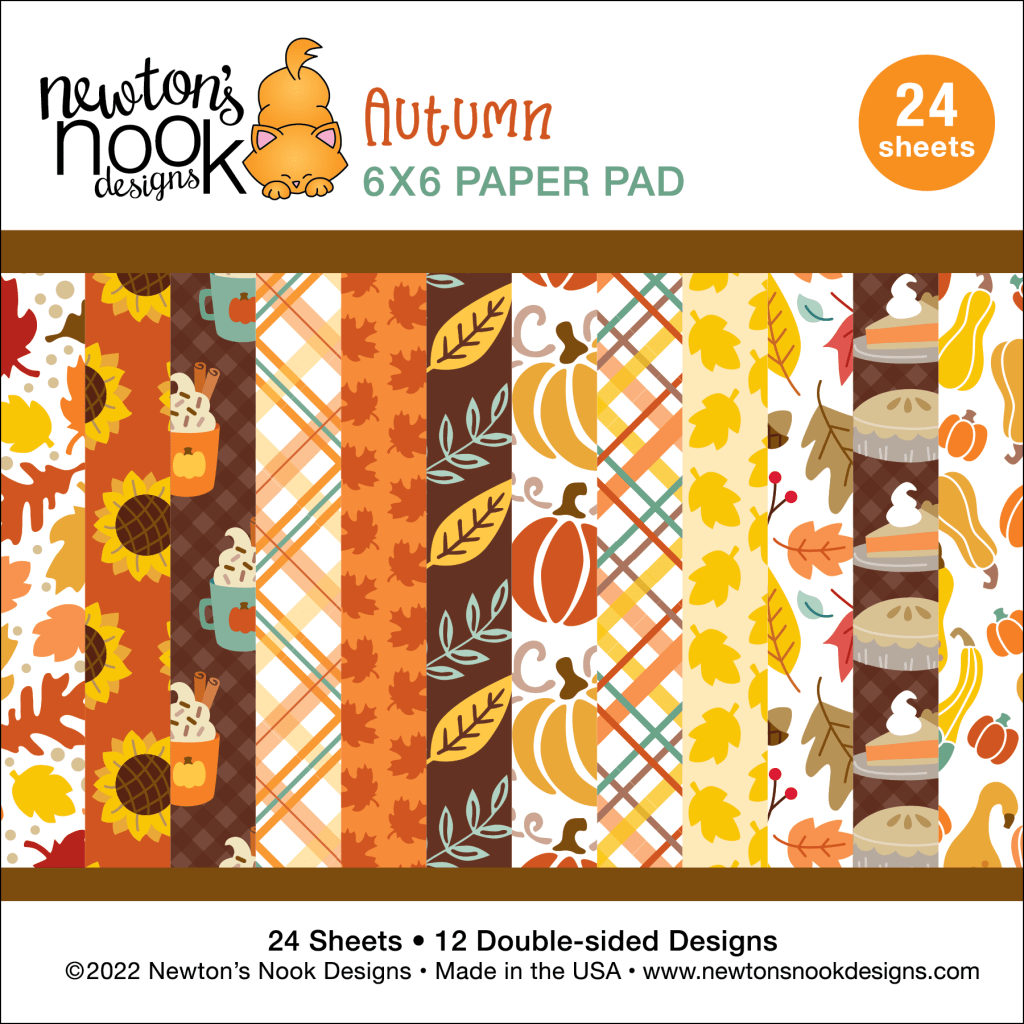
Autumn Paper Pad
Aren’t these new products just wonderful! I’m totally obsessed with it all. It makes me want to decorate my whole house for fall immediately.
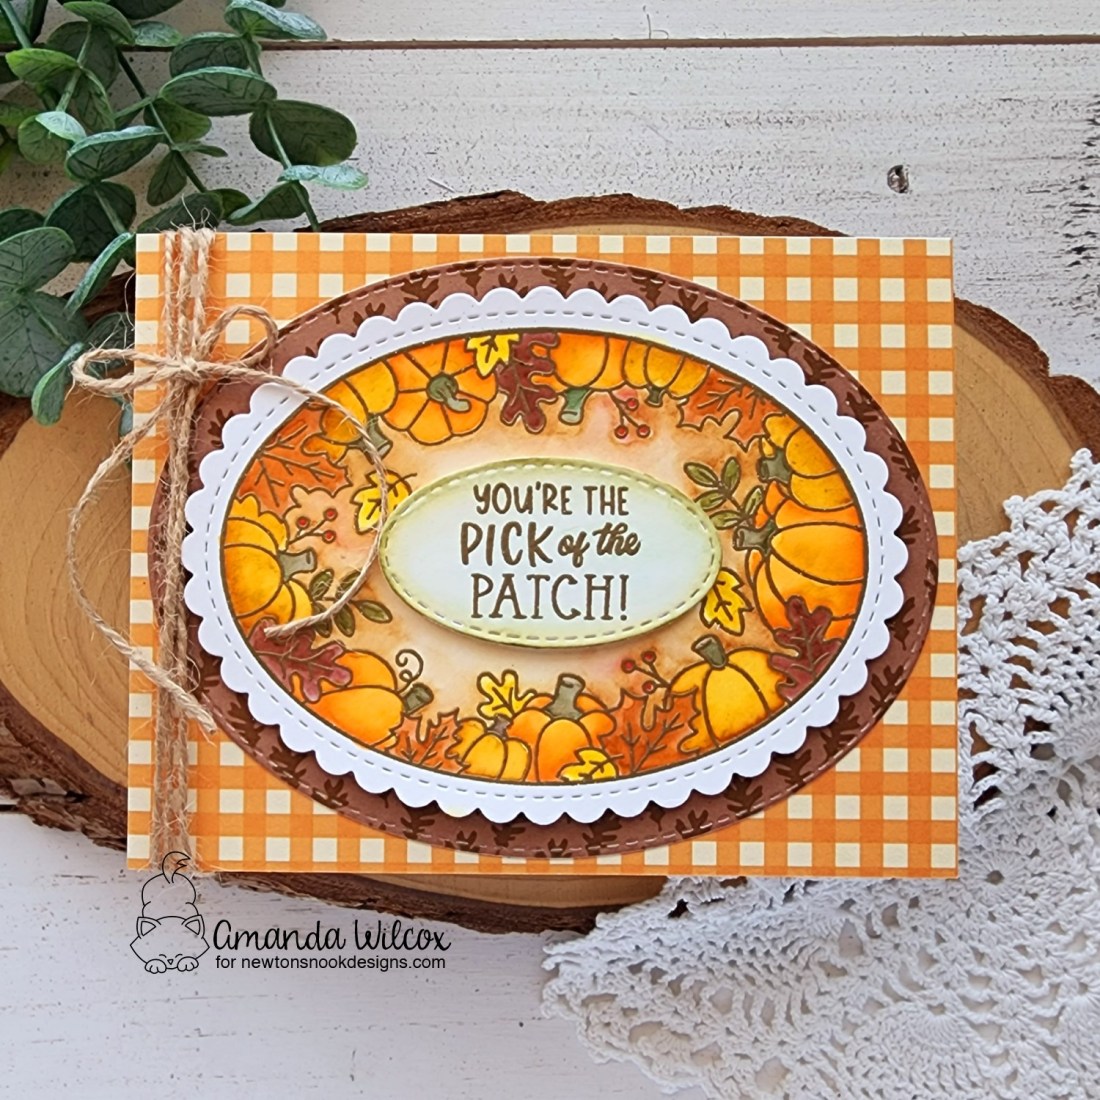
Today, I stamped and heat embossed the Autumn Oval with gold embossing powder on watercolor paper and watercolored it with Zig Clean Color Real Brush markers. These are my favorite for this technique. It’s so fun and relaxing. Once that was finished and dry, I die cut it with the largest scalloped oval die.
For my sentiment, I cut one of the smaller ovals using the same watercolor paper and heat embossed my sentiment in the same color. Then I took a green marker around the edge of the oval and drug the color inward with a wet paint brush.
Next, I chose 2 patterns from the Autumn paper pad and cut one with the largest oval die and the other was trimmed to A2 size. I adhered the plaid to a white card base and the large oval to that with liquid glue. Finally, I popped the watercolor ovals up with foam squares.
To finish off the design, I wrapped twine around the left side of the card and tied it in a bow. I absolutely LOVE how rustic this card feels. I just love it!
Would you like to win the “Autumn Oval” Stamp Set? This stamp set will be given away to ONE lucky winner!
Here’s how to win: Comment on the NND blog and Design Team blogs (see list below)! Thewinner will be chosen at random from the collective reveal posts. Make sure to check out each of their blogs and comment for your chance to win. You will not know which blog has been chosen so the more you comment on the better your chances are of winning! You have until Thursday August 18th at 9pm ET to comment — winners will be announced on the blog post on Friday August 19th.
Check out all the awesome Design Team Blogs below to enter: